


The traditional origami butterfly is quite a promising and accurate model to add to your spring crafts. Let’s find out how to fold this easy origami butterfly with the easy, fold-by-fold instructions for beginners. I have designed clear directions and chart instructions for this tutorial, so you won’t need video instructions later.
Craft this butterfly in orange with the black strips for a monarch butterfly. You can add this flower bouquets, hairclips, headbands and holiday gifts.
Fold-by-Fold: Origami Traditional Butterfly
This origami butterfly model needs diagonal, vertical, horizontal, and blintz folds. Initially, we work a many steps to just make guiding creases. There are many unfoldings and collapses involved, so you will love folding this paper butterfly. Now, I will explain it to you step-by-step:
Model Type: Traditional Origami (pure origami)
Sheet: Single
Difficulty: Beginner (level 3)
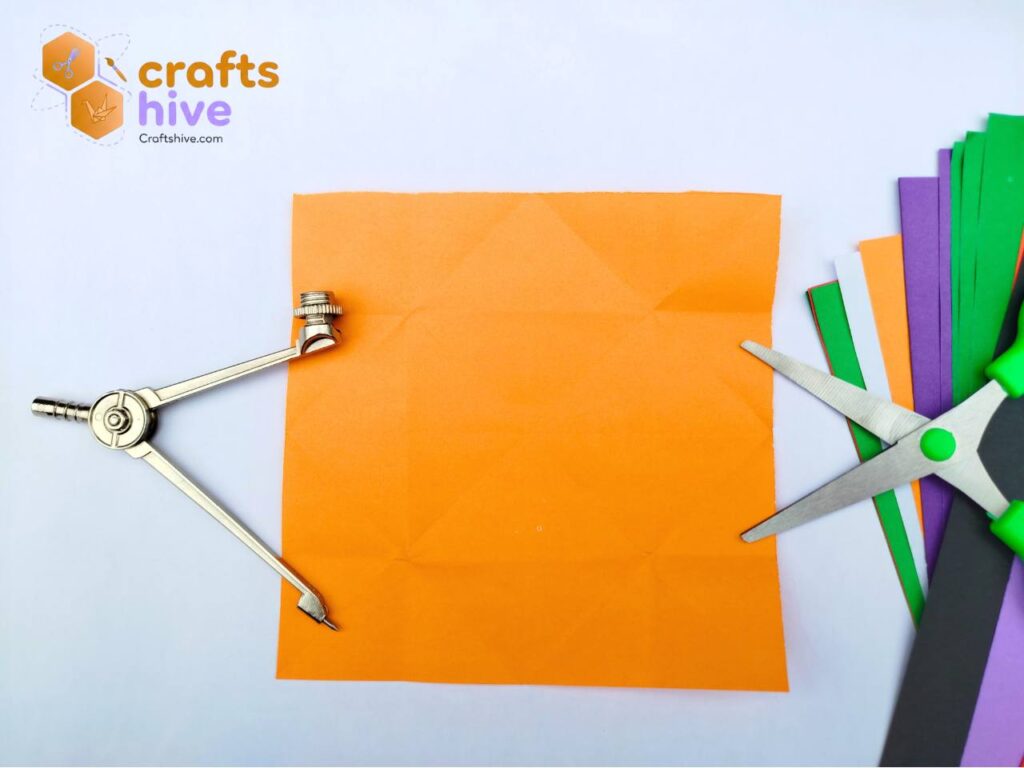
Tip for Paper Selection: The Kami paper or thin tant paper with less darker shade should be used for folding butterfly. I faced difficulty in last folds when I choose a thicker sheet. Also I recommend using a paper larger than 10cm by 10cm. Mine was 14cm by 14cm square sheet of paper in the demonstrartion.
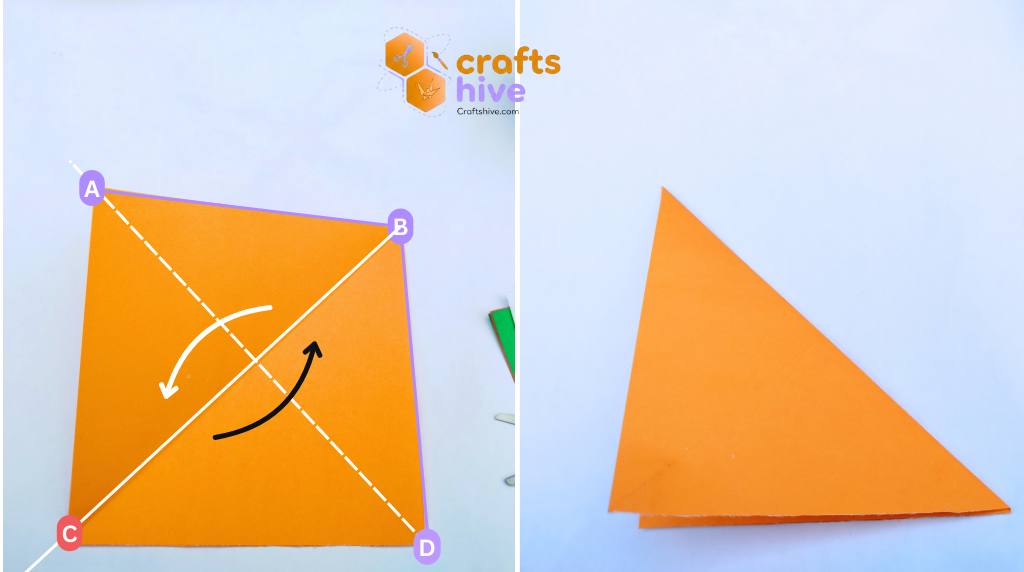
Step #1: Fold Diagonally
After this step, the paper will have two crossing diagonal creases in the shape of the letter ‘X’. To follow along, make sure your sheet is in a square position.
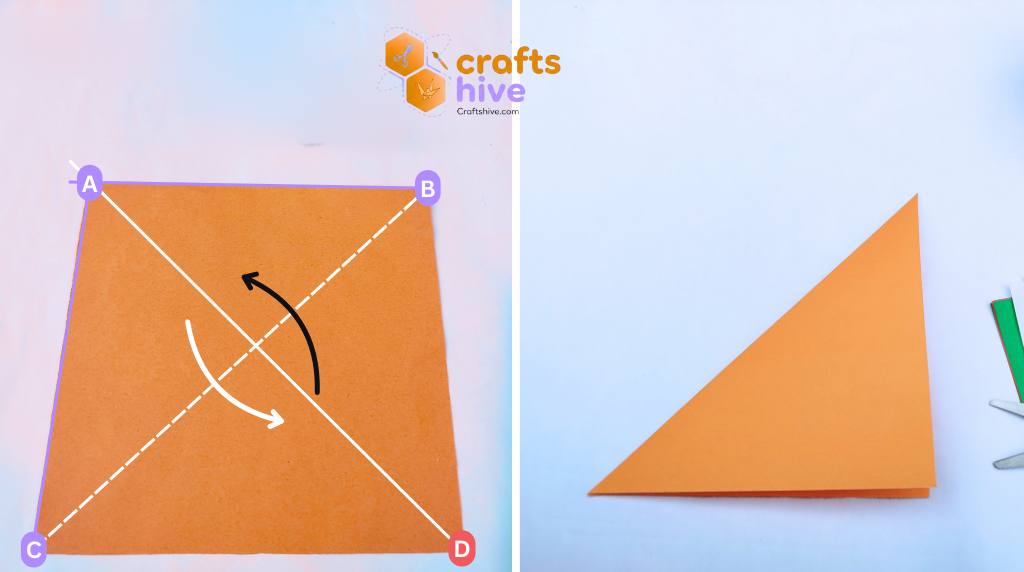
First, align the top left corner of the square sheet with the bottom right corner. Then align the respective sides, press the paper well, crease it, and unfold.
Label Instruction: Align the sides AB and AC with the sides BD and CD, crease the paper, and unfold. The respective corners must also align.

Your first diagonal crease will look like this.
Now, align the top right corner of the square sheet with the bottom left corner. Also, align the respective sides, press the paper well, crease it, and unfold again.
Label Instruction: Align the sides AB and BD with the sides AC and CD, crease the paper, and unfold.
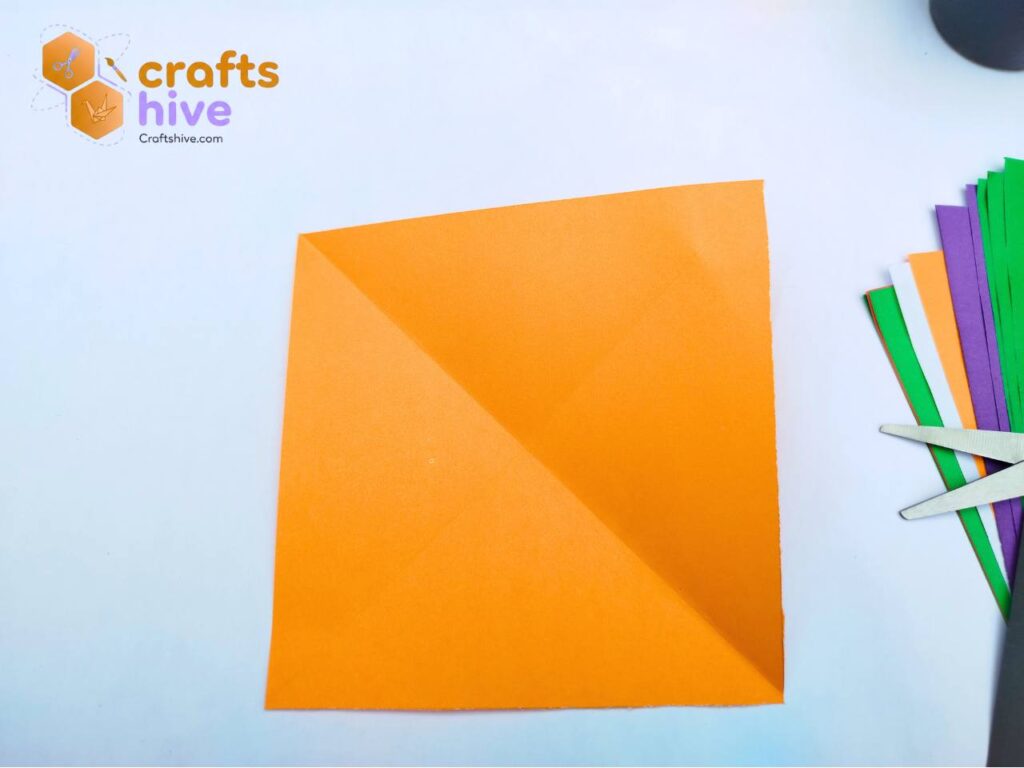
Here is what the crossing diagonal crease will look like.
Step #2: Make Vertically and Horizontally
After finishing this step, our square sheet will have two more crossing creases in the shape of the symbol ‘+’.
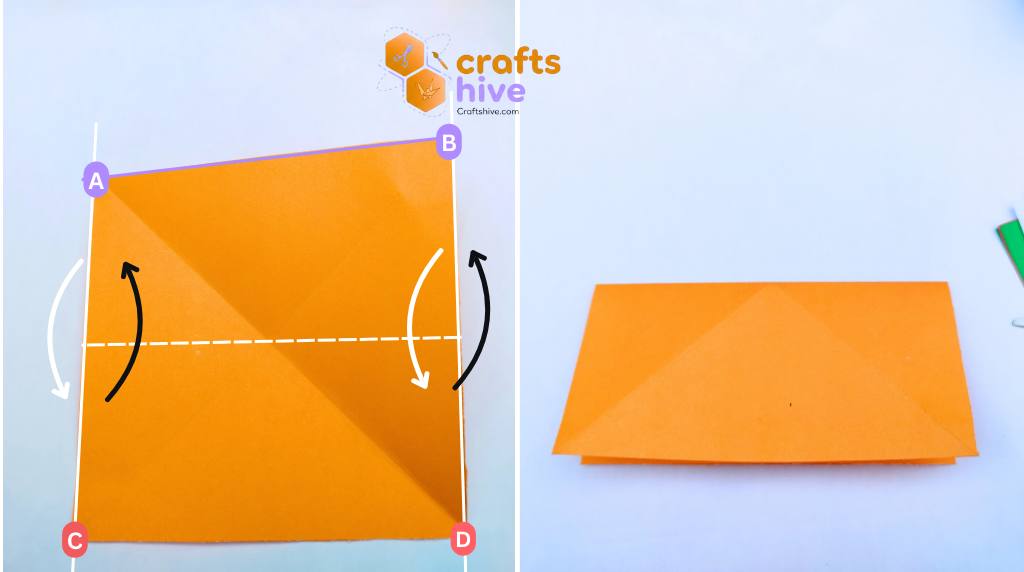
First, half-fold vertically down the top side and align it with the bottom side. All four corners must also align exactly. After creasing the paper, unfold it.
Label Instruction: Align the side AB wth the side CD, crease the paper, and unfold. (Mountain Fold)
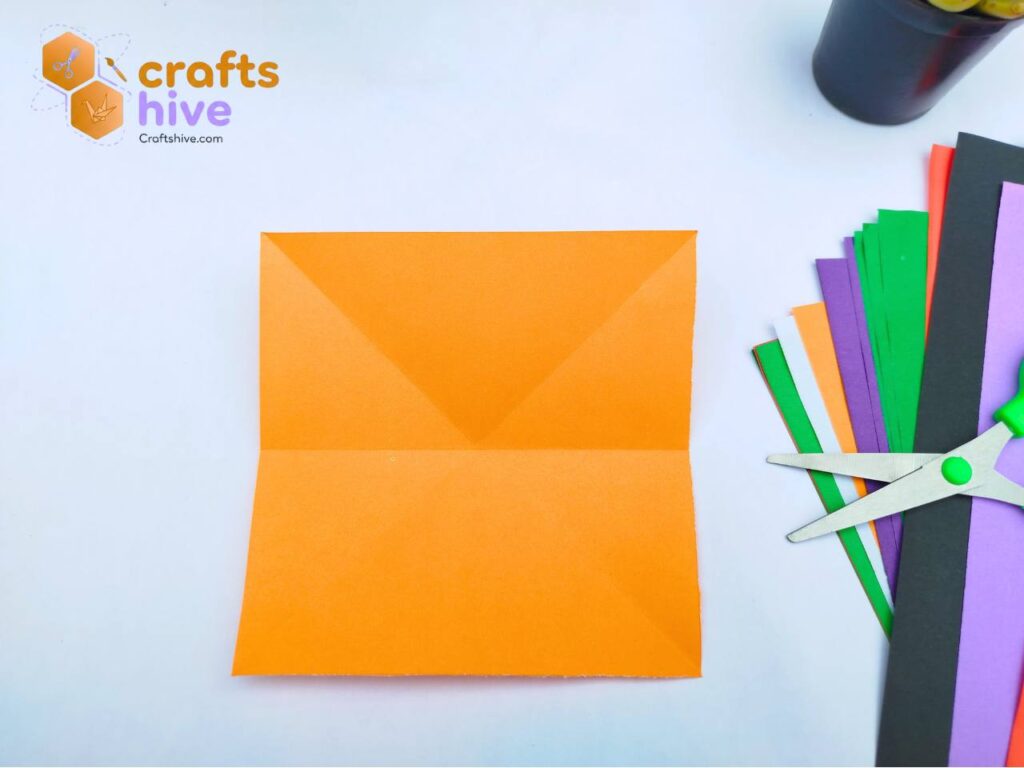
Your paper will have a horizontal crease at the centre of the square.
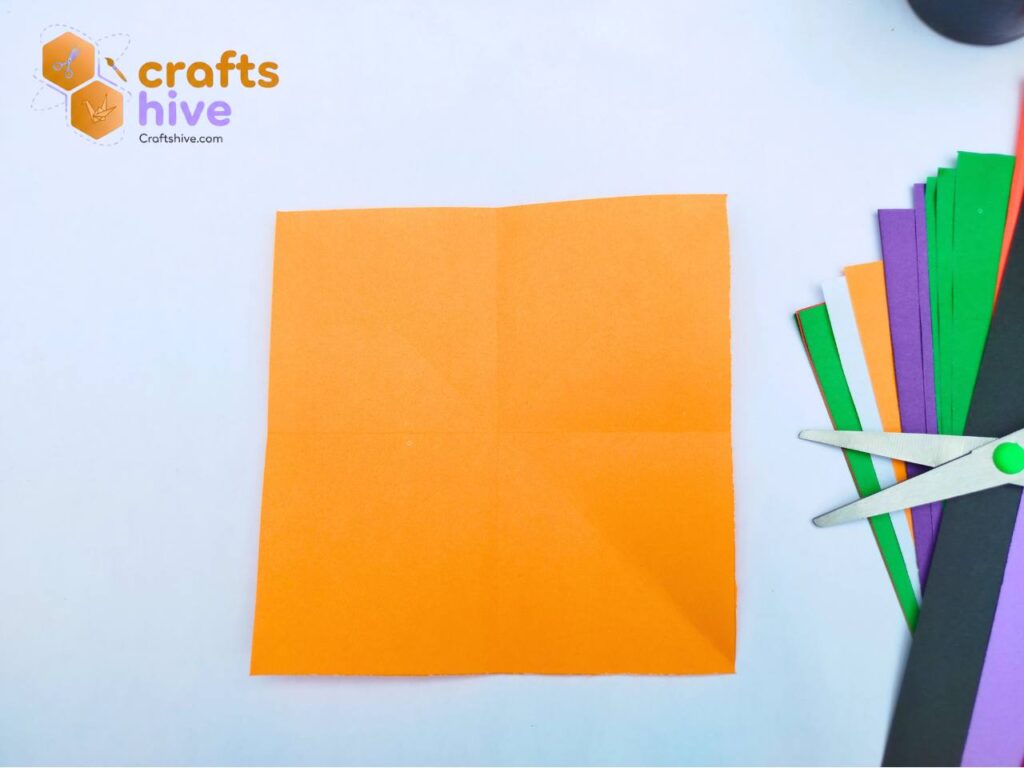
Repeat the same step with the left and right sides and you will have a vertical crease in the middle.
Step #3: Make Front Blintz Base
We want to make a Blintz Base on the active side as an intermediate step for making the guiding crease.
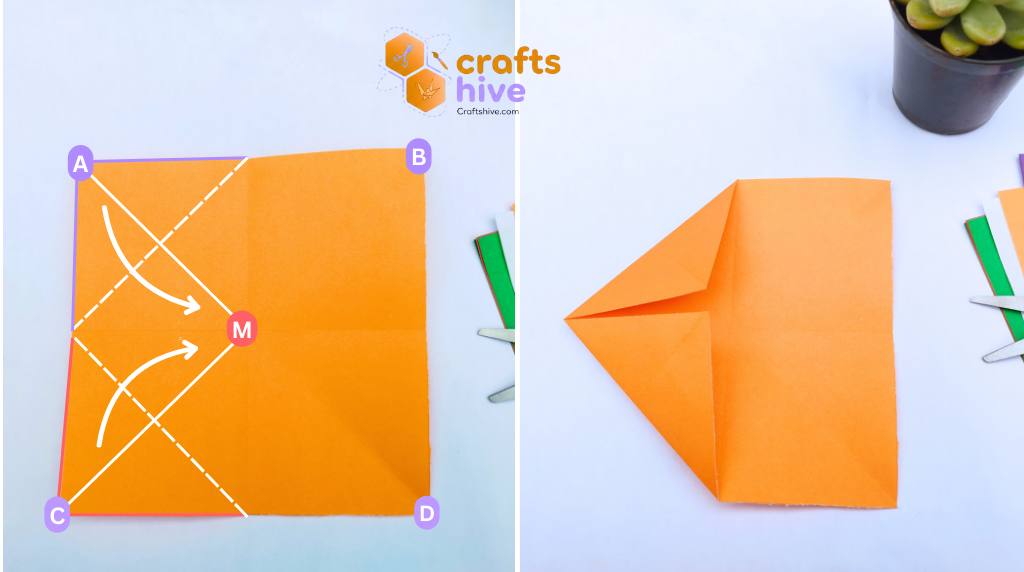
For this, fold and settle the top left corner of the unfolded sheet on the point of intersection of the crossing creases. Do the same for the remaining three corners of the square sheet. These are called the blintz folds.
Label Instruction: Settle the corners A, B, C, and D all onto the point labeled as M by Mountain Fold.
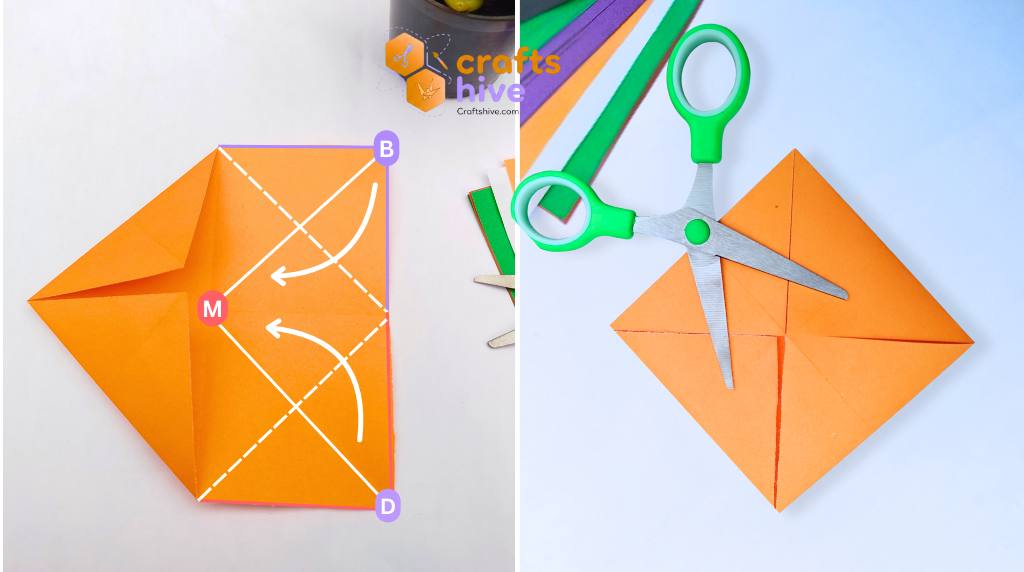
Step #4: Make Back Blintz Base
Again, as an intermediate step, we need a blintz base but this time, on the back side.
So, turn the blinzt base upside down so that you are facing its back side. Make the blintz fold on all four corners.

Label Instruction: Settle the corners E, F, G, and H all onto the point labeled as N by Mountain Fold.
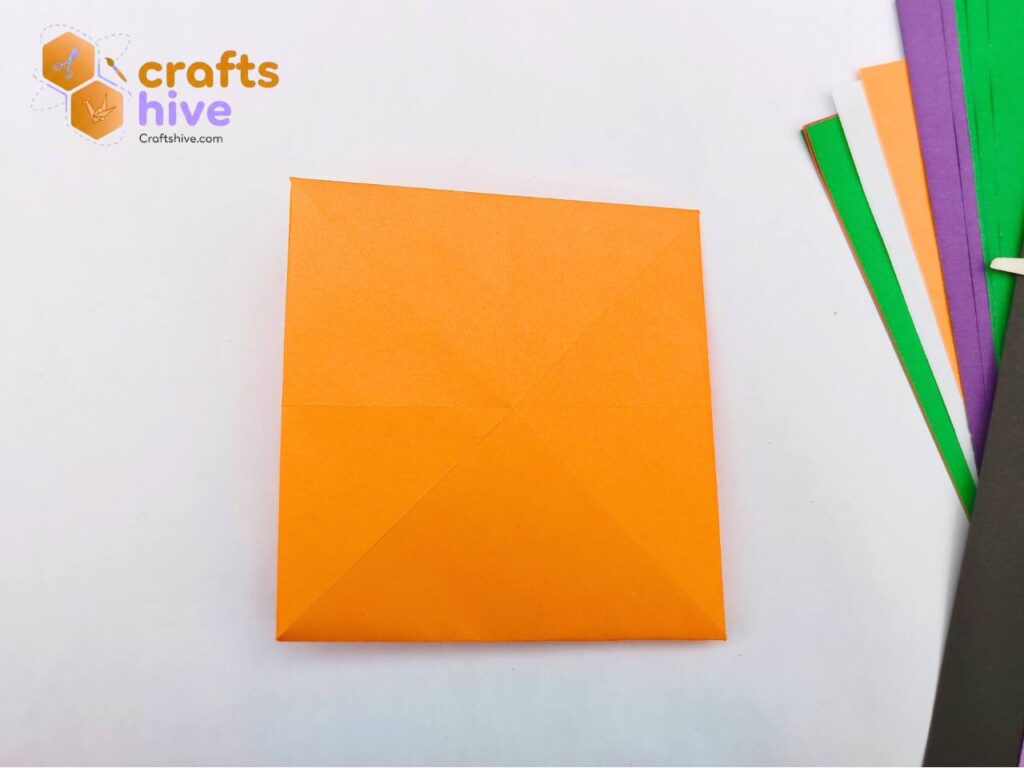
Step #5: Unfold
Now, we have all the guiding creases, unfold into a square sheet of original dimensions.
Step #6: Make Quarter Folds
On the paper, from left to right we have, four sections.
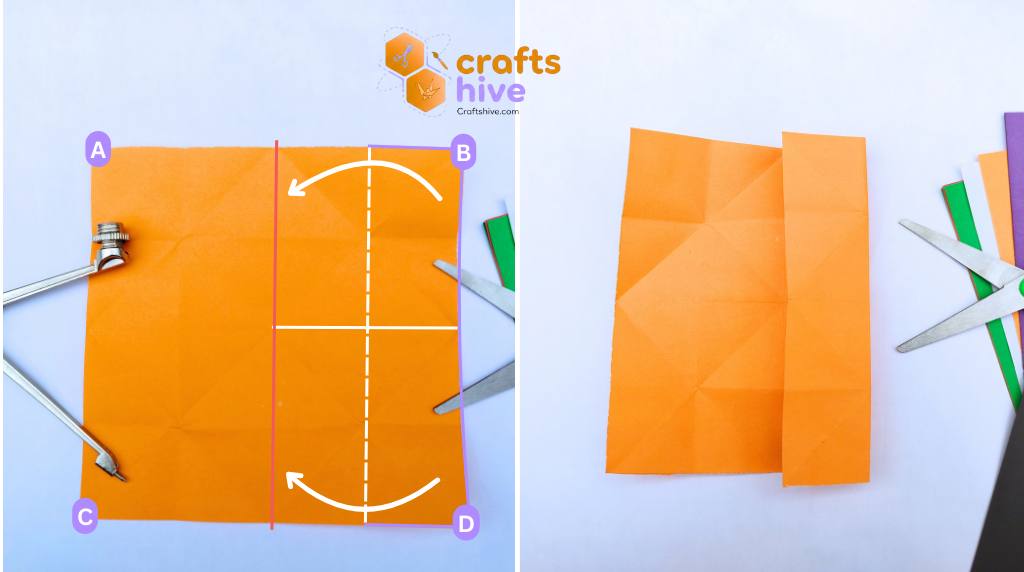
Fold the right side of the sheet and align it with the middle (vertical) crease. Press the paper to have a quater fold.
Label Instruction: Fold the side BD onto the vertical crease.
Repeat the above fold for the left side, too.
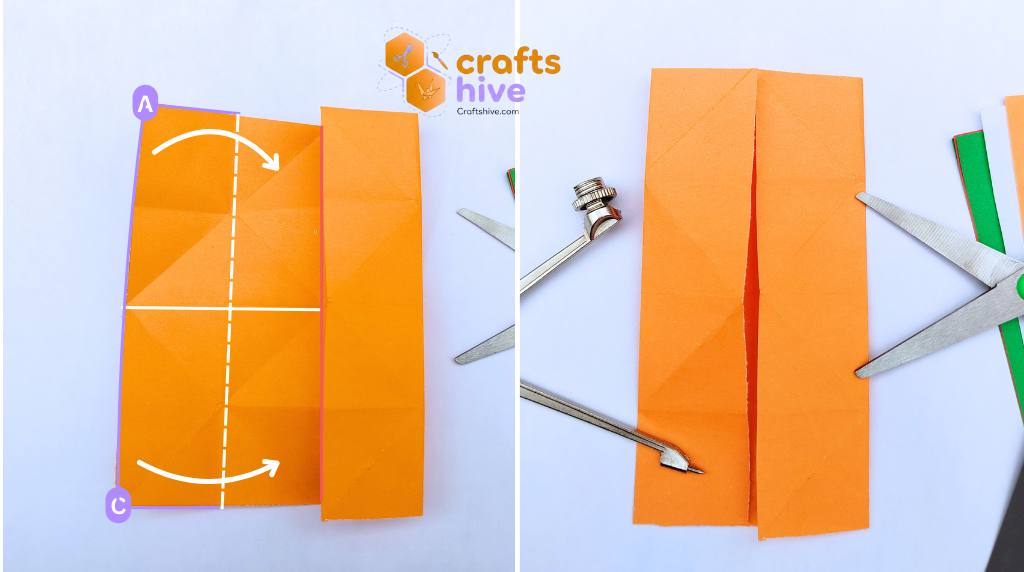
Step #7: Collapse to Small Squares
This will also be an intermediate step and actually is optional.
From the top to bottom we again have four rectengle sections. Fold the top side and align it with the horizontal middle crease. Your axis will be 2nd crease relative to the top.
Label Instruction: Fold the side IJ onto the mid horizontal crease.
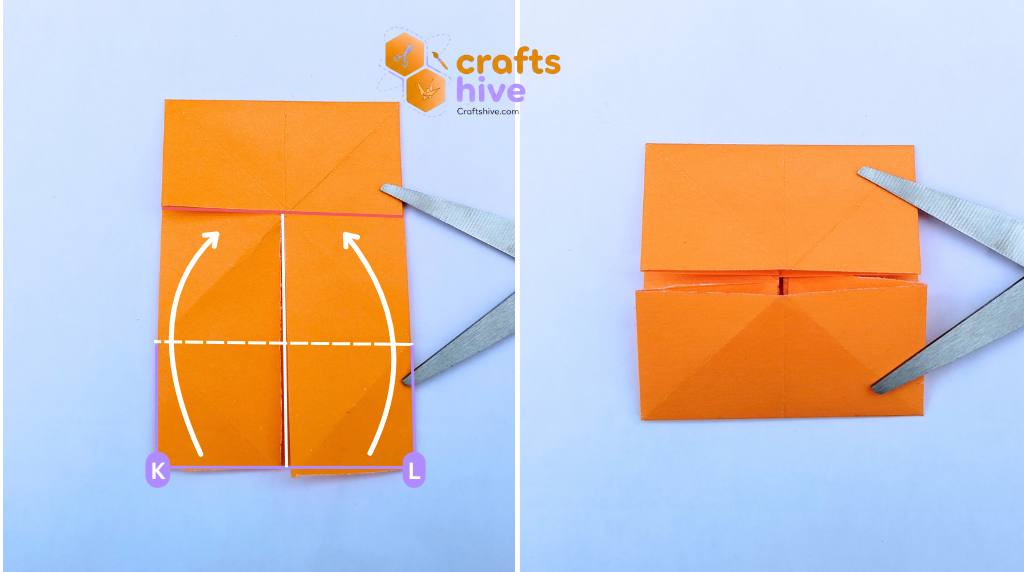
Repeat the same fold for the bottom side, too.
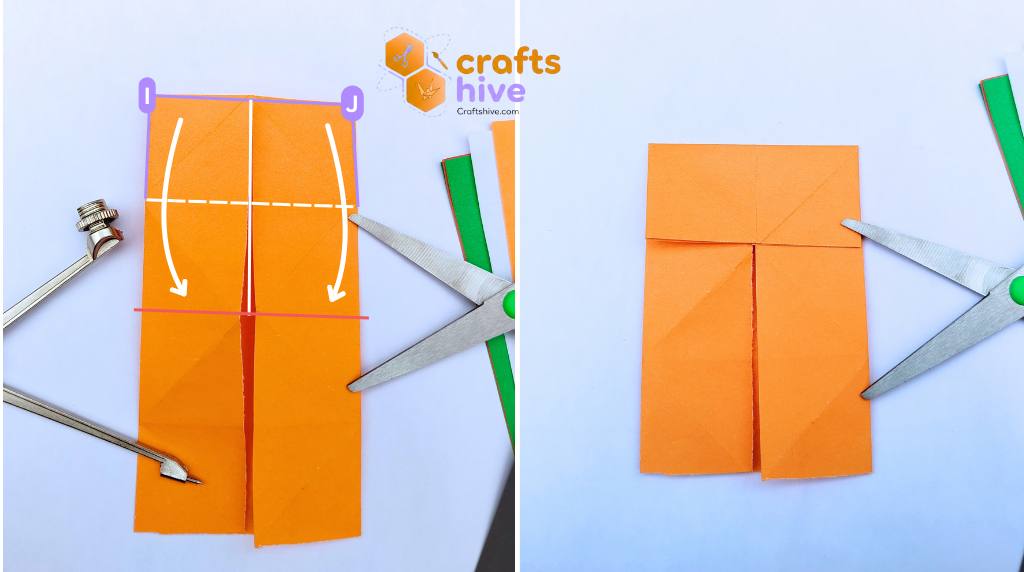
Step #8: Fold the Wings
Undo the top quarter fold. You can see the four squares.
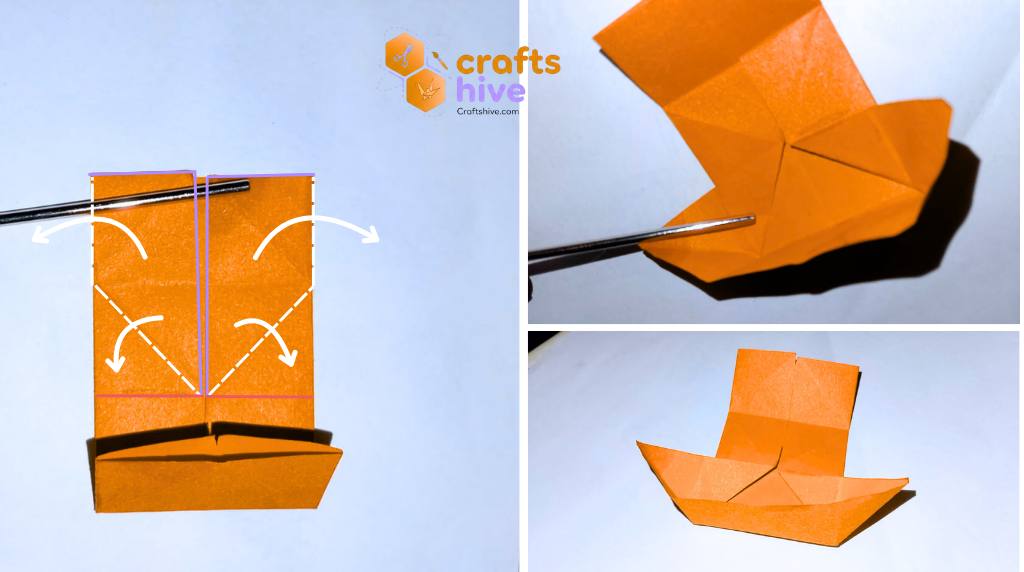
Fold the front top layer of the paper about the marked axis as far as you can from both sides. That is your left and right bottom squares must get a diagonal fold.
Focus on the back side and pinch everything down like above in the picture.
Repeat the same steps for the bottom side, too.
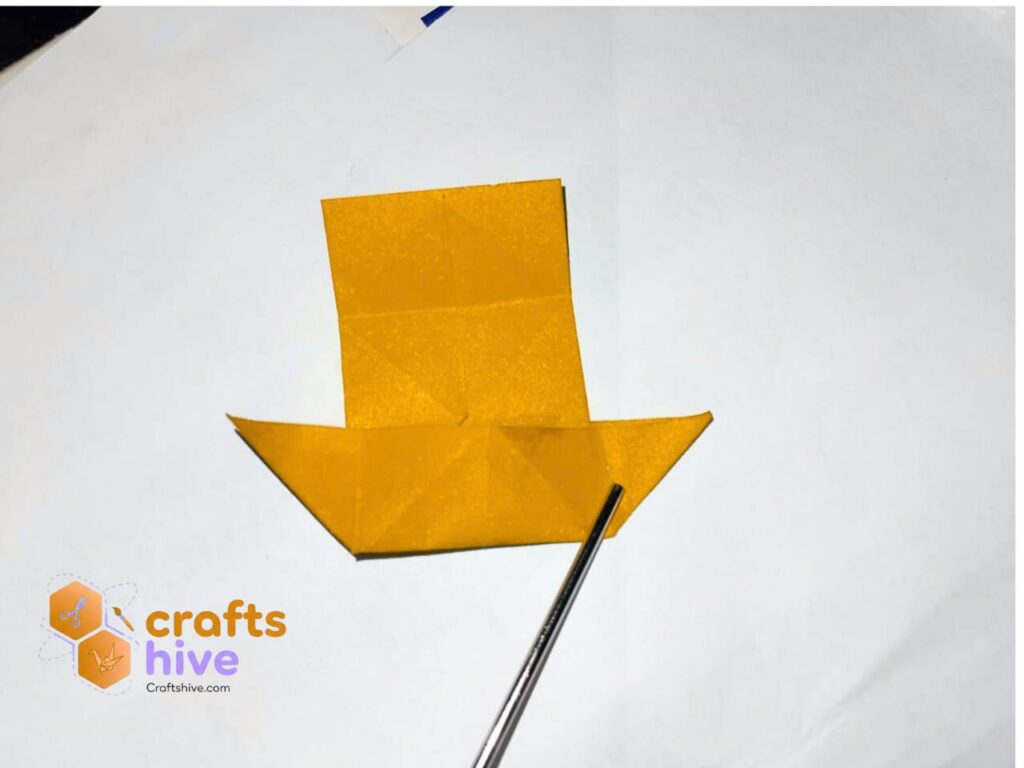
Step #9: Collapse About the Axis of Symmetry
Turn the model upside down.
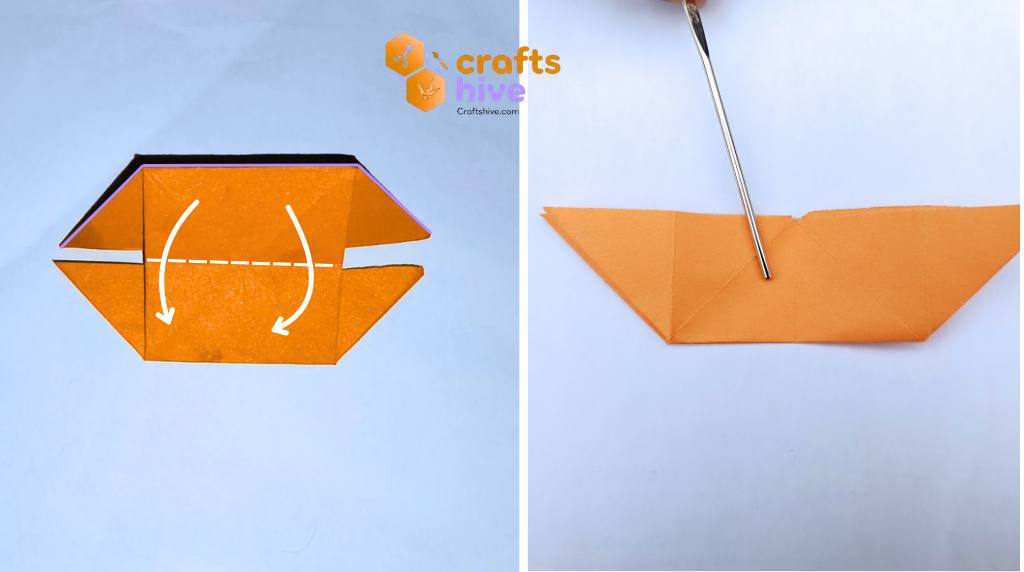
Collapse the whole top part onto the bottom side about the centre of symmetry.
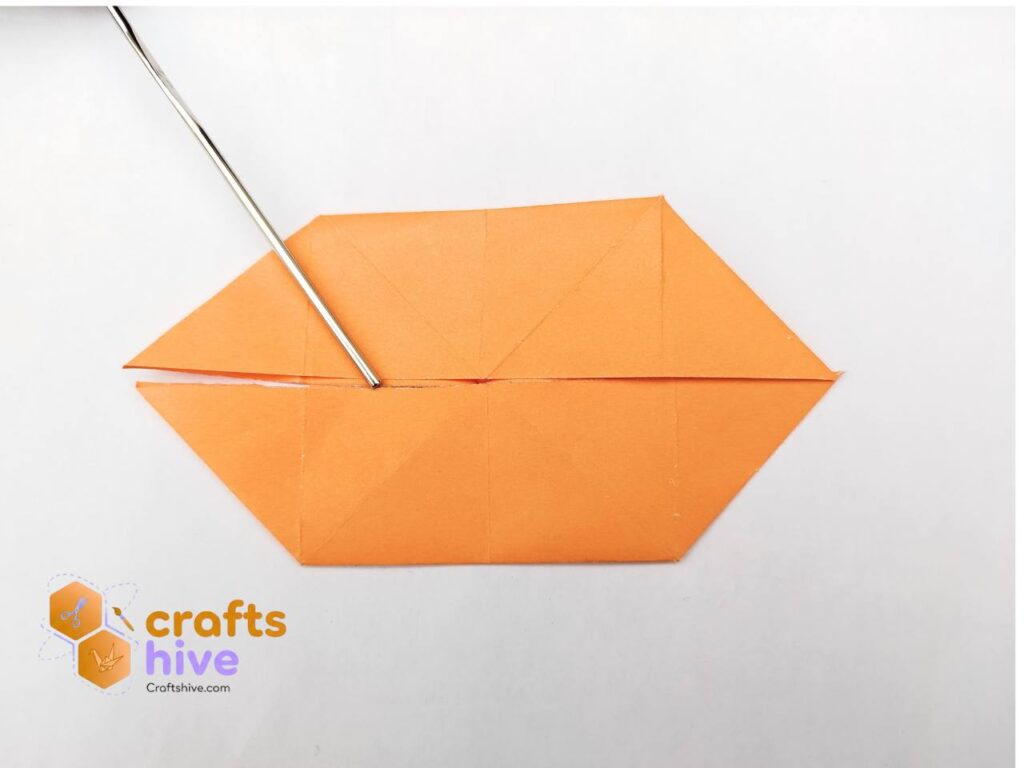
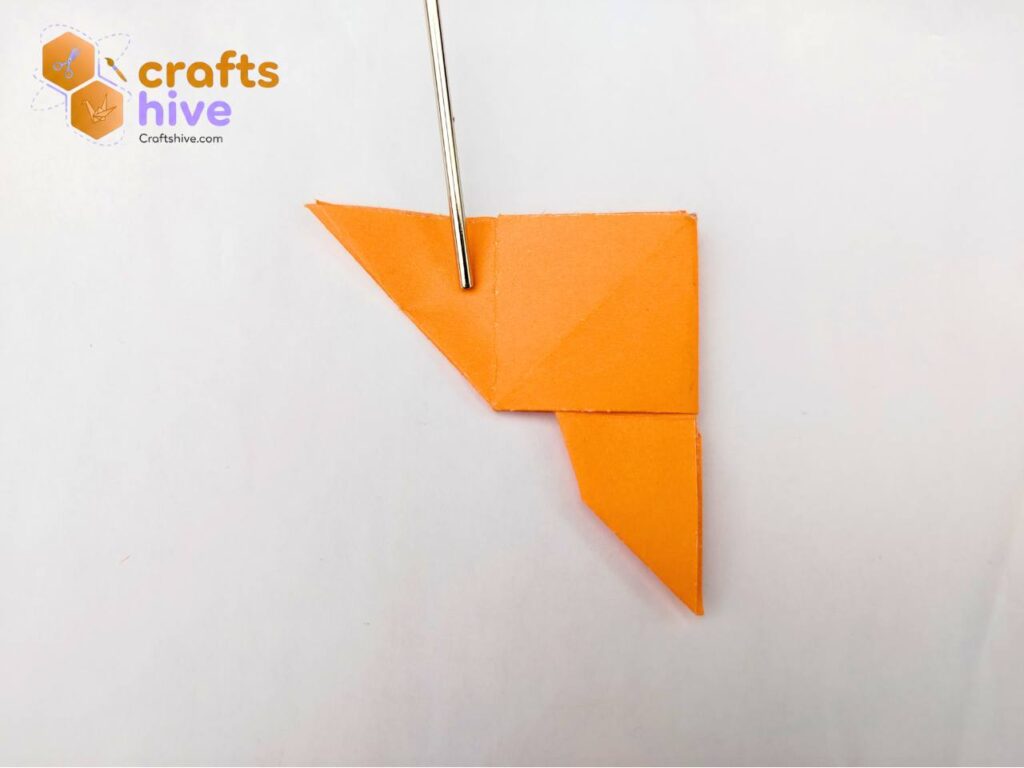
Step #10: Make the Tail of a Butterfly

You see, we have two layers after this collapse. Hold the right corner of the front layer and Mountain Fold it about the marked axis on the crease as far as you can.
Label Instruction: Fold the corner Q and align the top right side with the centre crease or the red line.
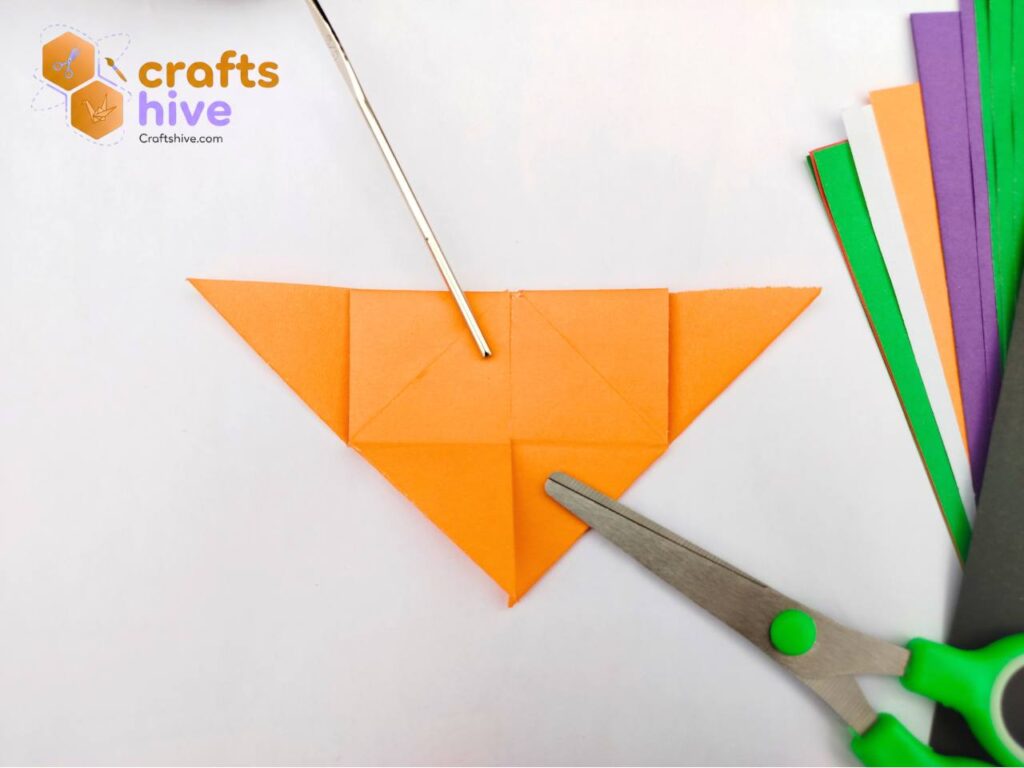
Repeat the same for the left front side.
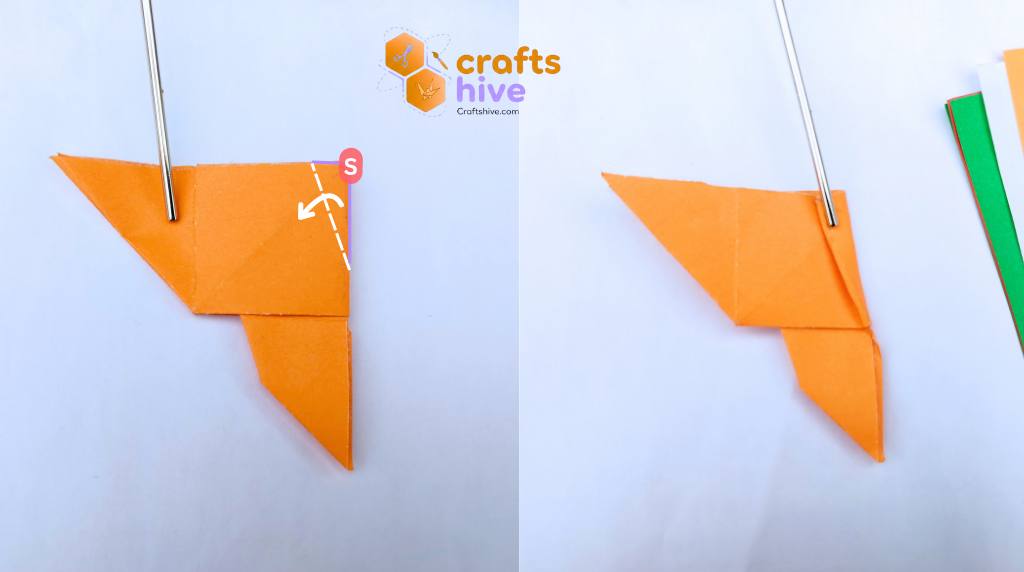
Step #11: The Wing Structure
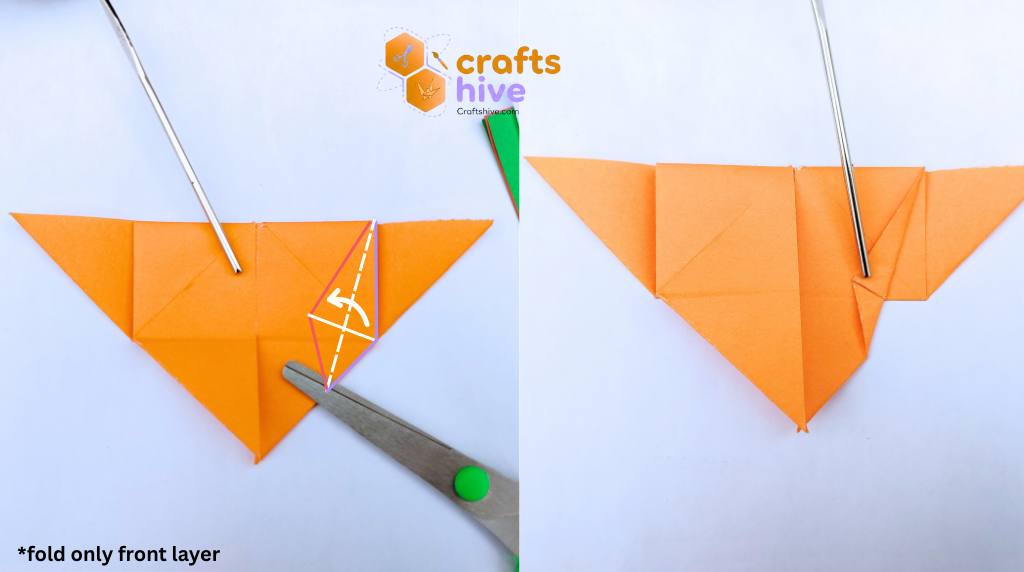
Again fold the front right side about the marked axis to the left and align on the red shape.
Repeat for the other side.
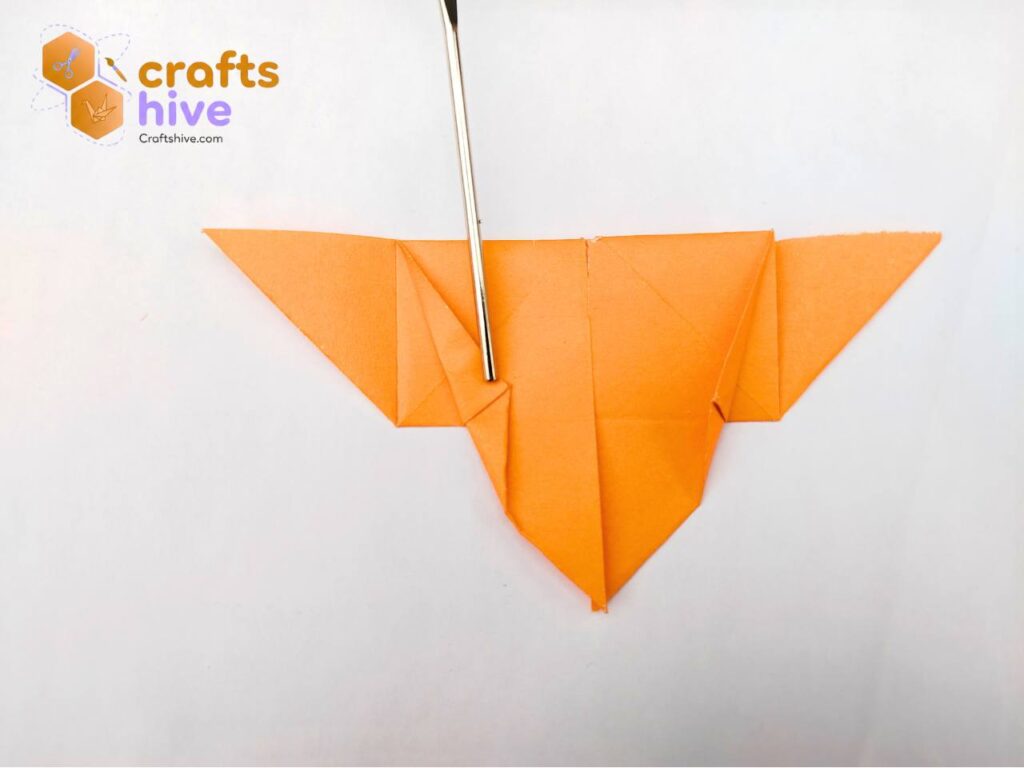
Step #12: Make the Body
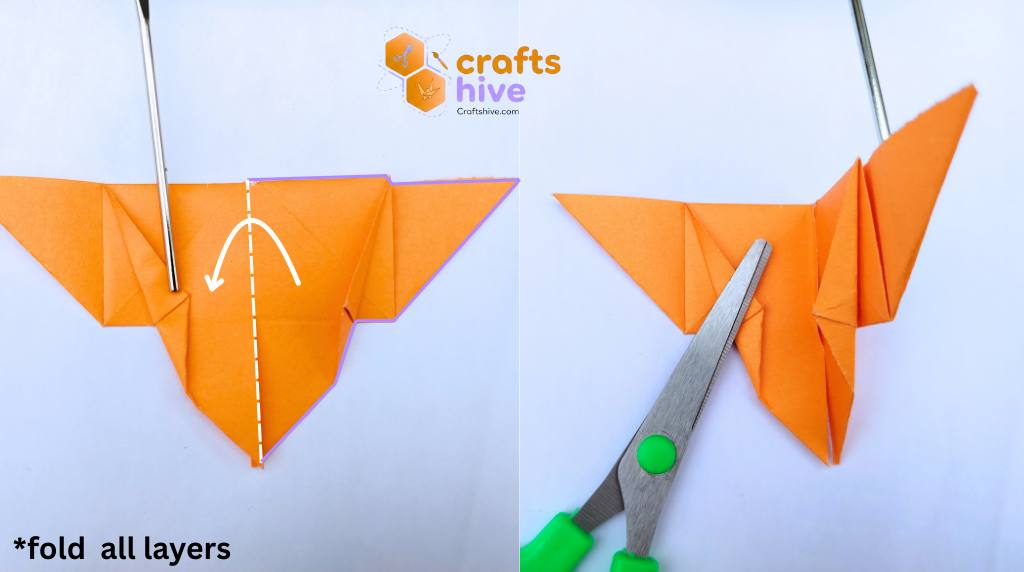
The other side will the top of our butterfly.
Collapse the butterfly in half about the centre of axis.
Fold the top right corner about the marked white axis. Repeat for the other side.
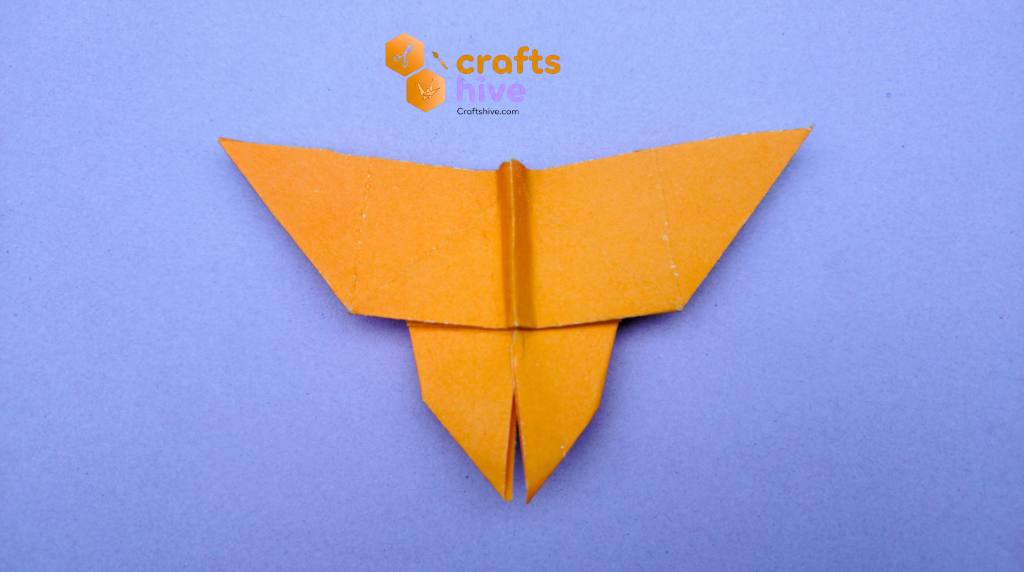
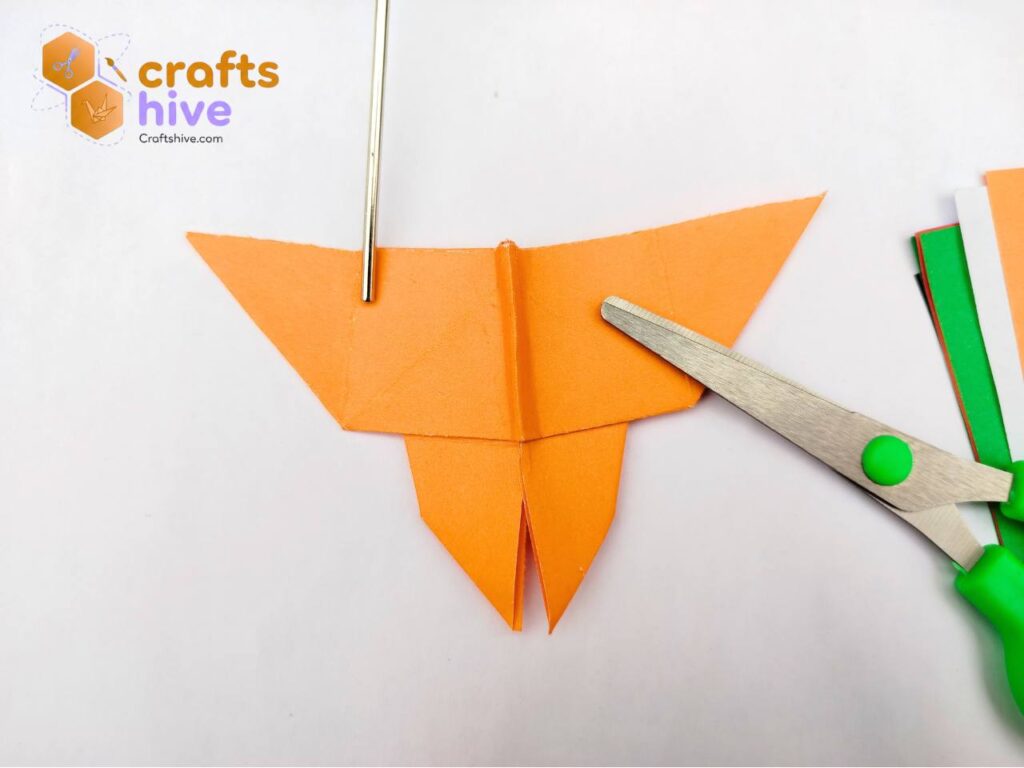
Finished
That’s it, the origami traditional butterfly is finished folding.
Did you find the tutorial helpful? Tell Us in the Comments.
Help us improve the weak points of our tutorial by your feedback and share photos of your work to us, too. See what is next:
About "Origamist@Craftshive"
Our origamist is expert in both the traditional origami and designing some REALLY creative crafts.
 How to Fold Origami Jumping Frog in 10 Steps
By Origamist@Craftshive
How to Fold Origami Jumping Frog in 10 Steps
By Origamist@Craftshive How to Fold Origami Ninja Star in 7 Steps
By Origamist@Craftshive
How to Fold Origami Ninja Star in 7 Steps
By Origamist@Craftshive How to Craft Cute Paper Bow with Origami and Cutting
By Origamist@Craftshive
How to Craft Cute Paper Bow with Origami and Cutting
By Origamist@Craftshive How to Fold Easy Origami Penguin for Winter
By Origamist@Craftshive
How to Fold Easy Origami Penguin for Winter
By Origamist@Craftshive How to Fold Origami Sailing Boat in 8 Steps
By Origamist@Craftshive
How to Fold Origami Sailing Boat in 8 Steps
By Origamist@Craftshive How to Fold Origami Traditional Heart for Valentine’s Day
By Origamist@Craftshive
How to Fold Origami Traditional Heart for Valentine’s Day
By Origamist@Craftshive How to Make Origami Square Base in 4 Steps
By Origamist@Craftshive
How to Make Origami Square Base in 4 Steps
By Origamist@Craftshive How to Make Origami Kite Base in 4 Steps
By Origamist@Craftshive
How to Make Origami Kite Base in 4 Steps
By Origamist@Craftshive How to Make An Easy Origami Swan in 13 Steps
By Origamist@Craftshive
How to Make An Easy Origami Swan in 13 Steps
By Origamist@Craftshive