


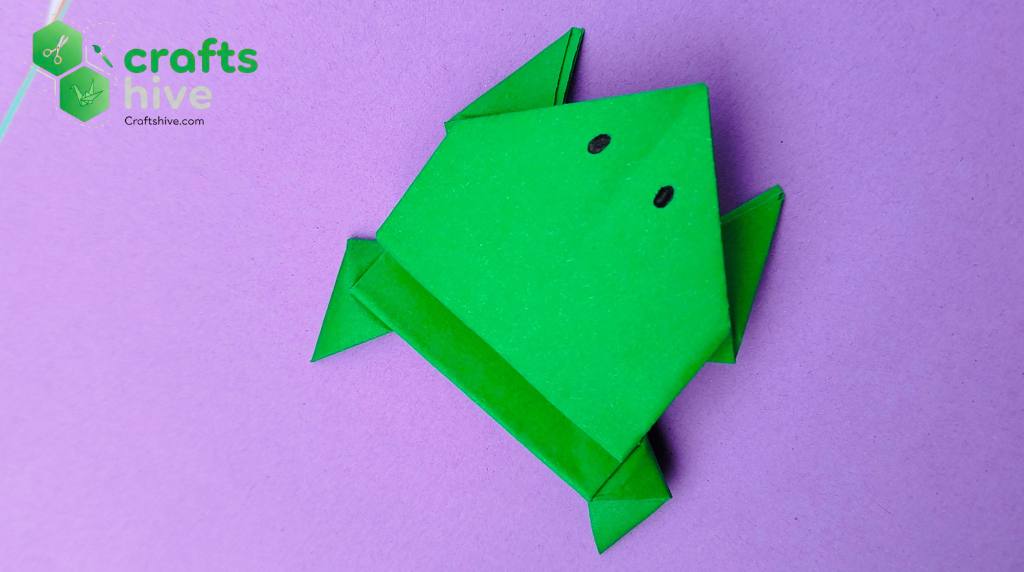
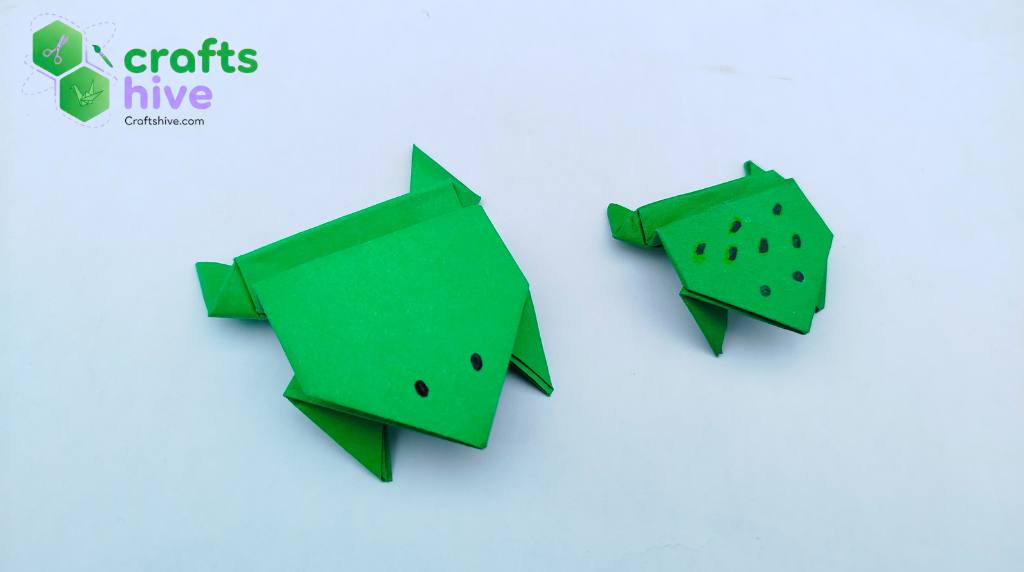
Well, I know the origami jumping frog that I learned in school jumps quite nicely. However, it has a bunch of visible folds and does not match that well to a frog even in drawings. And you can’t draw the eyes or back spots on it.
So, I folded and wanna teach you how to fold this cute origami frog in 10 simple steps. This is also a traditional model, way neater, jumps better and looks so accurate.
You can think of it as amn upgrade to your favorite paper jumping toy. I would draw eyes and it would turn out to be simply adorable. This is a great idea to teach your kids.
You can have a race of frogs after folding a few. Let’s dive into the guide.
Should I Use Square Sheet for Origami Frog?
By folding two test origami frogs before taking photographs for this tutorial, I came to the conclusion that the rectangle sheet is the best for origami frogs. This is in terms of the pressing difficulty of each fold.
Because the square sheet will eventually have to be collapsed into a rectangle by half-folding. So, pressing effort for each fold just doubles this way.
Since this frog model needs waterbomb base, the fold will be hard especially for the top legs. Also, we are all aware of the final step for making it jumping (this is so hard!).
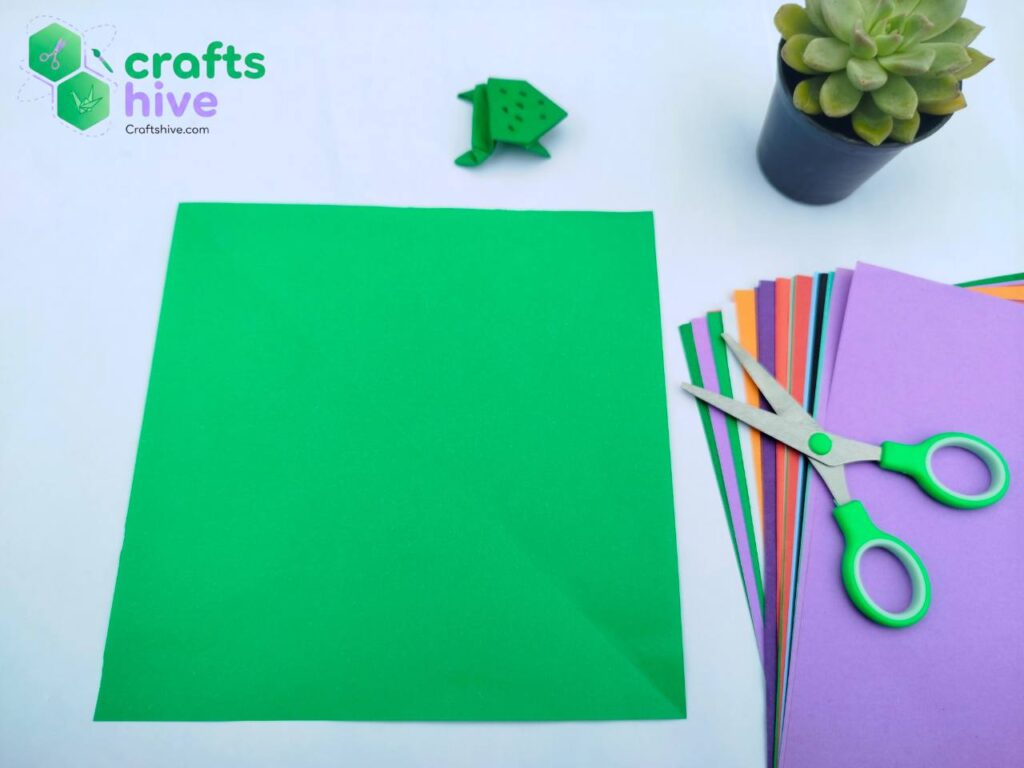
However, for demonstration, so all of us are on the same page, I will be using a 20cm by 20cm square sheet of Tant paper.
Tip: The origami frog folded on a square sheet jumps better than the rectangular sheet.
Origami Jumping Frog: Step-by-Step Instructions
For this origami frog, you need a waterbomb base, a squash fold, a Valley, a Mountain fold, collapse and jumping folds. This might be a little hard to fold but I will explain here super easily:
Folding time: About 7 minutes
Difficulty: Beginner (level 3)
Paper: Hear me out (only use a thin paper sheet for it!)
Step #1: Collapse into A Rectangle
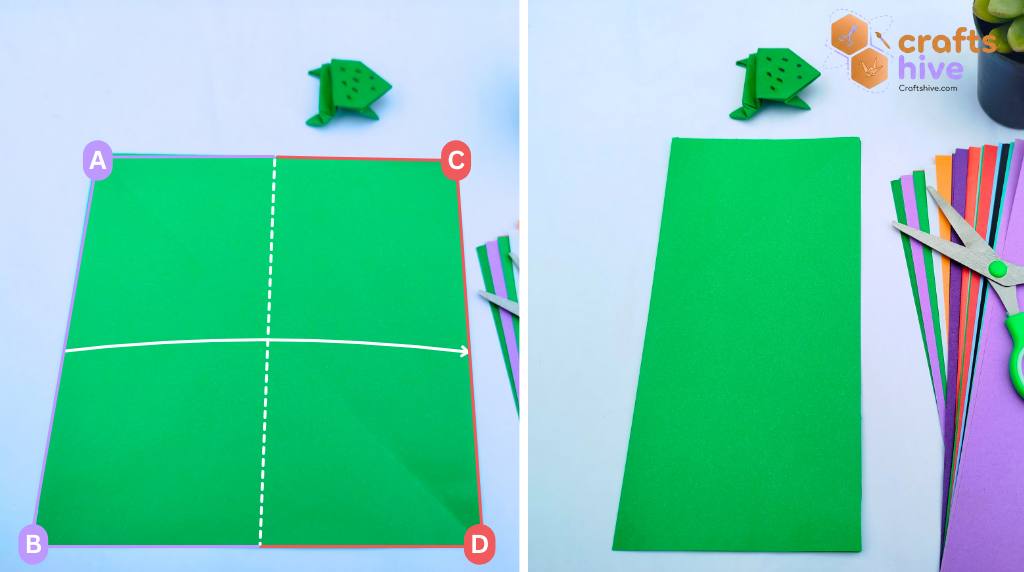
- With the paper sheet lying in normal square position, fold and align the left side of square with the right side.
- Press the paper flat evenly over the hinged side.
- The top and bottom sides must also align exactly.
Note: You can als cut through the centre crease to get a perfect single rectegle.
Label Instruction: Fold and align the sides AB with the sides CD and crease the paper.
Step #2: Waterbomb Base
Normally, we work on the Waterbomb Base with the square sheet. However, for this origami frog, we only need this base for folding the head and top legs of the frog. So, let’s learn how to do it on a rectangle:
Step #1: Diagonal Folds
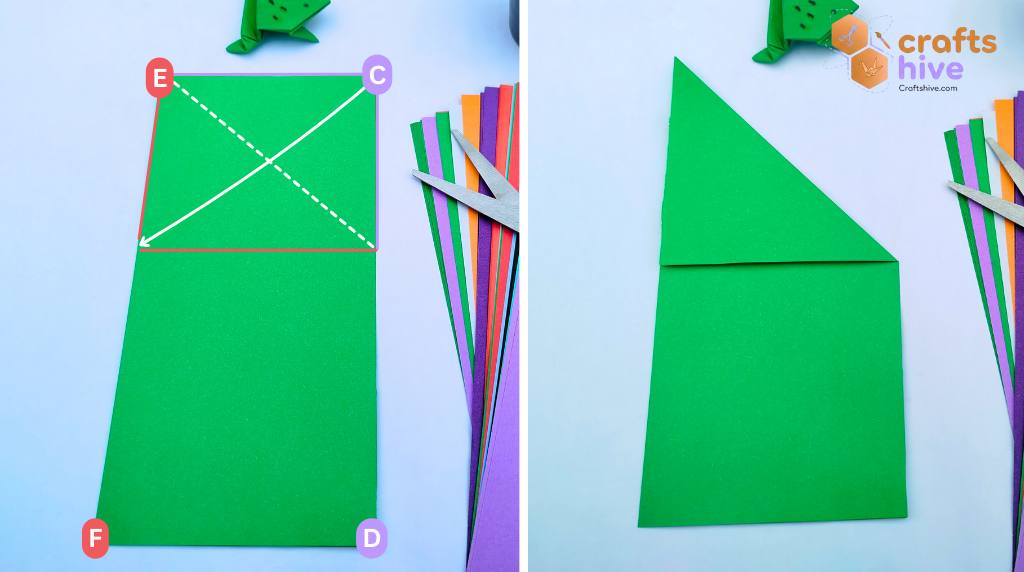
- First, start folding the top right corner of the rectangle straight along the diagonal line.
- Settle your folding flap over the sheet when the top side of the rectangle aligns exactly with the left side of the rectangle.
- Then crease the hinge and press the paper flat.
- Unfold.
Label Instruction: Fold the corner C and align the side EC with a part of the side EF.
We need another pseudo-square diagonal fold, but with the top left side of the sheet. You will be able to notice crossing “X” creases.
Step #2: Half Folds
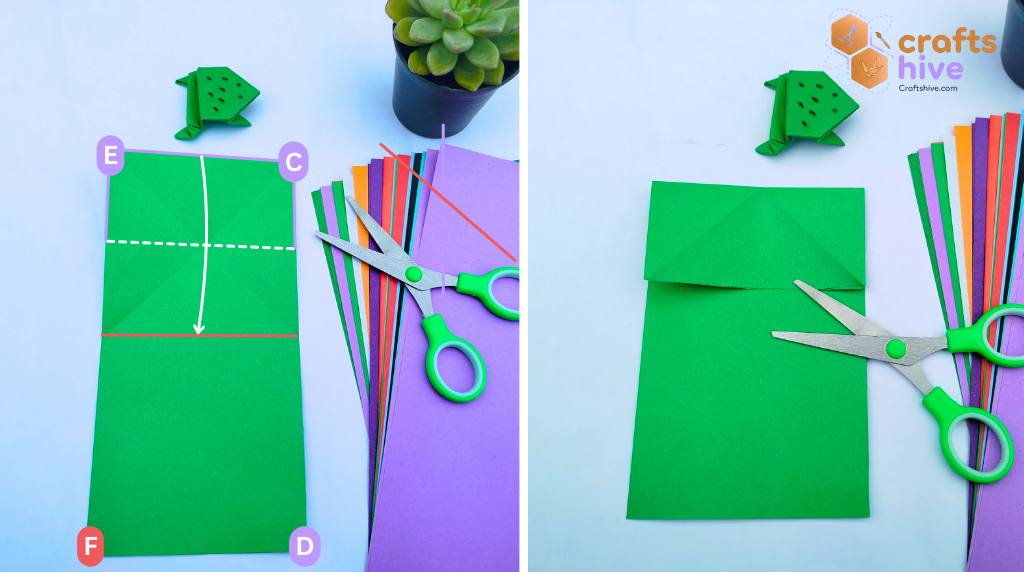
Considering the point of intersection of creases as the centre of our square, fold the top side of the rectangle and align this side with the ends of the diagonal creases.
This makes a half fold with respect to our square and makes a horizontal crease on the paper.
Label Instruction: Fold the side EC onto the bottom ends of diagonal creases.

Now, you can notice three triangles (one in the middle, two right triangles on both sides) on either side of the horizontal middle crease.
For the Waterbomb Base, we want the right triangles to be settled onto the middle triangle.
Step #3: Collapsing into The Base
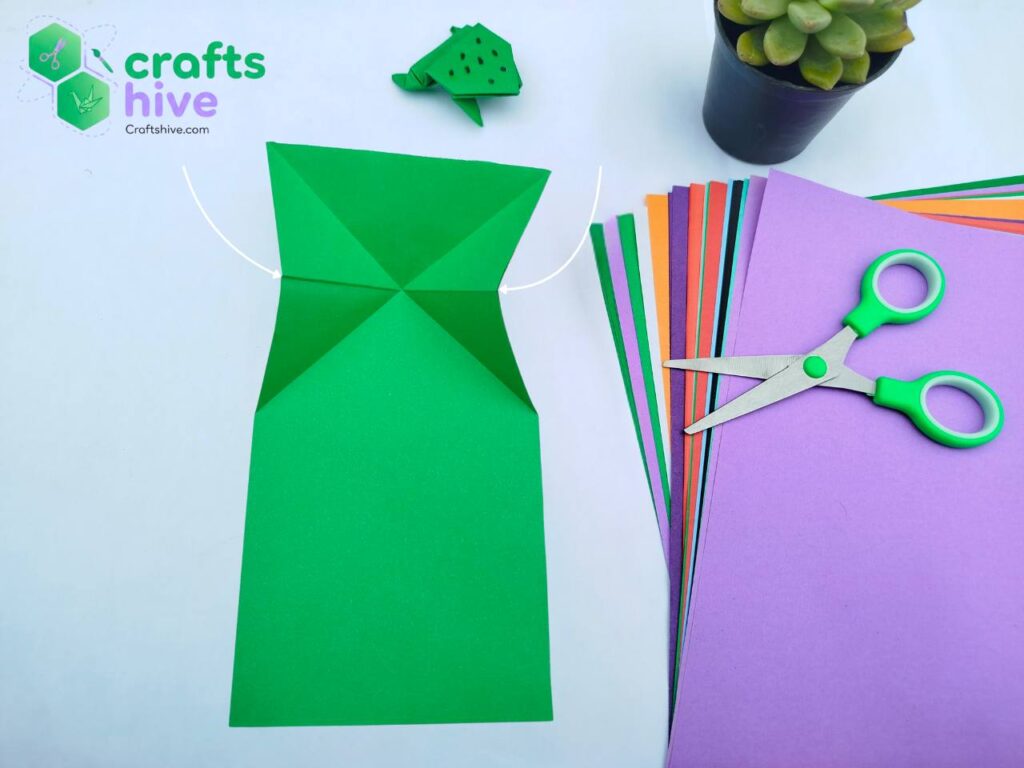
Hold both left and right sides of the middle crease and try to fold a little towards the opposite sides. This will highlight the creases well and hinges of folds for collapsing.
- First, with the hypotenuse of the bottom right triangle as a hinge, fold this triangle onto the middle bottom triangle.
- Similarly, fold the left bottom right triangle onto the left side of the middle triangle.
- Hold both folds simultaneously, and this will automatically collapse the top side of the square.
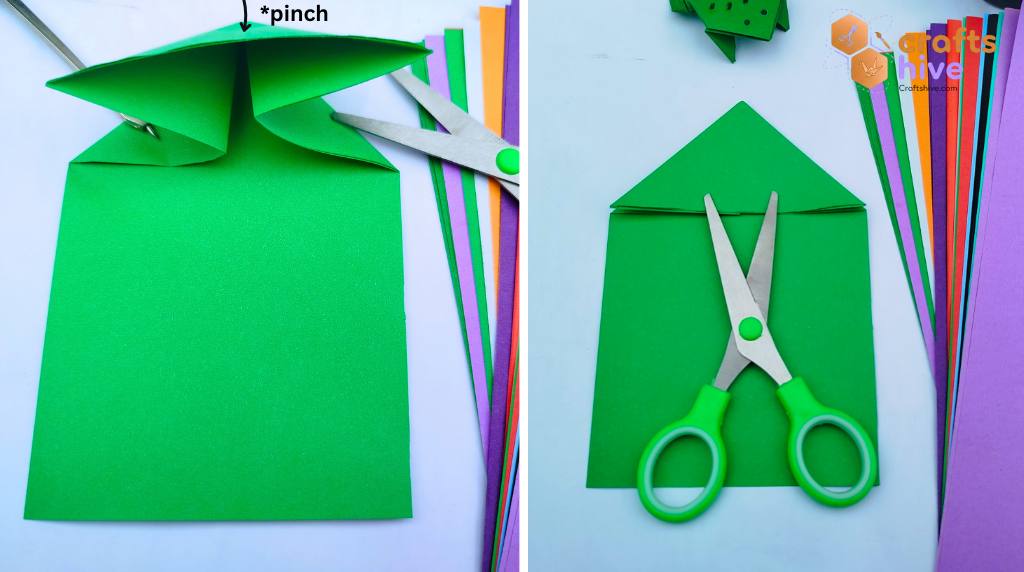
Now, just pinch the overlapping top side and crease everything very well. This completes our waterbomb based on a rectangle.
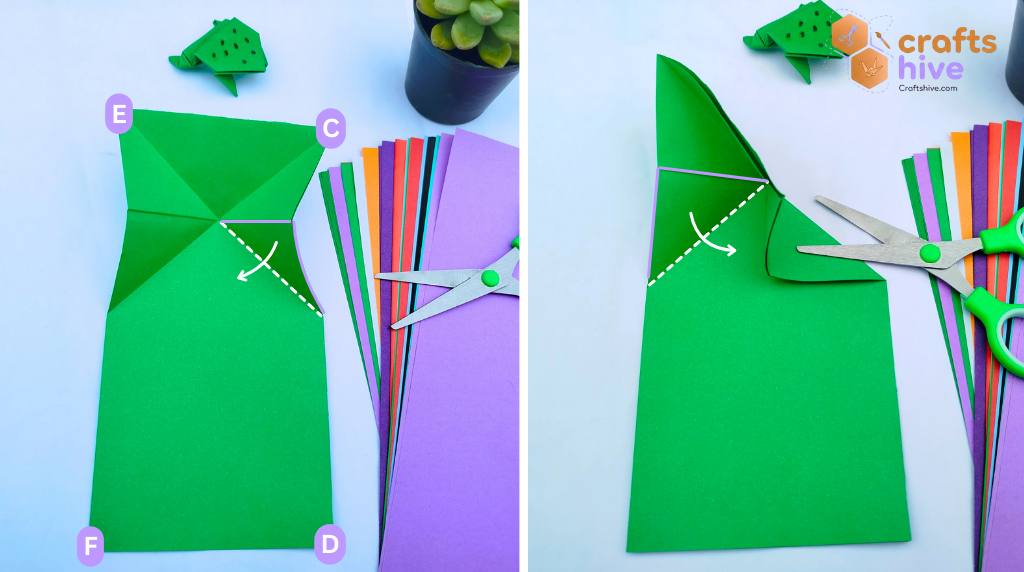
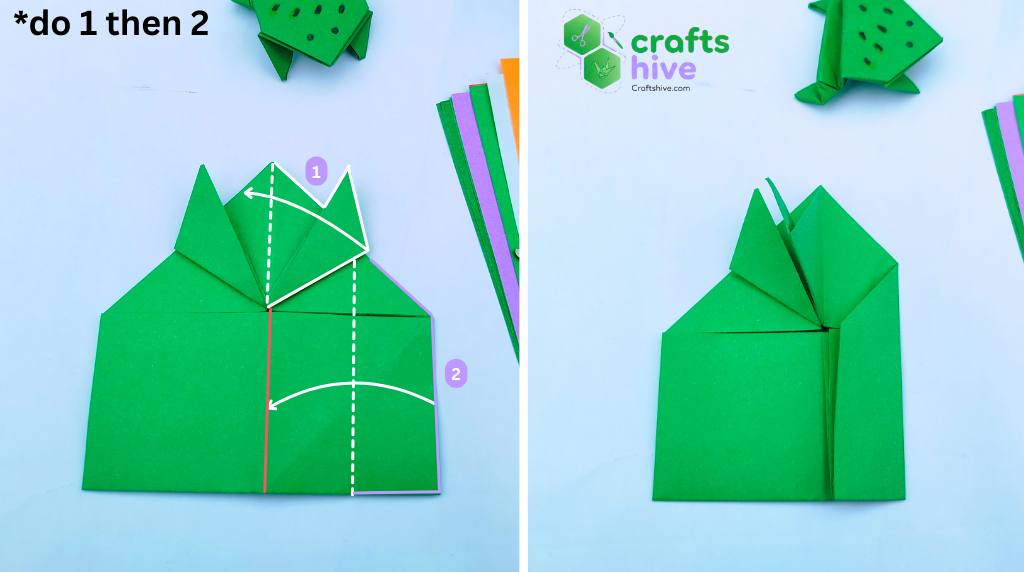
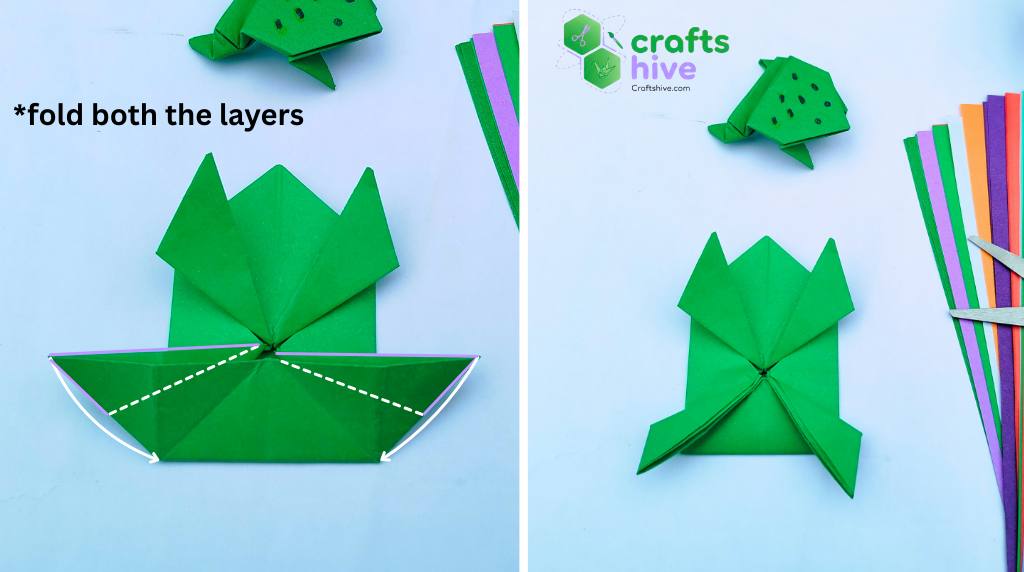
Step #3: Folds for Top Legs

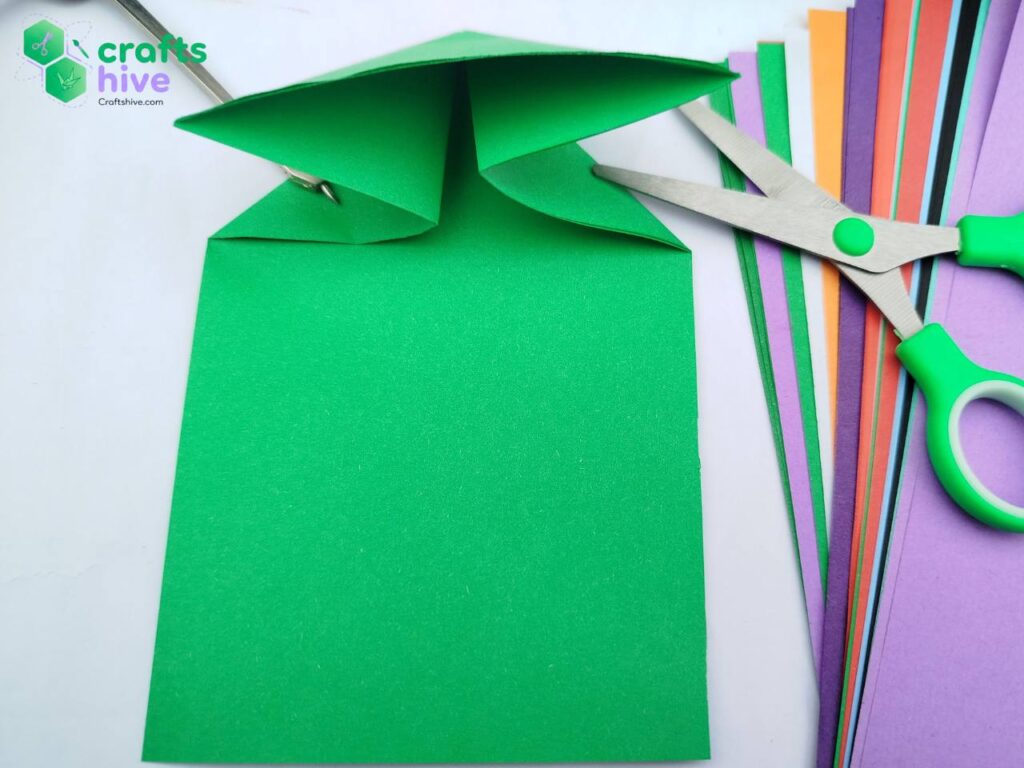
The Waterbomb fold has two layers. Fold the left and right corners of the front layer of the base about the marked axis. The bottom corner of this fold must lie on the bottom centre of the base.
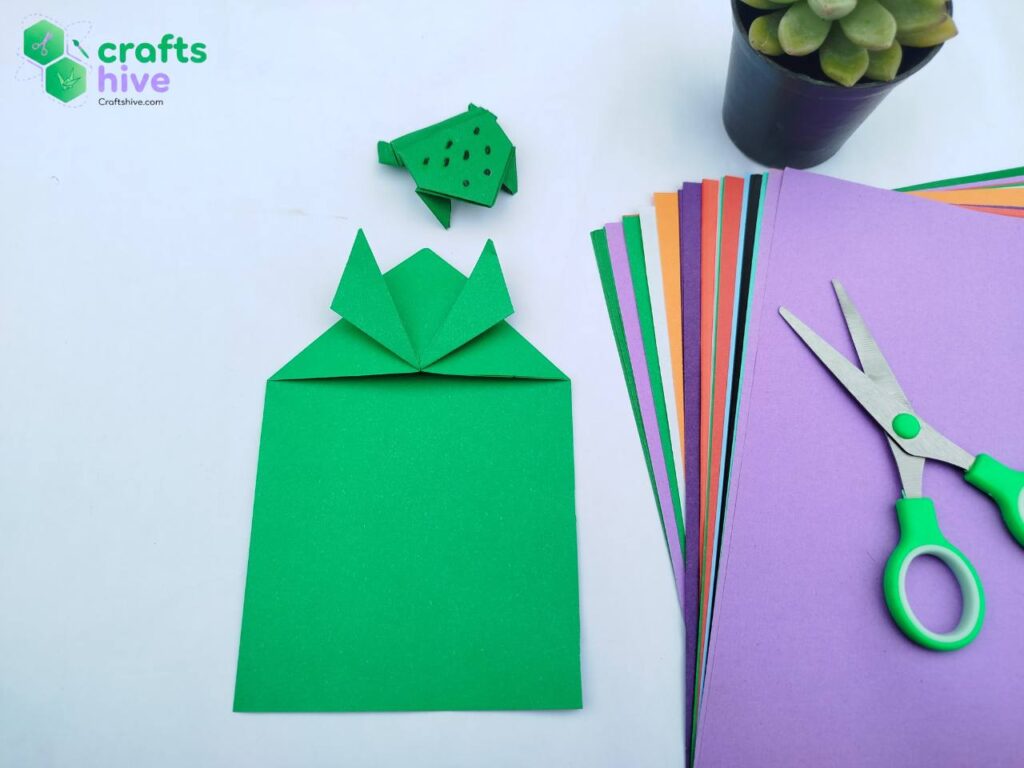
Here are the front legs of the origami frog. Now, we shall fold the legs and jumping part of the origami frog.
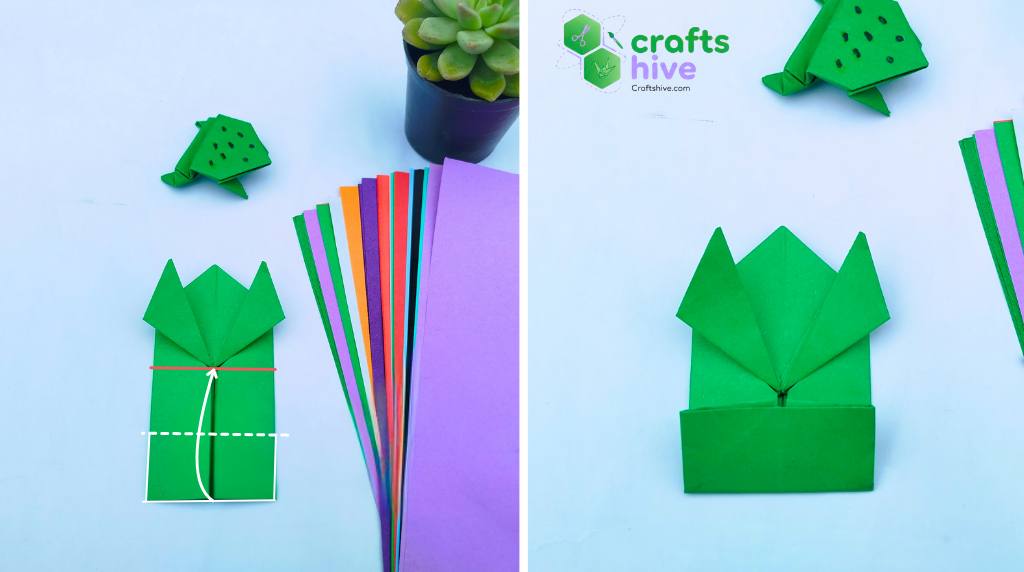
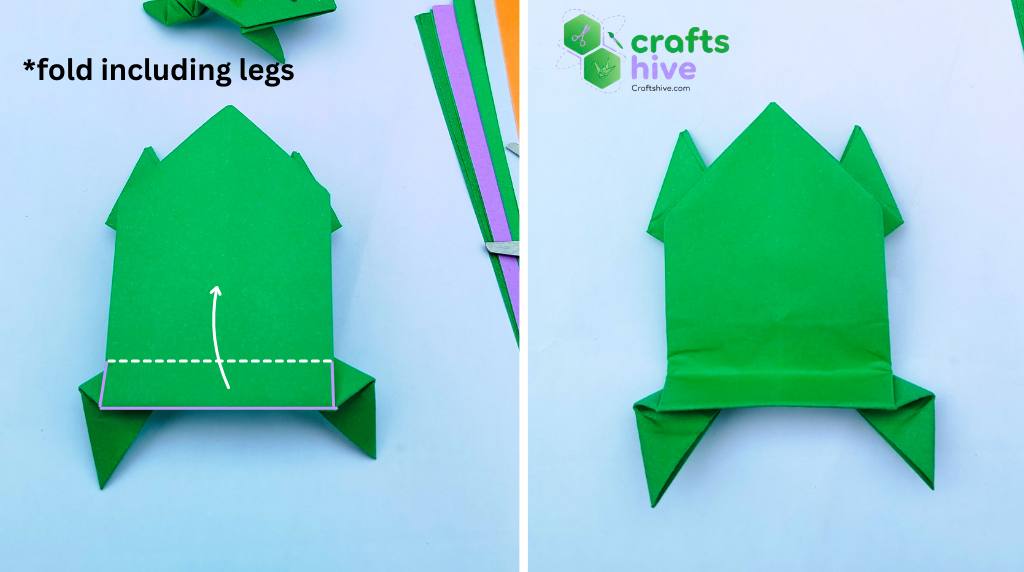
Step #4: Bottom Quarter Fold
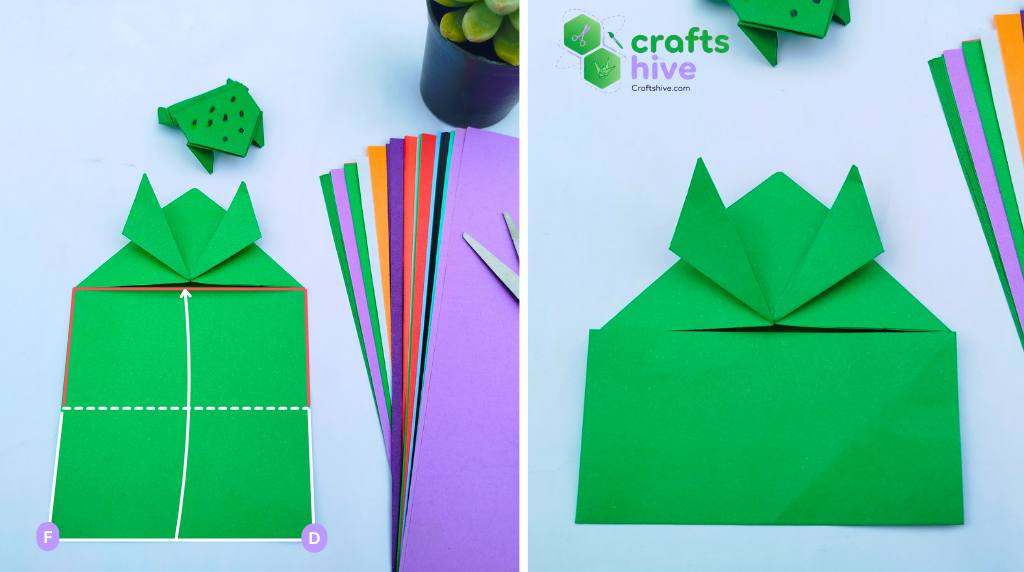
- Fold the bottom side of the rectangle and settle it just below the bottom edge of our Waterbomb base.
- Make sure to crease the hinge well and press the paper flat.
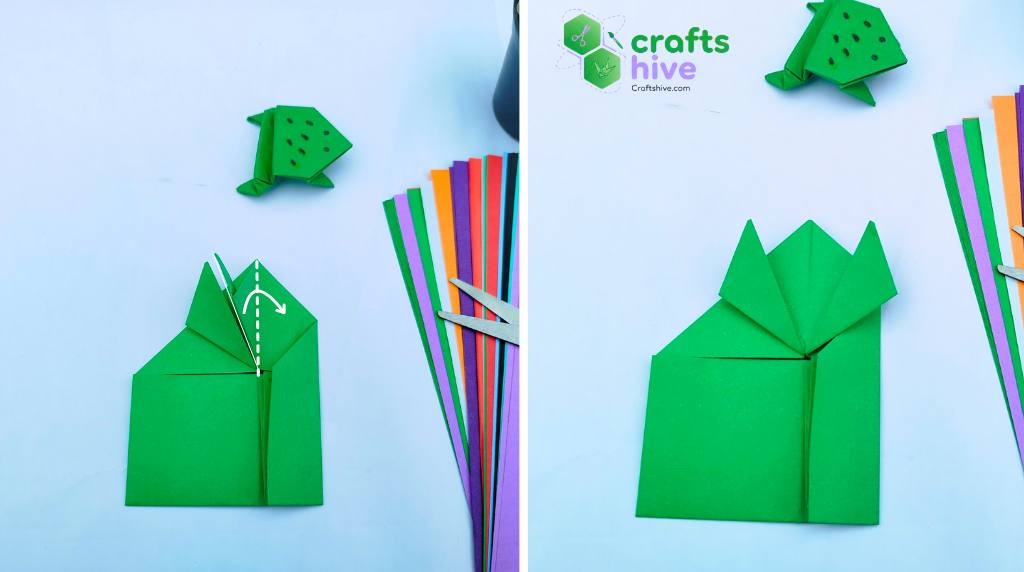
Step #5: Centre Crease
We missed a centre guiding crease for our side quarter folds. Let’s make that:

- About the axis of symmetry (which of course is the vertical centre line), fold the model in half in any direction.
- In my case, I folded the sides from the active side towards the back side. You can reverse that, and it will actually keep your model neater than mine.
Unfold.
Step #6: Sided Quarter Folds
- Either side of the quarter flap must align with the centre vertical crease. But the leg flaps will come in your way. So, first, you have to bring these flaps to the opposite sides along the vertical line.
- First, do this for the right leg flap (bring it to the left).
- Now, fold the right bottom side and align it exactly with the middle vertical crease.
- Crease well.
- Undo step 2.

- Repeat steps 2-4 for the other side of the rectangle.
Step #7: Intermediate Folds for Bottom Legs
Now, we shall make a squash fold. But it will be better to have some creases by some intermediate folds before doing this:
- Mountain Fold the bottom side of the work folded so far up to the point where both legs touch each other.
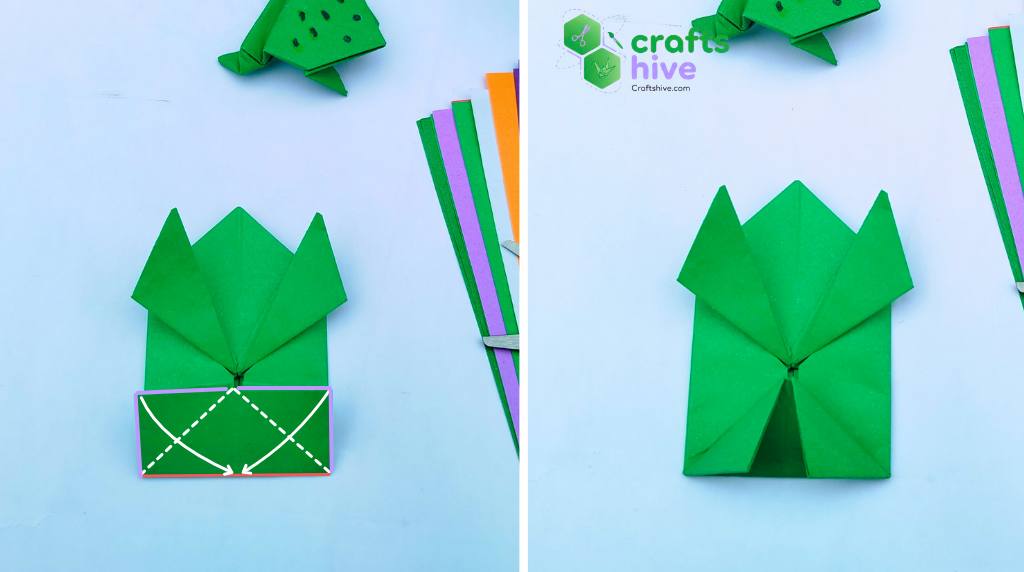
- Valley Fold the top left and top right corners of the previously folded flap about the respective diagonals. Settle those corners in the middle bottom.
- Undo both these folds and the mountain fold, such that the flap is just straight.
About the crease, move the front of the layers of this unfolded flap towards the respective sides as far as you can.
Step #8: Squash Fold
Now, we have an open but bounded shape.
Now collapse about the centre line like above to finish the squash fold.
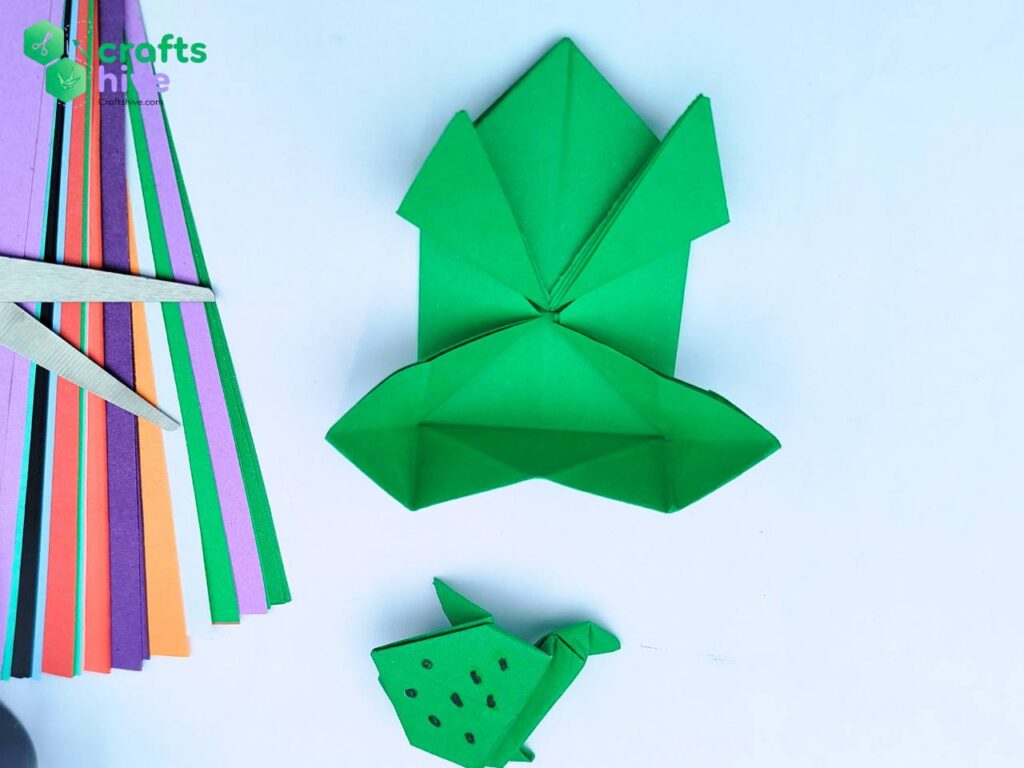
This is how your model must look so far.
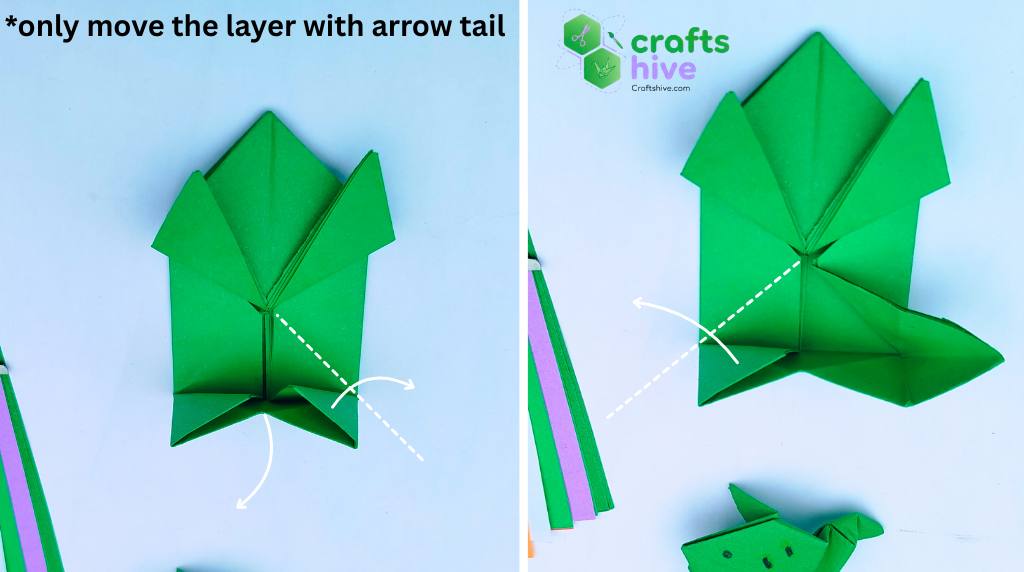
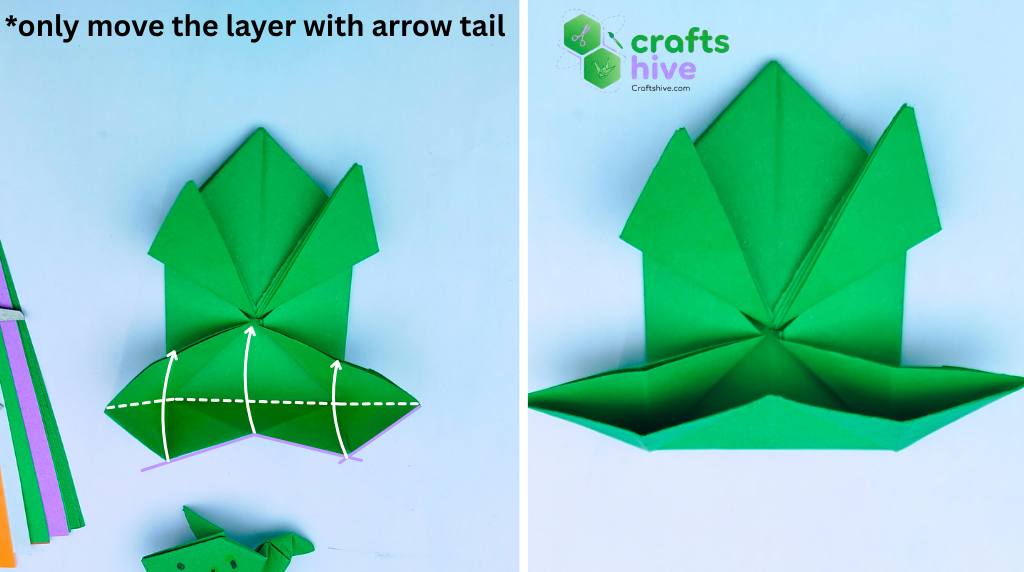
Step #9: Folds for Bottom Legs
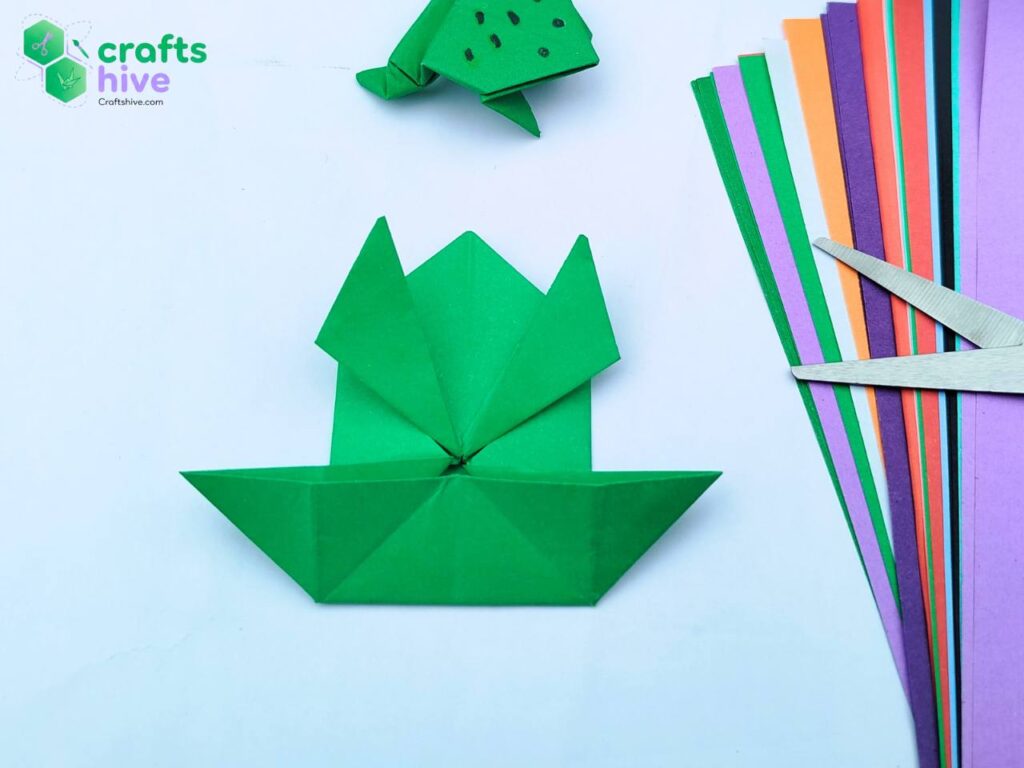
Now, hold both layers of this squash fold from either side and Valley Fold to make the bottom legs of the frog. Turn the side.
Step #10: Folds for Jumping Frog
Mountain fold the bottom side of the frog about the marked axis. You should hold all the layers.
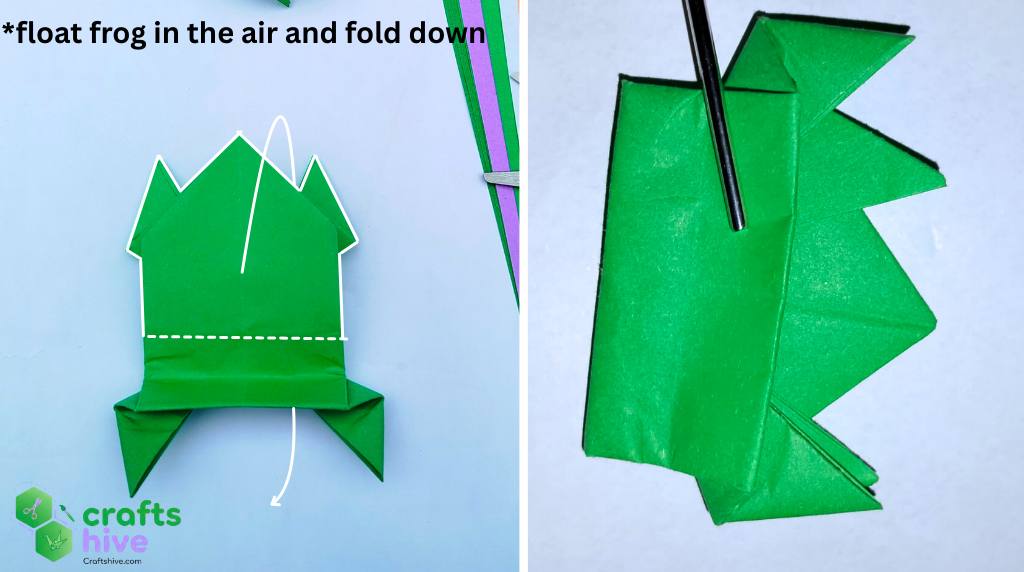
Valley Fold the top side of the frog about the marked axis.
In the Z-shape seen from the sides, bundle the previous folds onto each other, like in the picture. First, you push the back forward to fold about the common line of folds a bit.
Then simply fold the front fold onto the back like above in the picture. (This is a hard part of folding, so be patient.)
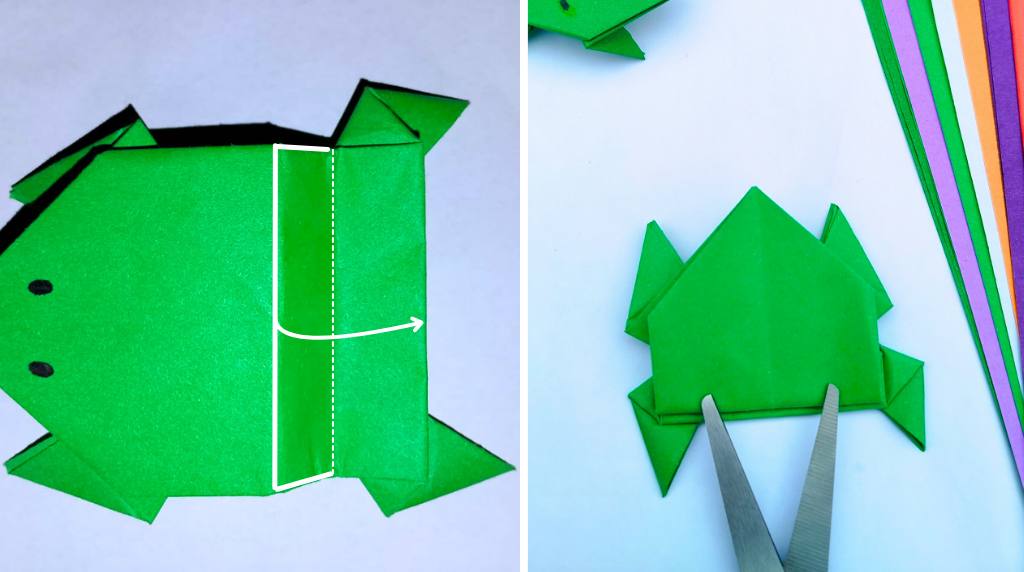
Finish
That’s it, the jumping origami frog is ready to jump! Now it is folded, press the back of the frog, release it and it will jump and cover some distance).

Did you find the tutorial helpful? Tell Us in the Comments.
Help us improve the weak points of our tutorial with your feedback and share photos of your work with us, too. See what is next:
About "Origamist@Craftshive"
Our origamist is expert in both the traditional origami and designing some REALLY creative crafts.
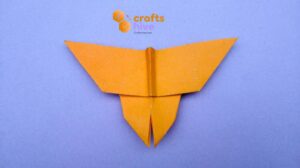 How to Fold Easy Origami Butterfly in 12 Steps
By Origamist@Craftshive
How to Fold Easy Origami Butterfly in 12 Steps
By Origamist@Craftshive How to Fold Origami Ninja Star in 7 Steps
By Origamist@Craftshive
How to Fold Origami Ninja Star in 7 Steps
By Origamist@Craftshive How to Craft Cute Paper Bow with Origami and Cutting
By Origamist@Craftshive
How to Craft Cute Paper Bow with Origami and Cutting
By Origamist@Craftshive How to Fold Easy Origami Penguin for Winter
By Origamist@Craftshive
How to Fold Easy Origami Penguin for Winter
By Origamist@Craftshive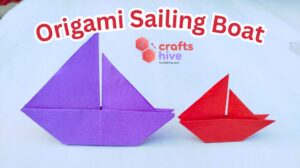 How to Fold Origami Sailing Boat in 8 Steps
By Origamist@Craftshive
How to Fold Origami Sailing Boat in 8 Steps
By Origamist@Craftshive How to Fold Origami Traditional Heart for Valentine’s Day
By Origamist@Craftshive
How to Fold Origami Traditional Heart for Valentine’s Day
By Origamist@Craftshive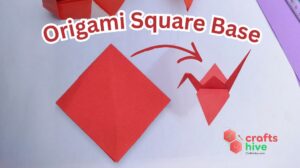 How to Make Origami Square Base in 4 Steps
By Origamist@Craftshive
How to Make Origami Square Base in 4 Steps
By Origamist@Craftshive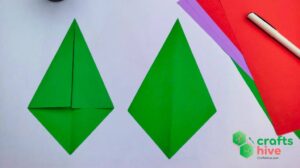 How to Make Origami Kite Base in 4 Steps
By Origamist@Craftshive
How to Make Origami Kite Base in 4 Steps
By Origamist@Craftshive How to Make An Easy Origami Swan in 13 Steps
By Origamist@Craftshive
How to Make An Easy Origami Swan in 13 Steps
By Origamist@Craftshive