


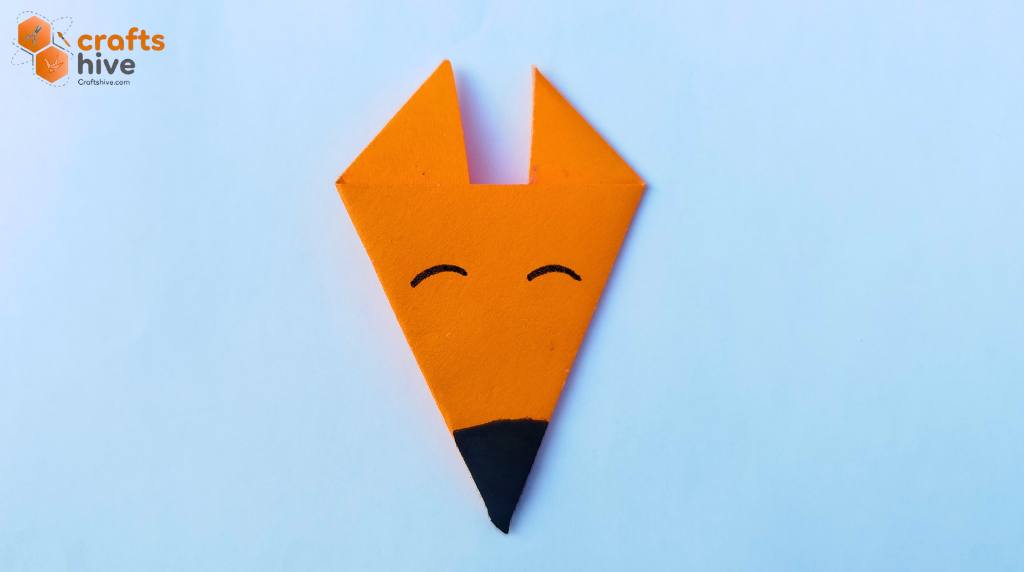
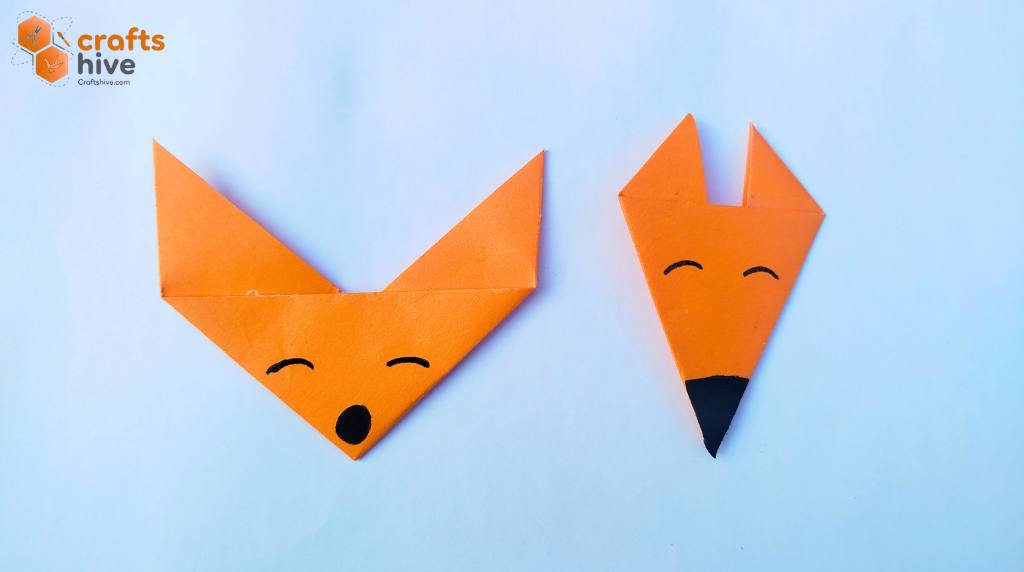
In the last origami fox tutorial, I promised to bring another version of the paper fox face. Let’s fold this even easier origami fox face in just three simple steps. I like to call it a long-headed fox and prefer it with simple eyes and a cone-like nose.
There is no limit to the size of the paper as long as it is square and one can fold it in 30 seconds. From fall crafts to winter, it is my recommendation as the first origami fold to teach kids.
I have made it simpler to learn with the label instructions. Therefore, you should definitely craft this origami fox.
Step-by-Step Instructions for Origami Fox Face
The wide-headed origami fox needed 4 folds, but surprisingly, this one needs only 3. No creases, no intermediate folds, just permanent folds, two of which are the same. So, I won’t be wrong to call this the easiest origami animal I will be sharing ever. Now, let me provide you with the
Difficulty: Beginner (level 0)
Model Type: Traditional
Preferred Name: Long-Headed Fox
Supplies
I will be using a 21 cm by 21 cm square sheet of Tant paper to show you how to fold this origami fox face. If you have Kami papers, just be sure they are orange on both sides.
You can fold this fox with a square sheet as small as 2cm by 2cm. I randomly cut a very small square from my large sheet, folded it, and it looked cool. So, size is not a problem here.

Other recommendations:
- Glue Stick for Folds
- Black maker for the Fox Face
Step #1: Select the Position for Your Sheet

Place your square sheet of paper on the table in a diamond position.
Normally, we place it in a square position. To get it in the diamond position, just rotate your sheet at an angle of 45 degrees on any side.
Step #2: Make A Diagonal Fold
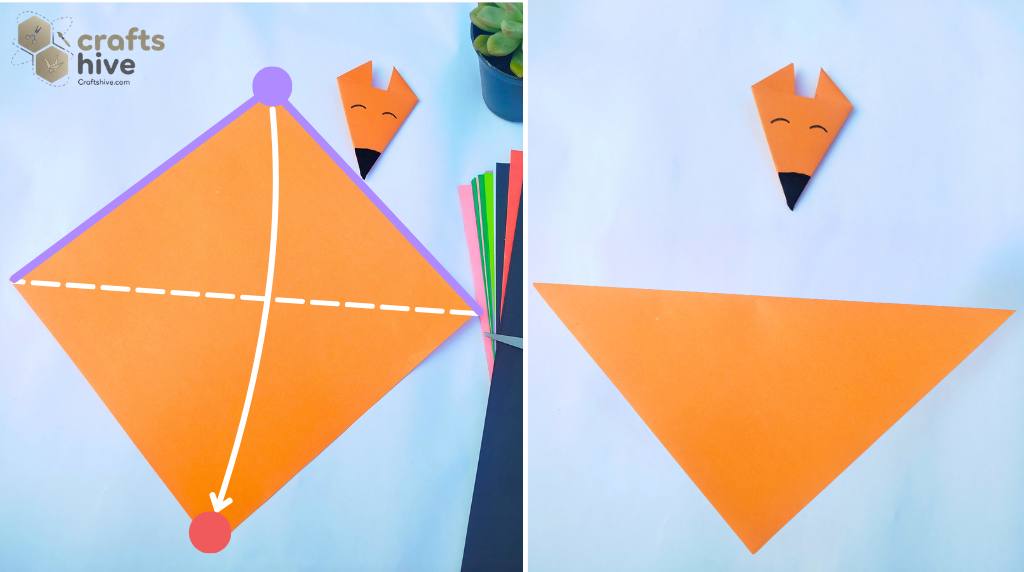
- Fold down the top corner of the diamond and settle it onto the bottom corner.
- Align the left top side with the bottom left side and vice versa for the right sides.
- Crease the hinge of the fold to let the paper press flat.
- We shall have a triangle.
Tip: I recommend applying some paper glue before folding the flaps, as we don’t need to unfold. Also, it will hold the two layers in place while folding the ears of the fox.
Step #3: Fold the Ears
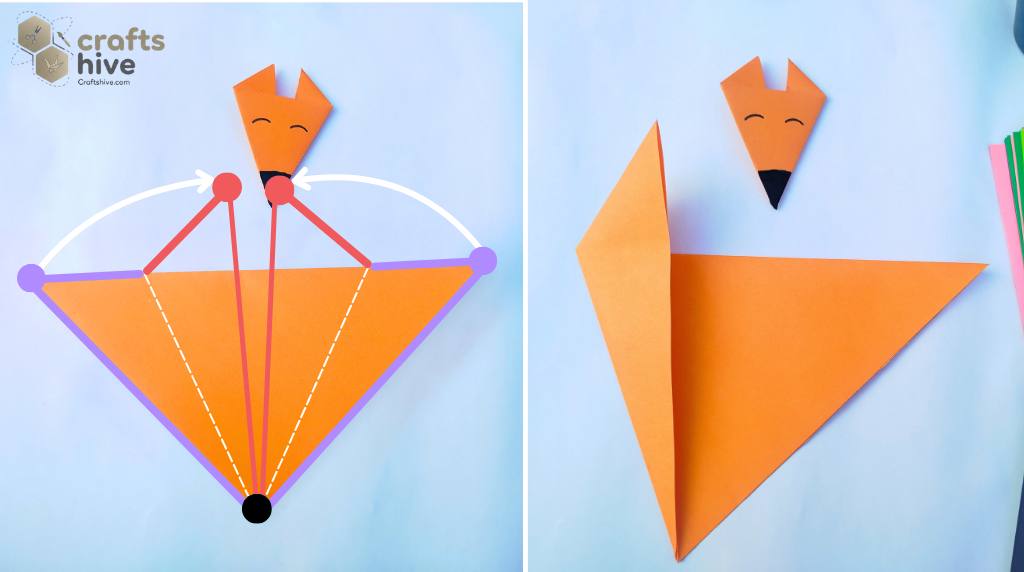
- Start folding the left corner of the triangle to the right and settle its left edge near the vertical centre line at a little angle to it. (don’t exactly align with the vertical centre line like above).
- Similar to the left ear, fold the right corner to the left and settle the corresponding edge at an angle to the centre line.
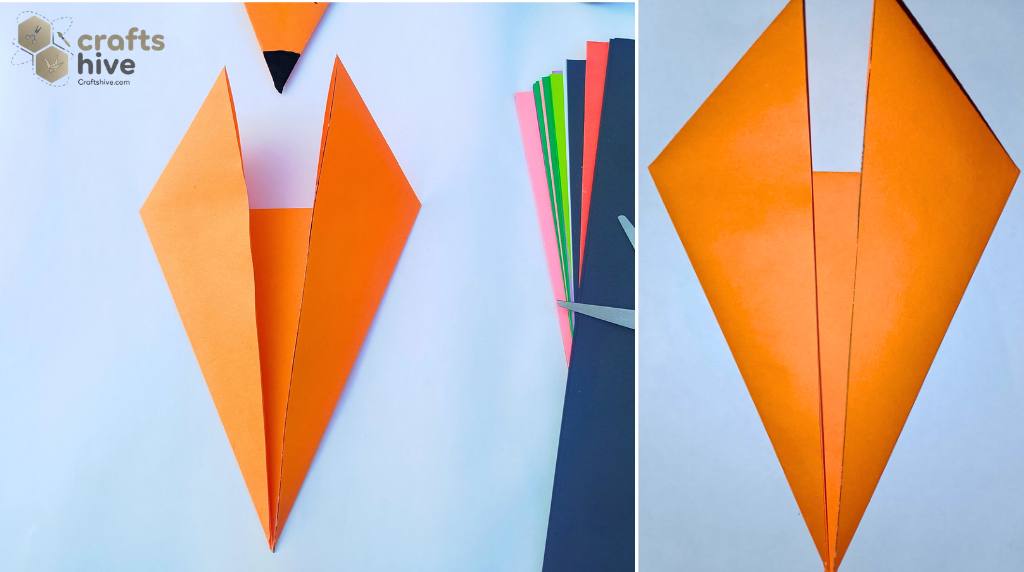
- Make sure the area between the two ears looks like a triangle, and the top corners of the ears have the same height.
Finished

- Unfold the ears a little and apply some glue, and refold them. Now, the ear folds will tend to stay in their place.
- Turn it upside down to see the front of the face.
- I have drawn the nose simply by colouring a portion of the bottom corner area in black.
- I have also drawn two sleepy eyes.
That’s all for this tutorial.
Found this Origami Tutorial Helpful? Leave A Feedback.
Your feedbacks let us know how well we were able to teach you this origami and what you want next (if we not have a tutorial on already. See what’s next:
About "Origamist@Craftshive"
Our origamist is expert in both the traditional origami and designing some REALLY creative crafts.