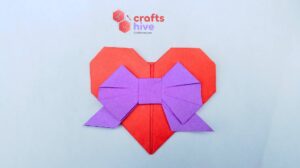


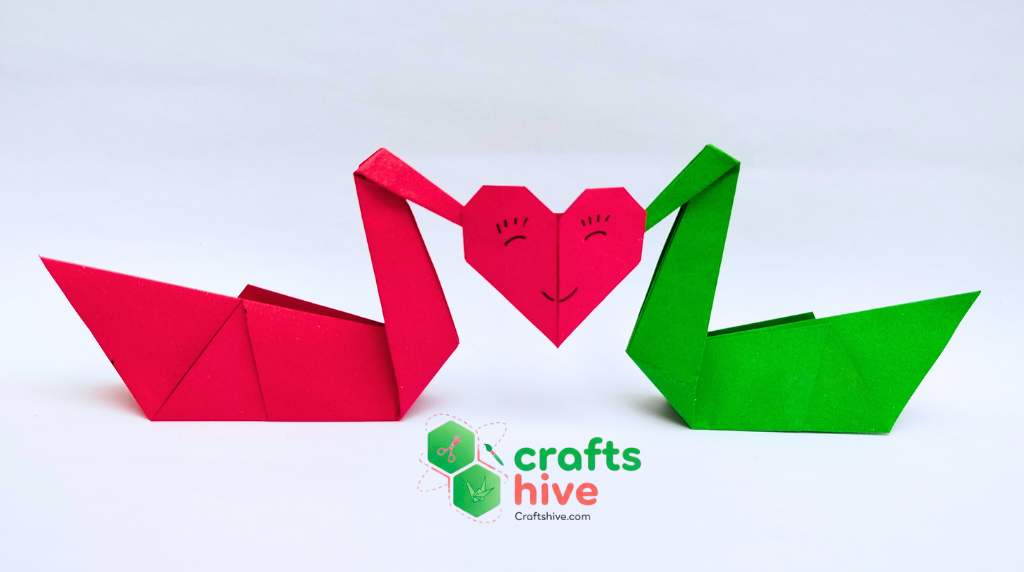
Let’s craft this easy, simple, and cute Valentine’s Day paper swan using traditional origami models. The idea is to craft a pair of basic swans with a smiling paper heart in the centre joining their heads.
This is quick origami love project and can be made for putting or your table and using as a greeting card.
Origami Valentine’s Day Swans: Step-by-Step Guide
Project Difficulty: Easy
Finishing Time: 15 Minutes
Model Type: Designed by Us
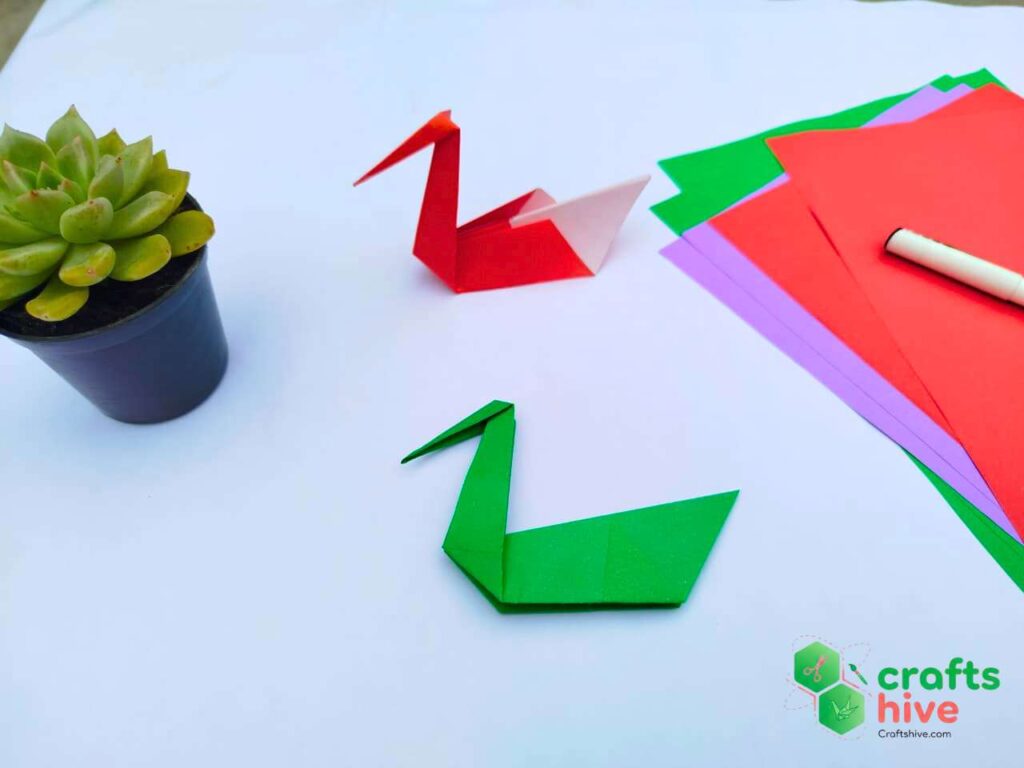
Part 1: Craft A Pair of Origami Swans
I will be making the basic origami swans from traditional origami in red and green. Both swans were made with a 14 cm by 14cm square sheet of paper, and I tried to maintain the same length for the mouth and neck. However, if yours don’t turn out to be the same, don’t worry.
For learning how to make a traditional origami swan in detail for this Valentine’s Day Swan Card, I recommend following my dedicated guide. Below will be quick but step-by-step instructions for such a paper swan:
Step #1 of Making the Swan: Make the Kite Base
The kite base will be the starting fold for our origami paper swan. It is easy to fold in 4 steps.
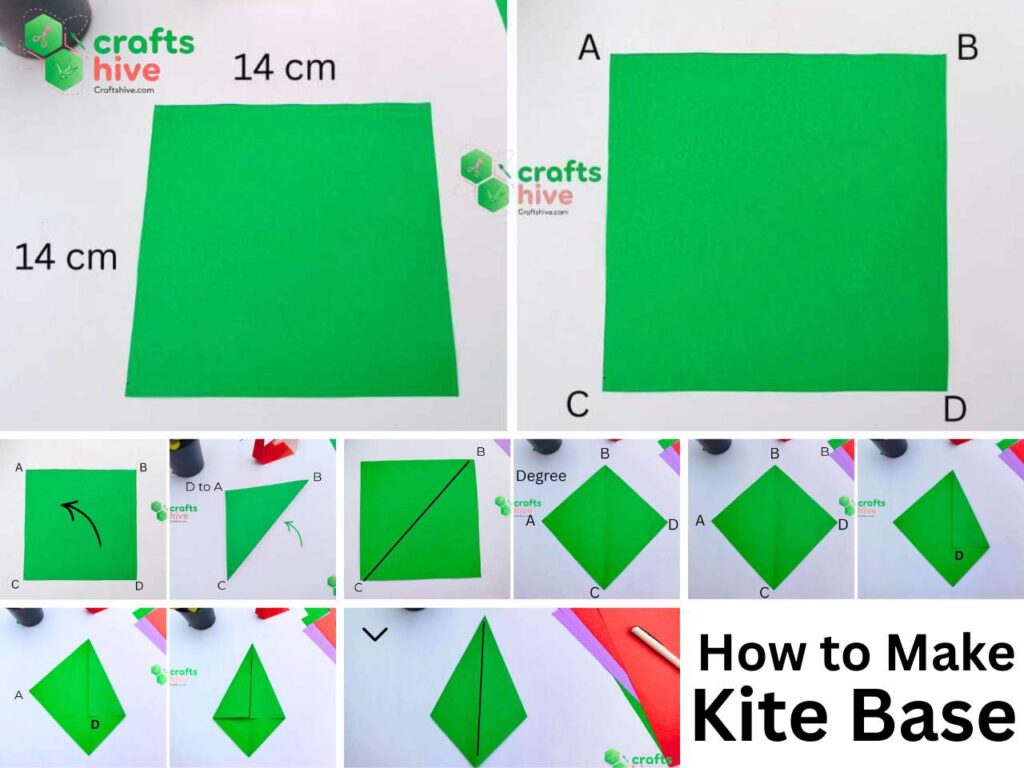
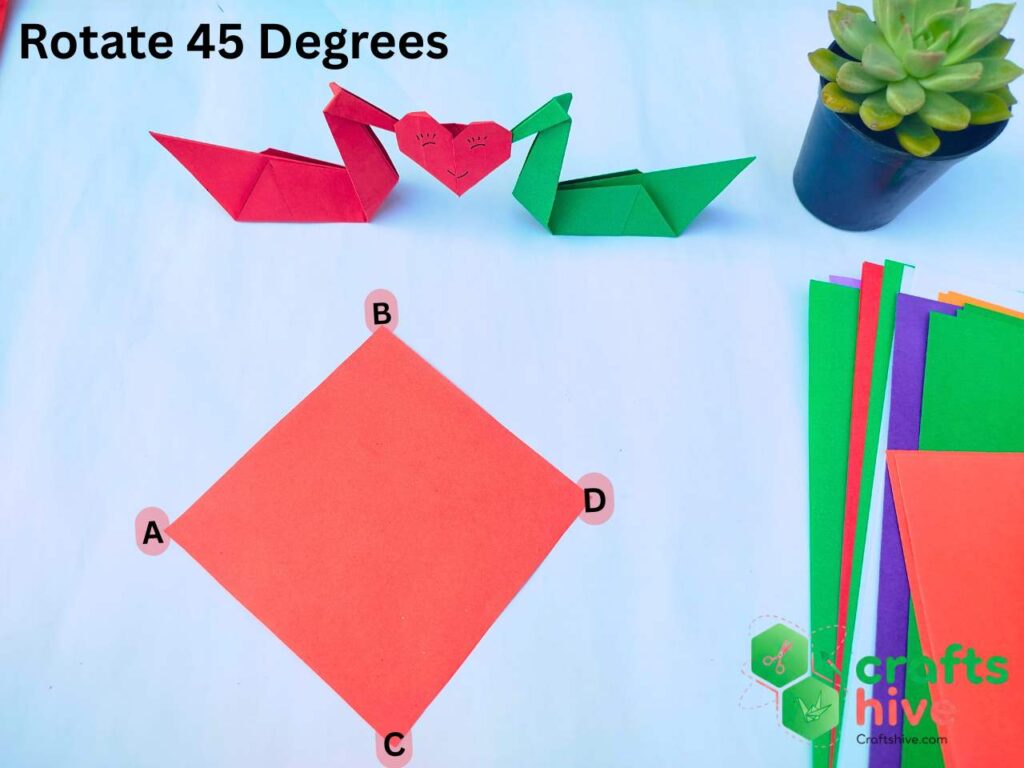
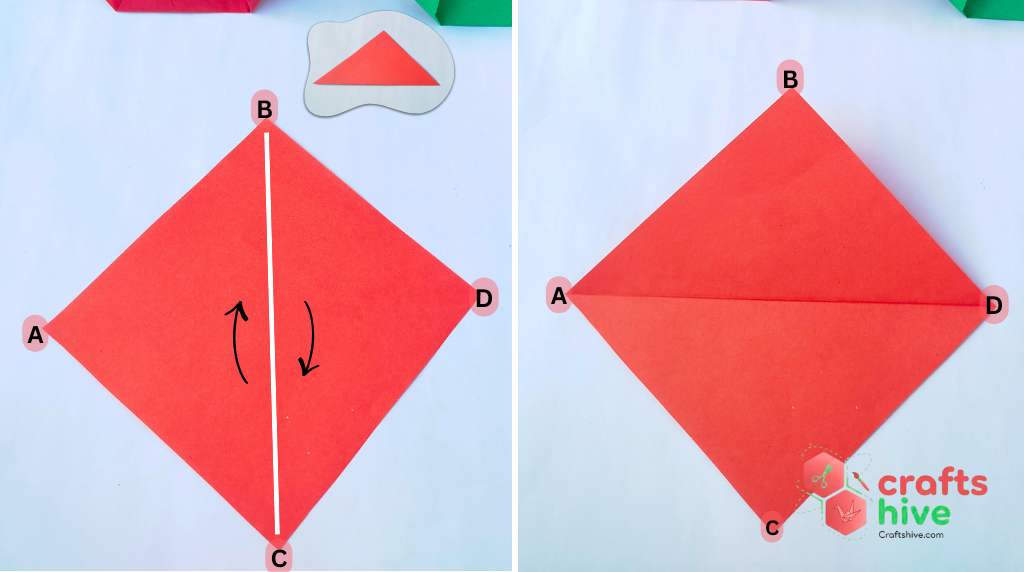
- First, let’s label the corners with the English alphabet A, B, C, and D.
- We shall hold the corner D, folding it, aligning the D with corner A. Crease BC will appear after pressing the paper and unfolding it.
- Rotate the square sheet at a 45-degree angle. It will now like like a diamond.
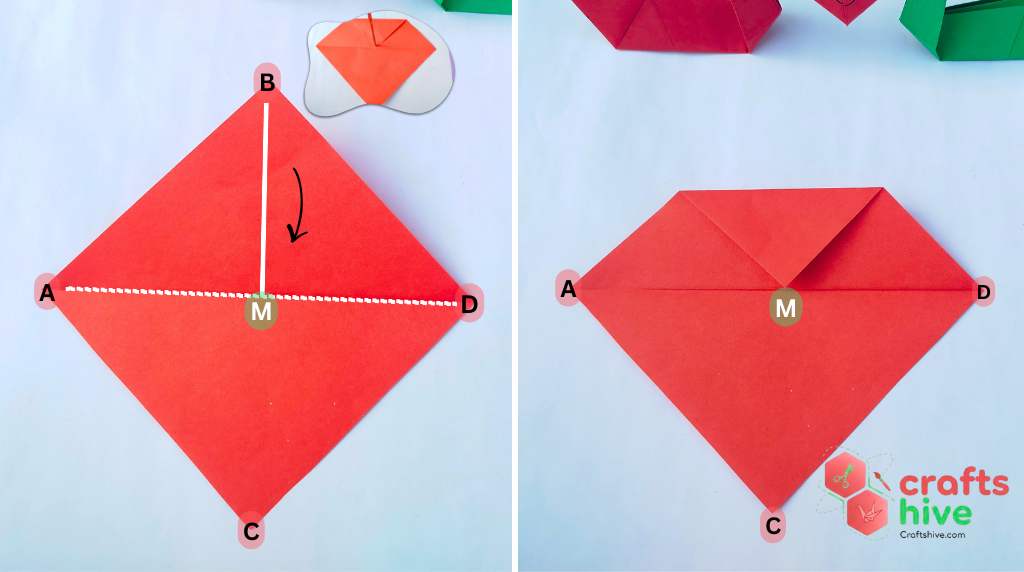
- Make the first kite fold by folding corner D and aligning the side BD with the crease BC.
- Make another kite fold by folding the corner D and aligning the side AB with the crease BC.
- Turn your folded sheet upside down.
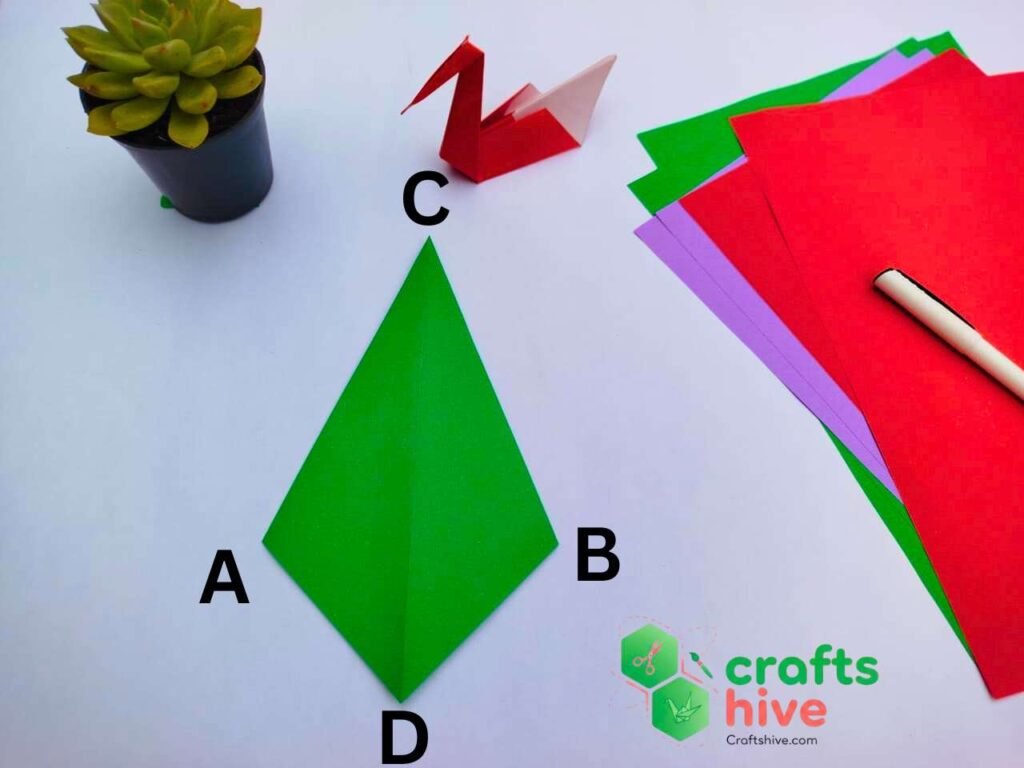
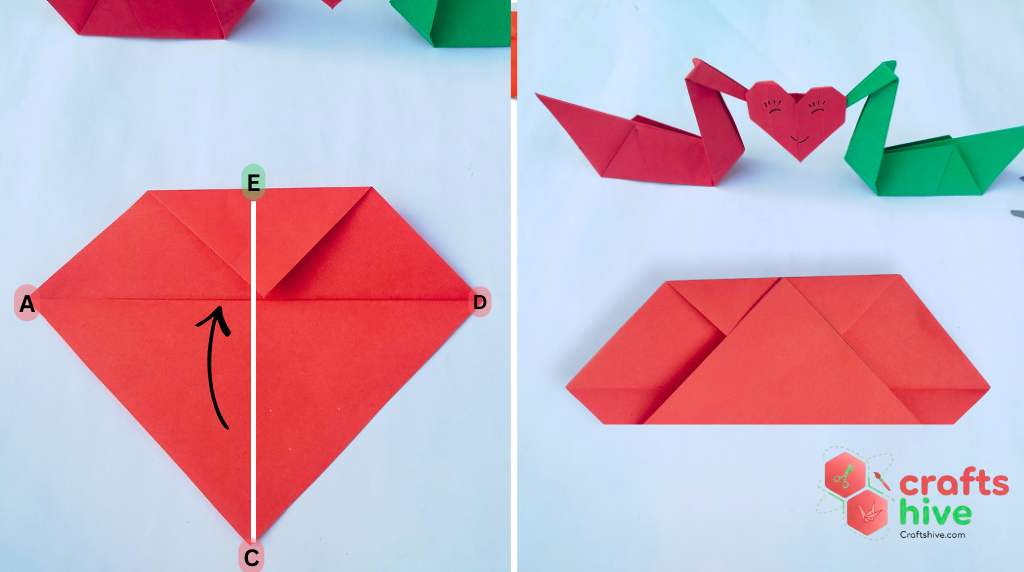
Let us label the corners of the upside-down kite base with A, B, C, and D.
Step #2 of Making the Swan: The Swan
Now, make two more kite folds on the upside-down kite base. We shall make the swan body base in four more steps.
- Folding the corner B, align the side BC with the crease CD.
- Folding the corner A, align the side AC with the crease CD.
- Rotate this fold sideways by 180 degrees.
- Let’s label the corners ACBD.
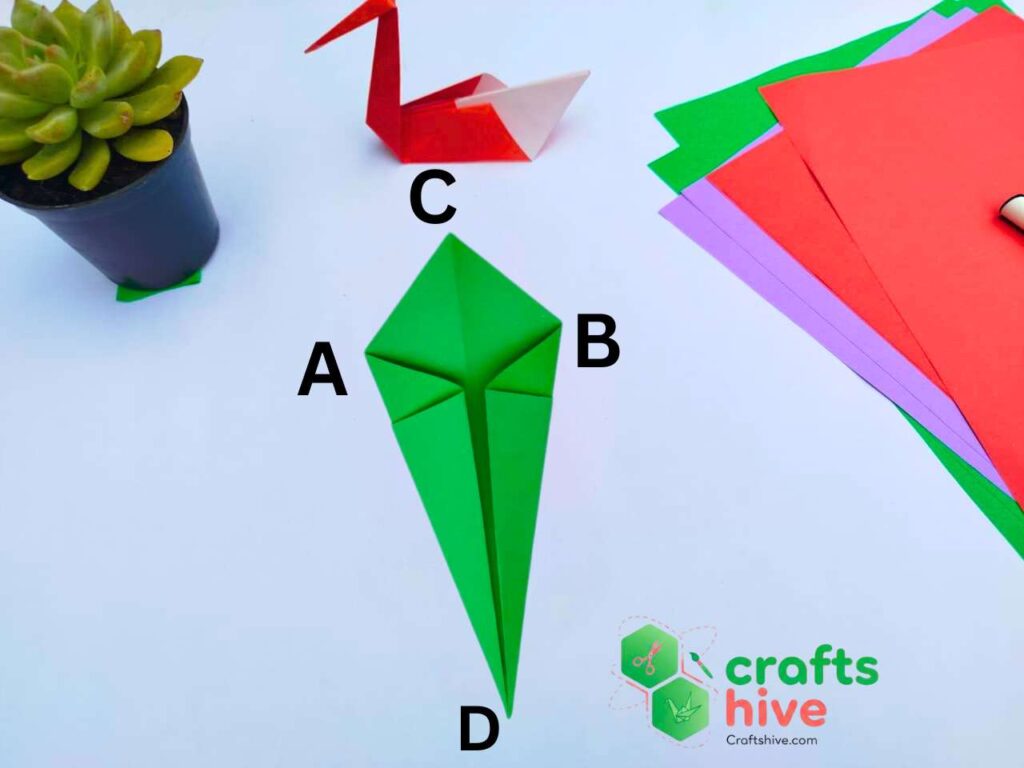
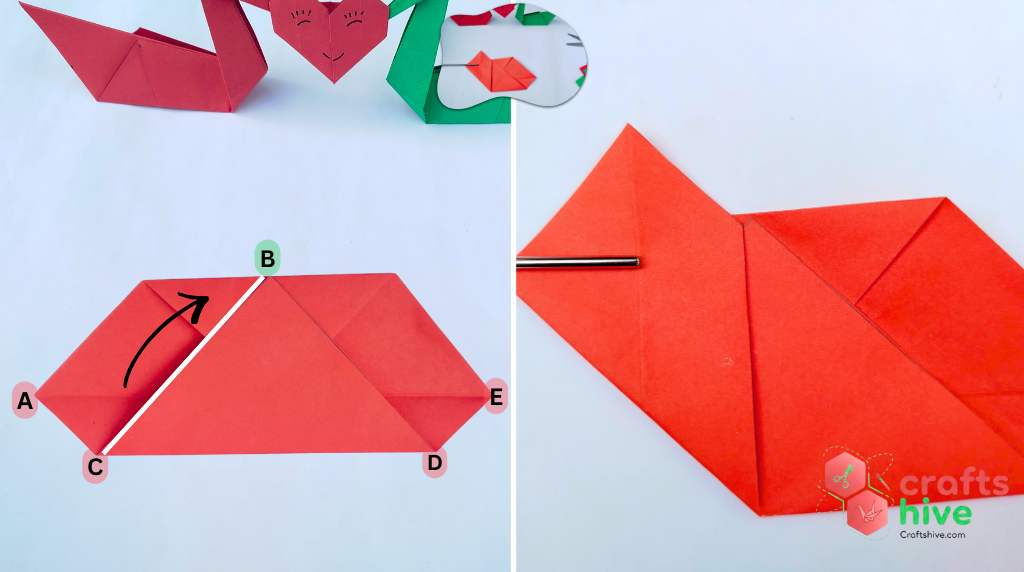
- Folding the corner D at the bottom, align it with the corner C at the top.
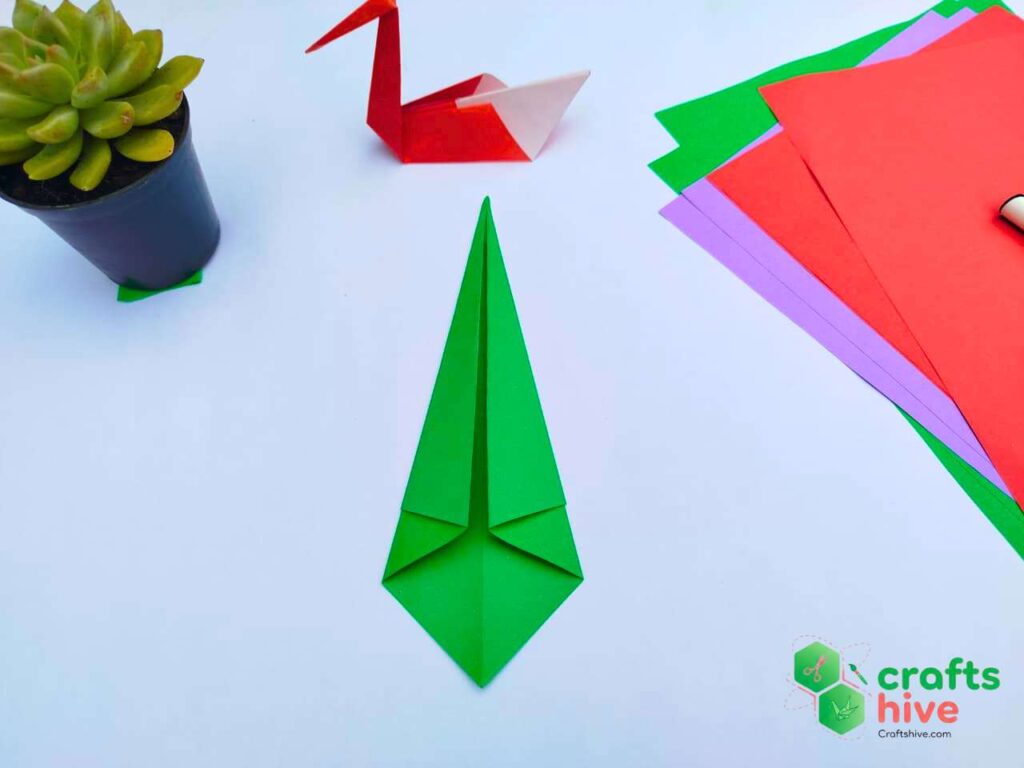
- Hold the corner previously labelled as D and fold it towards the bottom, making enough length for neck.

- Now rotate the folded swan 90 degrees sideways. You will be able to see the neck and head of the swan.
- Pull the neck and then head out.
Now, make another swan in same size but different color. While folding for the head, make sure to match the length.

Part 2: Craft An Origami Heart
I crafted a single origami heart again from traditional origami models using a 6cm by 6cm sheet. After finishing, I will also draw a smiling face on my heart. Here are the quick instructions for making the heart by folding:
Step #1 of Making the Heart: Diagonal Fold
- Rotate your sheet at a 45-degree angle so that it looks like a diamond from your perspective.
- Fold the corner C onto the corner B and crease and press the paper.
- Unfold the paper.
Step #2 of Making the Heart: Main Heart Shape
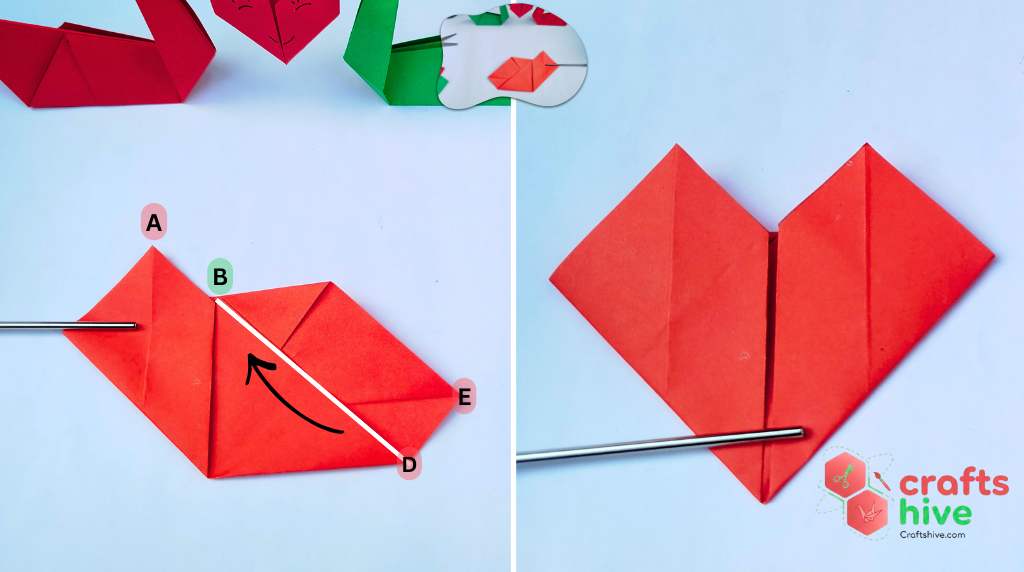
- Fold the corner B onto the mid point of the crease AD.
- Press the paper.
- Hold the corner C and fold it onto the mid point of the top edge of your previous fold.
- We shall call this point as B.
- And this time, let’s label the ACDEB.
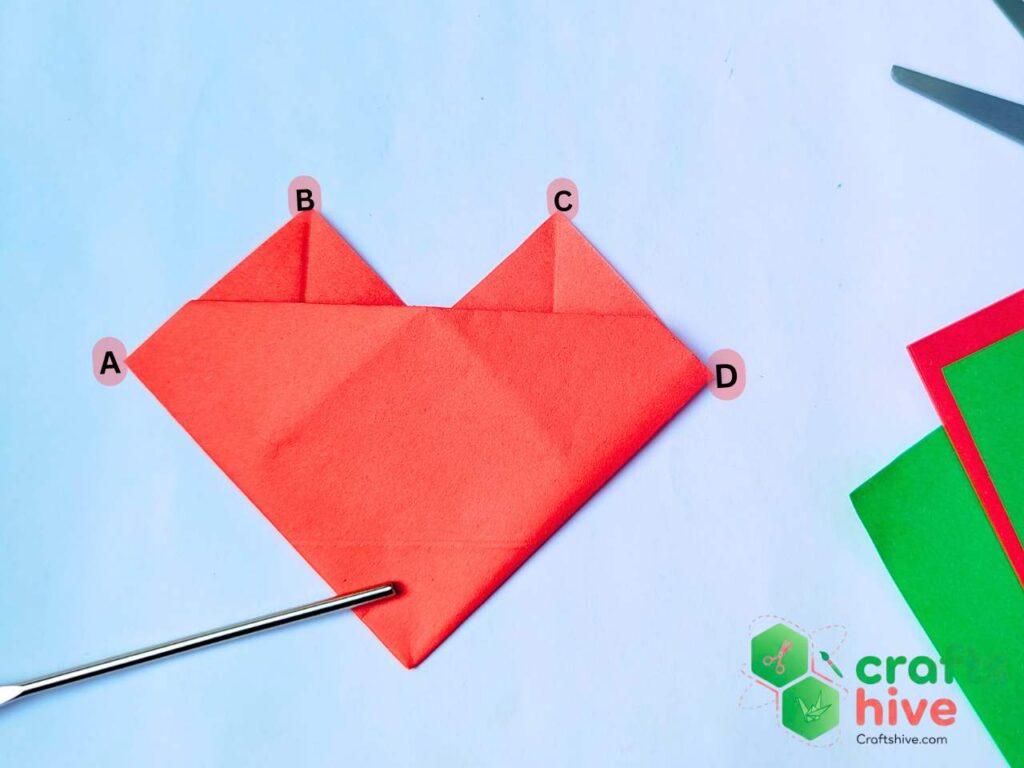
Step #3 of Making the Heart: The Sides of Heart
- Pick the corner C and place it onto the point B. This will make the left side of our origami heart.
- Now, pick the corner D and place it onto the point B. Press the paper. This will make the right side of our origami heart.
- Turn your heart upside down.
- Again label the corners ABCD.
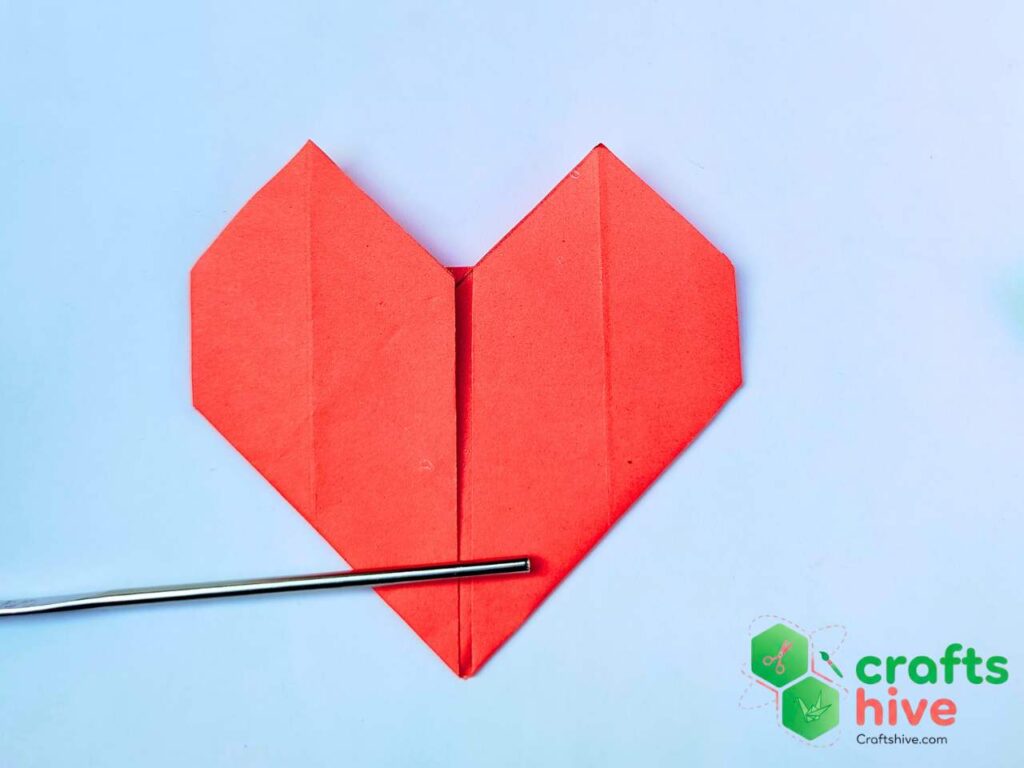
Step #4 of Making the Heart: Finishing the Heart
- Grab the corner labeled as A, fold it few centimetres towards right.
- Grab the corner labeled as D and fold it exactly towards left at the same distance as the left side.
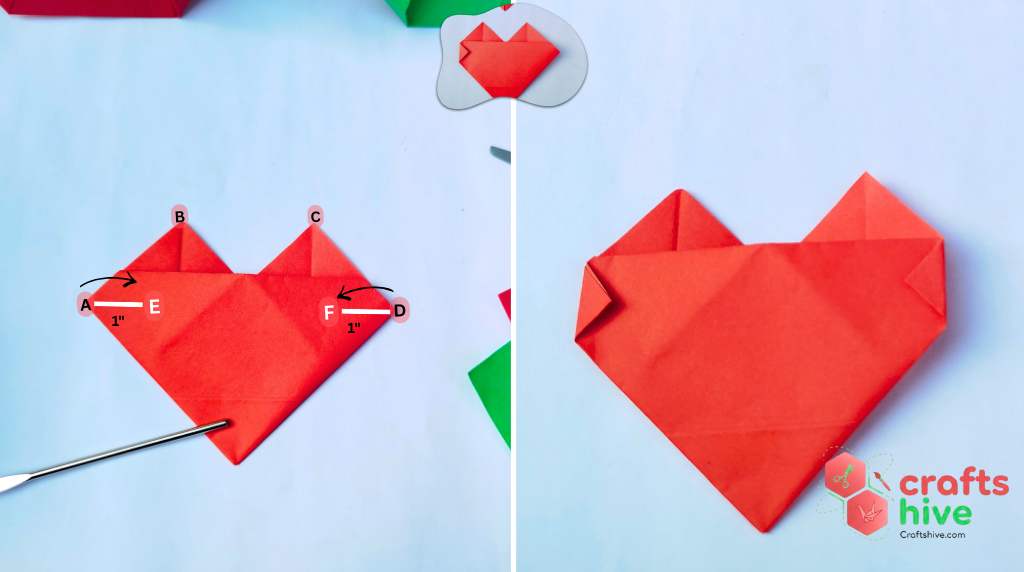
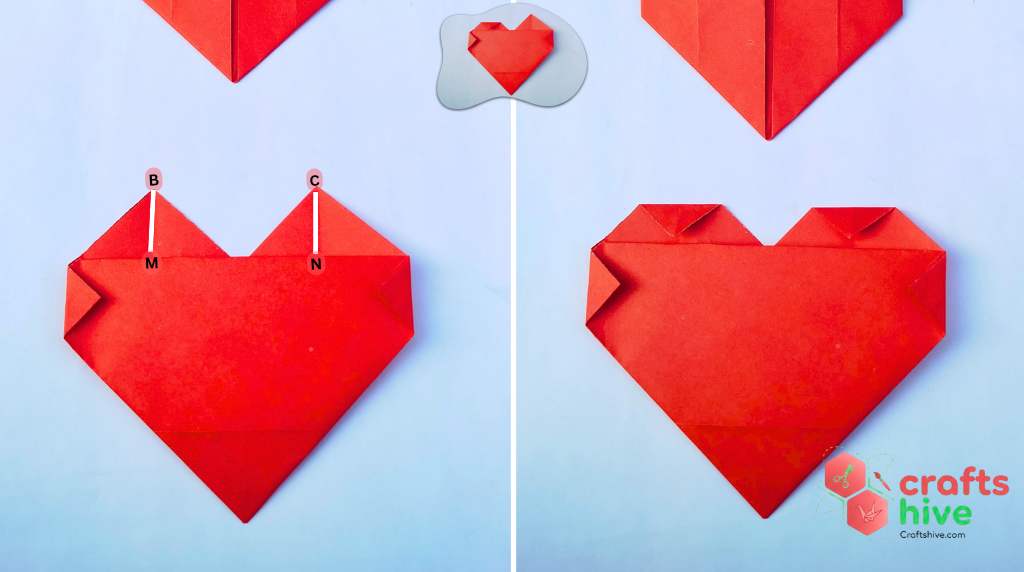
- Fold both the top corners.
- Draw the sleeping eyes with the eyelashes and a smile with black marker.
Part 3: Assemble
To assemble into the Valentine’s Day origami swan, apply the gum behind the heart. From the side, glue the head of the swan on the heart. Facing the other swan, attach neck of the red on the right side of the heart.
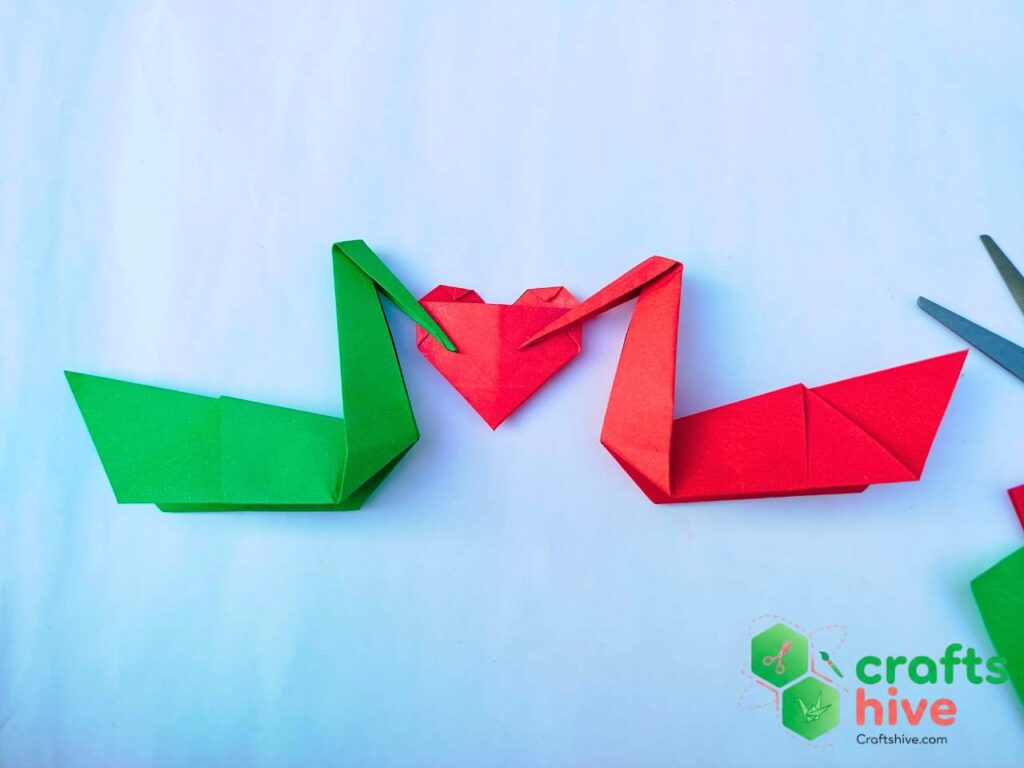 This is the finished origami love swan from paper.
About "Origamist@Craftshive"
Our origamist is expert in both the traditional origami and designing some REALLY creative crafts.