


Learn how to fold the easiest origami fox ever in just 6 steps. This will be a cute origami fox face with a wide head and an opportunity to draw the nose and eyes of the fox in your favorite style. I can fold it in less than 30 seconds, and I hope you can do this in a minute for the first time.
In the second tutorial, I will also teach the long-headed fox. But this one is my favorite, and I recommend you teach the kids. Then add to fall crafts and animal greeting cards.
Easy Origami Fox Face: Step-by-Step Instructions
To fold an origami fox, we only need 4 folds in total. That’s the easiest origami I have taught so far. Now, let me give step-by-step instructions on how to fold this origami animal:
Difficulty: Beginner (level 1)
Prefered Name: Wide-Headed Fox
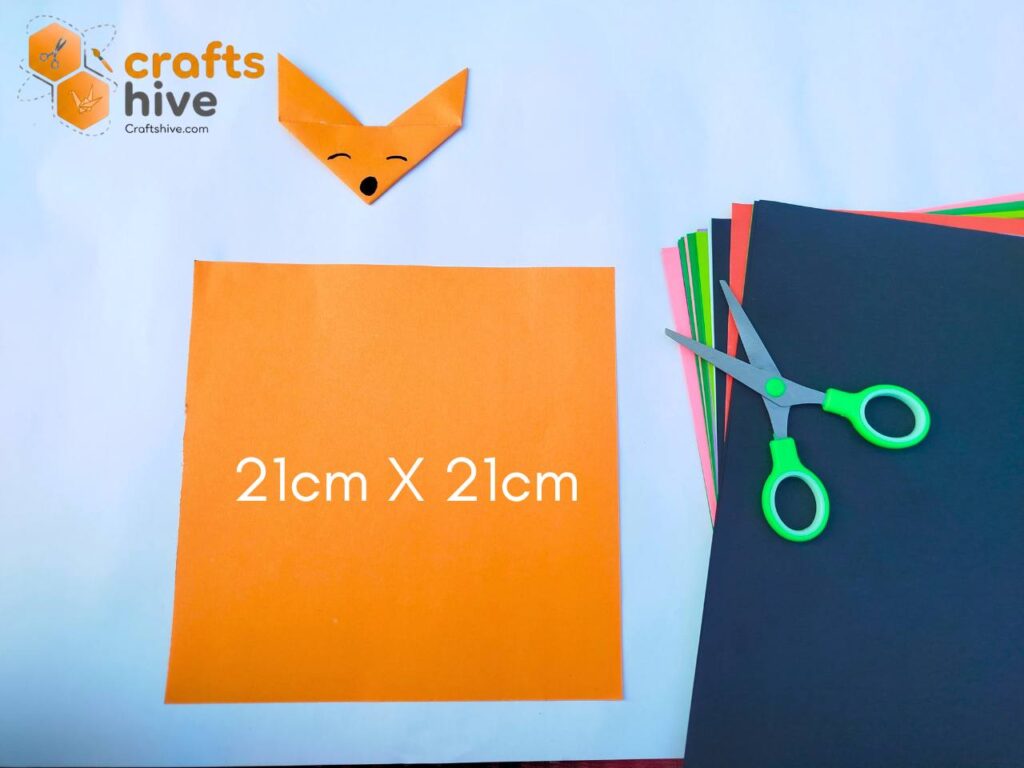
What you need
Grab a square sheet of Tant paper in orange of any area. Mine was 21 cm by 21 cm for the fox in the tutorial. However, I also folded it with a sheet as small as 3cm by 3cm, and it looks fine because it needs so few folds.
More recommendations:
- A glue stick
- Colored maker (black)
Step #1: Position the Paper Sheet
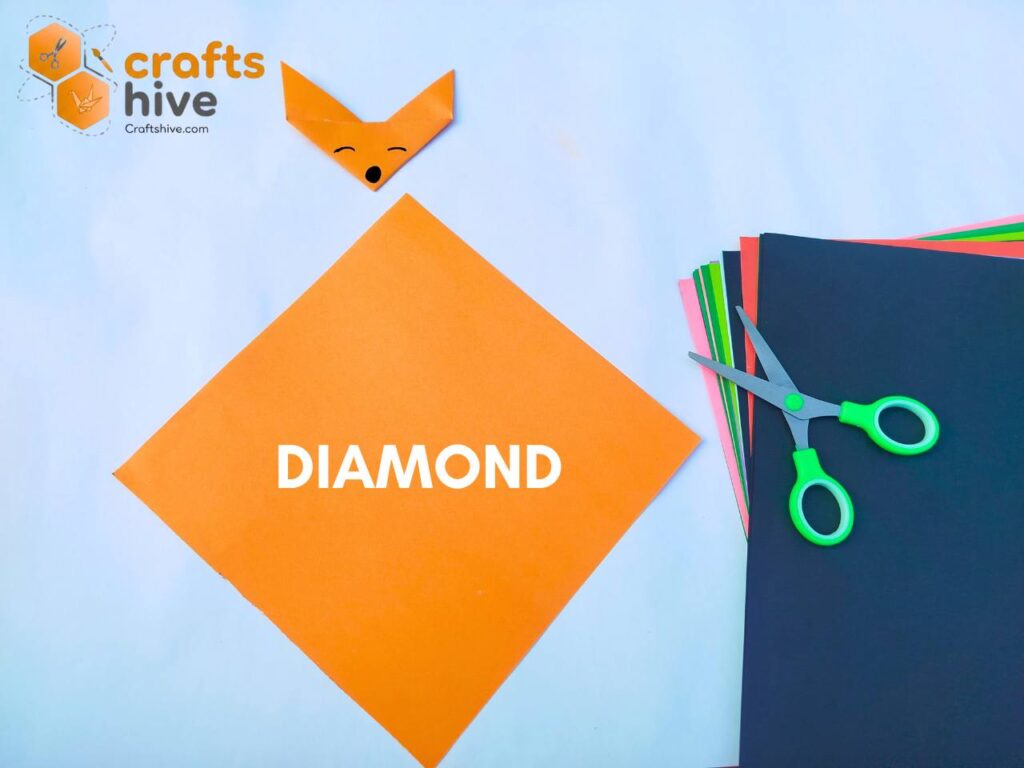
- Place your sheet of paper onto the table in the diamond position.
Normally, we would place it in a square position. Just rotate it 45 degrees to the left or right to get this position.
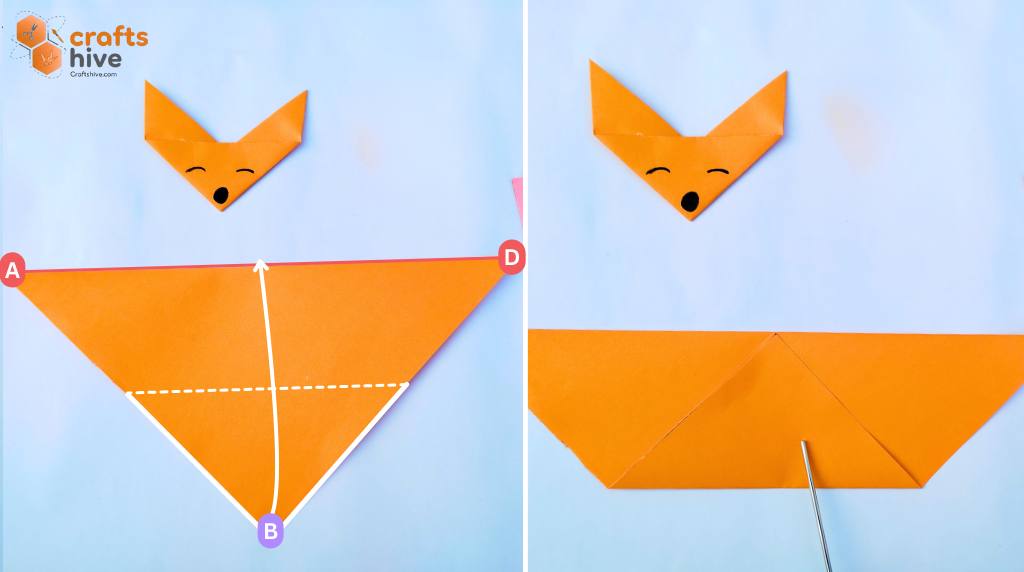
Step #2: Diagonal Fold

- Hold the top corner of the diamond and settle it onto the bottom corner.
- Align the top left and right sides with the bottom left and right sides of the diamond.
- Crease the hinge of the folded flap and press the paper flat.
Label Instruction: Fold the corner B onto the corner C and press the paper flat.
Tip: You can also apply some glue before folding, since we won’t unfold later like usual in usual creases.
Step #3: Fold for the Head
- We now have a triangle shape. Just Mountain Fold the bottom corner and settle it onto the top side of the triangle.
The corner must settle in the middle of this side.
Step #4: Fold the First Ear
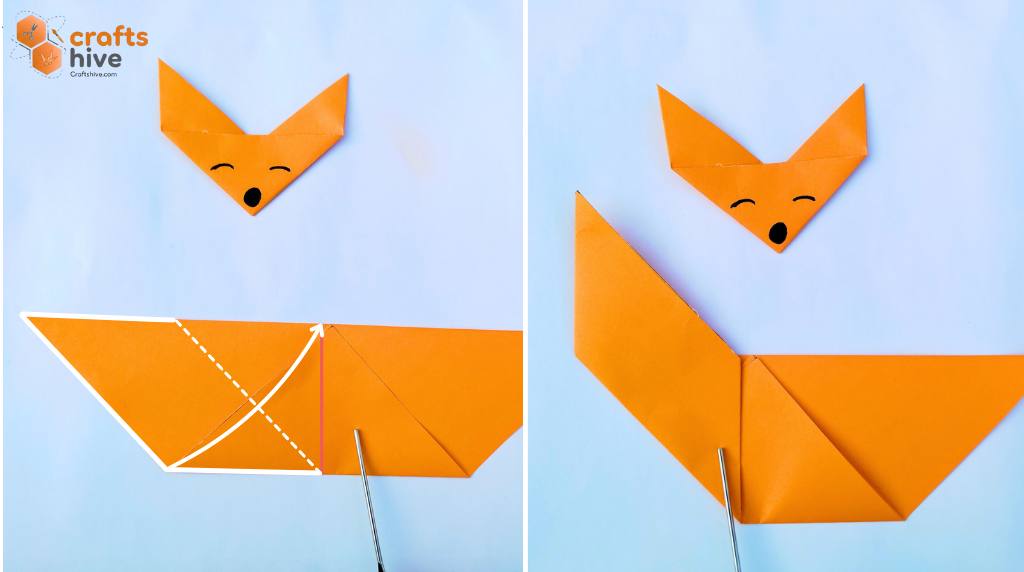
After Step #3, we shall have a shape with four corners. To make the first ear of the fox:
- Mountain Fold the bottom left corner of this shape about the marked axis, along with the left part, and align the bottom left side of this shape with the vertical middle line.
- Crease well the hinge of the fold.
Step #5: Fold the 2nd Ear
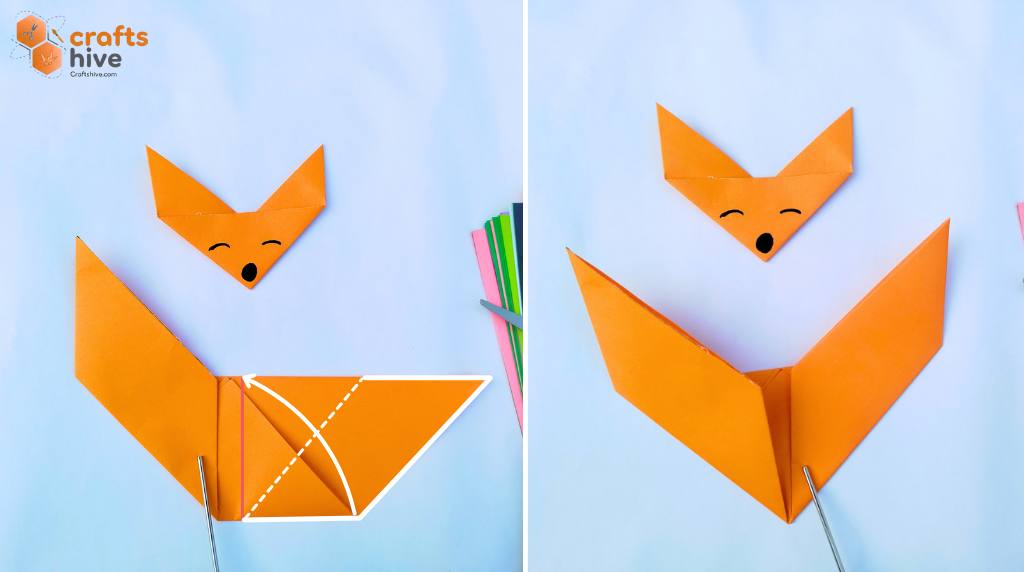
Repeat the similar fold in Step #4 on the right side of the shape folded so far.
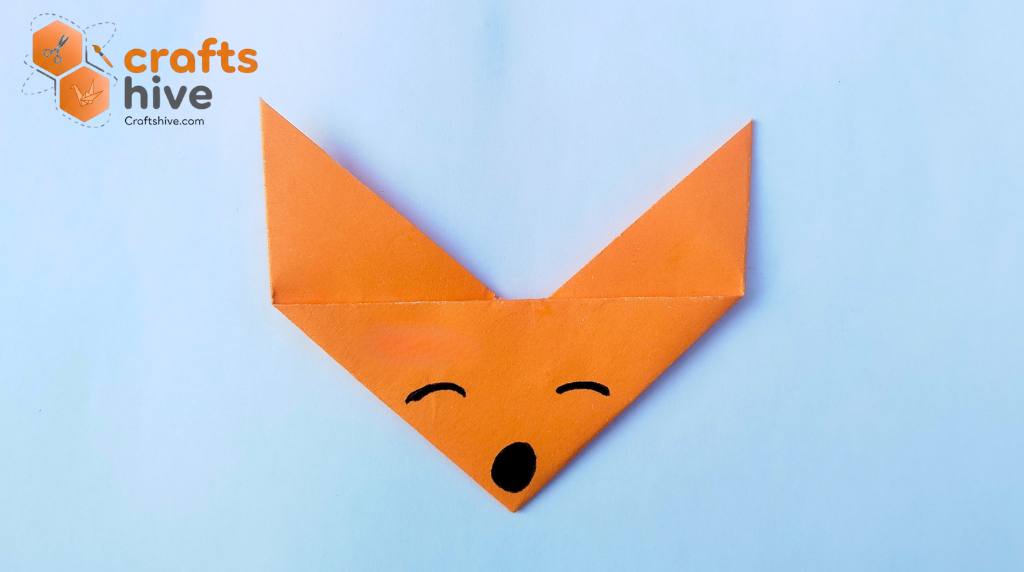
Step #6: Turn and See the Finished Origami
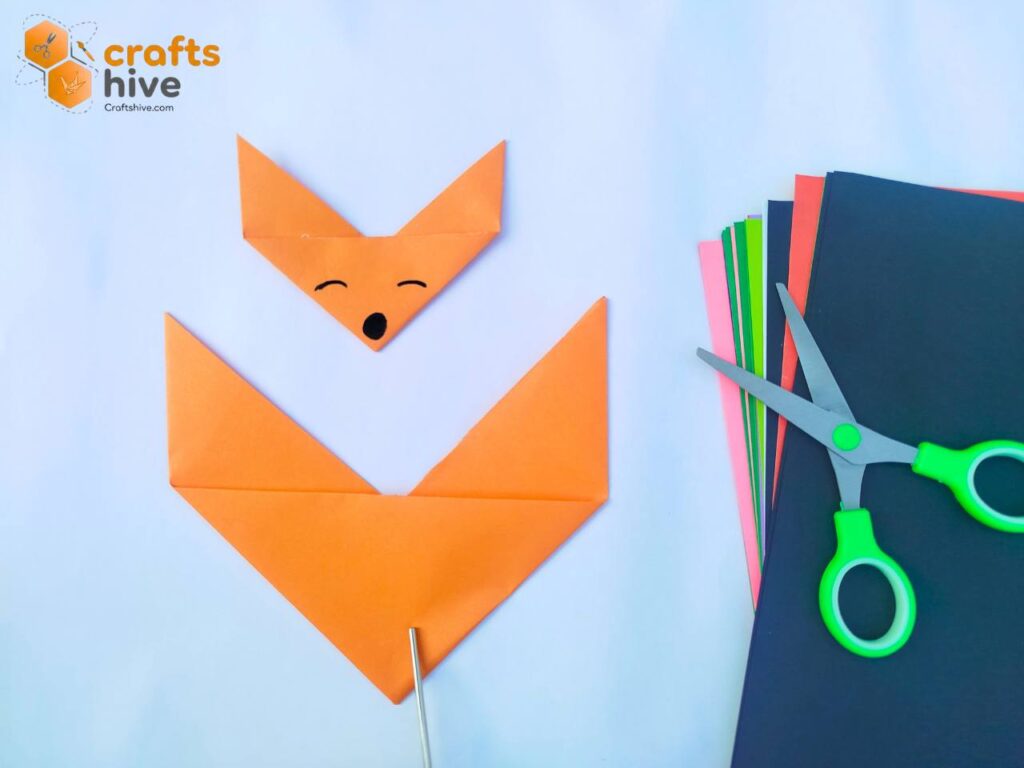
Just turn your origami fox face upside down. Then you can draw a face like mine using a black marker. Also, glue each fold for a better look.
Found this Origami Tutorial Helpful? Leave A Feedback.
You can help us improve the weak points of our instructions and diagrams with your feedback and share photos of your work with us, too. See what is next:
About "Origamist@Craftshive"
Our origamist is expert in both the traditional origami and designing some REALLY creative crafts.