


The origami carp is a simple 2D fish model from traditional origami. Let’s learn how to fold an origami carp in 12 easy steps with picture diagrams in this tutorial. I designed this tutorial to be easier and beginner-friendly than ever. It is a perfect model if the popular Koi Fish seems complicated and intimidating to you.
The construction is very similar to the origami whale that I have already taught. You can draw the scales and eyes like the golden carp on it and make it extra cute. Let’s begin the tutorial.
How to Make Origami Carp Fish: Step-by-Step Instructions
Like the origami whale, the Carp fish uses the kite base as the starting fold. So, you can skip the first few steps of this origami tutorial. We shall also have to turn the side upside down quite a many times and be careful of the directions of the fold.
One step also needs the squash folds. Now, let’s move towards the fold-by-fold instructions for folding a carp fish:
Model Type: Traditional Origami (pure origami)
Supplies:
- 20cm by 20 square sheet of paper (you can also work with a sheet as small as 6cm by 6cm)
- I used aqua
- Black marker
Difficulty: Beginner (level 2)
Folding time: 5 minutes
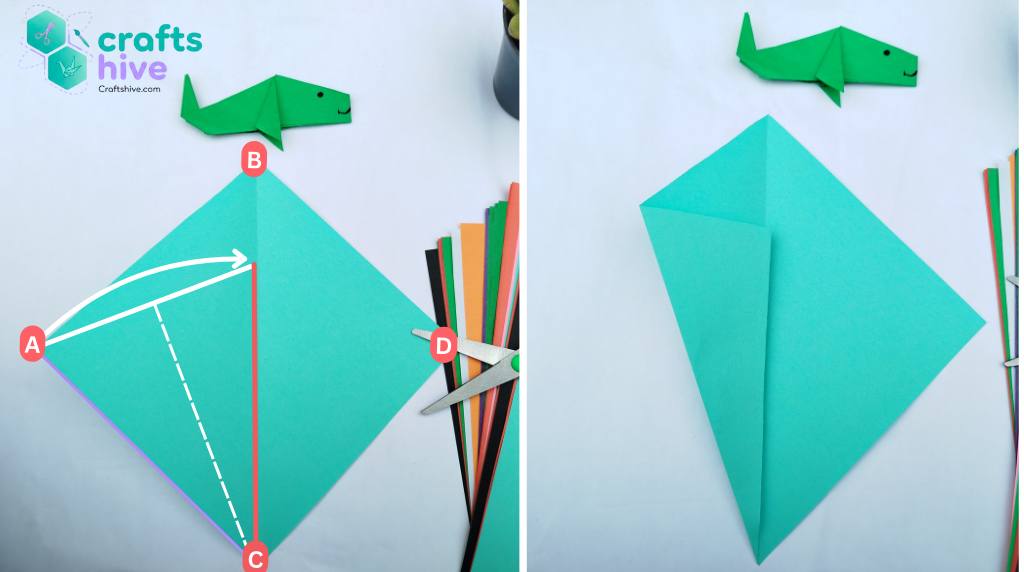
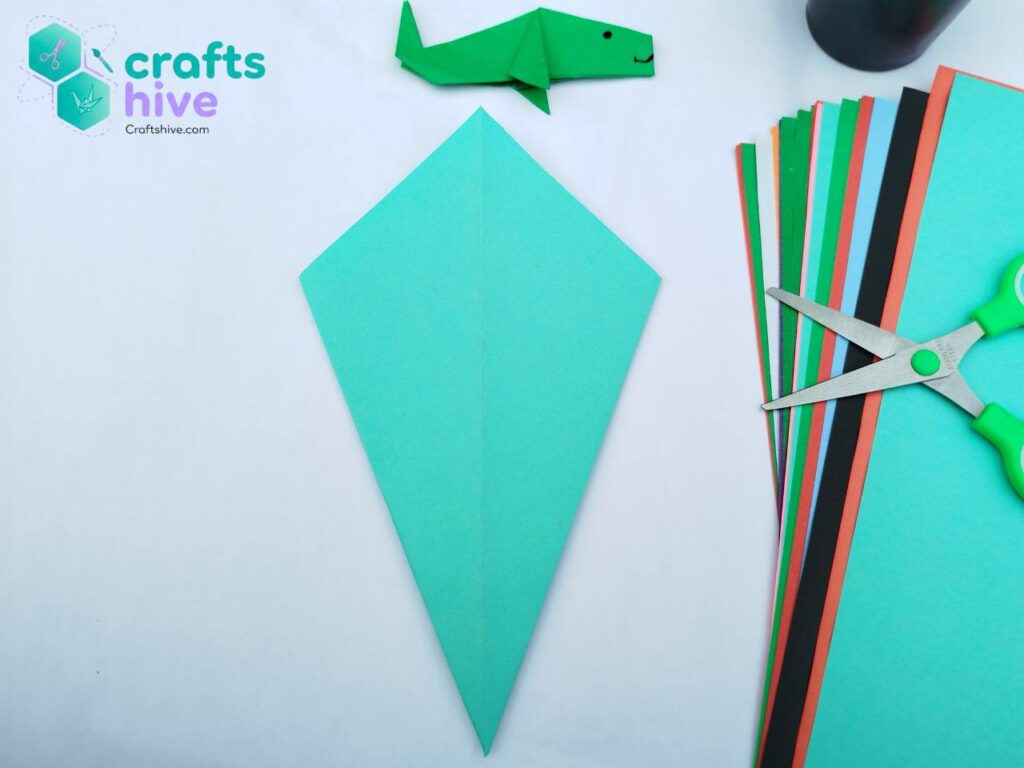
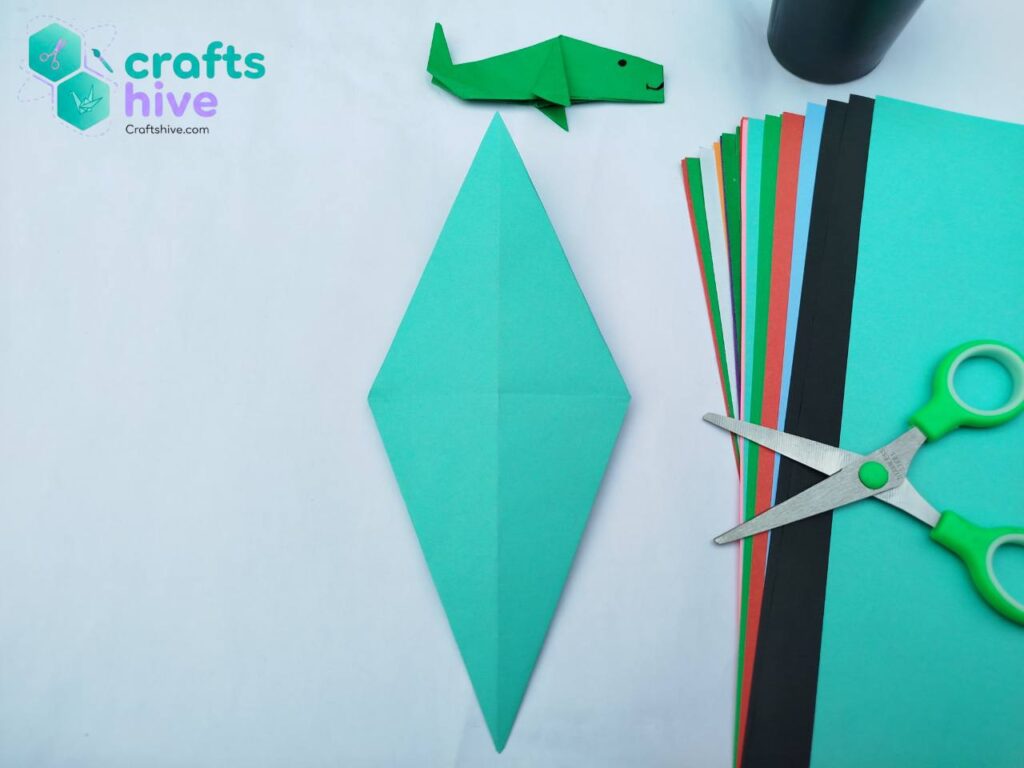
Step #1: Diagonal Fold
Place your square sheet of paper in the diamond position by giving the normally lying square a 45-degree rotation.
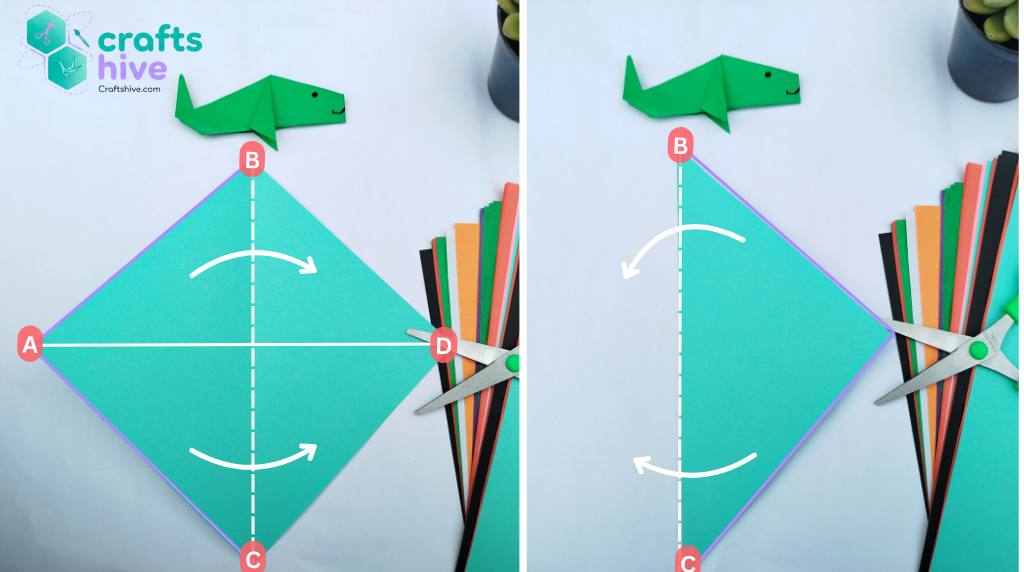
Fold and align the left corner of the diamond with the right corner. Also, align the top and bottom left sides with the top and bottom right sides, respectively, and crease the paper well. Unfold afterwards.
We shall have a diagonal vertical crease on the paper diamond.
Label Instruction: Fold and align the sides AB and AC with the sides BD and CD, respectively. Unfold the paper after creasing.
This is a guiding crease for making the kite base.
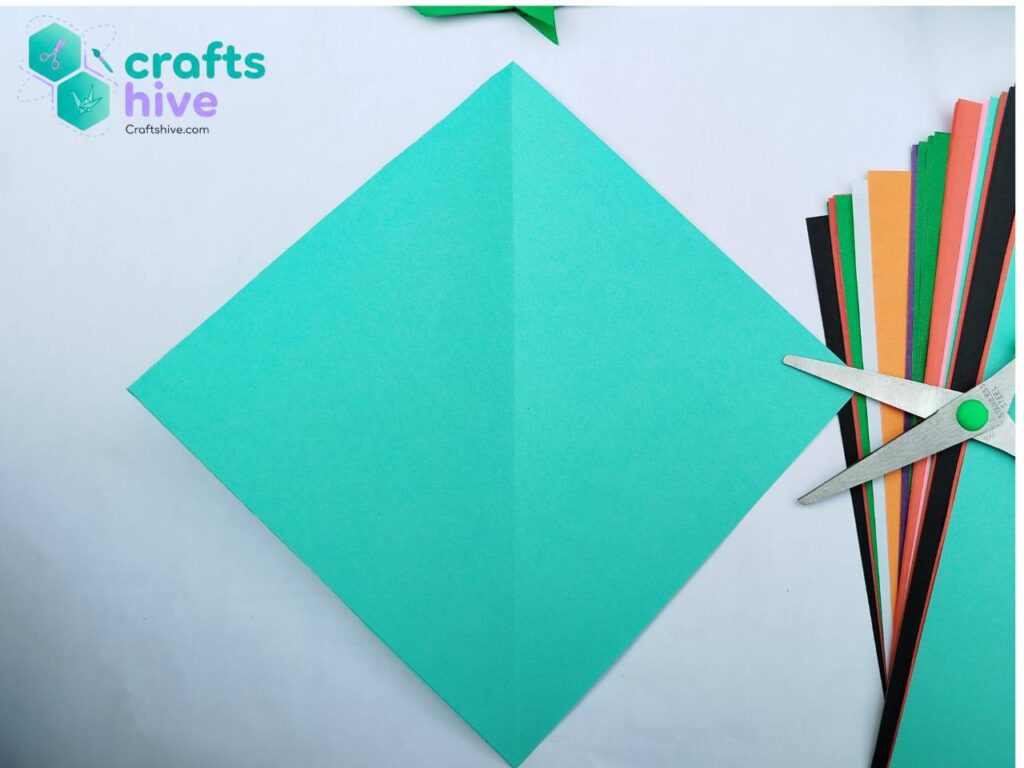
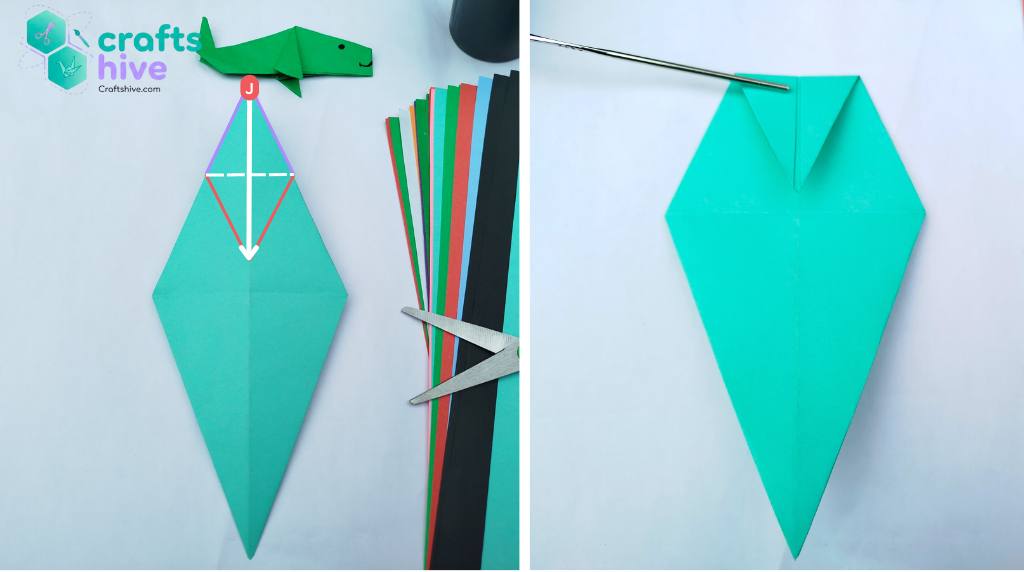
Step #2: Kite Folds
Folding the left corner of the diamond again, align the bottom left side with the vertical diagonal crease. This is the first kite fold.
Label Instruction: Align the side AC with the crease BC without folding the excess paper.

Make the 2nd kite fold with the right side this time and finish the kite base.
Step #3: Turn Upside Down
Turn the whole kite upside down with a rotation of 180 degrees.
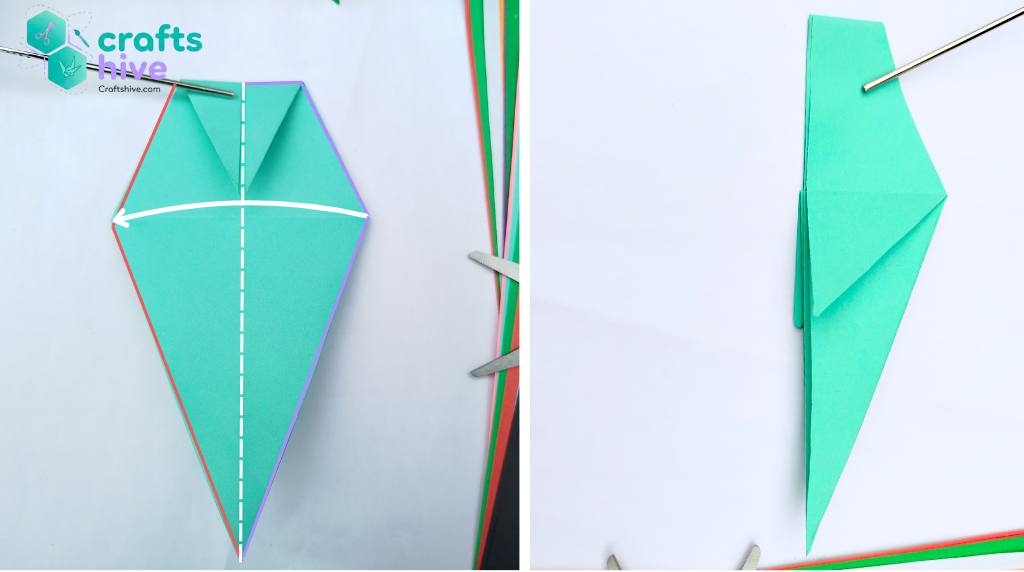
Step #4: Kite Valley Fold
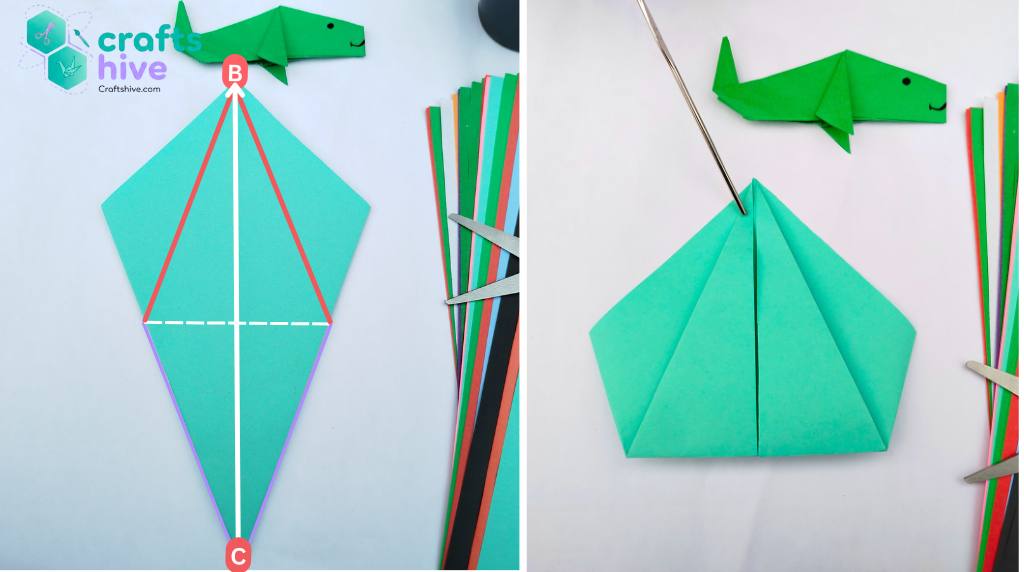
Valley Fold and settle the bottom corner of the kite onto the top corner exactly. This way, the axis of rotation will lie at the middle horizontal of the kite. Always fold from the side with one corner to the side with three corners.
Step #5: Turn the Side
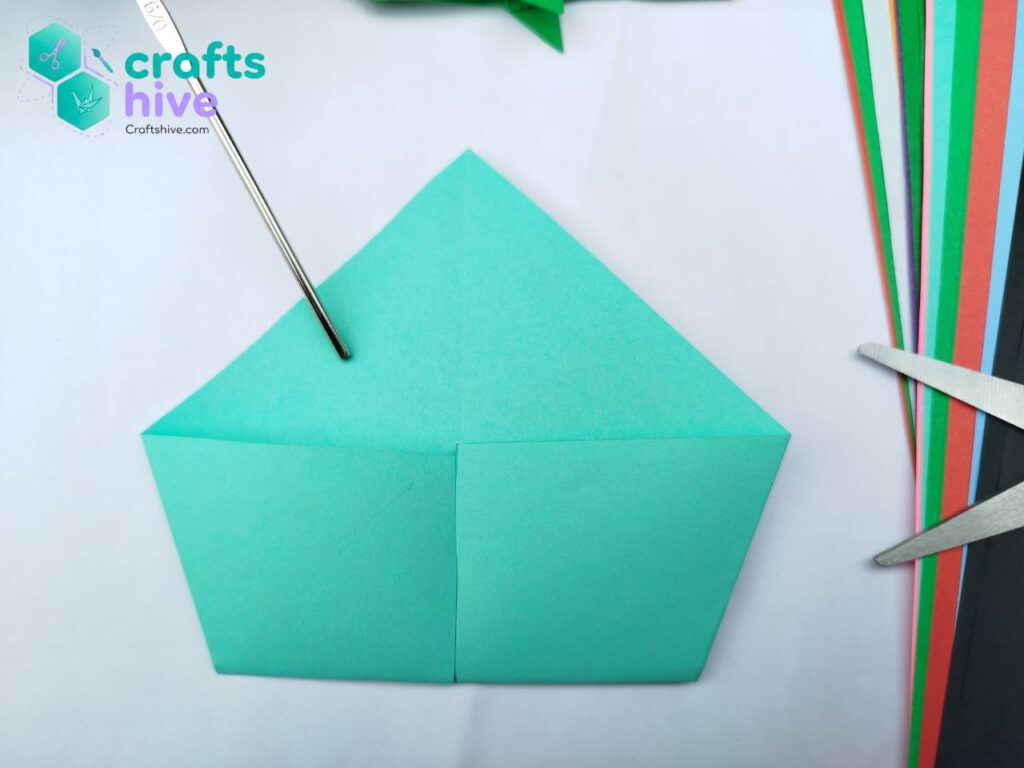
Holding the previous Valley Fold, turn your work upside down again. We shall have a shape of 5 corners, three above and two down, like a pentagon.
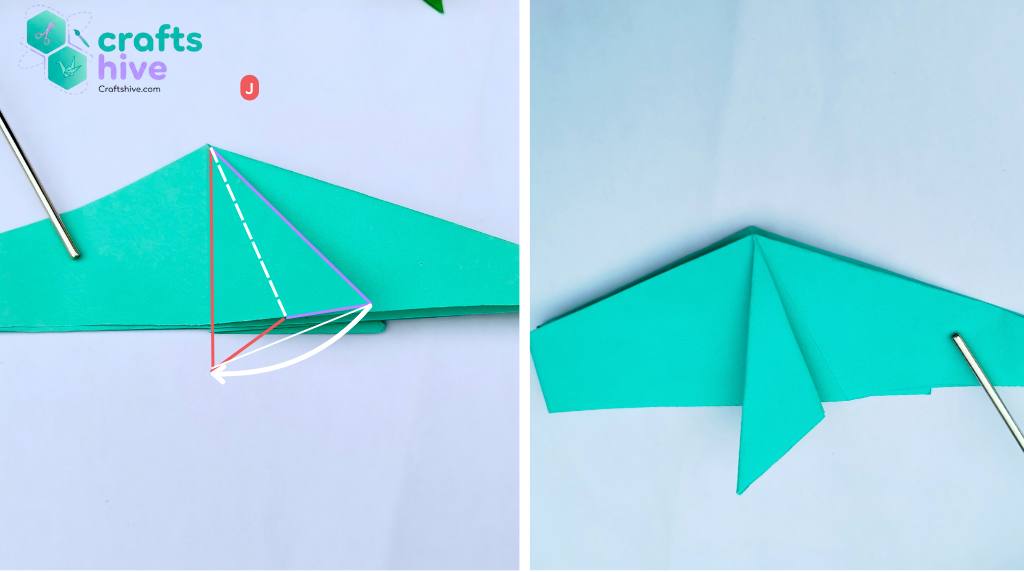
Step #6: Fins of Carp
We now want some type of squash fold and will first do some intermediate folds for this.

- Fold the left middle corner of the pentagon about the marked axis line (from the top to the bottom right corner), and align top left side with the vertical middle crease of the pentagon. Repeat this fold for the right corner, too.
- Undo both the folds.
- Pull the front right layer back towards you like above.
- In the same position, fold the entire right side towards the left about the crease.
- Repeat the same for the left side.
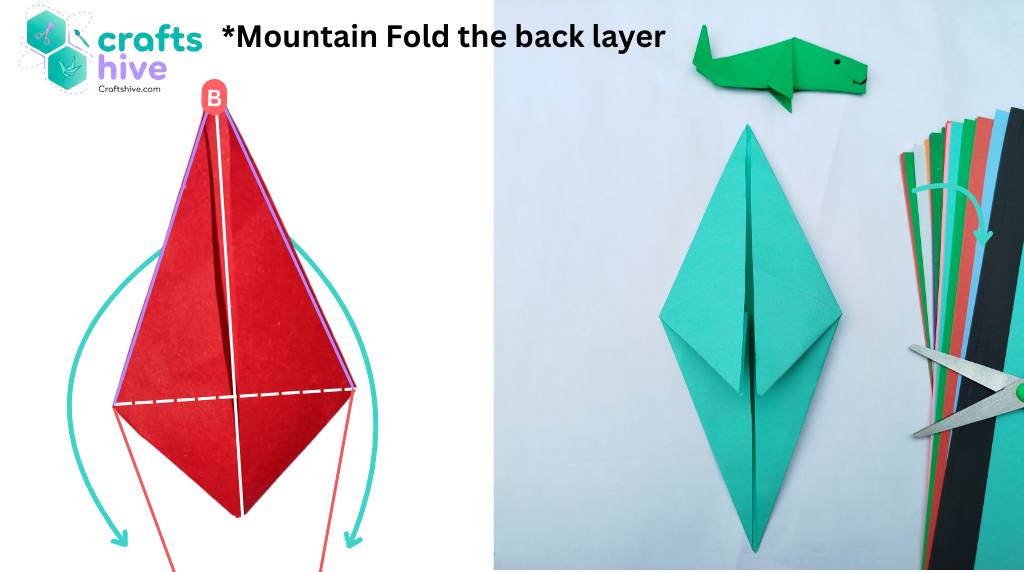
Now, bring the back layer to the front from behind by a mountain fold.
Step #7: Valley fold for Fins

Fold both the fins about the marked axis and change the direction of the corners from bottom to above.
Step #8: Turn the Side Again
For one more time, turn your folded shape upside down. This side must go inside the carp fish.
Step #9: The Head
Mountain fold the top corner of this shape (a diamond) and settle it at about 1/5th of ditance from the corner down to the centre.
Step #10: Collapse into the Carp
The vertical line will be our axis of symmetry. Collapse into the koi by folding the right side onto the left side of the folded work. You can see the head and the fins.
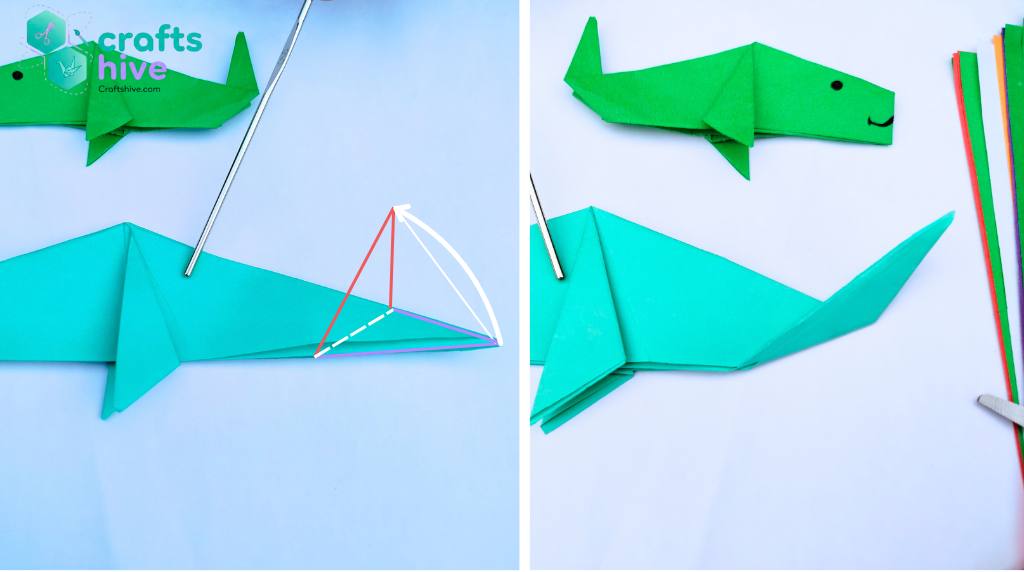
Step #11: Fold the Fins
Fold the fins towards the left about the marked axis.
Do the same with the fin on the other side, too.
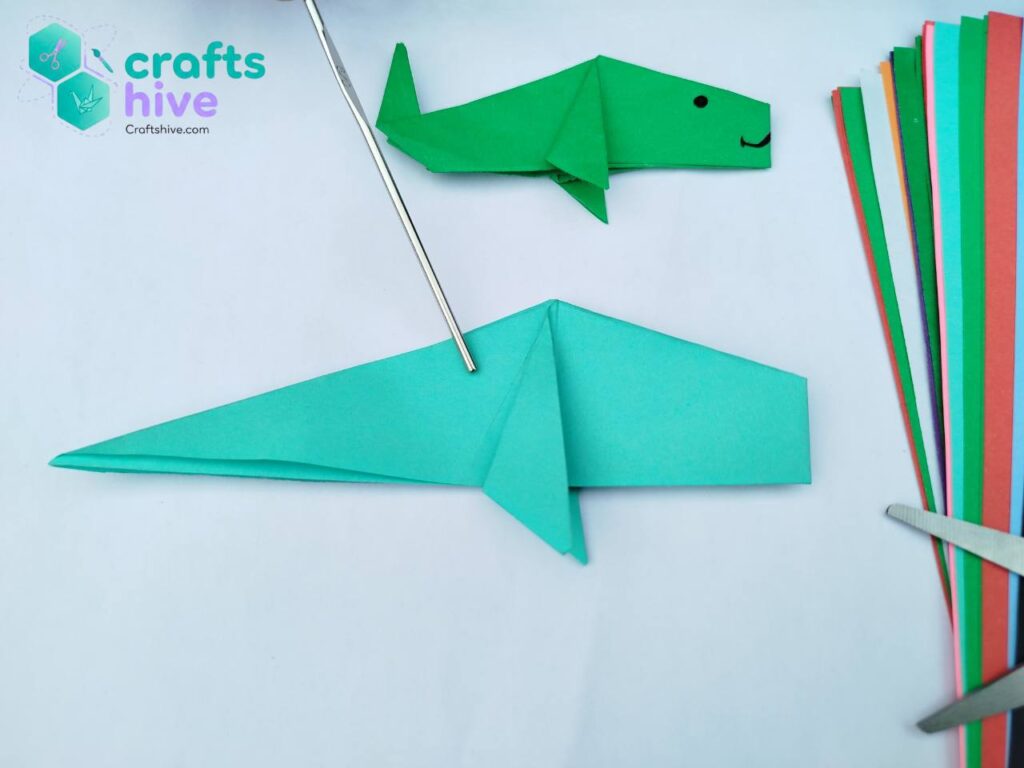
Step #12: Fold the Tail
Fold the right corner about the marked axis towards the left.
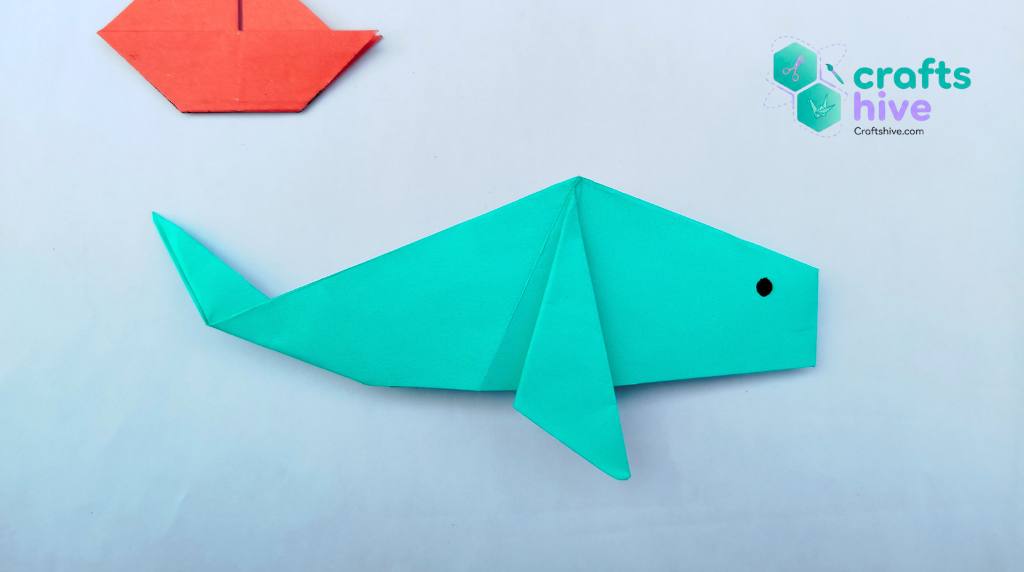
Finished
Turn the side and draw a simple dot as the eye of the carp. The traditional origami caro is finished now.
Did you find the tutorial helpful? Tell Us in the Comments.
Help us improve the weak points of our tutorial with your feedback and share photos of your work with us, too. See what is next:
About "Origamist@Craftshive"
Our origamist is expert in both the traditional origami and designing some REALLY creative crafts.