


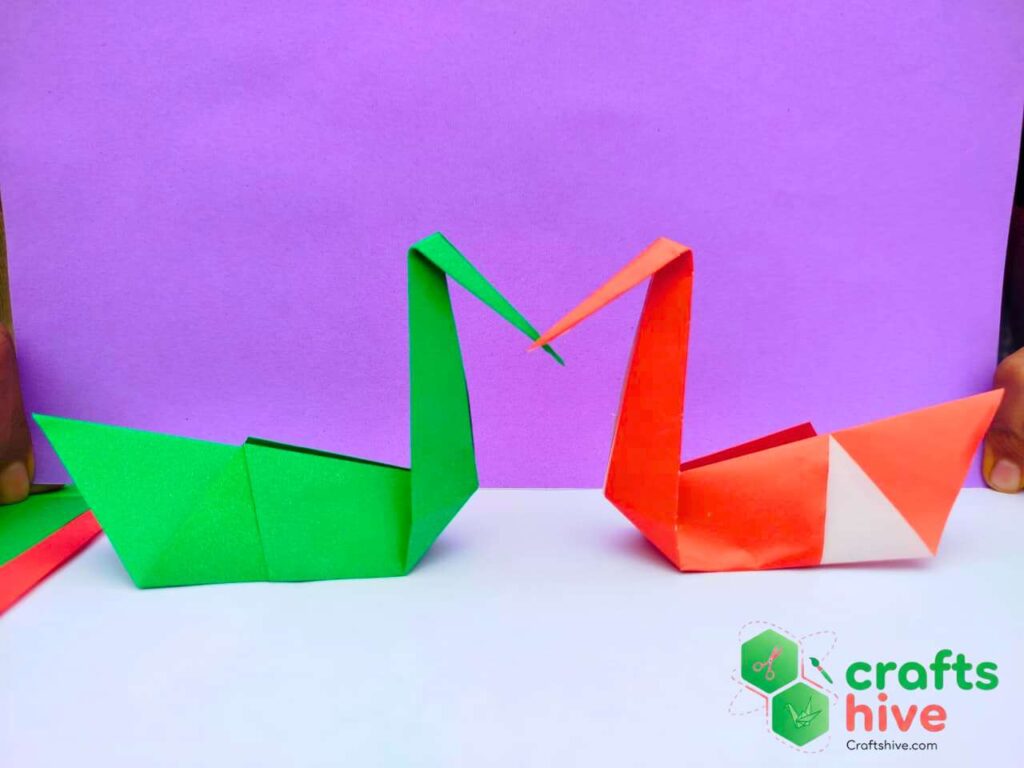
The traditional origami swan needs no support to stand and looks so CUTE. In this tutorial, I will teach you how to make an origami swan in less than 13 steps.
These count as the least of any other traditional origami birds, like the crane and the flapping bird.
You will also learn the origami Kite Base in the same guide and tips to change the size of your swan and make it neater.
Plus, I also have an inspiration to make a sweet origami swan Valentine’s Day table buddy.
So, keep reading this guide till the end.
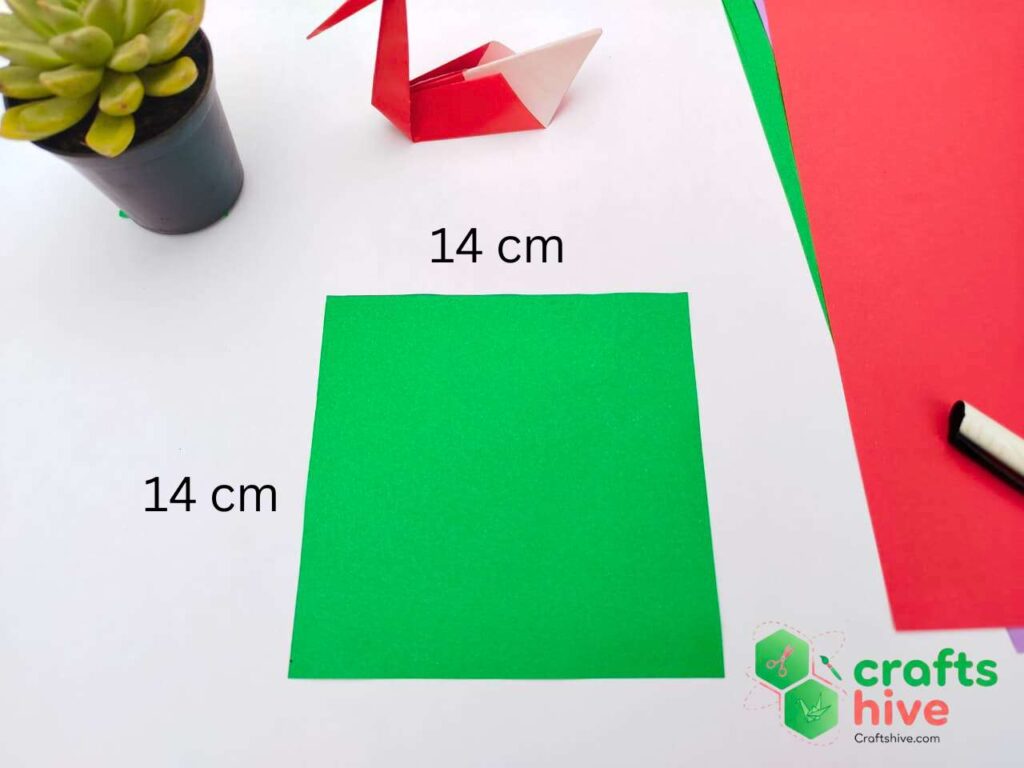
Preparations
On a clutter-free, solid surface like a table, place a square sheet of paper. We will be using a 14cm by 14cm paper sheet for an origami swan in medium size.
For a small swan model, use a 7cm by 7cm sheet.
Even with a small paper, your swan will be neater because this model needs less folding. See how to make your origami neater.
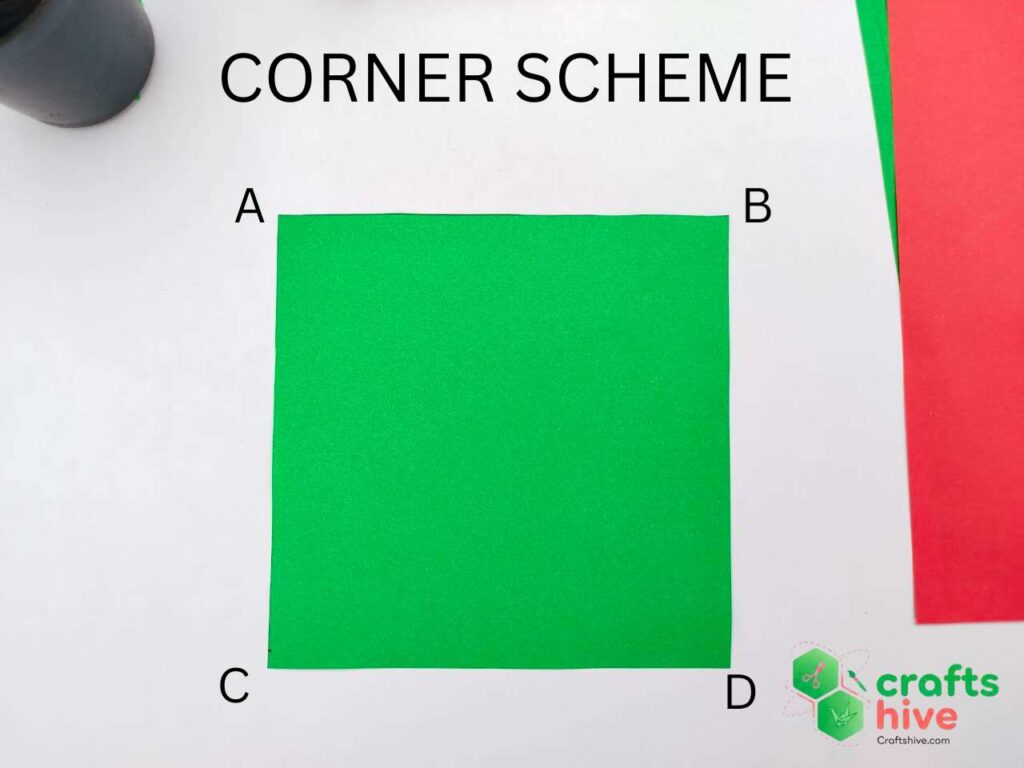
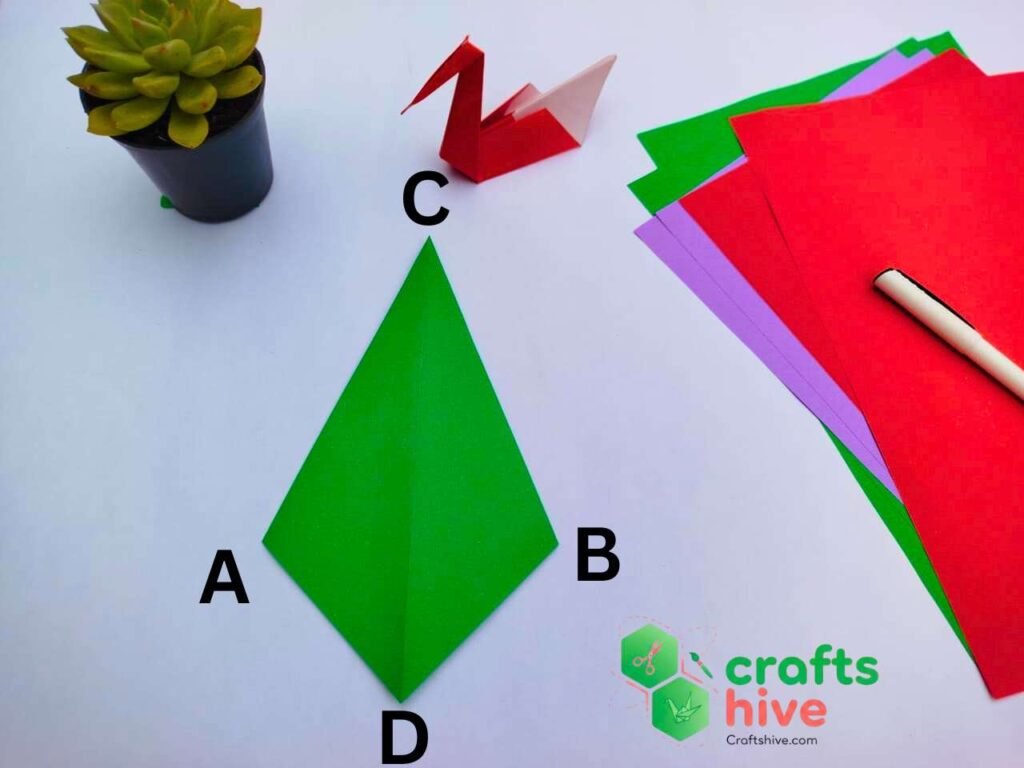
Corner Scheme
Let’s label the corners of our square sheet as A, B, C, and D for the chart origami instructions. This will make learning how to make an origami swan and its base easy, even with pictures.
Step-by-Step: How to Make an Easy Swan
Note: The traditional origami swan starts with the “Kite Base.” So, if you are already familiar with this easy base, skip steps #1 to step #4.
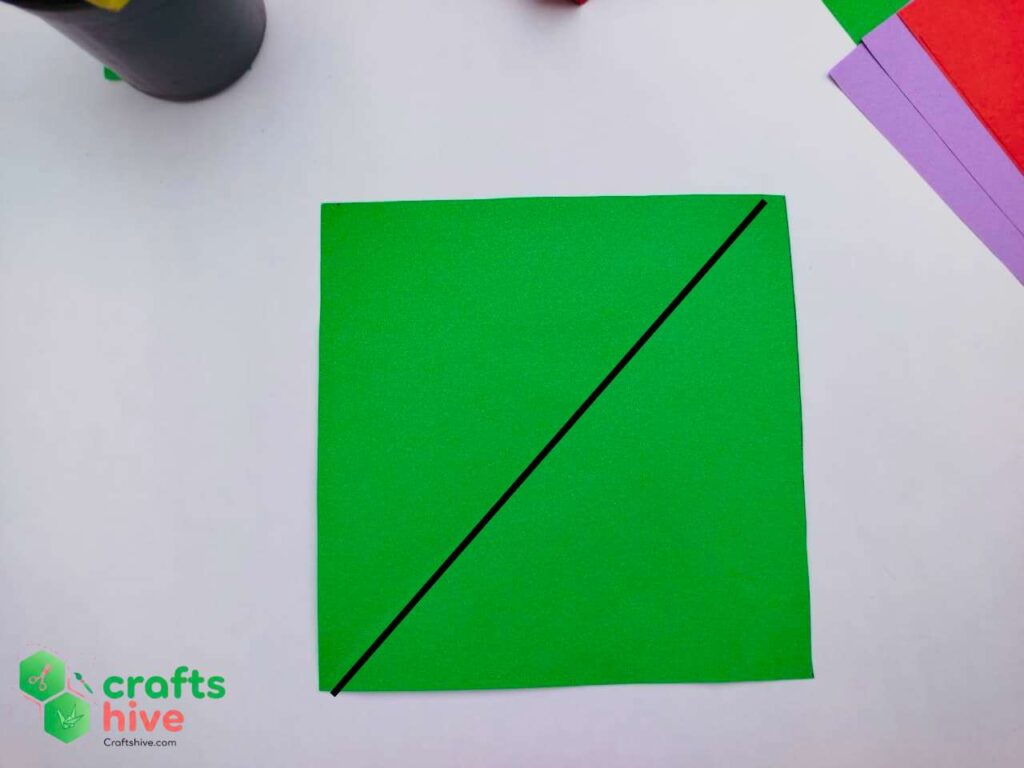
Step #1: The Diagonal Crease
Fold the square sheet of paper diagonally, press the fold across with a ruler or finger, and unfold it. Make sure your crease is visible enough.
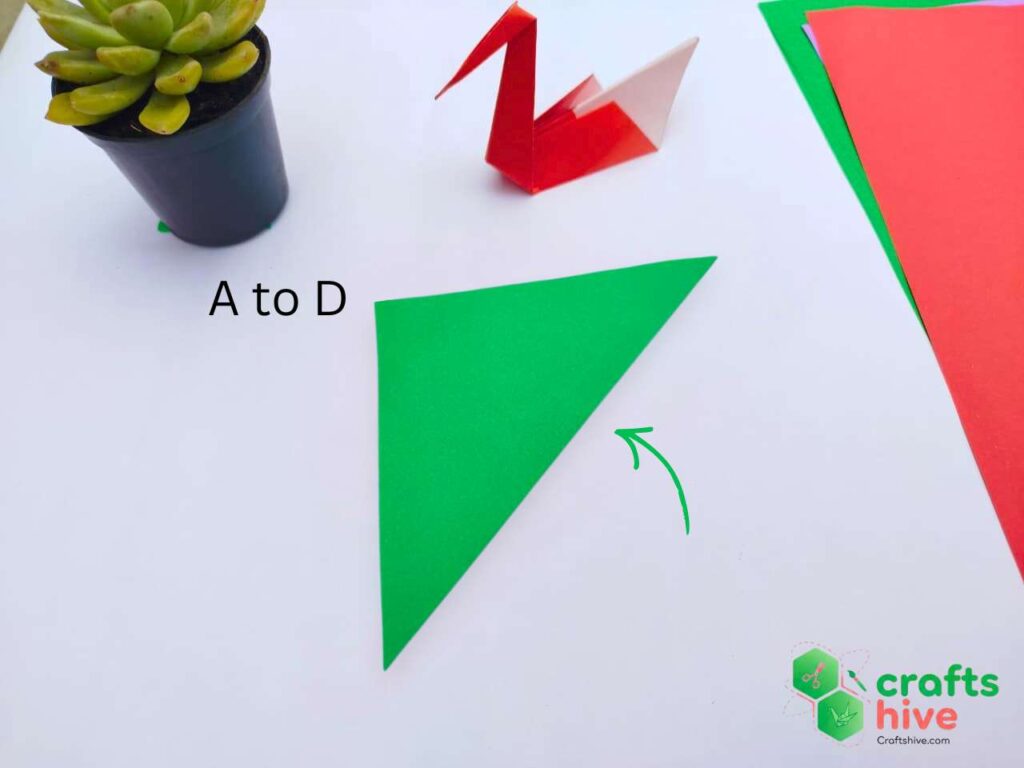
Chart Instruction: Hold the corner D and fold it such that corner D meets with corner A. Crease BC will appear after pressing.
Step #2: Rotate the Square
The diagonal crease made in step #1 will be used here as a guiding crease (to fold the paper exactly in half). Rotate your square sheet bout 45 degrees afterwards. From your perspective, the paper will look like a diamond.
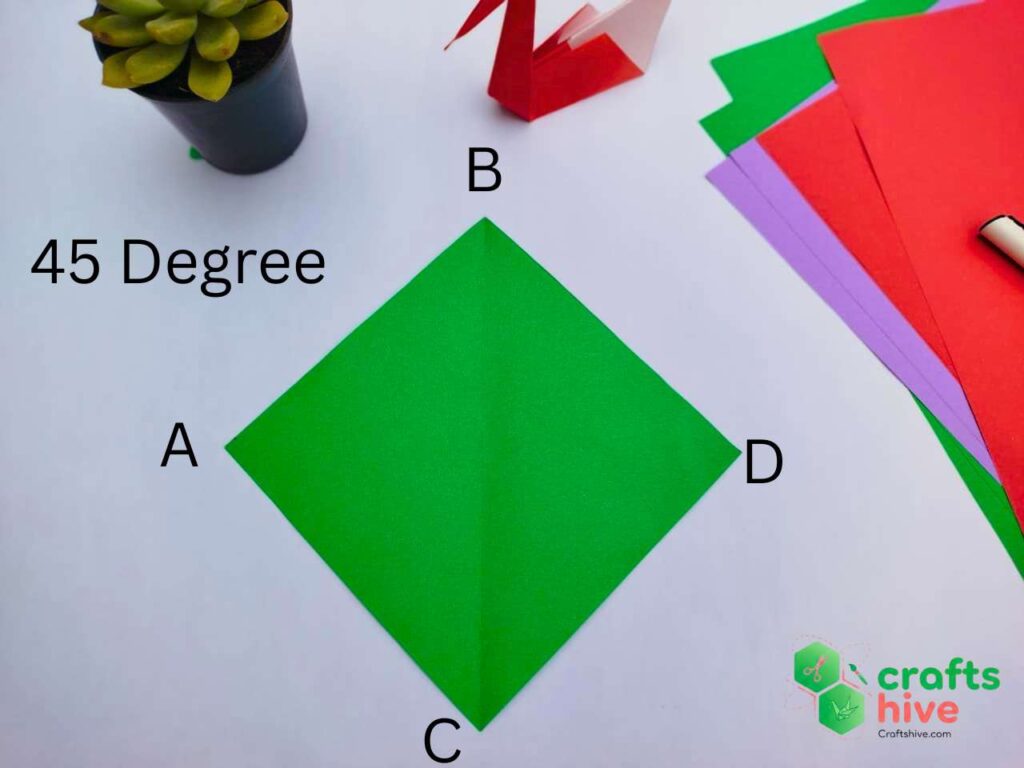
I have labeled the corners A, B, C, and D.
Step #3: First Half Fold of Kite Base
Hold the right corner (corner labeled D) of the rotated sheet and fold it such that the side BD aligns with the crease BC. We shall call it “half diagonal fold.” This will complete half of our kite sheet.
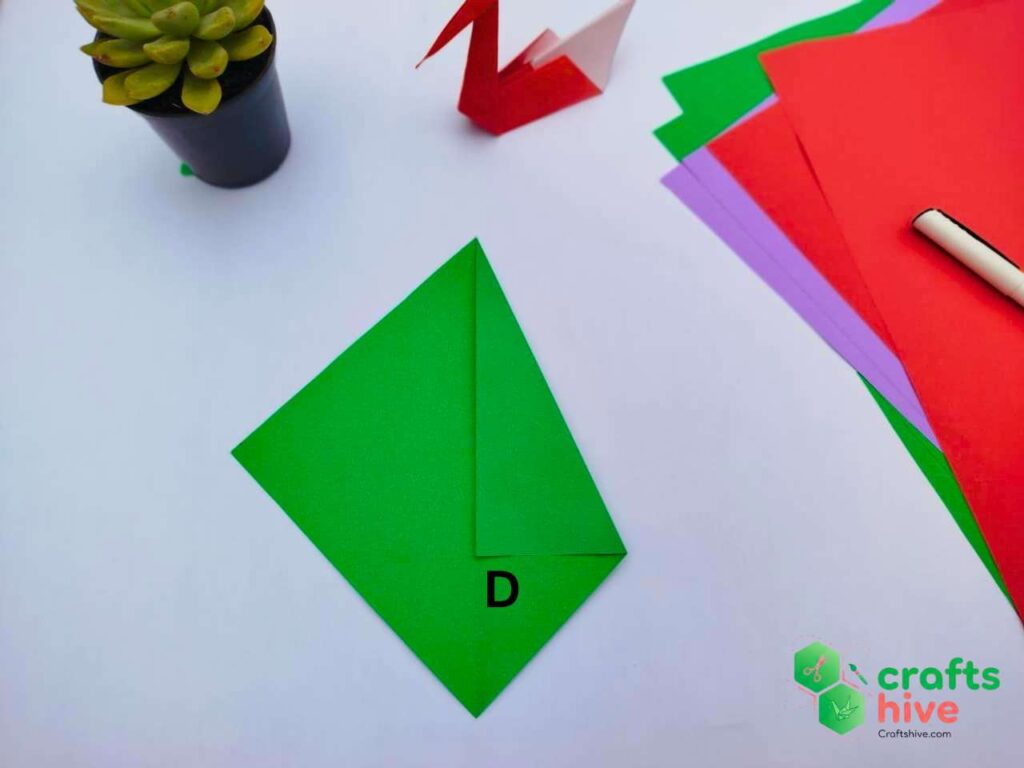
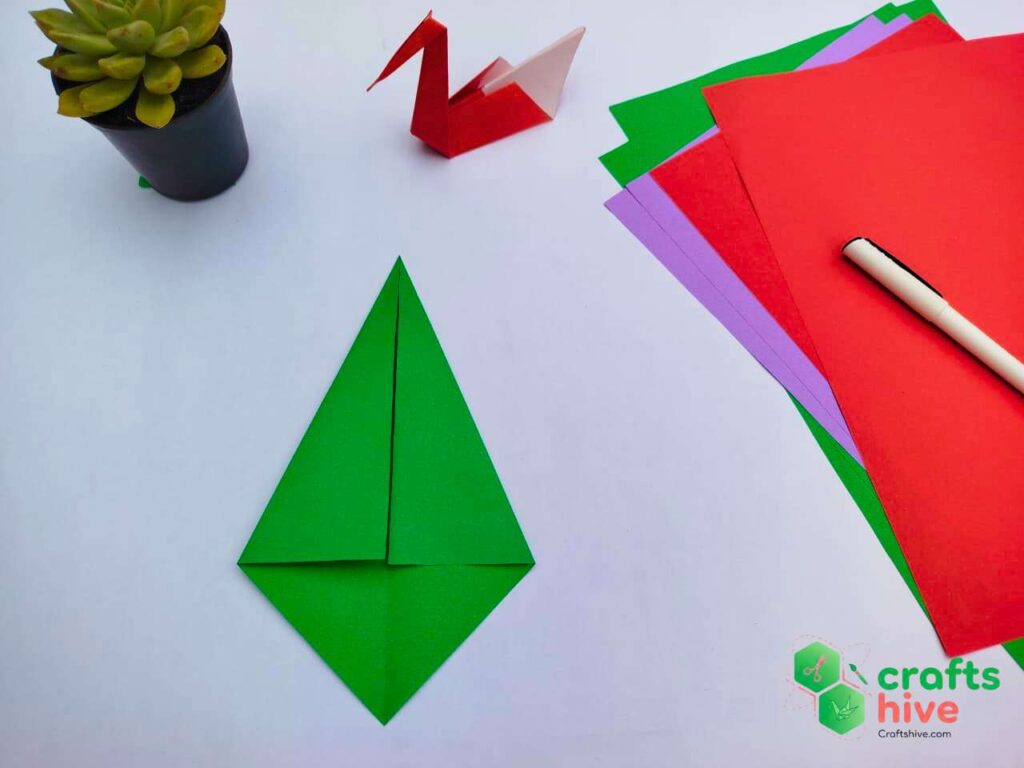
Step #4: Complete the Kite Base
Make another half diagonal fold, this time using the left corner (corner labeled A). This completes our kite base. You can see why it is called a kite by turning your origami work upside down.
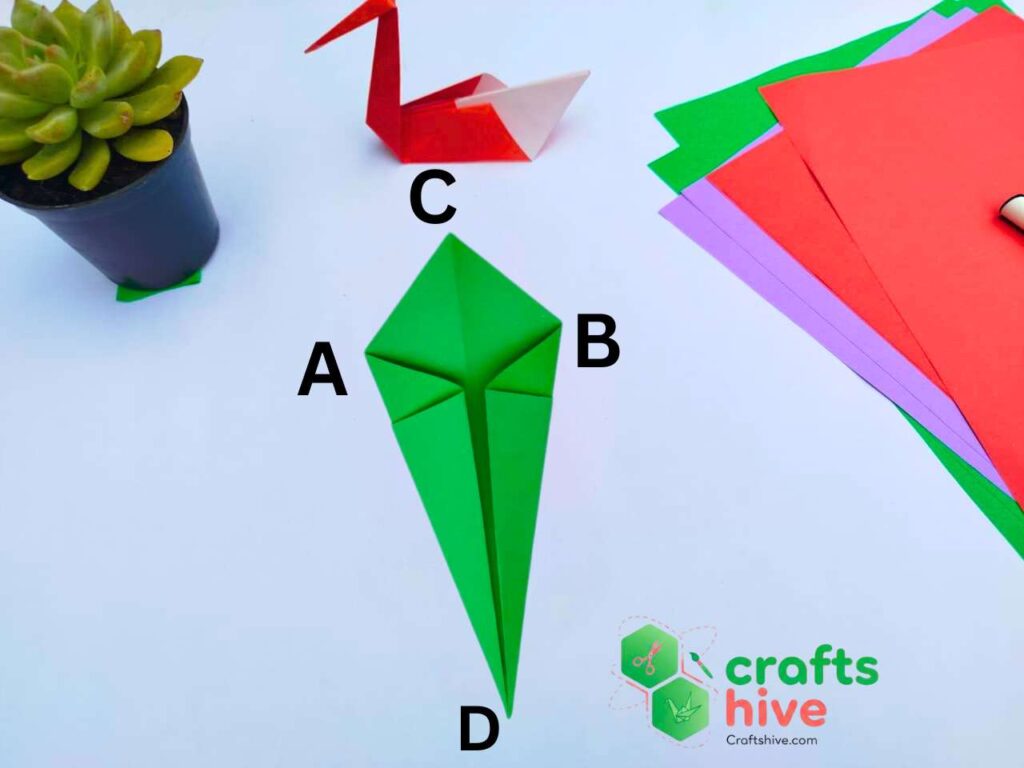
Step #5: Turn the Kite Base (Start of Swan Base)
Rotate the base 180 degrees (turn upside down). You can notice the crease bisecting your kite. Now this crease will be our guiding crease for swan base. I have labeled the corner ADBC. So, the crease will be CD.
Step #6: Fold the right side of the Kite
Hold the right corner of the kite base (labeled as B) and align the top side BC with the half kite crease CD. This will be the first “kite half fold.”
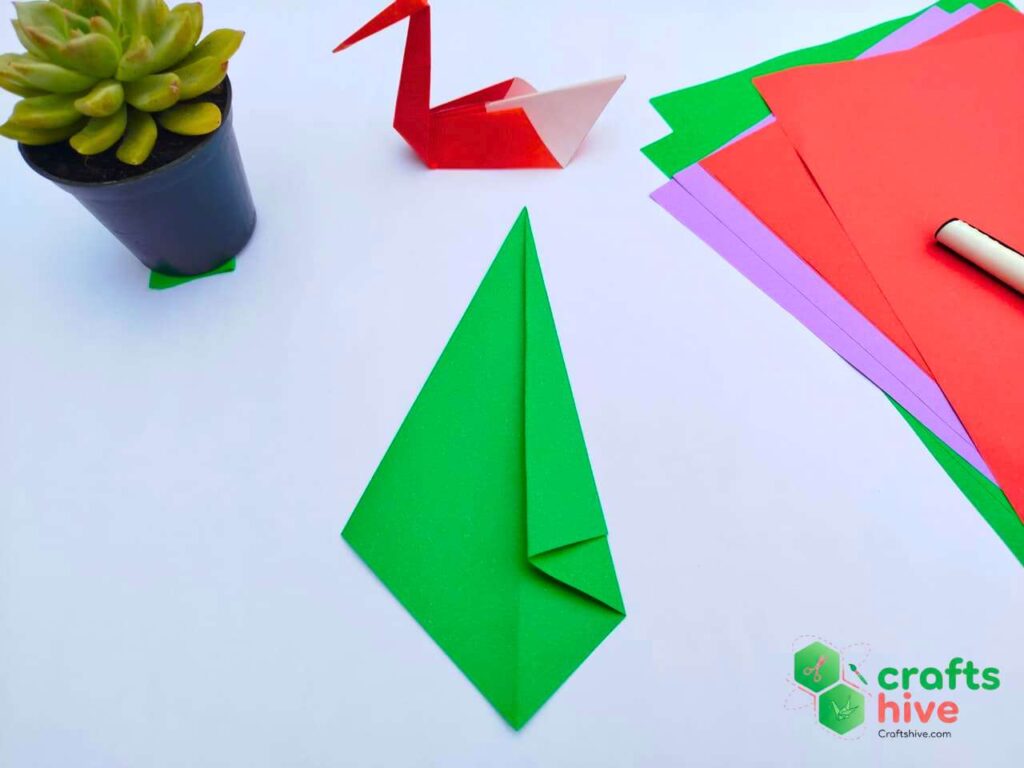
Step #7: Fold the left side of the kite
Now hold the left corner of the kite base (labeled as A) and align the top left side AC with the half kite crease CD. This will complete our swan base.
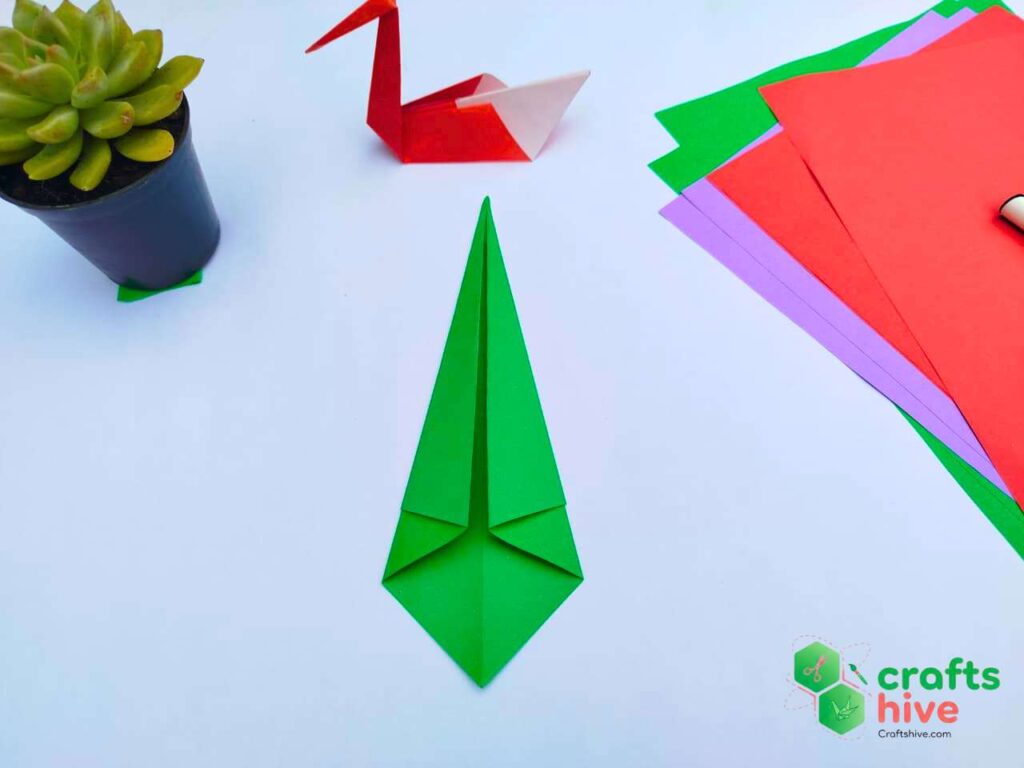
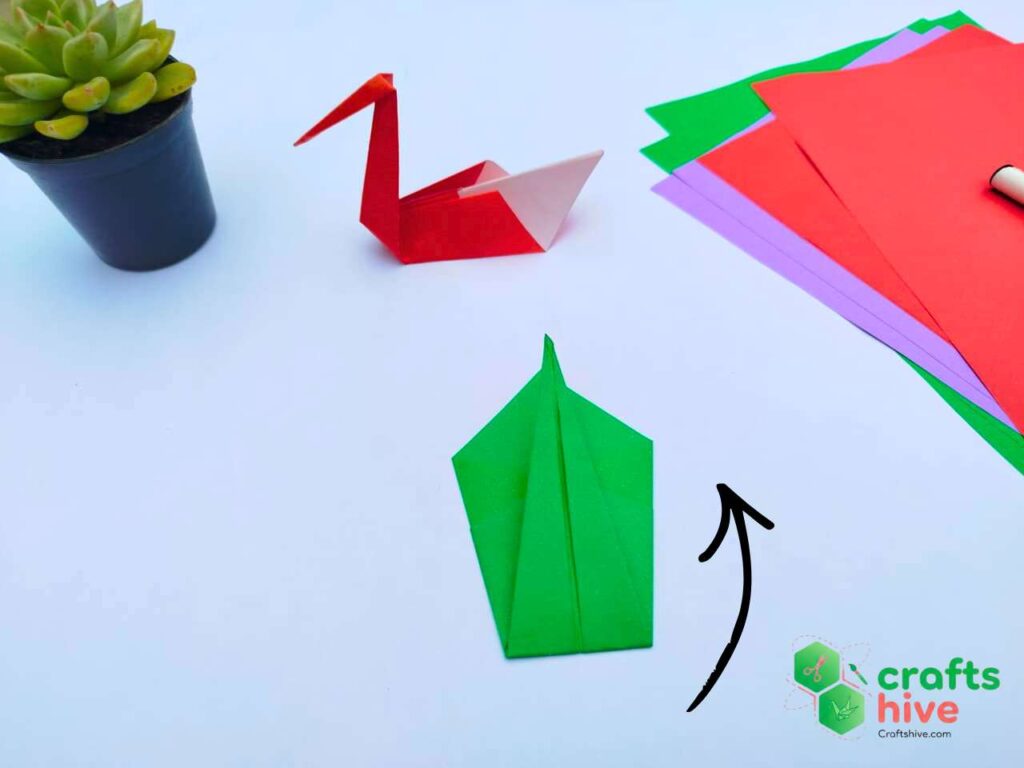
Step #8: Rotate Your Swan Base
This is an optional step, but as I mentioned in “HOW TO MAKE YOUR ORIGAMI NEATER,” always consider convenience while folding. Rotate your swan base 180 degrees right or left.
Let’s label the corners ACBD.
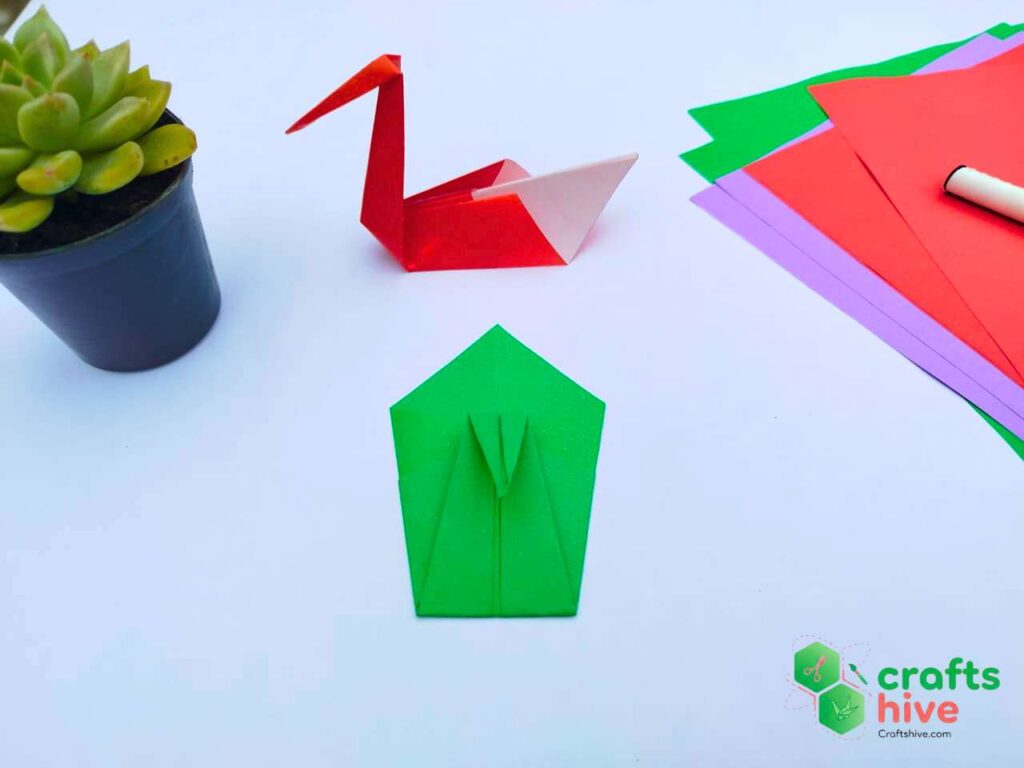
Step #9: Make the Swan Neck
Hold the bottom corner of the swan base (labeled as D) and fold it such that D just aligns with the top corner (labeled as C). This will make our swan neck, which will be further folded in the next steps.
Close Up of Neck:
(The illustration below shows how well your corner should be aligned with the top corner.)

Step #10: Make the Swan Neck
Hold the corner previously labelled as D and fold it towards the bottom. Keep the croner aligned with the centre line of the swan neck. How near the bottom is your corner? The length will decide the length of the head of orgami swan. Mine is about 1.5 inches.
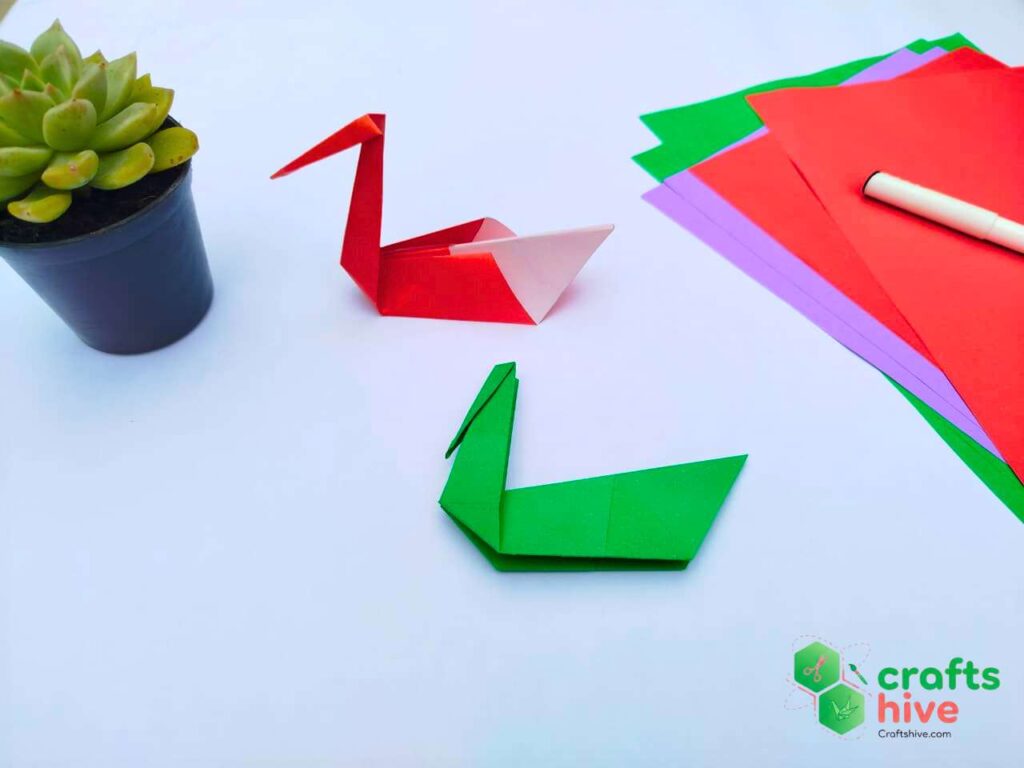
Step #11: Fold the Swan
Your origami swan will be symmetric but flat. So, fold your swan base about the axis of symmetry by holding the left and right sides and pushing the sides downward. This axis of symmetry is the line passing through the neck of a swan.
Then rotate the folded swan 90 degrees sideways. You can clearly see the folded neck and head of a swan.

Step #12: Pull the Neck of the Swan
Bring the neck of the swan out by rotating left and settle it in place by pressing the bottom of the neck.
Step #13: Pull the Neck of the Swan
Now, finally, rotate the head and press it so that it settles in place. This finishes our traditional origami swan model. You can place it on a desk without the support.
The Wrap Up of the Tutorial
The origami swan is based on the origami Kite Base, which can be made in 4 steps. You then make a swan bird base that is opened in the end with the head and the neck.
About "Origamist@Craftshive"
Our origamist is expert in both the traditional origami and designing some REALLY creative crafts.
 How to Fold Origami Jumping Frog in 10 Steps
By Origamist@Craftshive
How to Fold Origami Jumping Frog in 10 Steps
By Origamist@Craftshive How to Fold Easy Origami Butterfly in 12 Steps
By Origamist@Craftshive
How to Fold Easy Origami Butterfly in 12 Steps
By Origamist@Craftshive How to Fold Origami Ninja Star in 7 Steps
By Origamist@Craftshive
How to Fold Origami Ninja Star in 7 Steps
By Origamist@Craftshive How to Craft Cute Paper Bow with Origami and Cutting
By Origamist@Craftshive
How to Craft Cute Paper Bow with Origami and Cutting
By Origamist@Craftshive How to Fold Easy Origami Penguin for Winter
By Origamist@Craftshive
How to Fold Easy Origami Penguin for Winter
By Origamist@Craftshive How to Fold Origami Sailing Boat in 8 Steps
By Origamist@Craftshive
How to Fold Origami Sailing Boat in 8 Steps
By Origamist@Craftshive How to Fold Origami Traditional Heart for Valentine’s Day
By Origamist@Craftshive
How to Fold Origami Traditional Heart for Valentine’s Day
By Origamist@Craftshive How to Make Origami Square Base in 4 Steps
By Origamist@Craftshive
How to Make Origami Square Base in 4 Steps
By Origamist@Craftshive How to Make Origami Kite Base in 4 Steps
By Origamist@Craftshive
How to Make Origami Kite Base in 4 Steps
By Origamist@Craftshive