


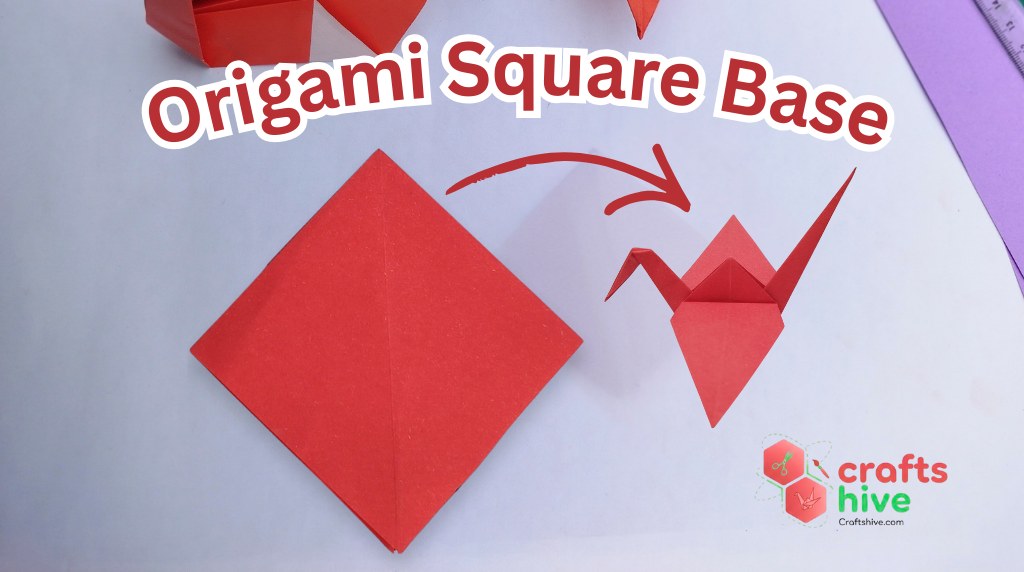
The origami square base is probably one of the most common and hence important starting folds for beginners.
The popular bird base uses it as a foundation. Similarly, tons of other traditional origami models, like a frog and a Lily, will use it.
That’s why this tutorial will be about how to make an origami square base with detailed, easy-to-understand, and beginner-friendly instructions.
I bet you won’t need a video tutorial afterwards because of the corner and section labeling approach.
What is Origami Square Base?
The square base is one of the 12 origami starting folds. It is a method of folding a square sheet of paper into a small square with 4 flaps to work further folds with. Unlike Blintz Base, which also has a square shape, it folds the paper inward completely.
It is also called the preliminary base because of its appearance in early origami models. Here is the basic idea to make a square base:
Start with a square sheet of paper
Fold the diagonals (X crease)
Make half folds horizontally and vertically (+ crease)
Fold the paper inside along the creases
Origami Square Base Step-by-Step Instructions
Folding Time: Less than 1 minute
Note #1: The Square base requires your folds to be creased more thoroughly than usual, and the paper to be pressed flat well while folding.
Note #2: The two arrows facing opposite sides in the origami pictures below will mean “Fold and Unfold.” A single arrow is to convey “Fold” alone.
Preparation: Origami Sheet & Corner Labeling
Grab and place a square sheet of paper (ours is 14cm by 14cm) on a clutter-free desktop. For practicing, we recommend using a large sheet of paper like ours and a thin one.
We have also tested making the origami square base with a square sheet as small as 4cm by 4cm.
But with such small paper, making a model like a Japanese Crane or, in general, the bird base becomes difficult and messy. So, if you are just testing, choose whatever size of paper you have.
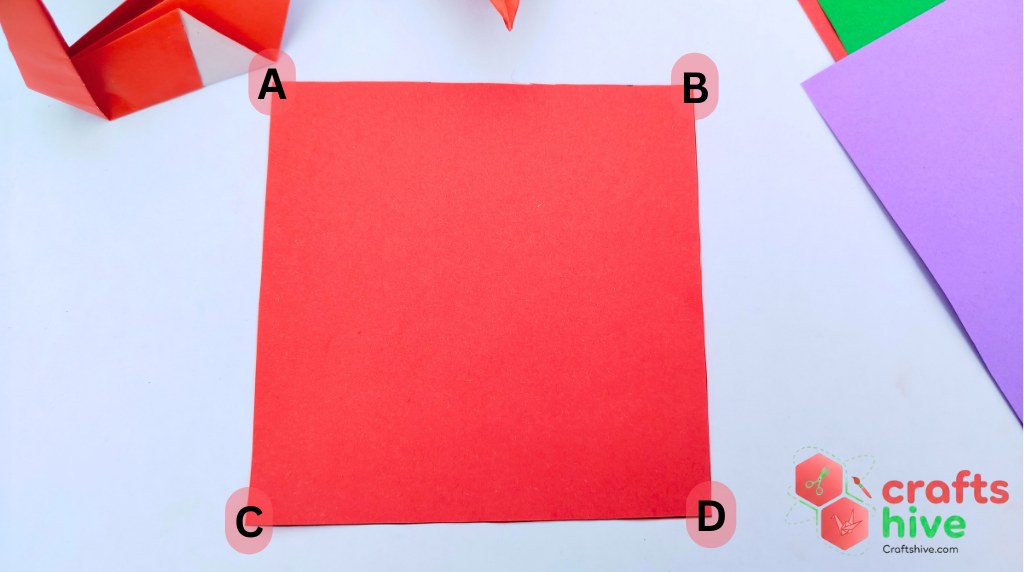
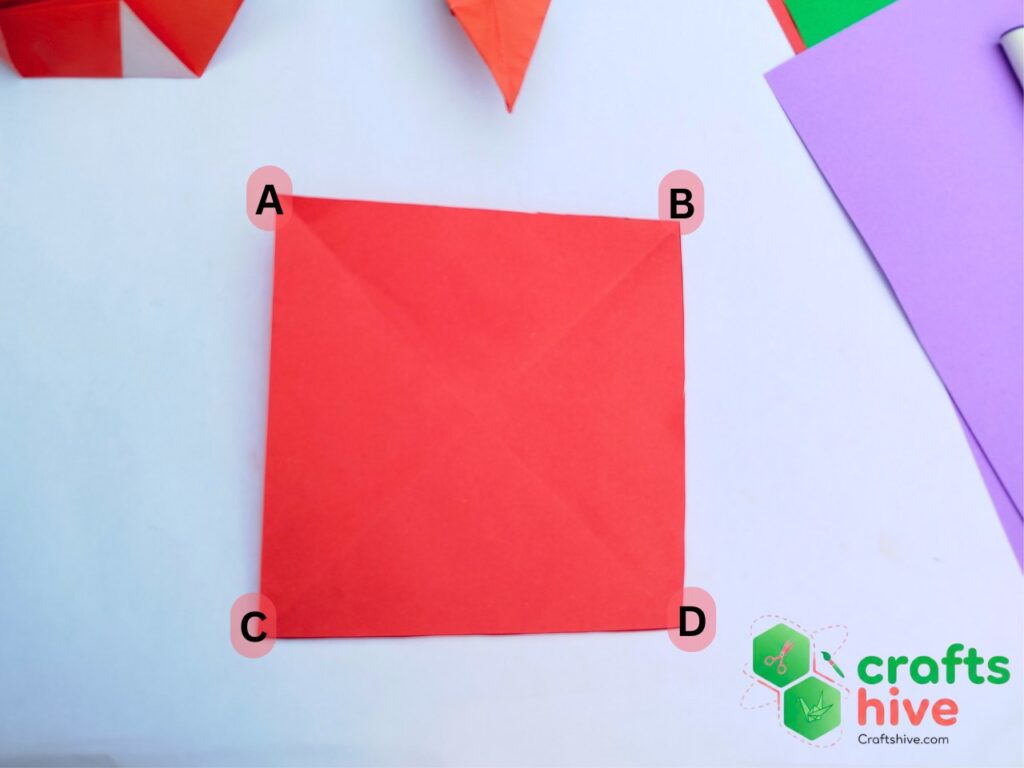
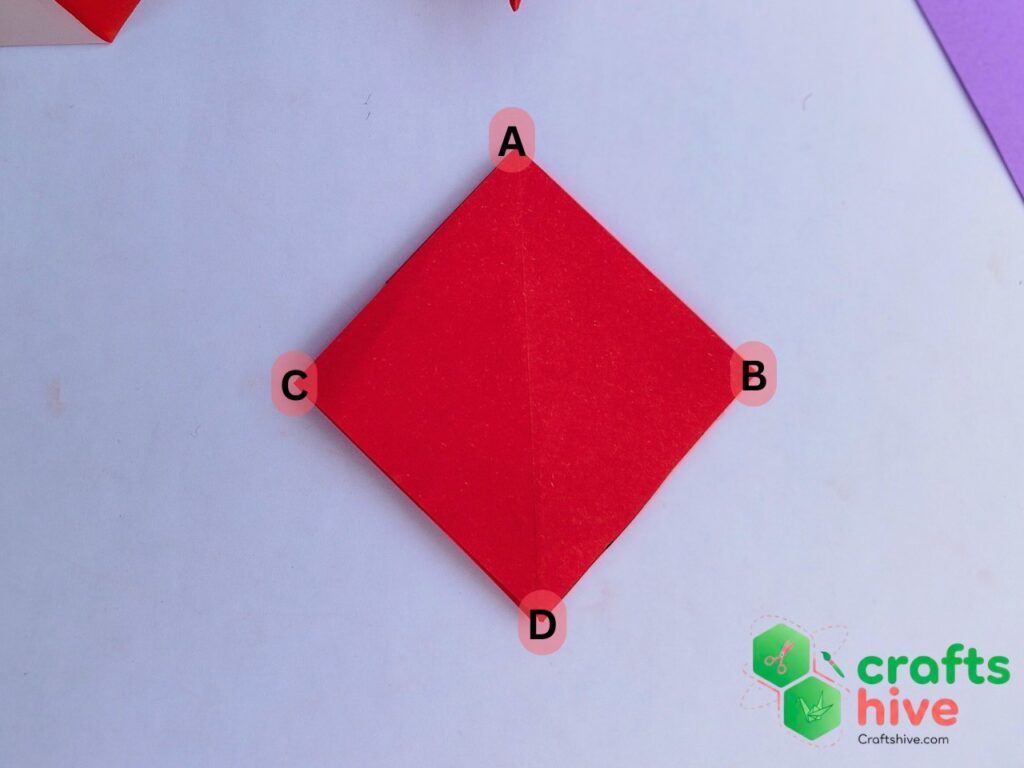
Corner Labeling: To make the written instructions easy to understand, I have labeled each corner of the square sheet of paper with the English alphabet. These are A, B, C, and D.
Section Labeling: With numerals, I will label areas traced by creases.
Step #1: Make the Diagonal Folds
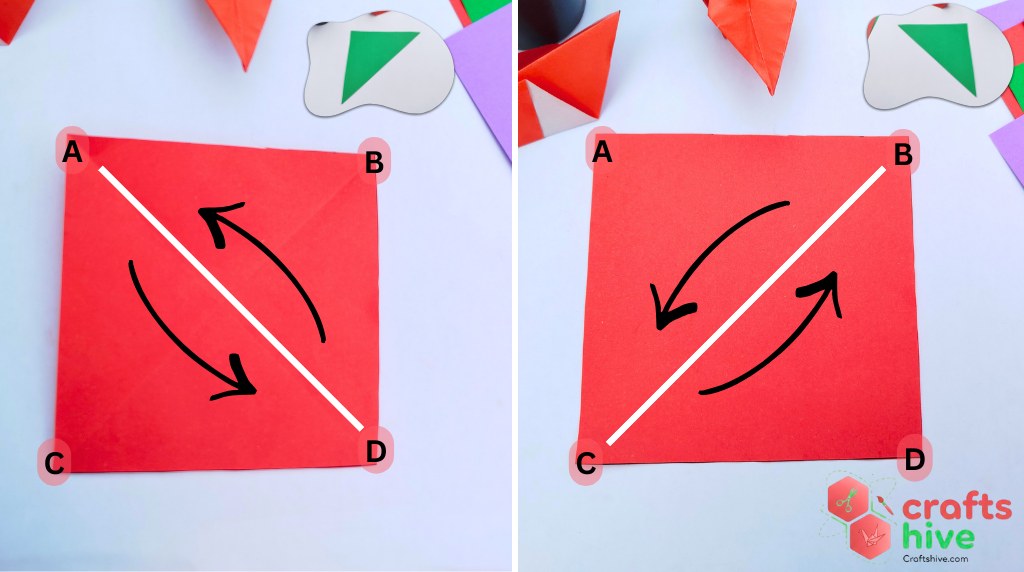
We want two crossing creases in an X shape on our square sheet. For this, grab the top left corner (labeled as A), fold the paper and align this corner with the bottom right corner (labeled as D).
Crease the paper well, fold it flat, and then unfold the paper. A crease BC from the top right corner to the bottom left corner will appear on the square sheet.
Now, grab the top right corner (labeled as B) of the unfolded sheet and fold it on the bottom left corner (labeled as C). Press the paper and unfold it. A crease AD can be seen.
Step #2: Make the Half Folds
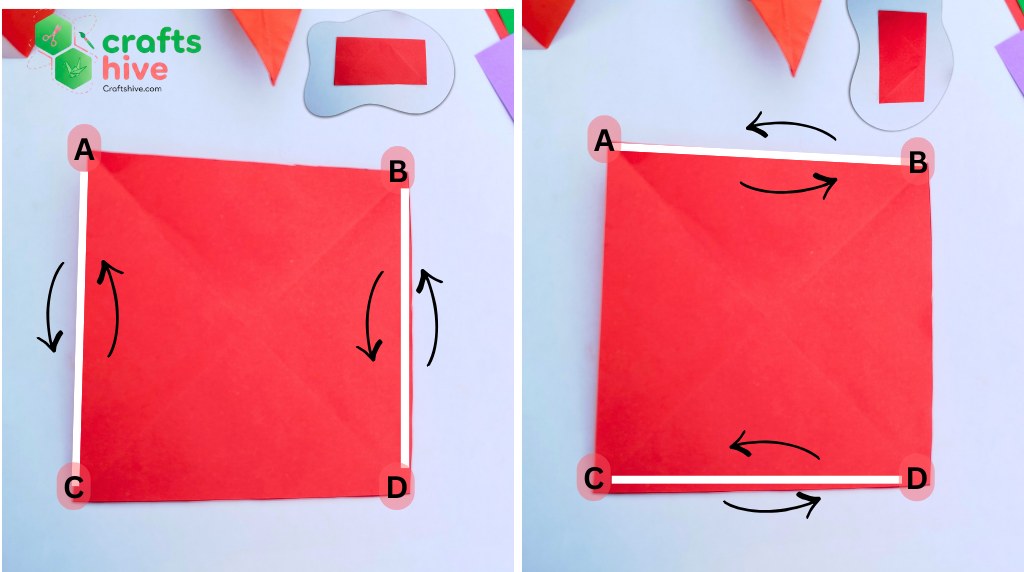
Now we want two more crossing creases, but like in a “+” sign. This will need half folds done on opposite sides.
For this, hold both of the top corners (labeled as A and B), folding the paper, align these corners with both the bottom corners (labeled as C and D). Unfold.
Similarly, simultaneously pick both left corners (labeled A and C), folding them, align with both the right corners of the square sheet (labeled as B and D). Unfold the paper.
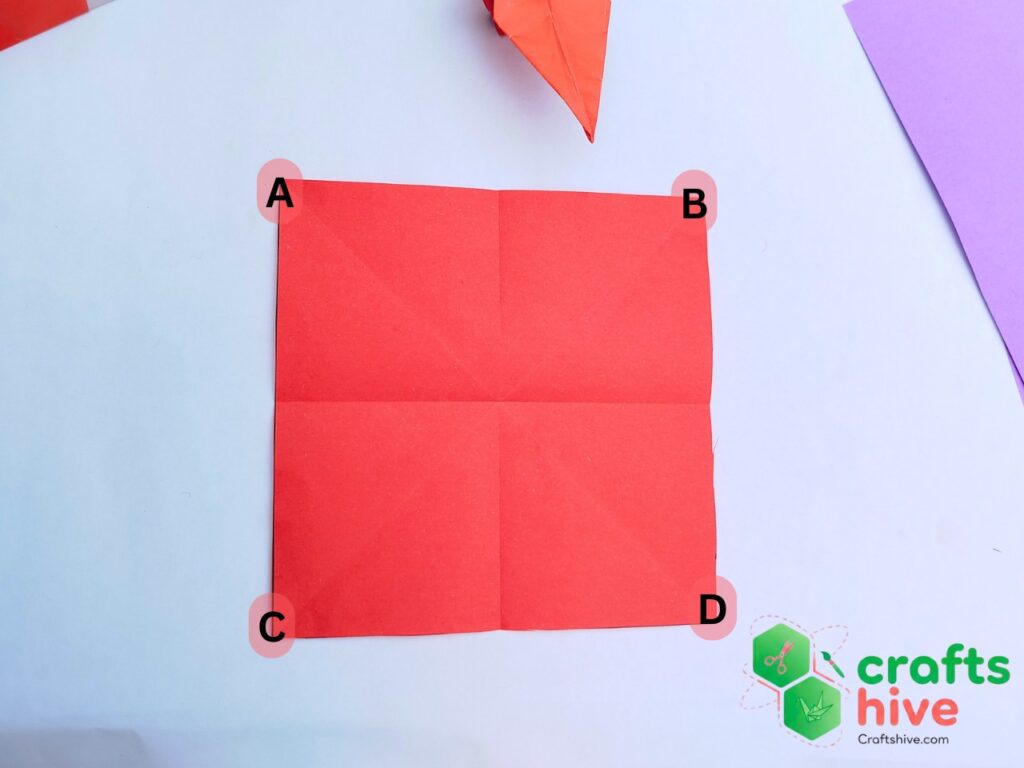
Step #3: Rotate The Sheet & Label Sections
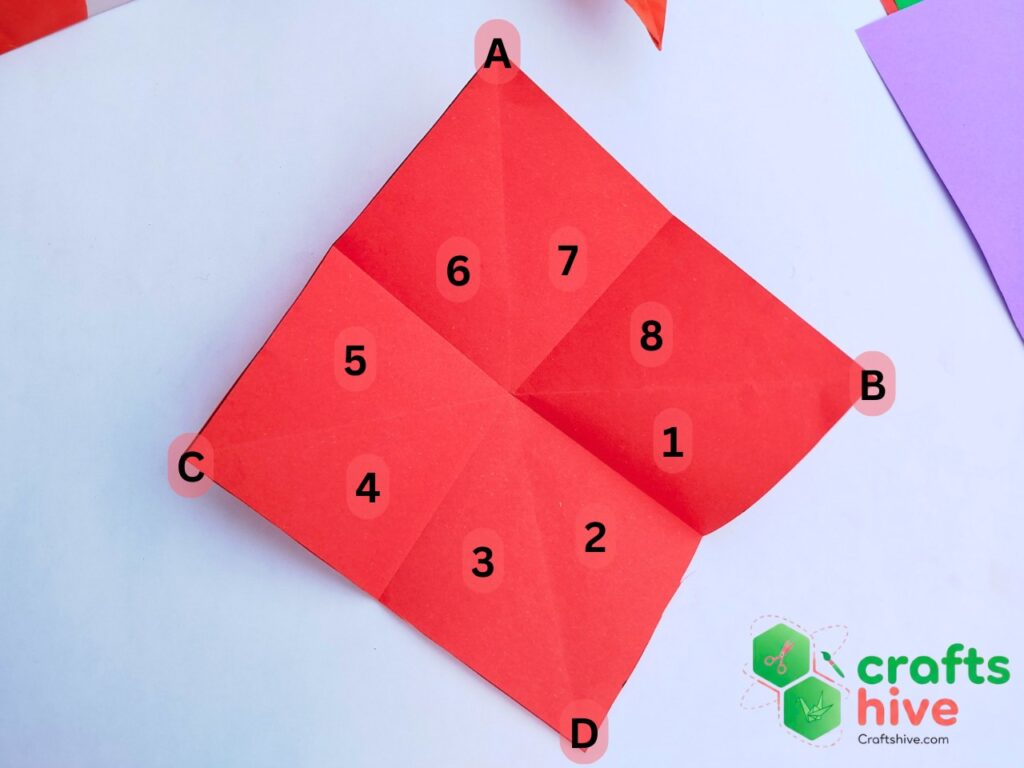
If you focus only on creases due to half folds, the creases have divided the paper sheet into 4 square sections. Now, make a 45-degree rotation on your sheet.
We shall select the bottom square of the rotated sheet as the base for our origami square. All the further folds will lie on this base.
At the same time, if we include the creases due to diagonal folds, there are actually 8 sections. I will label each section with a number from 1 to 8.
Step #4: Fold the Sections to Make the Square
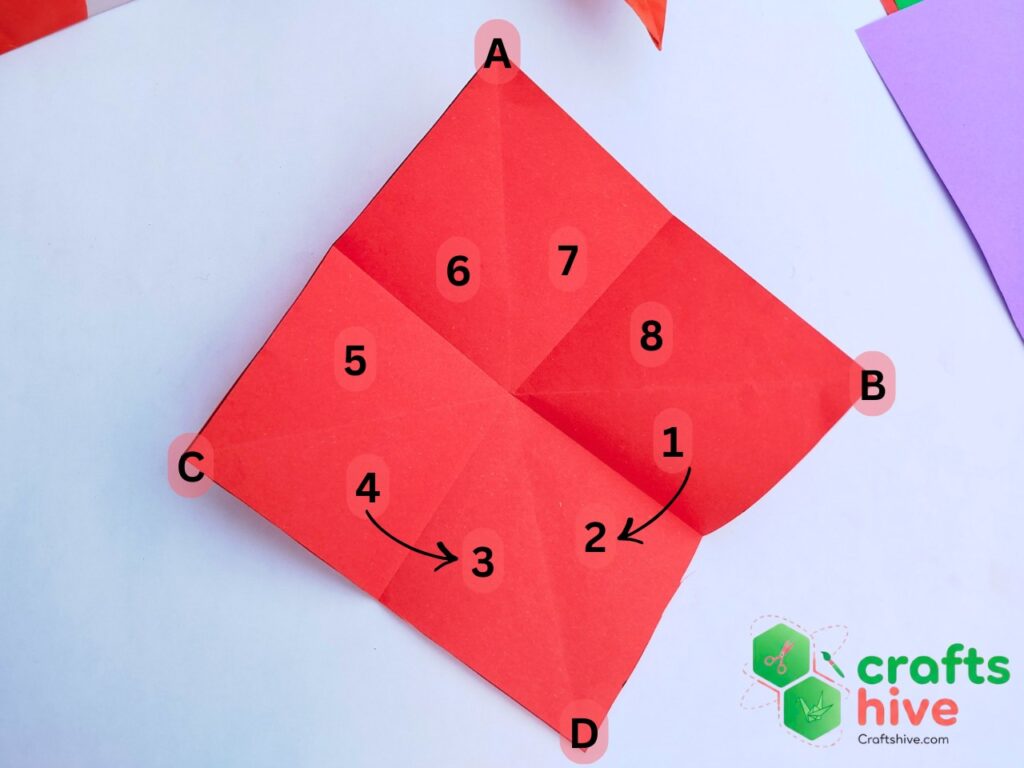
- Fold the section labeled as “1” onto the section labeled as “2”.
- Similarly, fold the section labeled as “4” onto the section labeled as “3”. Here are the pictures to guide you on how:

- As you follow points 1 and 2, the other sections will automatically fold into a closed shape similar to a cone. Inside the cone will be the sections labeled with a number from 5 to 8. Just press the cone down from above, and your origami square base will be completed.
What can you make with an origami square base?
You can make origami animals like a crane, a flapping bird, a cat, and a frog.
About "Origamist@Craftshive"
Our origamist is expert in both the traditional origami and designing some REALLY creative crafts.
 How to Fold Origami Jumping Frog in 10 Steps
By Origamist@Craftshive
How to Fold Origami Jumping Frog in 10 Steps
By Origamist@Craftshive How to Fold Easy Origami Butterfly in 12 Steps
By Origamist@Craftshive
How to Fold Easy Origami Butterfly in 12 Steps
By Origamist@Craftshive How to Fold Origami Ninja Star in 7 Steps
By Origamist@Craftshive
How to Fold Origami Ninja Star in 7 Steps
By Origamist@Craftshive How to Craft Cute Paper Bow with Origami and Cutting
By Origamist@Craftshive
How to Craft Cute Paper Bow with Origami and Cutting
By Origamist@Craftshive How to Fold Easy Origami Penguin for Winter
By Origamist@Craftshive
How to Fold Easy Origami Penguin for Winter
By Origamist@Craftshive How to Fold Origami Sailing Boat in 8 Steps
By Origamist@Craftshive
How to Fold Origami Sailing Boat in 8 Steps
By Origamist@Craftshive How to Fold Origami Traditional Heart for Valentine’s Day
By Origamist@Craftshive
How to Fold Origami Traditional Heart for Valentine’s Day
By Origamist@Craftshive How to Make Origami Kite Base in 4 Steps
By Origamist@Craftshive
How to Make Origami Kite Base in 4 Steps
By Origamist@Craftshive How to Make An Easy Origami Swan in 13 Steps
By Origamist@Craftshive
How to Make An Easy Origami Swan in 13 Steps
By Origamist@Craftshive