


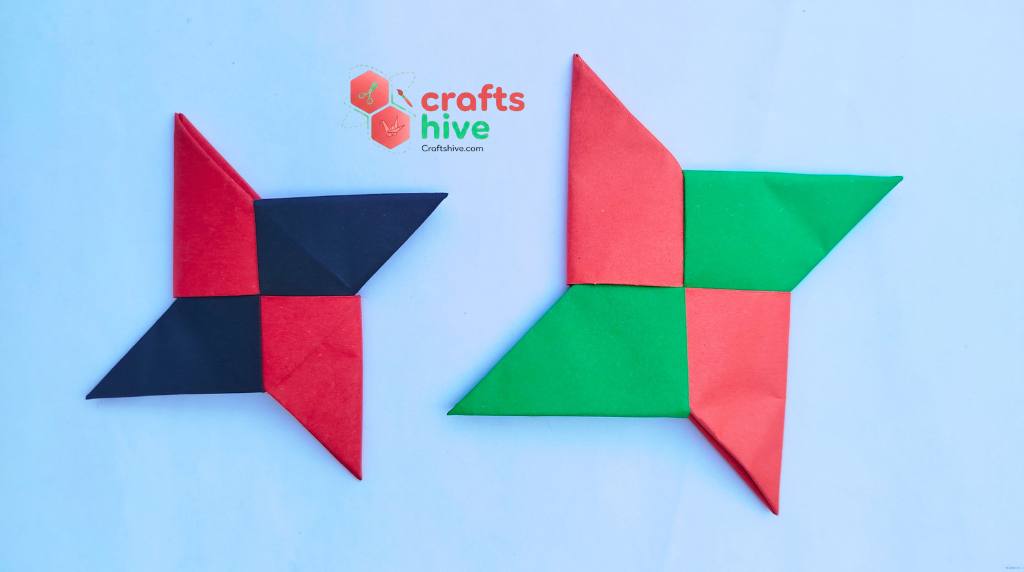
Learn how to fold an origami ninja star (aka Origami Shuriken) in 7 simple steps with label instructions, too. This is easily among the most fun and satisfying traditional models.
That’s why little ninjas look for it so intensely. You can craft some ninja stars for them in your favorite colors and any size. I will teach you everything from half-folds to assembly, so let’s get started.
Origami Ninja Star: Folding Instructions
The traditional ninja star is crafted by folding two separate ninja star halves. These halves are the same in shape and construction, except that we have to invert the directions of the fold to make them mirror each other.
Now, let’s understand folding a ninja star with the fold-by-fold instructions below:
Model Type: Traditional Origami (needs origami and assembly)
Difficulty: Beginner (level 3)
Folding time: Usually 5 minutes
Paper Suggestion
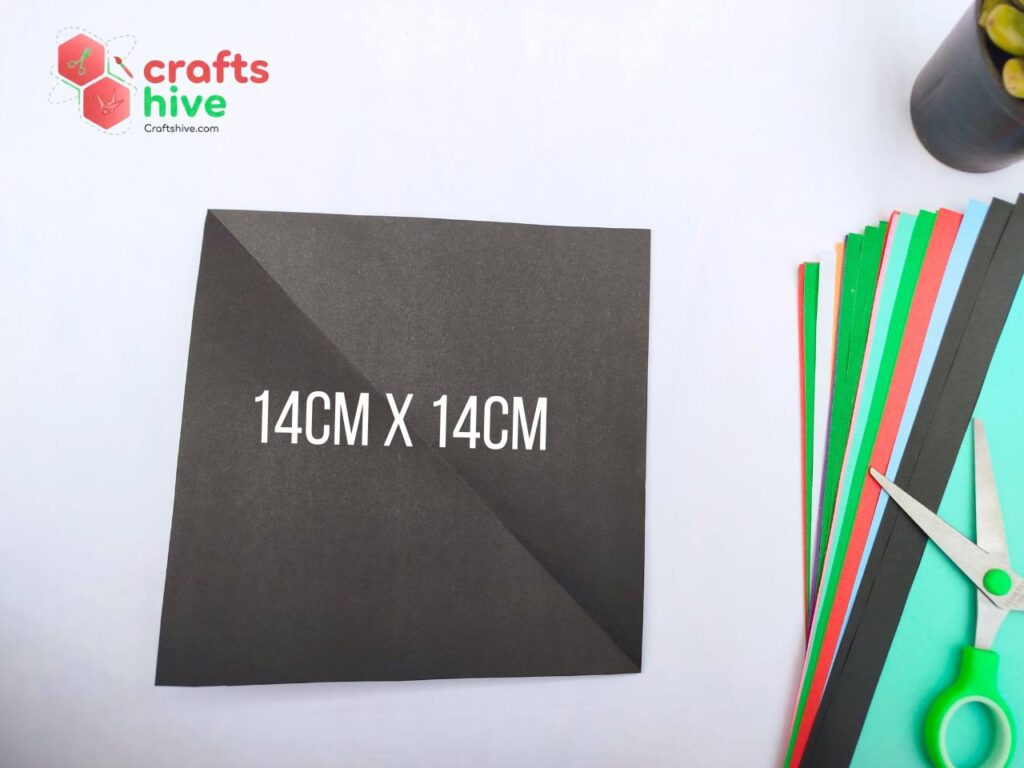
I recommend using two square Tant sheets of equal dimensions in two different colors. Choose the dark colors and those that provide a good relative contrast. Tant sheets will let you end up with a sturdy ninja star, and so I highly recommend them.
I will be using a black and a red 14cm by 14cm sheet for demonstration. You can also use red and green.
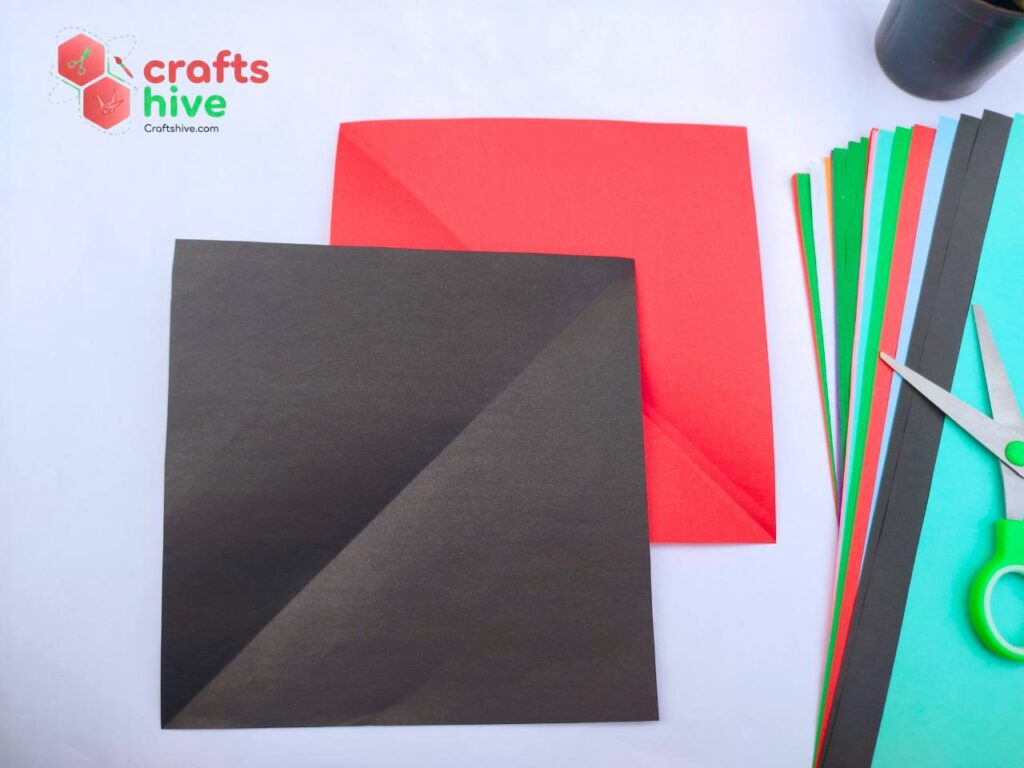
Take the black square sheet and place it straight onto your craft table. (Mine has a diagonal crease because I had to cut it from an A4 rectangle sheet by folding method).
Before you begin, check my tips on neater origami.
Step #1: Make Half Folds
We have to make two crossing creases in a “+” shape.
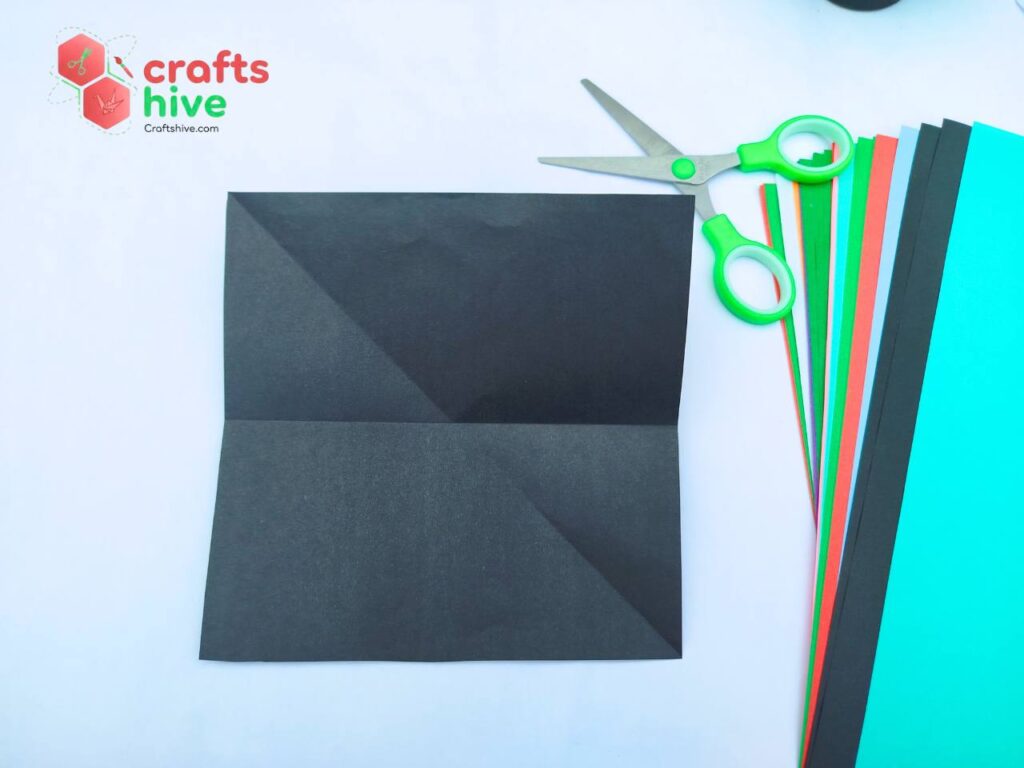
Horizontal Fold

Fold and align the top side of the square sheet with the bottom side of the square sheet, and press the paper well. Unfold it afterwards. You will notice a horizontal crease.
Label Instruction: Fold the side AB onto the side CD and crease the paper well.
Vertical Fold
Now, for the vertical crease, align the left side of the square sheet with the right side. The respective corners must also coincide for correct creasing. Unfold the paper then.
Label Instruction: Fold the side AC onto the side BD and press the paper. Unfold.
Step #2: Make Quarter Folds
We have to make quarter folds guided by the horizontal crease.
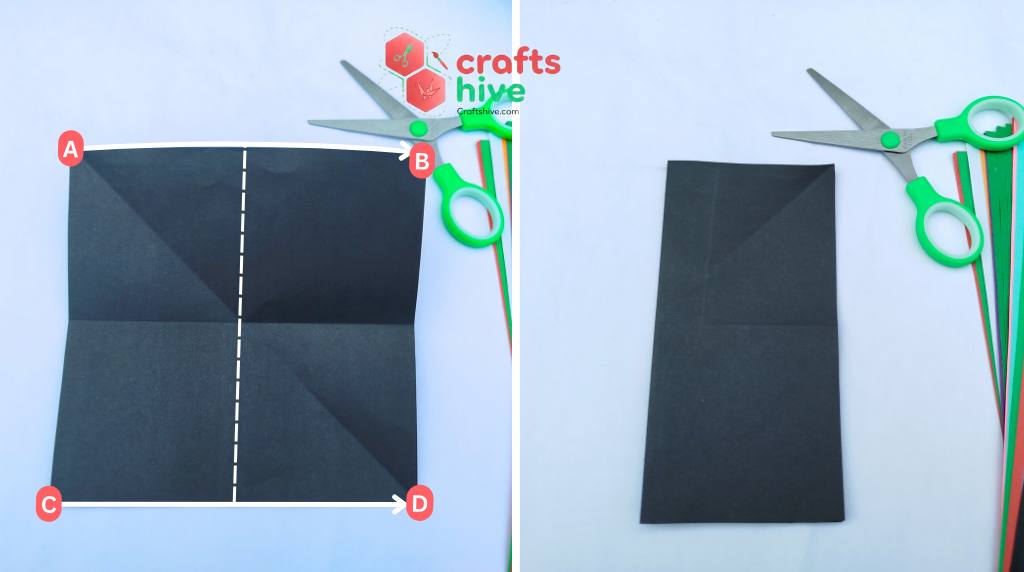
Top
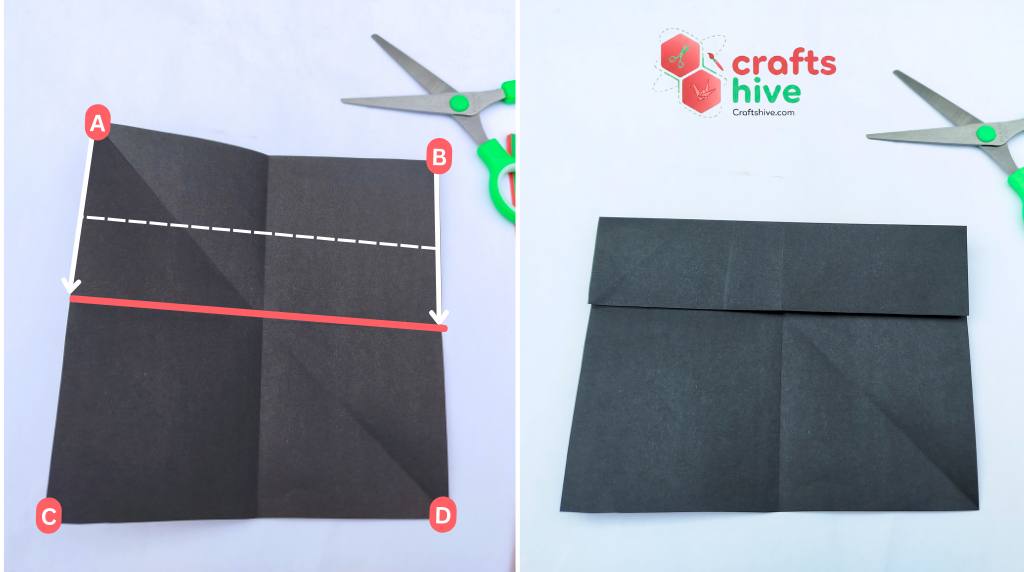
Align the top side of the unfolded square sheet with the horizontal crease. Don’t unfold then.
Label Instruction: Fold the side AB onto the x-crease.
Bottom
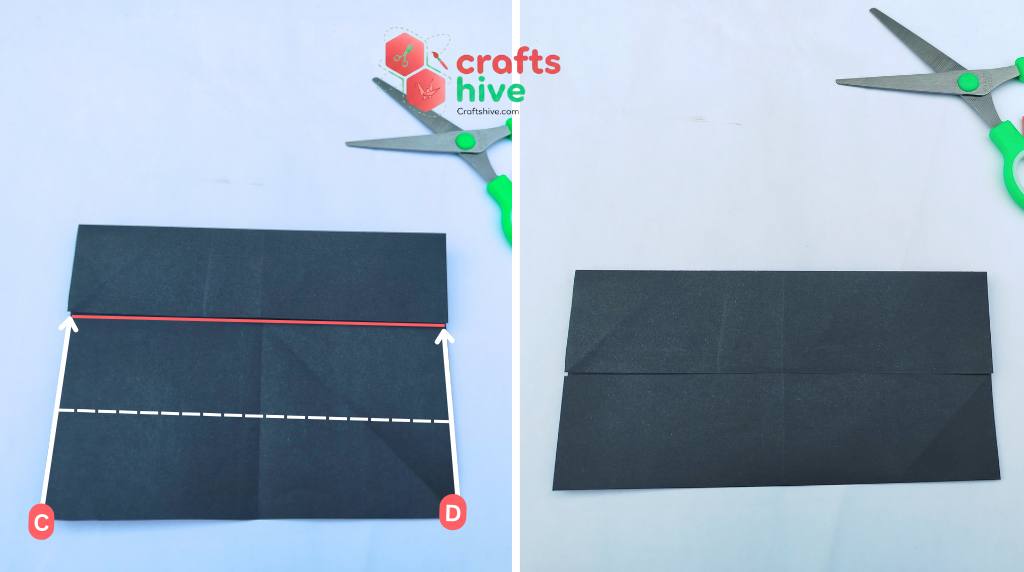
Fold the bottom side and align it with the horizontal crease. Similar to the top quarter fold, don’t unfold it then.
Label Instruction: Fold the side CD onto the x-crease.
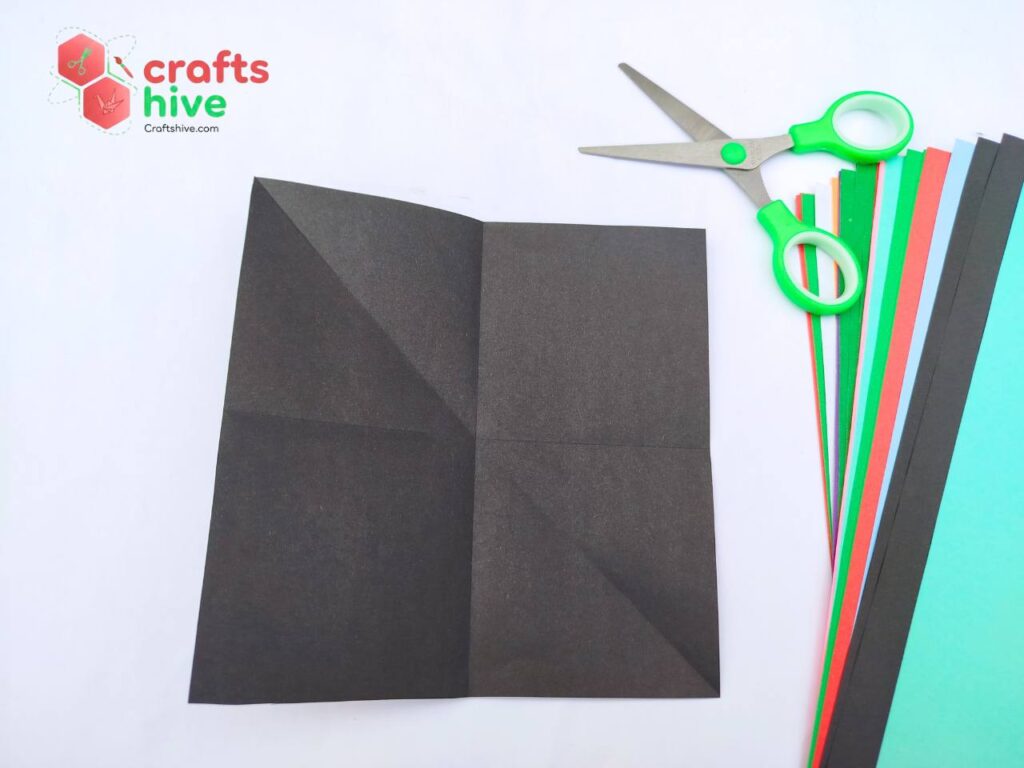
Step #3: Collapse the folded Paper in Half
We should be left with a folded rectangle with one-fourth height of the original sheet. That is 7/2 cm.
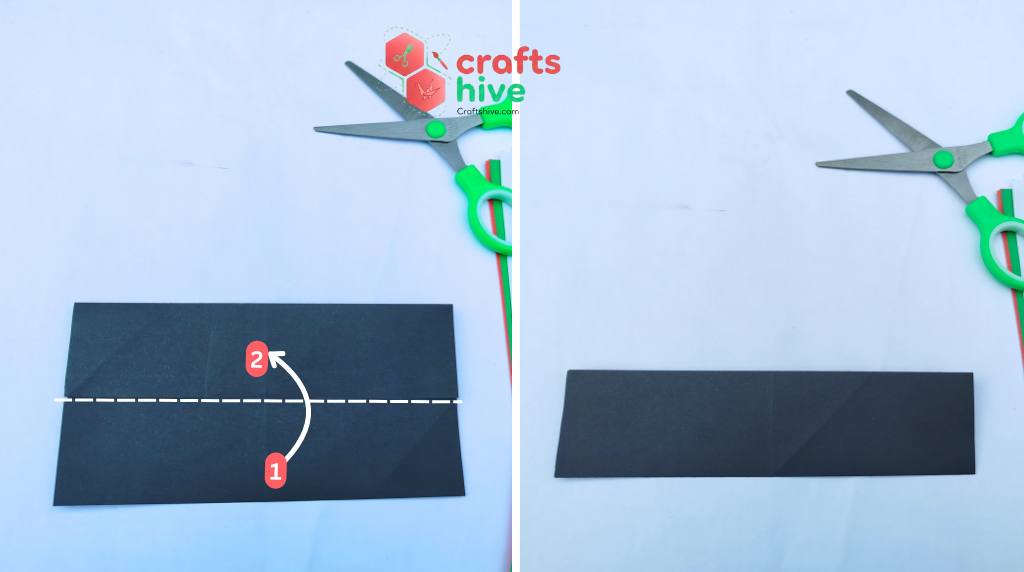
To do so, collapse the sheet with quarter folds in half by Mountain Folding the bottom section onto the top side, considering the x-crease as or axis of rotation.
Label Instruction: Mountain Fold the section labeled as 1 onto the section labeled as 2.
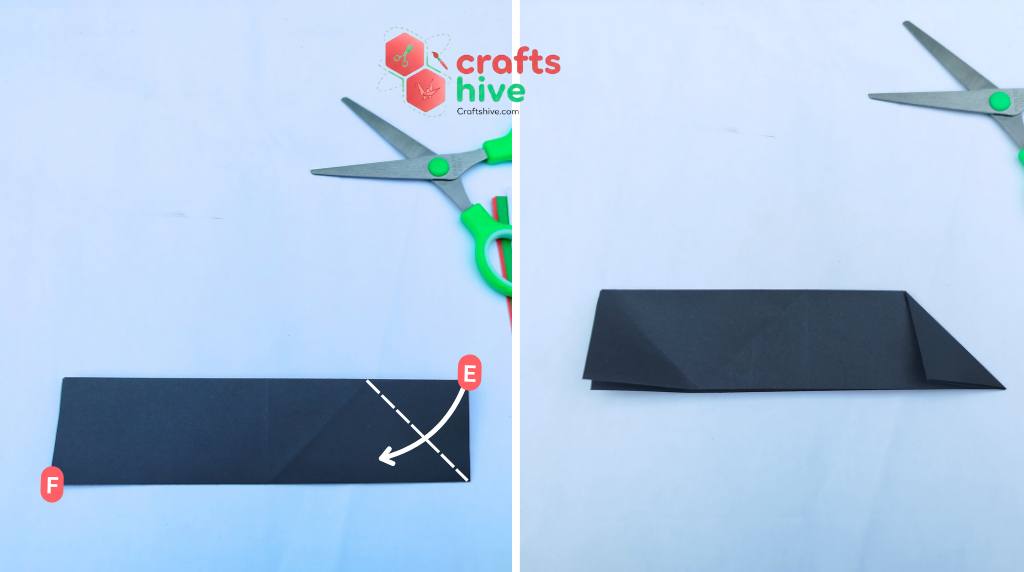
Step #4: Fold the Corners
Now, we have to make a parallelogram by folding the corners of the collapsed sheet.
Left
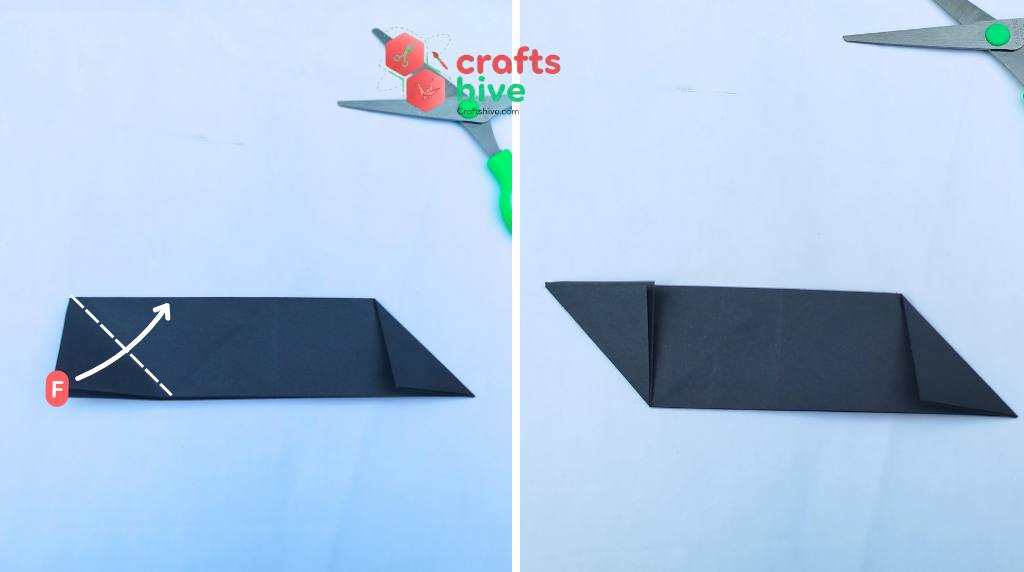
Make a diagonal Mountain Fold with the left top corner. The idea is to align the left side of the sheet with the top side of the folded work.
Right
Now, make a diagonal Valley Fold on the top right corner of the collapsed paper sheet. This is similar to folding a square sheet in half diagonally.
Step #5: Opposite Folds
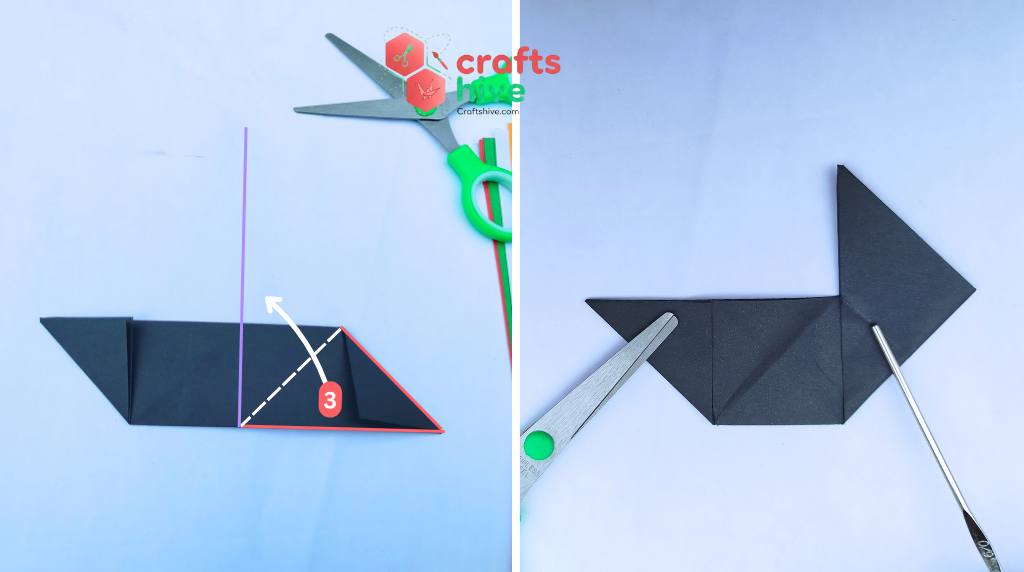
Focus on the y-crease (vertical crease), fold the entire right side, and align the bottom with the vertical crease.
Label Instruction: The right side is bordered by the red lines labeled by the number 3. The axis is represented by the dashed line.
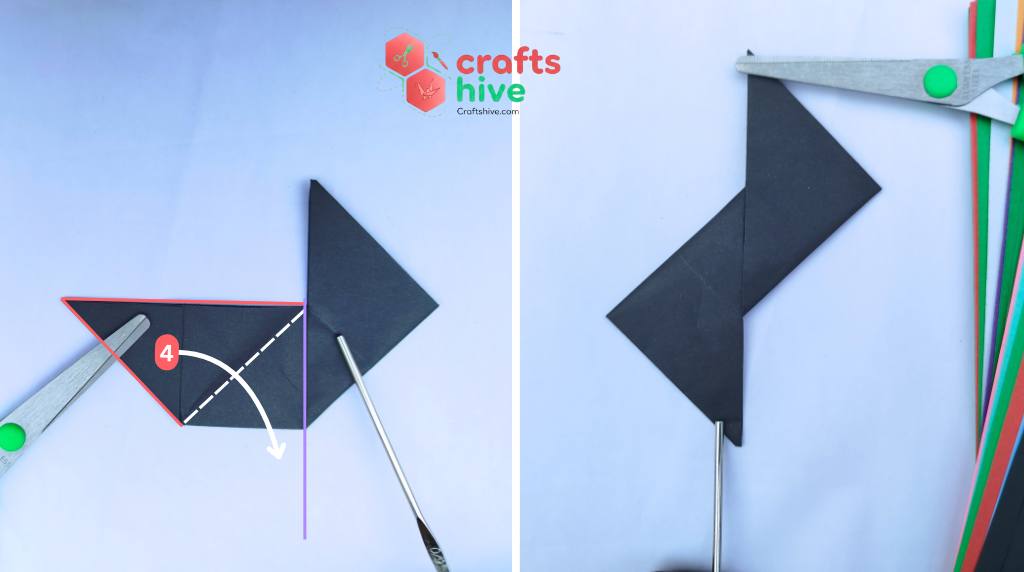
Now Valley Fold right side down to the bottom of the shape, and align the top side with the vertical crease.
Tip: Crease very well at this stage. I had to use a support to hold my work.
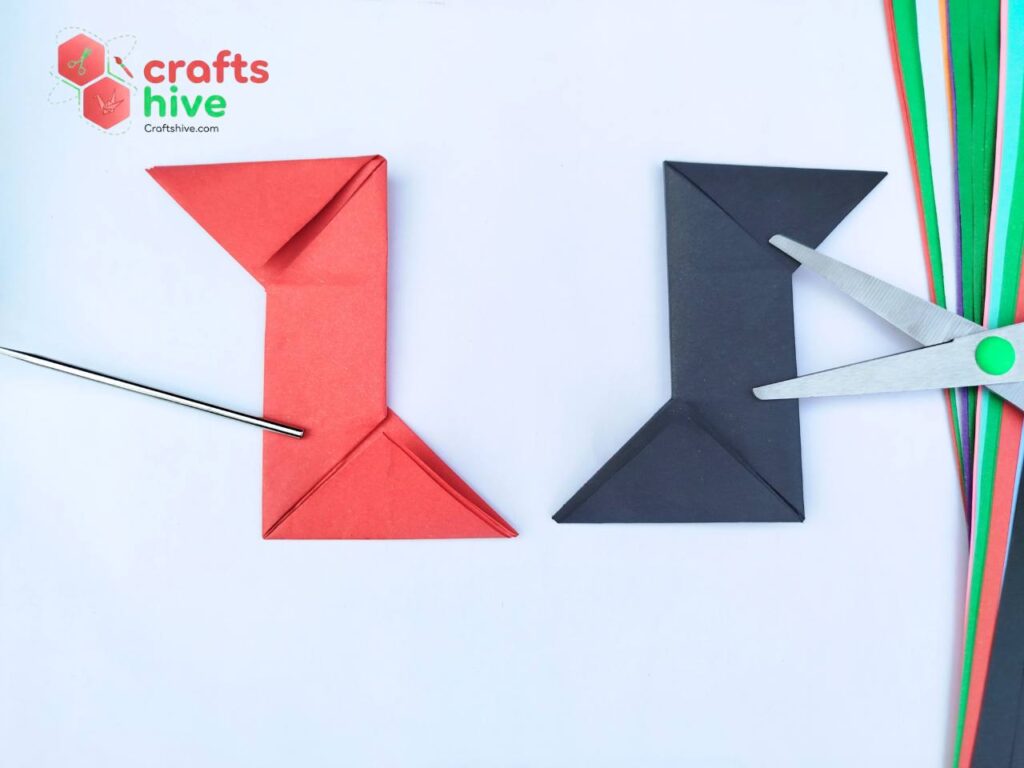
Step #6: Craft the 2nd Star Half
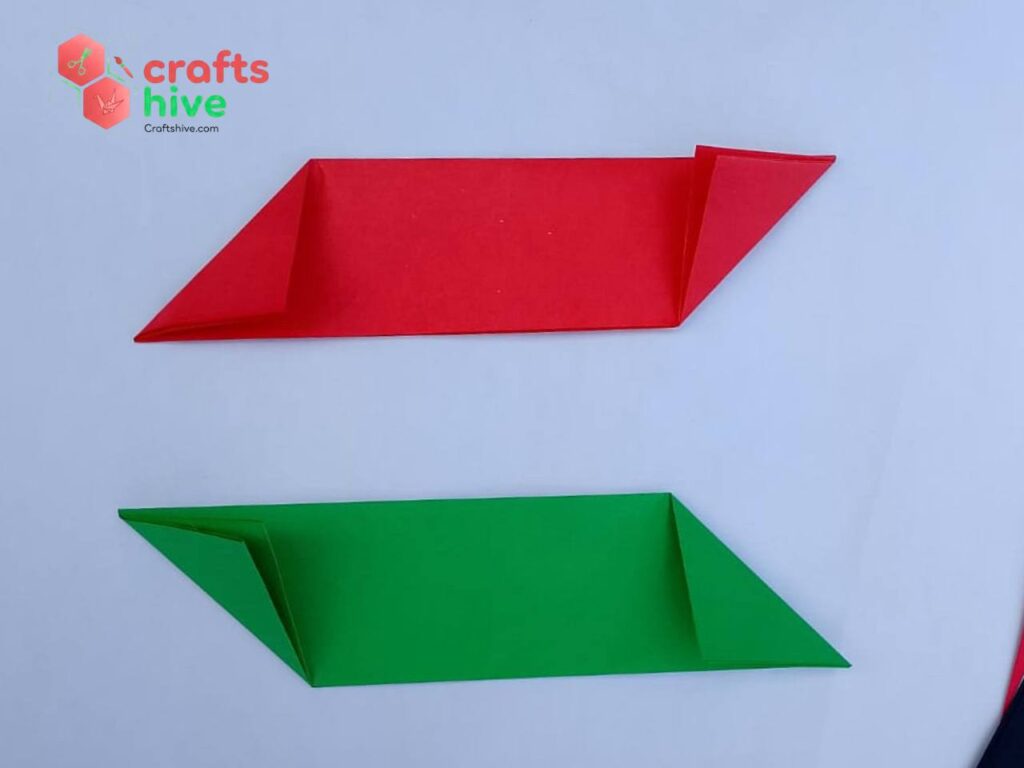
In the 2nd color, you will have to craft another such shape, following steps 1 to 6. However, the directions of the fold will be reversed.
For example, in step 4, we Valley Folded the right, and Mountain Folded the left. For the 2nd, do the opposite. Similarly, the type of fold will also be swapped for step 5.
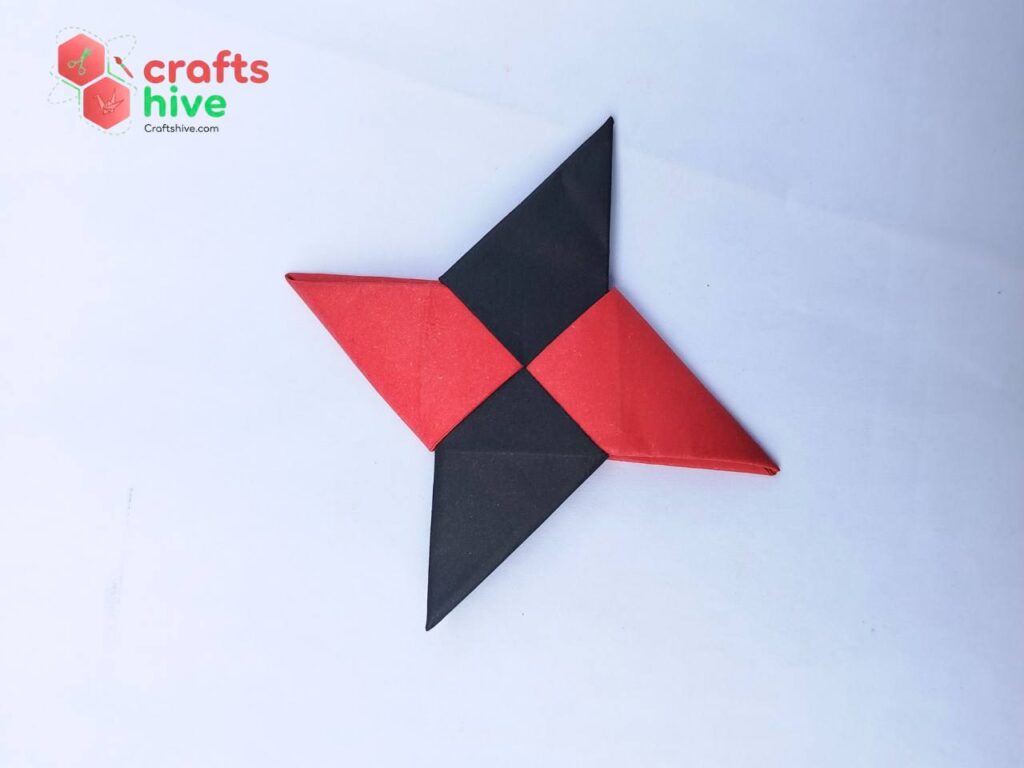
Match your models with the above picture.
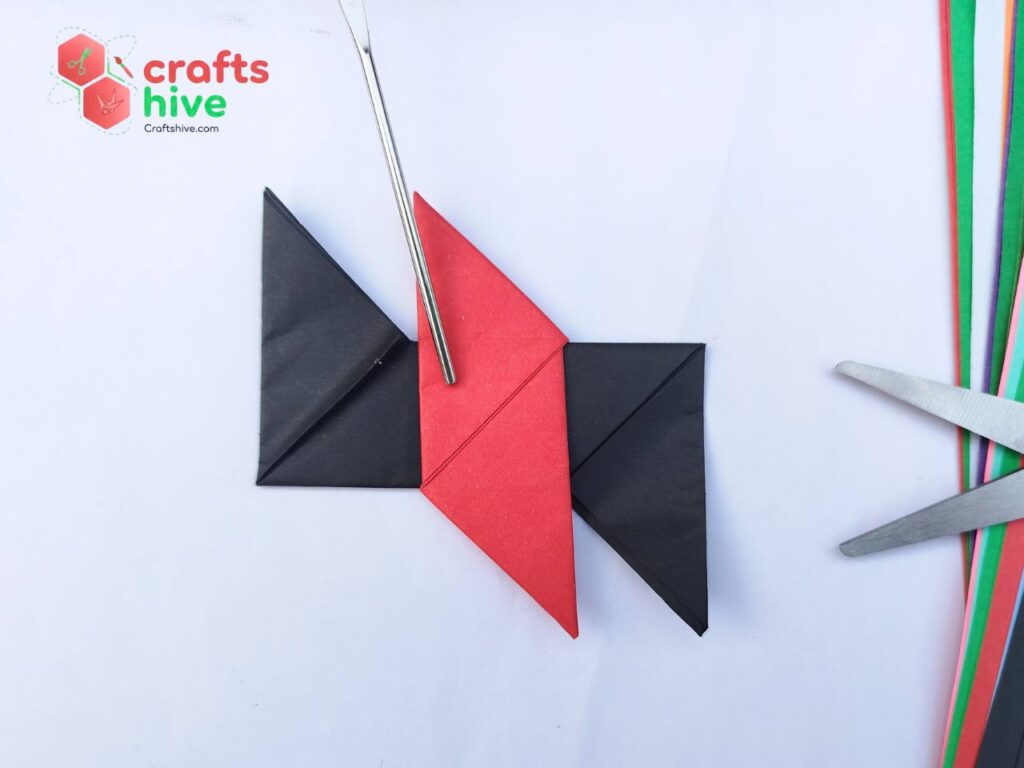
Step #7: Assembly
First place your ninja star halves side by side like in the picture.
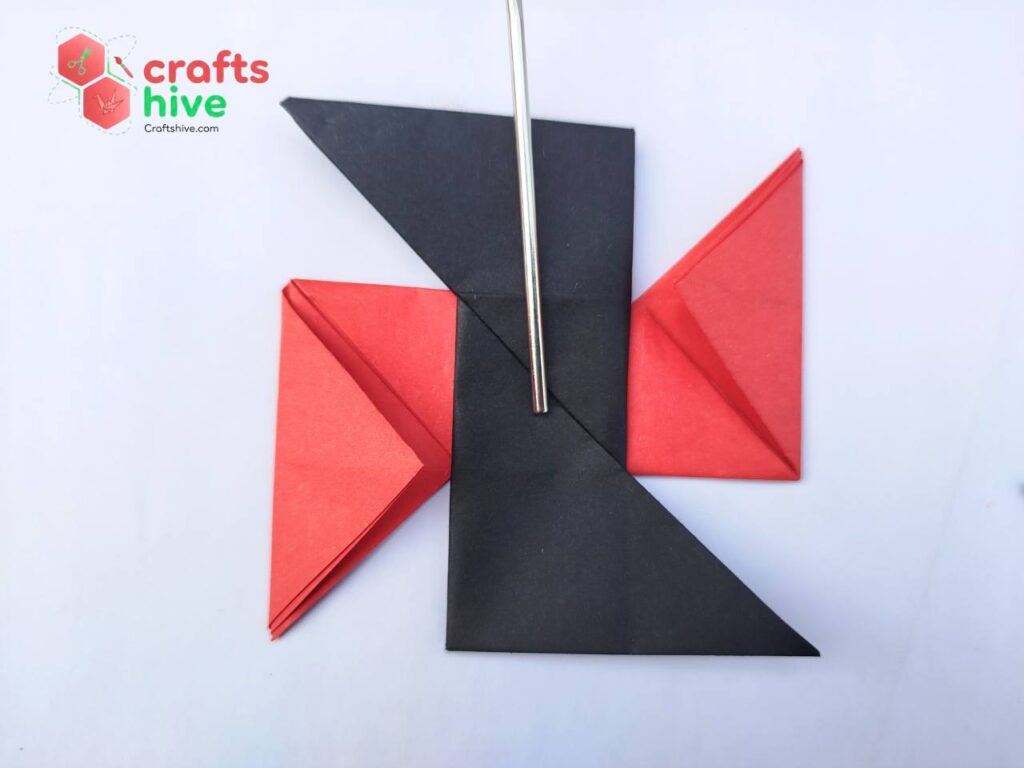
Rotate the red half 90 degrees to the left and turn the black half upside down. Place the black half above in the middle of the red half.
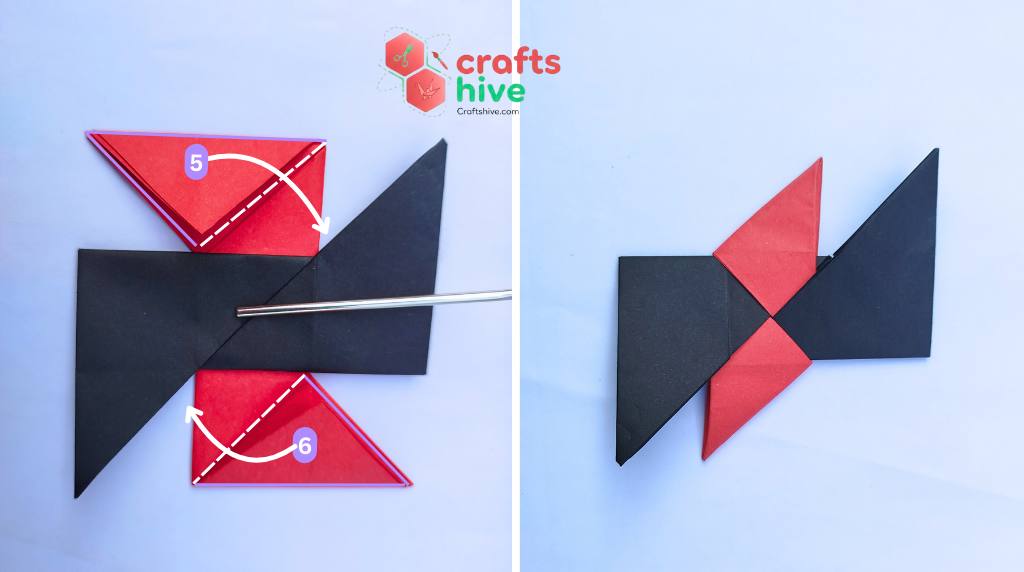
Mountain Fold the portion of the top of the red half marked by the purple lines (the inverted isosceles triangle) about the hypotenuse of the triangle. Then pass the corner through the black half down to the bottom.
Similarly, Mountain Fold the portion of the bottom of the red half marked by the purple lines (the inverted isosceles triangle) about the dashed lines (hypotenuse of the triangle). Then pass the corner through the black half up the top.
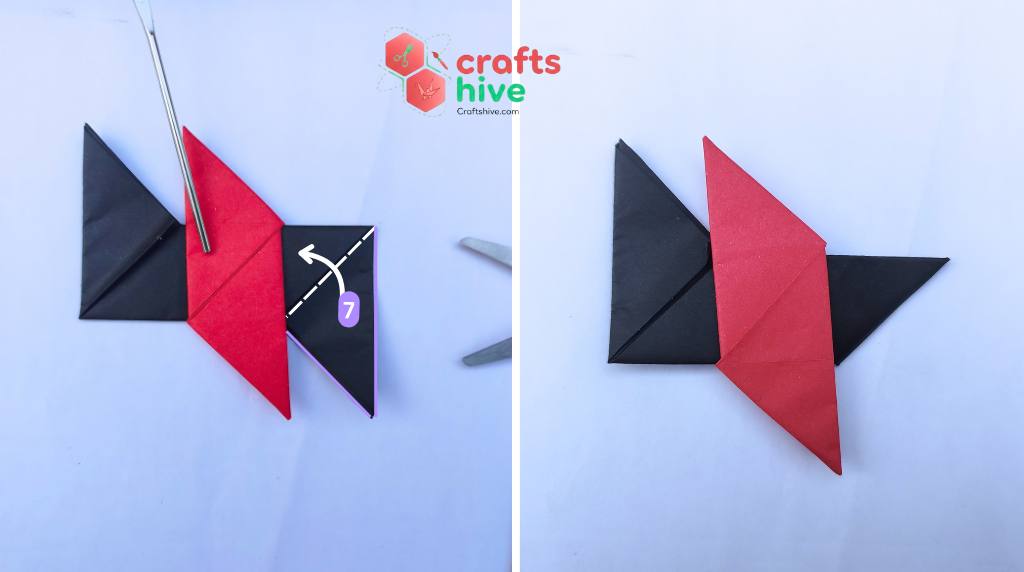
Turn the model upside down. Mountain fold the portion of the right side of the black half about the marked axis and pass through the red half this time.
Similarly, mountain fold the portion of the left side of the black half about the marked axis and pass through the red half.

Turn upside down and your origami ninja star in two colors will be finished.
Did you find the tutorial helpful? Tell Us in the Comments.
Help us improve the weak points of our tutorial by your feedback and share photos of your work to us, too. See what is next:
About "Origamist@Craftshive"
Our origamist is expert in both the traditional origami and designing some REALLY creative crafts.
 How to Fold Origami Jumping Frog in 10 Steps
By Origamist@Craftshive
How to Fold Origami Jumping Frog in 10 Steps
By Origamist@Craftshive How to Fold Easy Origami Butterfly in 12 Steps
By Origamist@Craftshive
How to Fold Easy Origami Butterfly in 12 Steps
By Origamist@Craftshive How to Craft Cute Paper Bow with Origami and Cutting
By Origamist@Craftshive
How to Craft Cute Paper Bow with Origami and Cutting
By Origamist@Craftshive How to Fold Easy Origami Penguin for Winter
By Origamist@Craftshive
How to Fold Easy Origami Penguin for Winter
By Origamist@Craftshive How to Fold Origami Sailing Boat in 8 Steps
By Origamist@Craftshive
How to Fold Origami Sailing Boat in 8 Steps
By Origamist@Craftshive How to Fold Origami Traditional Heart for Valentine’s Day
By Origamist@Craftshive
How to Fold Origami Traditional Heart for Valentine’s Day
By Origamist@Craftshive How to Make Origami Square Base in 4 Steps
By Origamist@Craftshive
How to Make Origami Square Base in 4 Steps
By Origamist@Craftshive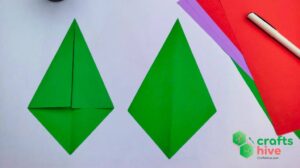 How to Make Origami Kite Base in 4 Steps
By Origamist@Craftshive
How to Make Origami Kite Base in 4 Steps
By Origamist@Craftshive How to Make An Easy Origami Swan in 13 Steps
By Origamist@Craftshive
How to Make An Easy Origami Swan in 13 Steps
By Origamist@Craftshive