

These instructions will show you how to fold a Father’s Day origami shirt with a necktie card using two square sheets of paper. I wanted it to look like a fatty Father uniform shirt. That’s why I did not cut the square sheet in 1:2 rectangle and made the sleeves longer. You can for sure have it look like the traditional origami shirt by adjusting the folds to your taste.
The idea is that you can insert the greeting card inside it because the shirt has two layers. I chose the solid red shirt and the black tie.
However, you can also use Hawaii-patterned paper for a summer shirt, and polka-dotted paper for a feminine shirt. It is very easy to fold in less than 5 minutes.
Fold Origami Uniform Shirt: Step-by-Step Instructions
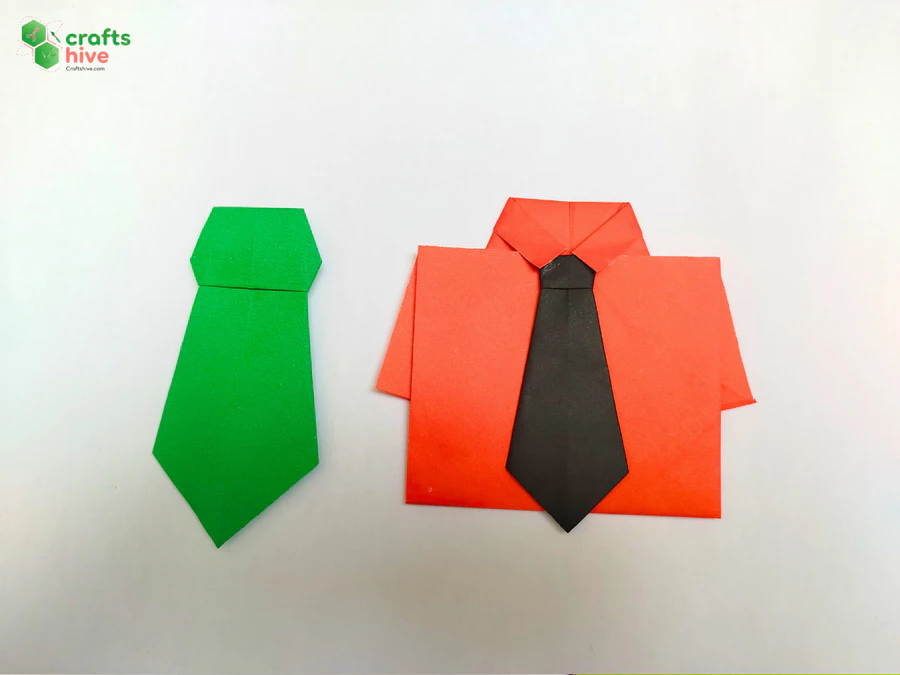
Model Type: Variation of Traditional Origami/Pure Origami
Recommended Paper: Both Kami and Tant Sheet (since this model is not two-sided, a two-color paper sheet won’t work). While working, use the color side down.
Difficulty Level: Beginner Level 2
Dimension Note: I used the uncut 15cm x 15cm square sheet of Tant paper in red for the shirt. However, most tutorials will suggest you cut this sheet in half so you are left with a 7.5cm x 15cm sheet. Note that they use a different method for folding the shirt. So, stick with the square sheet for this tutorial.
I used a square sheet in black with a diagonal length roughly equal to my shirt height. Use a protactor to cut a perfect square of such dimensions.
[ez-toc]
Step #1: Vertical Crease
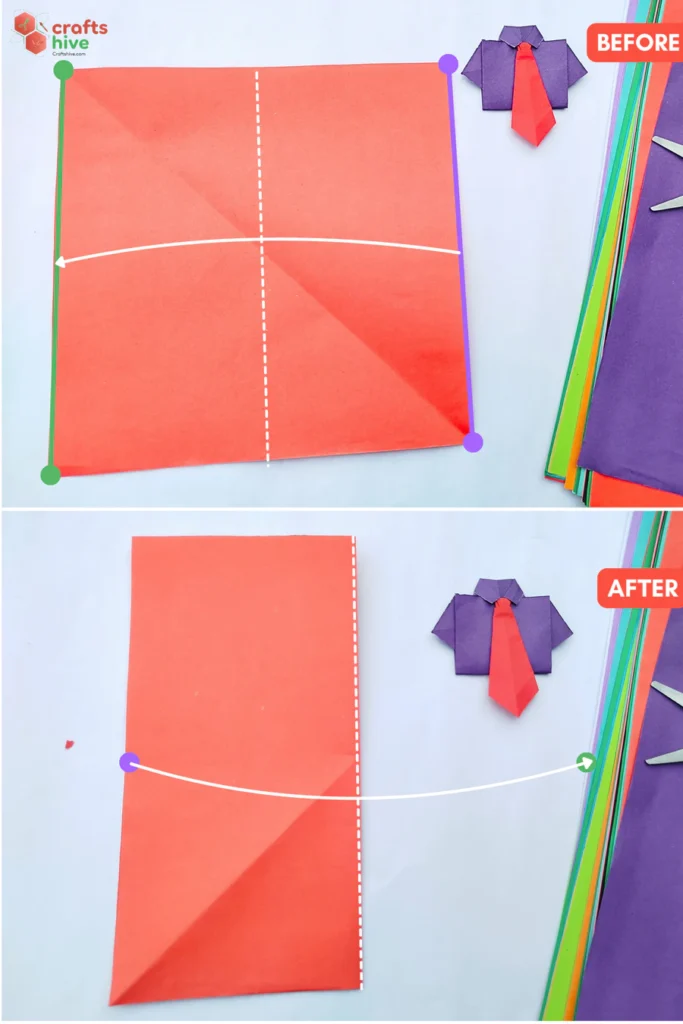
- Fold the square sheet along the horizontal, press the paper flat, and unfold to make a vertical crease in the middle.
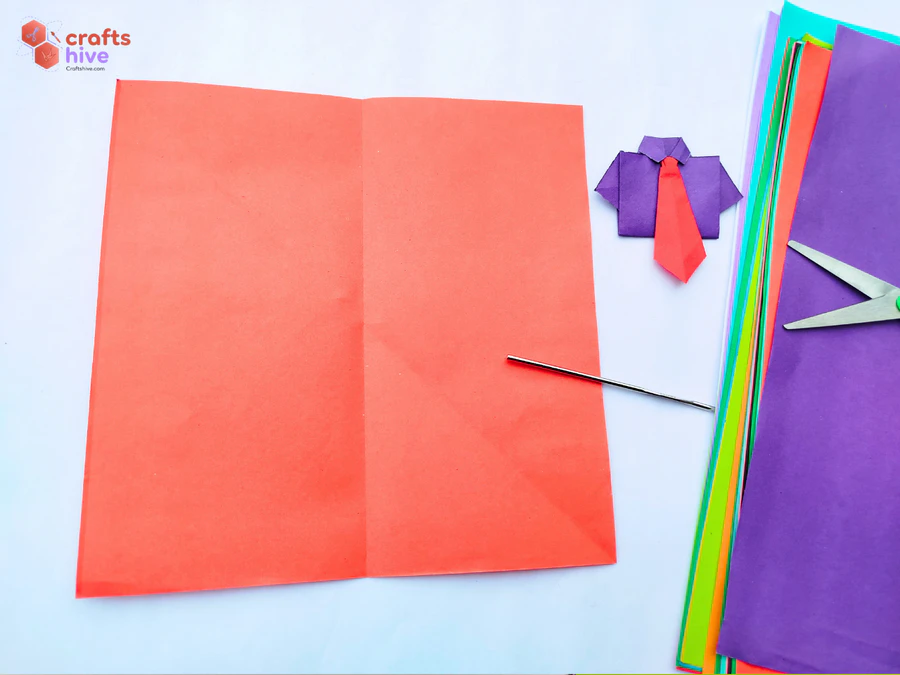
I aligned the left edge of the square sheet with the right edge, creased the paper, and unfolded the flap.
Step #2: Right Quarter Fold
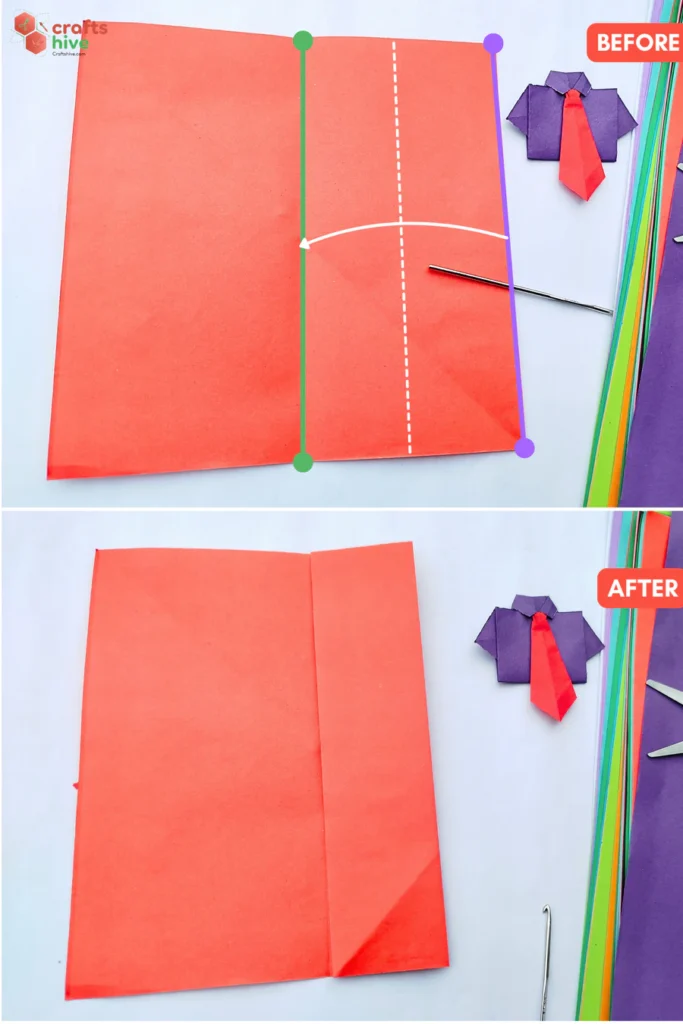
- Fold the right edge of the paper to the centreline, align it with the vertical crease, and press the paper flat. This is called the quarter fold, which halves the Half Fold.
Step #3: Left Quarter Fold
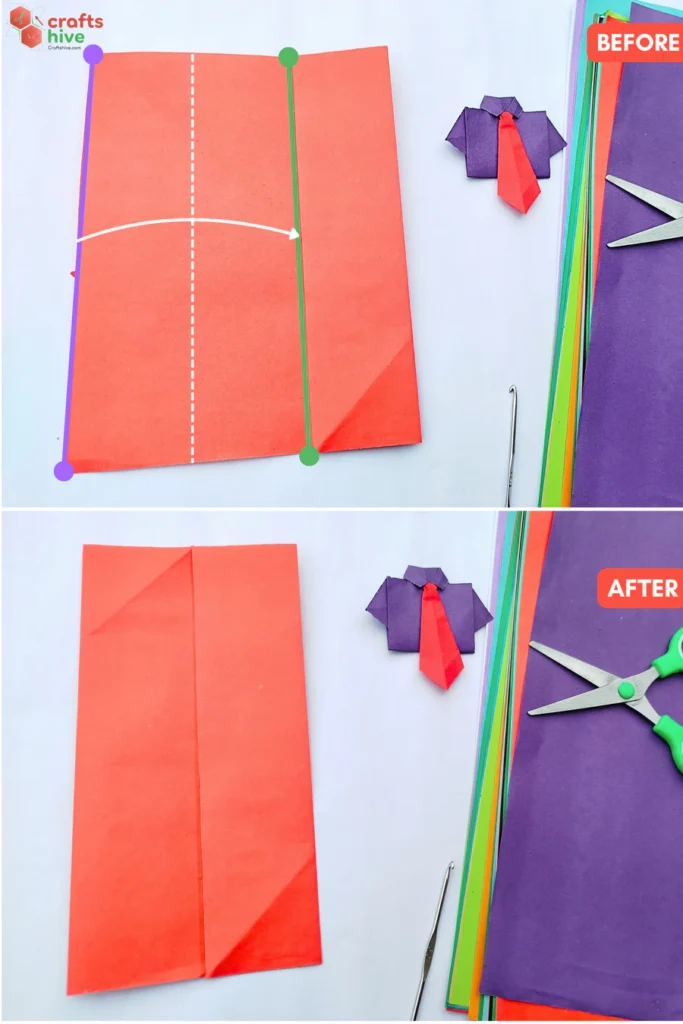
- Make another quarter fold with the left edge of the paper.
Step #4: Folds for Sleeve
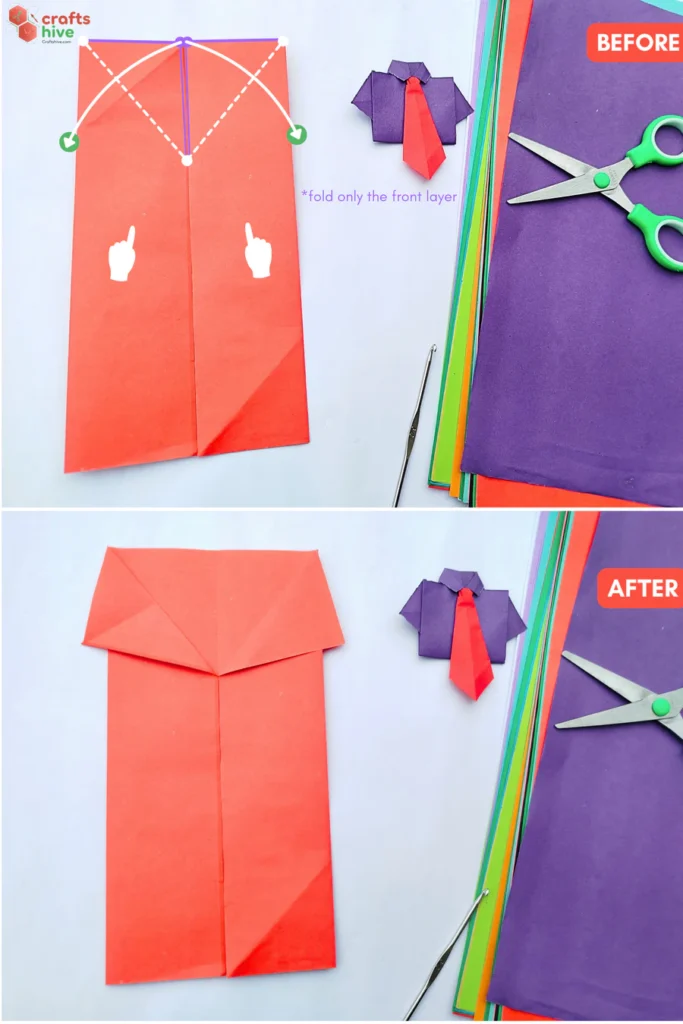
- Fold the left corner of the right quarter fold diagonally to the right. Normally, the corner in this type of fold must settle at the right edge. However, for the origami shirt, let it run away from the right edge to the outside. How far it goes away decides the thickness of the sleeves of the shirt. For the traditional shirt, extend the fold further than mine.
- Make a similar fold with the right corner of the left quarter fold, too.
Note: The extension of the flap must be symmetric for both sides for the identical sleeves. Also, I folded the sleeves a little less
Step #5: Turn the Side
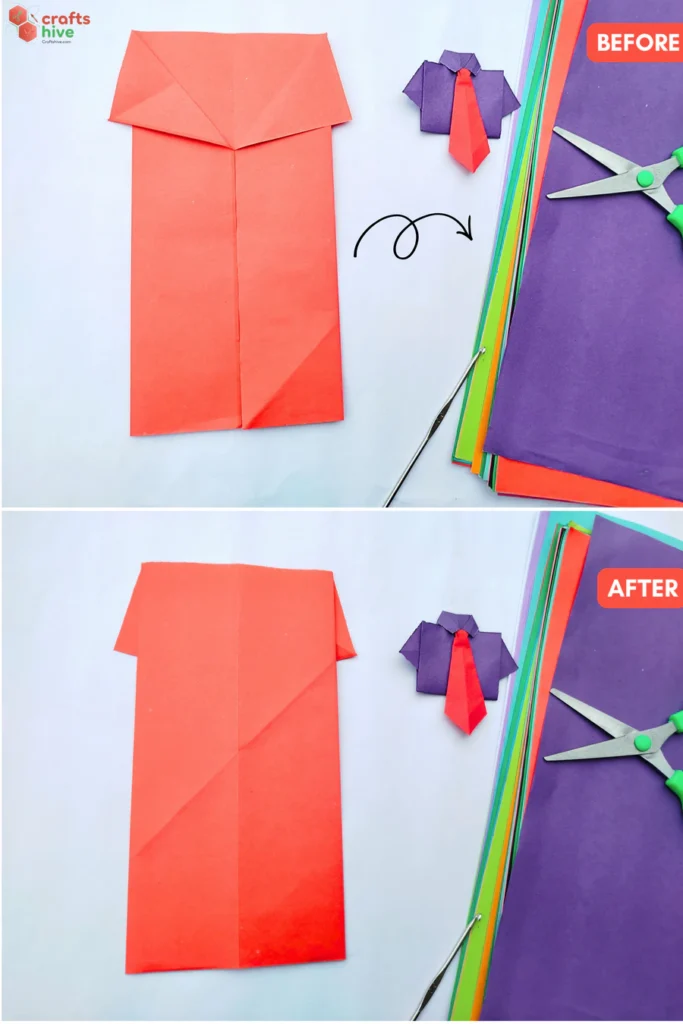
- Turn the entire model over to the other side.
Step #6: Valley Fold
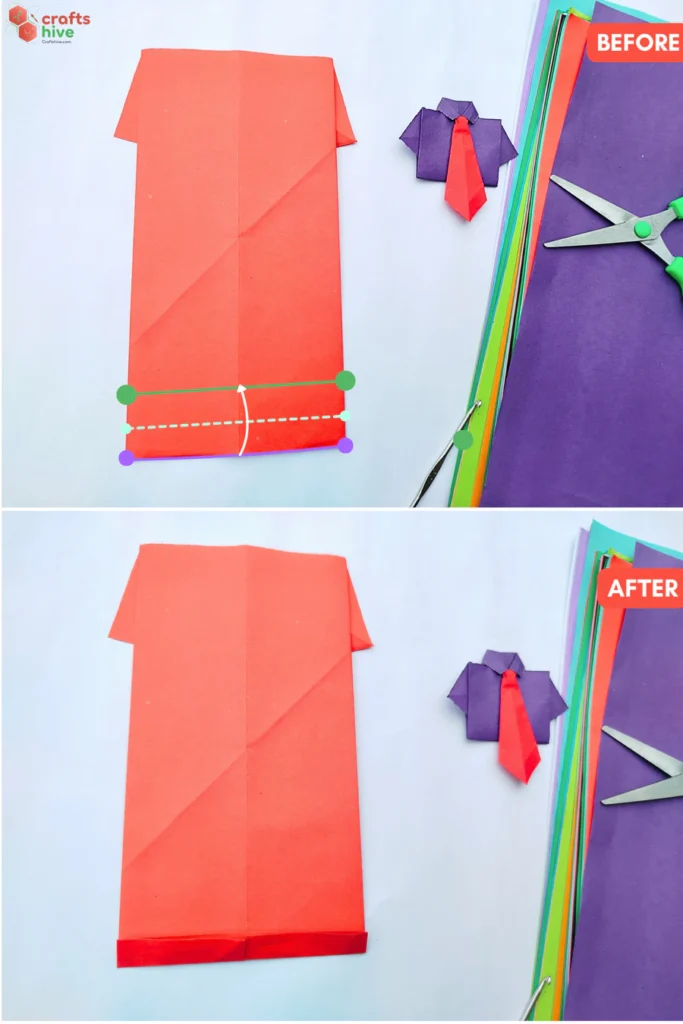
- Valley Fold the bottom edge of the model. The height of this fold decides the thickness of the collar of the finished origami shirt.
Step #7: Turn the Side
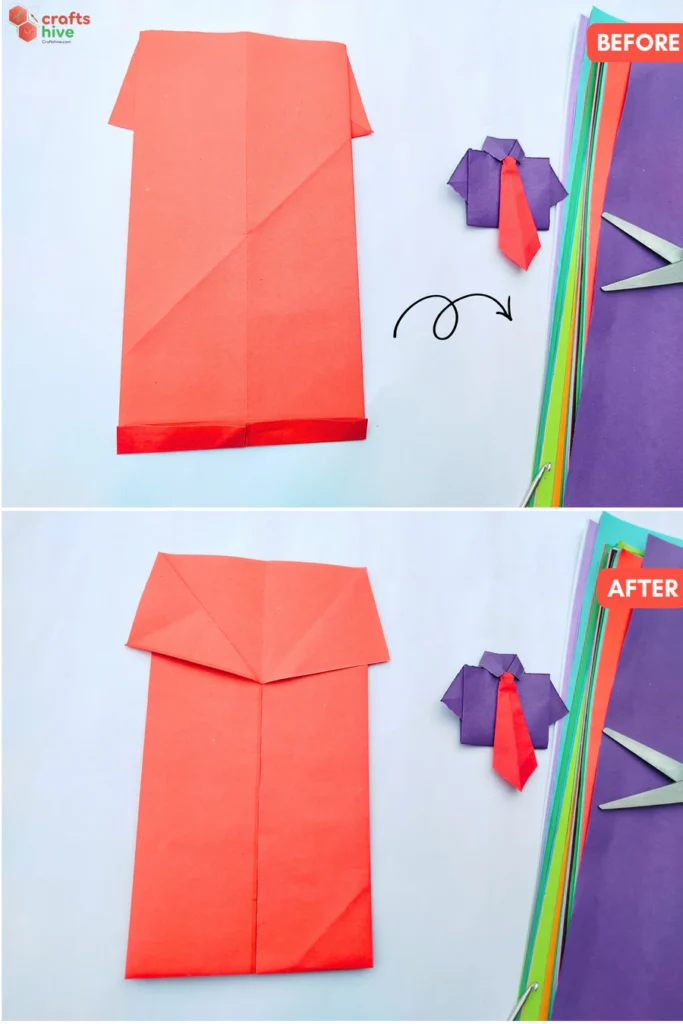
- Turn the model over again.
Step #8: Folds for the Collar
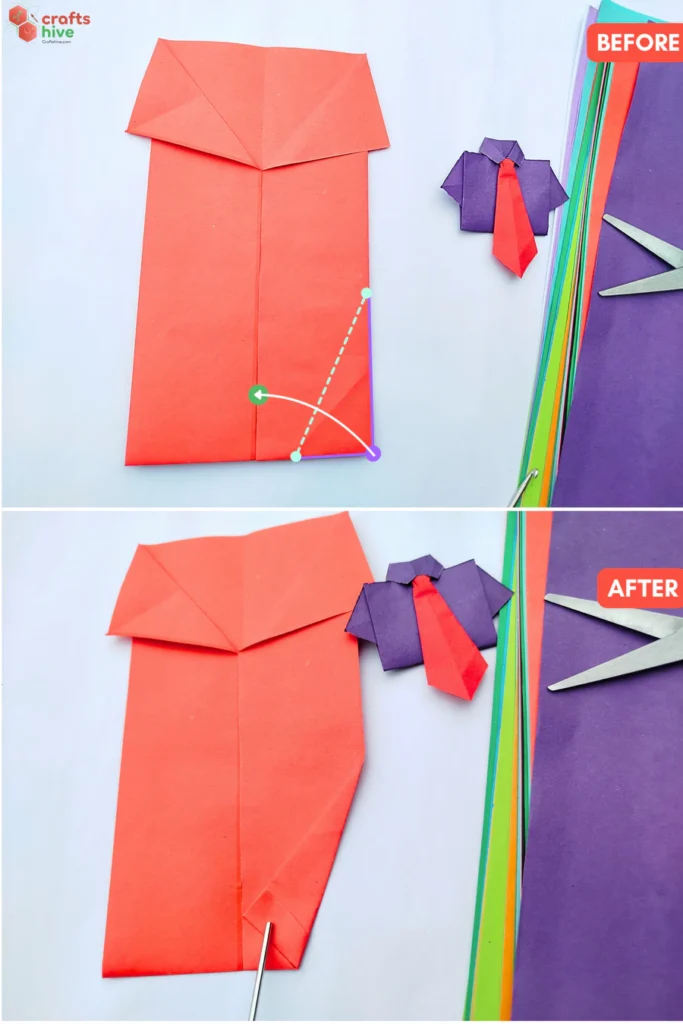
- Fold the bottom right corner of the model to the centreline, lift it to taste and settle it onto the vertical crease by pressing the paper flat.
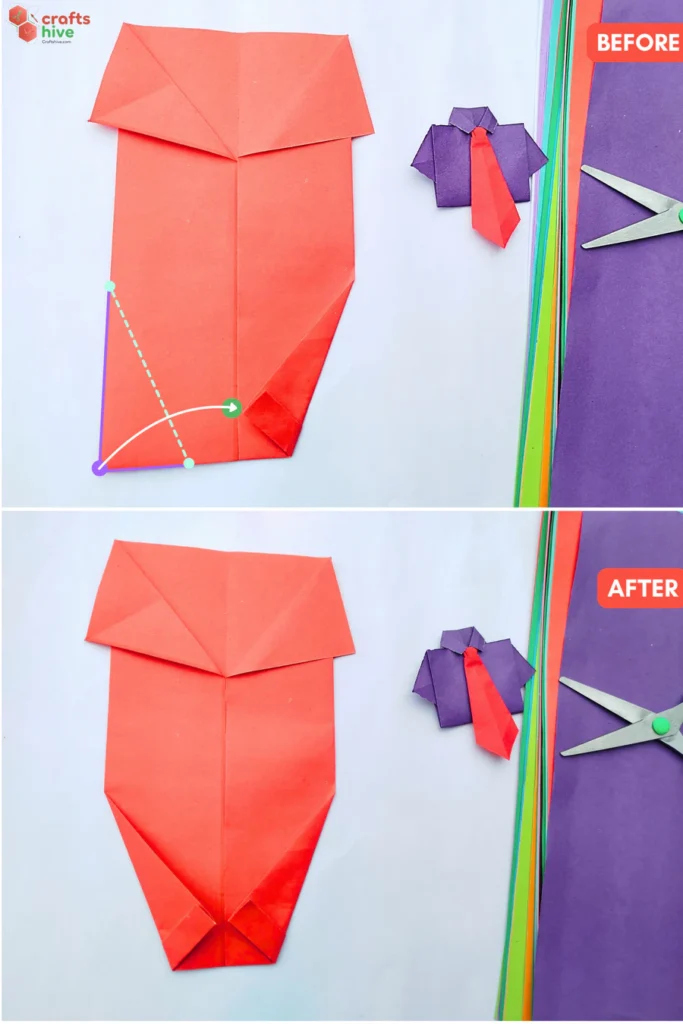
- Now, fold the bottom left corner of the model to the centreline, lift it as much as you did for the right fold and settle it on the vertical line.
Step #9: Rotate
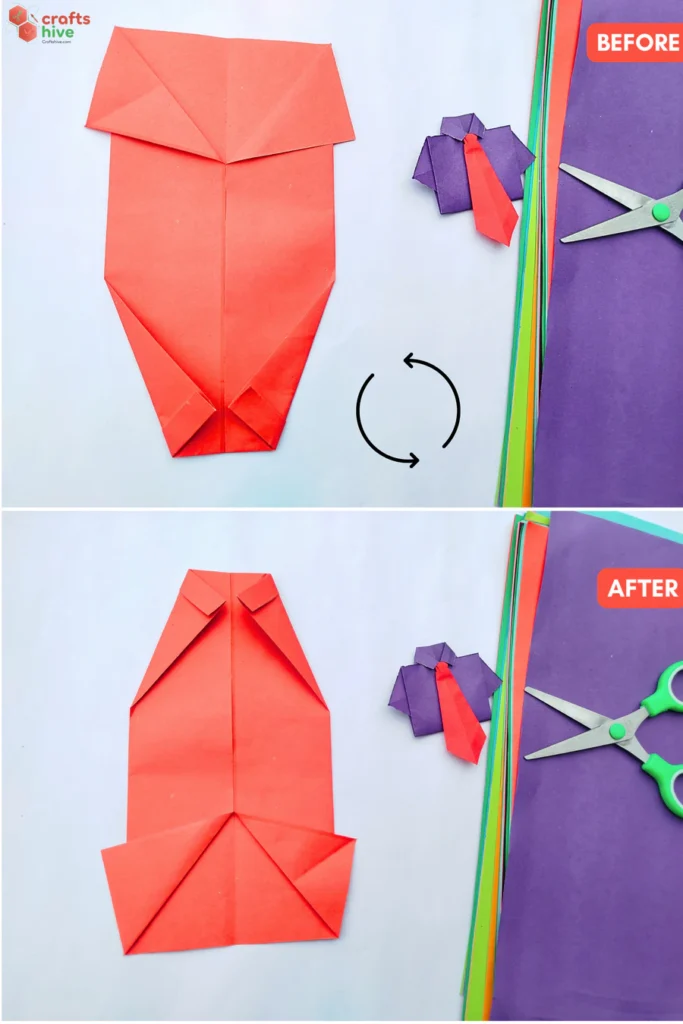
- Rotate the model 90 degrees sideways. This is the right orientation for the shirt.
Step #10: Mountain Fold
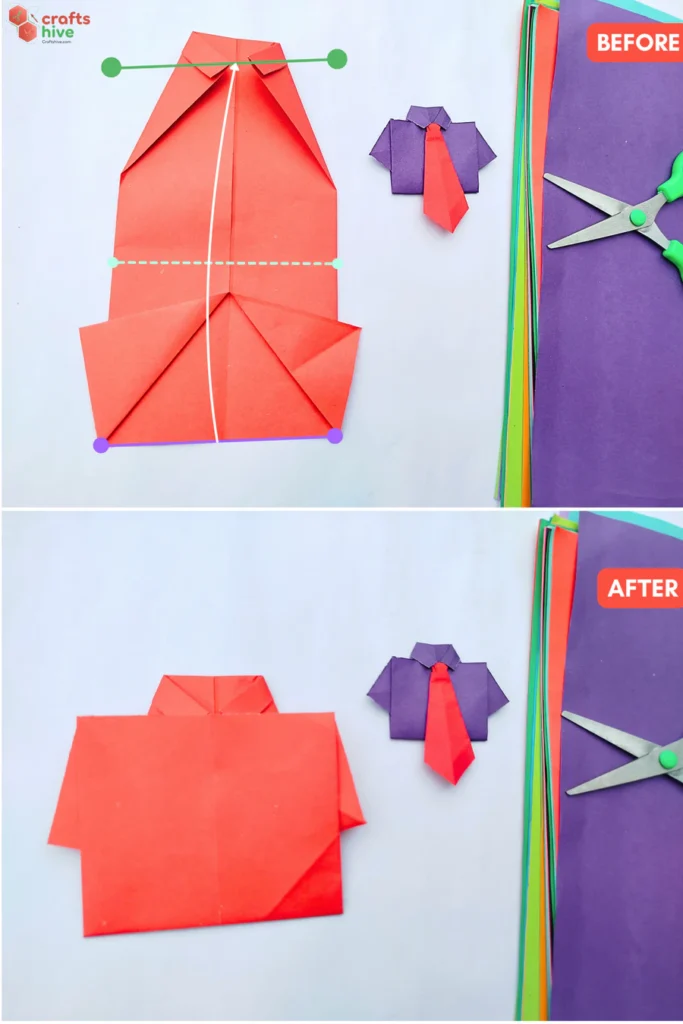
- Mountain Fold the bottom edge of the model all the way upto the collar of the shirt. Let the edge settle at the middle corners of the collar.
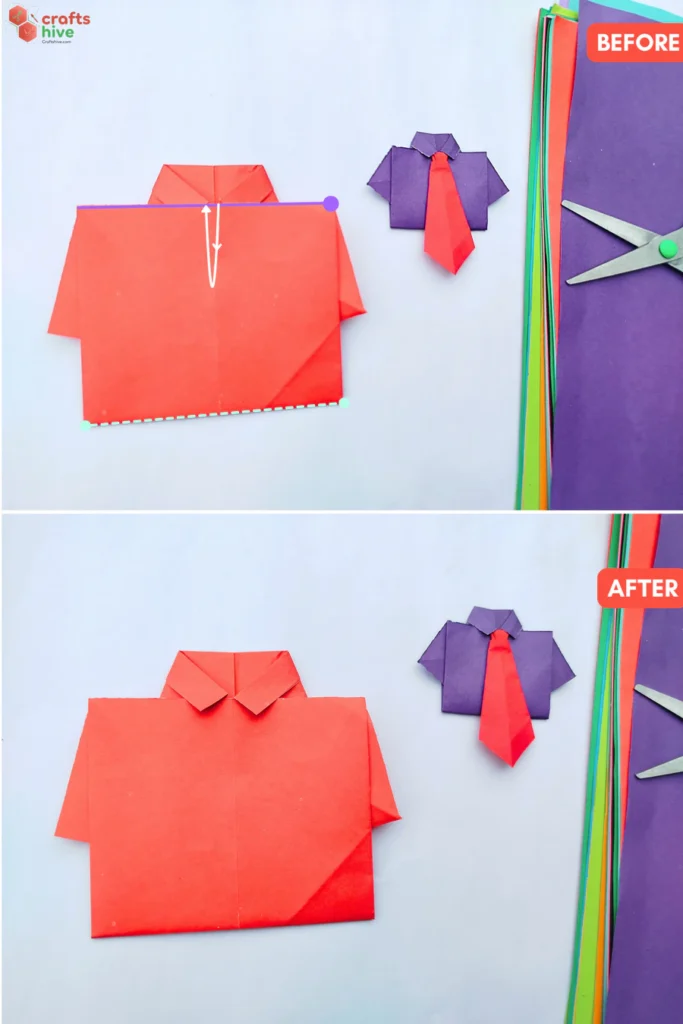
- Pull the edge back a little, then insert it below the collar and press the paper flat.
That’s it, this is how to fold an origami shirt. You can adjust certain folds, like for the sleeves and the cuff to make it better fit for you. Especially, mine was intentionally a little off from the traditional model, so you can test yourself to make it like that.
Make a Tie
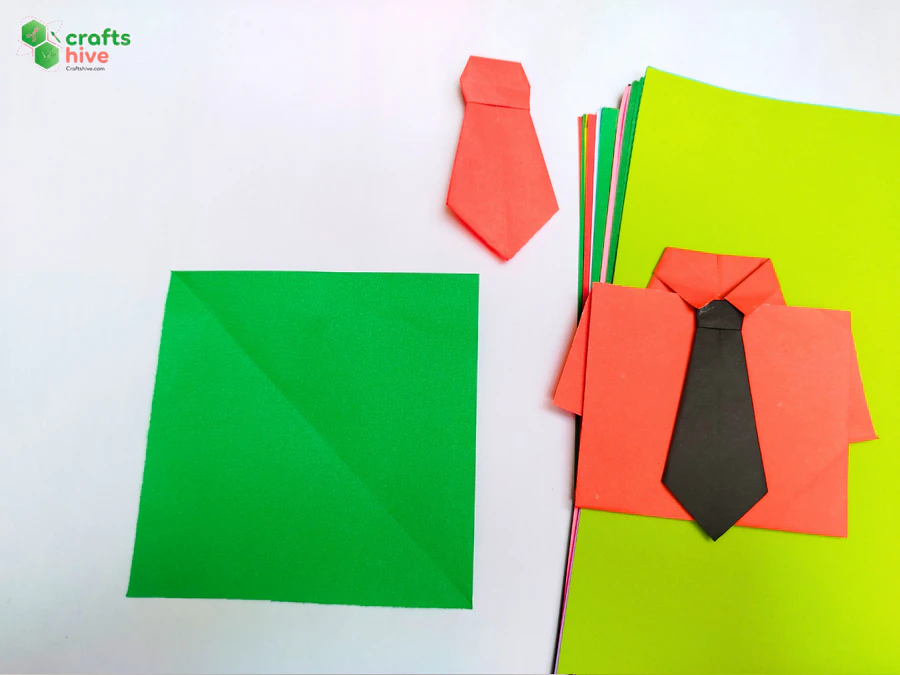
Learn how to fold an origami from my tutorial. The diagonal length of the tie must be equal to the height of the shirt. Apply some glue to the back of the tie knot and insert inside the collar. And here is the final look: 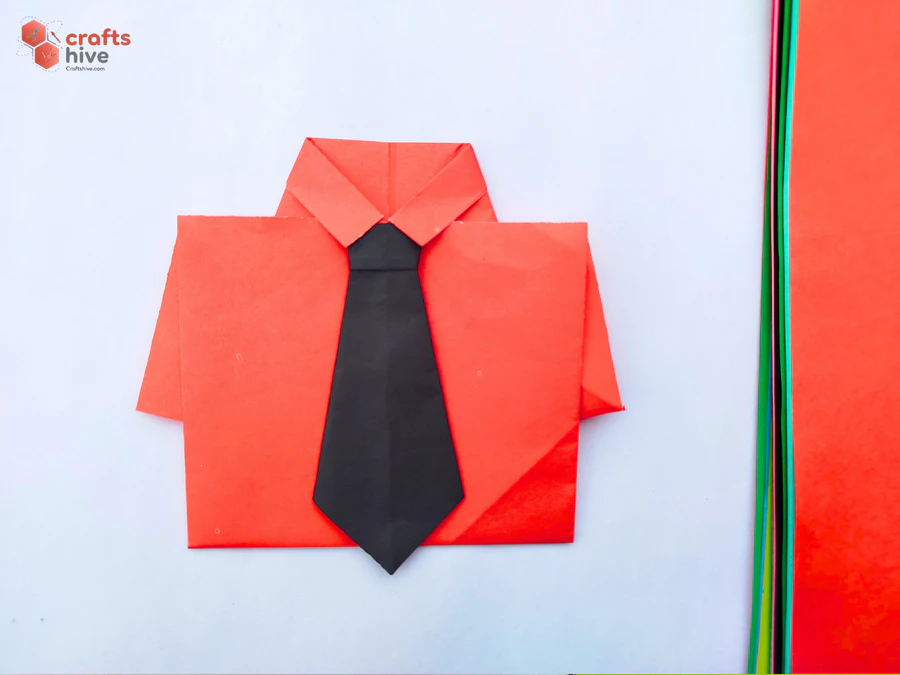
Was this Origami Tutorial Helpful? Tell us in the Comments.
Your feedback is a great way for us to improve our origami tutorials. So, share your thoughts on whether you tried this one or not, and highlight the weak points.

About "Talha"
Hey, I’m Talha, the Crafter on Craftstive.com. I love to share guides on folding cute origami models and paper crafts, and I am always ready to inspire your next craft project with my weekly craft discussions.