
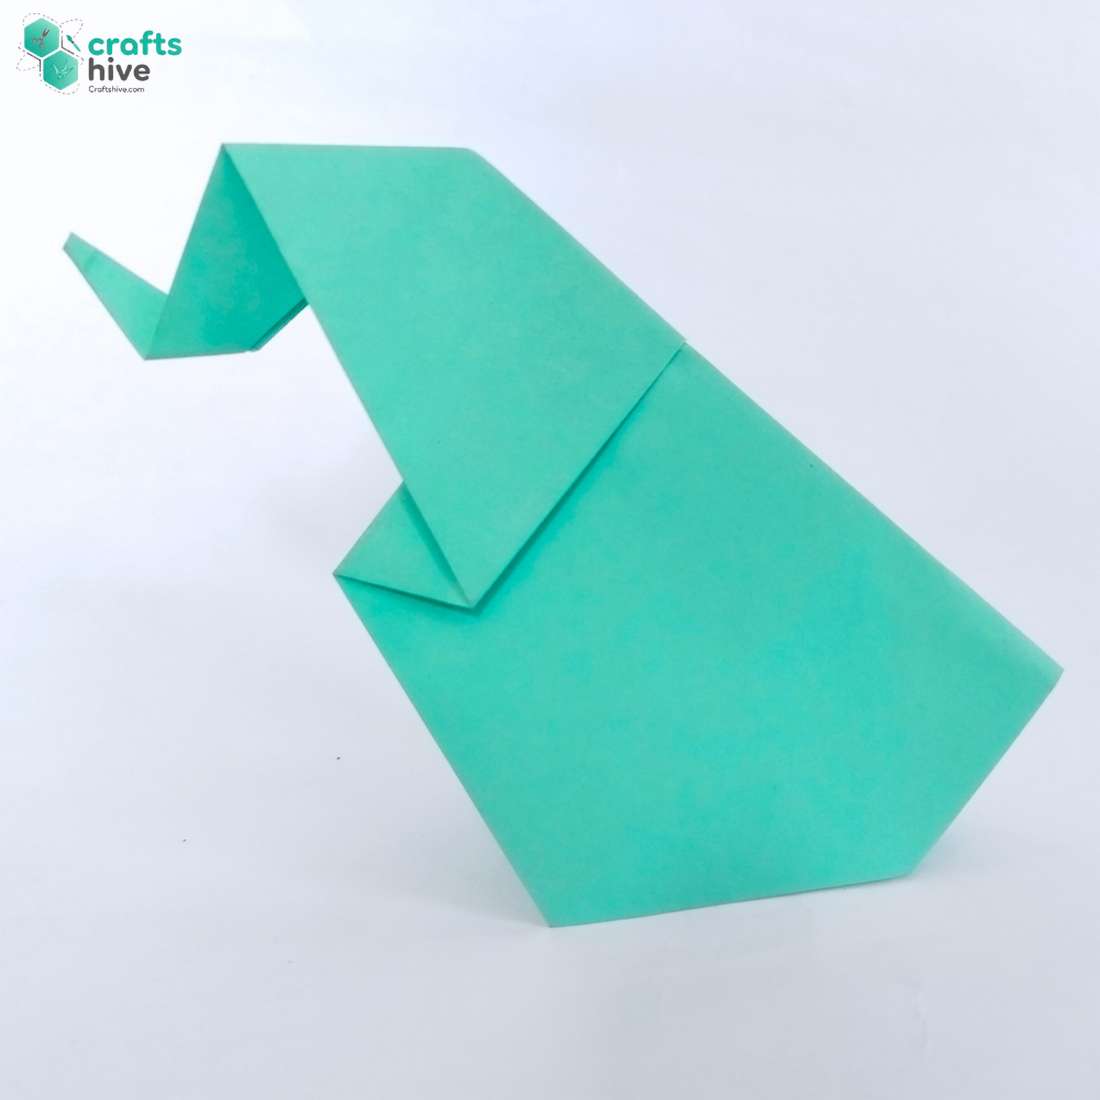
Learn how to fold a cute sitting elephant with 12 simple origami steps. This is a traditional model and can be folded from the Kite Base, basic folds, and Inside Reverse Folds.
It is a perfect model to practice origami basics and have a cute paper elephant for kids that perfectly balances on the table.
In the upcoming tutorial, I will also show you how to fold a Shouting Elephant. You can also draw a kawaii face on it in the way you like. That part, I leave up to you.
[ez-toc]
Origami Sitting Elephant: Step-by-Step Instructions
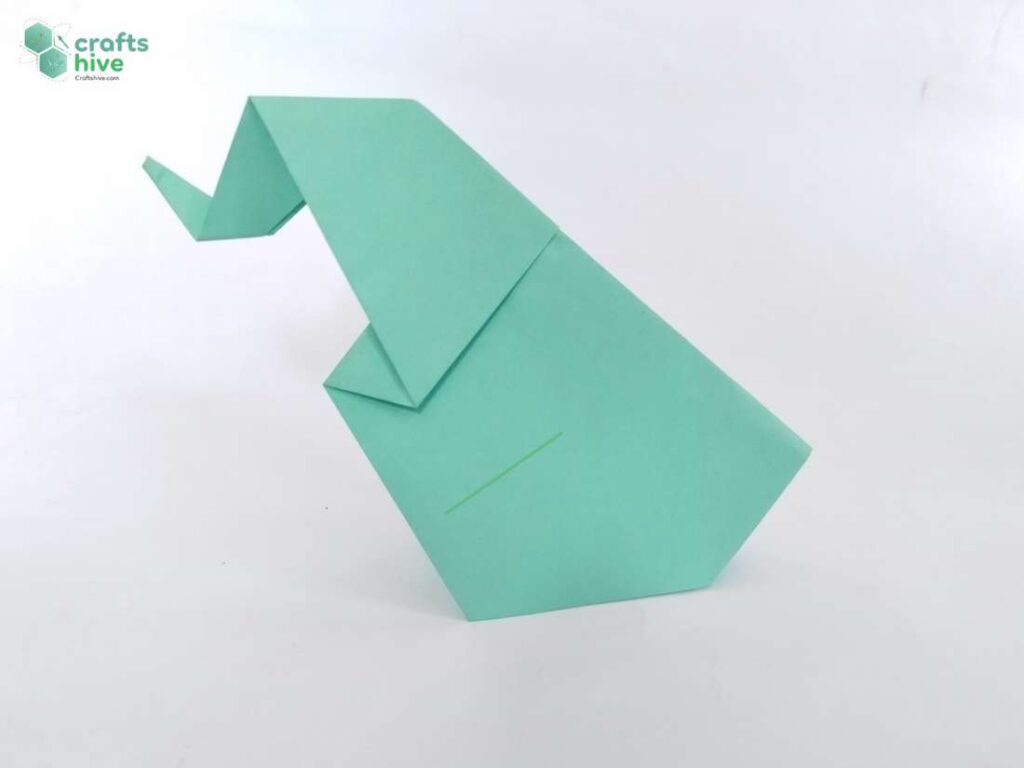
Model Type: Traditional/Pure Origami
Difficulty Level: Beginner Level 2
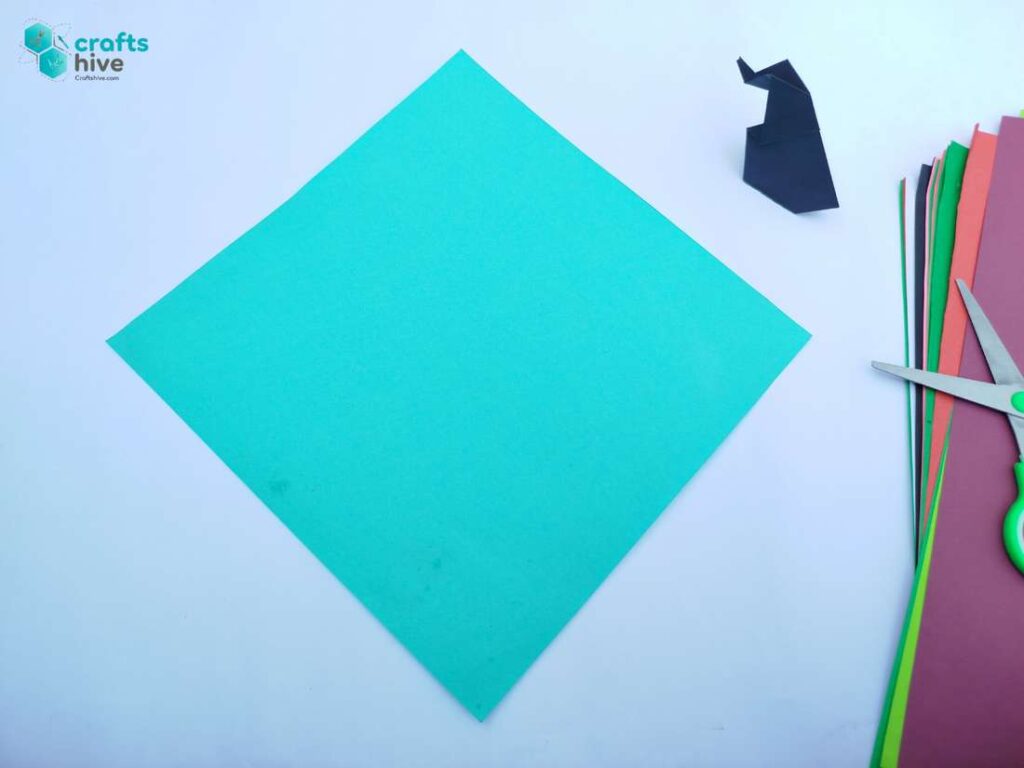
Recommended Paper: This model does not show both sides of the paper, so I would recommend using Tant Paper (I will be using a 15cm by 15cm square sheet of aqua and black paper).
Starting Fold: Kite Base
Folding Terms:
- Valley Fold: Fold the paper such that the side facing up coincides with itself.
- Mountain Fold: Fold the paper such that the side of the paper facing down coincides with itself.
Pre-Tip: Be sure to press the paper flat after each fold.
Before you start: To fold the origami elephant based on my references, place your square sheet flat in the diamond position.
Step #1: Middle Crease
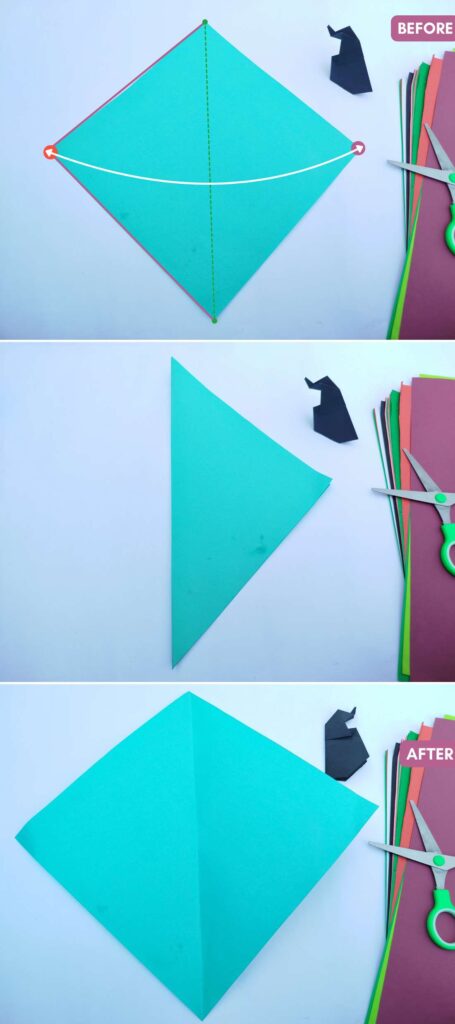
- Fold and unfold the paper in half along one of the diagonals. In my case, I folded along the vertical diagonal.
We’ll use the resulting crease in the middle as a reference for kite folds.
Step #2: Kite Base
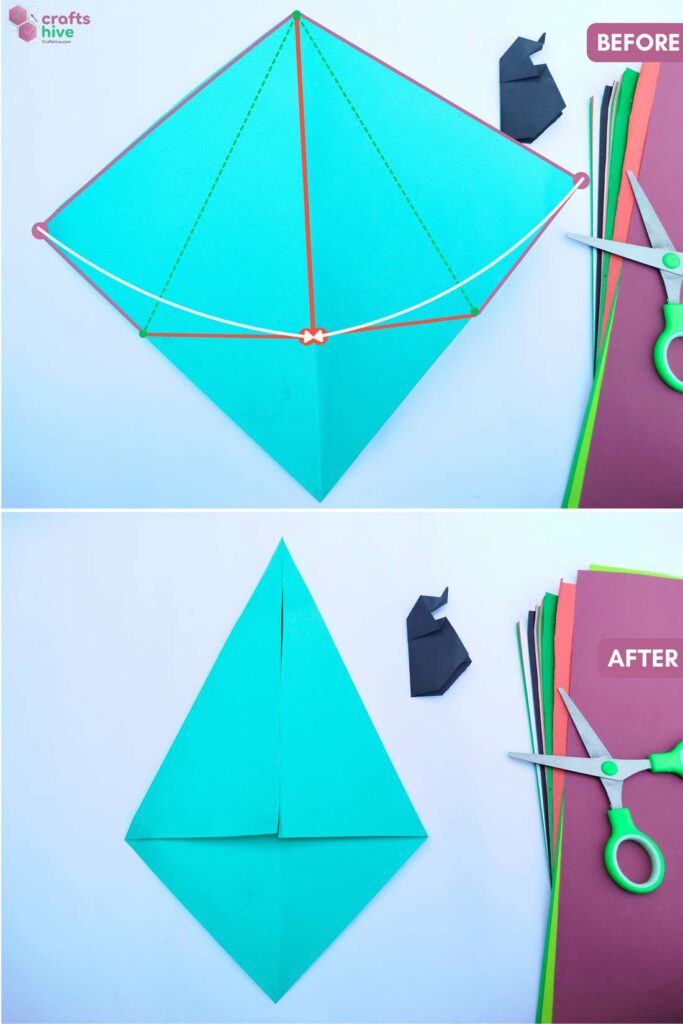
- Align the Top edges of the Diamond with the middle crease by folding the side corners to the centreline, and press the paper flat.
Since we folded two Kite Folds, we have folded the Traditional Kite Base.
Step #3: Turn
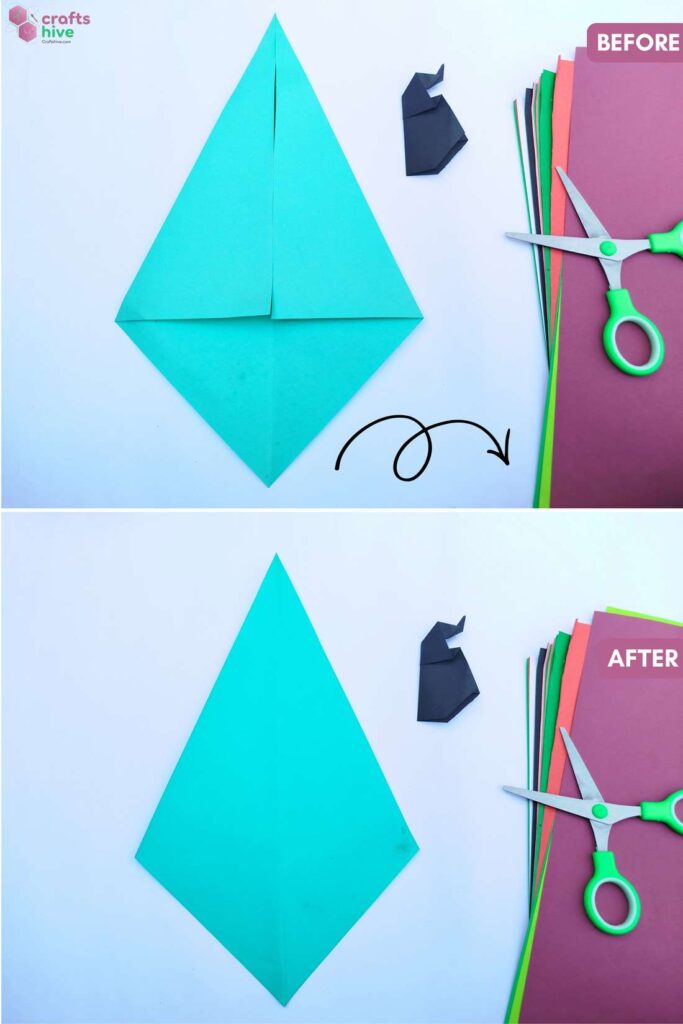
- Turn the Kite Base over to the other side.
Step #4: Fold Down
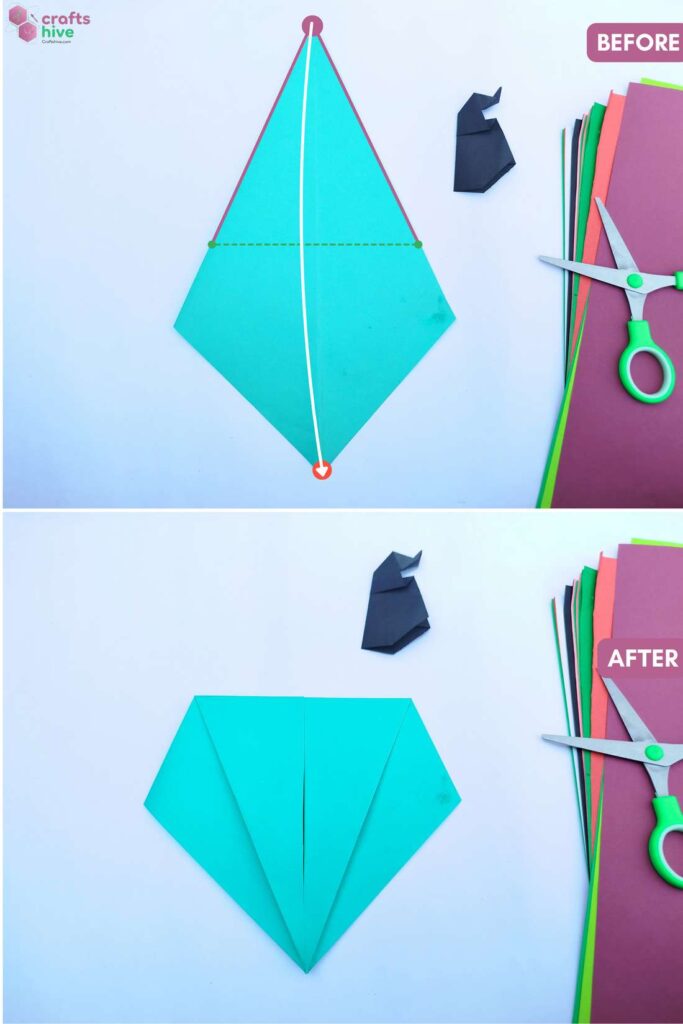
- Fold the Top Corner of the base down to the Bottom Corner and crease the fold.
Step #5: Fold Up
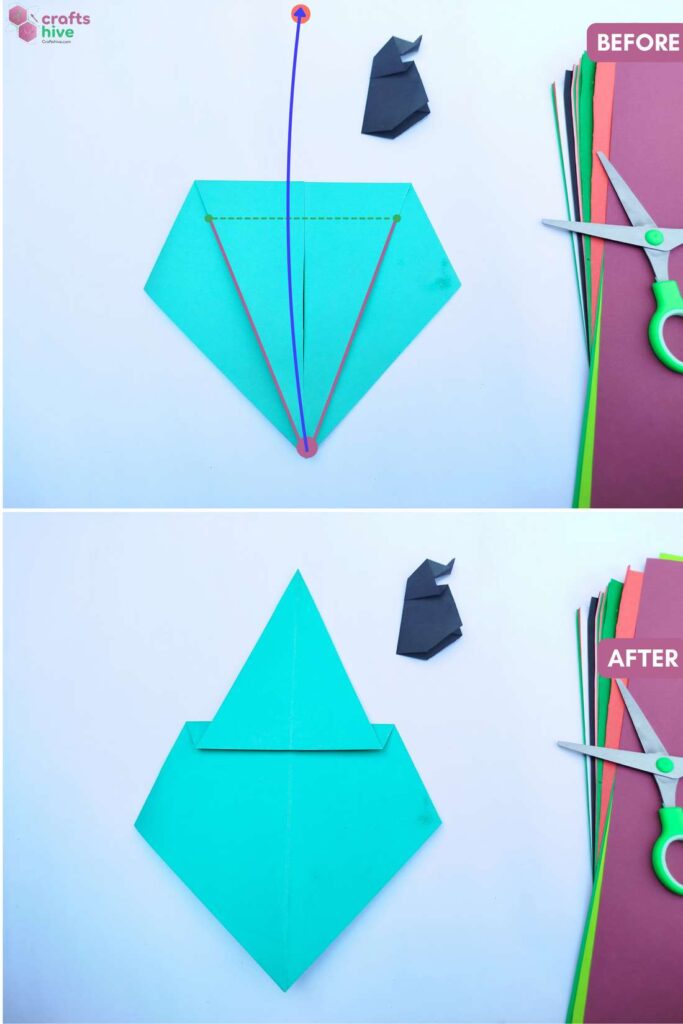
- Leaving about 1/6 of the height below the top edge, swing the flap up to the top and press the paper flat.
Note: You can adjust the extent of this to your taste.
Step #6: Turn
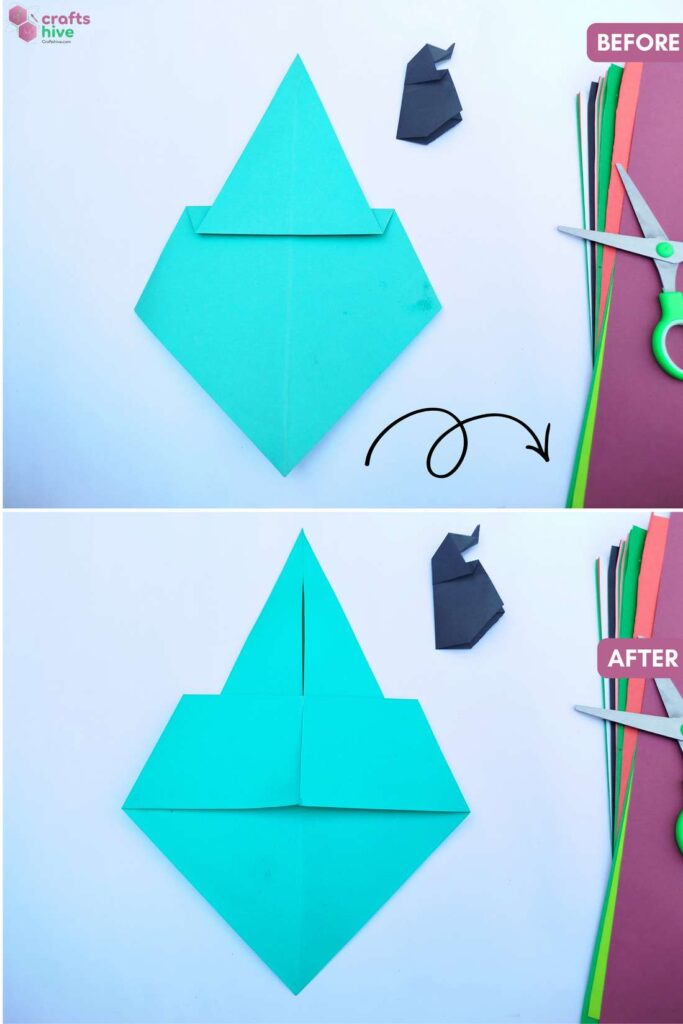
- Turn the entire model over to the other side.
Step #7: Fold Up
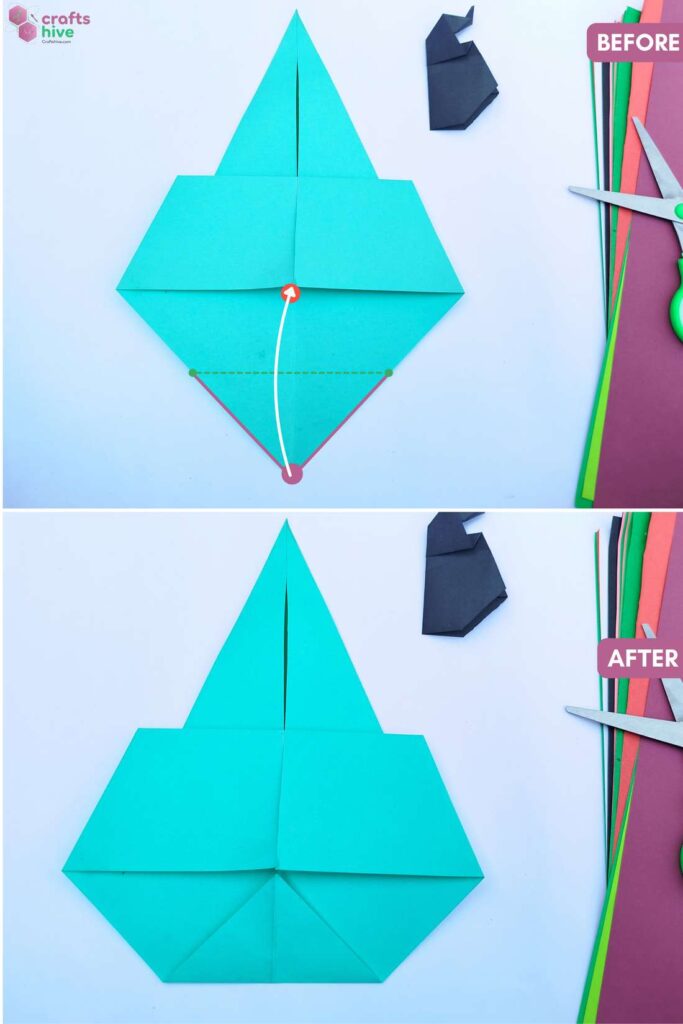
- Fold the bottom corner of the paper up to the start of the Kite flaps and press it flat.
Step #8: Fold in Half
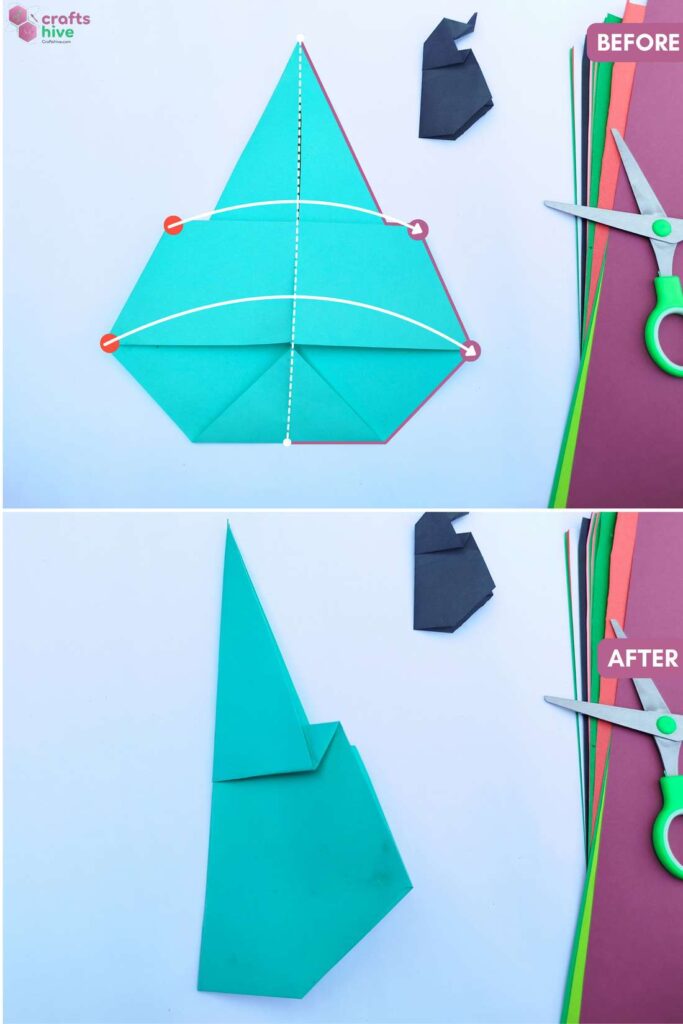
- Along the vertical centreline, fold the entire model in half. Press the paper firmly afterwards, as there are many layers on the way.
Step #9: Intermediate Fold for Mouth
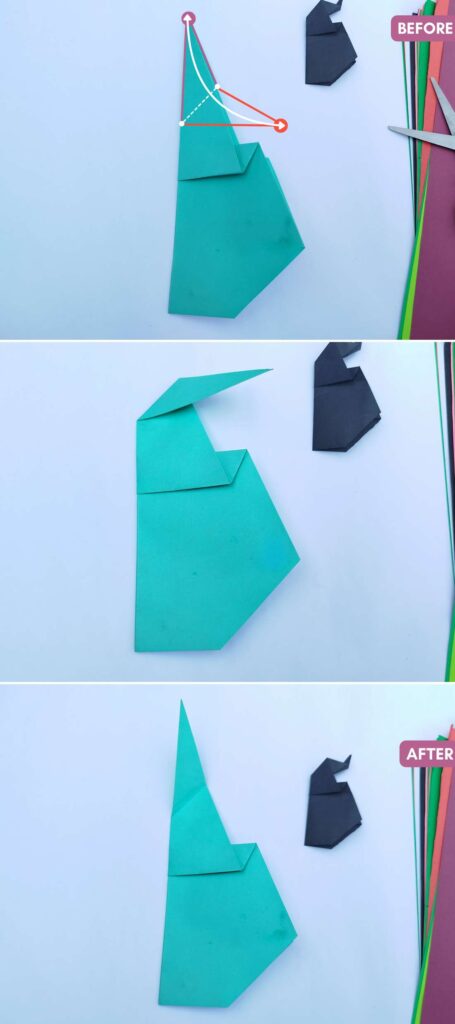
- Fold and unfold about half or more of the top overlapping flap down to the right side and crease it firmly.
Note: You will want to do this fold to your taste, too.
Step #10: Inside Reverse Fold
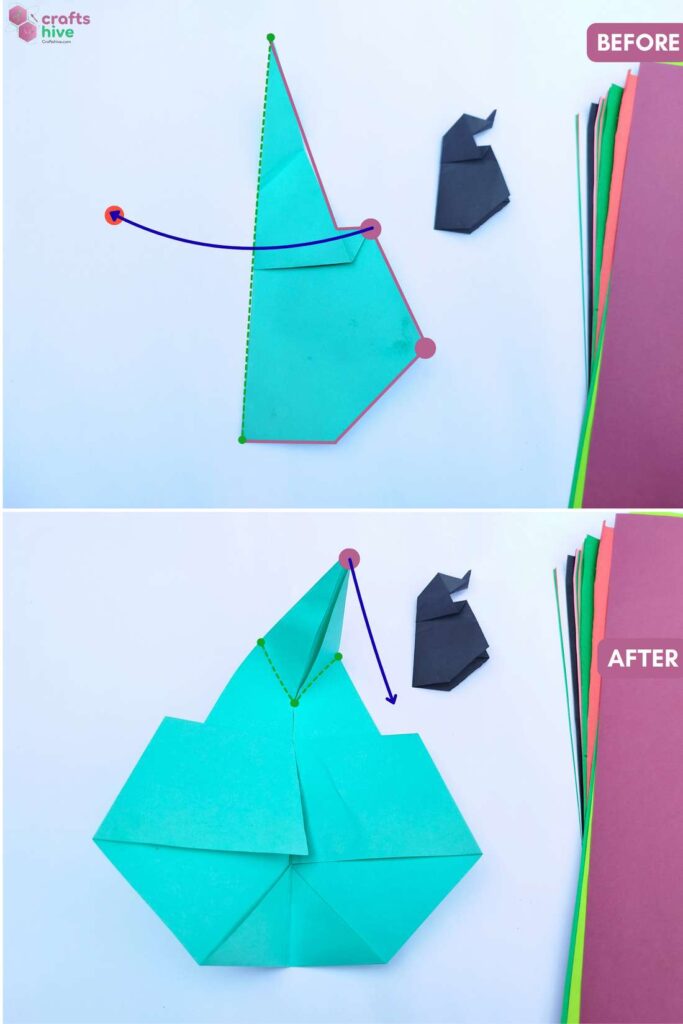
Note: I have shown doing the inside reverse fold for the head in the non-traditional style.
- Undo step #8. You will notice a smaller kite section made by the creases on the top. Pinch this portion from the back and the Mountain.
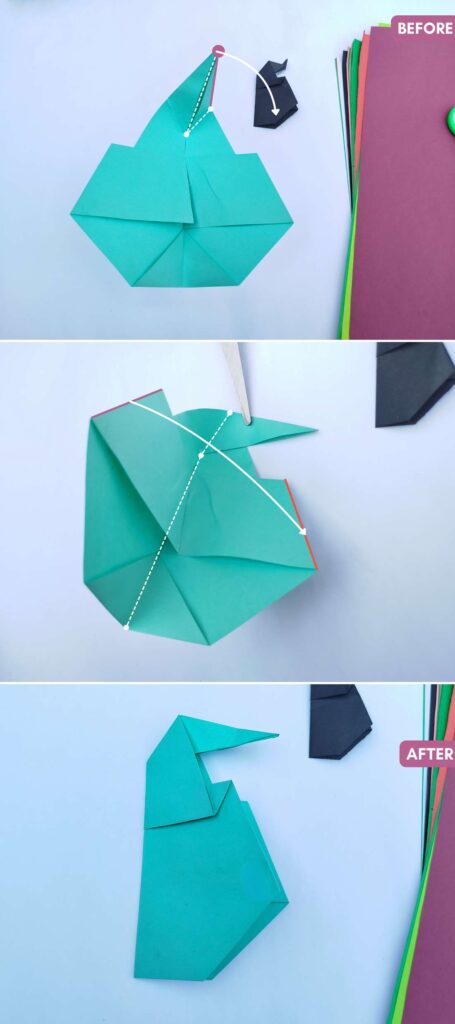
- Fold it in half along the vertical and lift it to the inside along the creases you made in step #9. Securing that fold, still, make a Valley fold with the rest of the model.
Step #11: Fold for Nose
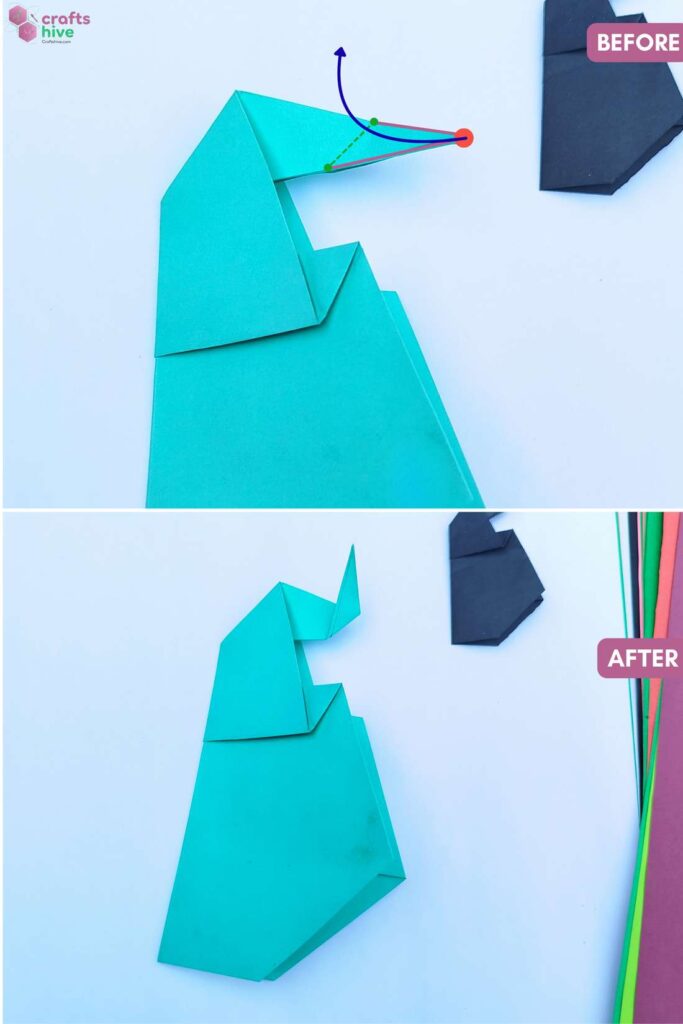
- Fold about half or more of the head up to the left, press the paper flat, and unfold.
Step #12: Inside Reverse Fold
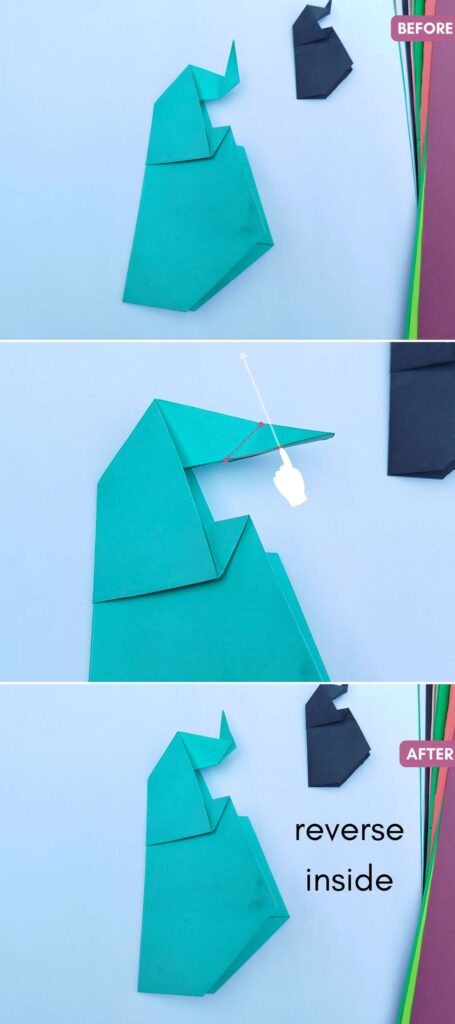
Note: This reverse fold follows the traditional method.
- Try to reverse the direction of the Fold you made in the previous step by pushing it to the inside along the middle and other creases, and press it flat.
Finished

That’s how to fold a traditional elephant. Isn’t it easy? As a small step for detailing, you can make a small outside reverse fold on the nose.
Was this Origami Tutorial Helpful? Tell us in the Comments.
Your feedback is a great way for us to improve our origami tutorials. So, share your thoughts on whether you tried this one or not, and highlight the weak points.

About "Talha"
Hey, I’m Talha, the Crafter on Craftstive.com. I love to share guides on folding cute origami models and paper crafts, and I am always ready to inspire your next craft project with my weekly craft discussions.