


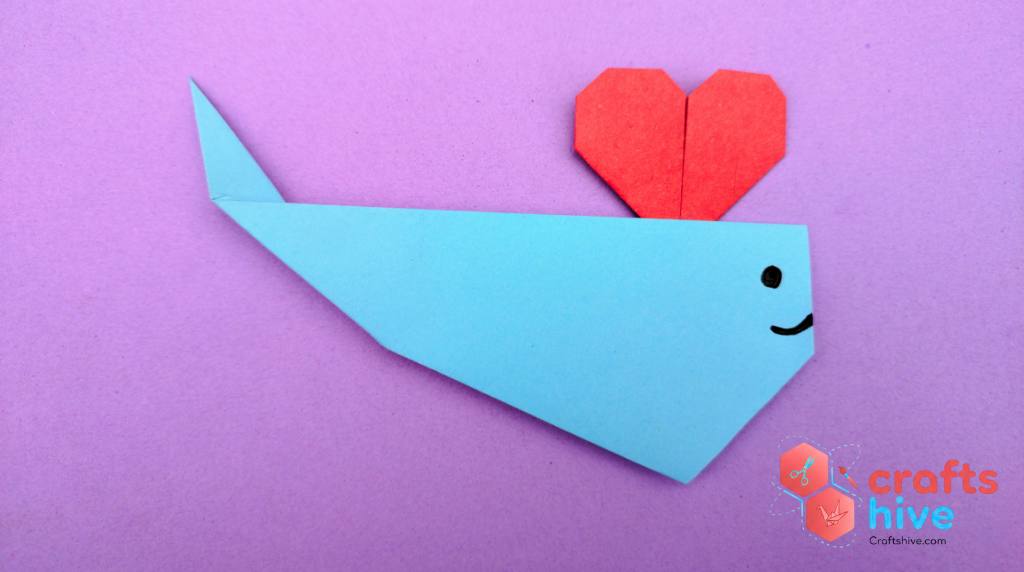
By replacing the water blow up of the whale with an origami heart, let’s make this very easy origami whale craft for Valentine’s Day. You can finish it in just 5 minutes of folding, drawing, and guling!
Origami Whale in Love: Step-by-Step Guide
Project Difficulty: Easy (uses traditional origami models and basic drawing)
Supplies:
- Two square sheets of paper. One must have 1/2 the length of the side of the other.
- A black marker
- Paper gum
- Scissors for cutting a small strip of paper
Part 1: Origami Whale

For the whale, I will be using a sky blue sheet of paper. Start by placing your square sheet flat and straight onto the craft table. See my tips on origami.
Sheet Dimensions: 14cm by 14cm
Step #1: Rotate the Sheet Into a Diamond
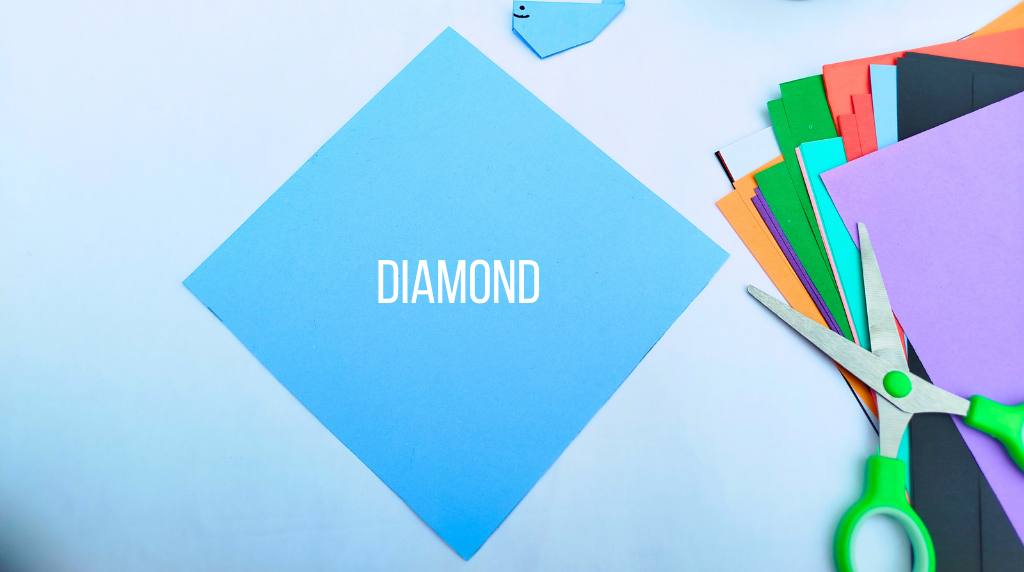
The origami whale is folded by taking the diagonal of the square sheet as the axis of symmetry. So, fold your sheet at a 45-degree angle to turn it into a diamond. It will have one top, one bottom, one left, and one right corner.
Step #2: Make the Diagonal Crease
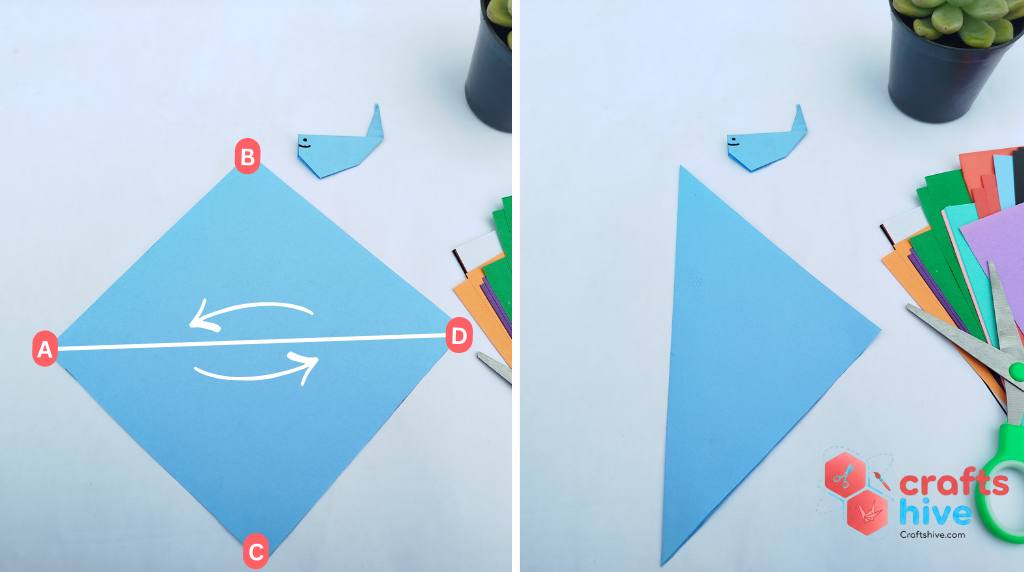
Fold and align the left corner of the diamond with the right corner. Press the remaining paper well and crease it. Then unfold the paper. This half fold leaves the paper with a diagonal crease.
Label Instruction: Fold the corner A onto the corner D, crease the paper, and unfold.
Step #3: Make Kite Folds
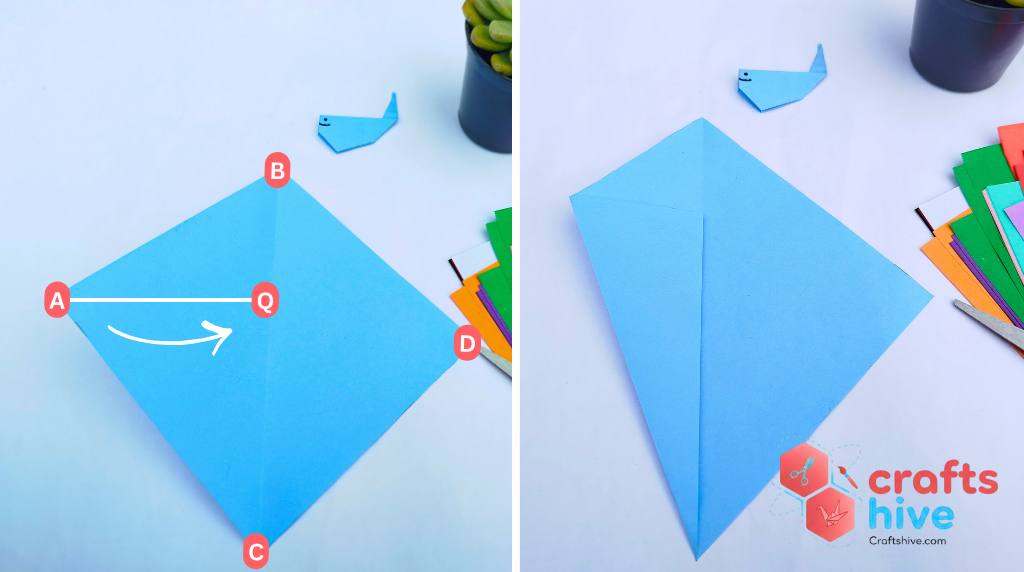
Hold the left corner in your fingers and fold it straight such that the bottom left side of the diamond aligns exactly with the diagonal crease in the paper. The corner must rest on that line.
Label Instruction: Fold the side AC and align it exactly with the crease CD.
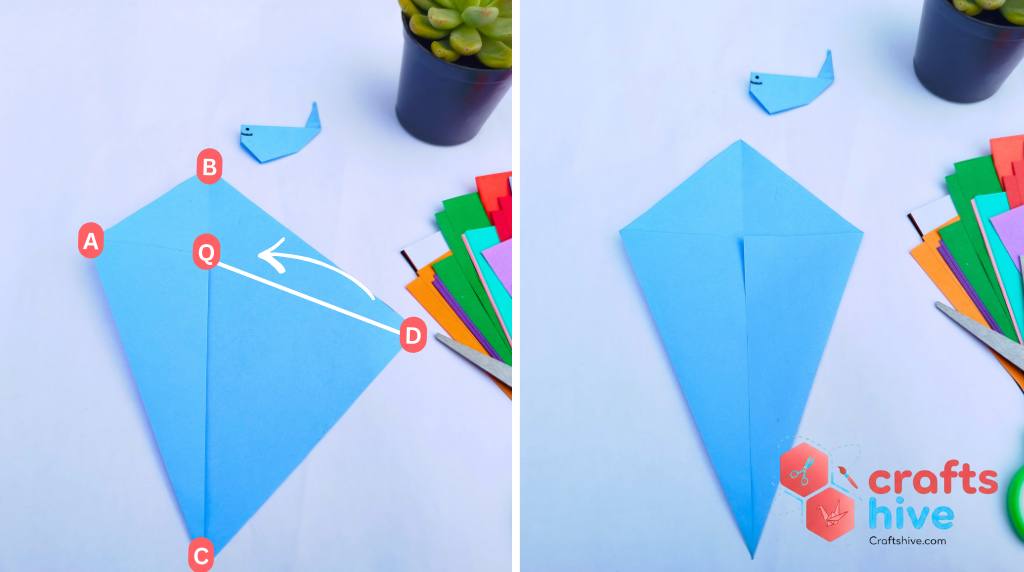
Now, repeat the same kite fold on the right side of the diamond. This will basically complete our kite base.
Label Instruction: Fold the side DC and align it exactly with the crease CD. Let’s label the common point of corners A and D as Q.
Step #4: Make a Valley fold for Whale Head
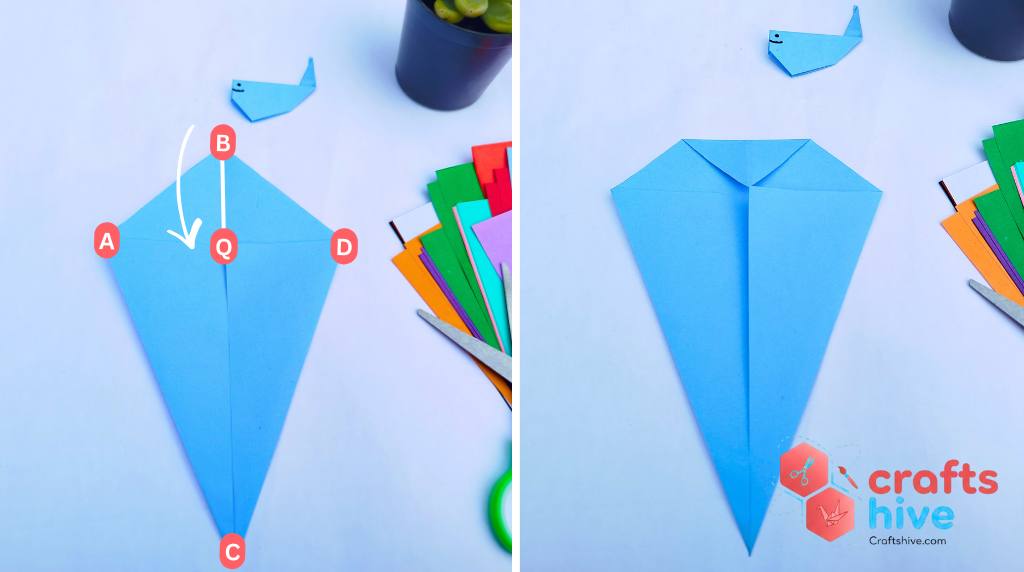
Make a valley fold with the top corner of the diamond all the way down to the new position for the left and right corners. This is the beginning of the kite’s folds or flaps. Or you can call it the start of 2nd layer.
Label Instruction: Fold the corner B onto the point labeled as Q.
Step #5: Fold Inside in Half
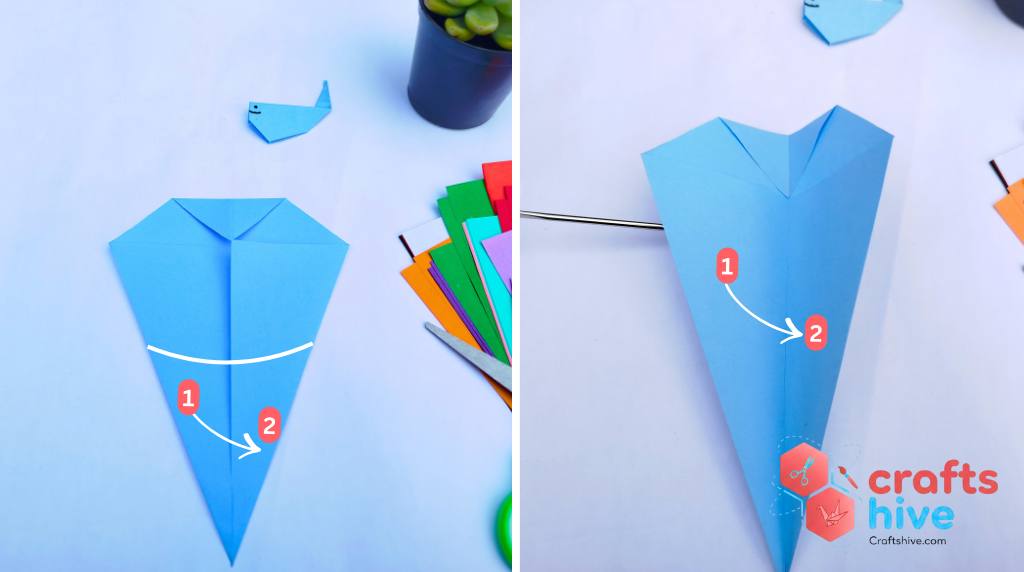
Now, we have to expose only the back side of our origami model folded so far, for the whale. To do so, simply fold the left side of the model onto the right side internally.
Label Instruction: Fold the section labeled as 1 onto the section labeled as 2.
Tip: Press the whole model well after folding as see if no inner corners are popping outside.
Face the left or right side of the model.
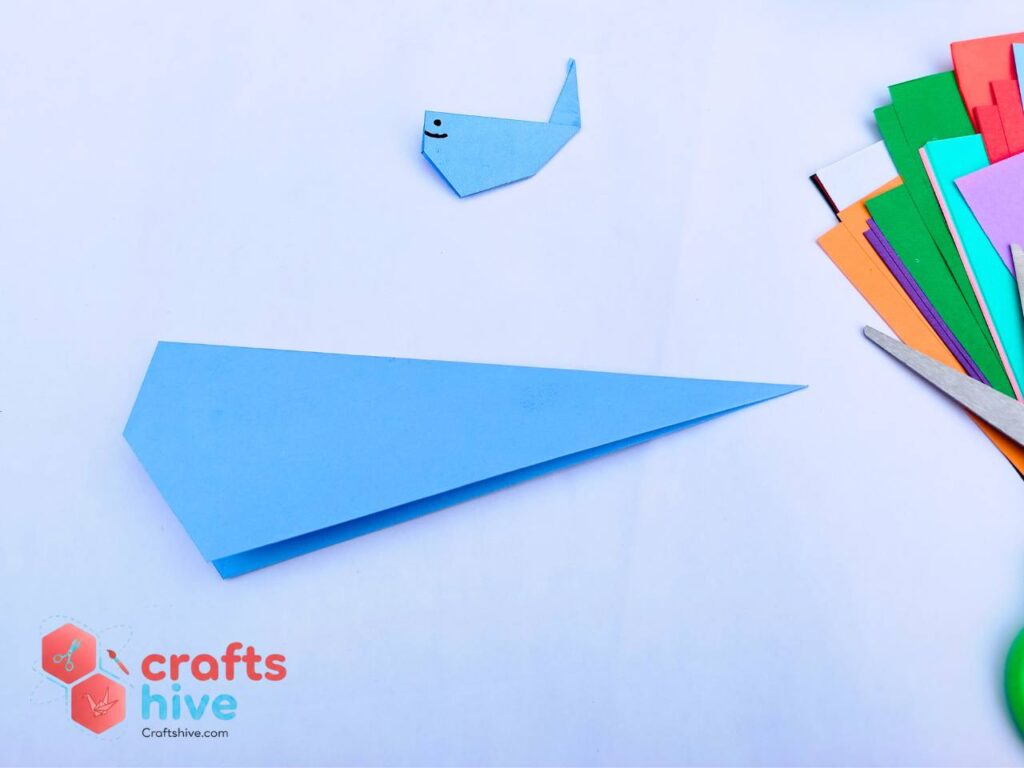
Step #5: Fold the Tail
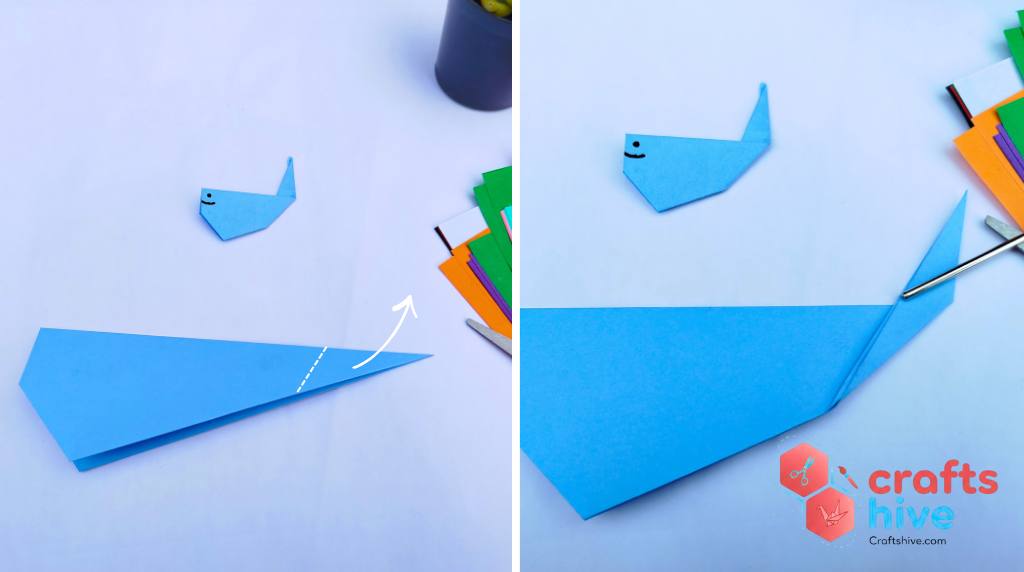
Hold the tip of the whale (on the side with only one corner) and make a mountain fold at a slight angle to the model as shown in picture.
Part 2: Whale Mouth

I have drawn a basic dot eye and a smile using a black marker. Mine got a little misplaced, so you can draw yours in a better or different way.
Part 3: Origami Heart

I will be making an origami heart and attaching it to the back side of the whale using a small strip and gum. For the heart, I used 7cm by 7cm square sheet of paper.
Finished

Did You like this Project?
Tell us in the comments and share your origami model.
About "Origamist@Craftshive"
Our origamist is expert in both the traditional origami and designing some REALLY creative crafts.