
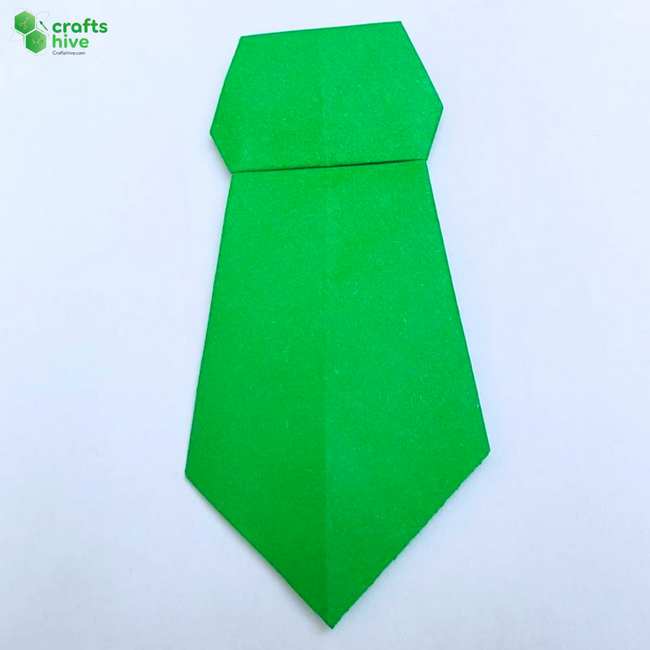
Let’s fold a simple origami tie in less than 1 minute. It’s a PERFECT match for Father’s Day cards, gift boxes, and the traditional origami shirt. You can fold it with striped, dotted, and even patterned Kami paper instead of the usual plain. I have made a set of a red shirt and this necktie.
The idea is to use a small paper sheet with the diagonal length equal to the height of the shirt. For now, let’s learn how to fold this cute tie.
[ez-toc]
Origami Neck Tie: Step-by-Step Instructions
The traditional origami tie is symmetrical about the diagonal and hence, needs the kite base. You have to work the Mountain and Valley folds, and also squash a few folds. Overall, this model is quite freeform as the folds that give it the shape are judgment folds.
That means you can experiment with and have ties with different looks and shapes. However, it is easy and quick. Now, let me provide you with the fold-by-fold instructions.

Recommended Paper: Either way, only one side of the paper will appear in the front of the final model. So, both Kami and Tant papers are OK to work with.
I used a 10cm by 10cm square sheet of Tant paper in green for demonstration. However, you can stick with the standard-sized Kami.
Step #1: Triangle Fold

- Before this fold, place your square sheet on the table in the diamond position.
- Now, fold the paper in half along the vertical diagonal and press the paper flat to make a crease.
Step #2: Unfold
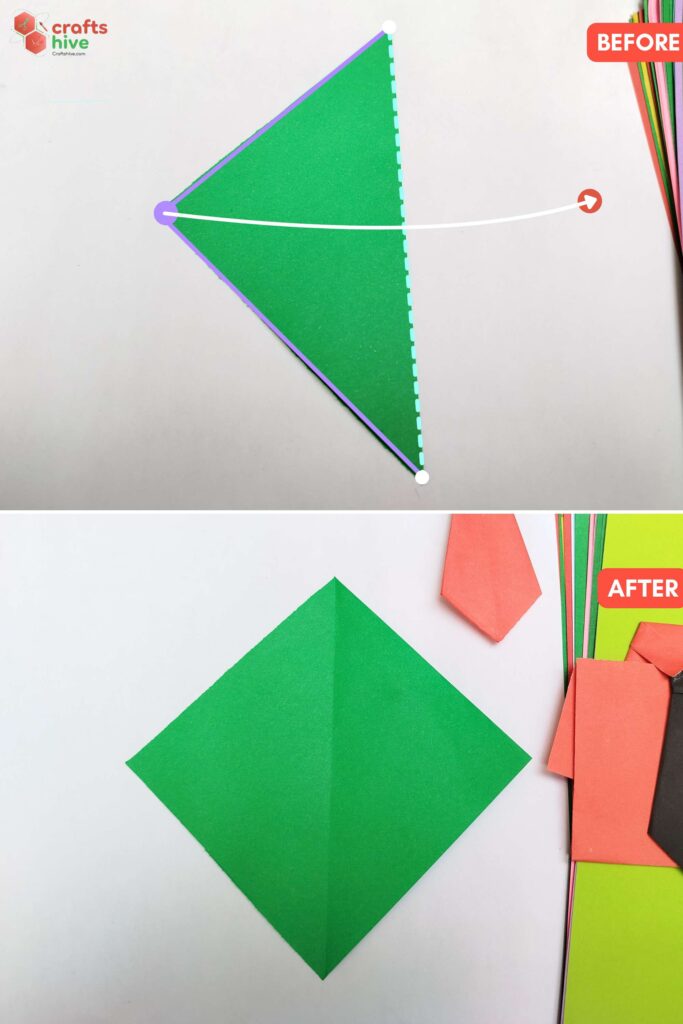
- Unfold the triangle flap and press the paper flat. You know, have a vertical guiding crease for the kite folds in the middle.
Step #3: Kite Base
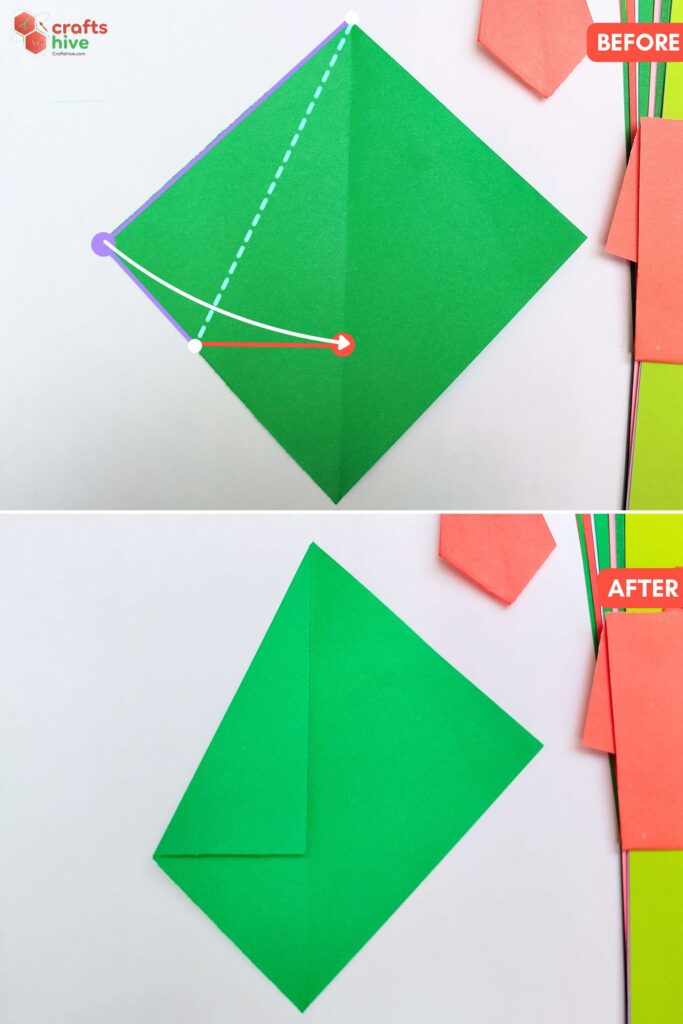
- Fold the left corner of the creased diamond to the centreline and align the top left edge with the middle crease.
- Press the paper flat to make a crease. The bottom left edge must run with the top left edge and settle perpendicular to the crease.
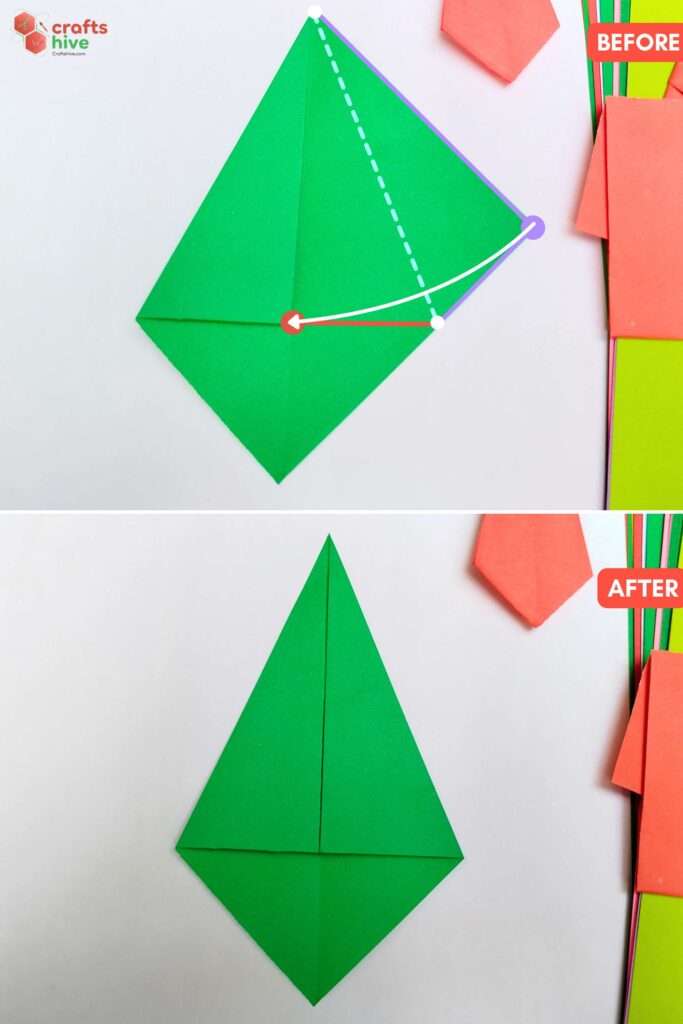
- Make the 2nd kite fold using the right corner and edges.
Step #4: Turn
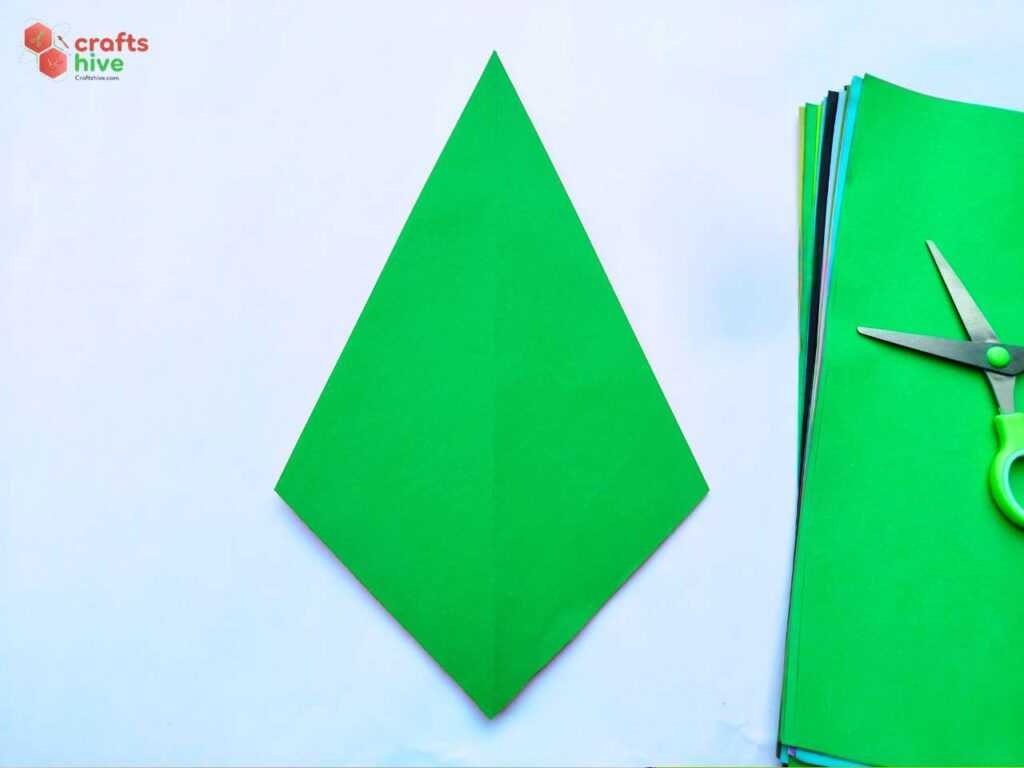
- Turn the kite base over to the other side.
Step #5: Mountain Fold
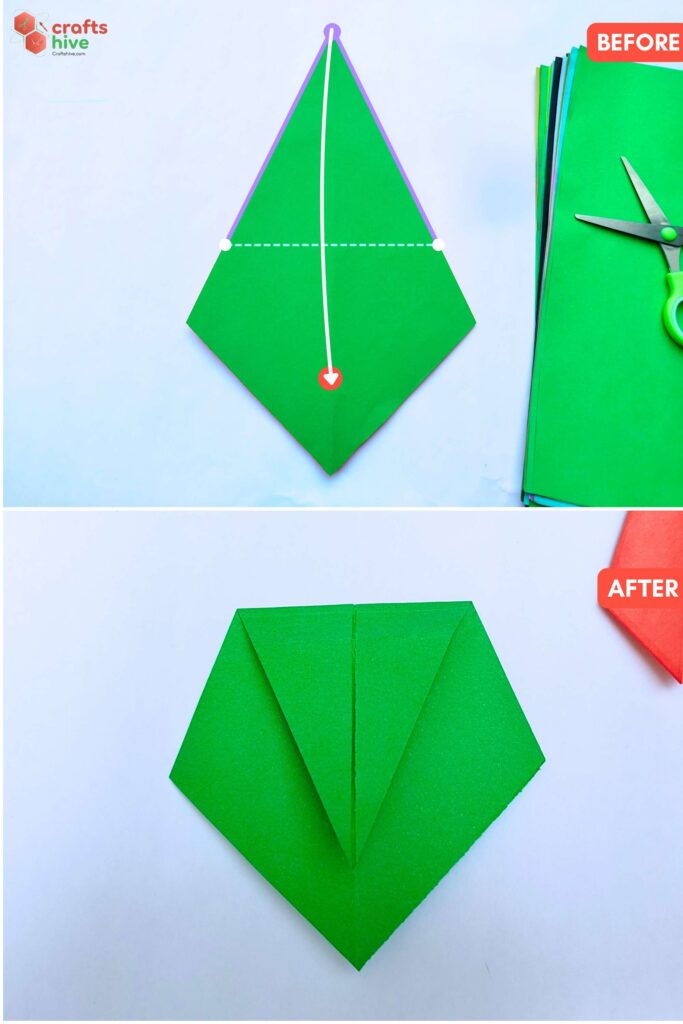
Focus on the triangle formed by the three corners of the bottom of the kite.
- Fold the top corner of the kite base all the way straight to the bottom, and settle the corner at about the midpoint of the vertical height of the triangle.
Note: This fold is done to taste, but I found the above method better.
Step #6: Valley Fold
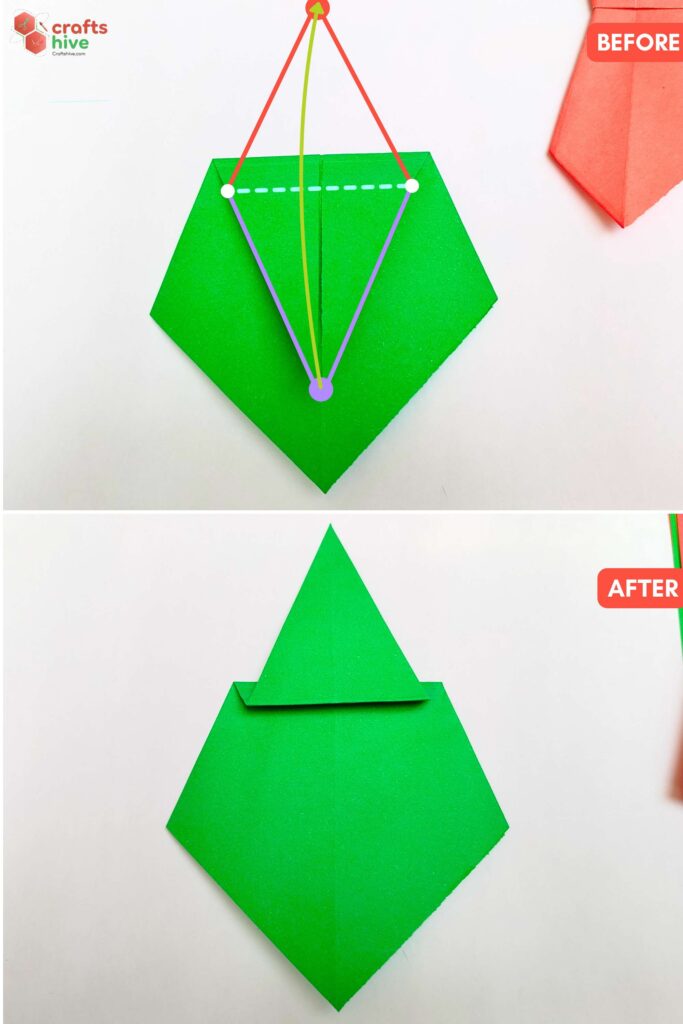
- Valley Fold about 1/8 of the Mountain Flap. This fold is also done to taste, so you can also fold about 1/6 of the flap, too.
Step #7: Turn
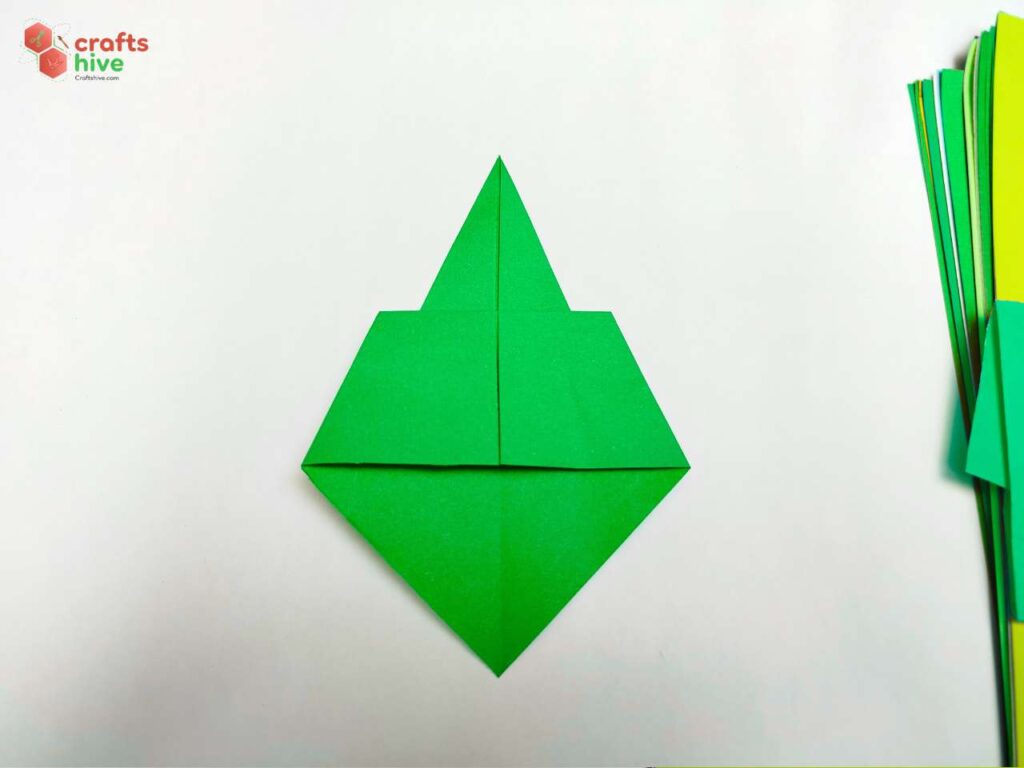
- Turn the entire model over to the other side.
Step #8: 1st Side Fold
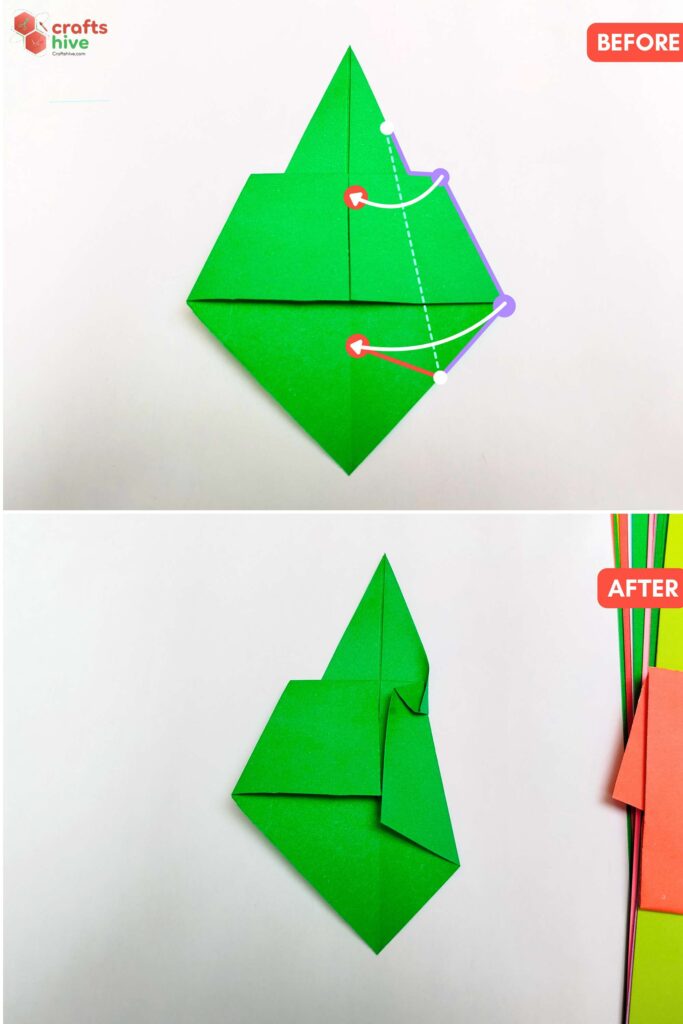
- Fold the right side of the model and align its middle corner straight with the centreline. Let a portion of the Valley Fold edge run with the fold.
Folding Tip: This is my preferred method of folding the tie. You can fold the right side a little away from the middle line for a thin tie, and also align the whole edge with the centreline.
Note: The next fold must be symmetrical to this fold. So, if you want them overlap, decide already.
Step #9: Pull the Knot Part
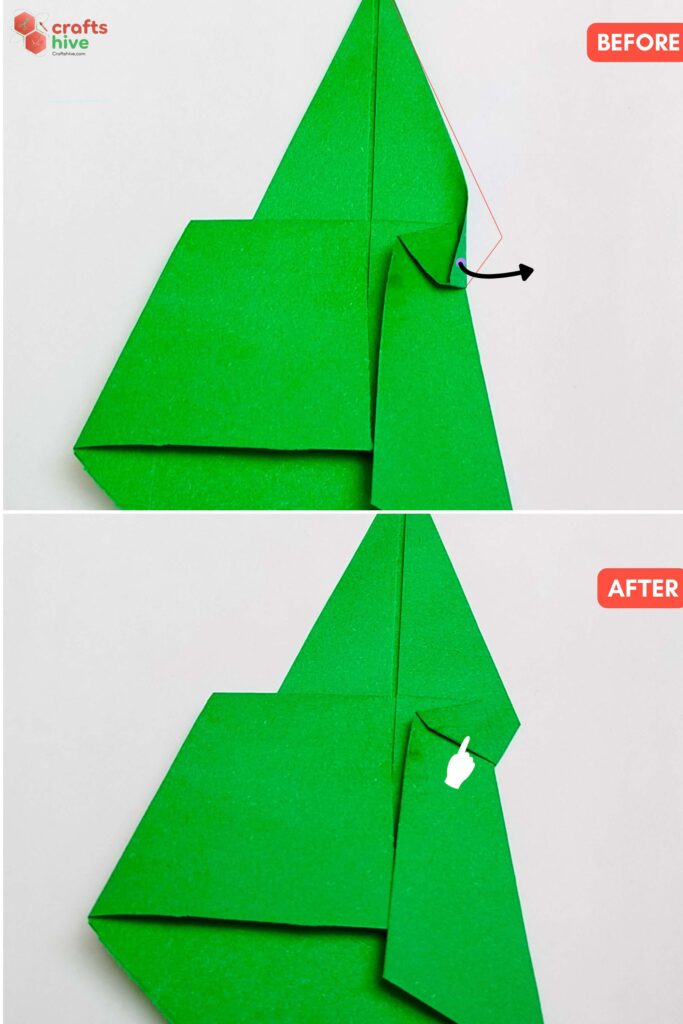
- Pinch the portion of the Valley Fold that ran with the side fold and open it to the right. Then press the paper flat to make a crease.
Step #10: 2nd Side
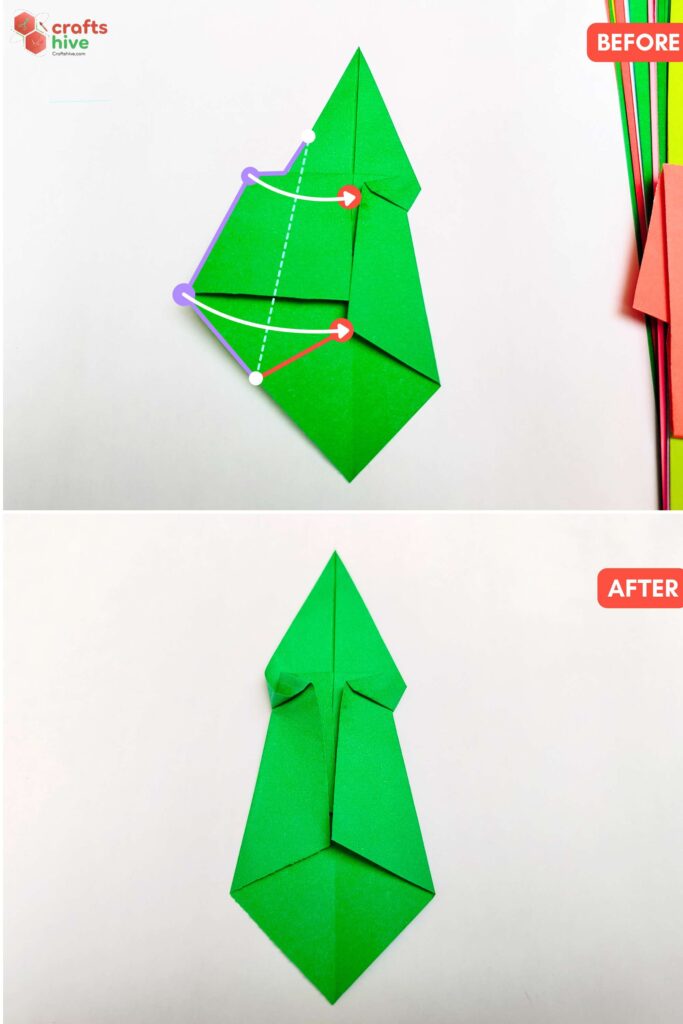
- Repeat the same fold on the right side of the model.
Step #11: Pull the Knot Out
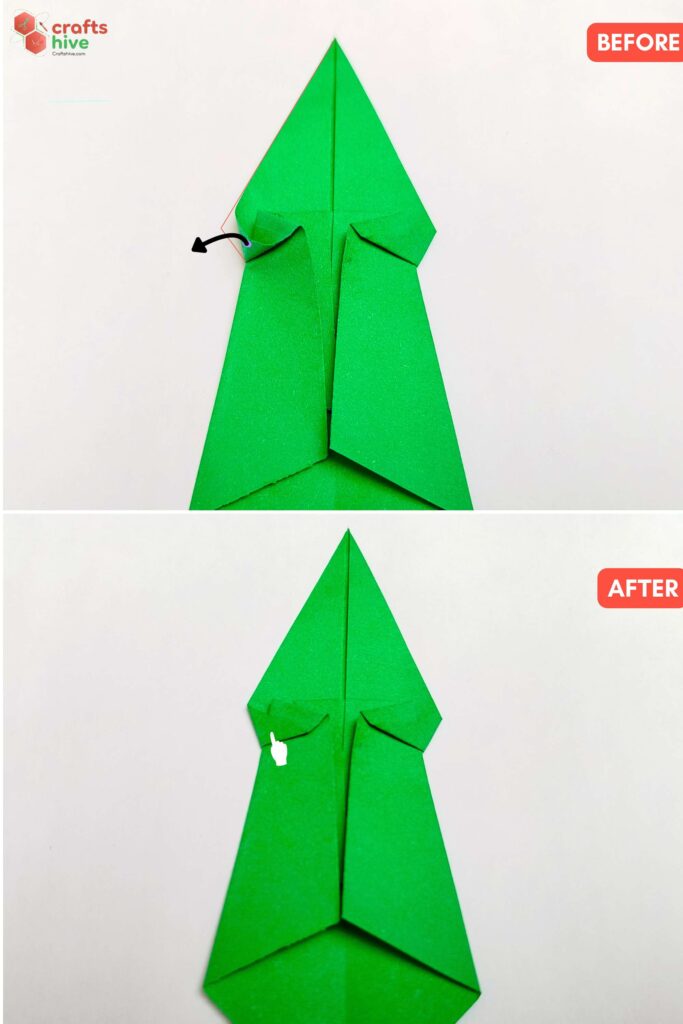
- Open the pocket and press it flat so that you get a straight edge.
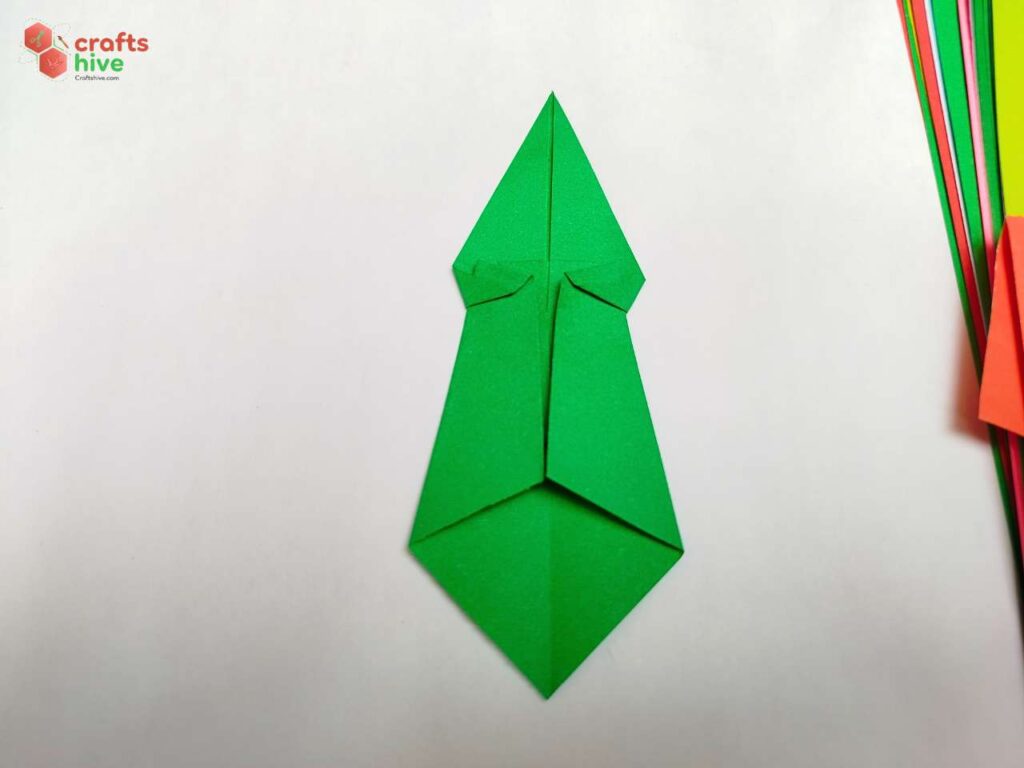
Step #12: Mountain Fold
Note: Do this fold to taste, too.
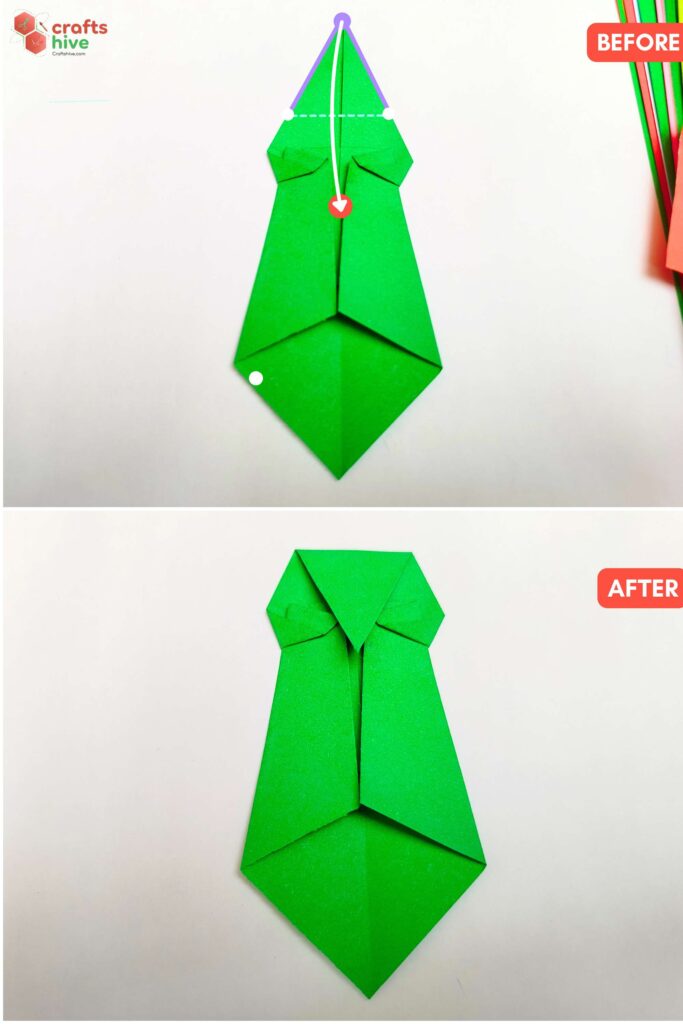
- Mountain fold a portion of the Valley Flap using the top corner.
Step #13: Insert the Flap
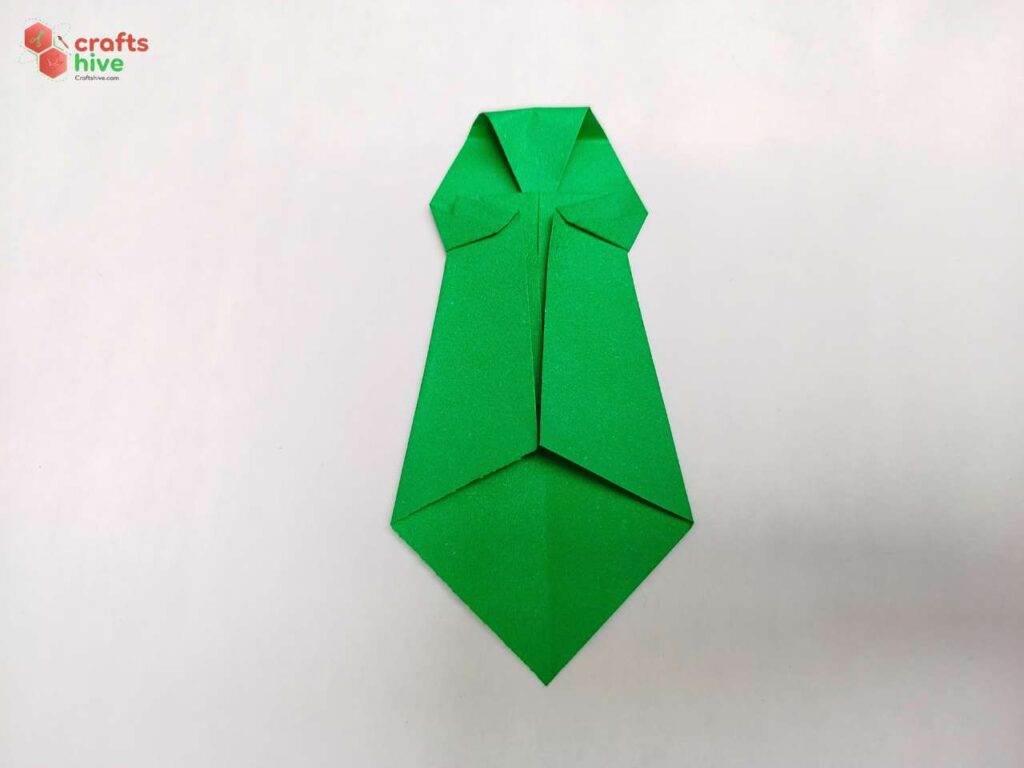
- Insert and hide the Mountain Fold inside the flap and press the paper flat afterwards.
See the Back
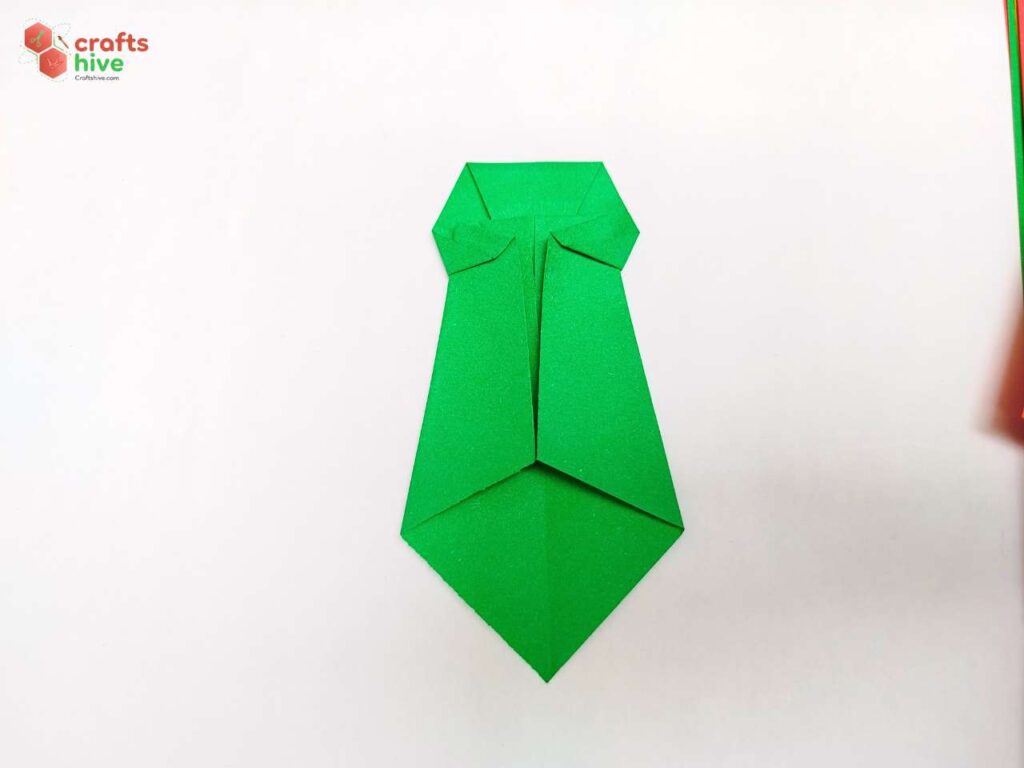
- Here is how the necktie will look from the back.
Finished
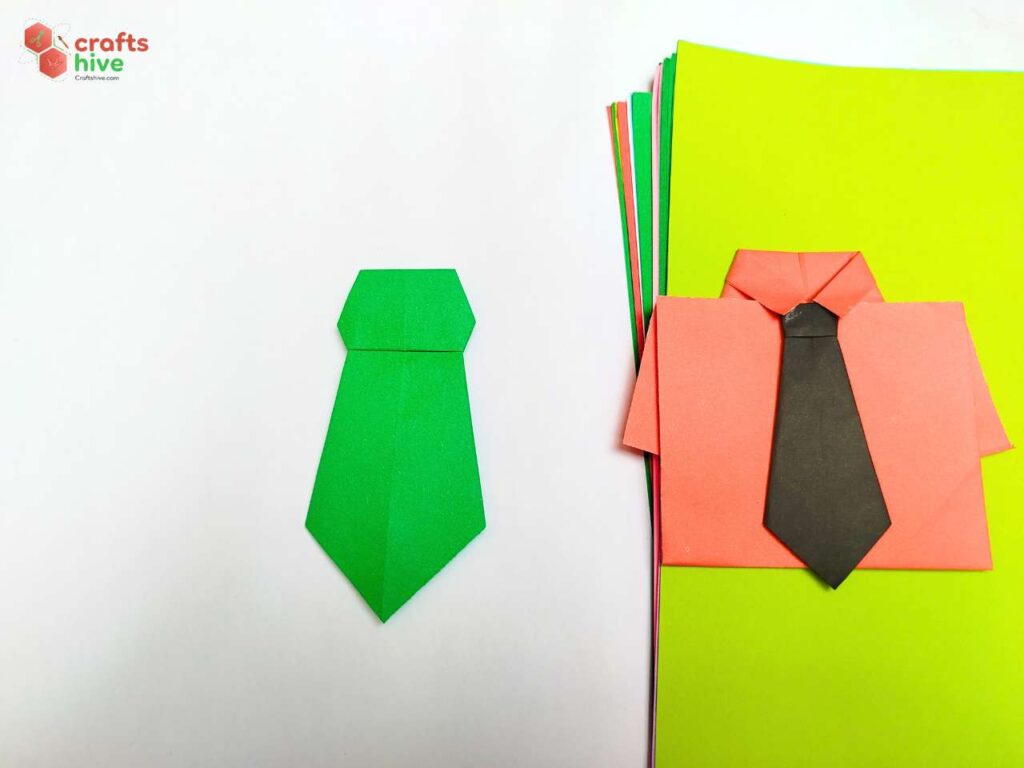
And that’s how the finished origami tie will look (if you let me judge your folds!). I have paired a black tie with a red shirt, whose tutorial is coming soon.
Was this Origami Tutorial Helpful? Tell us in the Comments.
Your feedback is a great way for us to improve our origami tutorials. So, share your thoughts on whether you tried this one or not, and highlight the weak points.

About "Talha"
Hey, I’m Talha, the Crafter on Craftstive.com. I love to share guides on folding cute origami models and paper crafts, and I am always ready to inspire your next craft project with my weekly craft discussions.