
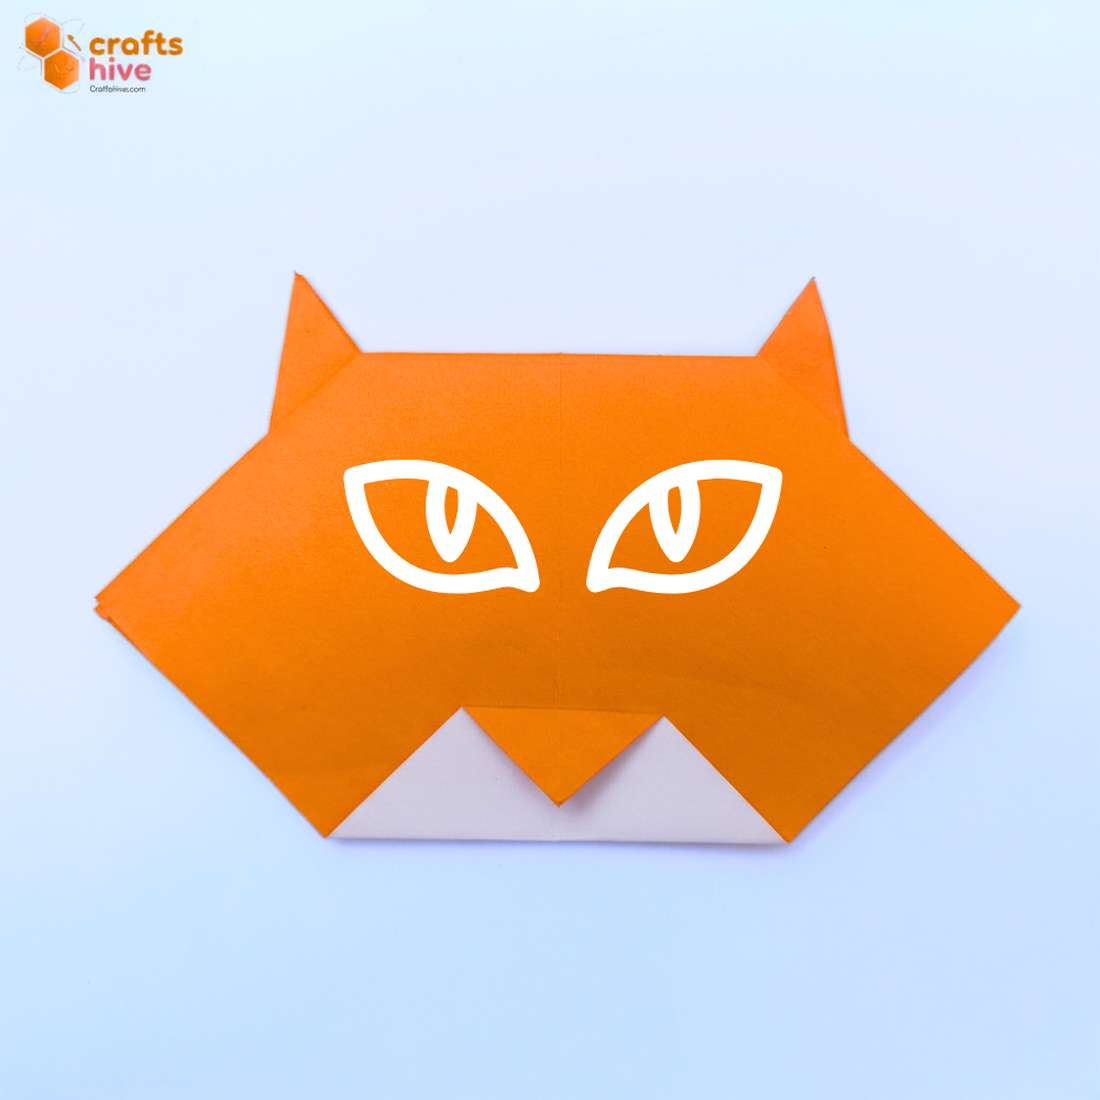
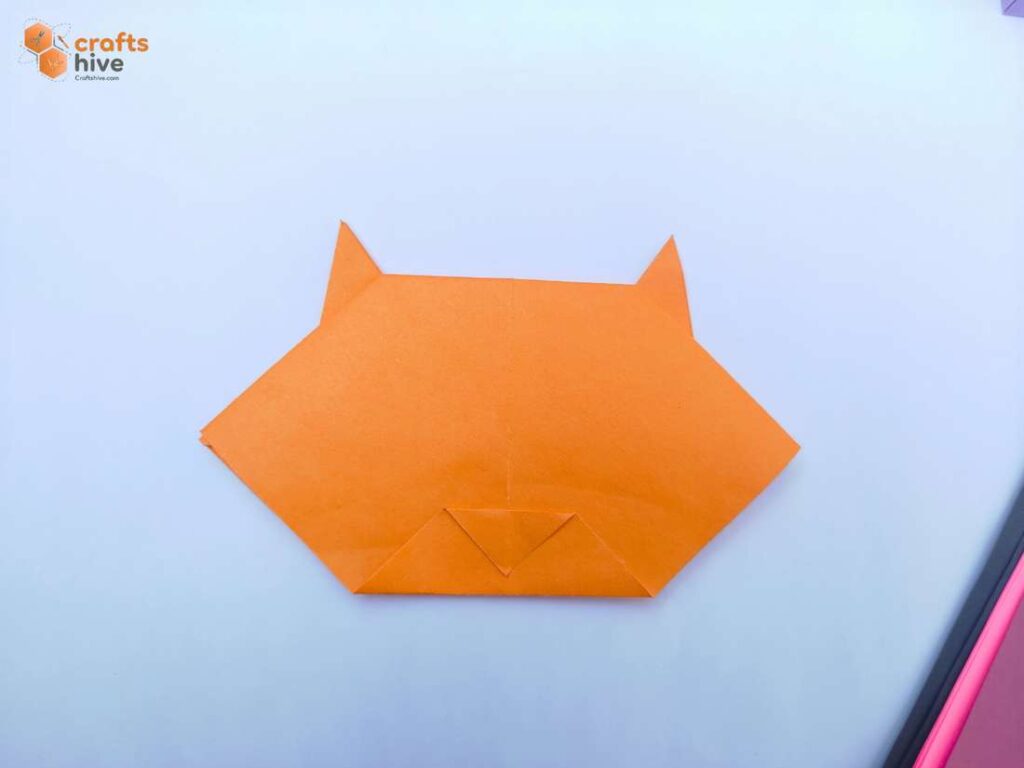
These instructions will show you how to fold another traditional model of the origami cat face. This model shows both sides of the paper, unlike the first one.
We will also fold the mouth, so it is going to be a little more advanced than the previous, but definitely under Beginner Level 1. In fact, you can fold it in less than 1 minute.
This design is also flexible in terms of the final form of the face you want. Like you will want to make the ears slightly longer or make the face bulky. You can also craft a black cat for Halloween and attach eye stickers to it.
[ez-toc]
Origami Cat Head: Step-by-Step Instructions
Model Type: Traditional/Pure Origami
Recommended Paper: Kami (15cm by 15cm Square Sheet)
For demonstration, I will be using a 14cm by 14cm square sheet of Tant paper.
Step #1: Diagonal Creases

- Fold and unfold the paper in Half along both the Diagonals, and set your square sheet in the Diamond Position. We shall use the first as a pre-crease and the 2nd as a guiding crease.

Step #2: Blintz Fold
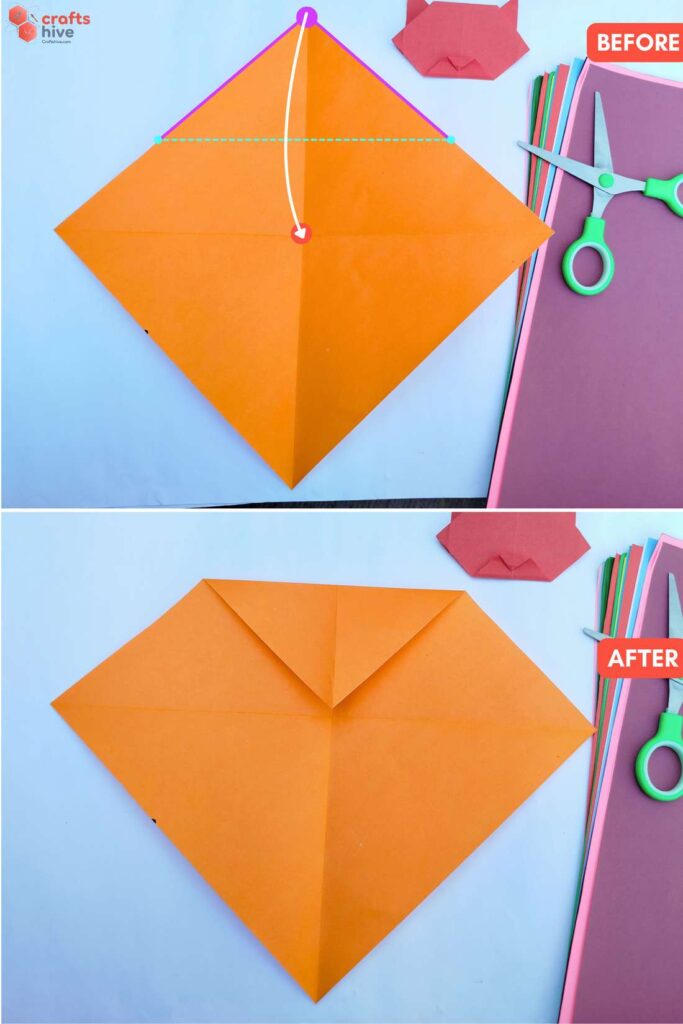
- Fold the Top corner of the paper down onto the Intersecting Point of the diagonal creases and press the paper flat.
Step #3: Swing Fold
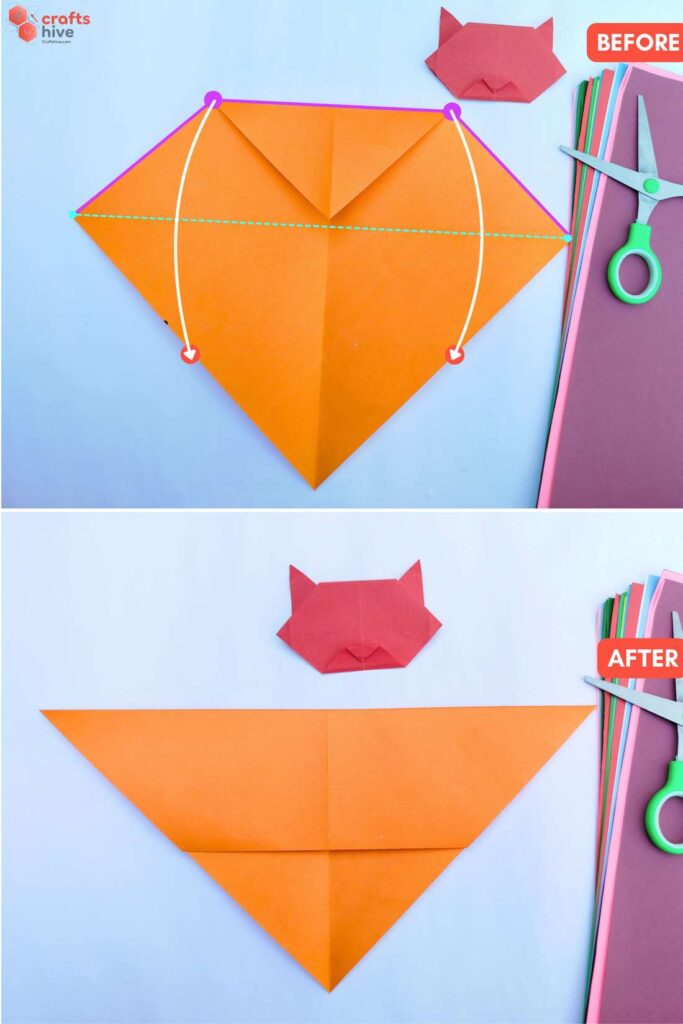
- Along the Horizontal Diagonal crease, swing the whole flap to the bottom. Here we have a triangle shape.
Step #4: Fold in Square
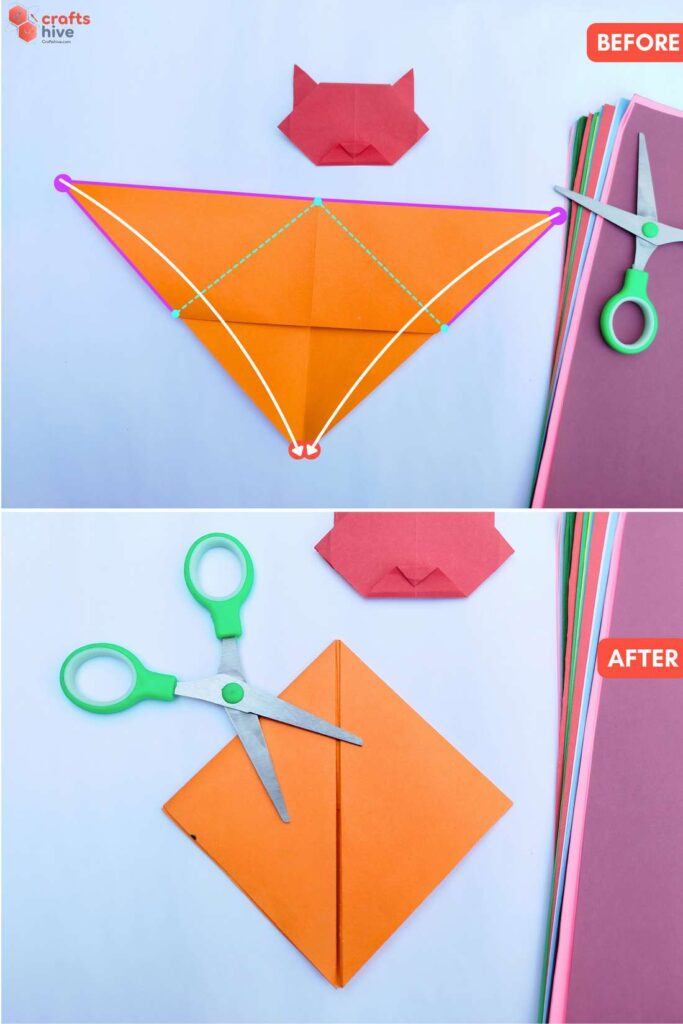
- Fold each Right Triangle in half to the bottom to make a Square.
Method: Fold either Side Corner of the Triangle onto the Bottom corner and press the paper flat.
Step #5: Folds for Ears
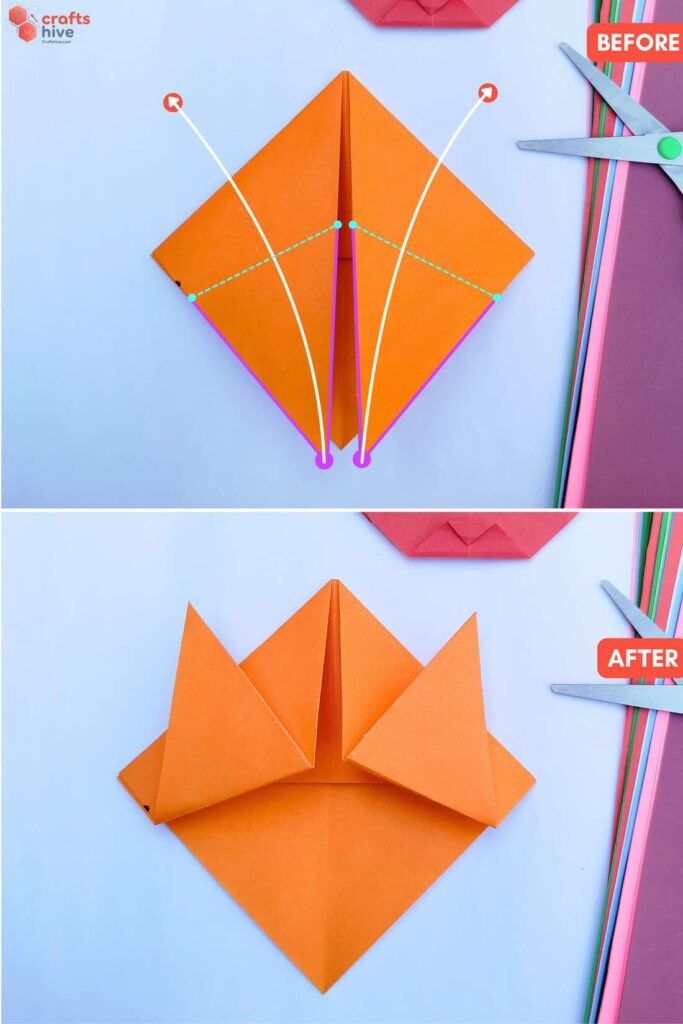
- Fold the Bottom corner of the Right Flap upward, tilted towards the Right, and crease the fold when enough of the Fold exceeds the top edge.
- Similarly Fold the bottom corner of the left flap as much as the other flap.
Important Note: This fold is done to taste, but you will want small ears for traditional cat, so turn your model the other side to adjust before creasing.
Step #6: Mountain Fold
This fold is also done to taste.
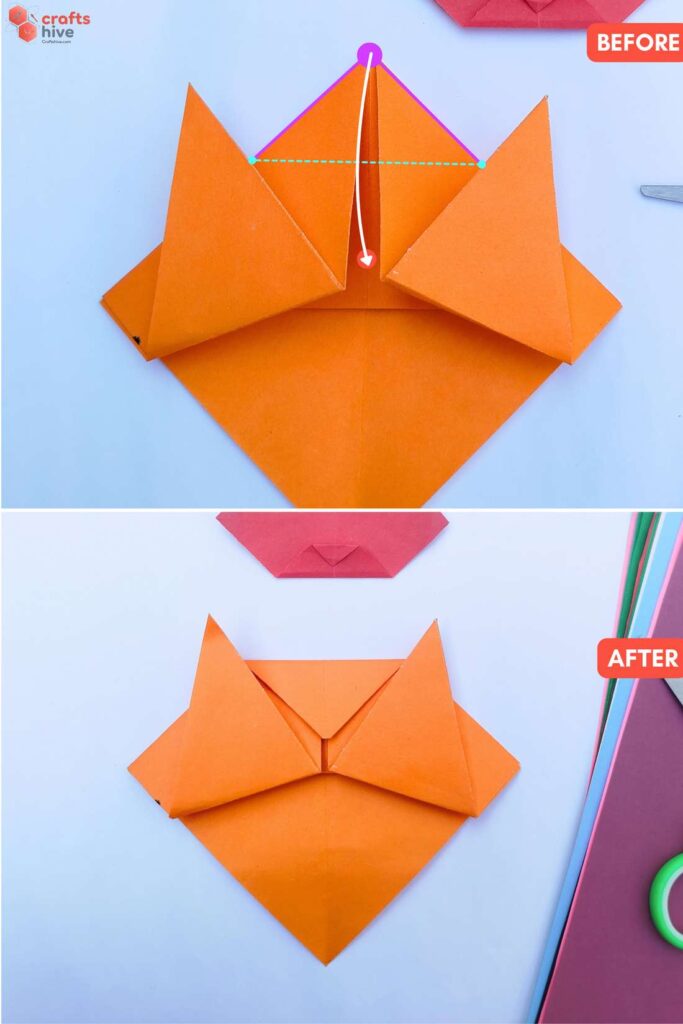
- Make a Mountain Fold with the top corner of the paper. I like to fold it along the intersection of the Earflaps and the square edges. You will want to hinge the fold about a line a little upward, too, for a more traditional look.
Step #7: Turn

- Turn the model over to the other side and see if the ears and forehead of the cat look nice.
Step #8: Folds for Mouth
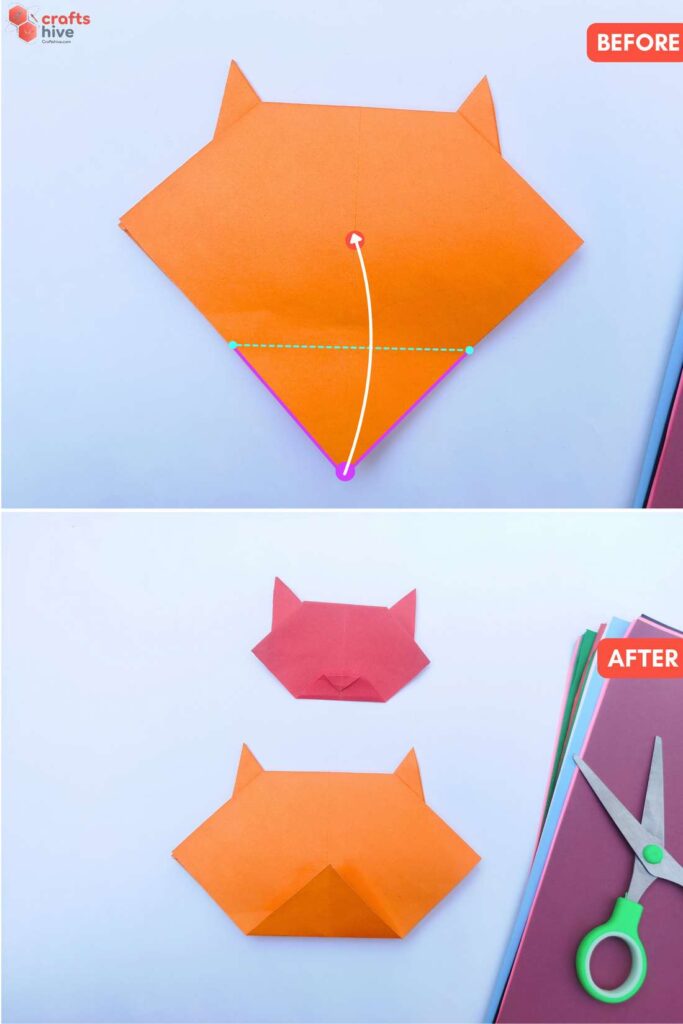
- Valley Fold the Bottom Corner of the face so that the length of the top side edges is the same as the length of the bottom side edges.
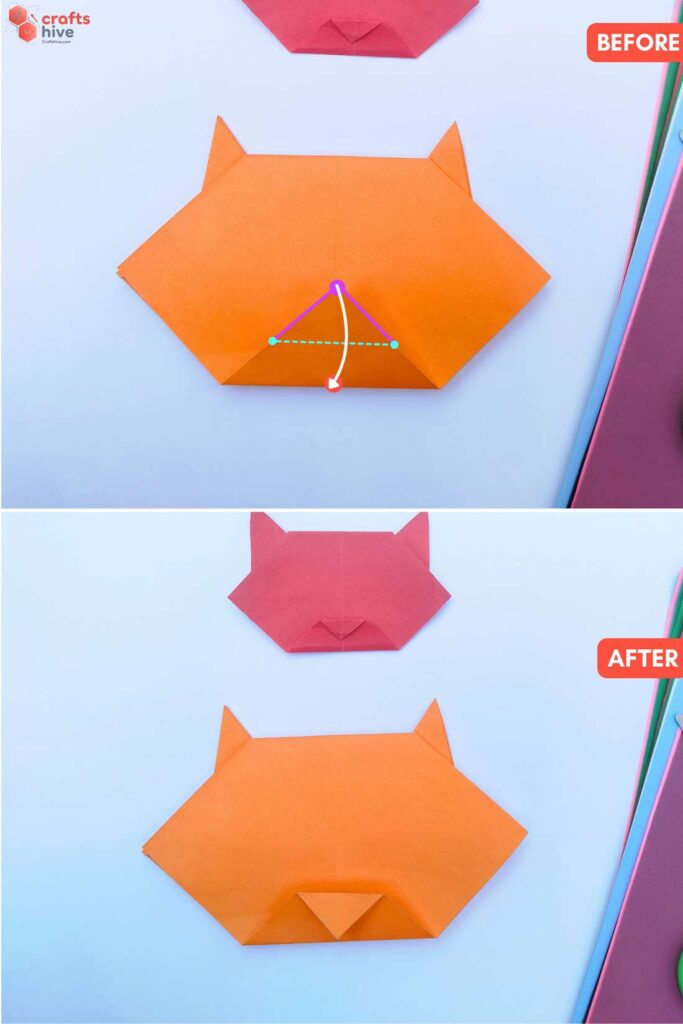
- Valley Fold the top corner of the mouth flap. Do this fold to taste, but the traditional cat must have a smaller height, about 1-third or 1-fourth of the total.
Was this Origami Tutorial Helpful? Tell us in the Comments.
Your feedback is a great way for us to improve our origami tutorials. So, share your thoughts on whether you tried this one or not, and highlight the weak points.

About "Talha"
Hey, I’m Talha, the Crafter on Craftstive.com. I love to share guides on folding cute origami models and paper crafts, and I am always ready to inspire your next craft project with my weekly craft discussions.