

Looking for the easiest way to make a no-scissor paper box? Learn how to fold the origami rectangle box with these instructions in just 8 simple steps.
Of the other traditional origami boxes we have discussed so far, this is the easiest and the fastest to fold. In fact, this one does not need a Squash fold.
It is also paper-efficient in comparison to the Masu, Snabu, and even the oblong box. With a standard 15cm by 15cm, you can have a box big enough to hold all your marker colors, scissor and glue.
I have made myself one for holding my Tant paper leftovers, and it works fine. Fold as many as you can, any color, to organize your craft table.
Origami Simple Box: Step-by-Step Instructions
Model Type: Traditional Origami/Pure Origami
Recommended Paper: The space efficiency of this paper box comes at a cost. That is the base and sides use a single layer of the paper sheet. So, for structure and sturdiness, I recommend using a square sheet of Tant paper. However, to show both sides of the paper, Kami works fine.
Difficulty Level: Beginner Level 1
Step #1: Vertical Crease
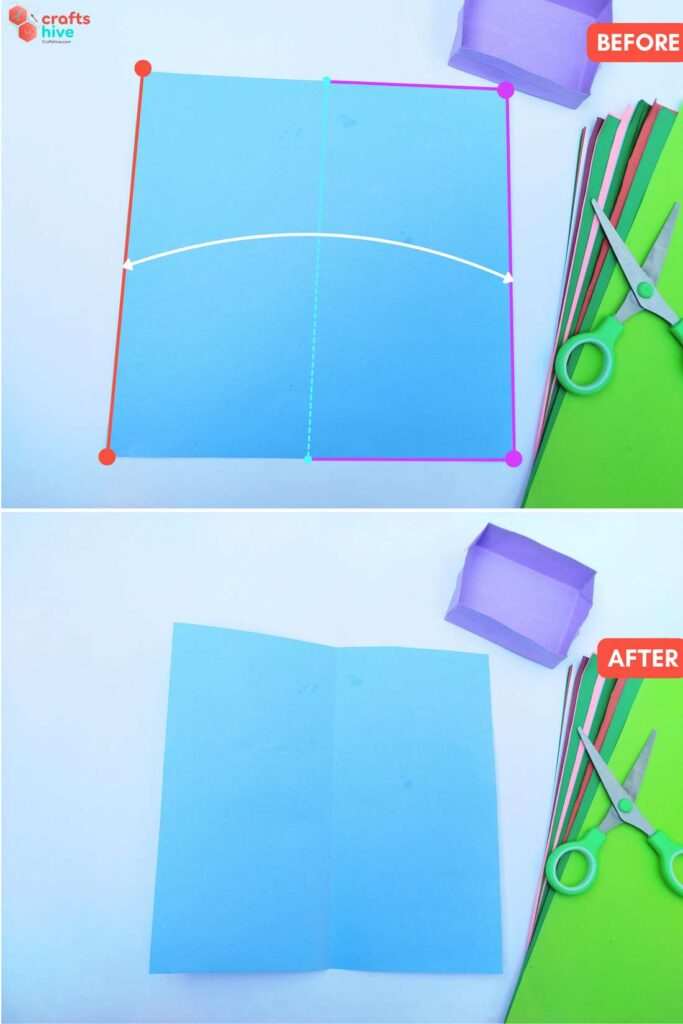
- Fold the paper in half along the vertical, press it flat, and unfold.
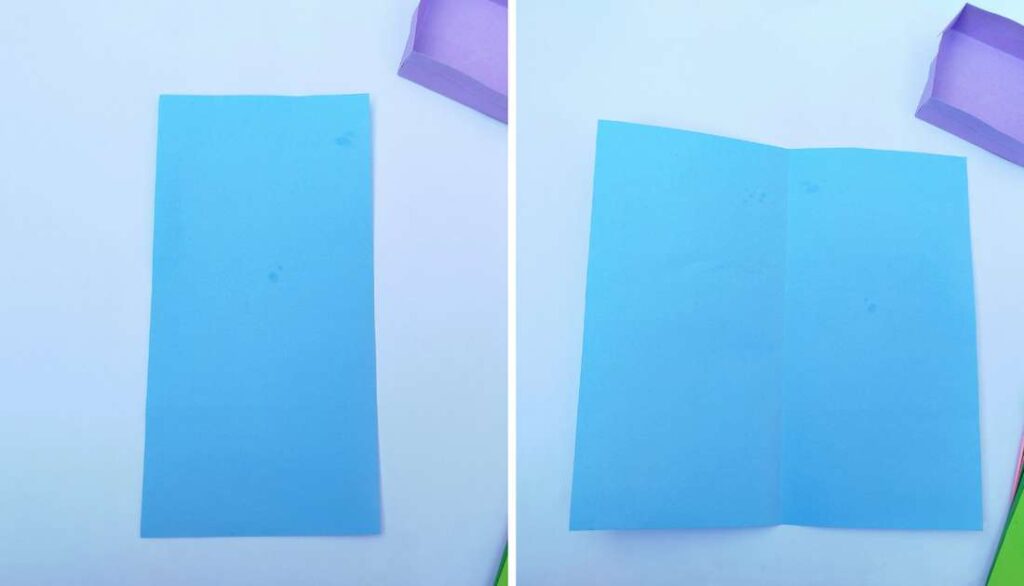
I aligned the right edge with the left edge, creased the fold, and unfolded to make a vertical crease.
Step #2: Quarter Folds
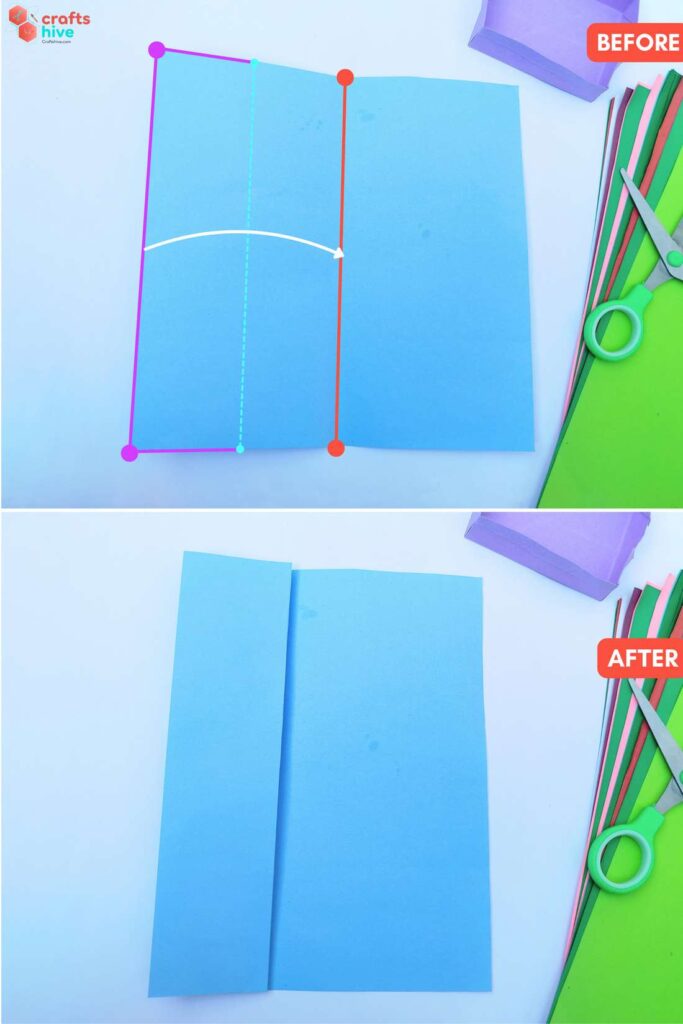
- Fold the right edge of the paper upto the centreline and crease the fold.
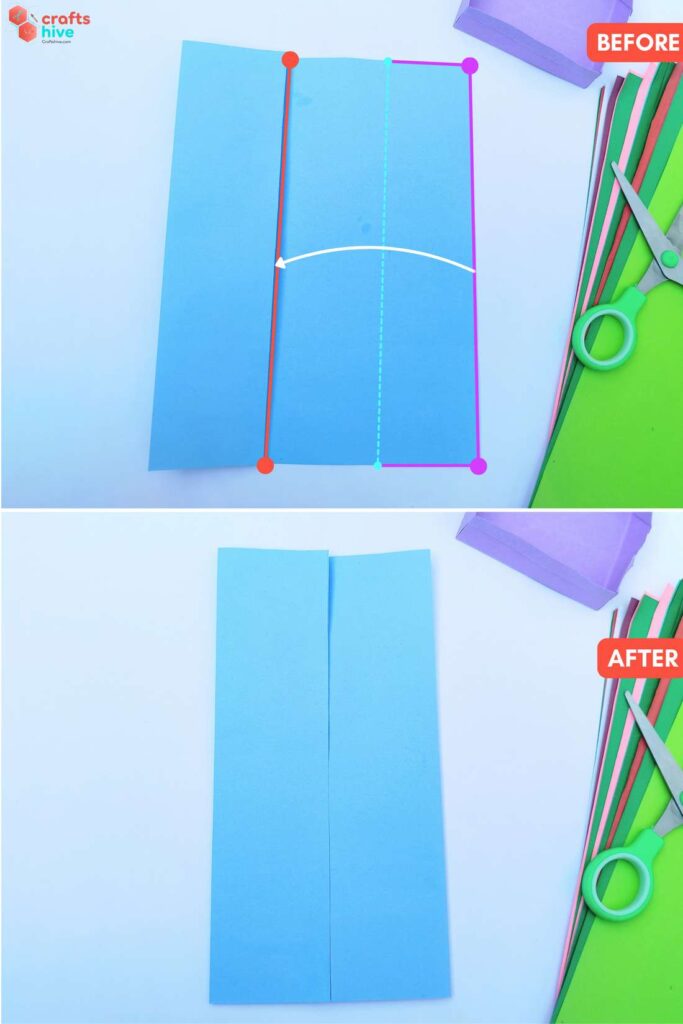
- Also, fold the right edge of the paper upto the centreline and crease the fold.
Step #3: Folds for the Flaps
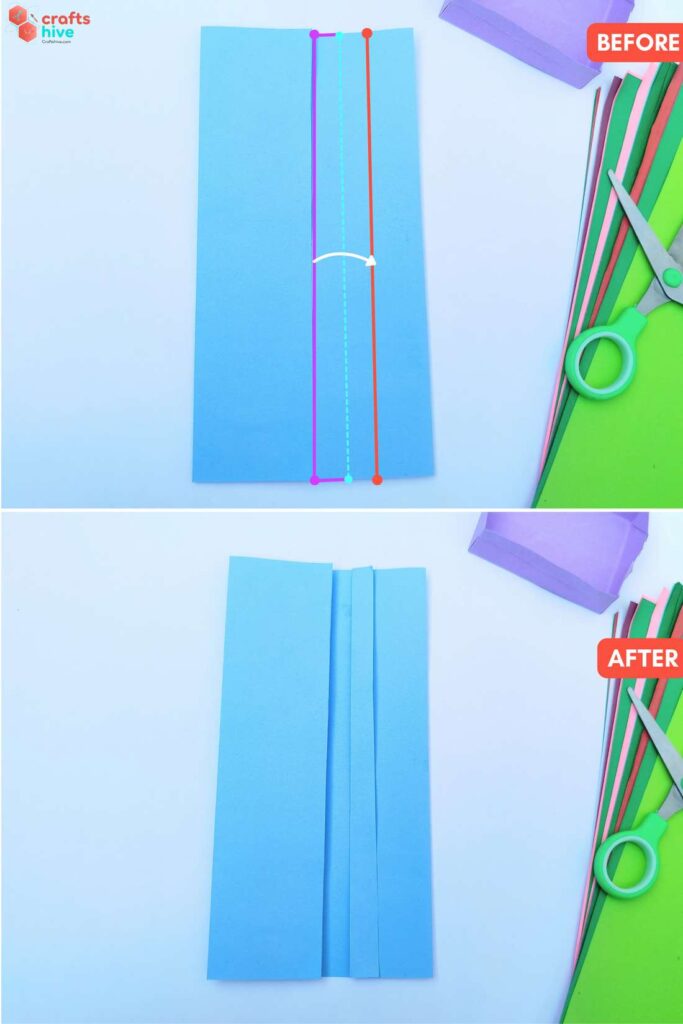
- Fold about 1/4 of the Left Edge of the Right Quarter flap towards the right and press the paper flat.
Note: This fold affects the height of the sides of Rectengle Box and is done to taste.
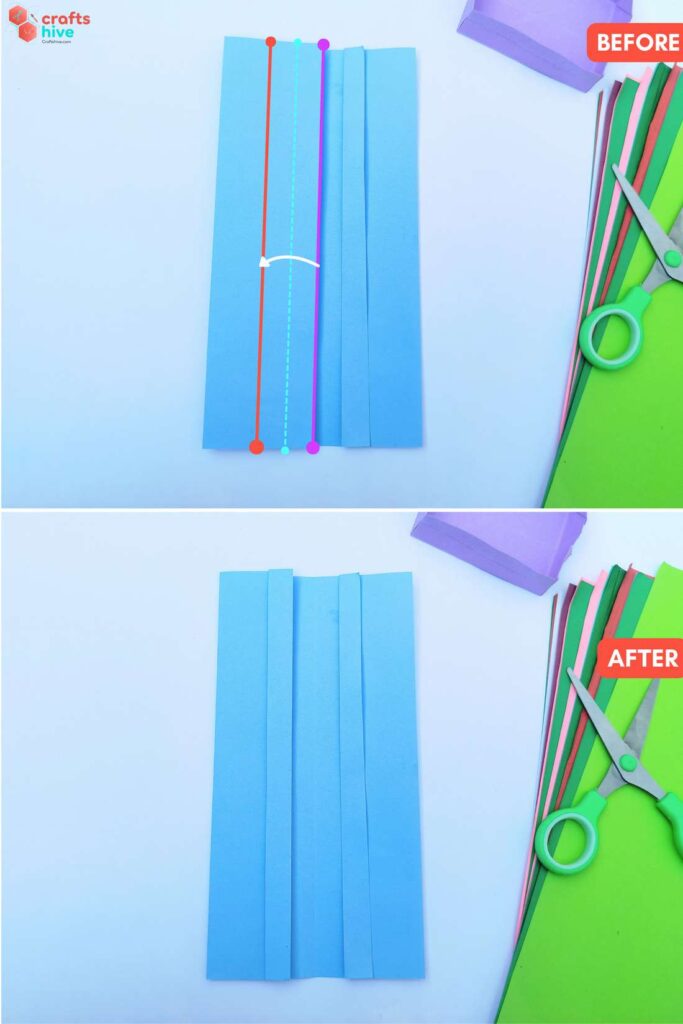
- Fold the corresponding edge of the Left Quarter Flap towards the right as much as you folded the for Right flap.
Fold the paper in half along the vertical, press it flat, and unfold to have a vertical crease in the middle of the sheet.
Step #4: Unfold

- Undo the Step #3.
Step #5: Corner Folds
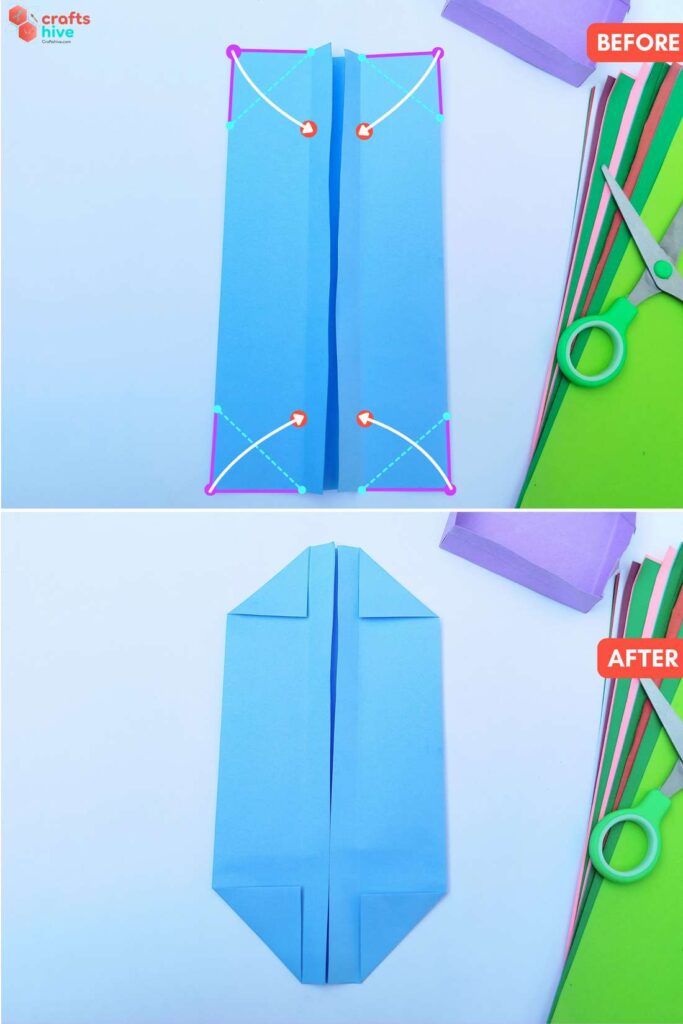
- Diagonally fold all four corners of the paper and align the corresponding edges to the Vertical Creases made by the folds in Step #3.
For example, fold the top corner down towards the right and settle it onto the crease. Similarly, do for other corners.
Step #6: Refold
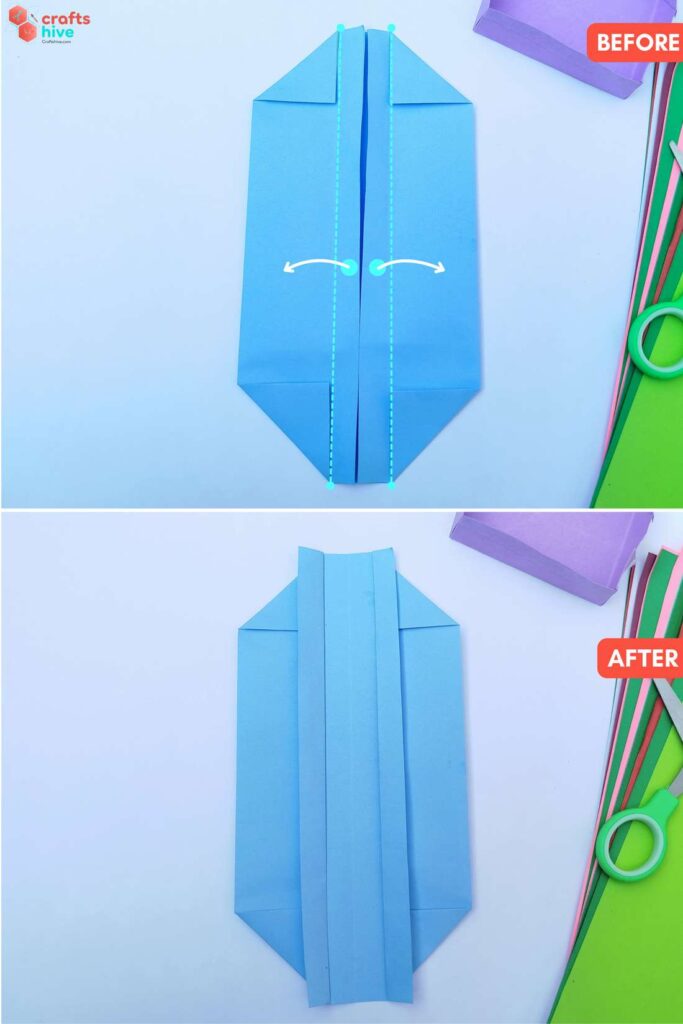
- Swing the flaps of Step #3 back to their original position. That is to refold the flap along the vertical creases.
Step #6: Opposite Folds
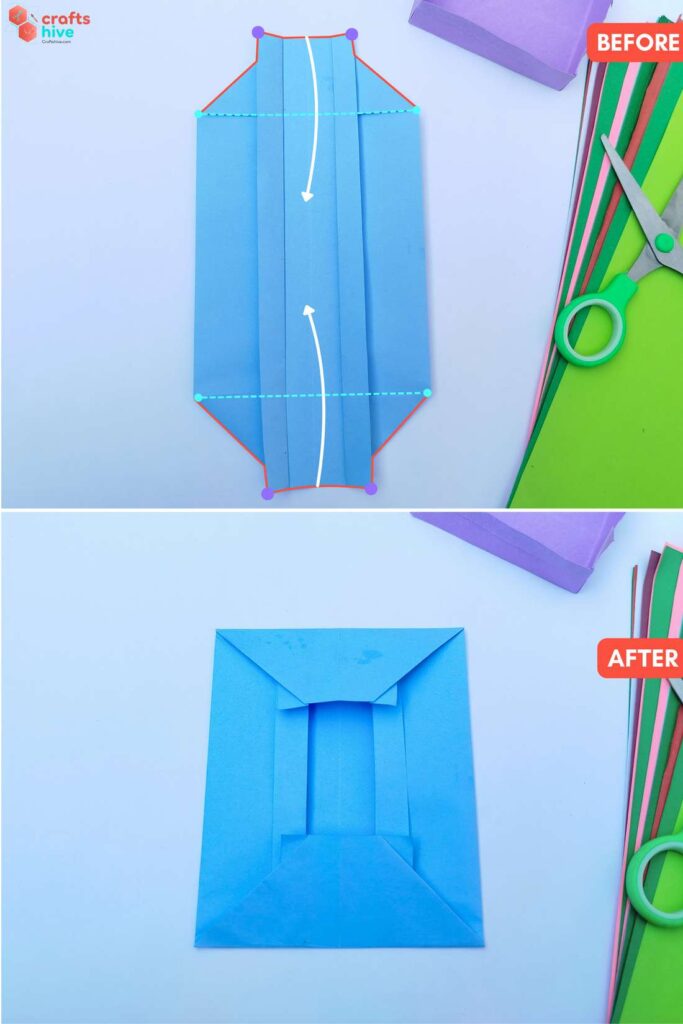
- Fold the top and bottom parts of the paper about the corners created by the corresponding diagonal folds.
Step #7: Unfold
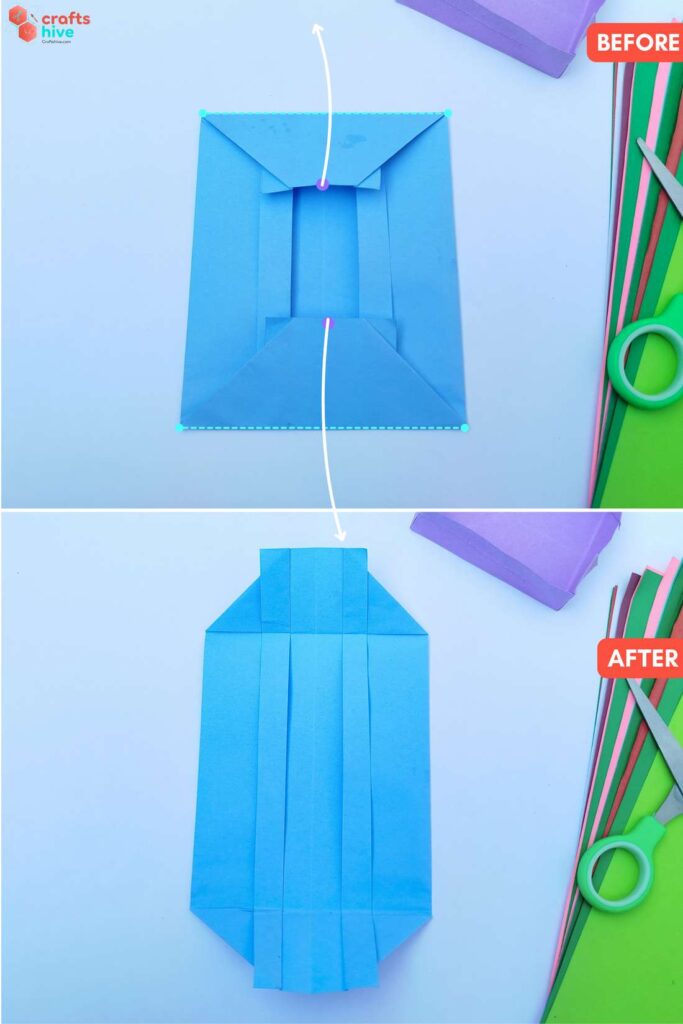
- Swing the flaps back, but don’t press flat.
Step #8: Open the Box
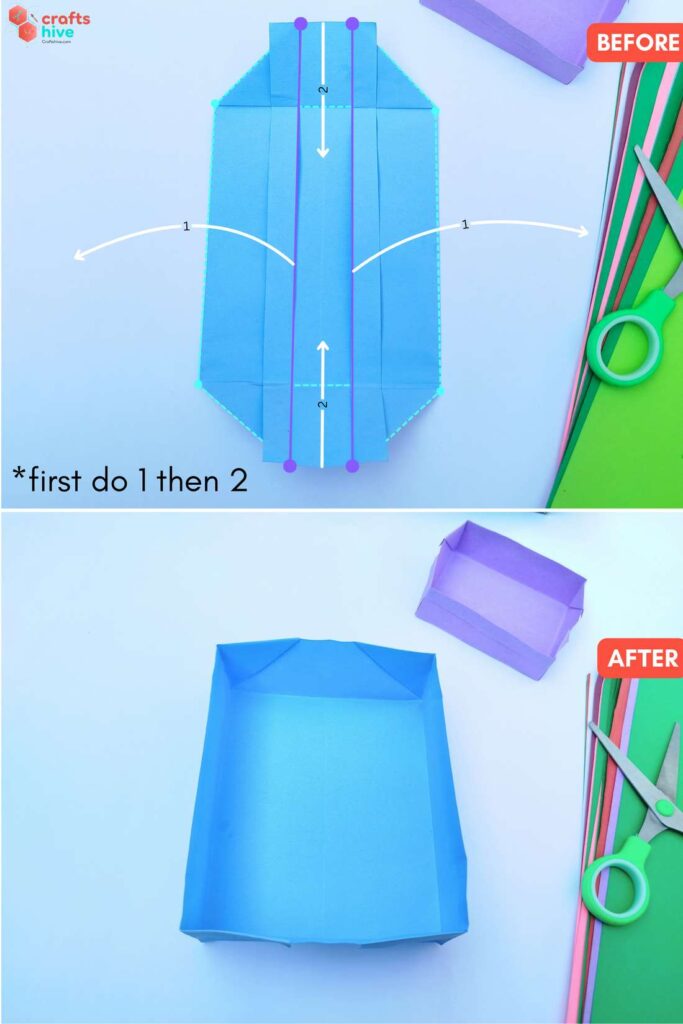
- Pick and pull the edges of the folds made in Step #3 to either side until.
- Swing the flaps of folds made in Step #6 back to either side.

- Pinch along the bottom of the edges of the sides to make each side perpendicular to the base and straight.
Finished

That’s how to fold an origami rectangle box that has enough size to hold scissors, markers, and other stuff.
Do you need a Lid?
The design offers flaps on two sides, but you can fold a rectangular box with a slightly bigger sheet to make a lid for it. Before that, glue the flaps to the sides.
How to Make it Stronger?
Glue on two sheets of Tant paper and then fold the same box. This also allows for a box with both colors of the paper.
Was this Origami Tutorial Helpful? Tell us in the Comments.
Your feedback is a great way for us to improve our origami tutorials. So, share your thoughts on whether you tried this one or not, and highlight the weak points.

About "Talha"
Hey, I’m Talha, the Crafter on Craftstive.com. I love to share guides on folding cute origami models and paper crafts, and I am always ready to inspire your next craft project with my weekly craft discussions.