
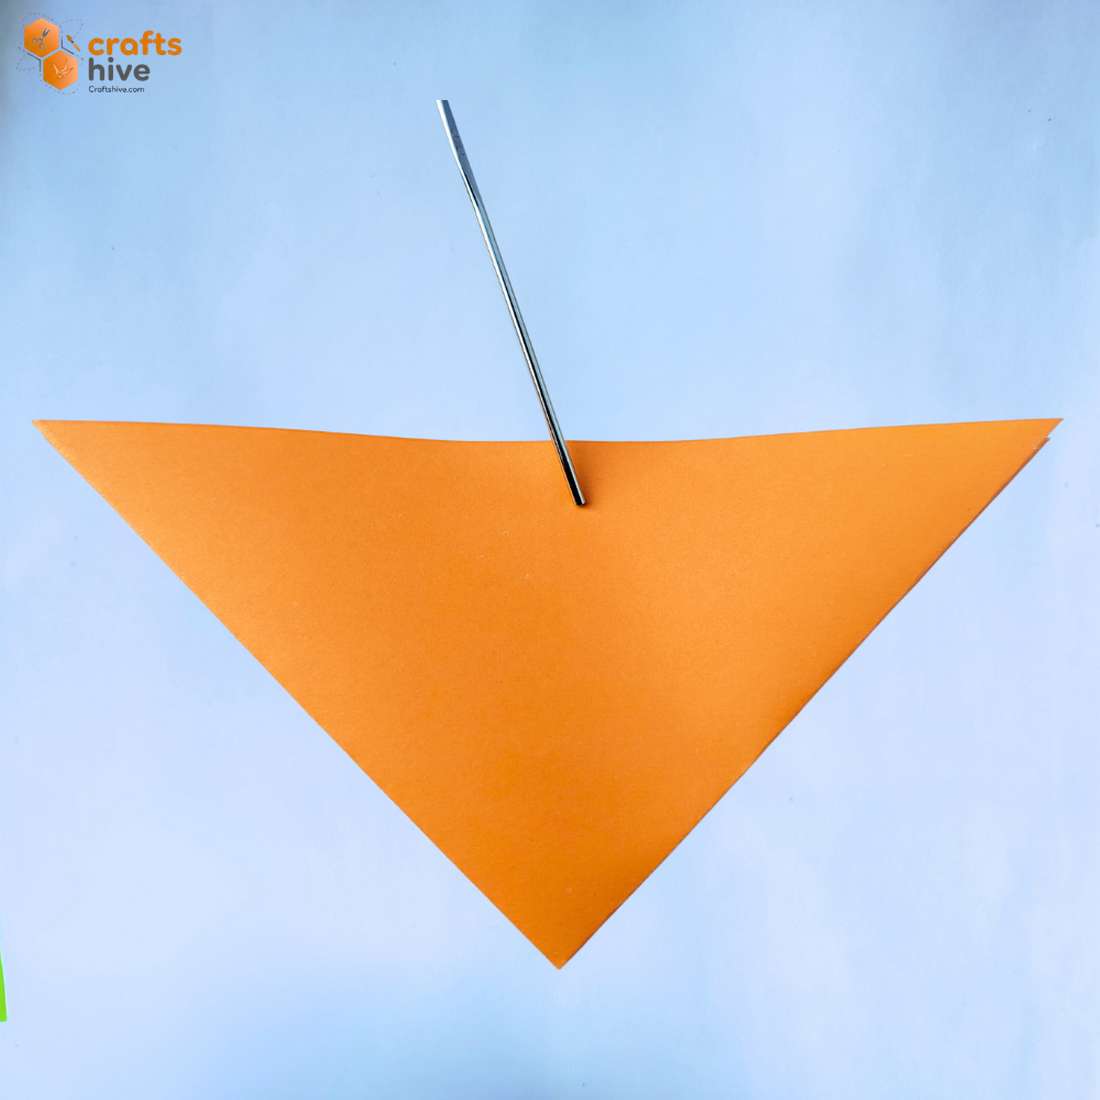
In this class on origami basics, you will learn how to fold an origami Waterbomb base in 4 steps. This base lets you collapse your square sheet into an isosceles triangle with two symmetrical flaps to work with.
The method works much like an origami Square base, which is also a collapsible base but in a square shape. You can use this base for several traditional origami techniques, both as a preliminary fold and as an intermediate fold.
Take, for example, the origami Japanese Waterbomb, aka inflatable balloon, by which it gets its name. There are definitely many modern origami models that need this base. So, let me teach you how to fold this base in simple steps!
Uses of Origami Waterbomb Base
Once you are done folding your origami waterbomb base, you can make the following traditional models using it:
- Origami Inflatable Balloon
- Origami Balloon with Wings
- Origami Triangle Fish
- Origami Jumping Frog
- Modular Origami Spinner
Origami Waterbomb Base: Step-by-Step Guide
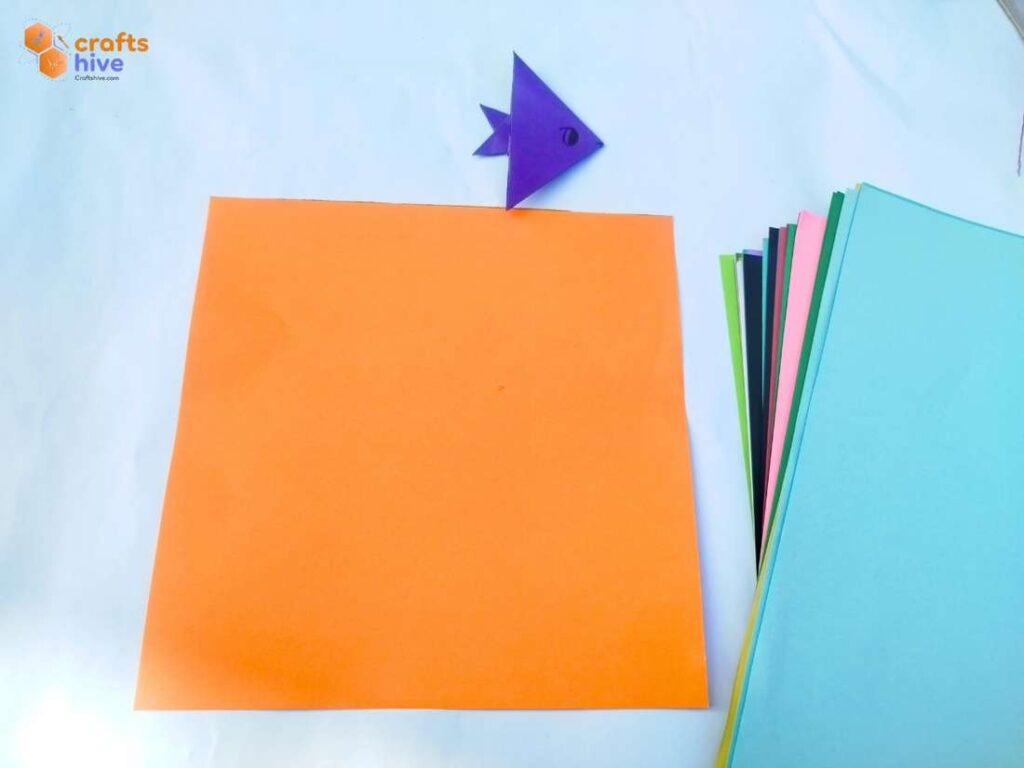
We shall begin with three pre-creases and then collapse all three triangle sections.
Difficulty: Beginner level 2
Step #1: Horizontal Crease
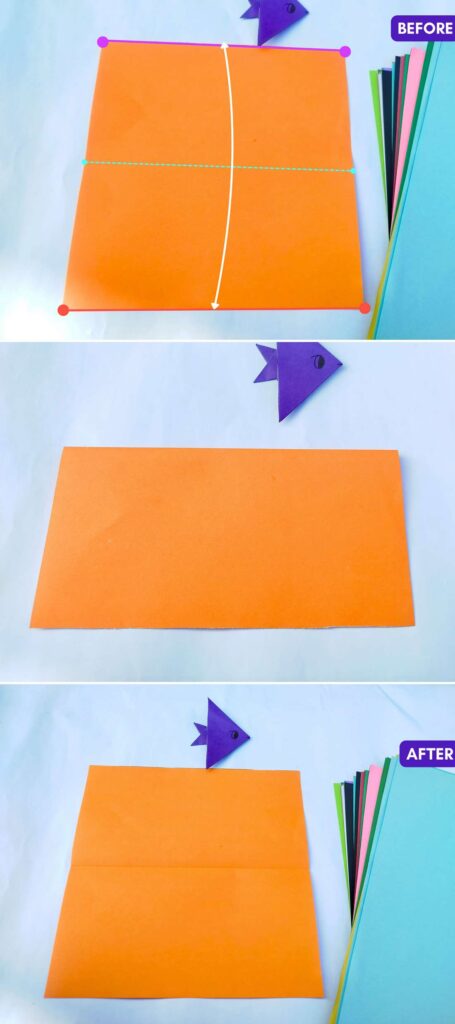
- Fold and unfold the paper in half along the Horizontal to make a crease in the middle.
Step #2: 1st Diagonal Crease
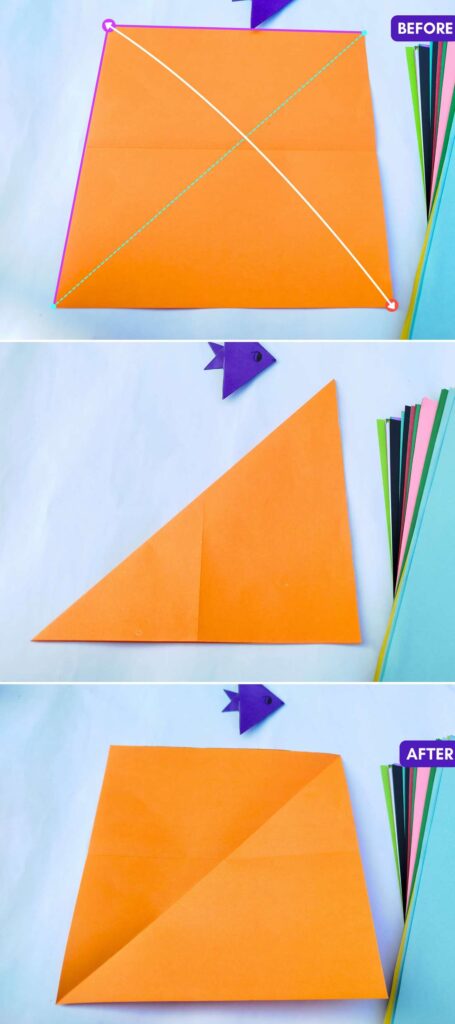
- Now, fold and unfold along one of the two diagonals. For example, I folded along the top right and bottom left corners.
Step #3: 2nd Diagonal Crease
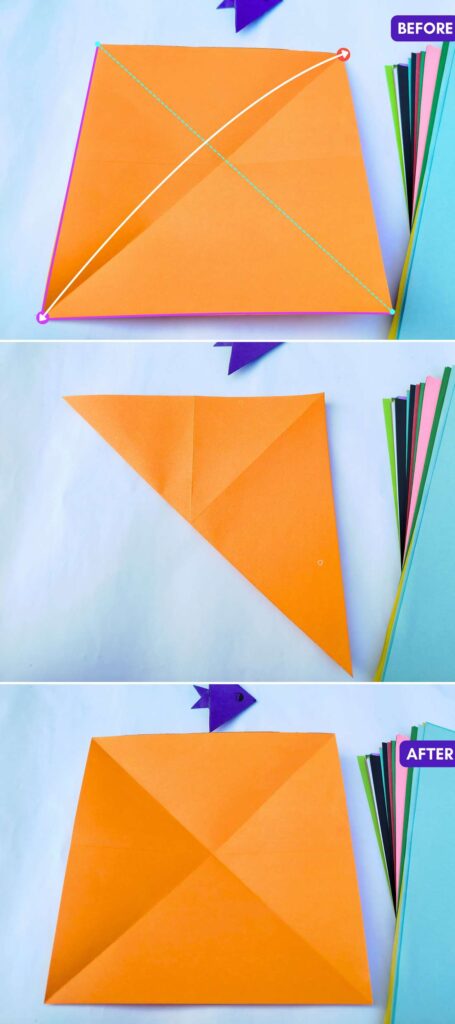
- Fold and unfold along the other diagonal. For example, I folded along the top left and bottom right corners.
Step #4: Collapsing into the Base
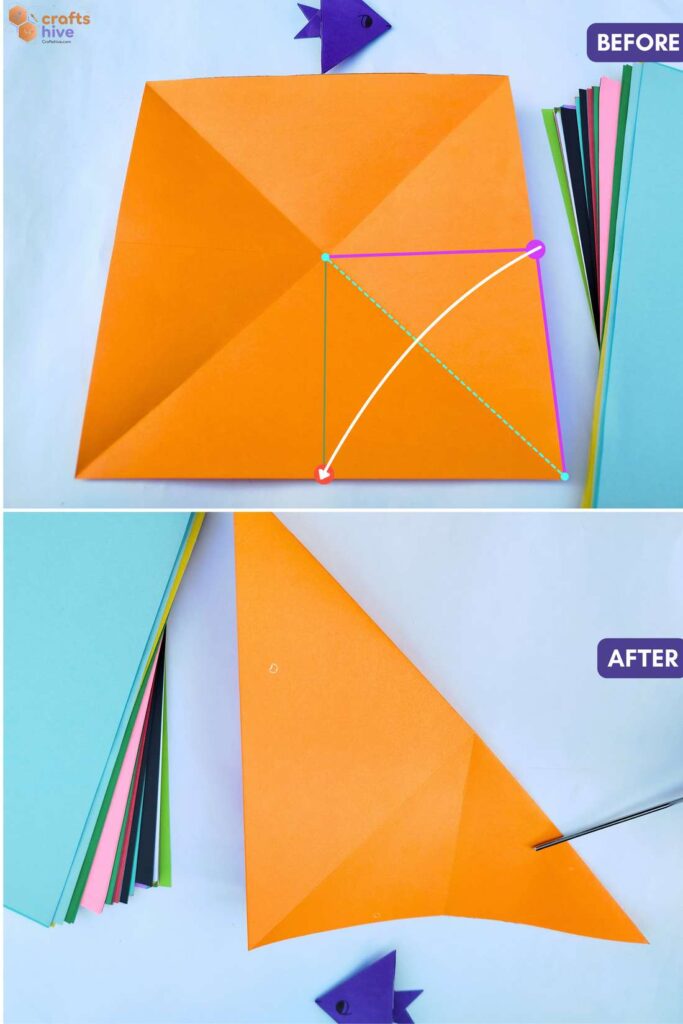
Let’s collapse the paper into the waterbomb base onto one of the four triangular sections. For example, the bottom, in my case.
- Fold the Middle Right Corner to the Midpoint of the Bottom edge along the Right Hypotenuse of the Bottom Triangle.
Folding Tip: If your project does not demand neatness, you can also make a vertical pre-crease to find the midpoint.

- Fold the Left Corner of the Front Flap to the Right Corner and crease the Perpenicular Hinge Very Well.
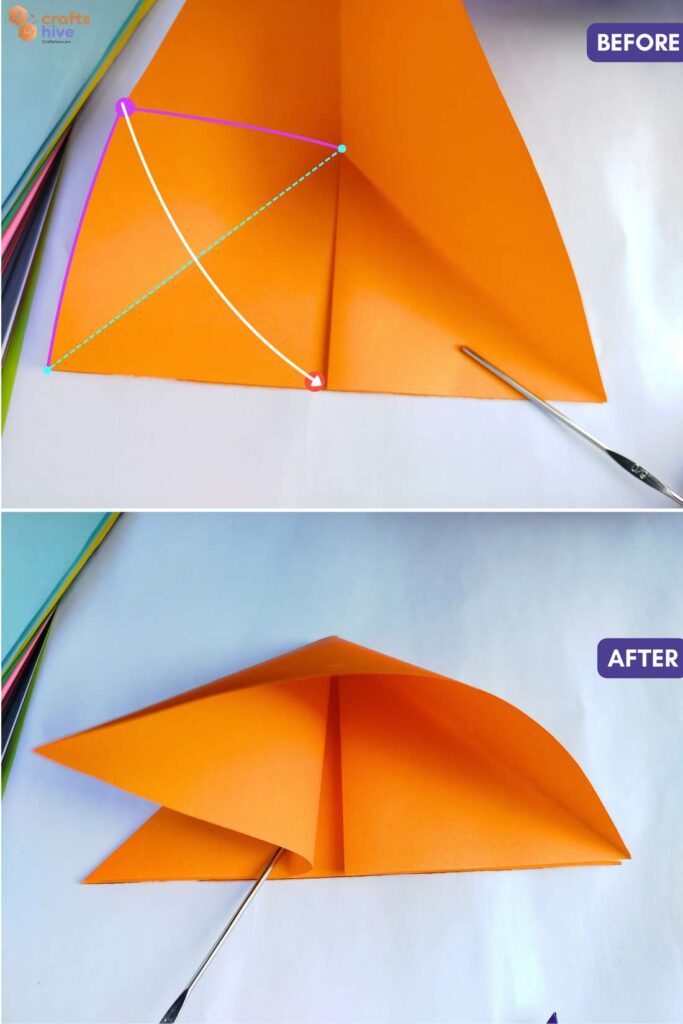
- Similar to the right side, fold the Middle Left Corner to the Midpoint of the Bottom edge along the Left Hypotenuse of the Bottom Triangle.
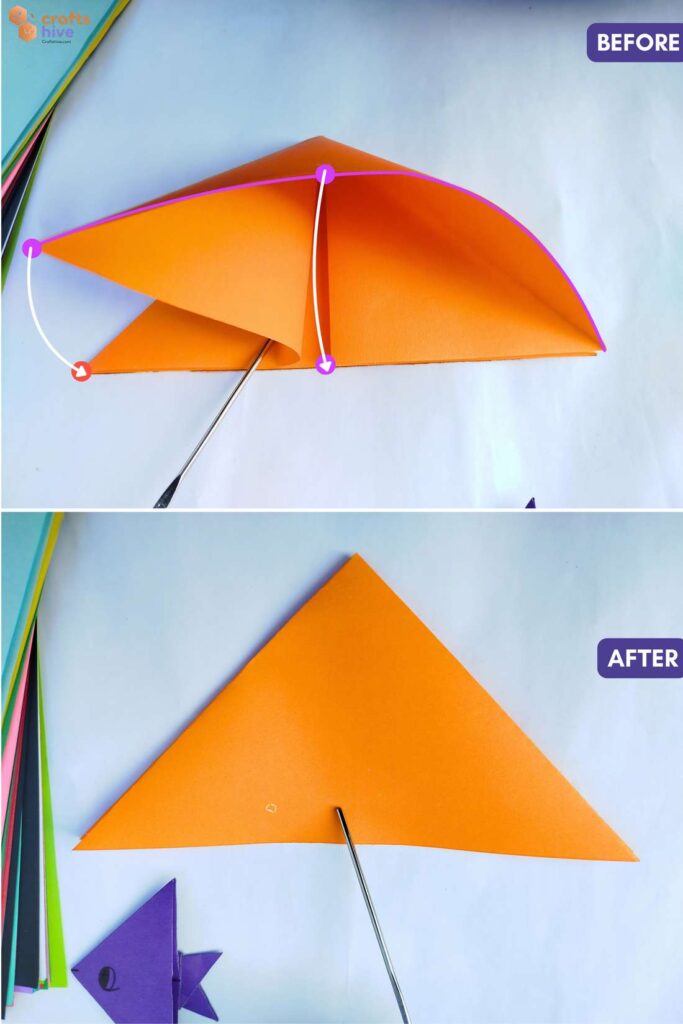
Unlike the right side, the other layers of paper will try to collapse into the needed positions.
- Just press all the layers down and crease well so that you have a single triangle like this.
Finished
That’s how you can fold an origami waterbomb base with a method very similar to the square base. Then you can either turn it into a Fish. Learn how to do so following my Easy Origami Fish Tutorial.
Was this Origami Tutorial Helpful? Tell us in the Comments.
Your feedback is a great way for us to improve our origami tutorials. So, share your thoughts on whether you tried this one or not, and highlight the weak points.

About "Talha"
Hey, I’m Talha, the Crafter on Craftstive.com. I love to share guides on folding cute origami models and paper crafts, and I am always ready to inspire your next craft project with my weekly craft discussions.