
Subscribe to MiLena !!
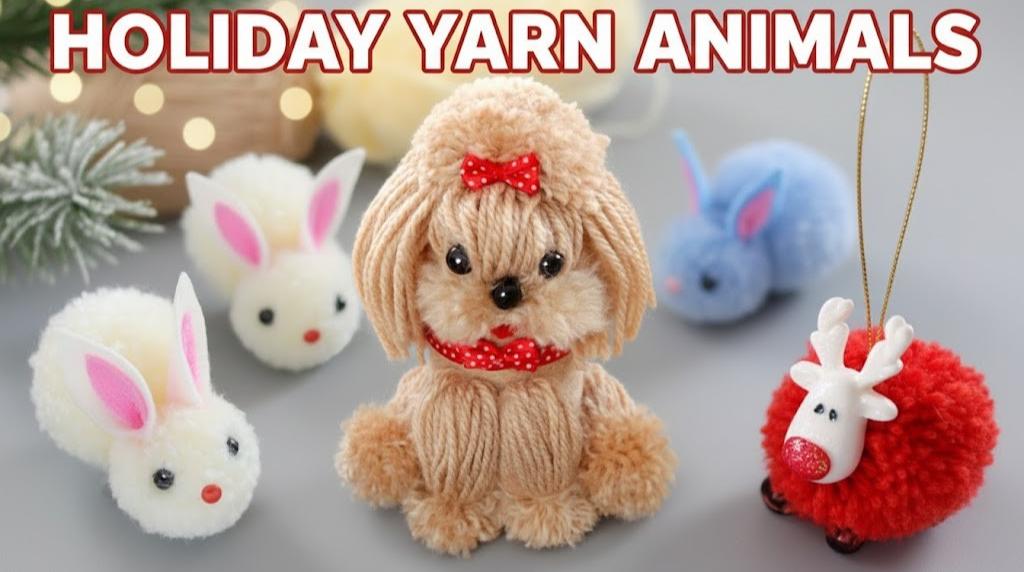
Learn some REALLY cute yarn animal plushies for the NEW year and Christmas!!! These are fluffy, can be finished in 7-10 minutes, and need no pattern. Plus, I assure you will find some REALLY clever ways to make plushies following them.
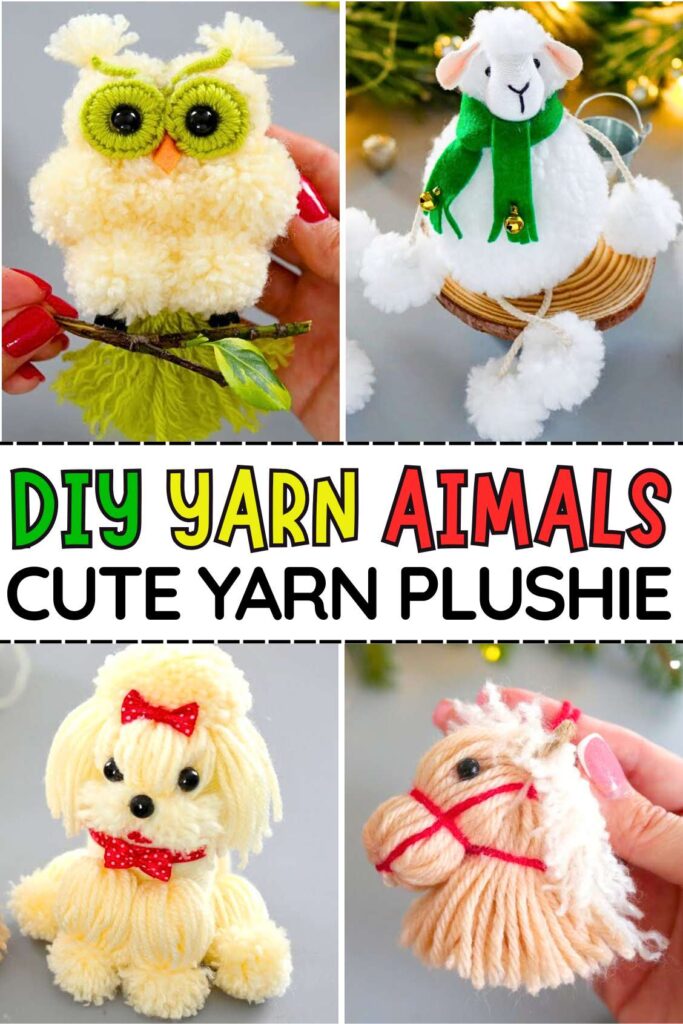
Like using different shapes of cardboard cutouts for the pom pom and cord roll as an animal body base. Moreover, these holiday animal plushies are CREATIVE. It means you get the horse, puppy, owl, and more.
Wanna make an ornament or a little keychain gift for kids? These are simply irresistible!
[ez-toc]
Horse Plushie Guide?
Idea #1: Craft A Holiday Yarn Puppy
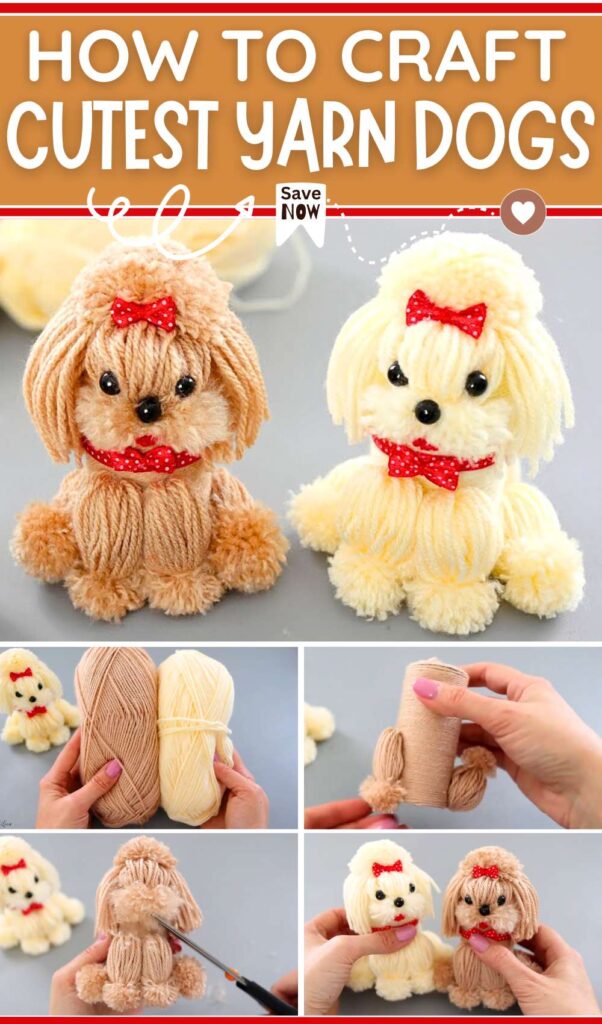
I won’t say this is the simplest pom pom puppy plushie since a simpler one has already been shared.
Nonetheless, it is cute, pleasing to the eye, and looks like a real Toy Poodle sitting.
No worry, you are not gonna make it from yarn alone, there is a clever catch.
And that is to attach the pom poms around the used cord or tissue paper roll. This clever base really saves the effort.
Anyway, this one uses a machine-washable yarn and a circular cardboard base for a pom pom. So gather everything, the little sheet, accessories, too.
Maybe the video tutorial is loading. Be Patient!
Idea #2: Craft A Holiday Yarn Owl
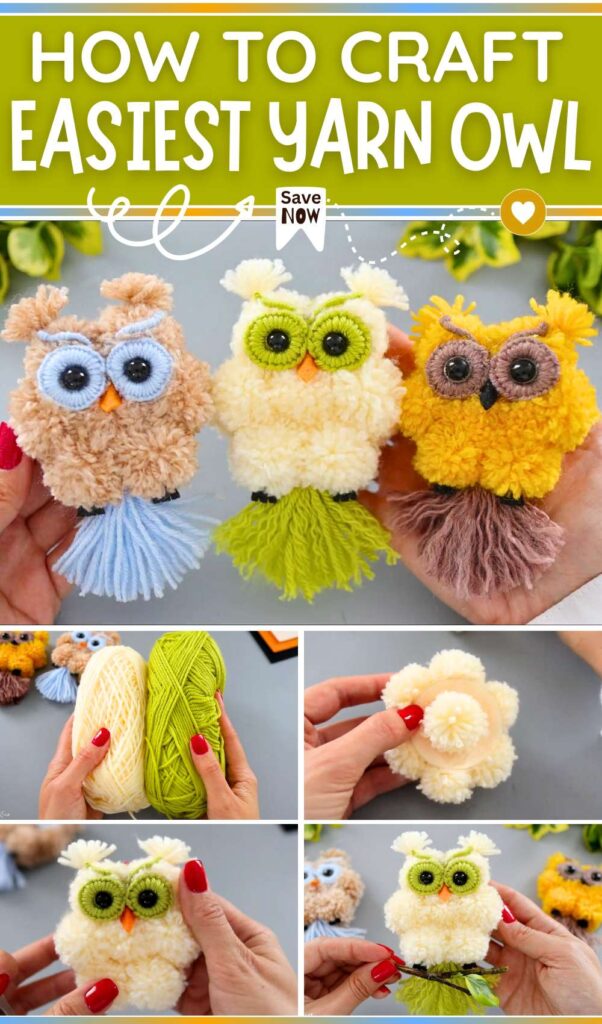
Craft this complete pom pom owl plushie by attaching small pom poms around a circular cardboard base. For the pom poms, you can use the thread tubes, and for the eyes, wrap some yarn around your finger.
Then work around the thread using a sewing needle. This small owl looks cute, and you can make in three color ideas.
Make 14 pieces of the pom poms, each with 10 turns, and start gluing them to make the body of the owl. For the tail, simply make the fringes.
Colors: Blue and brown, green and beige & yellow and brown.
Idea #7: Craft A Holiday Yarn Horse
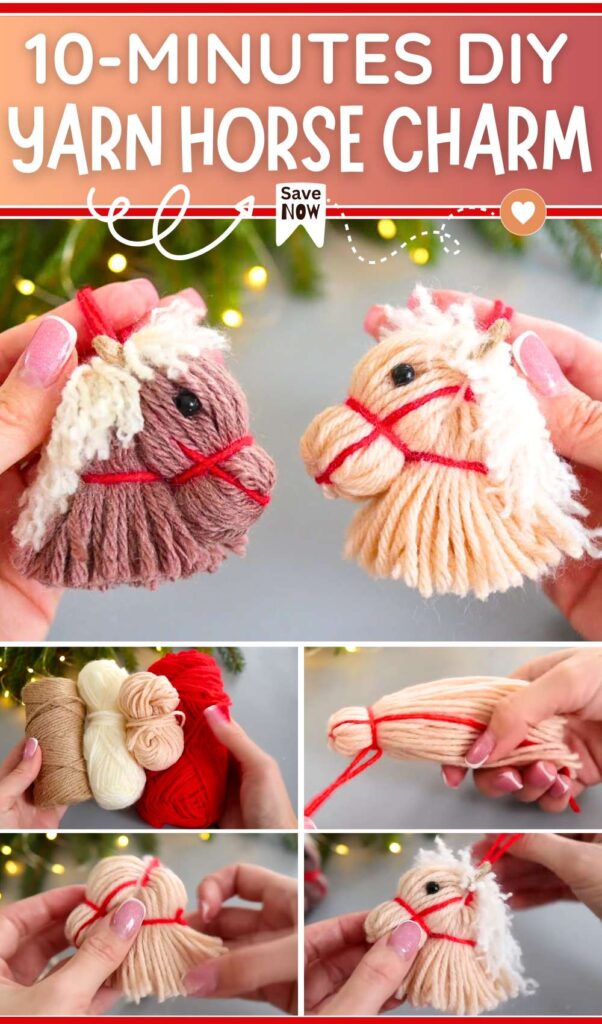
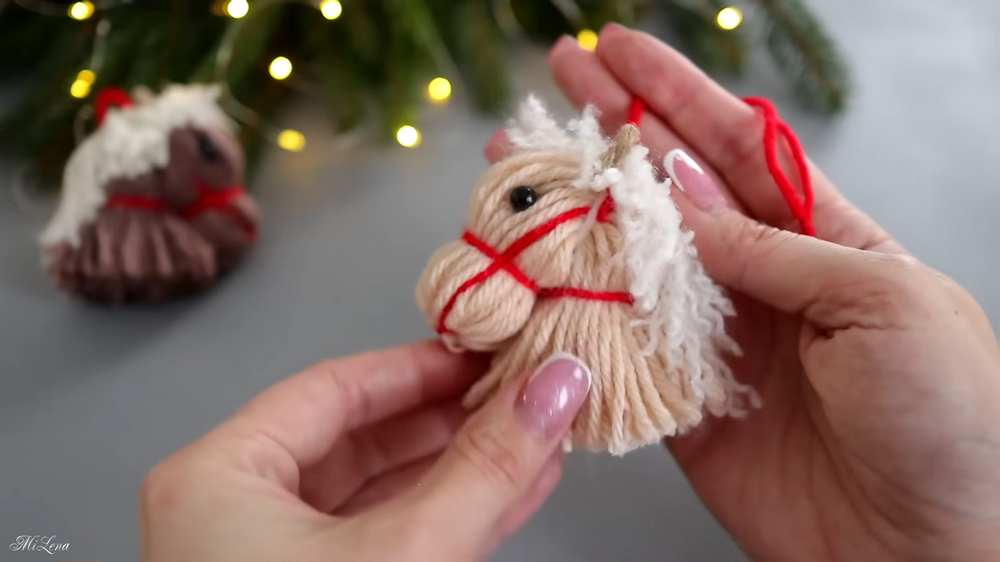
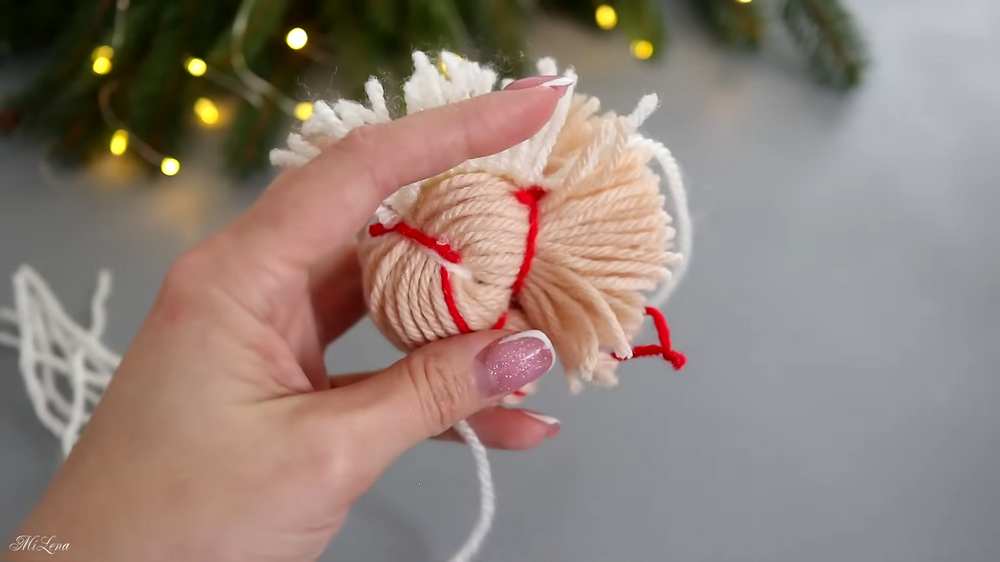
Use three colors of yarn and cord to craft this “Symbol of the New Year” yarn pom pom horse. The idea is not to make the complete horse, but the head and neck.
It reminds me of the stick horse toy, except that there is no stick (haha). To make the pom pom, use the 12cm long cuboid box.
The rest of the yarn animal needs just some knotting and gluing. The cord ears and the mane are quite interesting. Make this yarn animal an ornament for Christmas and the New Year.
or Written Guide?
Materials Needed
-
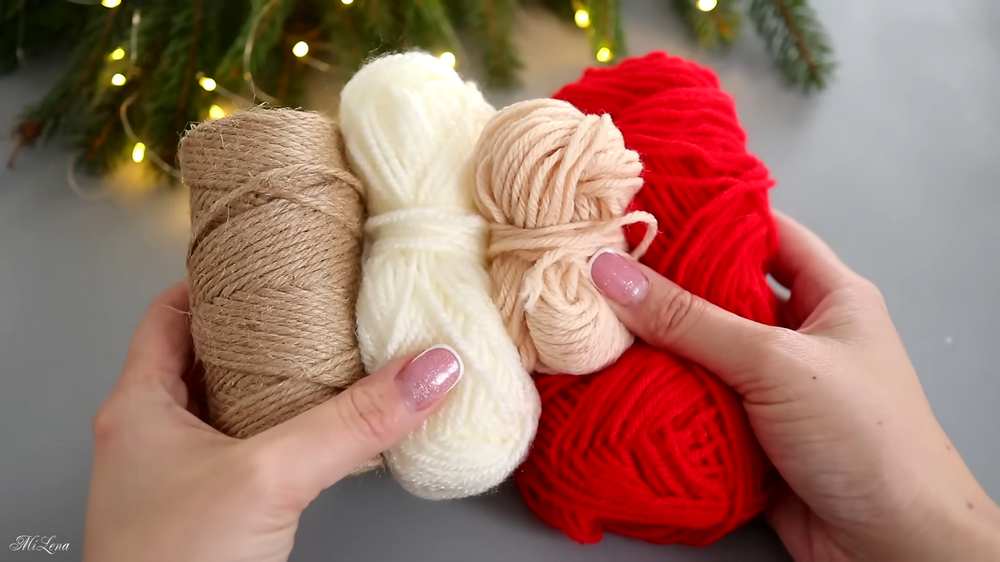
Yarn: Light brown or beige (main color), white (for the mane), and red (for the bridle and hanging loop).
-
Small Cardboard Box: Approximately 5-6 inches (12-15 cm) long to use as a wrapping template.
-
Scissors: Sharp craft scissors.
-
Hot Glue Gun.
-
Twine/Jute String: A small amount for the ears.
-
Small Black Beads: Two for the eyes.
-
Tweezers: For precise placement of small parts.
Instructions
1. Form the Head Base
-
Take your main color yarn (beige/brown) and wrap it around the long side of your cardboard box 55 to 60 times.
-
Slide the bundle off the box, keeping the loops intact. This long, continuous loop will be the foundation of the horse’s head.
2. Define the Face and Muzzle
-
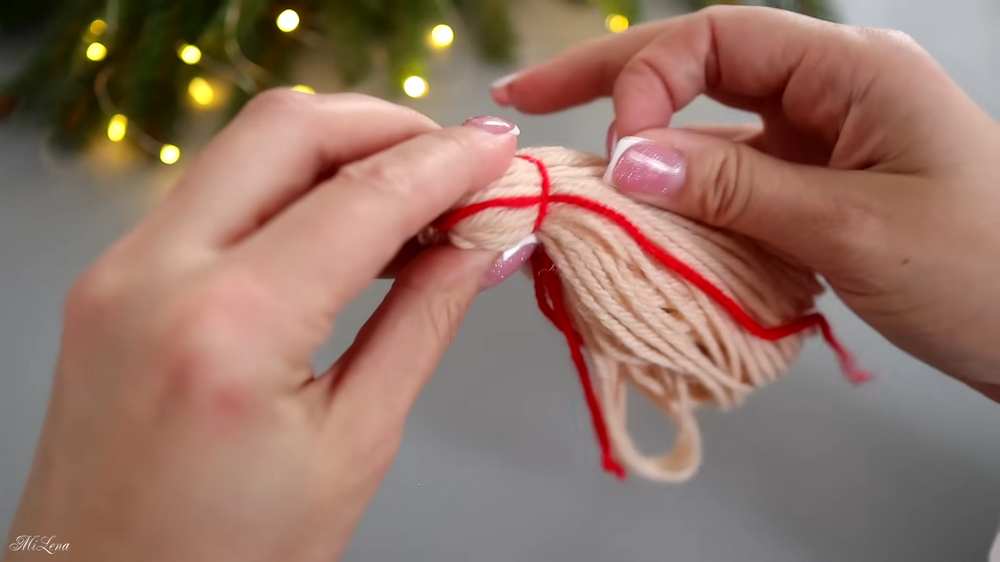
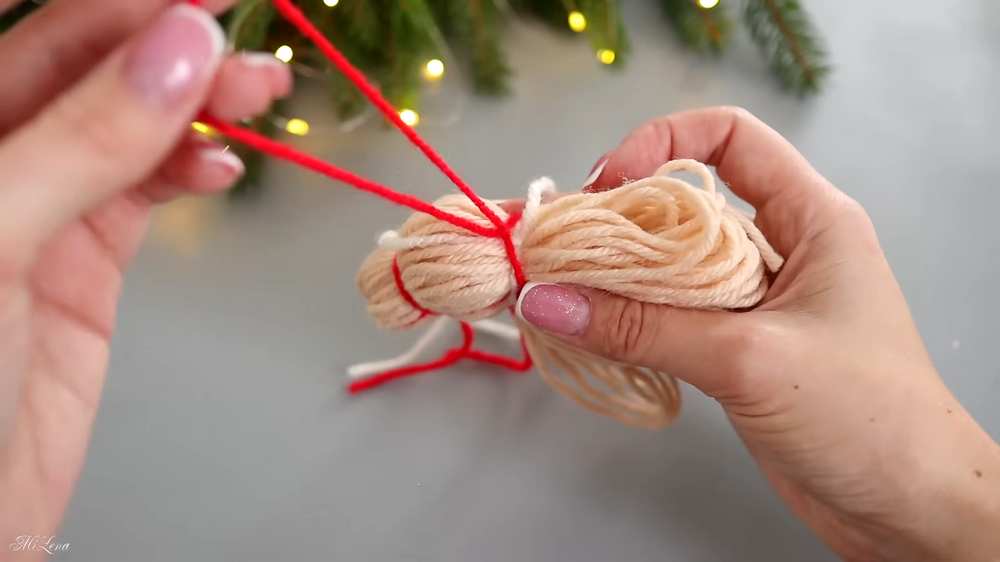
The Snout: Take a piece of red yarn. Tie it tightly around one end of the beige bundle, about 1 inch from the edge. This creates the “nose.”
-
The Bridle: Use another piece of red yarn to wrap and tie around the snout area crosswise, then lead it back toward the jaw area to mimic a harness. Tie it securely.
-
The Head Shape: Tie a final piece of red yarn further down the bundle to cinch the “neck” area, giving the top part a rounded head shape.
3. Create the Mane and Forelock
-
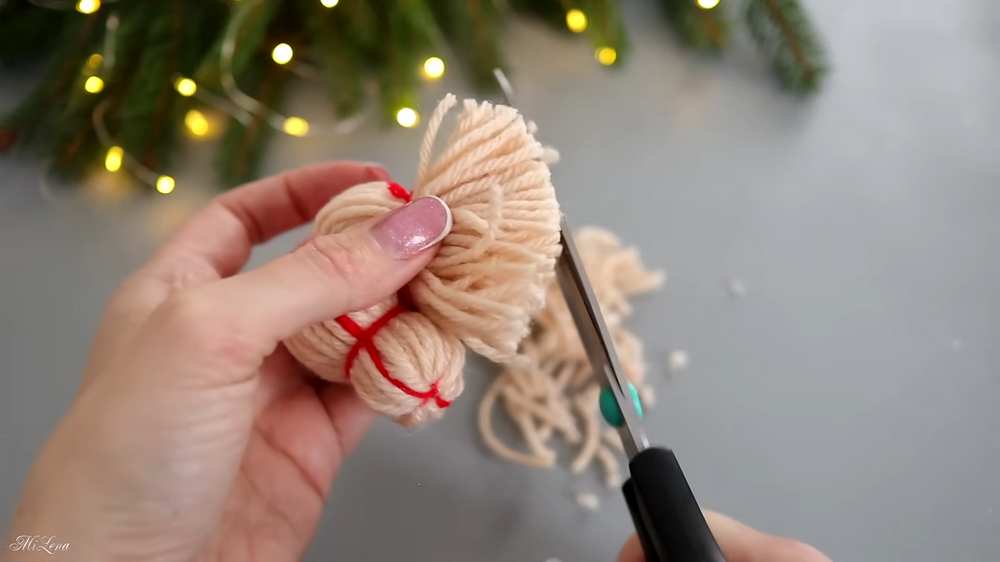
Prepare the Hair: Wrap white yarn around three of your fingers about 10-15 times. Cut the loops open at one end to create a fringe.
-
Make Small Bundles: Take small groups of these white strands and tie them in the middle with a scrap of white yarn. You will need about 3-4 of these small “pom-pom” bundles.
-
Attach: Using your hot glue gun, glue one bundle to the top of the head between the “ears” area (this is the forelock). Glue the remaining bundles down the back of the head to form a flowing mane.
4. Craft and Attach the Ears
-
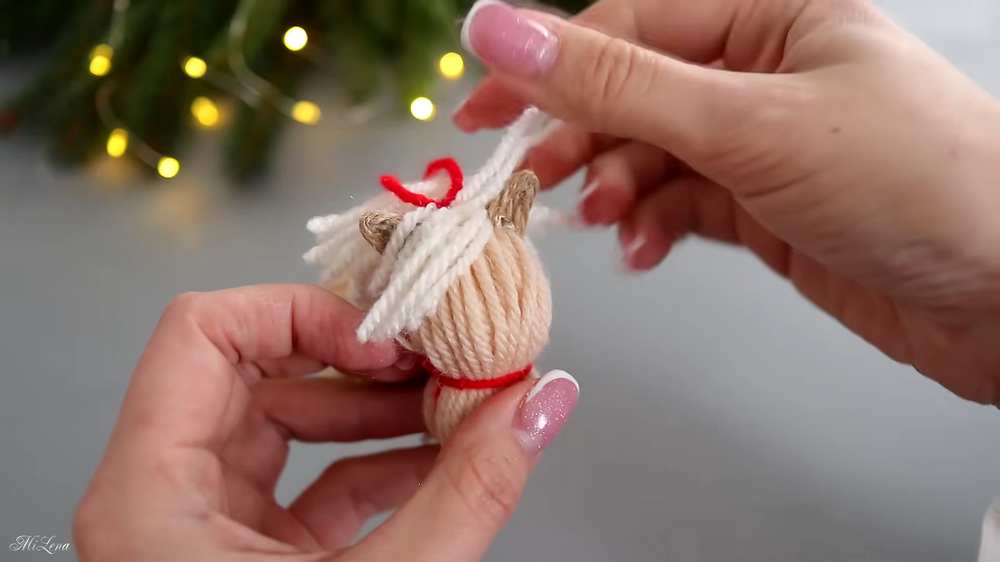
Cut a small 1-inch piece of twine.
-
Fold it into a “V” or triangle shape. Apply a small dot of hot glue to the base and pinch it together to hold the shape. Trim any frayed edges.
- Glue two of these ears onto the top of the head, tucking them slightly into the white yarn of the mane.
5. Add Facial Features
-
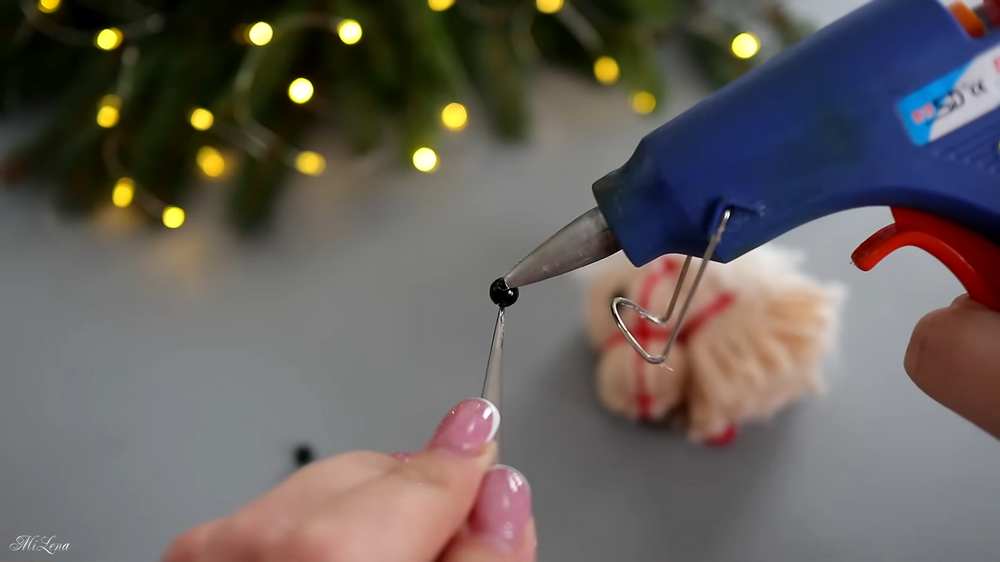
Using tweezers, pick up a small black bead. Apply a tiny dot of hot glue to the bead and press it onto the side of the beige head, just above the red bridle line.
-
Repeat on the other side for the second eye.
6. Final Trimming and Hanging Loop
-
Trim the Neck: Use your scissors to cut the loops at the bottom of the beige bundle so they hang straight down like a neck.
-
Neaten the Mane: Trim the white yarn mane and forelock to your desired length.
-
The Loop: Tie a loop of red yarn through the top of the horse’s head (under the mane) so it can be hung on a Christmas tree.
Your handmade yarn horse ornament is now ready to gallop onto your holiday tree! You can experiment with different yarn colors to create a whole stable of festive friends.
Idea #3: Craft A Holiday Yarn Bunny
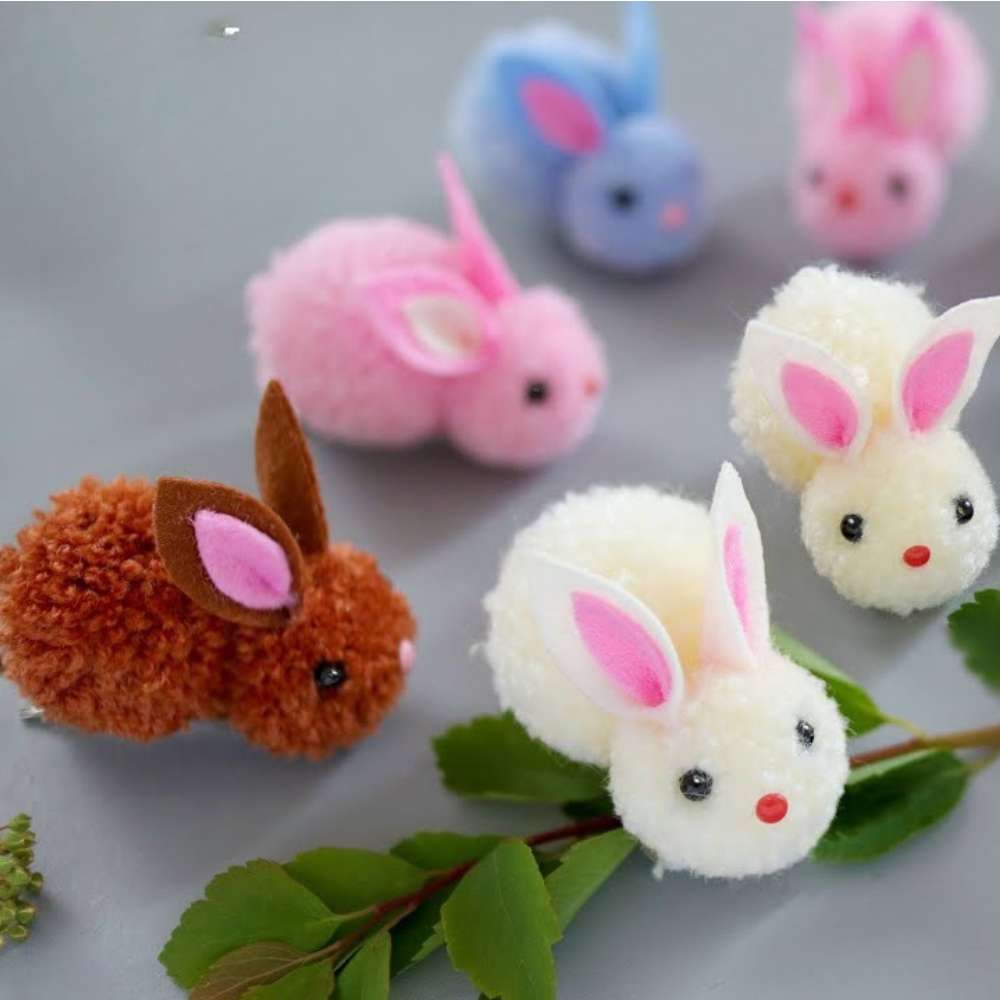
Make these simple and 7-minute yarn bunny hairpins for kids using just two round pom poms. The felt ears in two colors and the overall softness and life-like look, everything is interesting.
In what color do you like a bunny? White, blue, brown, or pink, any of them is allowed.
For these mini pom pom bunnies, trim the pom pom into balls of 3.5cm and 2.5 cm. After you are finished with it, attach your hairpin with felt.
Use: beads for eyes and a little bit of felt in two colors.
Idea #4 Craft A Holiday Yarn Sheep
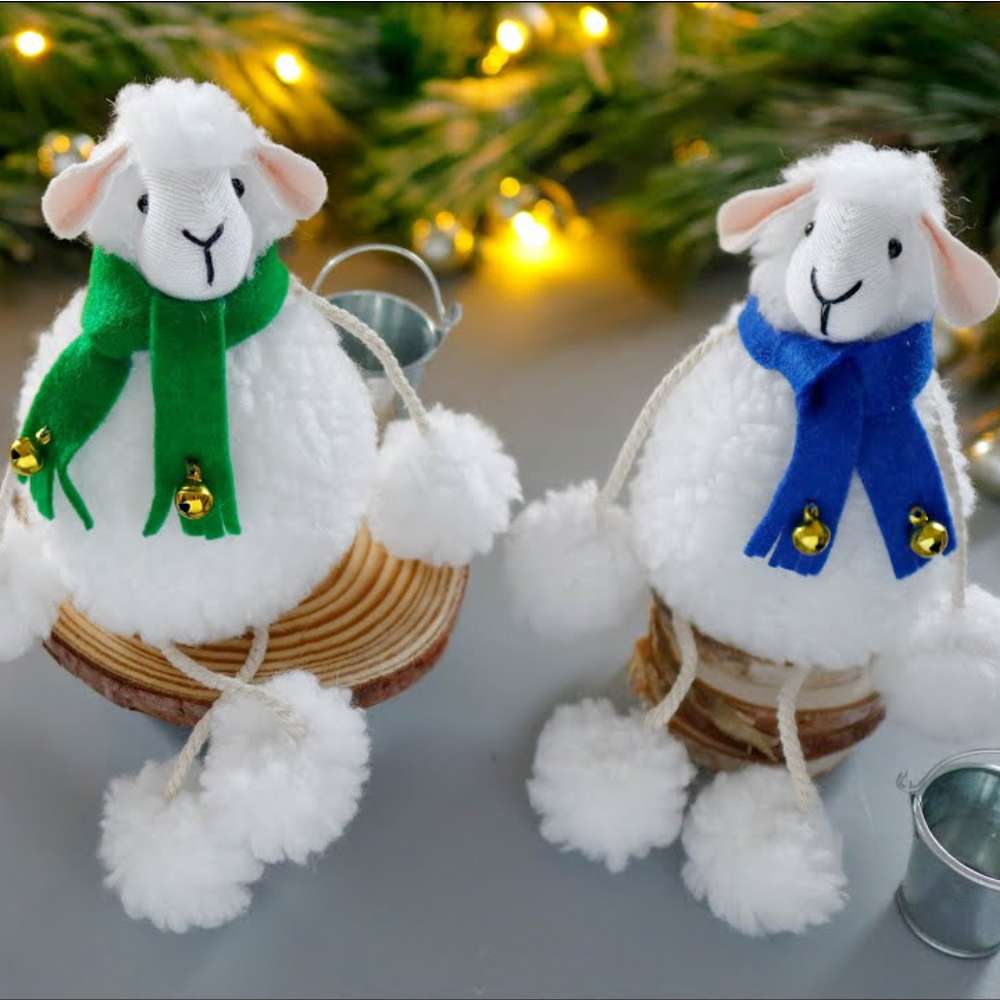
Leggy animal plushies are funny and have been quite trendy lately. This sheep yarn leggy plushie uses, not the pom poms, but the segments from the artificial sheepskin fur.
Make four rounded balls by cutting and sewing with this fur for legs and one larger for the body. Attach the legs to the body with some lengths of yarn.
You also need the rounded side of an old white sock to make the nice head of the sheep. A lot of cutting and sewing is needed, but this is a must-make for the New Year.
Idea #5 Craft A Holiday Yarn Reindeer for Christmas
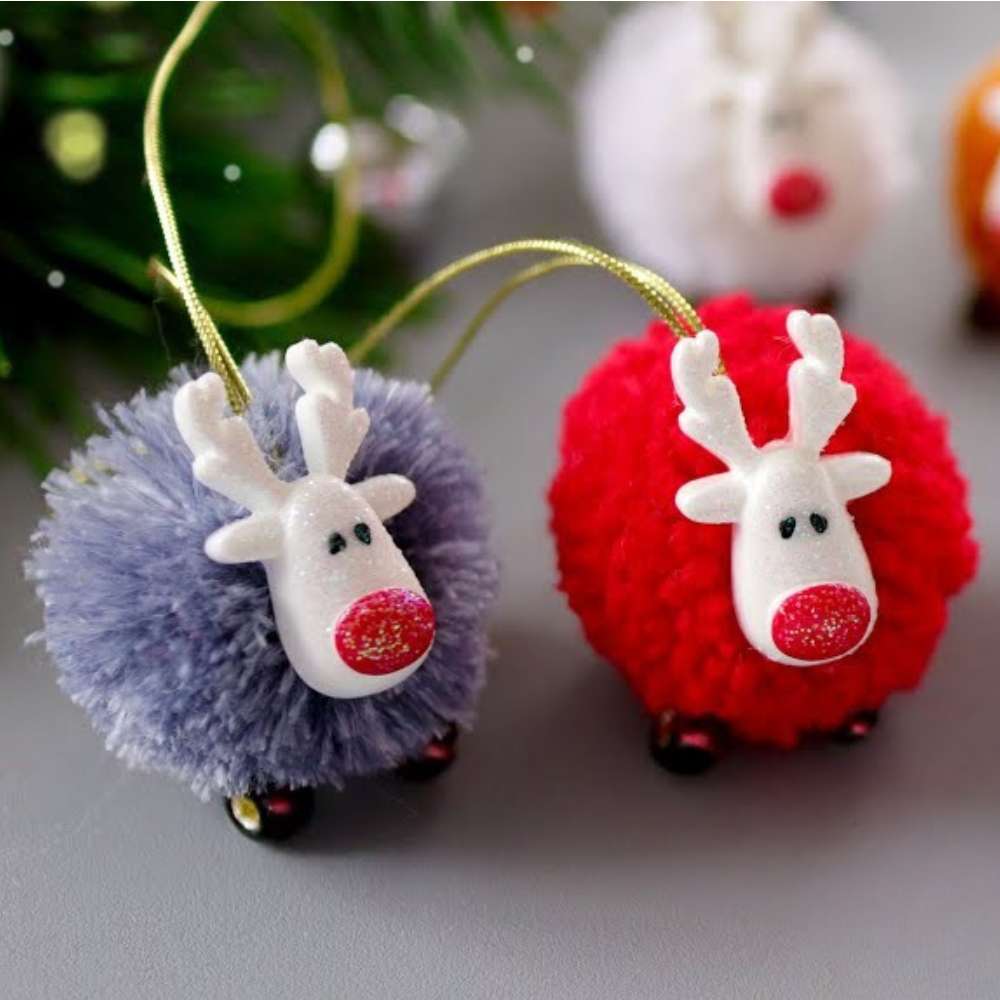
This miniature Christmas reindeer can be crafted from just one pom pom and 3D printed plastic heads. The template for the head is still available, I think, it is a bit inaccessible pom pom animal project.
Therefore, try it only if you have the proper equipment and the needed stuff. Otherwise, it would be a great option to make your own pom pom head. It is a great ornament idea for the NEW year and Christmas.
Way #6: Craft A Pom Pom Panda

To craft a sitting panda keychain, start with a 5cm cardboard base and wrap it 200 times. This will be the head of the panda. For the body, you will have to wrap the black yarn 50 times and 180 times around a 6cm base.
For the muzzle, a 2cm base with 50 wraps. After you have all the pom poms, stack onto the other, attach the arms, legs, ears, and safety beads.
Way #8: Craft A Pom Pom Penguin

This super-realistic yarn penguin plushie can stand without support. It also uses some felt. From the felt, you have to take a cutout for the flappers, feet, and beak.
When the plushie is finished, you can make wearables using red and white felt, like a Santa hat and scarf for Christmas. Craft it at any time of winter.
Talking about crafting it, first wrap black yarn 120 times around a 4.5cm base. Immediately after that, wrap around the same base, the white yarn 60 times. Stack the white wrap over and complete the combined pom pom.
This will let you have the penguin body with a belly. For white on the face, again make a two-color pom pom. You can insert an unfinished pom pom in the face for the eye sockets.
Way #9: Craft A Pom Pom Cheburashkha
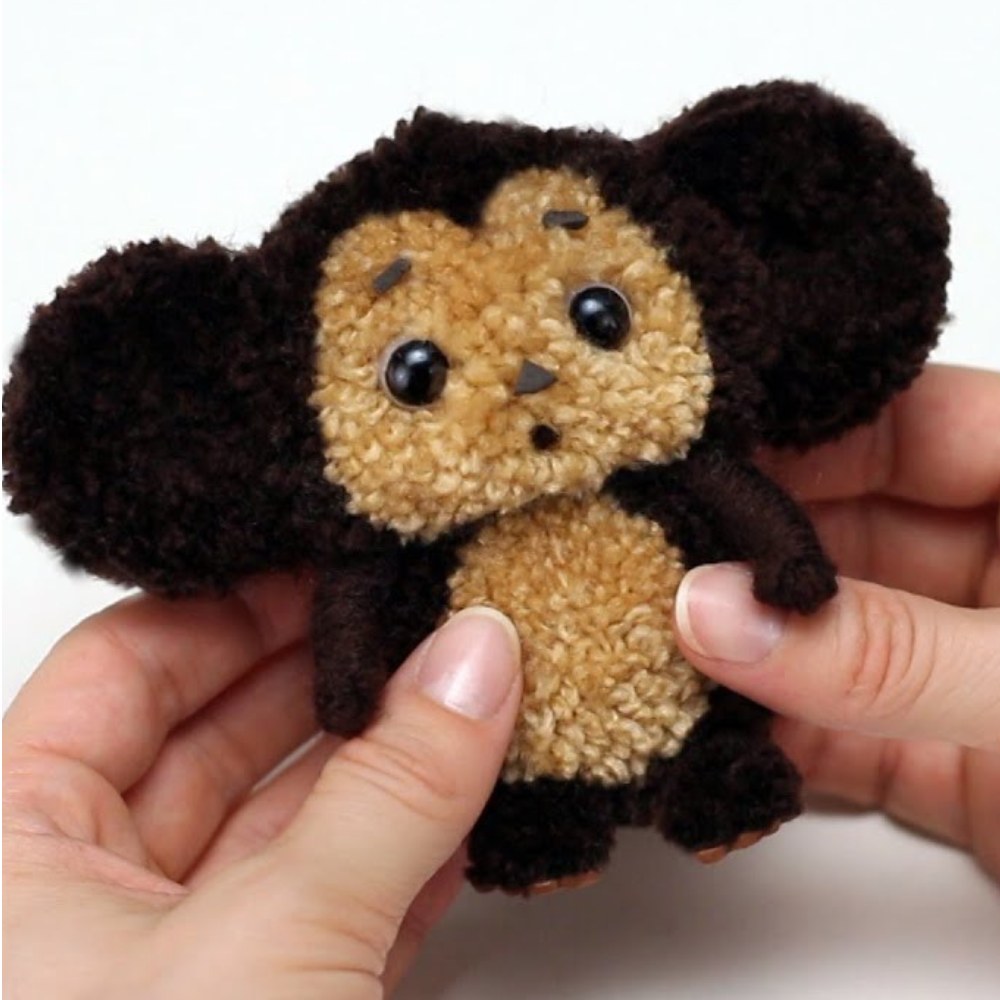
Cheburashka is actually a fictional animal, or what people say, inspired by “an unknown” animal. It is a hybrid of monkey, bear, and rabbit. We shall craft a small Cheburashka doll with poms, craft eyes, a popsicle stick, and a round foam base.
The body is not round, but quite flat. The same can be said for the ears. Start by wrapping brown yarn 130 times around a 5.5cm base. Squish together a light brown wrap of 60 turns.
This will make the face of Cheburashka. Make a similar pom pom but a little smaller for the body, too. For the ears, make circles of 4cm in diameter, and place loops of yarn all around.
For the arms, you have to make long, looped cylinders of yarn. Overall, let me call it an intermediate plushie.
Way #10: Craft A Pom Pom Polar Bear

Winter is still there for a while. And if you have some white yarn left, craft this life-like baby polar plushie. It stands on its legs in a pose that we call standing on four legs.
Wrap white yarn 160 times around a 4.5cm base and make an ellipsoid of it. This will be the body pom pom. Next is a small pom of 60 wraps, about a 2.5cm base for the head.
Use hot glue to attach, and always trim the pom neatly. A black felt nose and plastic beads look nice on it. You will also learn the capsule pom poms for the legs.

About "Talha"
Hey, I’m Talha, the Crafter on Craftstive.com. I love to share guides on folding cute origami models and paper crafts, and I am always ready to inspire your next craft project with my weekly craft discussions.
Hi there amazing and beautiful crafts to keep young ones engaged.