

Learn how to fold an origami bunny face with kawaii eyes and a smile in less than 1 minute. This is one of the easiest origami models and allows you to show your face drawing skills.
Whether you draw the usual animal eyes or eyes from Chibi art, it will look cute. The shape of the head is a hexagon, which matches well with most of the bunny faces in the drawing.
I recommend learning and teaching this origami bunny to kids. It is just so easy.
Origami Bunny Face: Step-by-Step Guide
Like other origami faces, this bunny face also needs the triangle base. Then, folding the corners, we align the bottom sides parallel to the centreline. So, this must be easy. Now, let me describe how to fold the origami bunny in 8 steps:
Model Type: Traditional Origami with Drawing
Difficulty: Beginner (level 1)
Preferred Name: Origami Kawaii Bunny
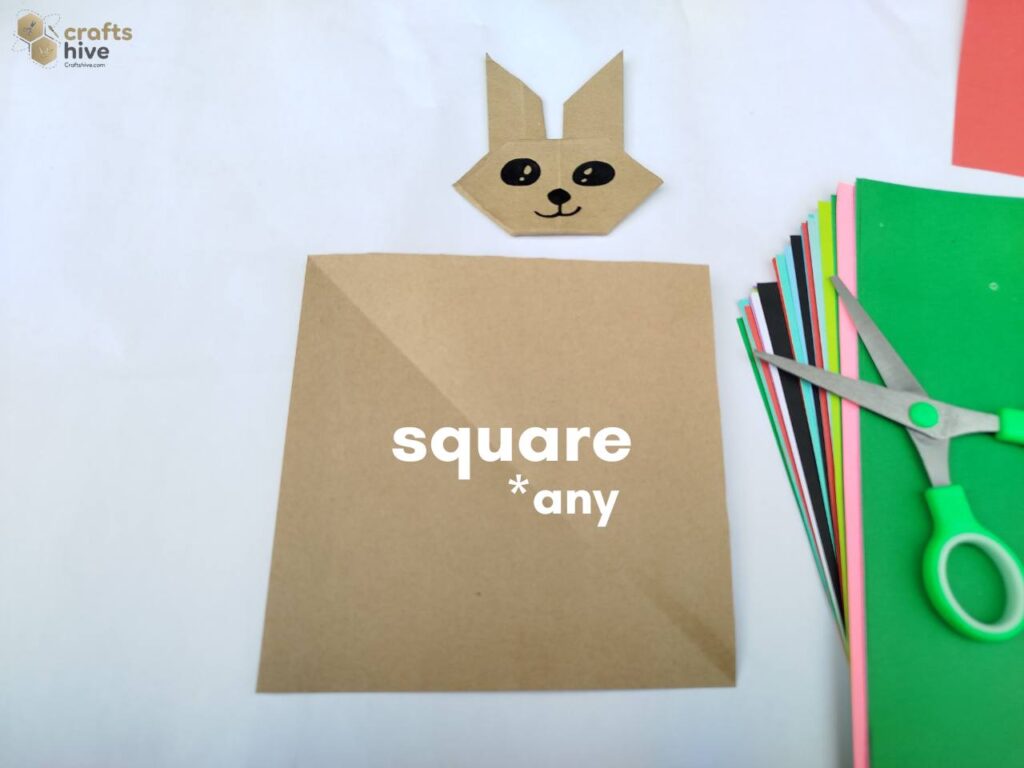
For this tutorial, I will be using a square sheet of Tant paper in soil brown. You can also use white, pink, or purple. Mine will be a 16.4cm by 16.4cm sheet.
Step #1: Position the Sheet

- Try placing your square sheet of paper onto the table in the diamond position. This way, the diagonals become vertical and horizontal lines.
If your sheet is in the normal square position, give it a 45-degree rotation sideways to have the diamond position.
Step #2: Make the Diagonal Fold
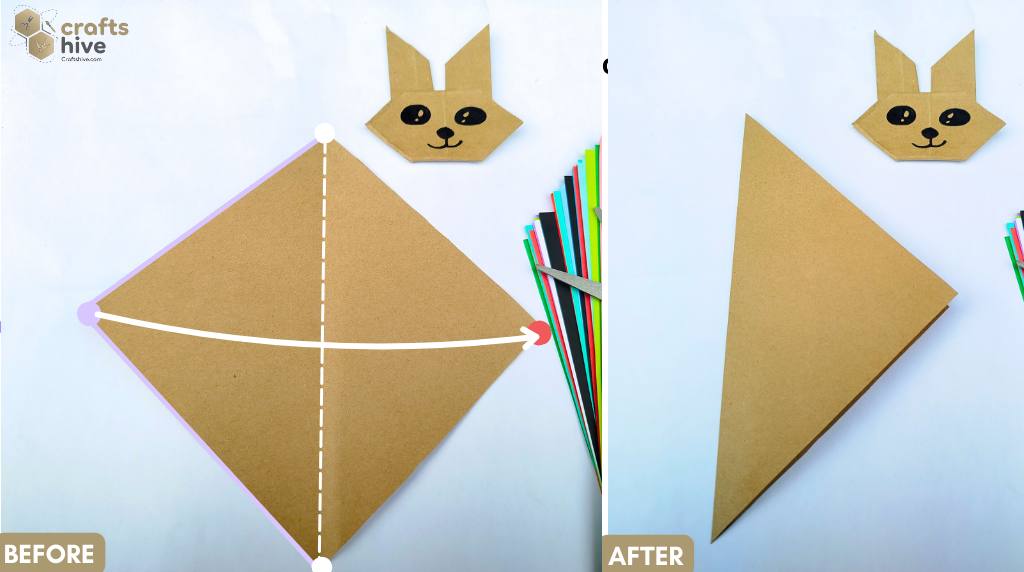
- Fold the paper in half diagonally (about the vertical diagonal) and press the flap flat. We shall have a triangle.

- Rotate the triangle towards the left such that the open side of the fold is above and the hinge is at the bottom.
Alternate: You can simply fold the bottom corner of the diamond, let it settle onto the top corner, and press the paper flat.
Step #3: Fold in Half
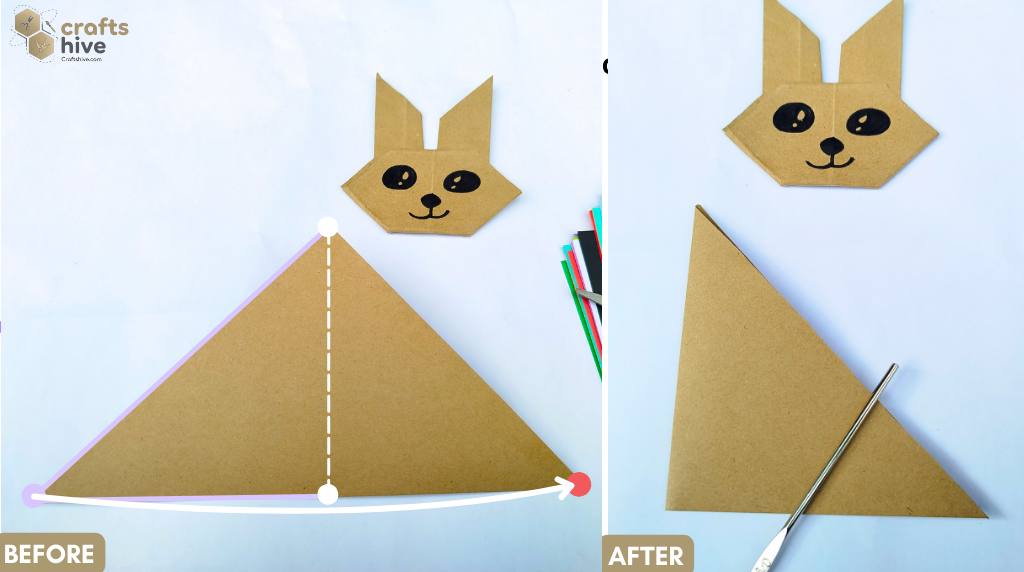
- Fold the triangle in half about the vertical centreline (passing through the top corner) and unfold to make a vertical crease.
To do so, fold the left corner to the right and let it settle onto the right corner.
Step #4: Fold the Top
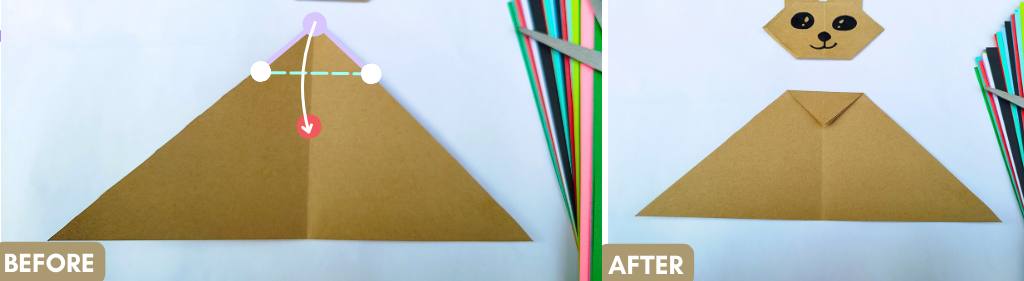
- Mountain Fold the top corner of the triangle to the bottom of about 2.5cm vertical height. In general, it could be about 1-4th of the original vertical height.
- The corner must align with the vertical centreline.
Step #5: Fold the Bottom
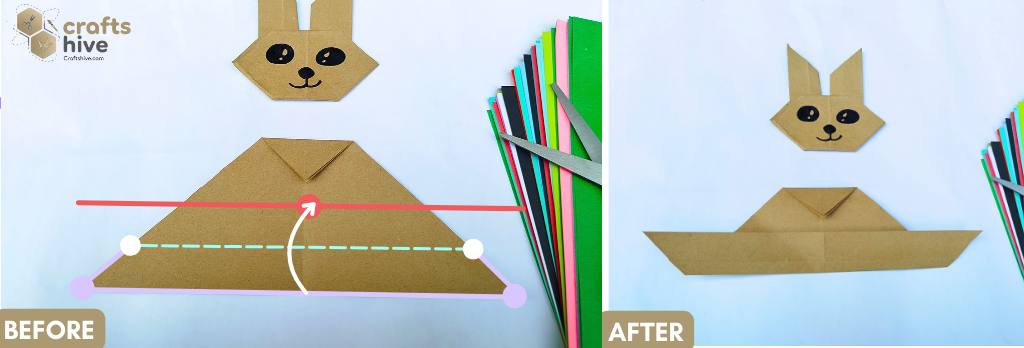
- Valley Fold the bottom side of the triangle about the horizontal line to the top by 2.5cm.
Observation: The length of both the top and the bottom folds must be the same for a symmetrical hexagon.
Step #6: Fold for the Ears
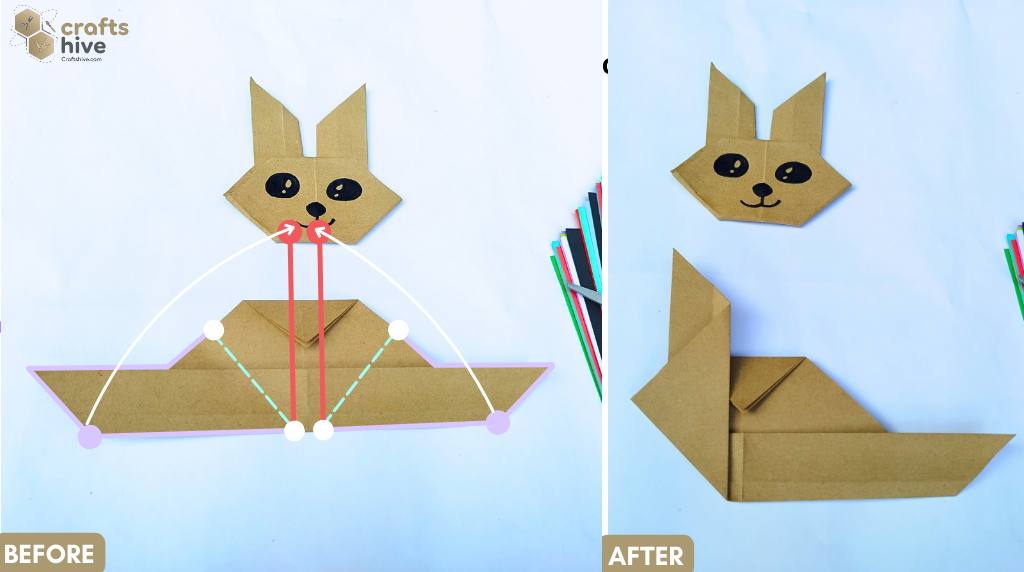
- Fold the bottom left edge of the paper to the top-right, and align it parallel to the vertical centreline, a little away to the left of it.
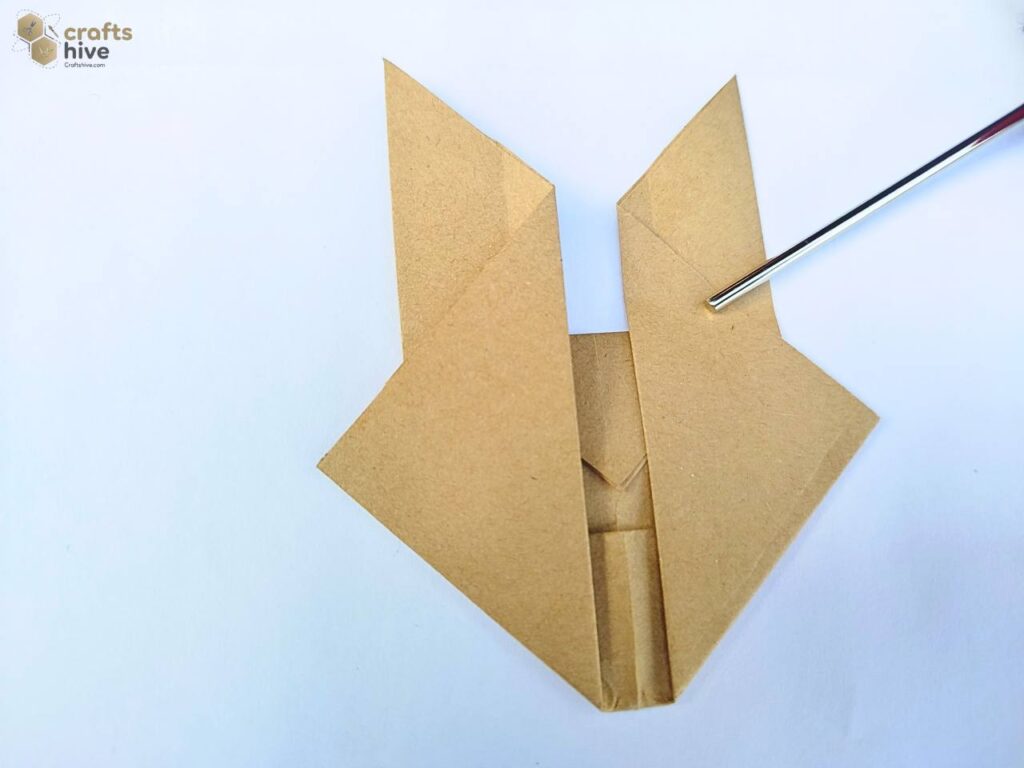
- Similarly, fold the bottom right edge of the paper to the left-right, and align it parallel to the vertical centreline, a little away to the right of it.
Step #7: Fold for the Chin

- Valley Fold the bottom of the bunny face and align it onto the top side of the previous bottom fold. This way, the height of the fold will be 1.3cm.
Step #8: Turn
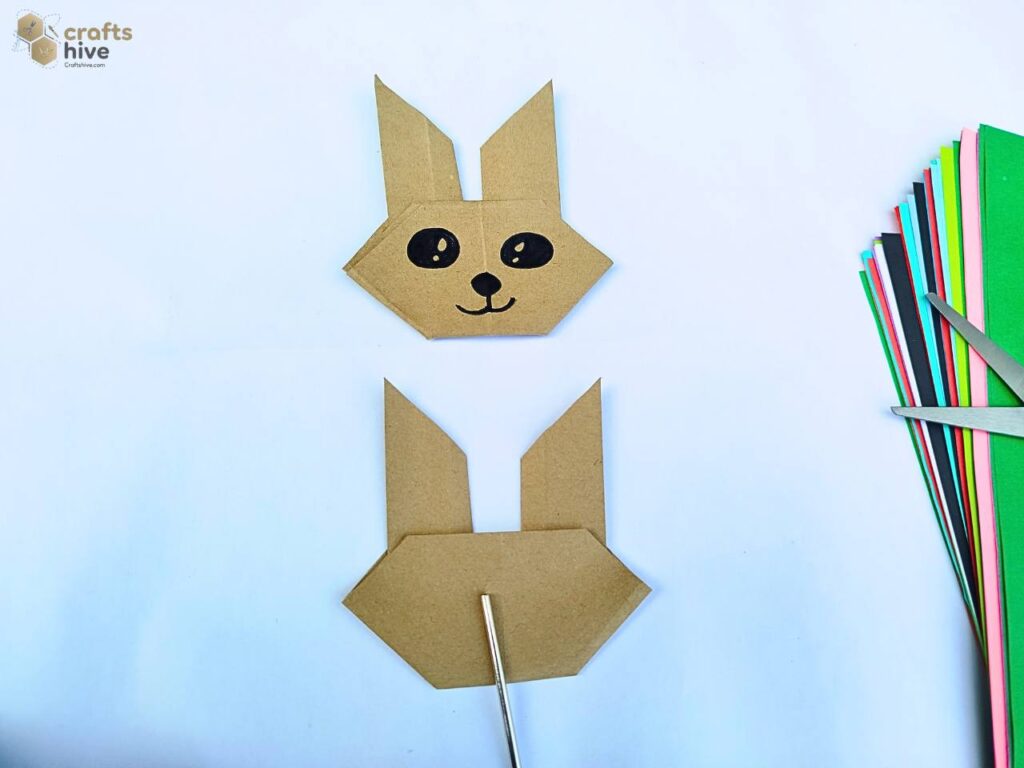
- Turn the bunny face upside down, so that the front side of the bunny faces up.
Finished
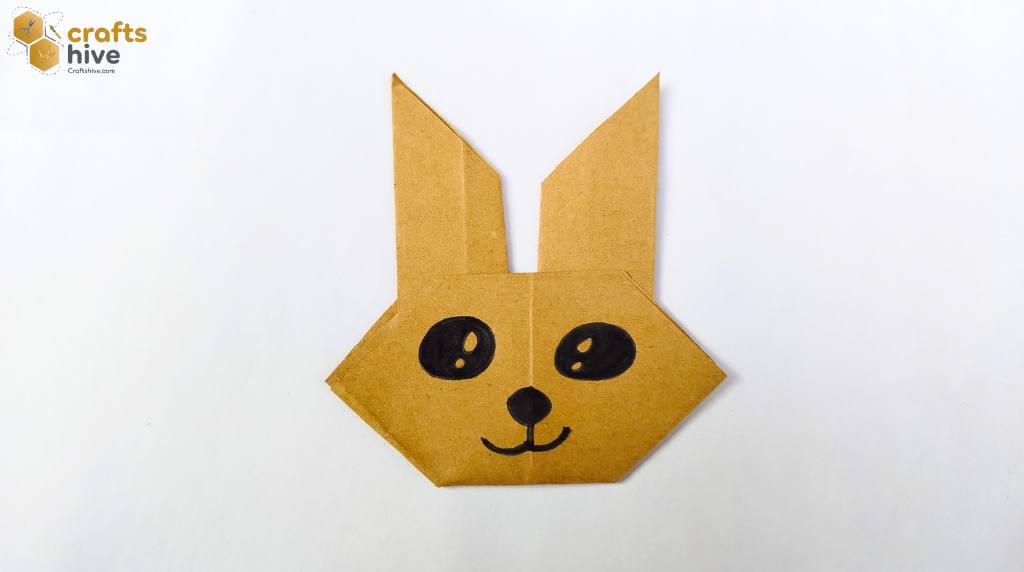
- I have drawn the kawaii eyes using the black colored marker.
- Down to it, the animal’s nose and a smile connected to the nose with a line.
Did you like this quick Craft? Tell Us in the Comments.
You can help us improve the weak points of our tutorial with your feedback. You can also encourage me to design such LOVE crafts.

About "Talha"
Hey, I’m Talha, the Crafter on Craftstive.com. I love to share guides on folding cute origami models and paper crafts, and I am always ready to inspire your next craft project with my weekly craft discussions.