

Learn how to fold the traditional origami elephant face with a cute face drawing. This model is pretty simple to fold in less than 1 minute. While not the easiest elephant face that we shall teach later, it is a pretty cool model to make with the kite base and frog base. By folding this model, you can have a good time with the family and also teach them the squash fold.
This elephant has a long, pointy nose and ears, but you can definitely enhance over this. Add this to bookmarks, gifts, and origami boxes. Here, I have pretty simple and detailed instructions for you.
[ez-toc]
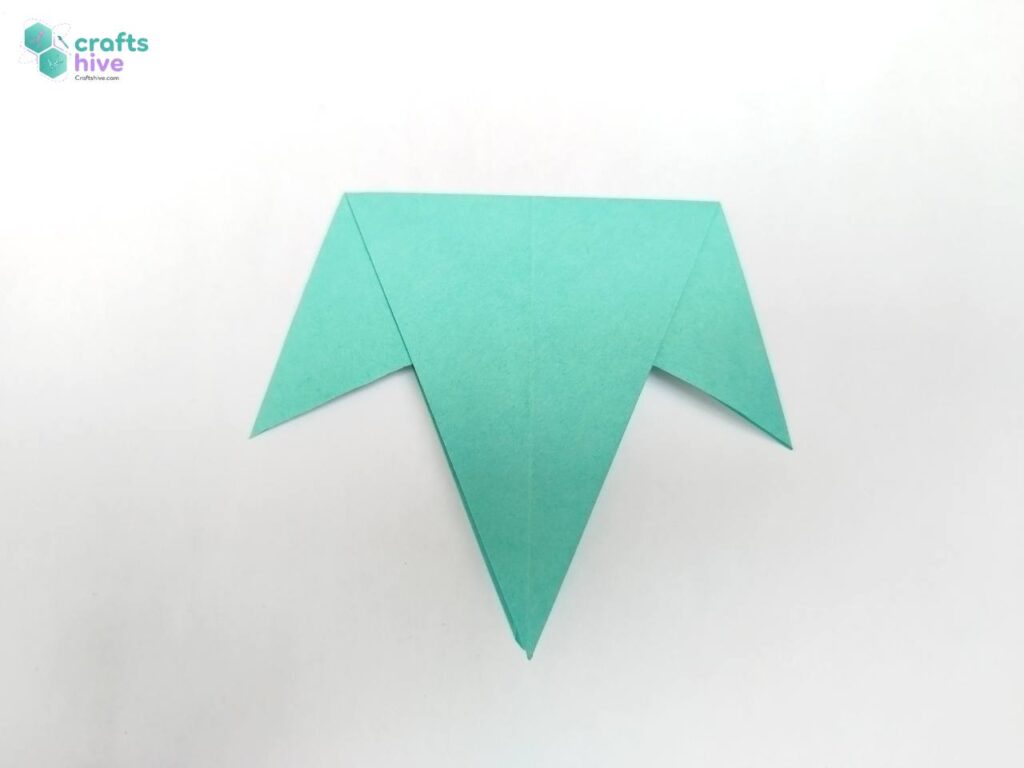
Origami Elephant with Face: Step-by-Step Guide
Most of the steps needed to fold the origami elephant face are the same as origami talking fish and origami whale. This simply means you have to fold an origami frog base, which in turn needs the origami kite base. So, if you are already aware of folding the frog base, skip steps #1 to #9.
You can later draw the face in your favorite method. Now, let me provide you with the step-by-step instructions to fold this fun animal face:
Model Type: Origami with Drawing/Traditional Origami
Recommended Paper: Both Kami and Tant Papers are great
I used 15cm x 15cm square sheet of Tant paper in aqua.
Step #1: Diagonal Crease
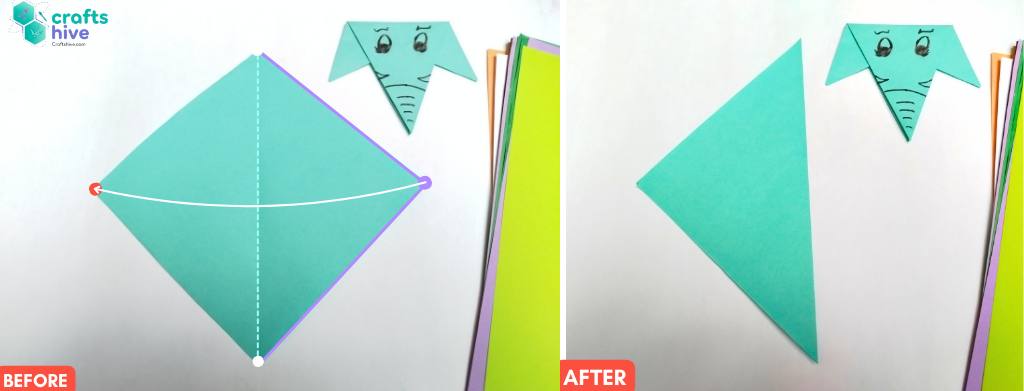
- With your square sheet placed in the diamond position, fold the paper in half along the vertical diagonal. Press the paper flat and unfold to make a vertical middle crease.
To do so, I folded the right corner of the diamond onto the left corner and aligned the respective sides.
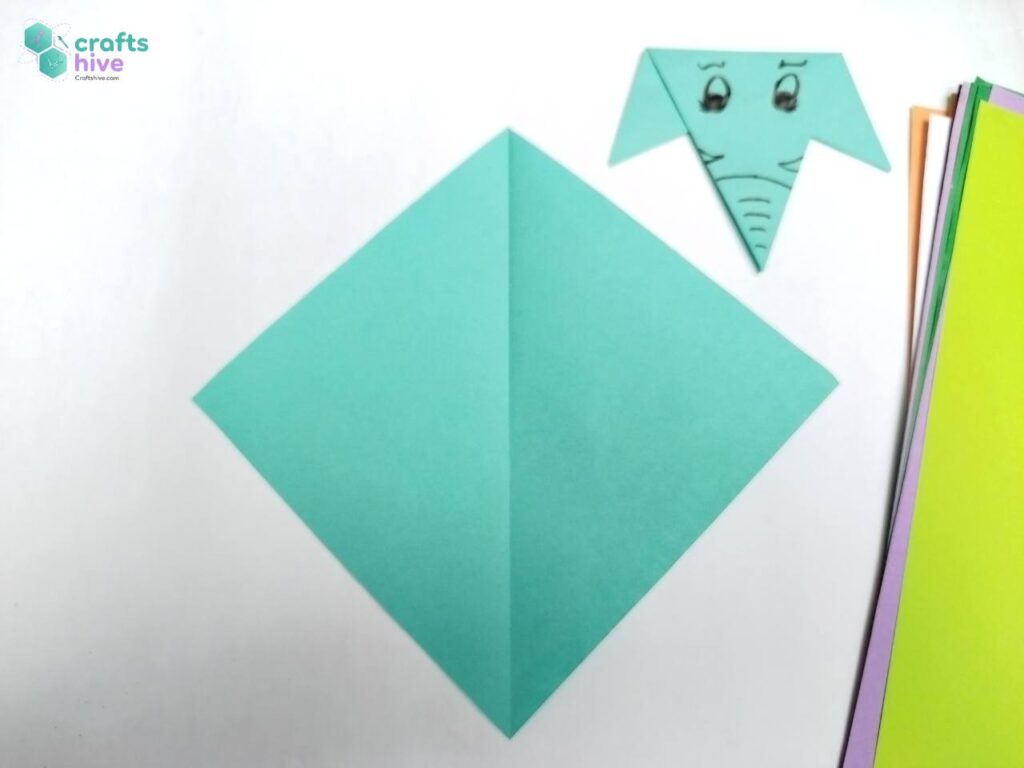
This crease will be used as a guiding crease for kite folds.
Step #2: The Kite Folds
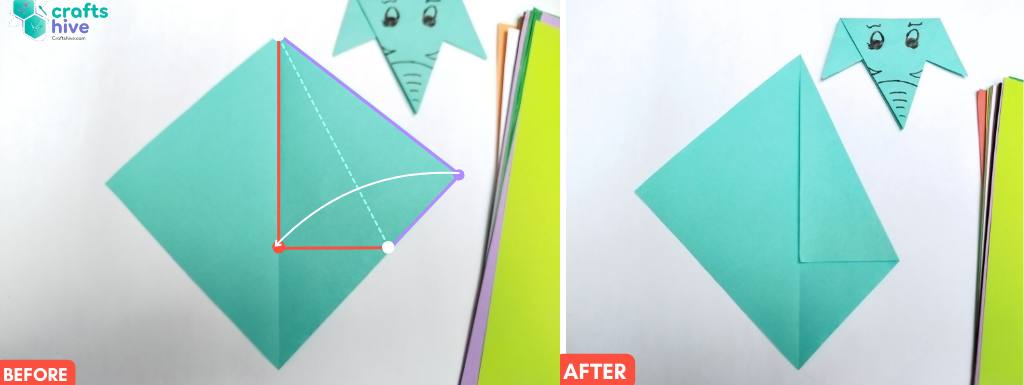
These folds will make the Kite Base for the origami elephant face.
- Fold the top right edge of the creased diamond to the vertical centreline and align this edge with the vertical crease. Be sure the bottom edge that slides with the top right edge stays perpendicular to the vertical crease.
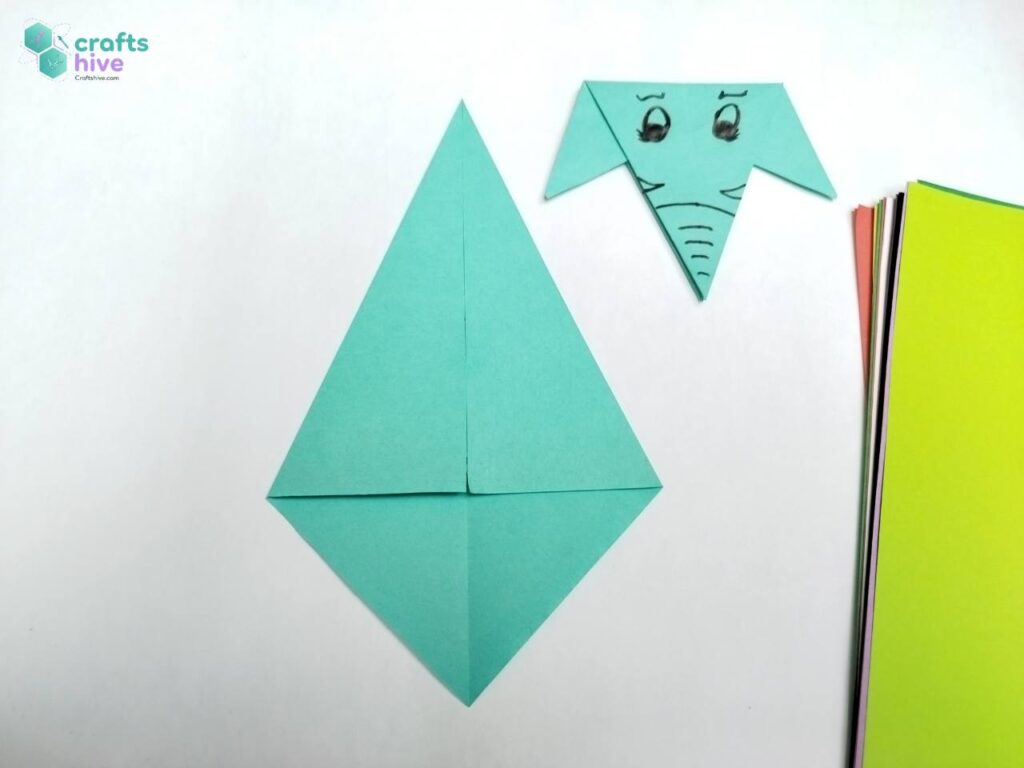
- Make another kite fold with the right edge of the diamond.
Step #3: Turn
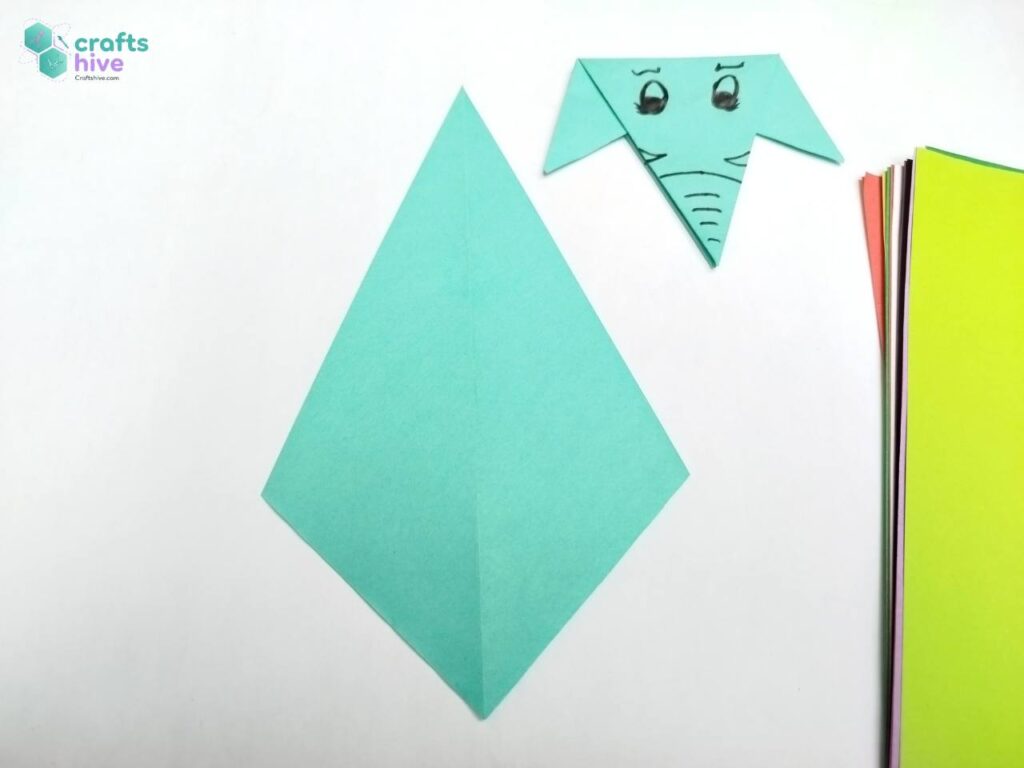
- Turn the kite base over. Make sure the section with three corners is at the bottom.
Step #4: Fold in Half
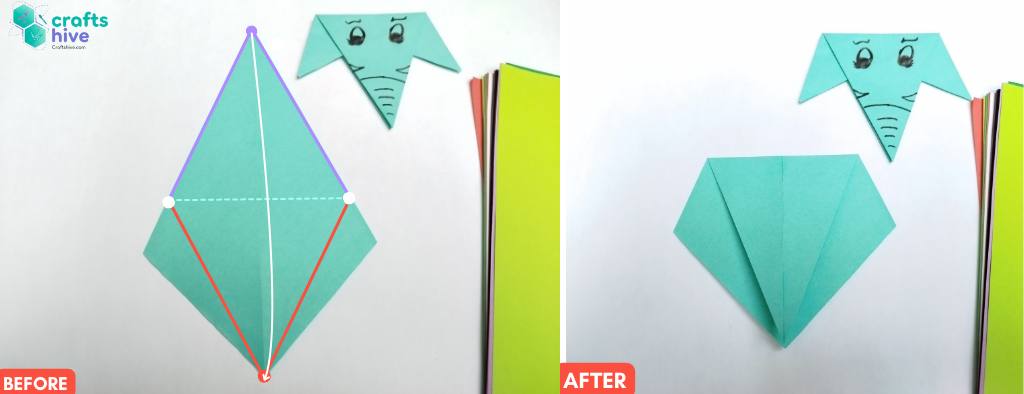
- Fold the top corner to the bottom of the kite base all the way upto the lower corner and crease the paper well.
Step #5: Turn
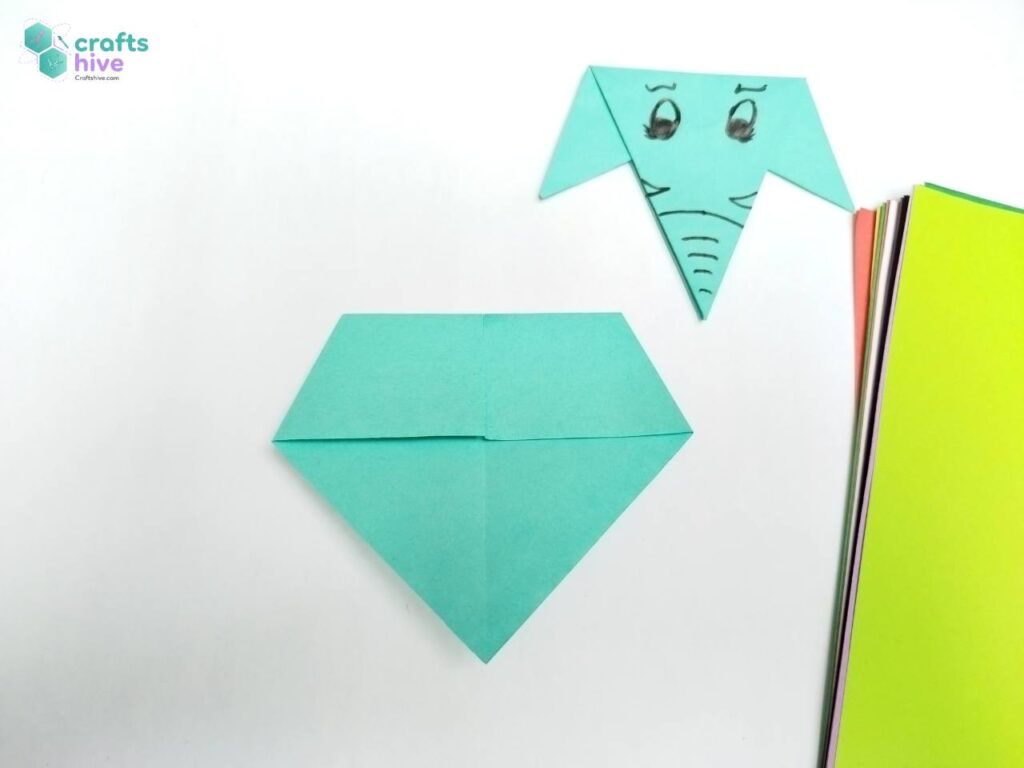
- Turn the entire model over. You will have a diamond shape with two flaps on the top section.
Step #6: Intermediate Fold for Squash
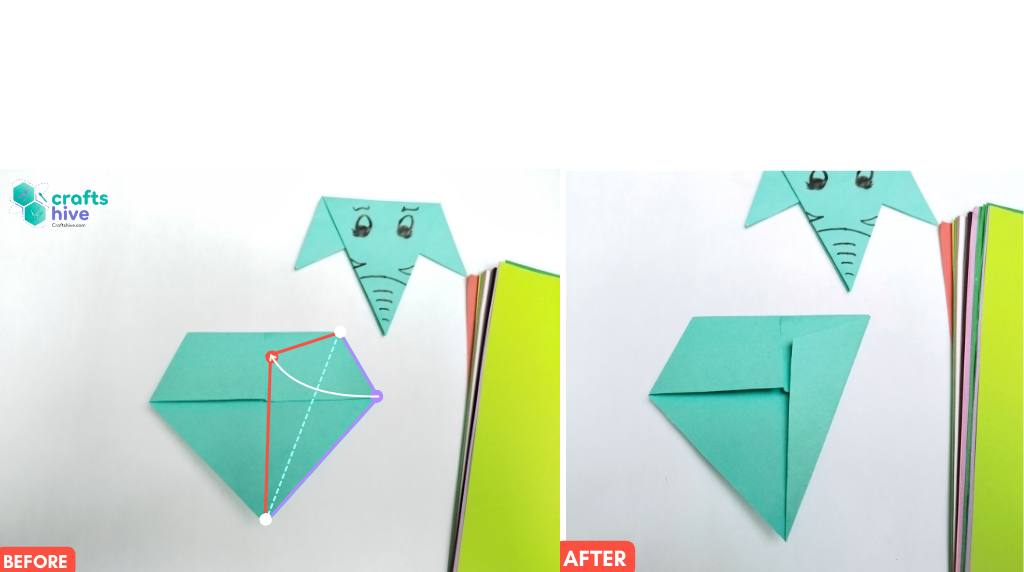
- Fold the right edge of this diamond shape to centreline as far as you can (align this edge with the centreline.)

- Repeat the same fold for the left edge, too.
Folding tip: You can skip these folds and work the squash fold directly, but I have found this intermediate crease very helpful.
Step #7: Squash Fold
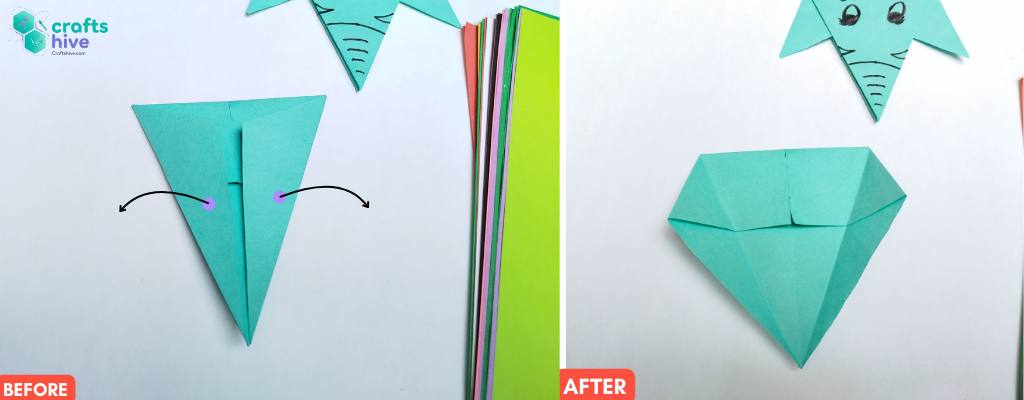
- “Book Fold” the flaps, or in other words, undo the previous two folds.
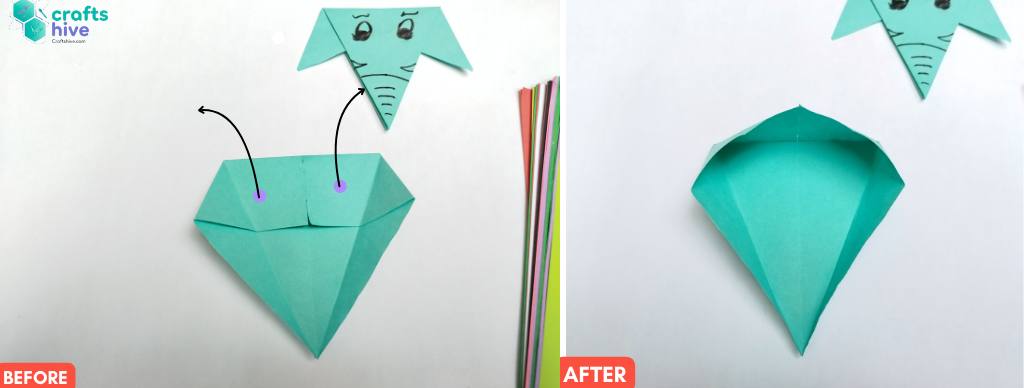
- Open the pockets by pulling the top flaps away from you.
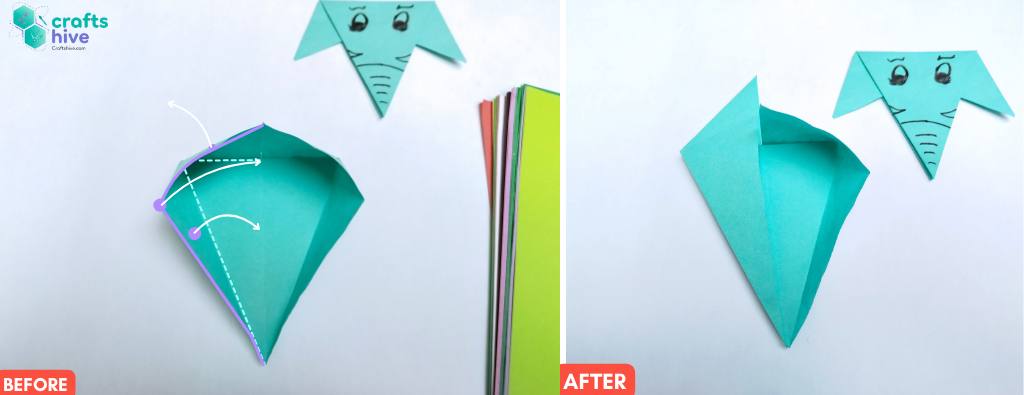
- With the flaps remaining pulled, refold along the creases made by the intermediate folds to make a squash fold. It will reverse the flaps or bring them out.

- Repeat the squash fold for the right side, too. Until this step, we had to do the same steps as in the talking fish.
Step #8: Turn
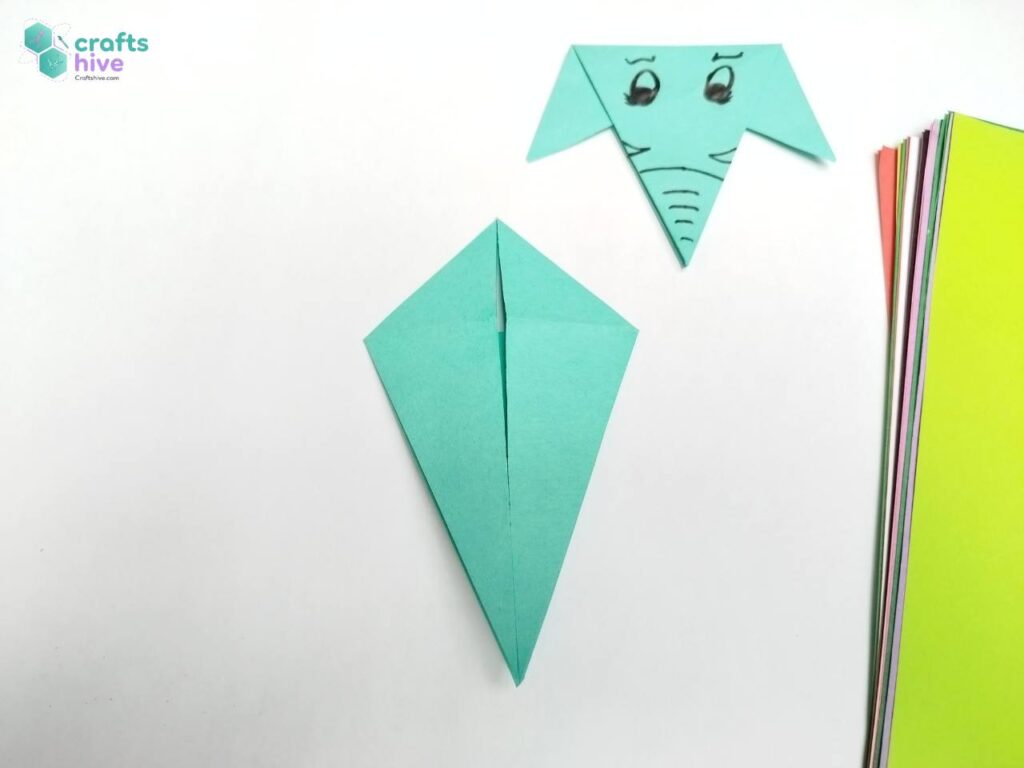
- Turn the whole model over again.
Step #9: Refold the Back
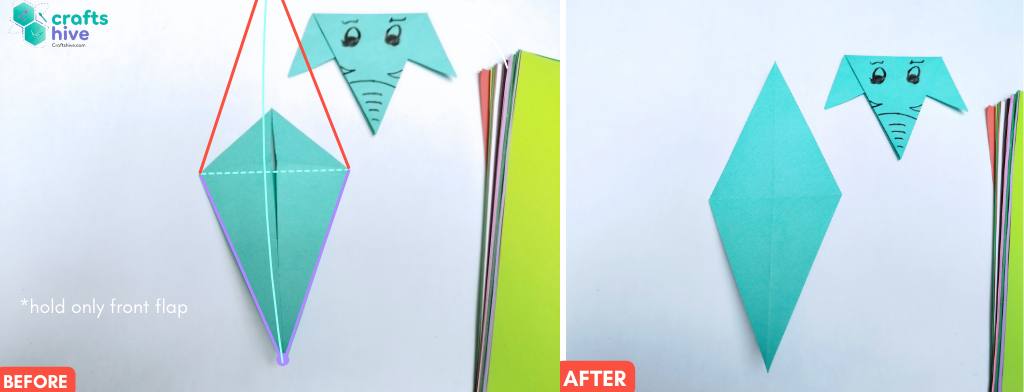
- Holding only the front flap, fold the bottom of the talking fish base to the top along the horizontal crease and press the paper flat.
Step #10: Turn
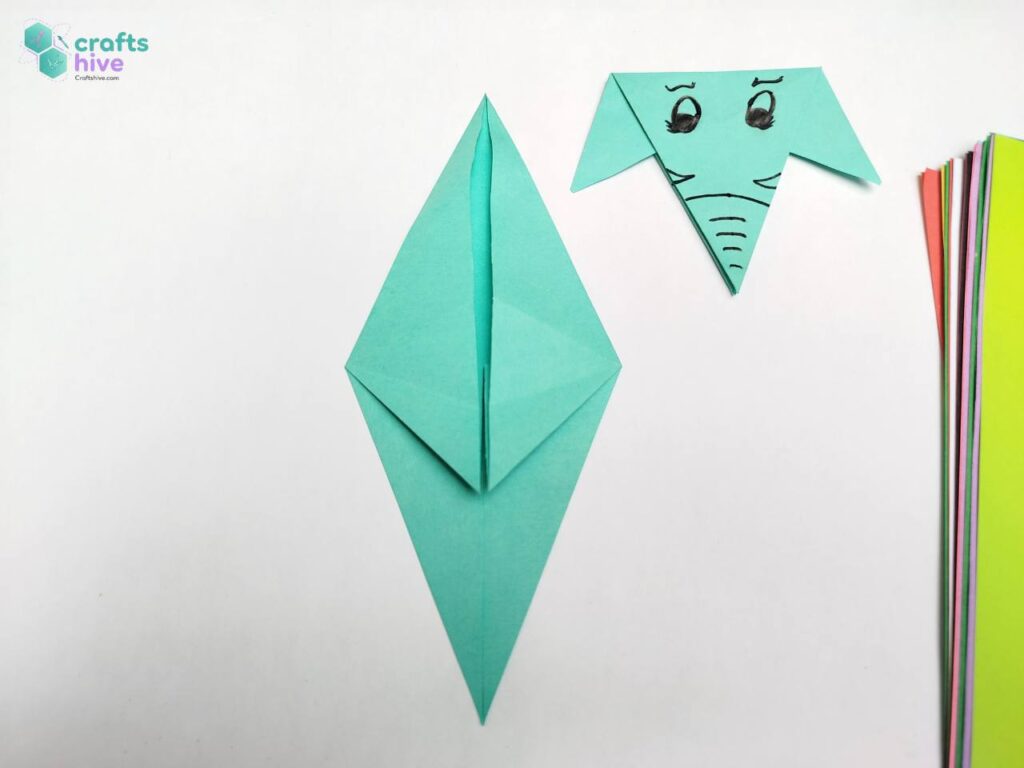
- Turn the model over. You will notice two more flaps in the middle of the base. These will make the elephant’s ears.
Step #11: Pull The Ears
Note: Make sure the ear flaps face downward. If not, Mountain Fold them.
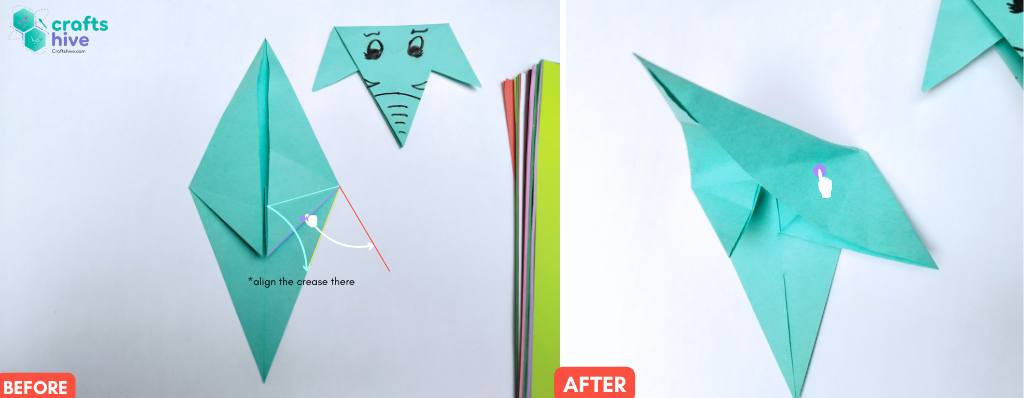
- Pinch the right flap and start pulling it to the right. Press the paper a little when the crease on the flap aligns with the bottom right edge of the base.
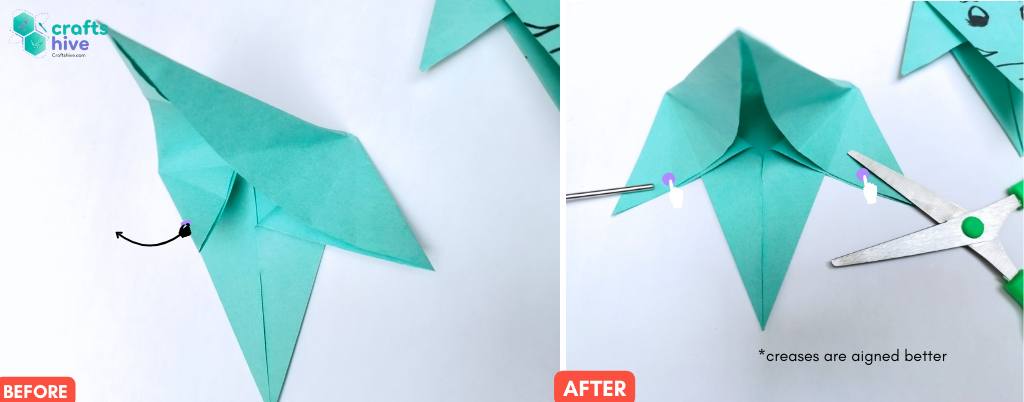
- Pull the left flap to the right and align the crease to the edge. Keep both the flaps pressed down. This will move the top side of the base down.
Step #12: Collapse into Elephant Face
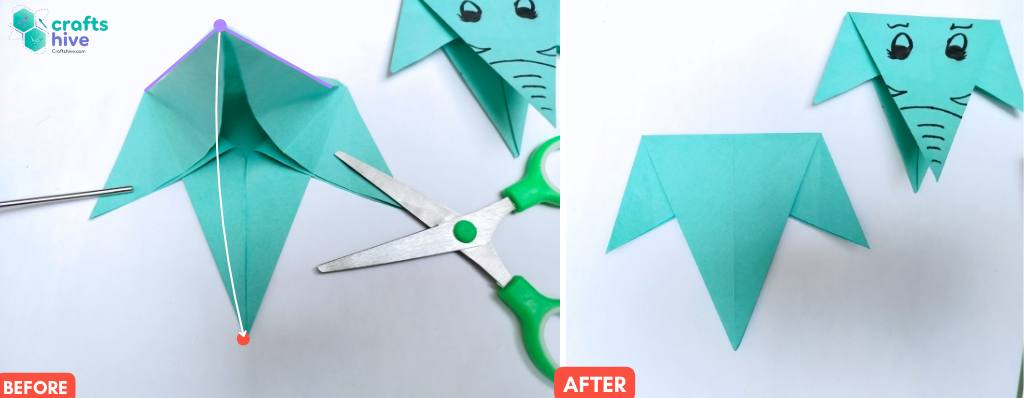
- Fold the top corner of the base onto the bottom corner and press the paper flat very well. Also, check if the ears look similar and have been pulled out completely.
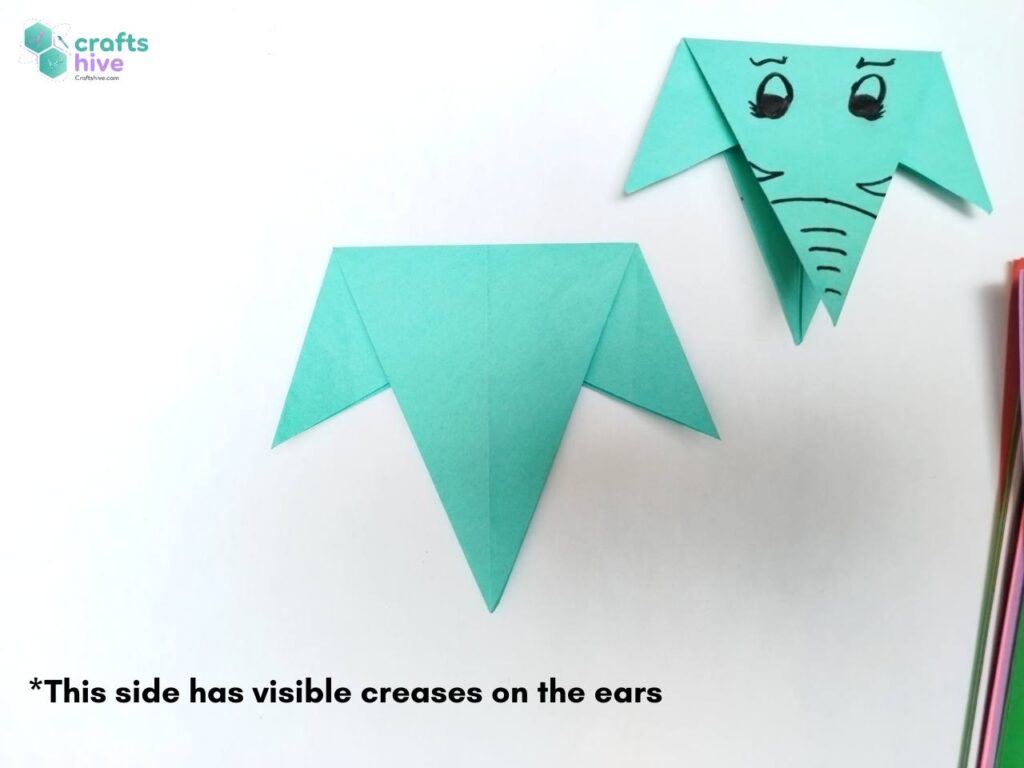
- If you want to draw the face on the elephant’s face, use the other side, as it will not have creases on the ears.
Finished
- That’s the other side of the elephant face and completes our origami elephant guide.
Was this Origami Tutorial Helpful? Tell us in the Comments.
Your feedback is a great way for us to improve our origami tutorials. So, share your thoughts on whether you tried this one or not, and highlight the weak points.

About "Talha"
Hey, I’m Talha, the Crafter on Craftstive.com. I love to share guides on folding cute origami models and paper crafts, and I am always ready to inspire your next craft project with my weekly craft discussions.