

Let’s fold an origami Masu box in 11 simple steps. This origami box is a perfect replica of the Feudal Period Masu boxes and can be folded with a lid following almost the same steps. It does not need any cutting or gluing, and with layers of paper quite practical.
I also have some Masu boxes on my crafting table for placing the sticky notes and beads.
They can be designed as gift boxes after attaching a paper bow to them. You can also use patterned sheets to make it for special occasions. Let’s dive into the guide.

[ez-toc]
Origami Masu Box: Step-by-Step Guide
To fold the traditional Masu box, you start with a Blintz Base by folding the four Blintz Folds. That’s why it is also known as Blintz Box. To follow the tutorial, you must be able to identify the sections created by the creases.
So, be sure you are in a room with good lighting and a place to lay the paper flat after each step for clear creases. Now. Let me provide you with the step-by-step instructions to fold this easy box:
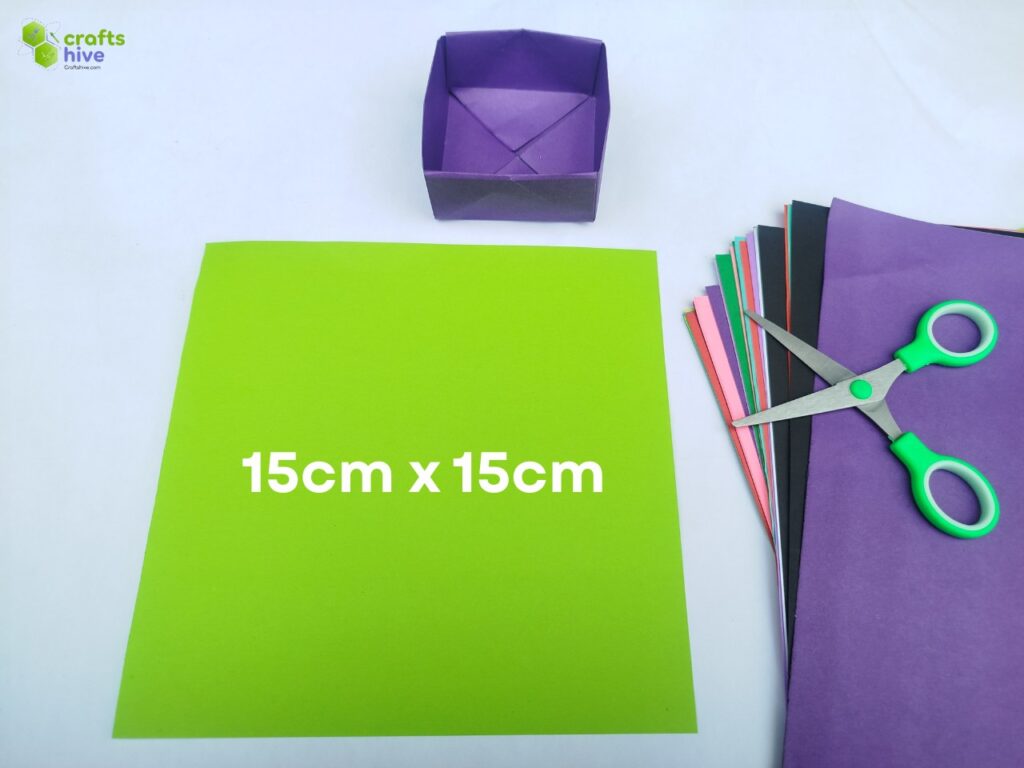
Model Type: Traditional/Pure Origami
Paper Used: 15cm x 15cm sheet of Tant Paper
Preferred Name: Pure Origami Open Box
Folding Time: 5 minutes or less
Step #1: Horizontal Fold
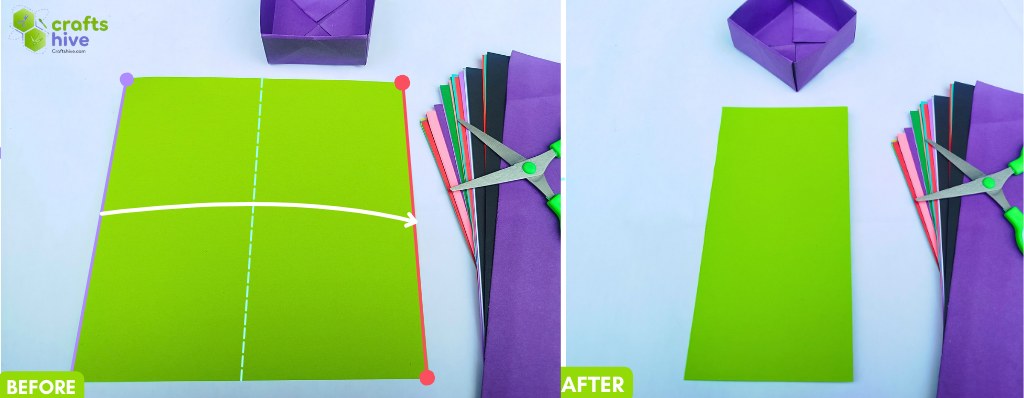
- Fold the paper horizontally along the vertical centerline and press it flat.
- Unfold to make a vertical crease on the square sheet.
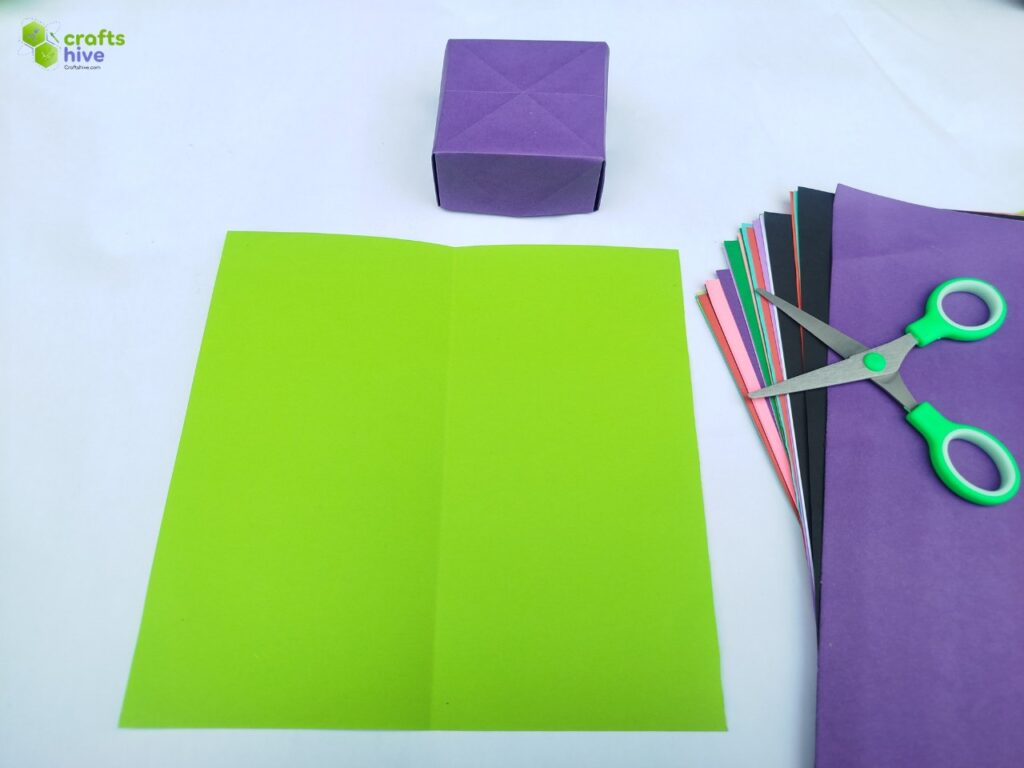
Step #2: Vertical Fold
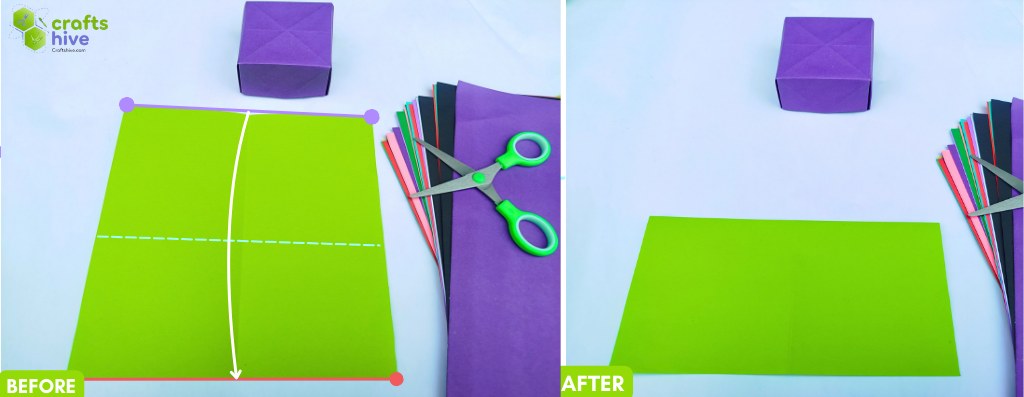
- Fold the paper vertically along the horizontal centerline and press it flat.
- Unfold to make a horizontal crease on the paper.
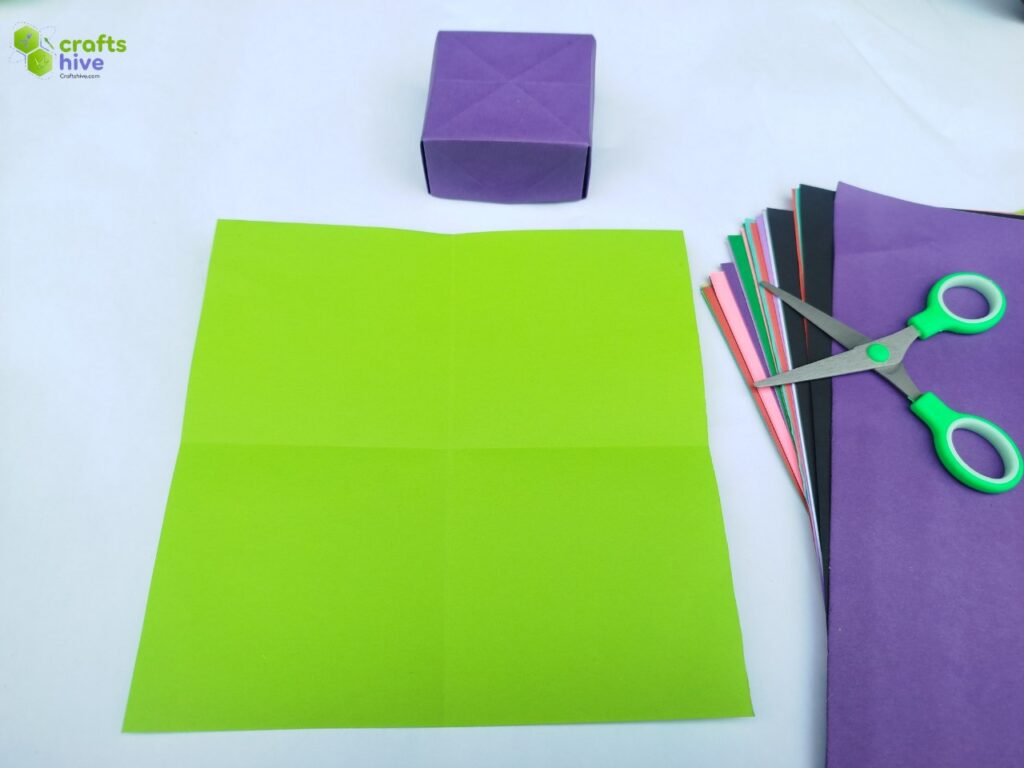
Observe that we have two crossing creases in the shape of the “+” symbol.
Step #3: Blintz Fold
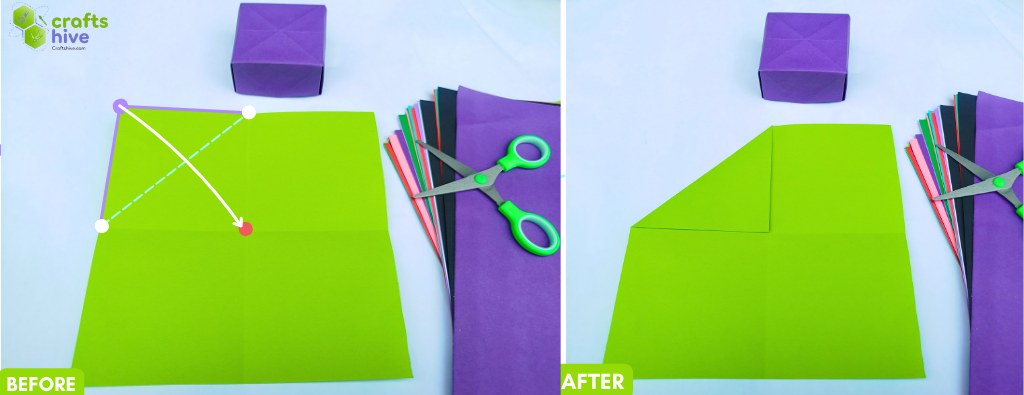
The creases have divided the square sheet into four square sections. You will want to make “Blintz Folds” with all four corners to complete the “Blintz Base”.
- Fold the top left corner of the top left square diagonally. (Fold the top left corner of the square sheet onto the intersecting point of creases and press the paper flat.
Step #4: Remaining Blintz Folds
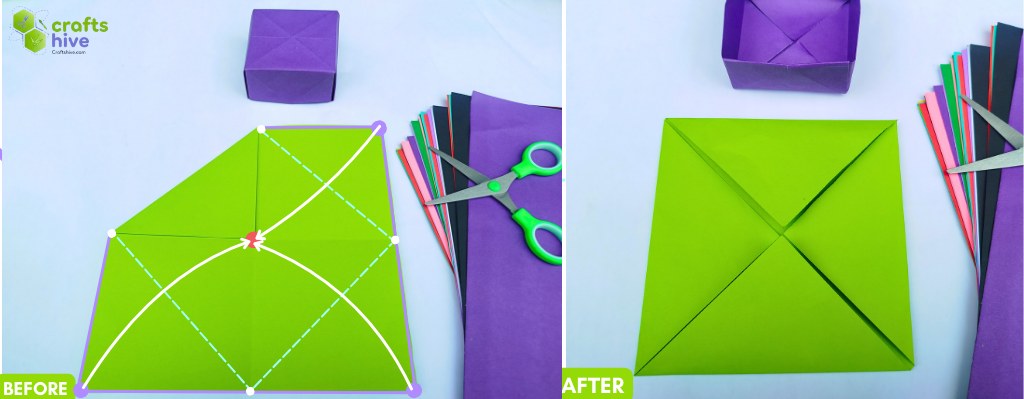
- Repeat the “Blinzt Fold” on the remaining corner of the square sheet. These four folds constitute a “Blintz Base” whose overall shape is a square.
Step #5: Quarter-Folds Vertically
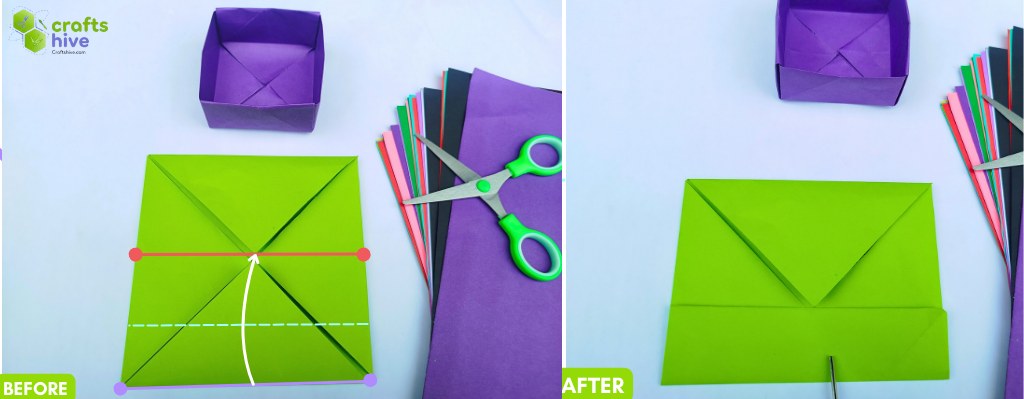
- Fold the bottom side of the “Blintz Base” in a quarter vertically along the horizontal and press the paper firmly.
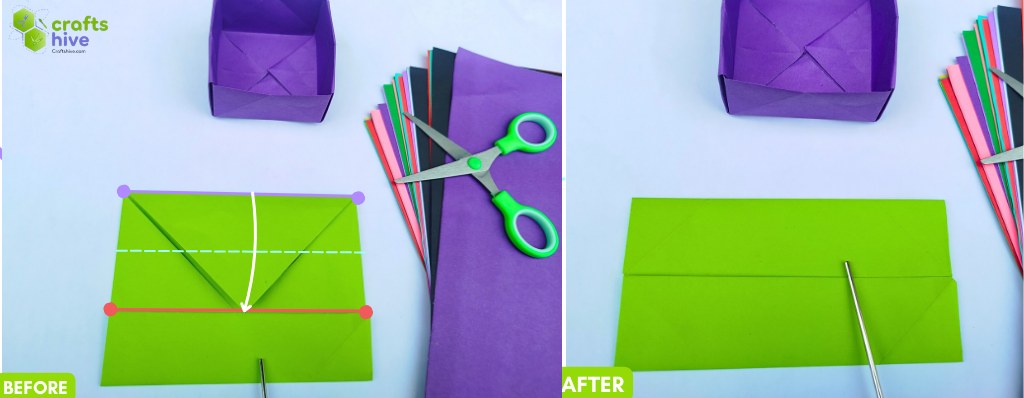
- Fold the top side of the “Blintz Base” in a quarter down along the horizontal and press the paper flat.
Step #6: Unfold
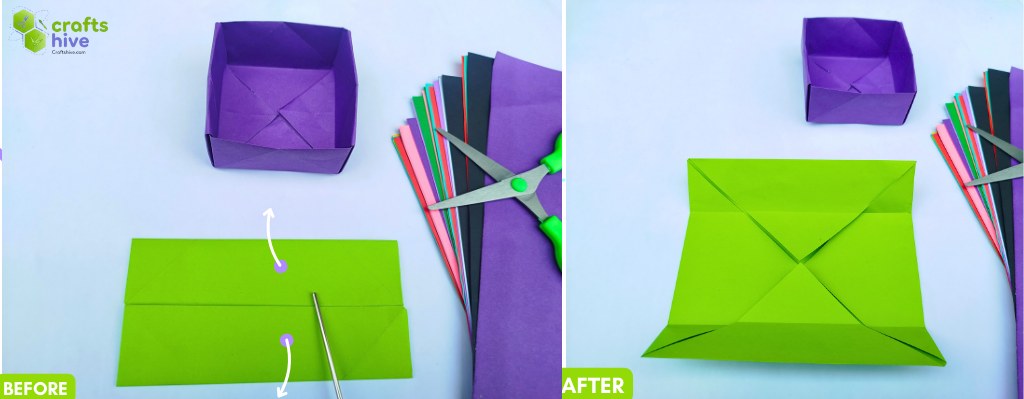
- Undo both the quarter-folds. You will again have a “Blintz Square” but with the creases.
Folding Tip: After unfolding, press the base flat firmly.
Step #7: Half-Folds Horizontally
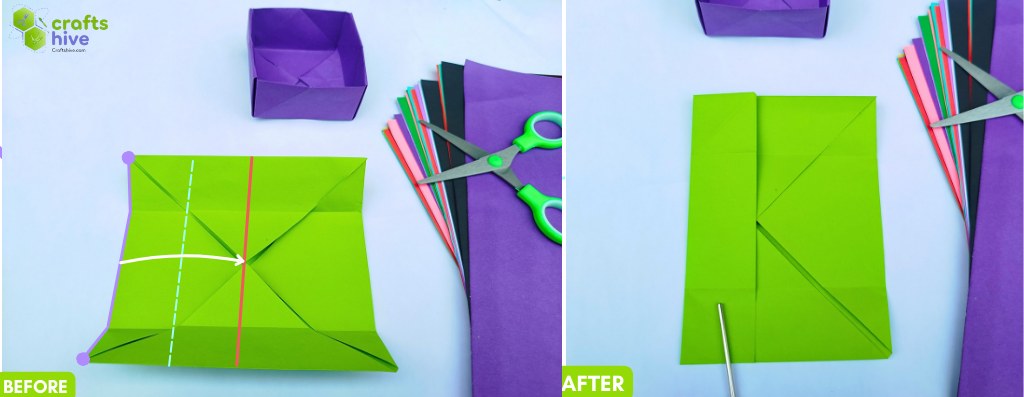
- Fold the left side of the unfolded “Blintz Square” in a quarter along the vertical and press the paper flat.
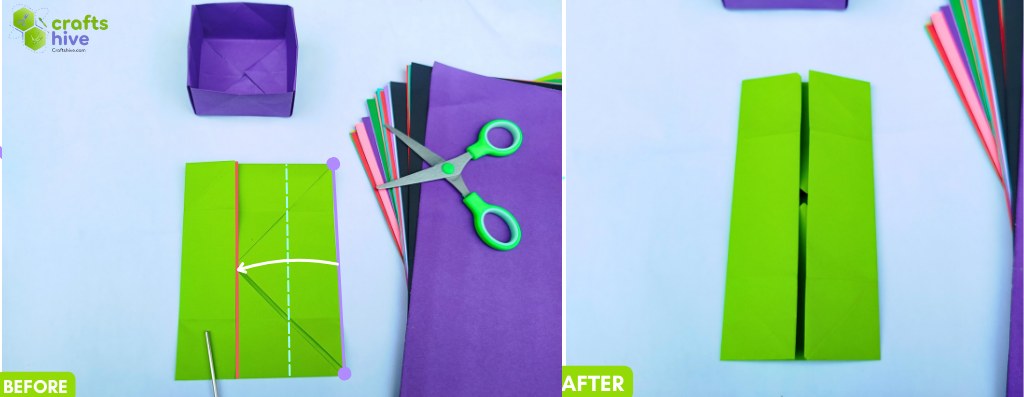
- Fold the right side of the unfolded “Blintz Square” in a quarter along the vertical and press the paper flat.
Step #8: Unfold
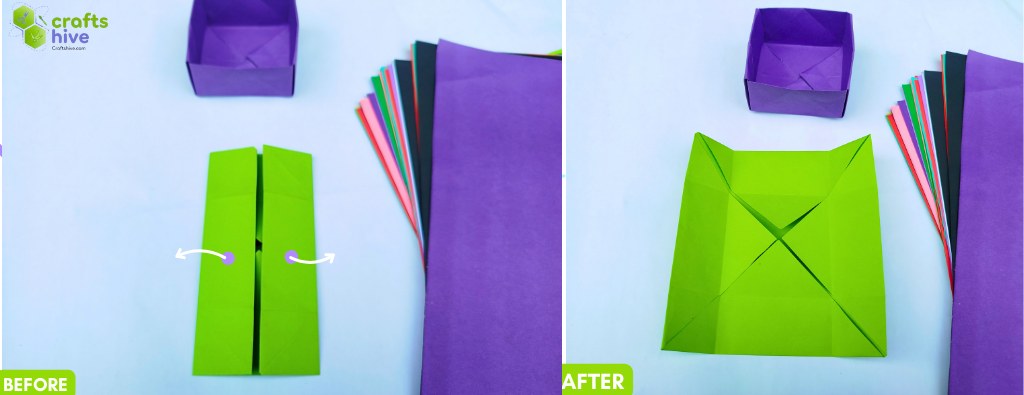
- Unfold the previously folded flaps.
Step #9: Unfold the Blntz Folds
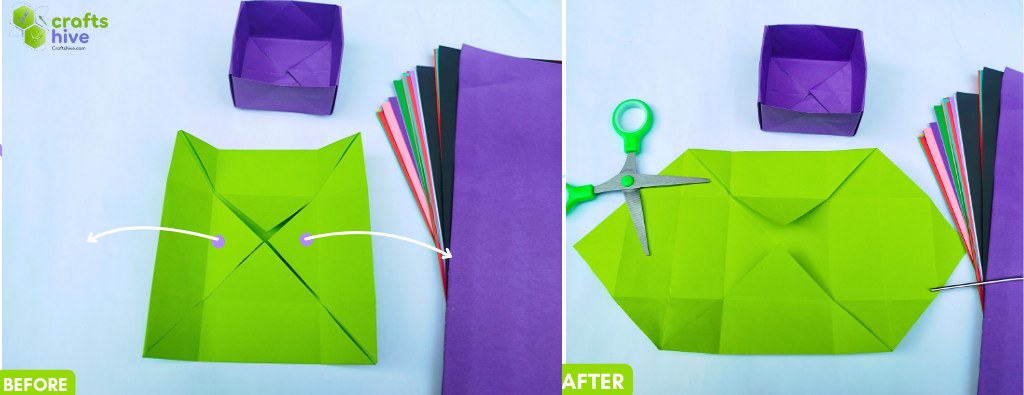
- Unfold the left and right “Blinz Folds.” You will have a shape with 6 sides.
Step #10: Fold
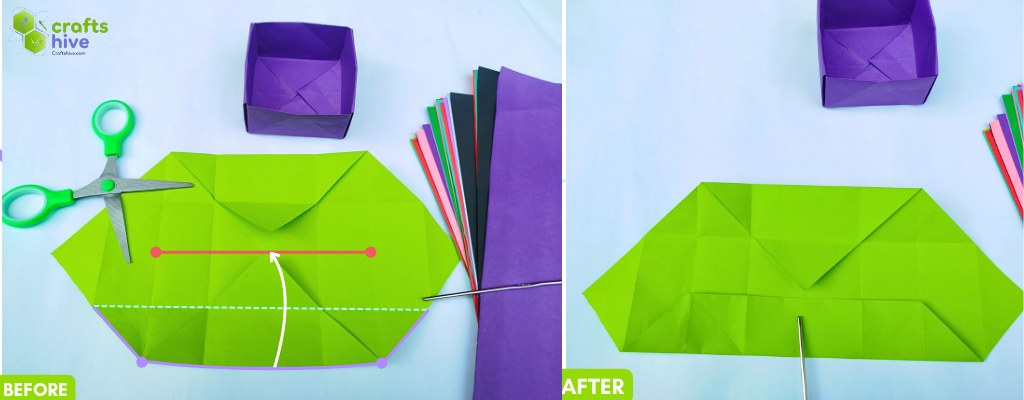
- Fold the bottom side to the top about the horizontal quarter crease and press the paper flat.
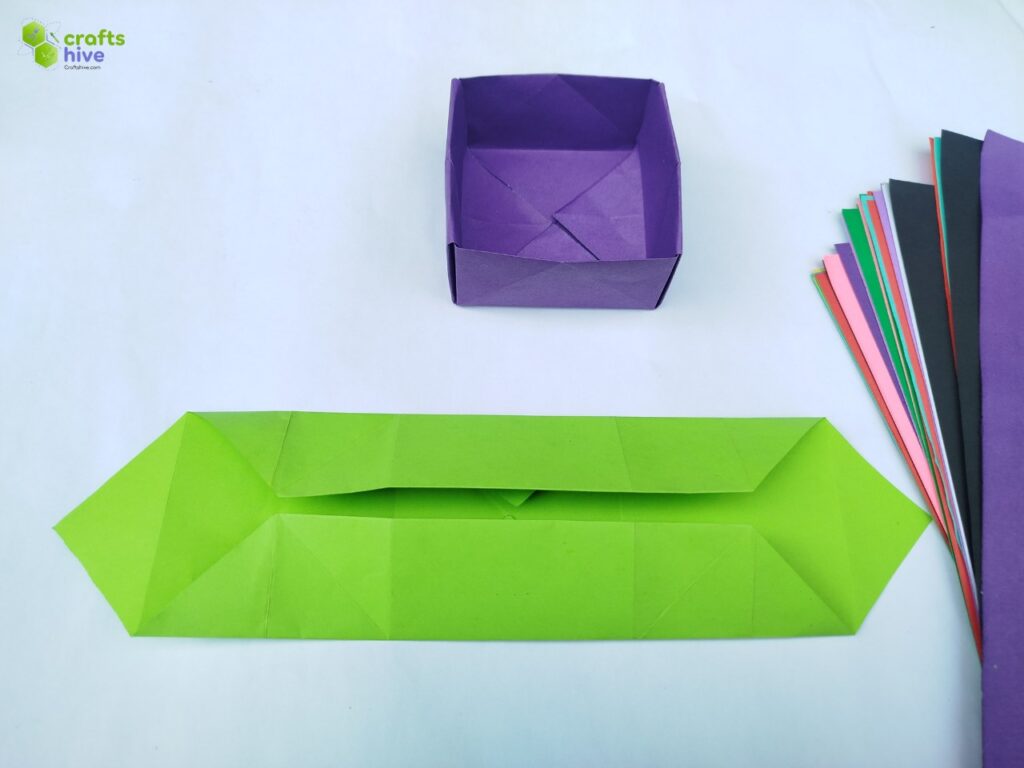
- Similarly, fold the top side to the bottom about the horizontal quarter crease and press the paper flat. You shall have an elongated symmetrical shape like above.
Step #11: Box Folds
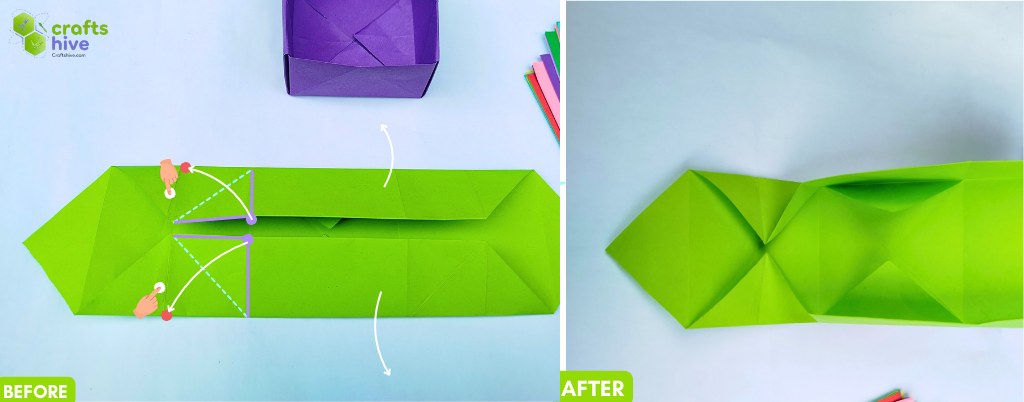
Focusing on the left side,
- Hold the left 90-degree triangles of the flaps in place, and hold the square section diagonally to the right by folding the rightmost triangles onto the middle triangles.
- Press the paper flat.
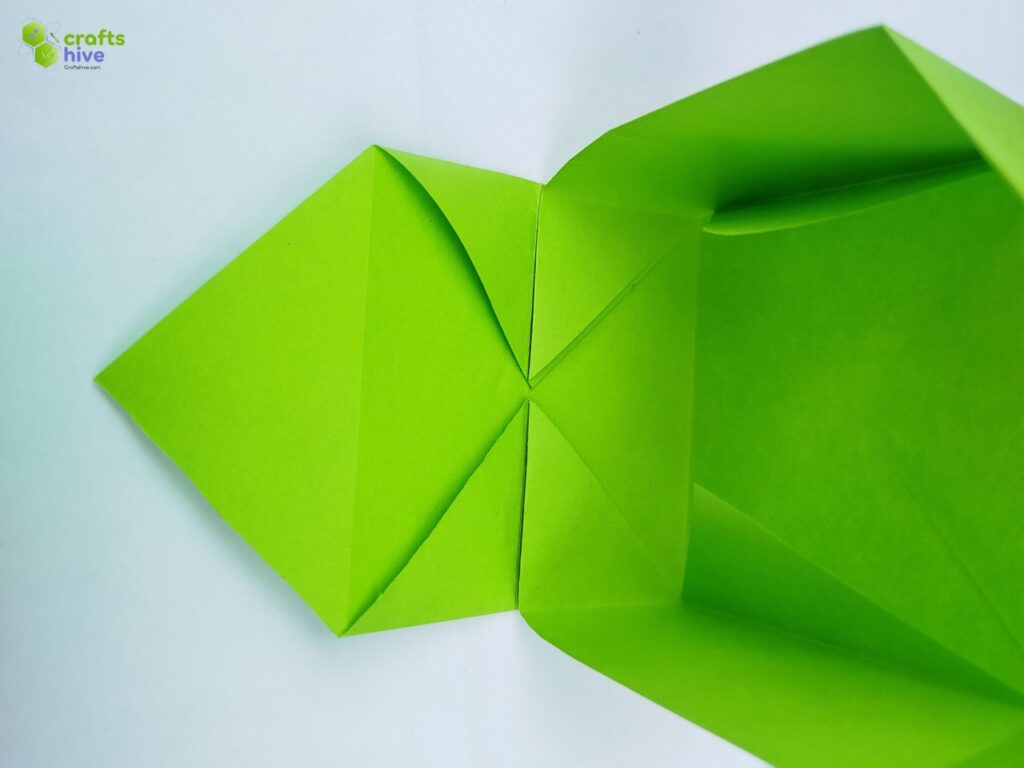
This will lift the right side of the model like shown above. Make sure it is perpendicular to the surface of your table.
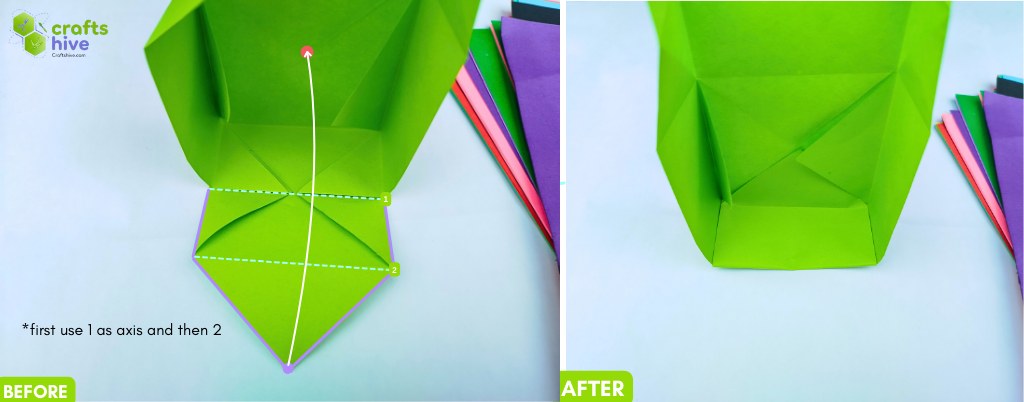
- Let the corner side of the left face you.
- Valley Fold this corner along the axis far from you, and let the triangle flap sit on the lifted wall. (1)
- This will complete the three sides of the box already.
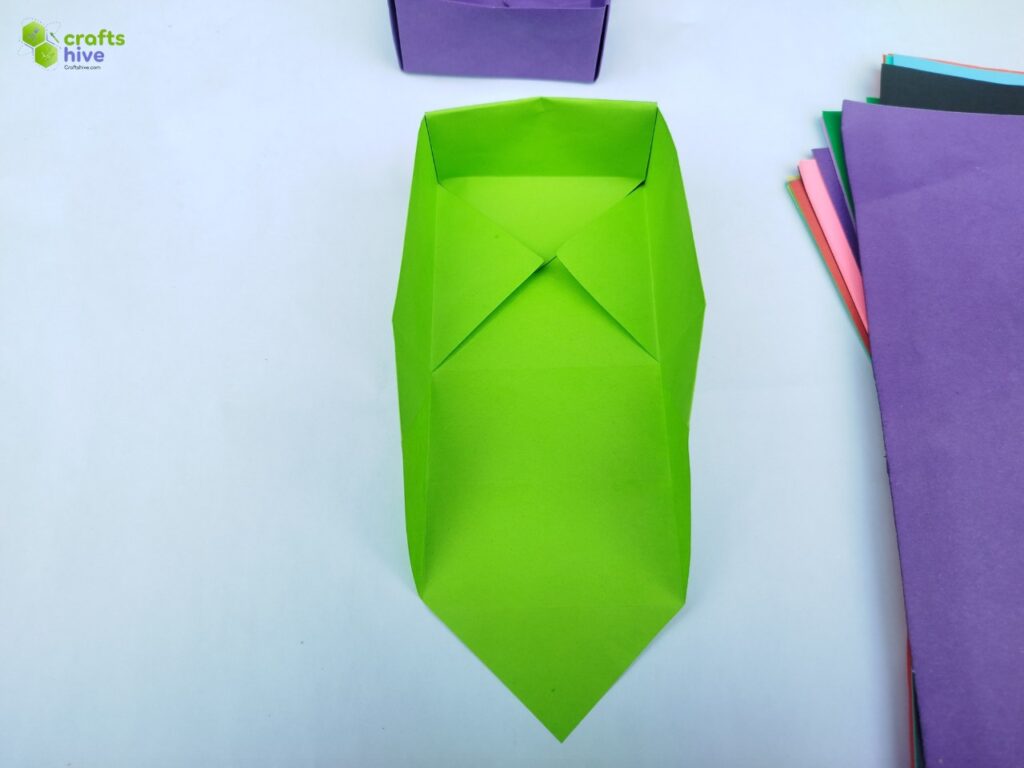
- Place the unfinished box such that the triangle part of the previous right side faces towards you.
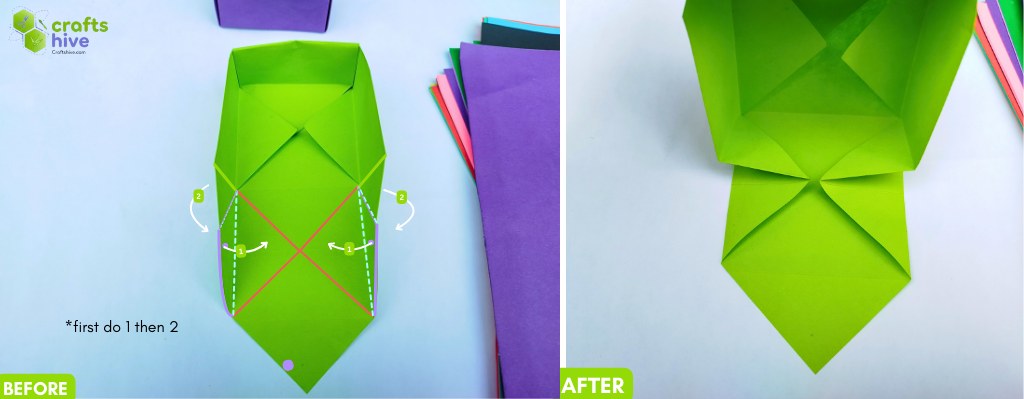
Focus on the creases on the walls. It has three triangular sections.
- Fold the first two triangles (which make a single isosceles triangle) onto the surface of the box.
- Fold the third triangular section onto the middle triangle. Make sure the fold brings in contact only the outside parts of the sides.
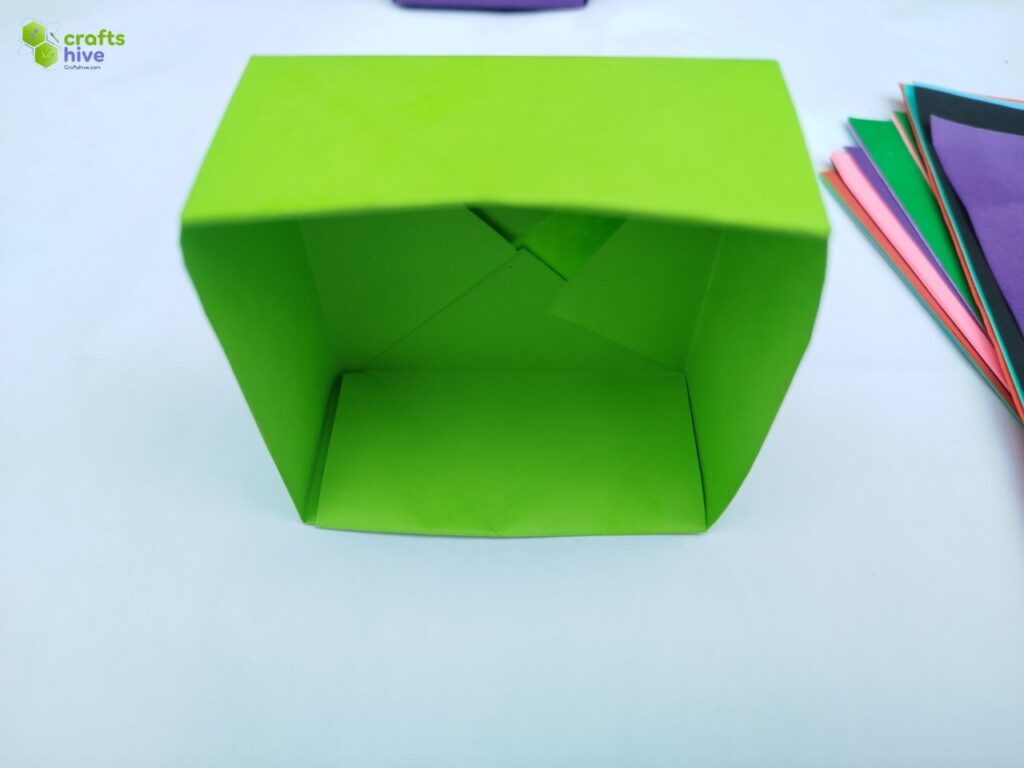
- Valley Fold the corner inside the box, like in the remark (1)
- Place the box on its surface, and that completes our easy guide on how to fold an origami Masu box.
Finished Box

- I have folded a pair of Masu boxes to keep my small origami models inside.
How to Make a Lid for The Box
- If you cut a square from rectengle sheet, fold a Masu box with slightly longer sides. You can use the other box as a cover for the first.
- If you used the Standard Kami paper, you don’t make Blintz Folds all the way to the center, but a little back from that. This box will have slightly larger dimensions.

About "Talha"
Hey, I’m Talha, the Crafter on Craftstive.com. I love to share guides on folding cute origami models and paper crafts, and I am always ready to inspire your next craft project with my weekly craft discussions.