

Learn how to fold the easiest origami full-fox in only 11 steps. This is designed by Fumiaki Shingu that ends up as a sitting fox without support. Add this basic fox to your fall and winter paper crafts and teach to the kids.
Origami Traditional Fox: Step-by-Step Guide
This origami classic fox starts with the triangle base, which is the easiest of all. No complex folds like squash or petal, only the Valley folds and Half Folds are needed for this fox variation.
Now, let me provide you with the step-by-step instructions for folding it:
Model Type: Pure Origami and Classic
Difficulty: Beginner (level 1)
Preferred Name: Origami Sitting Fox
Preferred Sheet: Kami Sheet with one side white
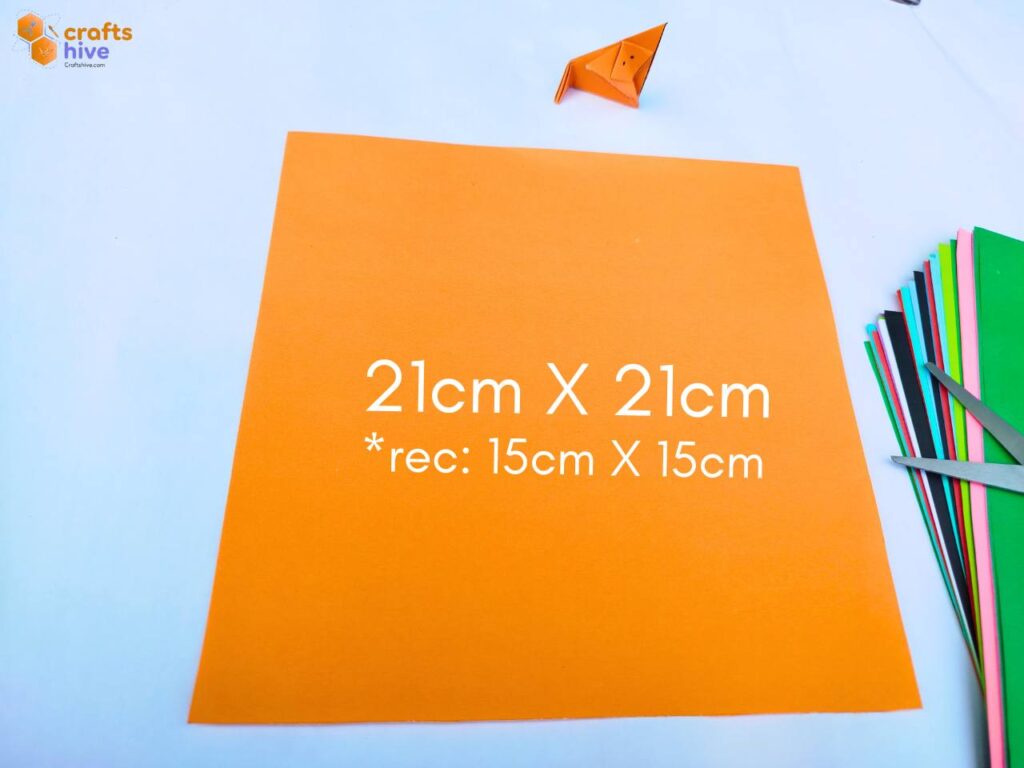
- I like to use big, Tant sheets for the tutorials. However, I recommend using the standard Kami sheet in orange. Also, try to go with thin sheets.
- Also avoid smaller sheets as it might not look neater in the case origami fox.
Step #1: Position of the Sheet

- Place the square sheet onto the tabletop in the diamond position by rotating it 45 degrees to the side.
Tip: Either way, we have to make a diagonal fold after this step. But the correct position of the sheet adds convenience in later folding.
Step #2: Diagonal Fold
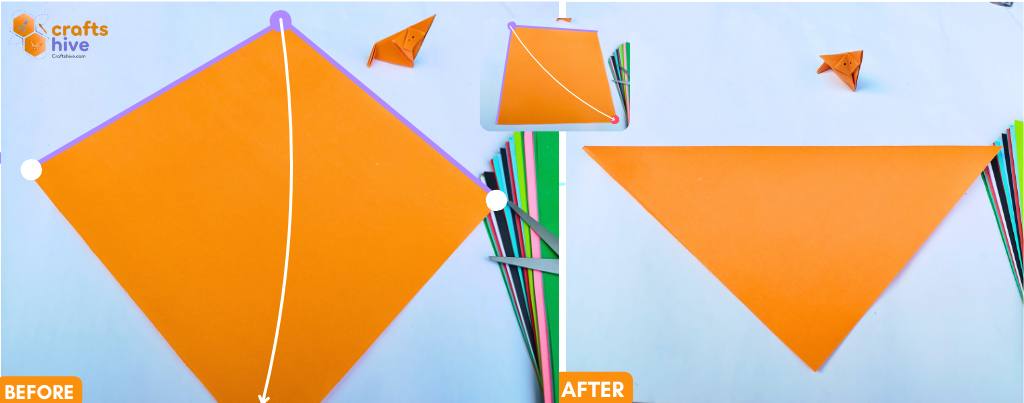
- Fold the paper in half diagonally about the horizontal diagonal and press the flaps flat.
Simply, fold the top corner of the diamond to the bottom and settle it onto the bottom corner. Align the respective sides, too and crease the paper well.
Step #3: Triangle Half Folds
Note: These folds will transform the triangle into a square.
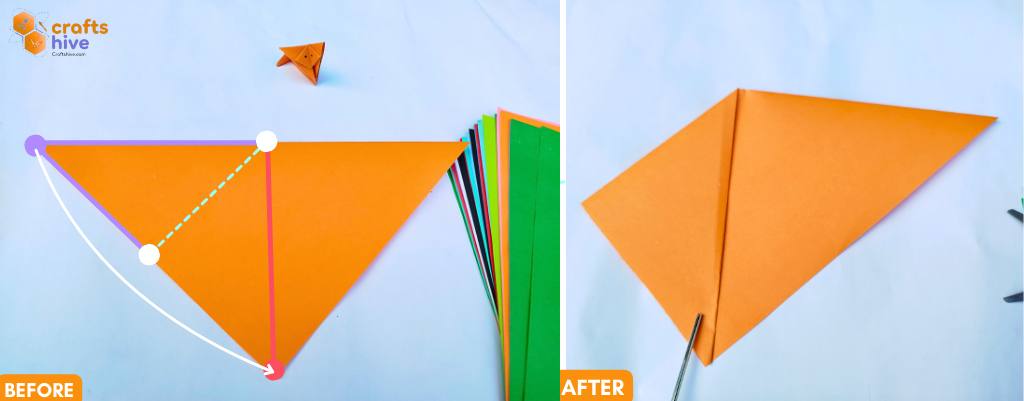
- Fold the top left corner of the triangle to the bottom corner and settle it onto this corner. Be sure to align the half of the top side with the centreline of the triangle.
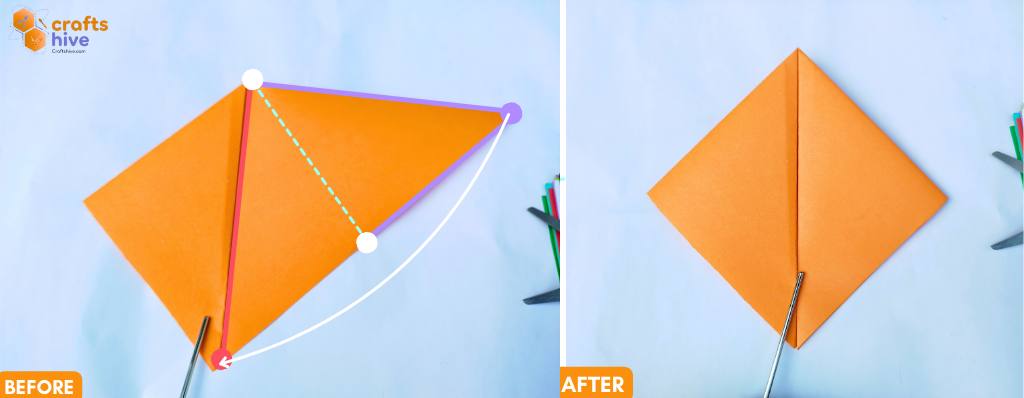
- Fold the right corner the same way and press the whole flap and hinge flat.
Step #4: Turn the Side

- Turn the square upside down along the horizontal so that the top and bottom side remains the same.
Step #5: Fold the Front Layer
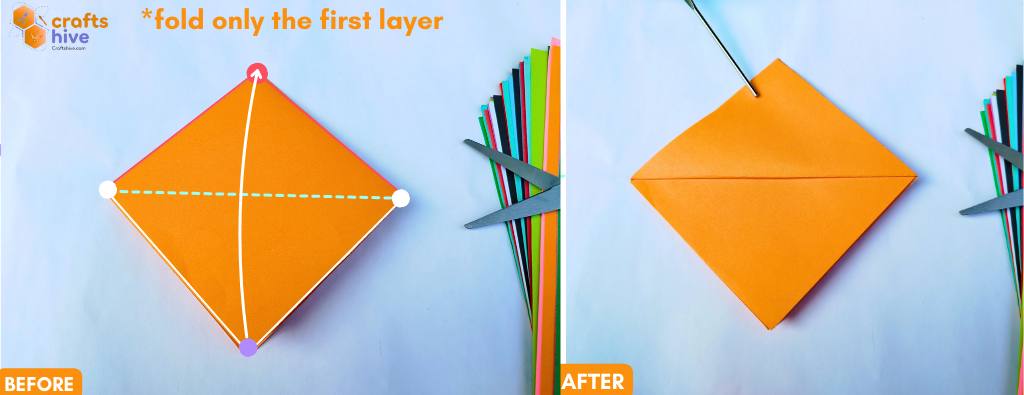
- The square has three flaps, two of which are single-layered. Half-fold the bottom corner of the frontmost layer of the square to the top corner and crease the paper.
Step #6: Fold in Half
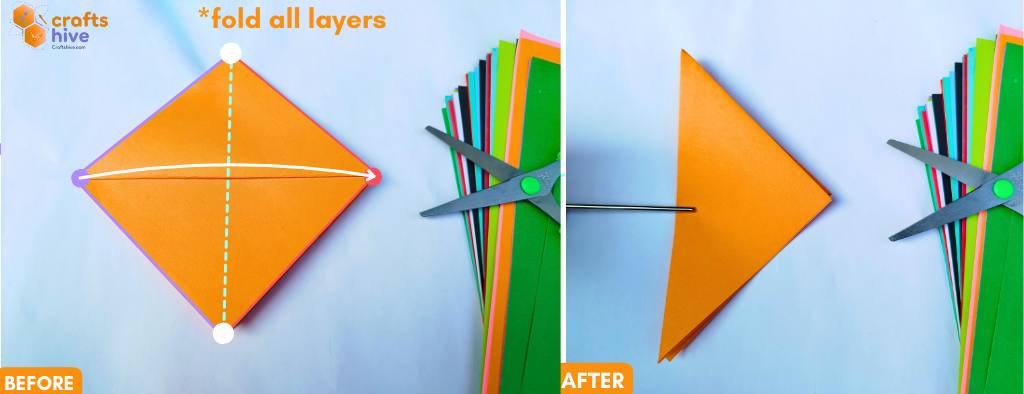
- About the vertical axis (through the top and bottom corners), fold the square in half diagonally from left to right.
Step #7: Rotate

- Give the triangle a 90-degree rotation to the left so that the bottom has two corners and top has one corner.
Step #8: Judgement Fold
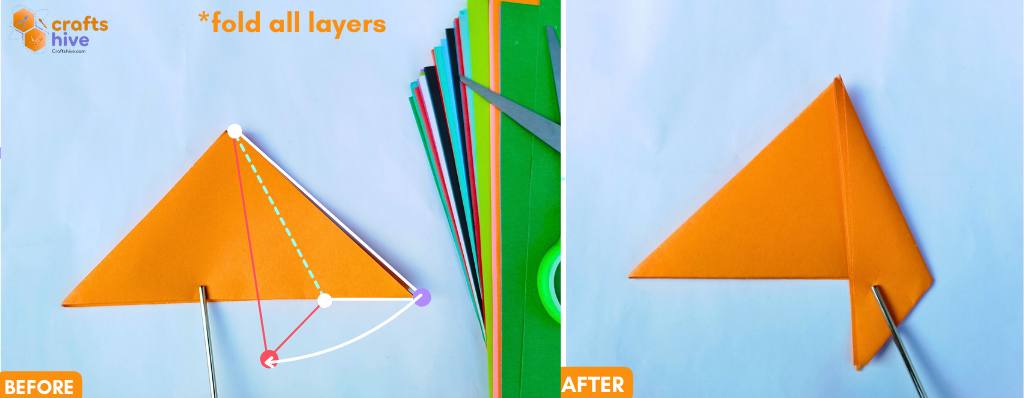
- I have titled this fold “Judgment Fold” because the extent to which the fold is quite arbitrary. However, to guide yourself better, align the top right side of the triangle with the vertical centreline.
- However, I folded the right side to the left and settled it a little away from the middleline to the left.
- Don’t crease the paper hard for this step. Let it get unfolded.

- You can notice three closed cup-folds.
Step #9: Open the Layer
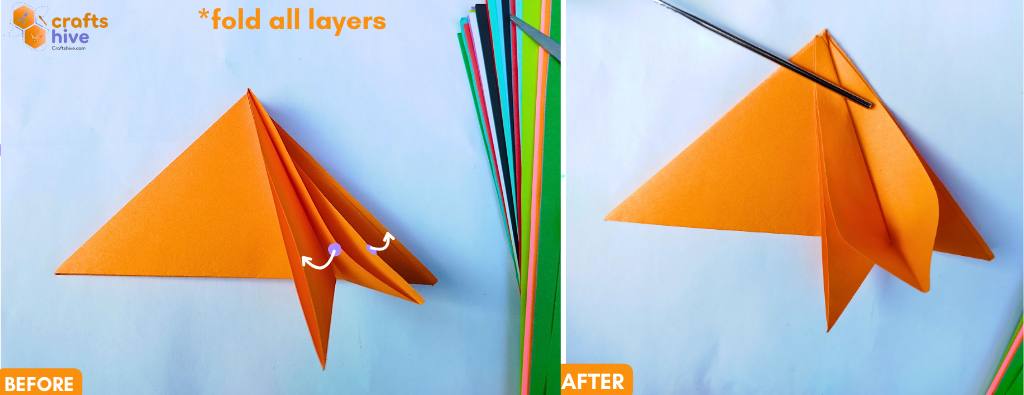
- Open the middle fold and fold the left and right sides onto the left and right folds, respectively.
Observation: You can notice the top corner of the middle opened fold.
Step #10: Squash the Head
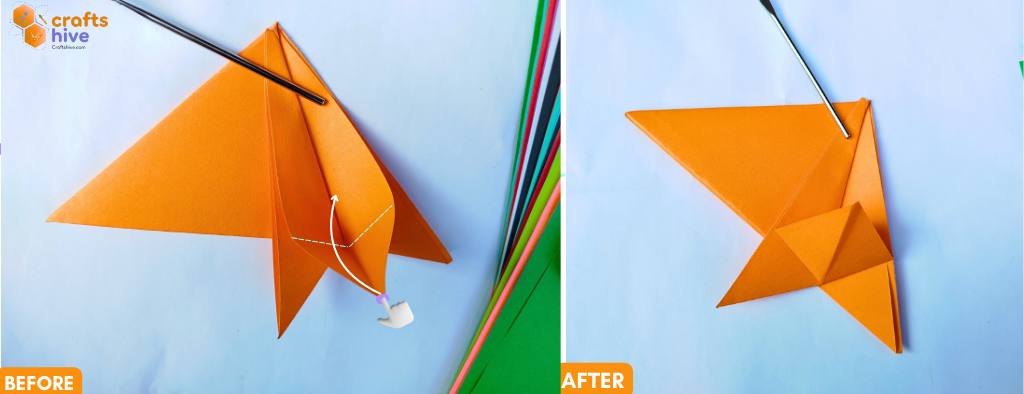
- Push to the corner, and Valley fold it onto the opened fold. Press the paper flat well.
Step #11: Fold for the Leg
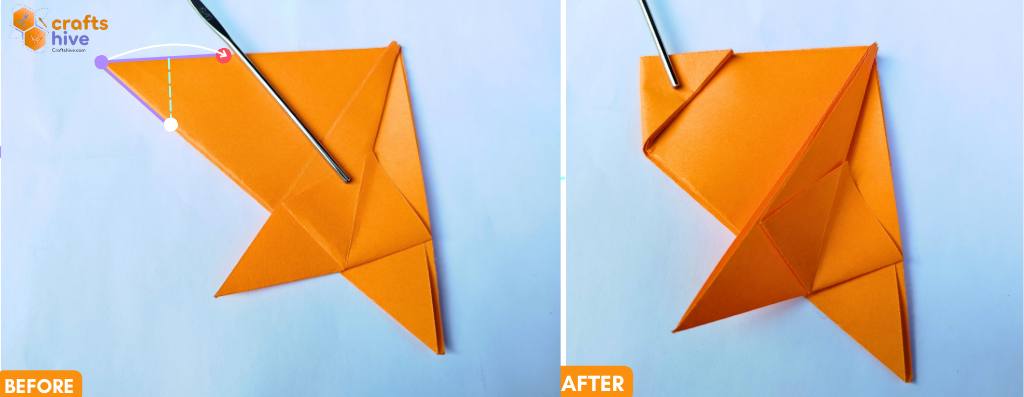
- Fold the top left corner of the shape to the right and let it unfold. It is also a Judgment Fold.
Finished
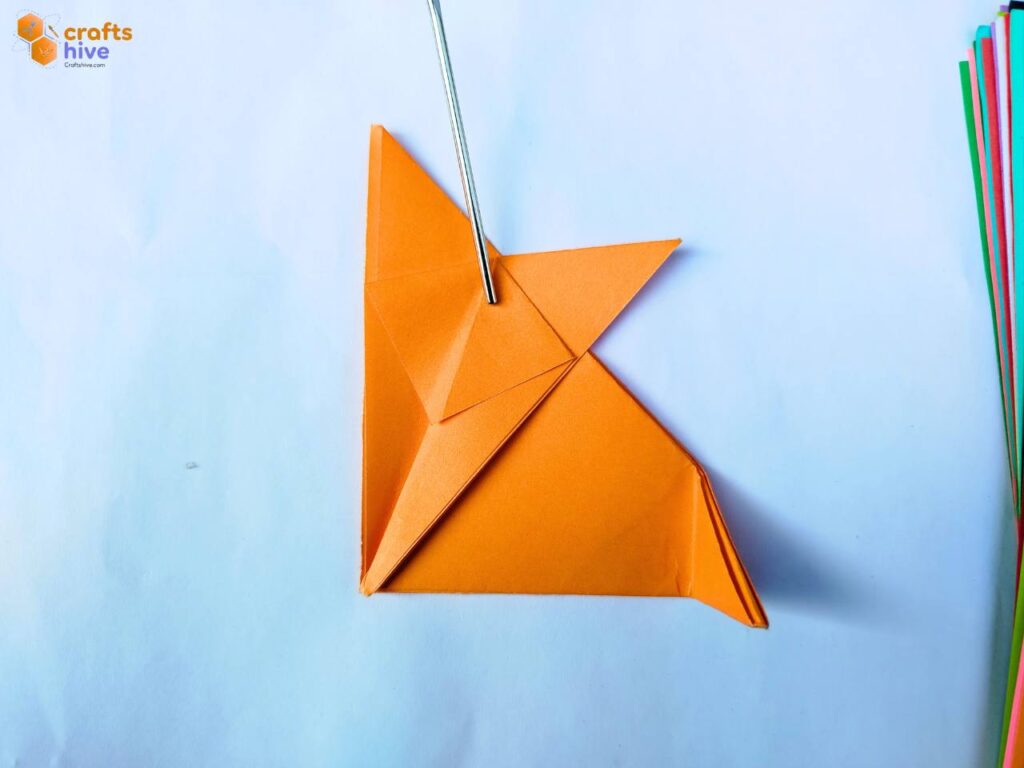
- Rotate the finished origami fox to the side.
- I recommend drawing the eyes and the nose.
This finishes the classic origami fox that can stand straight on the table.
Did you find this Origami Tutorial Helpful? Tell us in the Comments.
Your feedback is a great way for us to improve our origami tutorials. So, share your thoughts on whether you tried this one or not, and highlight the weak points.

About "Talha"
Hey, I’m Talha, the Crafter on Craftstive.com. I love to share guides on folding cute origami models and paper crafts, and I am always ready to inspire your next craft project with my weekly craft discussions.