
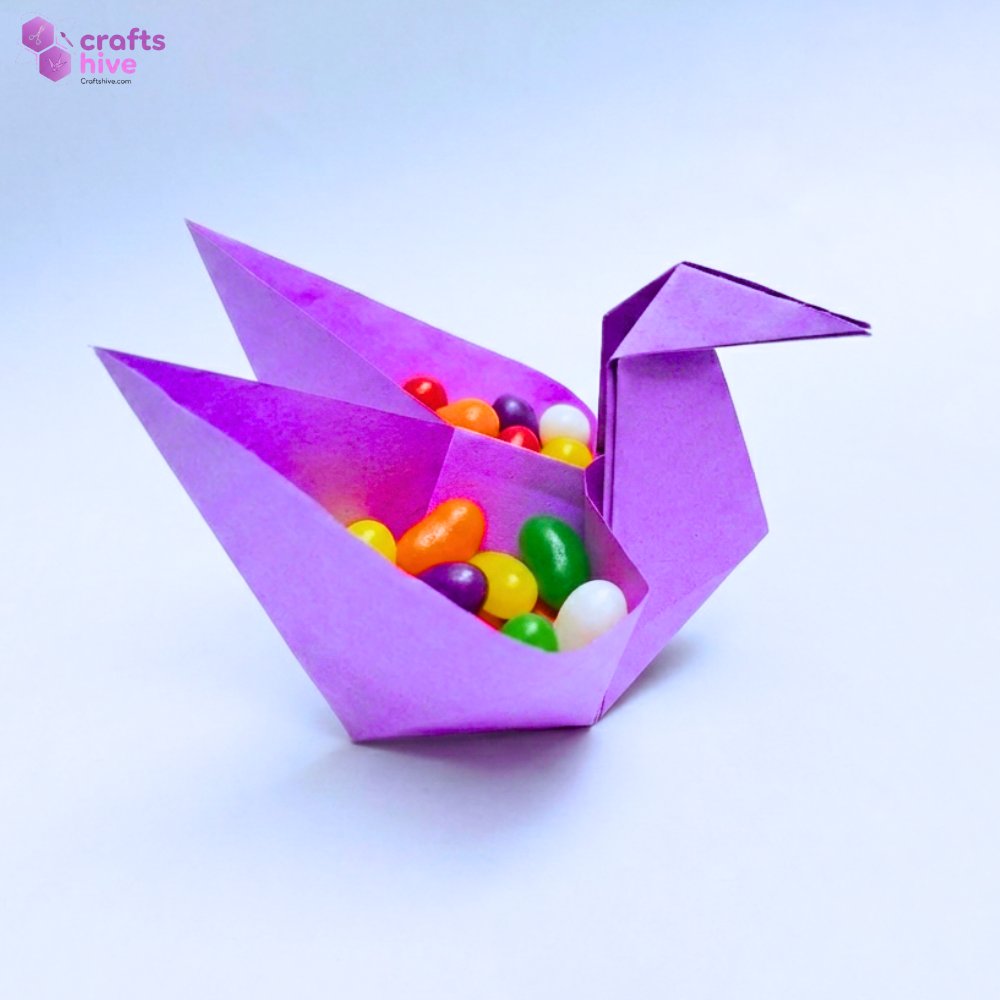
Learn how to fold an origami swan candy dish for Halloween, New Year, Christmas, and other holidays in 16 steps. This is a cute and useful variation of the traditional swan. The idea is to craft a swan with two open pockets in the back that can hold candies, jelly beans, beads, or anything small.
You can fold many swans in different colours, from red to purple, and even in golden and place them on the holiday table.
And since it does not need any support to stand, it will equally be a lovely decoration. Let’s dive into how to fold this lovely swan for the holidays.
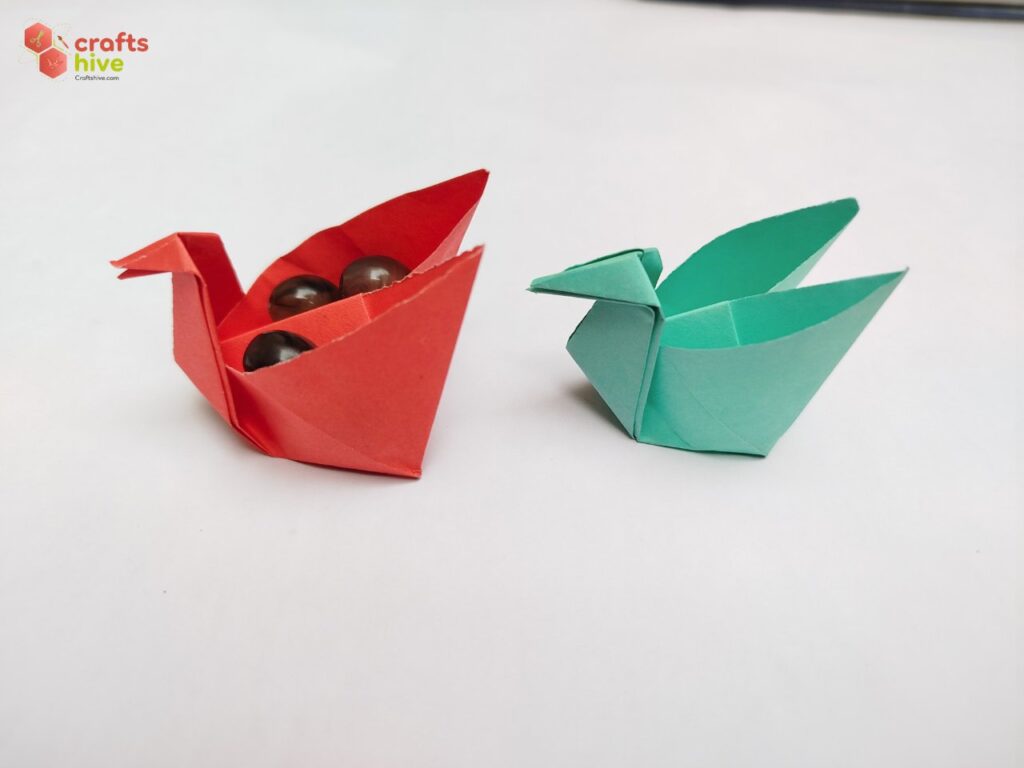
Origami Swan Candy Dish: Step-by-Step Instructions
The traditional swan candy dish gets those pockets with ample space for candies due to the clever squash folds made in the kite base. Specifically, you will be one step before the frog base.
I will show you how to fold these squashes with the intermediate folds. That’s why the fold will be easy and precise.
You will find the instructions super easy to follow along. Now, let me provide you folding a candy swan fold-by-fold:

Model Type: Pure Origami/Traditional Origami
Folding Time: Less than 2 minutes
Preferred Name: Swan with Pockets
Preferred Sheet: Kami because you get white for inner of the pockets (patterned sheets and glittery sheets will make a perfect match for holidays).
Paper Size: I used a 15cm by 15cm square sheet of Tant paper in purple
Step #1: Diagonal Fold
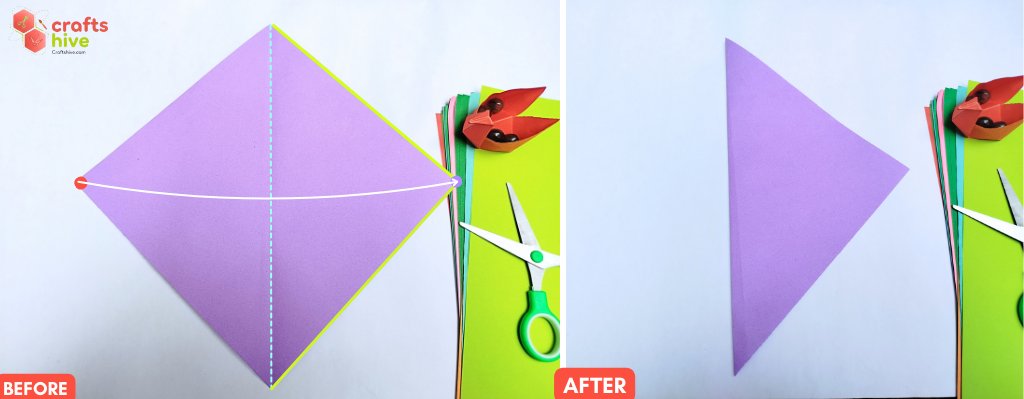
- Place your square sheet on the table in the diamond position.
- Then fold the paper in half along the vertical diagonal, and press the flap flat. Unfold it to make a vertical crease in the middle of the diamond.
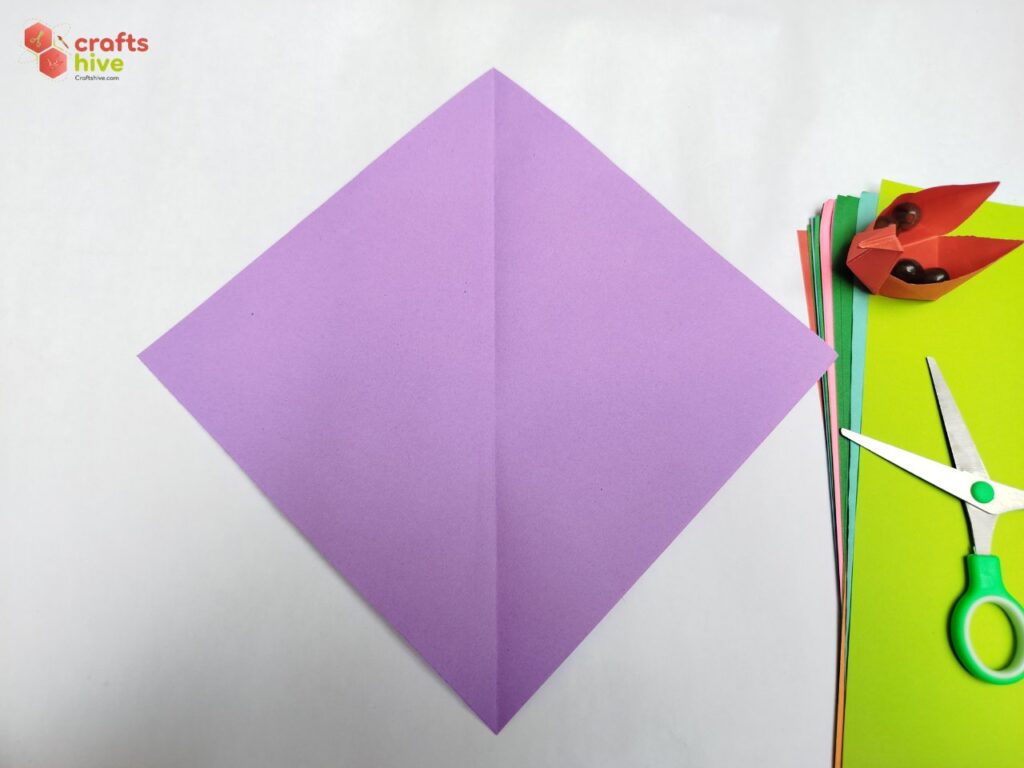
I folded the left corner onto the right corner, aligned the corresponding edges and made the crease.
Step #2: The Kite Base
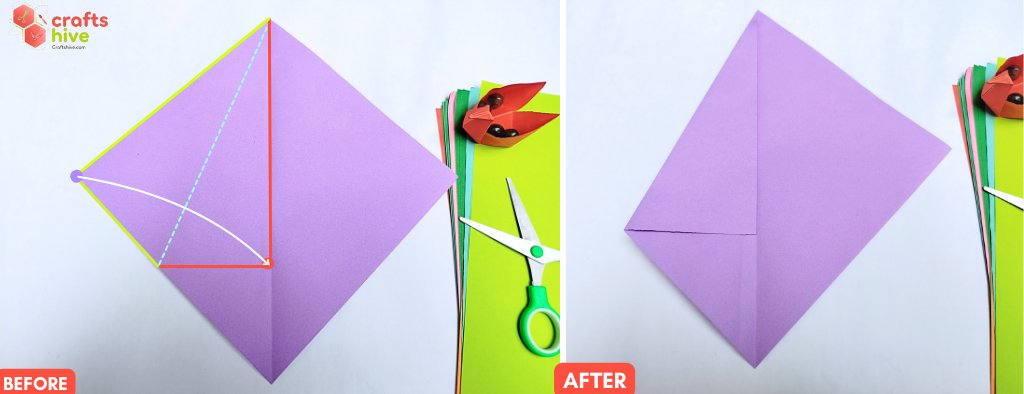
- Now, fold the top left edge of the creased diamond to the centre crease and align this edge with the same. The bottom left edge that slides with the top left edge must be perpendicular to the vertical crease.
This is called the standard kite fold.
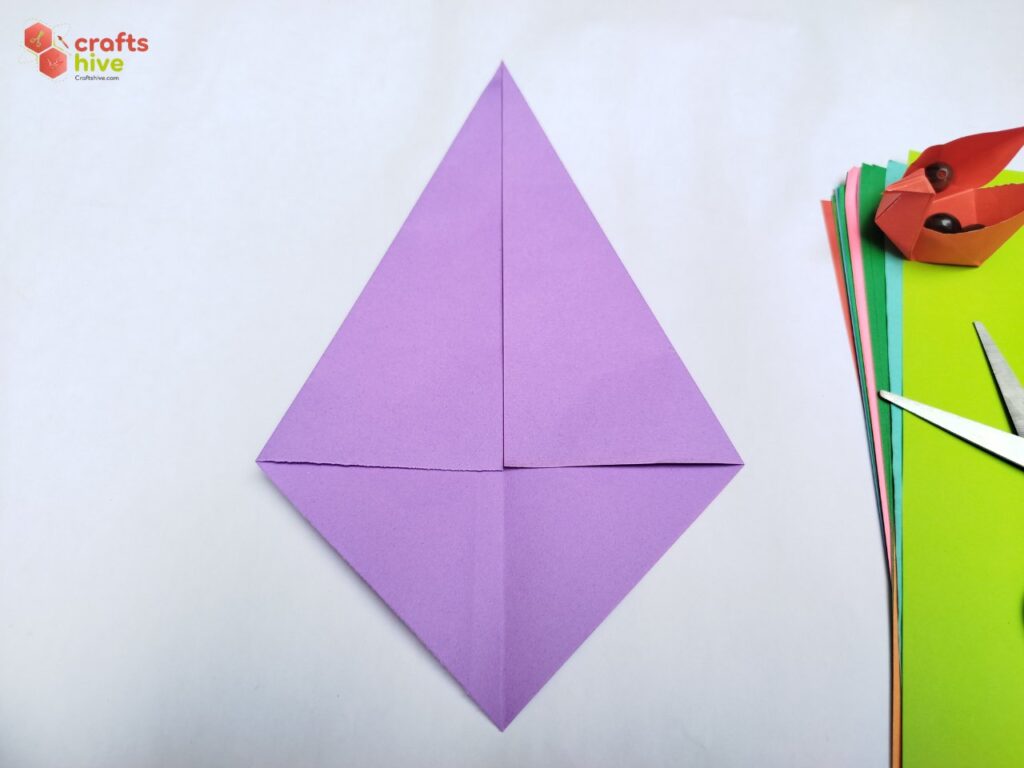
- Make another kite fold, this time, with the left edge to finish the kite base.
Step #3: Turn the Side
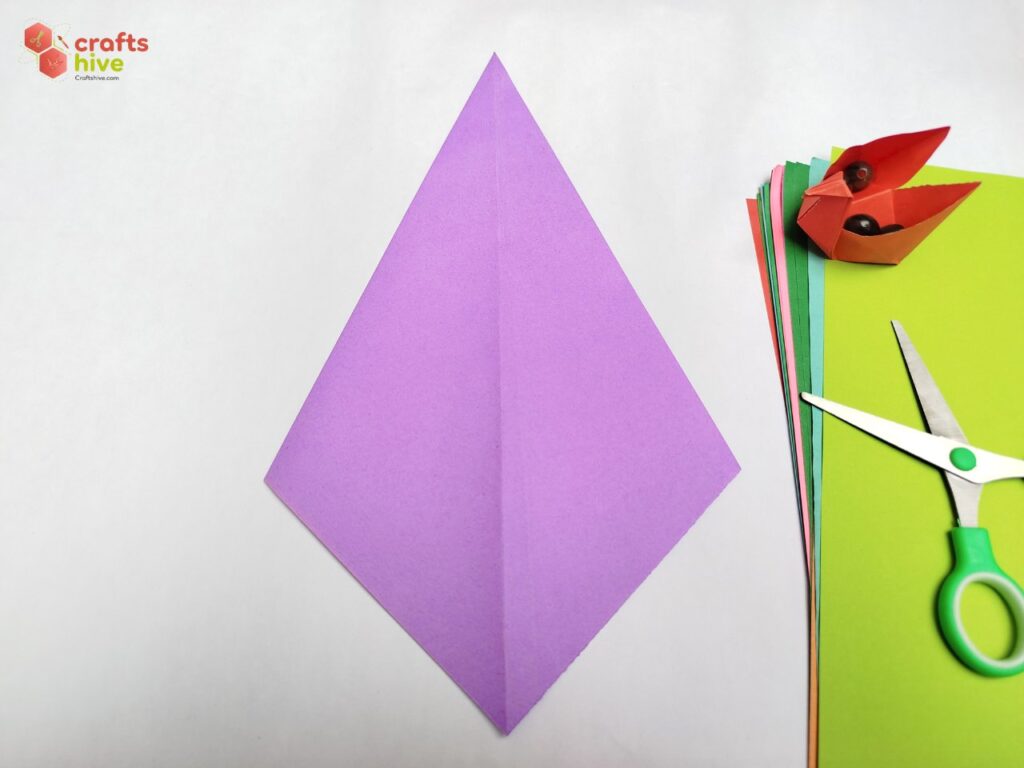
- Fold the kite base over to the other side.
Step #4: Mountain Fold
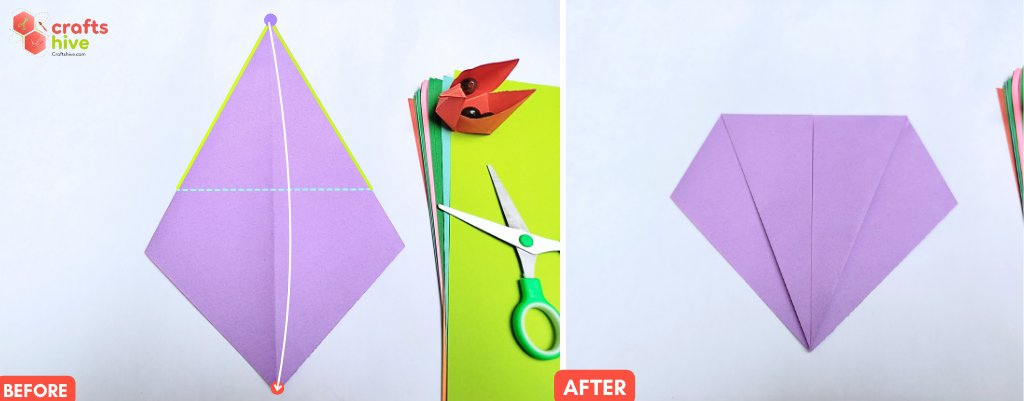
- Fold the top corner of the kite all the way upto the bottom corner and press the paper flat.
Step #5: Turn the Side

- Turn the entire model over such that the previously folded flat stays folded.
Observation: You are left with a diamond shape with two pockets in the top section.
Step #6: Intermediate Fold for Squash Fold
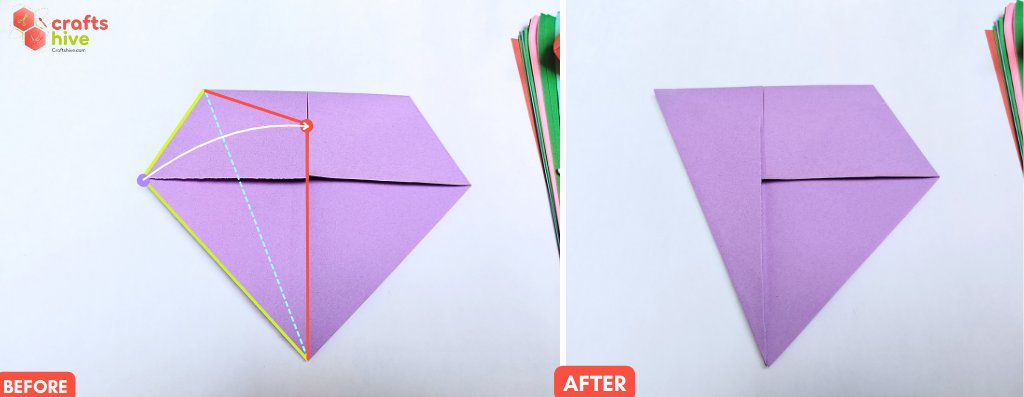
- Fold the right edge of this diamond shape to the centreline along the topmost right and bottom corners as far as you can.
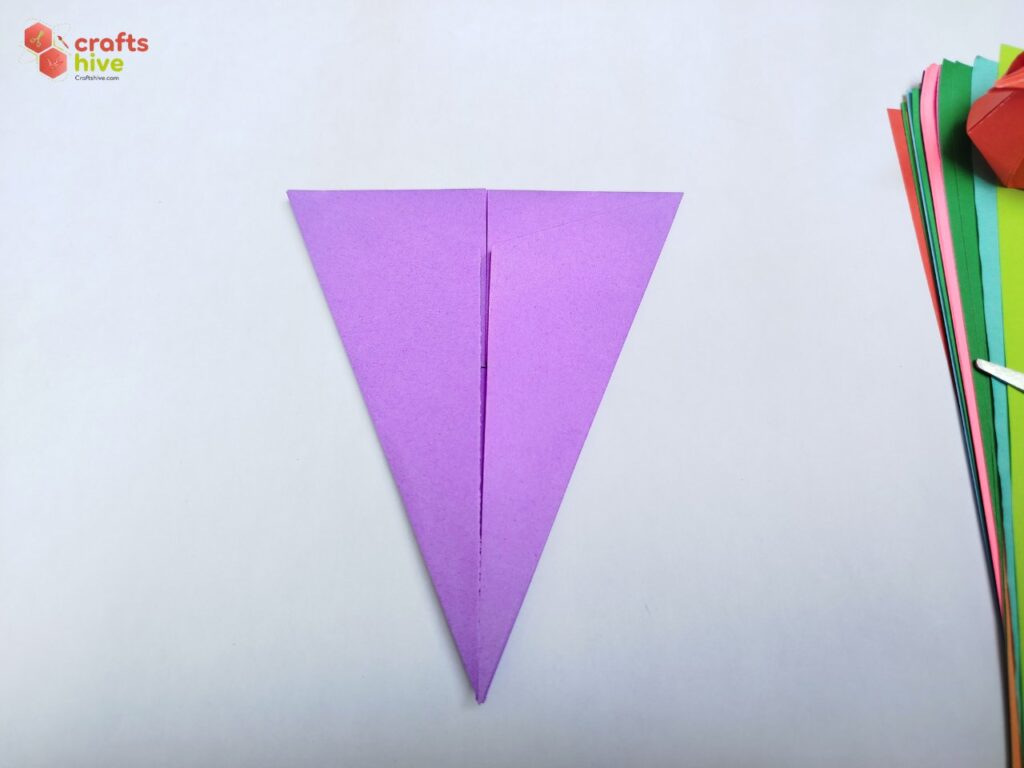
- Make another intermediate fold, this time by sliding the flap along the top left and bottom corners.
Folding tip: You can skip these folds and work the squash fold directly, but I have found this intermediate crease very helpful.
Step #7: Squash Fold
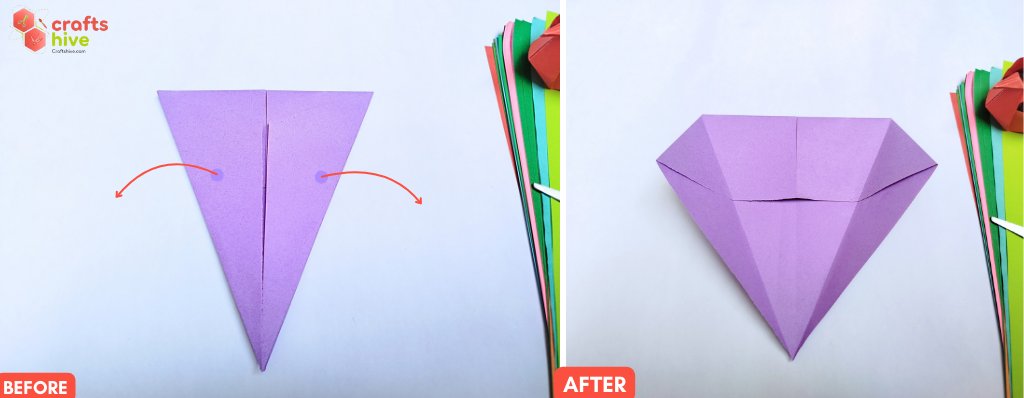
- Unfold both the intermediate folds. You can observe the intended guiding creases for the book fold. We want to reverse-fold the pockets and then squash them.
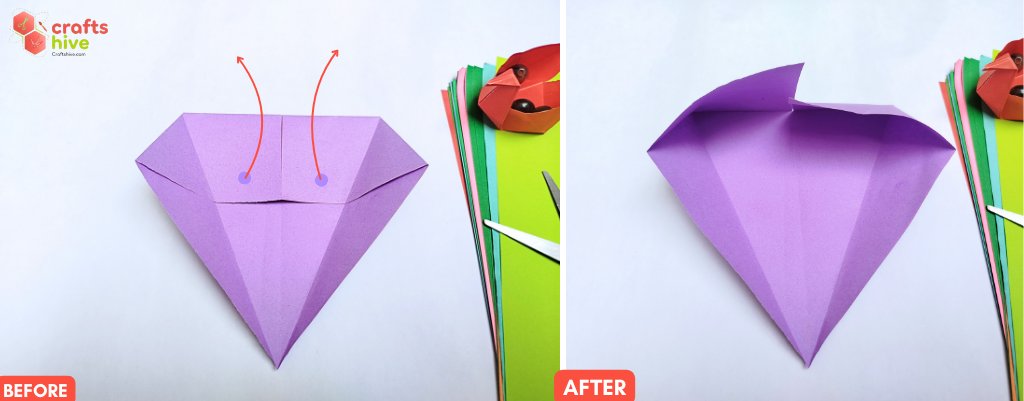
- Pinch the flaps of the pockets and pull them away from you to open them about the creases made in step #4.
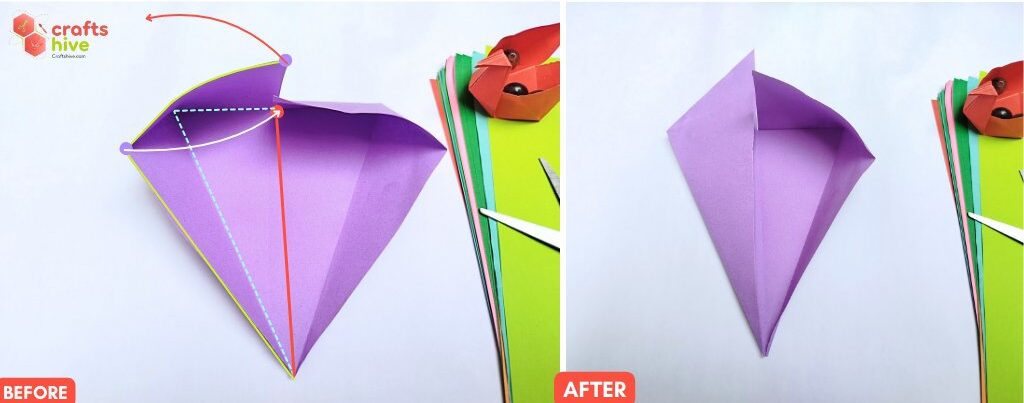
- With the flaps of the pocket remaining pulled, refold the left and right flaps along the creases made by the intermediate folds. This combines the left and right flaps with the top pockets. So, you are left with left and right triangular pockets.
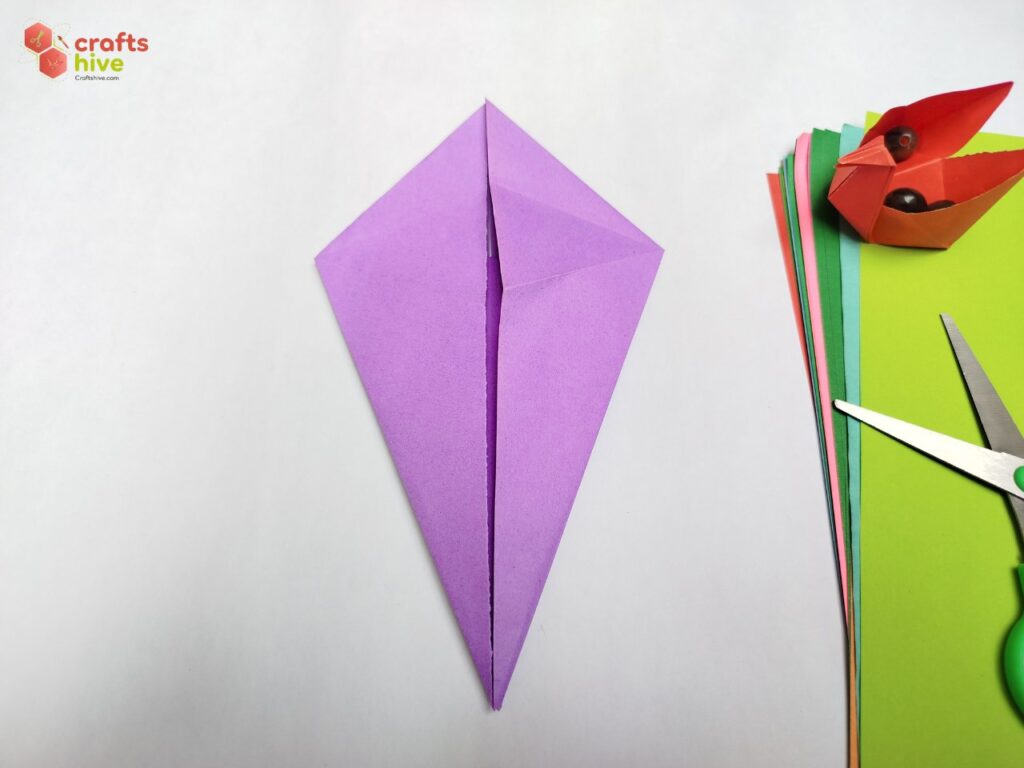
- Make sure to repeat the squash for both sides.
Step #8: Valley Fold for Swan’s Neck
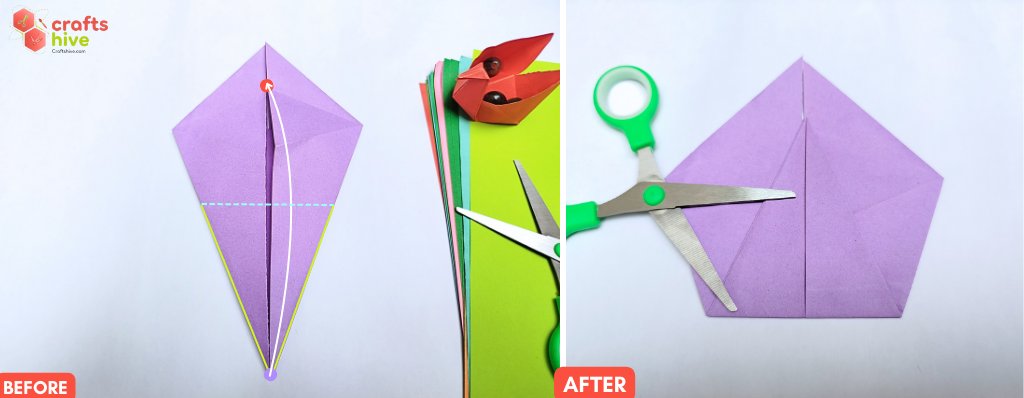
- Hold the bottom corners of both flaps together and make a Valley fold. You have to settle the corner a little below the top corner, right on the middle line.
Folding Tip: You can also use the common point of top creases as a reference for this fold.
Step #9: Mountain Fold for Swan’s Head
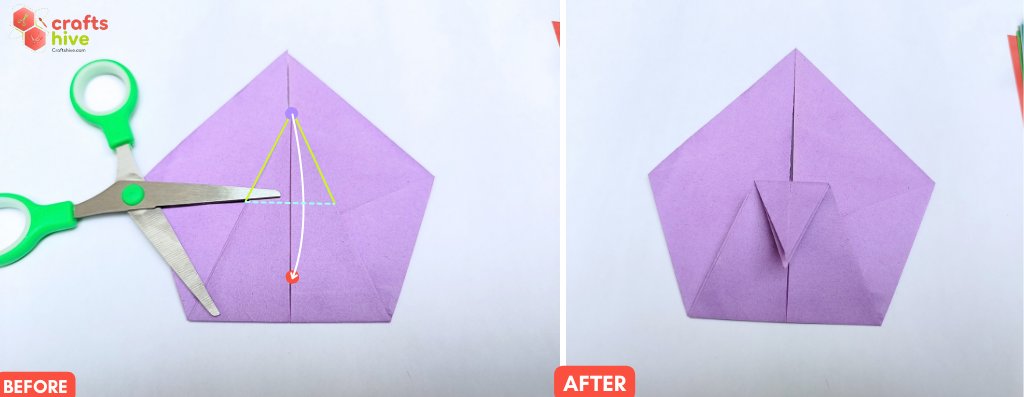
- Make a Mountain Fold with a few centimetres of the previously folded flap. This will make the head of the swan.
Step #10: Turn

- Turn the whole model over to the other side. It will look quite like a pentagon with a centre line.
Step #11: Collpase
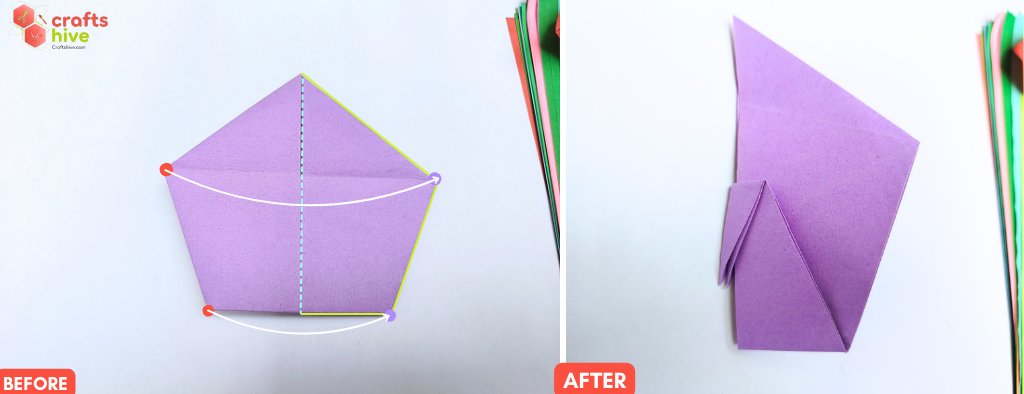
- Fold the model in half along that vertical centreline. Make sure to align the corresponding corners and sides pretty well.
Step #12: Pull the Neck
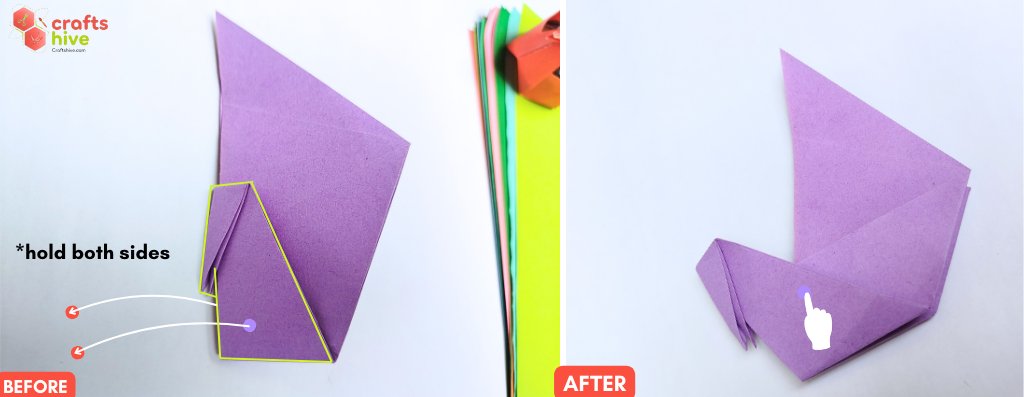
- Lift the model in your hand, pinch the neck area from both sides and pull it out. Afterwards, press the paper flat to make a new crease.
Folding Tip: If you don’t pull the flap too much, the swan may become imbalanced. So, before firming the crease, check if it will stand well even when the pockets are unfilled.
Step #13: Pull the Head
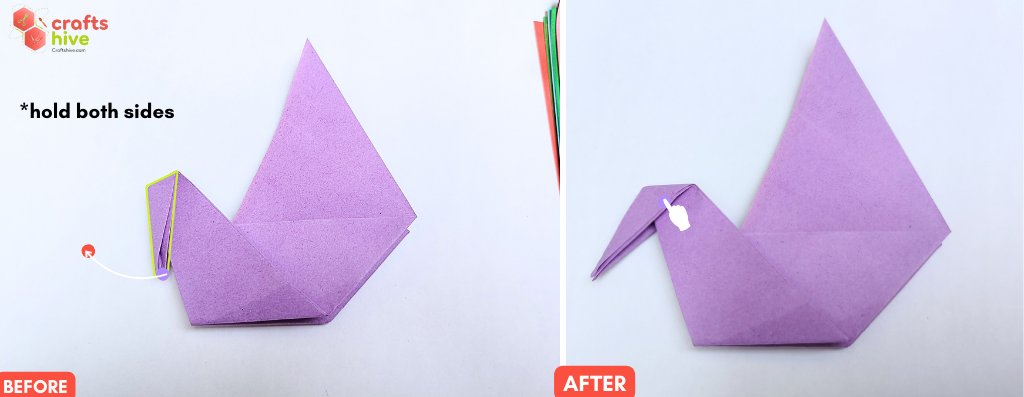
- Similar to the neck, pull the head fold out, too.
Step #14: Open the Pockets
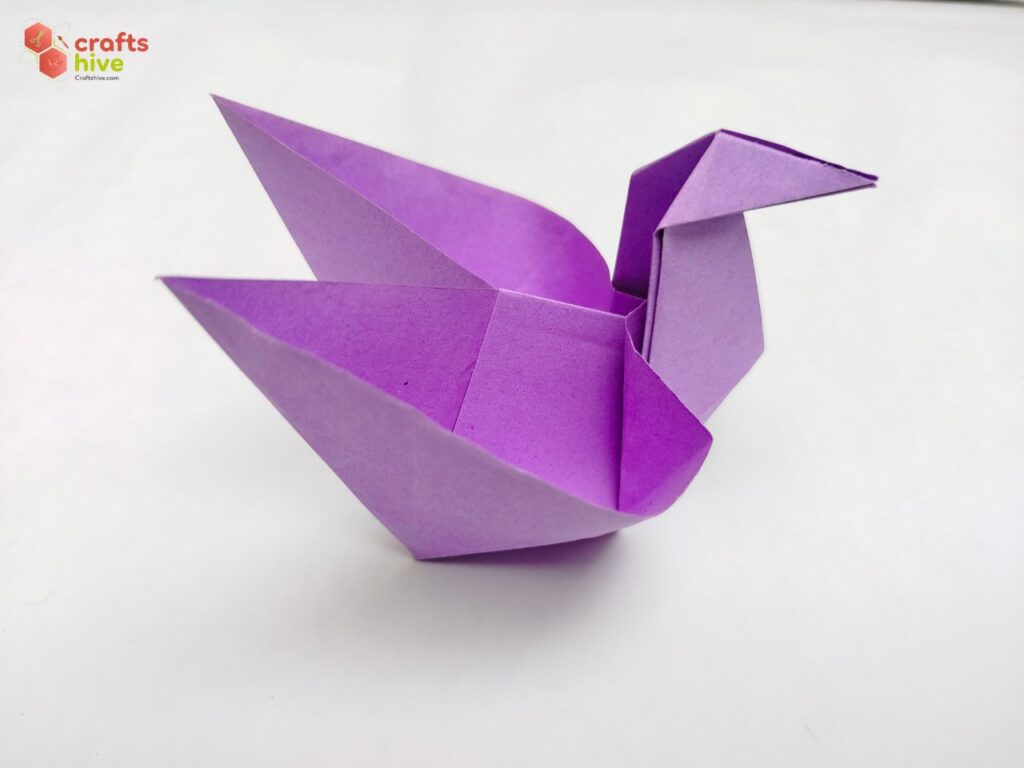
- You have to insert the finger inside the pockets and move it arond for making the pockets of the swan candy box ready to be filled with candies or pearls. You can let it stand without support over the flat base.
Finished
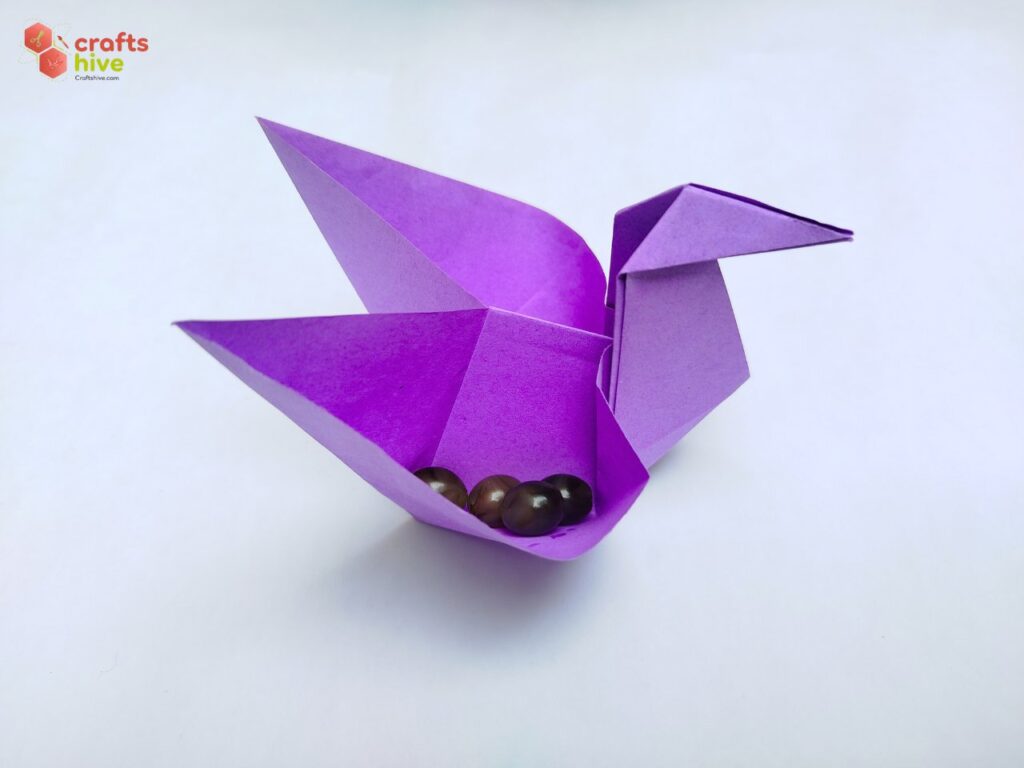
And that’s it! The origami swan candy box is ready for Christmas, Halloween and the New Year.
Did you find this Origami Tutorial Helpful? Tell us in the Comments.
Your feedback is a great way for us to improve our origami tutorials. So, share your thoughts on whether you tried this one or not, and highlight the weak points.

About "Talha"
Hey, I’m Talha, the Crafter on Craftstive.com. I love to share guides on folding cute origami models and paper crafts, and I am always ready to inspire your next craft project with my weekly craft discussions.