
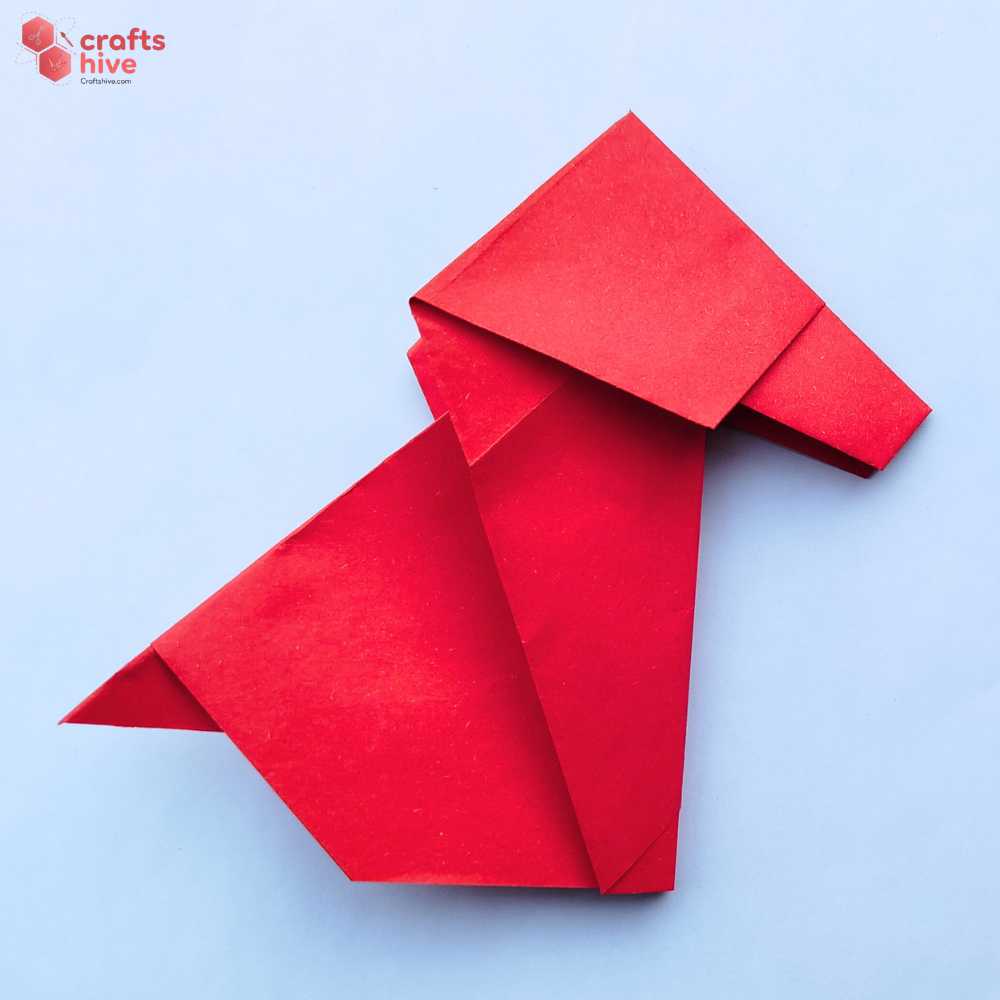
Let’s fold an easy origami sitting puppy in 16 simple steps. This is a traditional model and ends up as a full-body origami puppy that looks the same from both sides. With the kami paper, it will have the feet in a different color and can stand on the table without support. You can make many different sizes and colors to charm up your study or drawing table.
After this origami puppy tutorial, you can also check my origami puppy face and origami dog with heart tutorial. They are also super easy to fold. Let’s dive into the step-by-step instructions:
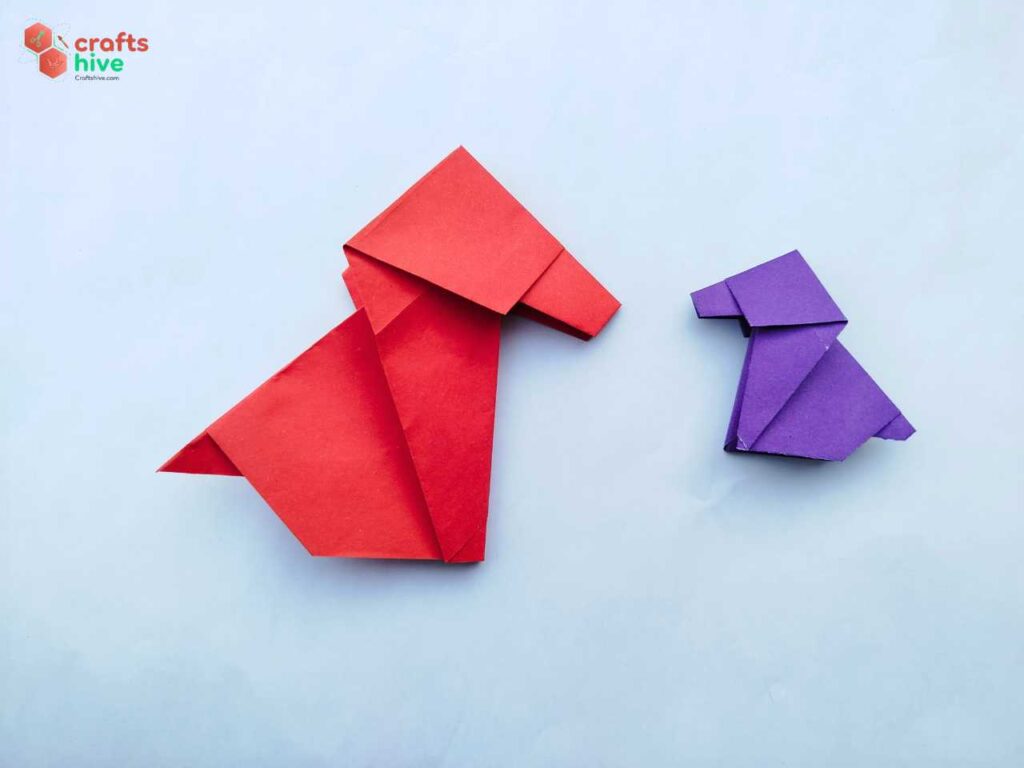
Origami Traditional Puppy: Step-by-Step Instructions
The origami traditional puppy is worked on the kite base with alternating Mountain and Valley Folds. In the end, we also have to squash the paper and make new creases to bring the puppy into the exact shape. Here is what I will mean by Mountain and Valley Folds in this tutorial:
Mountain Fold: Fold the corner towards you.
Valley Fold: Fold the corner away from you.
Model Type: Traditional/Pure Origami
Folding Time: 2 minutes
Preferred Sheet: Use Kami when you want a different color for the feet. Otherwise, it is so small detail that you can use Tant paper, too.
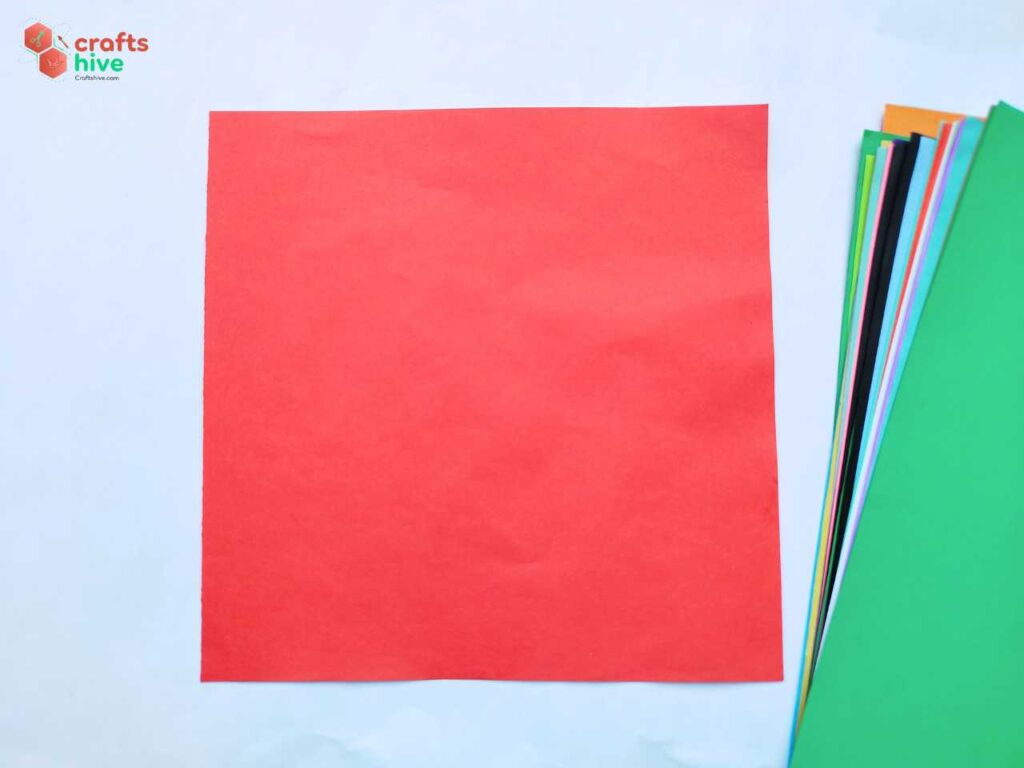
Dimensions: I used a 16 cm by 16 square sheet of thin Tant paper
Color: Brown is popular.
Preferred Name: Standing Full Puppy
Note: Be sure to have your square sheet placed in the diamond position, as we shall be using one of the diagonals as symmerty line for the origami puppy.
Step #1: Diagonal Fold
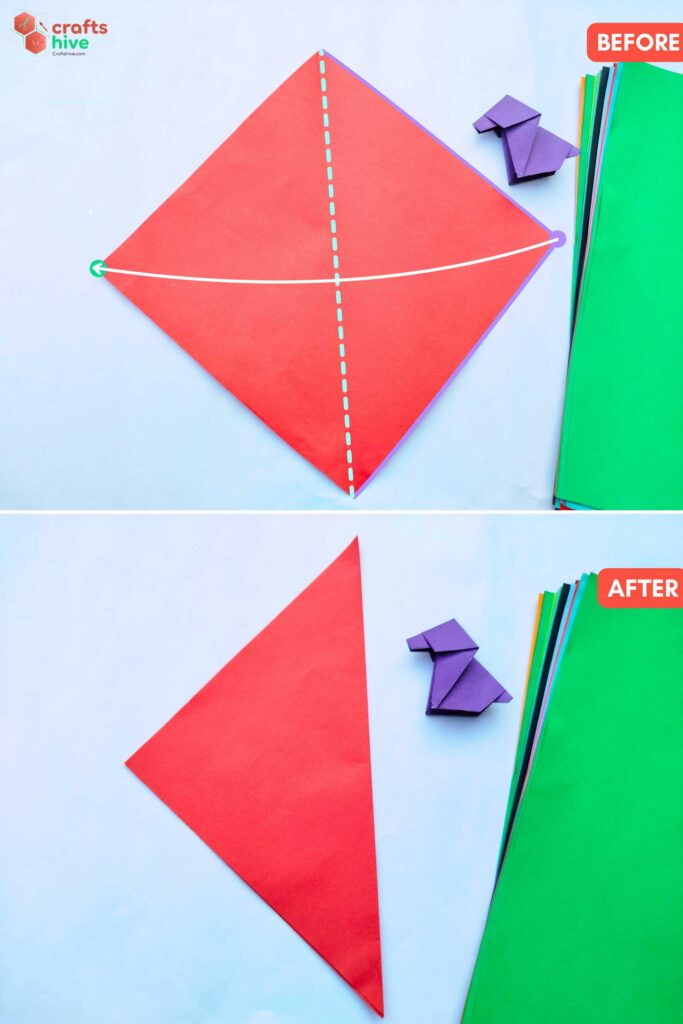
- Fold the paper in half along the vertical diagonal, and press the paper flat.
I folded the left corner of the diamond onto the right corner and aligned the corresponding edges.
Step #2:Unfold
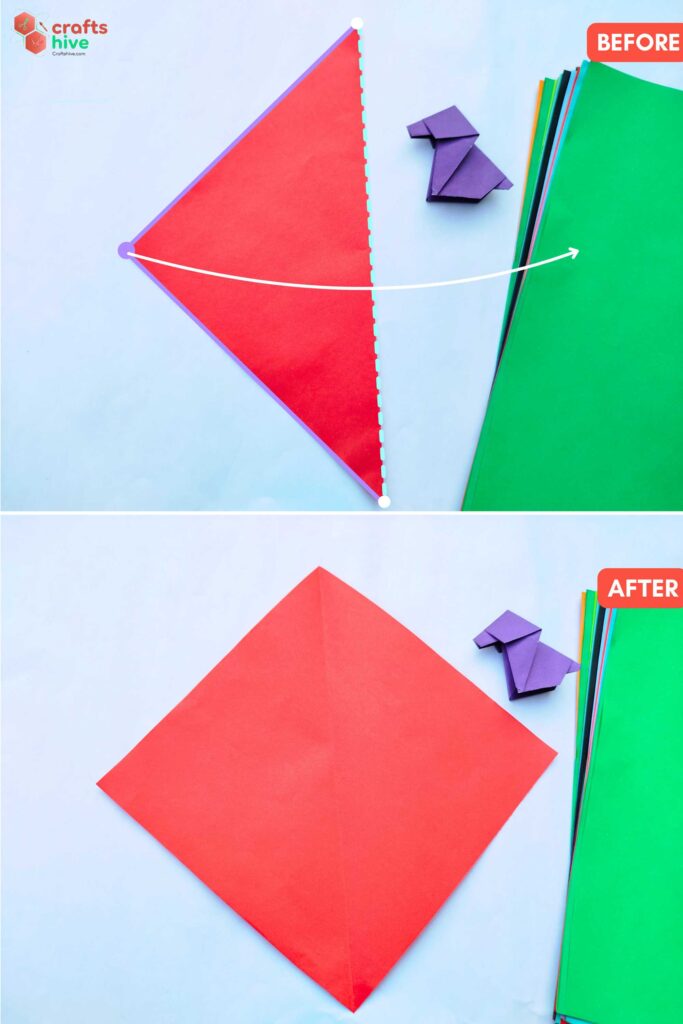
- Unfold the triangle into the square to make a middle vertical crease.
Step #3: Kite Base
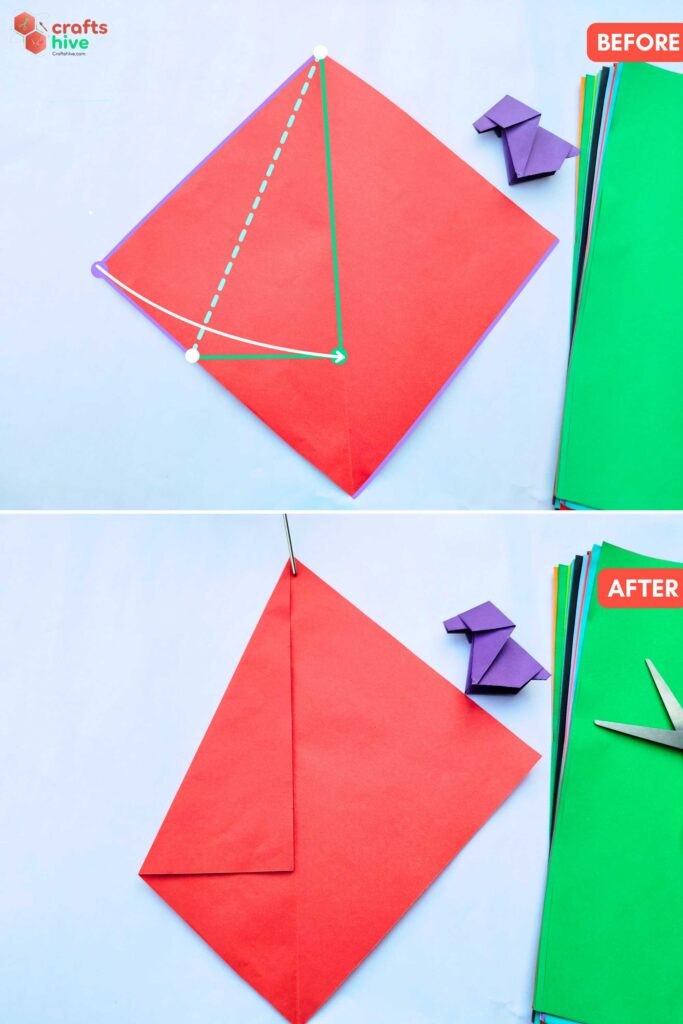
- Align the whole top left edge of the diamond with the vertical centreline and press the paper flat. This is called the Kite Fold. We need two such folds to make a Kite Base.
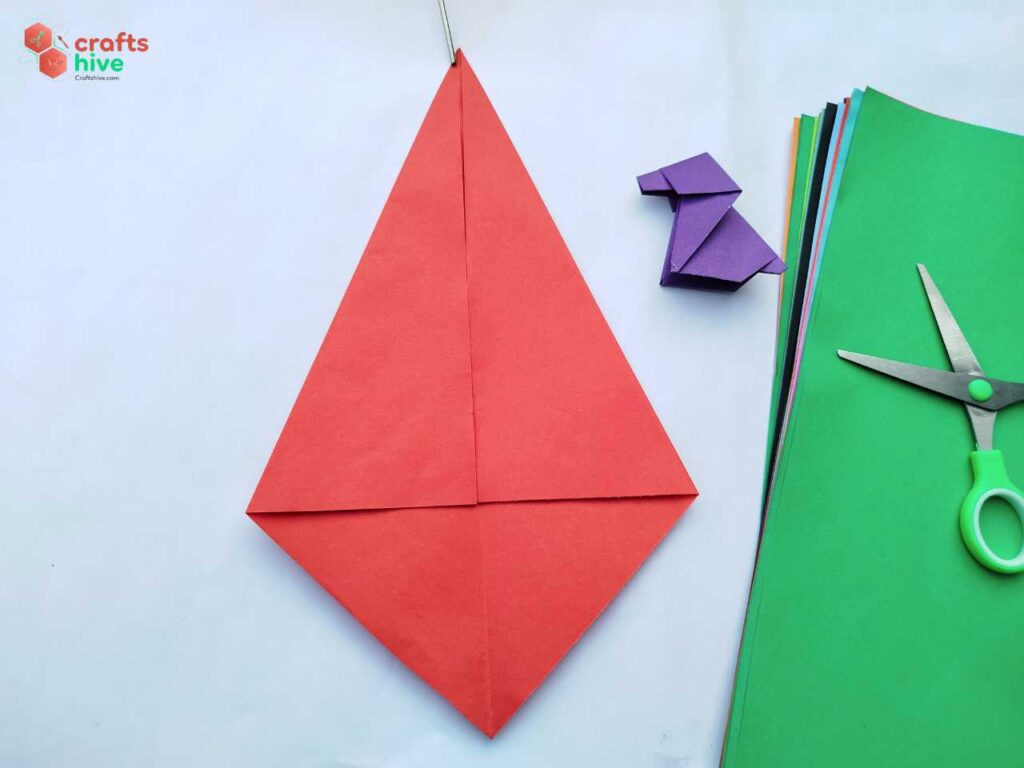
- Make another kite fold, this time with the top right edge of the paper. The corners of both folds must settle at the same height.
Step #4: Turn the Side
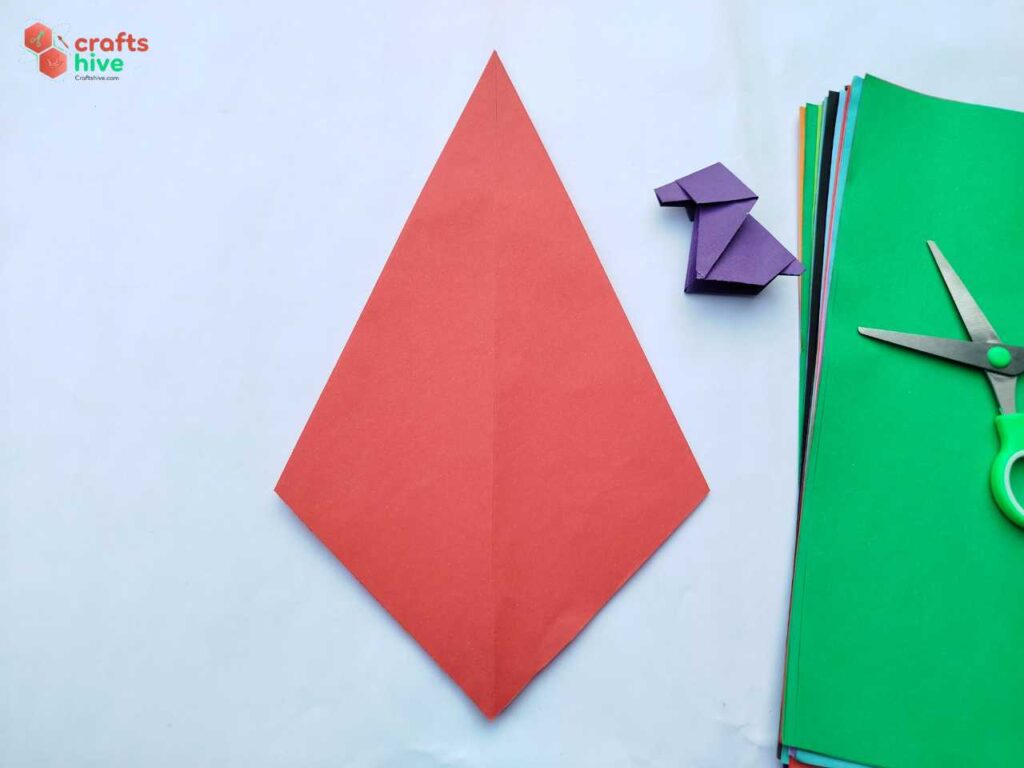
- Turn the kite base over.
Step #5: Half Mountain Fold
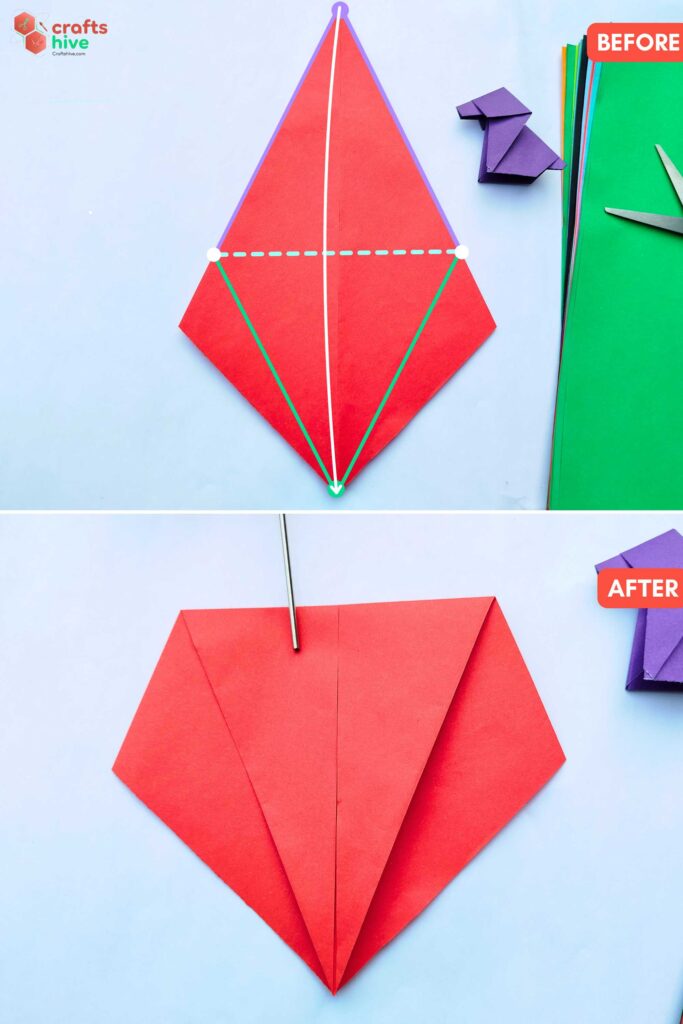
- Make a Mountain Fold using the top corner of the inverted kite base, all the way down to the bottom corner, and press the paper flat.
Step #6: Valley Fold the Mountain Flap
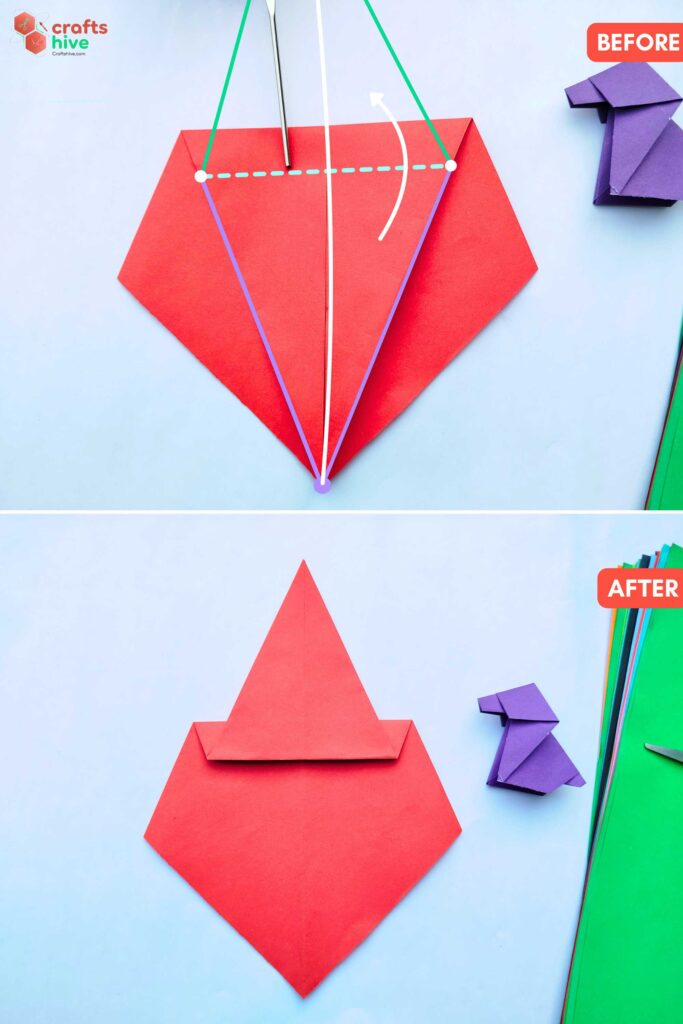
- Valley Fold about 1/6 of the Mountain Fold Flap all the way up to the top, and press the paper flat to make a new crease.
Step #7: Turn the Side

- Turn the whole model over.
Step #8: Mountain Fold
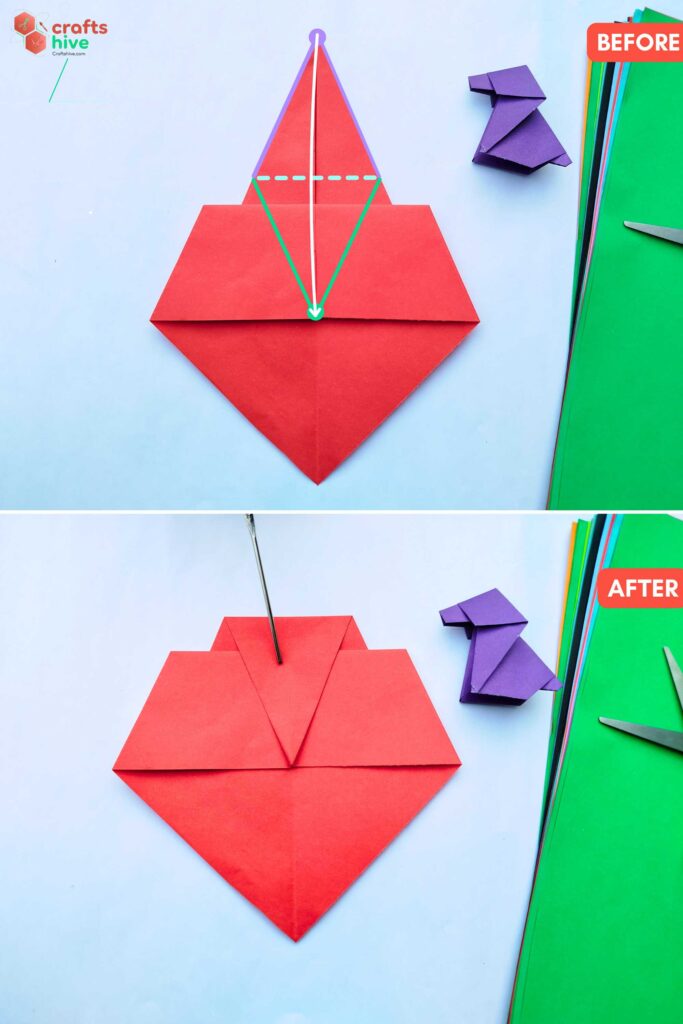
- Mountain Fold about 1/6 of the Valley Fold Flap all the way to the bottom.
Alternative Way: Fold the top corner of the Valley Fold Flap onto the Kite Fold corners in the middle line.
Step #9: Valley Fold the Top Mountain Flap
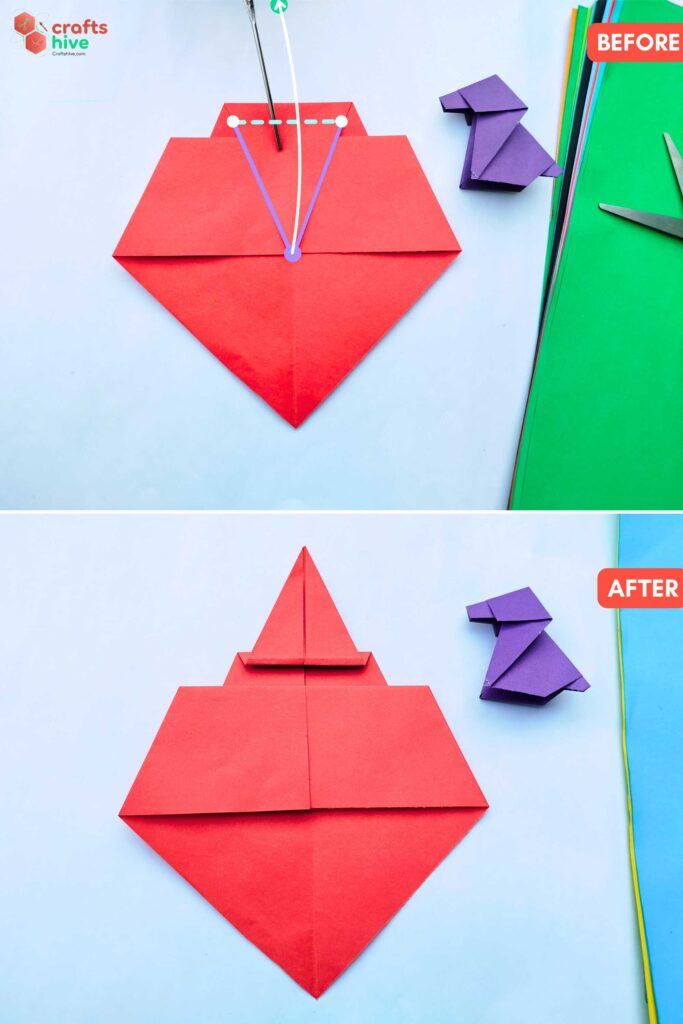
- Valley Fold about 1/7 of the Mountain Fold Flap all the way to the top.
Step #10: Mountain fold The Valley Flap
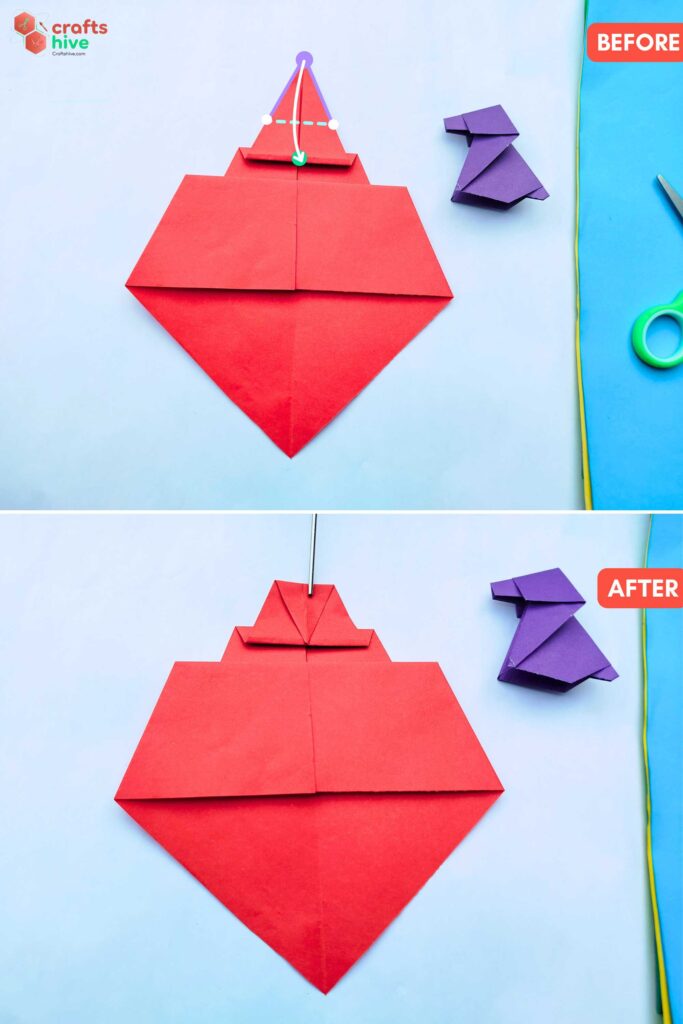
- Mountain Fold the top corner of the Valley Fold Flap all the way down to the hinge or bottom edge of the Valley Fold Flap.
Step #11: Valley fold the Bottom Flap

- Valley Fold the bottom corner of the inverted Kite Base all the way up to the corners of the Kite Folds. (start of the pocket flaps).
Step #12: Mountain fold the Bottom Valley Flap
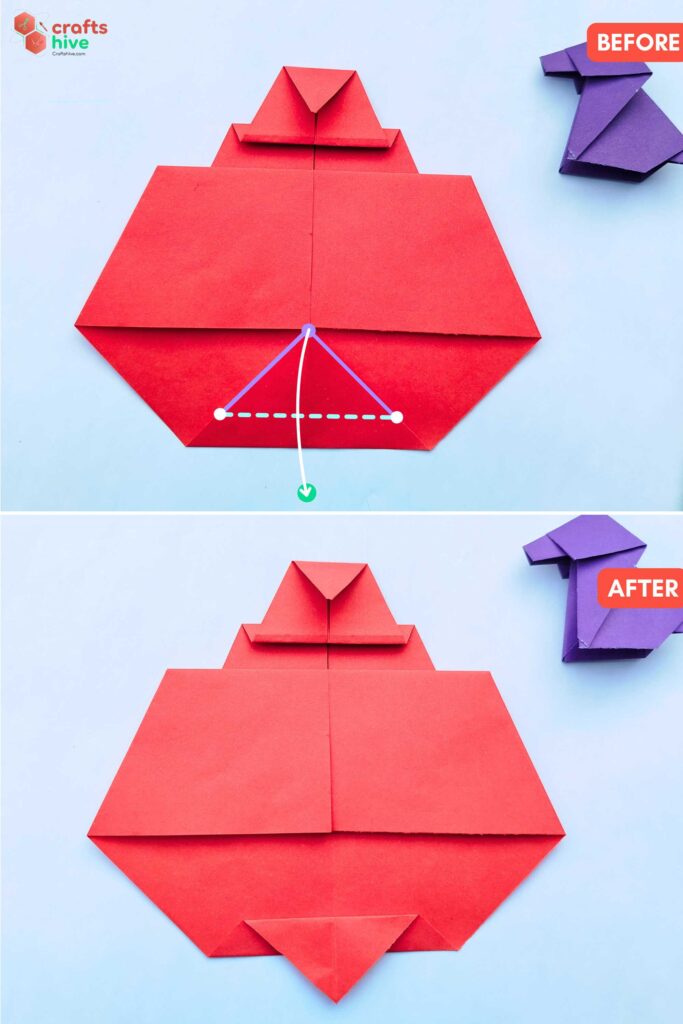
- Mountain Fold about 1/4 of the Valley Fold flap all the way to the bottom and press the paper flat.
Step #13: Collapse in Half
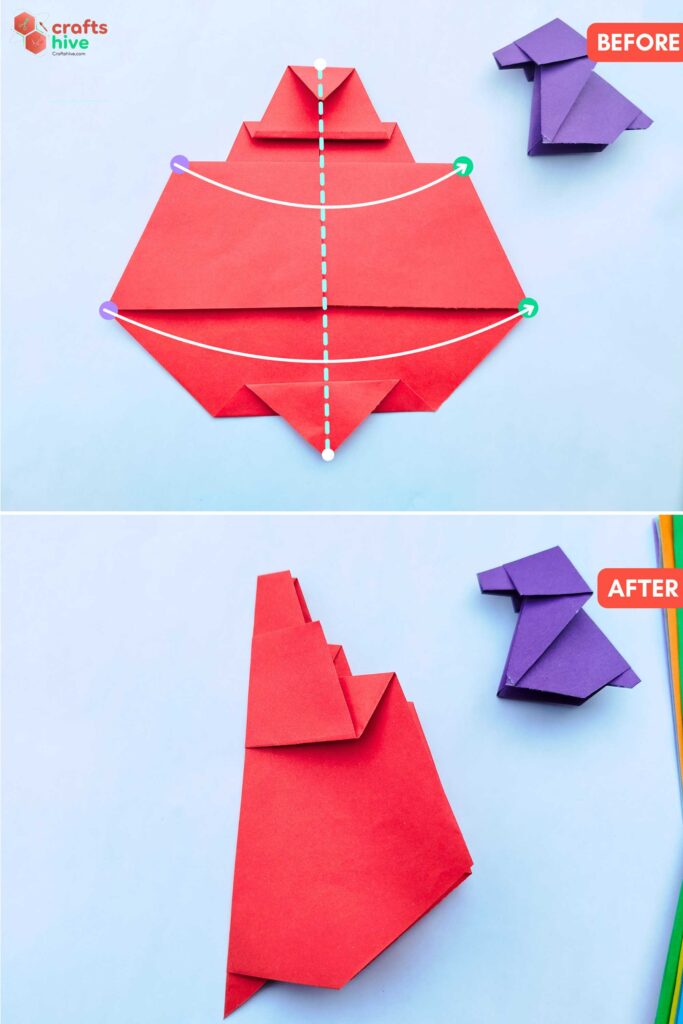
- Along the vertical centreline, fold the entire model in half. Each corner and edge must align as the model is symmetric. You can notice the tail inside and the head flap over the body.
Step #14: Pushing the Legs and Head
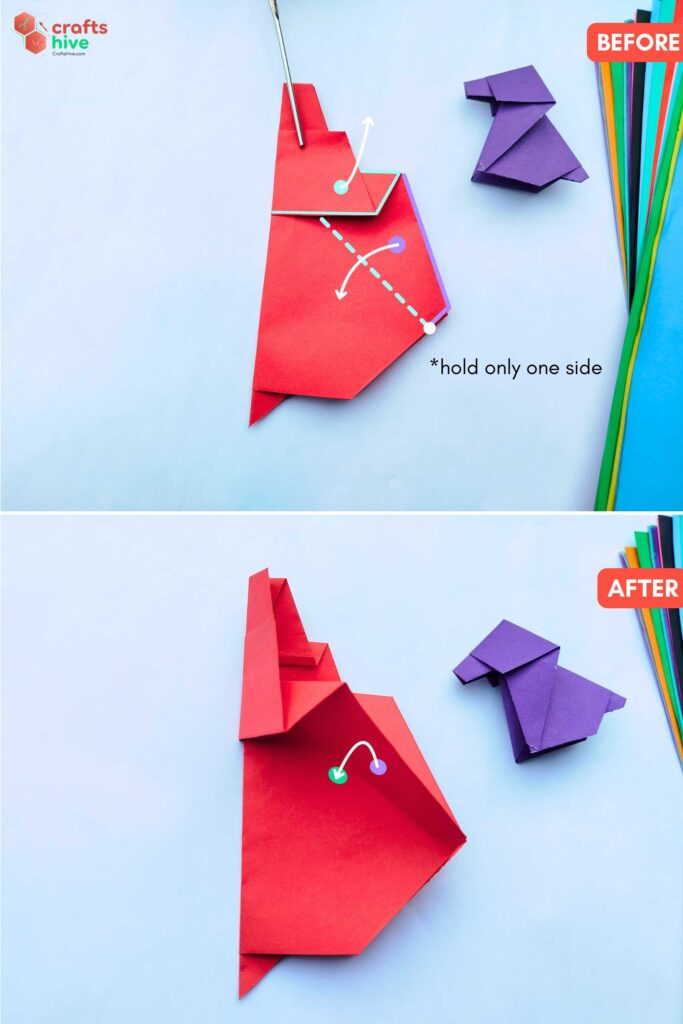
- Open the head pocket a little and fold the lined edge about the shown axis to the bottom-left onto the body.

- Do the same for the other side of the origami puppy and press the whole model flat. There will be no crease to guide you along for these folds, so the extension of the fold depends on your taste.
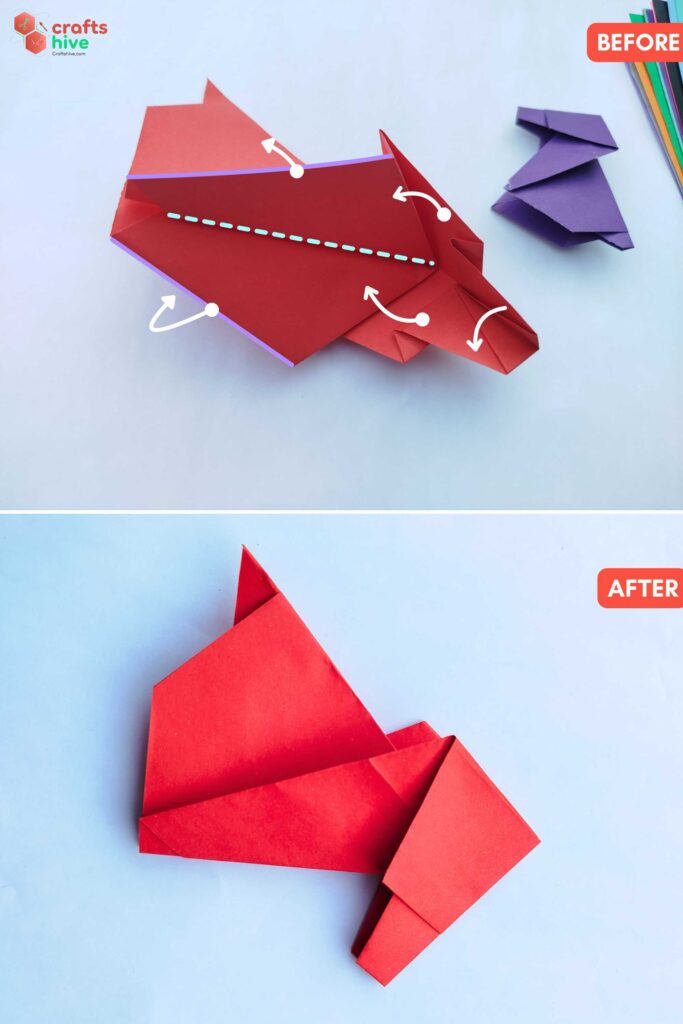
- Press the folds flat and close the pockets onto the flaps.
Finished
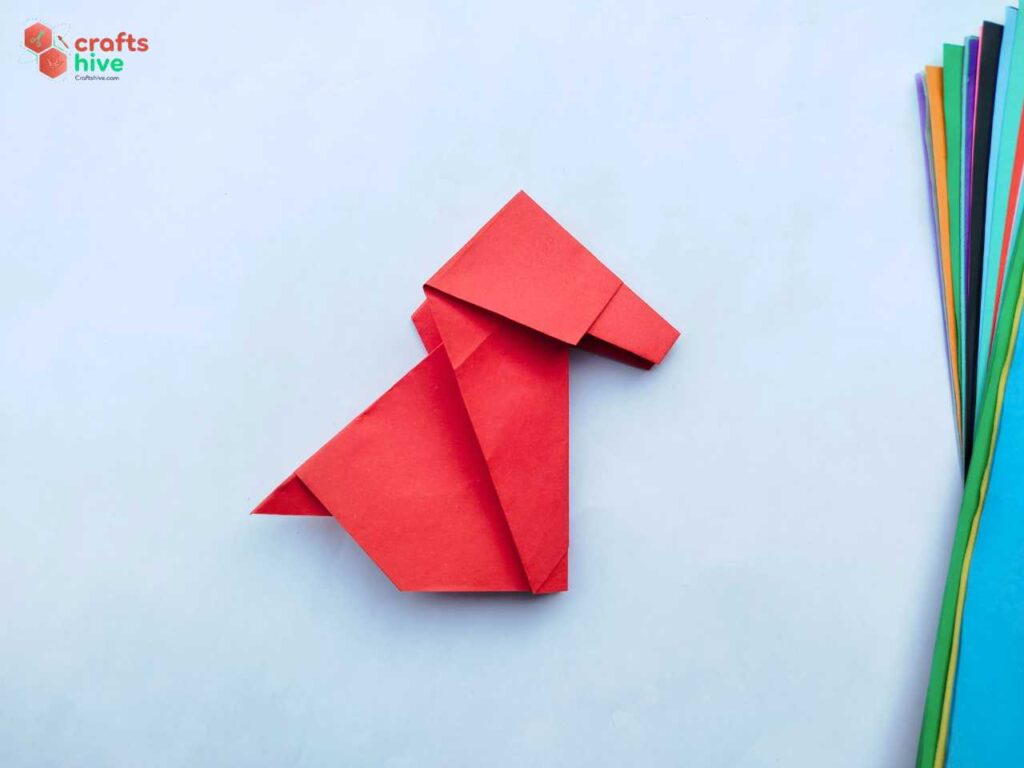
And that’s it! The finished origami puppy can stand on the table once you open the sides a little. With the kami paper, the feet will appear in white.
Did you find this Origami Tutorial Helpful? Tell us in the Comments.
Your feedback is a great way for us to improve our origami tutorials. So, share your thoughts on whether you tried this one or not, and highlight the weak points.

About "Talha"
Hey, I’m Talha, the Crafter on Craftstive.com. I love to share guides on folding cute origami models and paper crafts, and I am always ready to inspire your next craft project with my weekly craft discussions.