


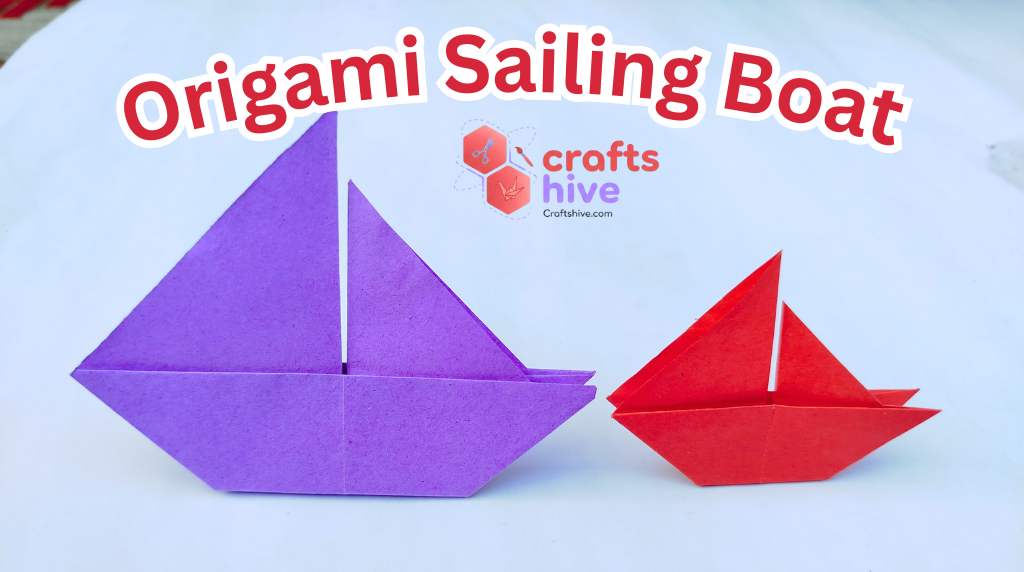
The traditional origami sailing boat is a cute and very accurate model of a sailing boat. You can learn how to fold such an origami sailing boat just from one sheet of paper with my step-by-step tutorial.
I have simplified its confusing folding parts, with the corner and section labeling, so learning will be easier and faster. You can add this paper boat to kids’ school crafts for summer, fish drawings and just to add ocean feel to your table.

That’s because, this boat can stand straight without support.
It is also possible to have a separate color for the boat and sails that will make it even beautiful. I will explain in just 8 simple steps, so continue reading this tutorial.
How to Make an Origami Sailing Boat: Step-by-Step Guide
The traditional origami sailing boat starts with four half-folds (vertical, horizontal, and both diagonals) and uses the blintz fold, too. You will also fold the whole model in reverse and collpase it in the end. Overall, it is a fun origami model to learn. Here are the step-by-step instructions:
Difficulty Level: Easy (Step #8 might be a little difficult for starters)
Finishing Time: 5 minutes
Model Type: Traditional Origami
Paper sheet: 14 cm by 14cm
Tip: You can fold this sailing boat with a two-color sheet for presenting the sail and the boat in different colors.
Fold restriction: Little (should be worked with a sheet bigger than 6cm by 6cm)

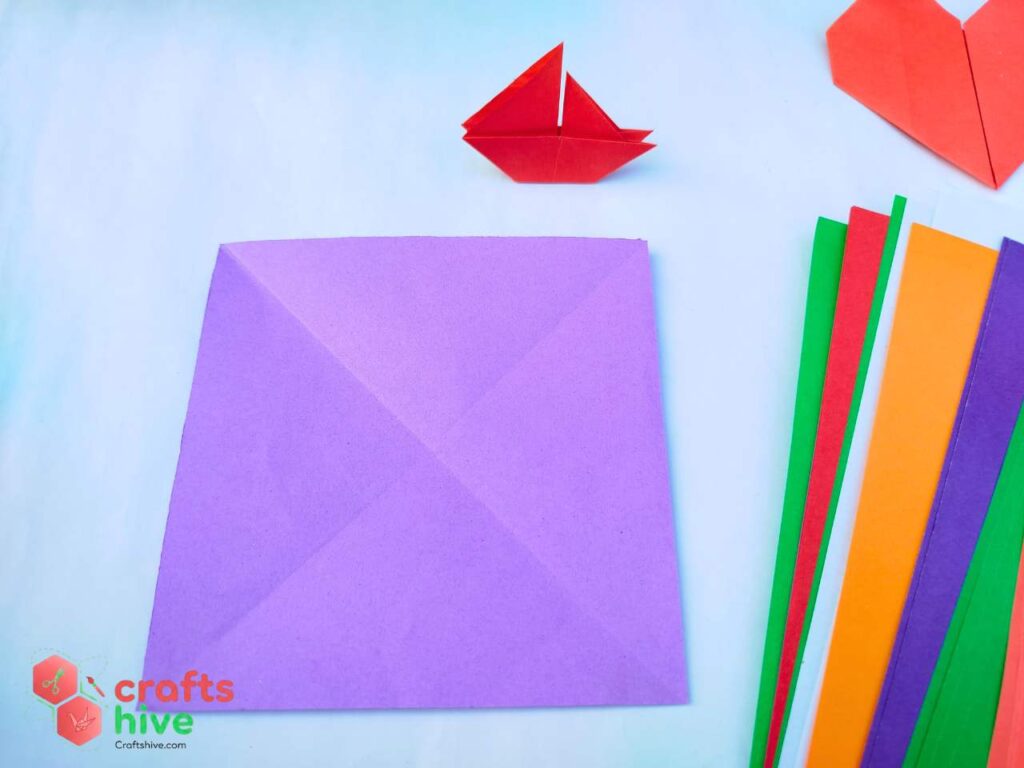
On your crafting table, place a square sheet of paper straight. Let we label the corners of square sheet as A, B, C, and D.
Step #1: Diagonal Creases
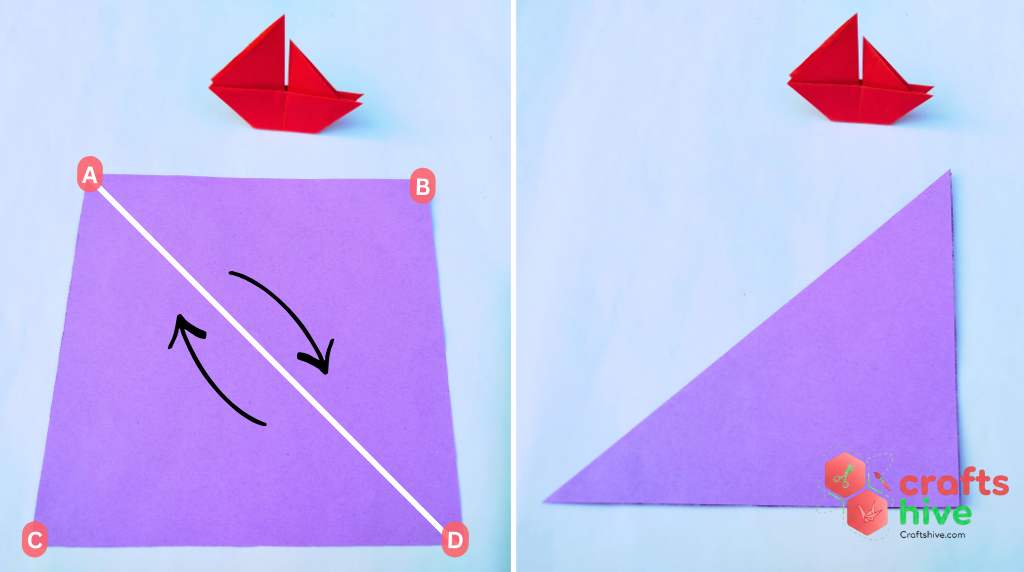
Fold the top left corner of the square sheet onto the bottom left corner of the sheet, crease the paper, and unfold. This will be the first diagonal crease.

Label Instruction: Fold the corner A onto the corner D and unfold after creasing. The crease BC will appear.
Now, fold the top right corner of the creased square sheet onto the bottom right corner, crease the paper well, and unfold. On the paper, there will be two crossing creases making the letter “X.”
Label Instruction: Fold the corner B onto the corner C and unfold after creasing. The crease AD will appear. This is similar to making a square base.
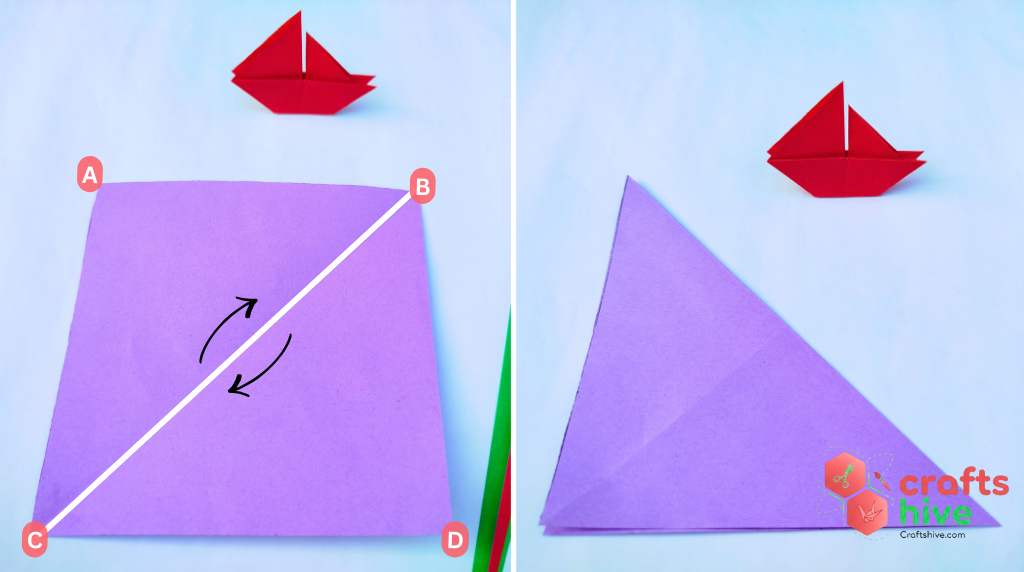
Step #2: Perpendicular Creases

Just make the vertical and horizontal half-folds, crease the paper, and unfold. Make sure to unfold into the square sheet after each half-fold.
For horizontal crease, fold the left side of the sheet onto the right side, crease the paper and unfold. Now for vertical crease, fold the top side of sheet onto the bottom side. Unfold.
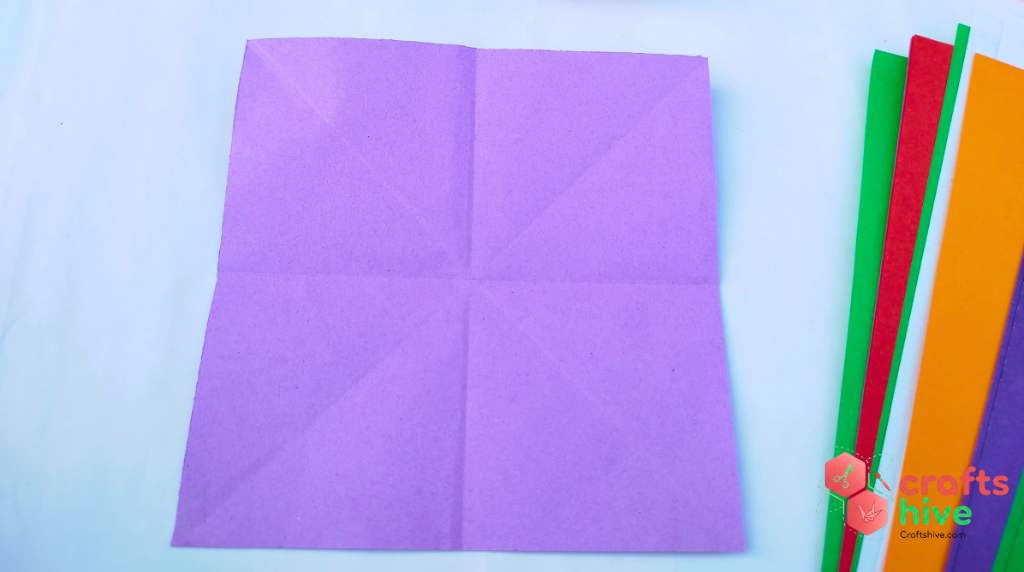
Label Instruction: Align the side AB with the side CD and press the paper evenly. Similarly, align the side BD with the side AC.
Step #3: Rotate the Sheet into A Diamond

Rotate the paper 45 degrees to make the sheet look like a diamond.
Step #4: Make Blintz Folds & Unfold the Two
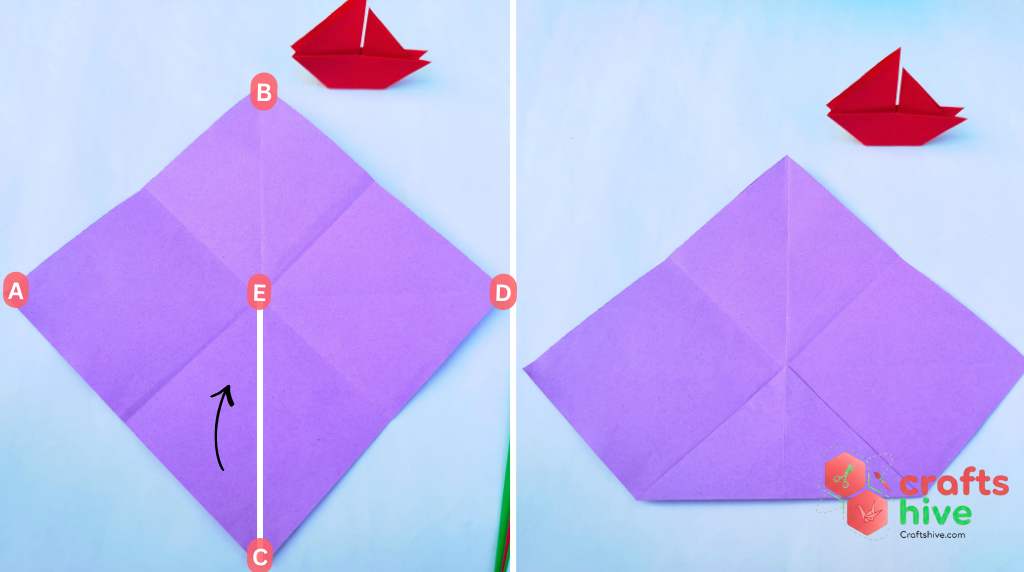
We shall be making three blintz folds. To do so, first fold the bottom corner of the diamond onto the middle of the square sheet marked by the crossing creases. This will be the first blintz fold.
Label Instruction: Fold the corner C onto the point labeled as E (the point of intersection of all the creases).
Similarly, fold the left corner and the right corner of the sheet onto the point of intersection of diagonals. These will be the remaining two blintz folds.
Label Instruction: Fold the corner D onto the point E and fold the corner D onto E, too. Crease the paper well.
Tip: For a detailed guide on the blintz fold, check how to make the blintz fold.
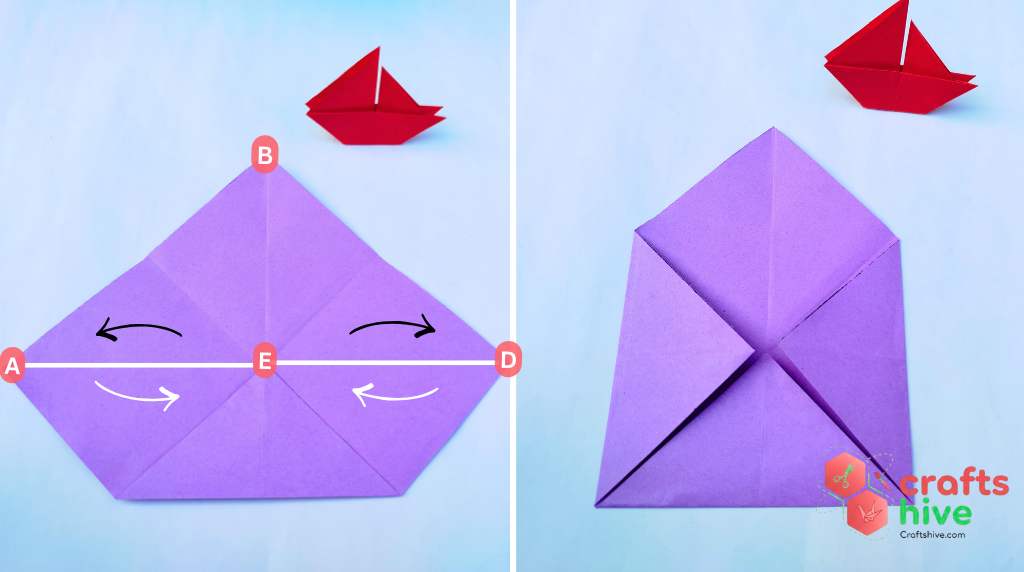
Step #5: Fold the Blintz Flaps in Half

Unfold the left blintz fold. You will be able to notice a diagonal but straight crease (from your perspective). Align the left corner straight with this crease. This will fold our left blintz flap in half.
Label Instruction: Undo step #4 for both sides. Fold the paper from and at the points labeled by dots.
Now unfold the right blintz fold and repeat the same fold as the left flat.
Label Instruction: Fold the corner D onto the point labeled by the dot.
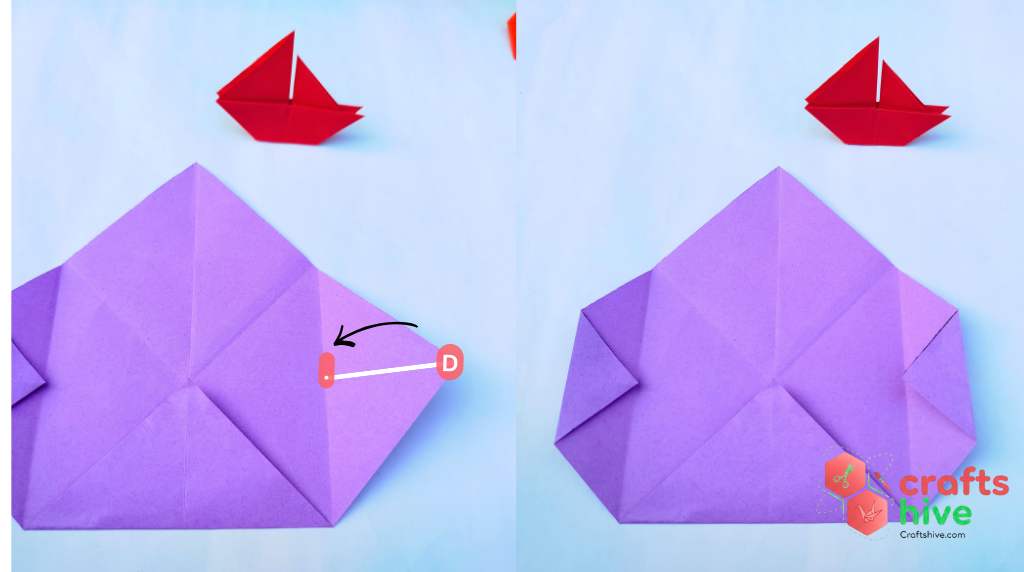
Step #6: Fold the Sides
Rotate the left and the right blintz flap 90 degrees to the right and left respectively.
Make sure your fold looks like above in the pictures.
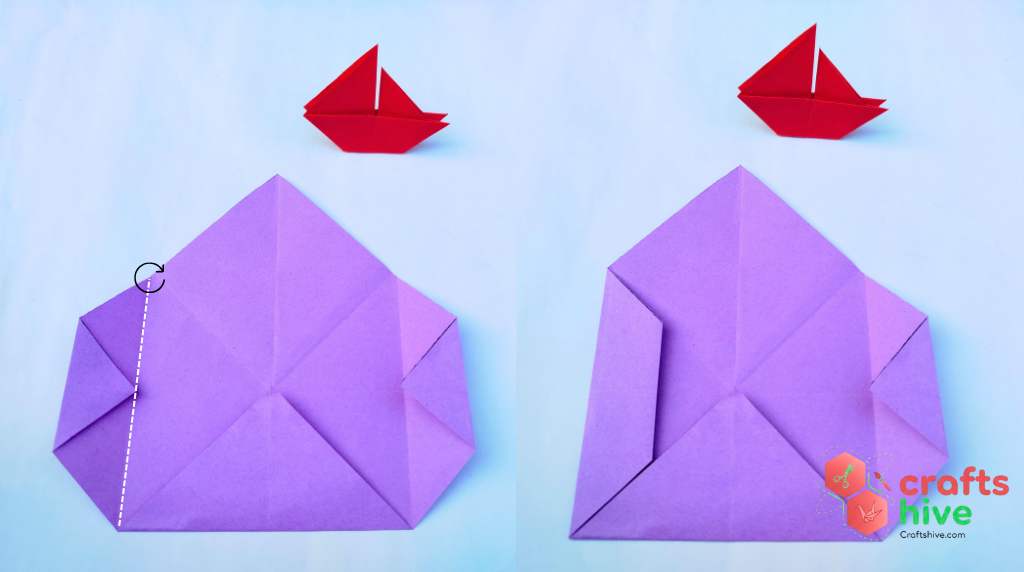
Step #7: Mountain fold the Bottom
We have to fold back the bottom blintz fold, but such that your axis of rotation is away from the top of the original crease. This part will decide how long your sail will be. You can see the two triangles ion each side of the blintz flap.
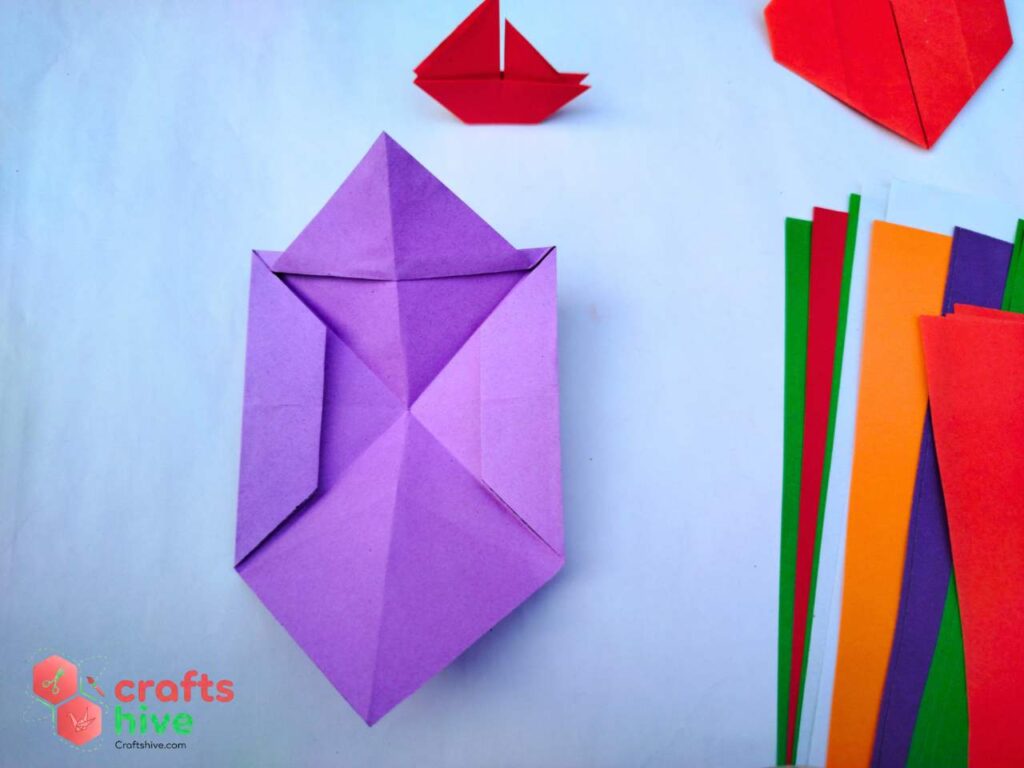
Rotated 180 degrees.
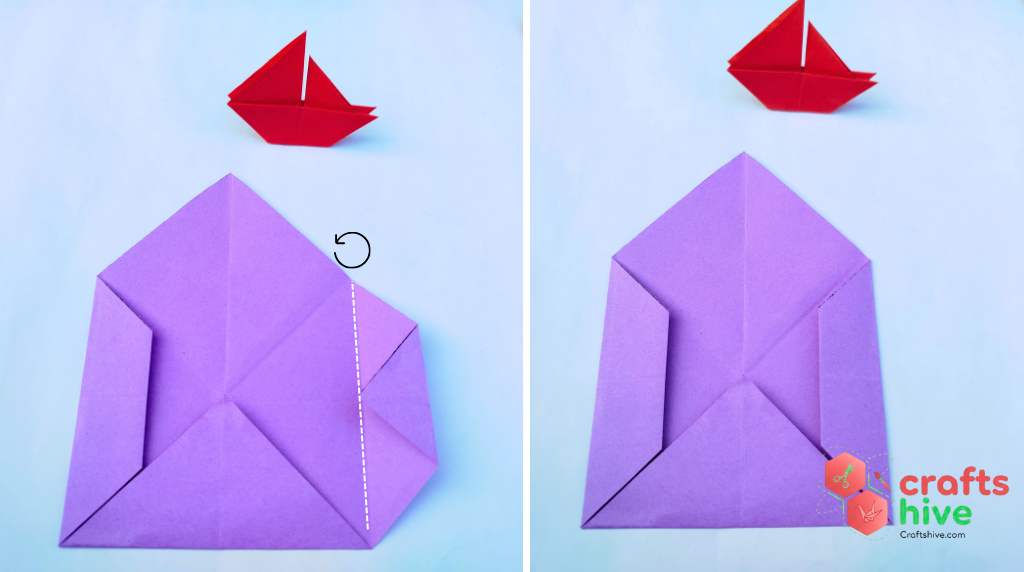
Step #8: Inside fold for the Boat
Turn your model folded so far upside down. Now, we have to collapse our model into the boat.
To understand it rightly, see the labeled diagram and focus on the back.
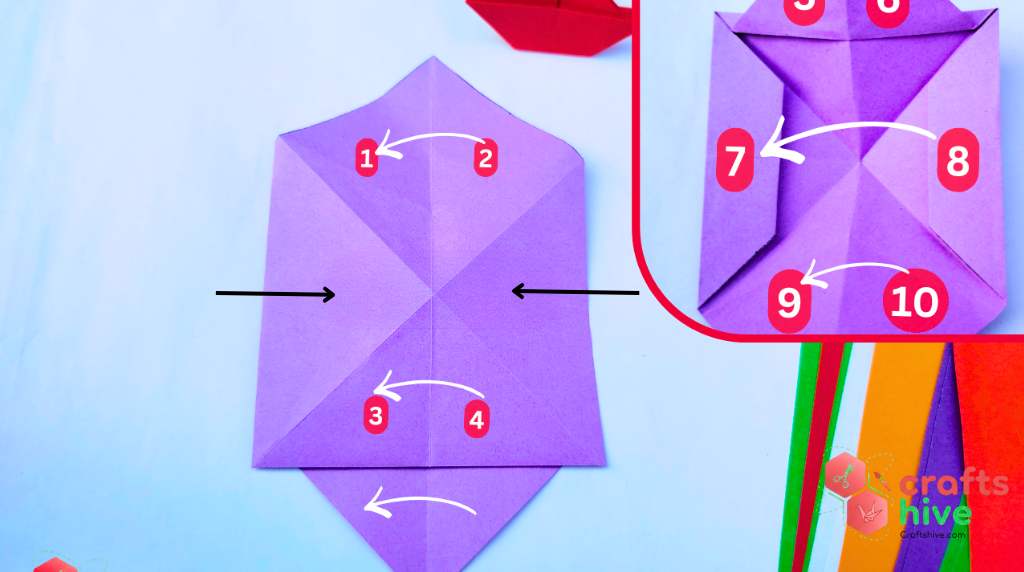
You can see the sections made by the creases. We have to fold the model in half such that the section labeled as 1 touches all the sections labeled as 2.
However, the middle unlabeled sections face still remain untouched. Similarly, the bottom sections must also meet each other exactly. Afterwards, see your modle from side.
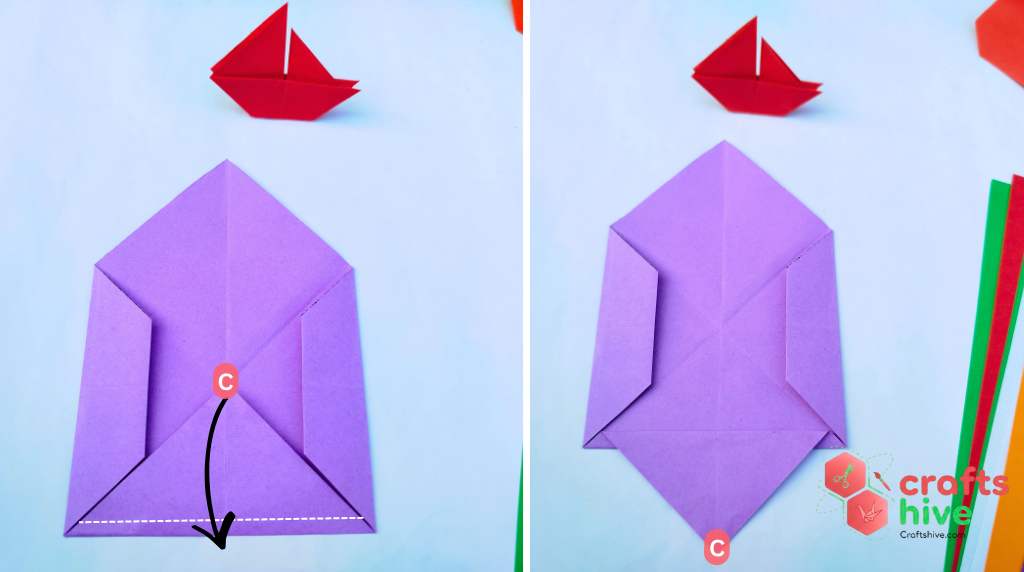
Step #9: Make the Base of the Boat
The boat will have two sails.
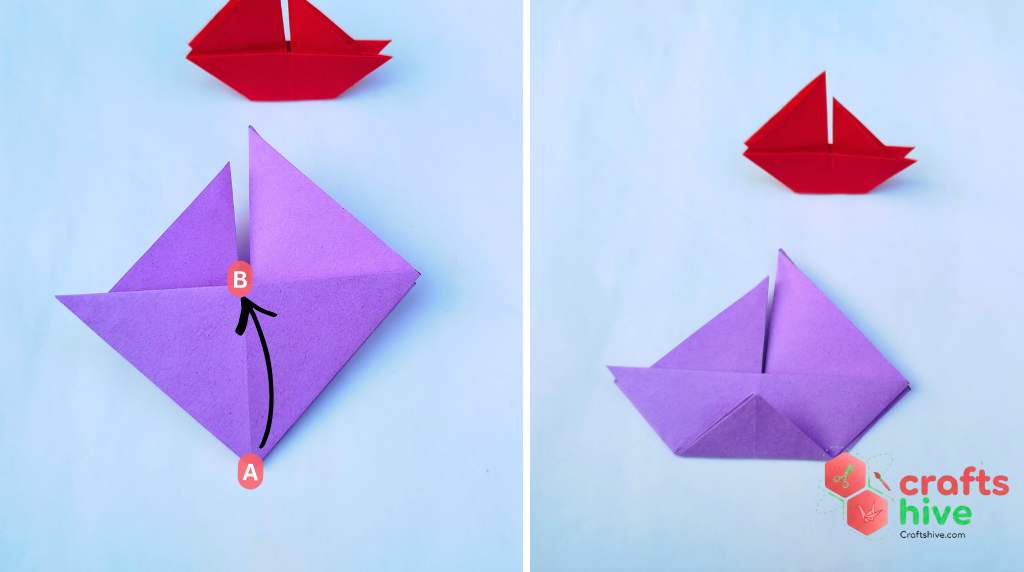
To make the base, fold the bottom onto the start of the sails. You can use it to show your boat standing without any support.
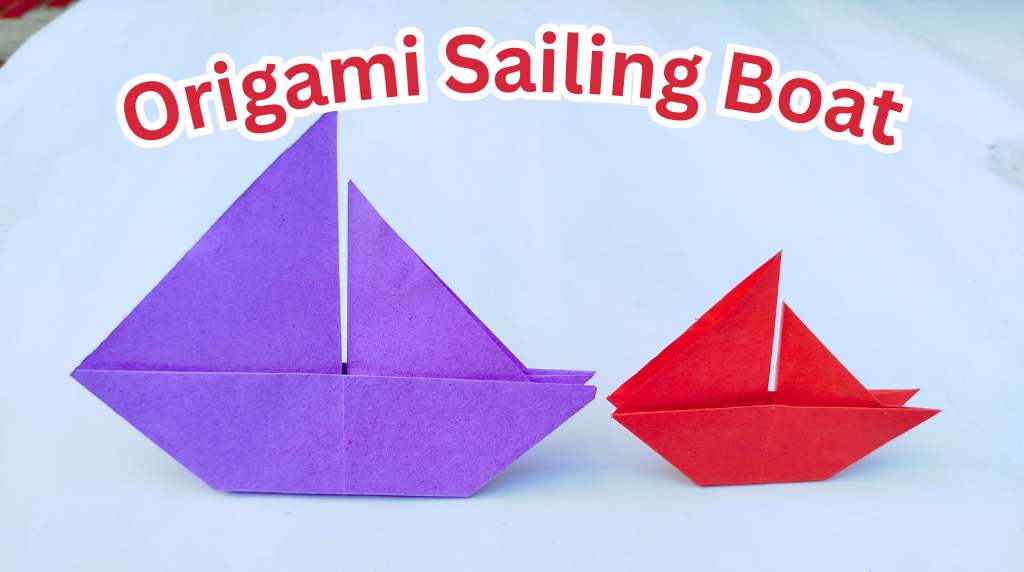
Finished
Here is the finished boat!
Next Traditional Model?
About "Origamist@Craftshive"
Our origamist is expert in both the traditional origami and designing some REALLY creative crafts.
 How to Fold Origami Jumping Frog in 10 Steps
By Origamist@Craftshive
How to Fold Origami Jumping Frog in 10 Steps
By Origamist@Craftshive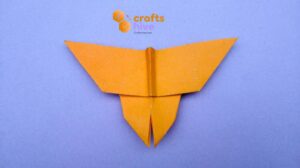 How to Fold Easy Origami Butterfly in 12 Steps
By Origamist@Craftshive
How to Fold Easy Origami Butterfly in 12 Steps
By Origamist@Craftshive How to Fold Origami Ninja Star in 7 Steps
By Origamist@Craftshive
How to Fold Origami Ninja Star in 7 Steps
By Origamist@Craftshive How to Craft Cute Paper Bow with Origami and Cutting
By Origamist@Craftshive
How to Craft Cute Paper Bow with Origami and Cutting
By Origamist@Craftshive How to Fold Easy Origami Penguin for Winter
By Origamist@Craftshive
How to Fold Easy Origami Penguin for Winter
By Origamist@Craftshive How to Fold Origami Traditional Heart for Valentine’s Day
By Origamist@Craftshive
How to Fold Origami Traditional Heart for Valentine’s Day
By Origamist@Craftshive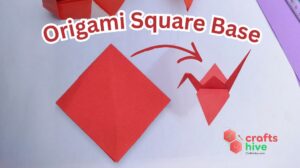 How to Make Origami Square Base in 4 Steps
By Origamist@Craftshive
How to Make Origami Square Base in 4 Steps
By Origamist@Craftshive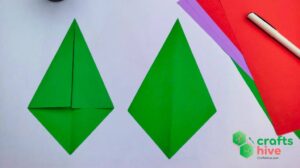 How to Make Origami Kite Base in 4 Steps
By Origamist@Craftshive
How to Make Origami Kite Base in 4 Steps
By Origamist@Craftshive How to Make An Easy Origami Swan in 13 Steps
By Origamist@Craftshive
How to Make An Easy Origami Swan in 13 Steps
By Origamist@Craftshive