
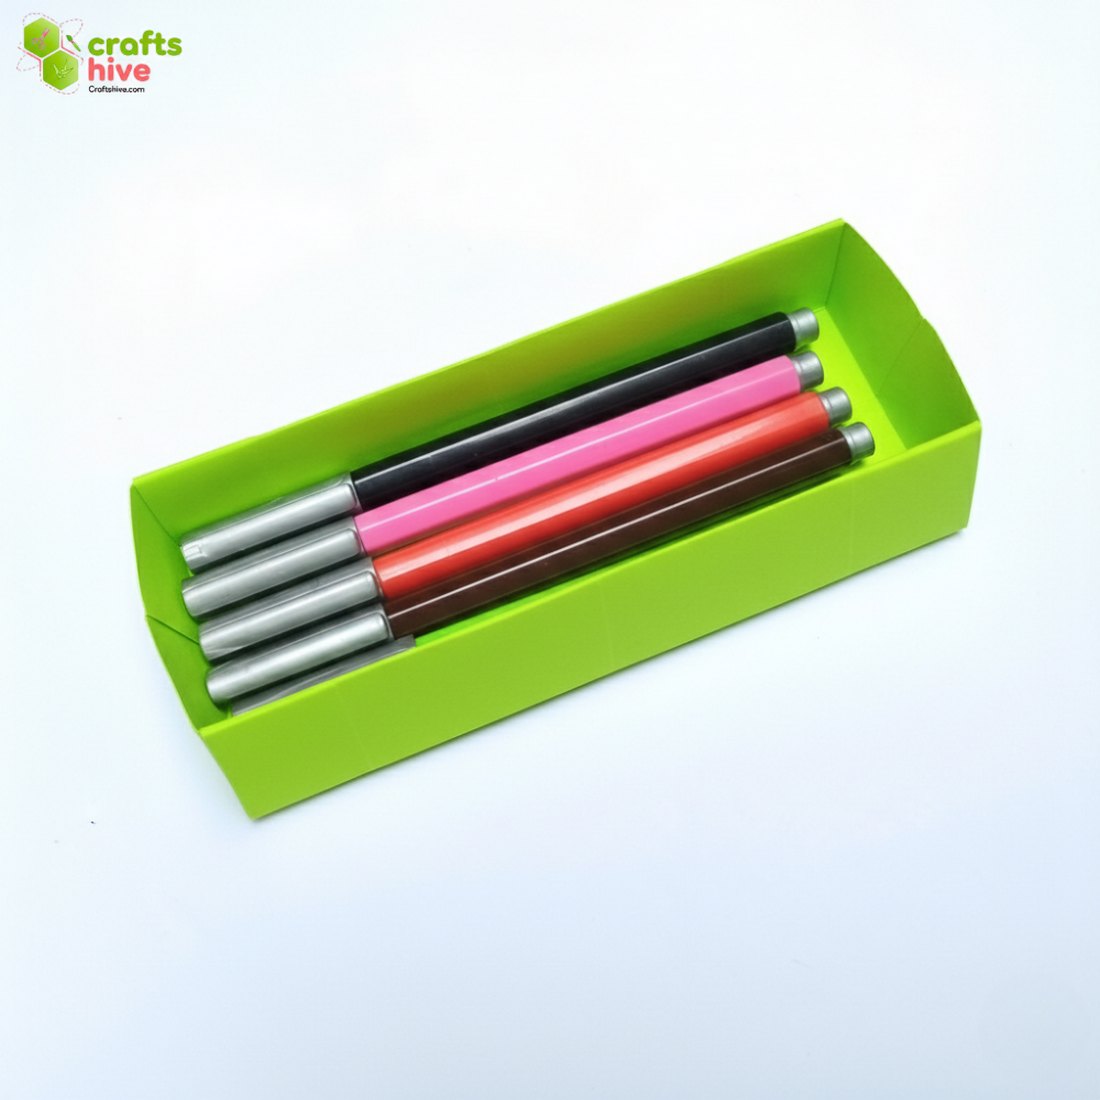
Learn how to fold an origami long rectangular box from a single sheet of paper in 16 steps. This is a traditional model also known as the origami oblong box and perfect for holding colors, markers, and envelopes. The construction is very similar to the Masu box, but it has more space, and you can put longer things inside.
Personally, I don’t like the flaps that much in terms of functonality but they look absolutely beautiful. I will also show you how to make flaps shorter. The instructions are accessible to the starters, so try this for sure.
[ez-toc]
Origami Long Box: Step-by-Step Guide
Like the Masu box, the origami oblong box requires numerous vertical and horizontal creases on the paper. We have to cleverly squash the sides and bring the pockets to the middle of either side to make a hollow space.
However, the folds are super easy, mainly half-fold to half-quarter fold (yes!). You will end up with a box with nice flaps to lift it. Now, let me provide you with the step-by-step instructions to fold it:
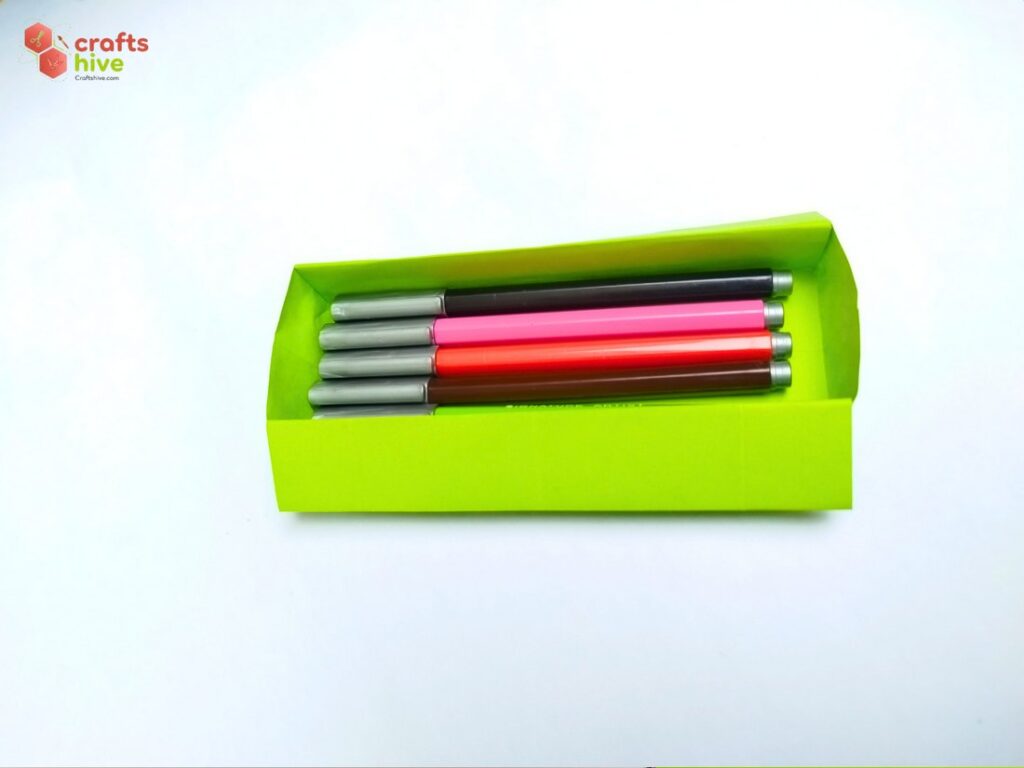
Model Type: Traditional/Pure Origami (No gluing, no cutting)
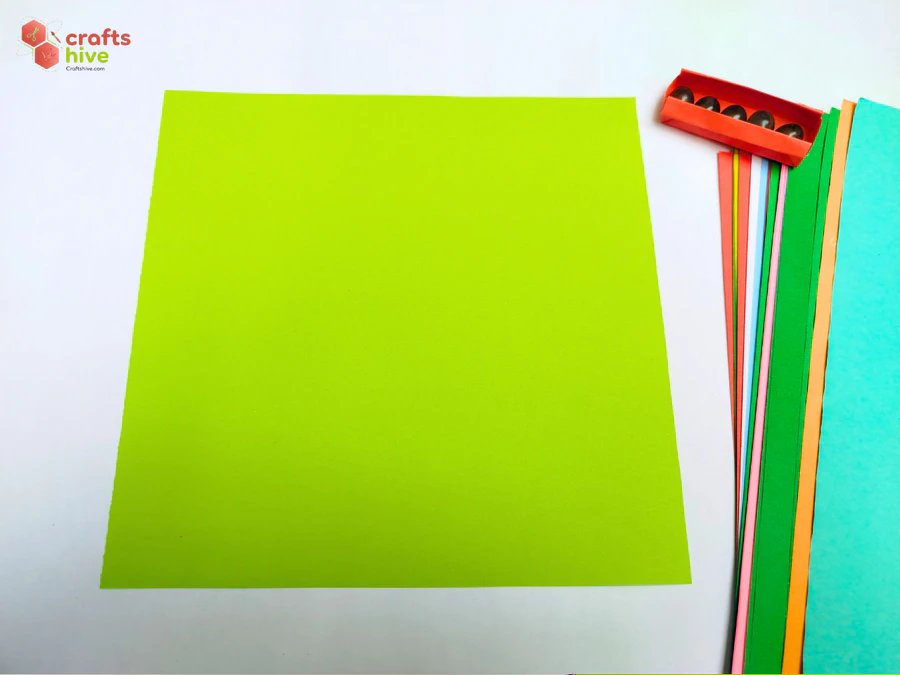
Recommended Paper: The box will be as long as the side length of the square sheet and about half as wide. So, use a larger square sheet of paper. Both Kami and Tant paper work well for it. However, thicker sheets are great for having a sturdy box.
I used a 15cm by 15cm square sheet of Tant paper in parrot for demonstration.
Preferred Name: Origami Rectangle Box
Skill Level: Beginner Level 2
Step #1: Horizontal Middle Crease
Orientation: Normal
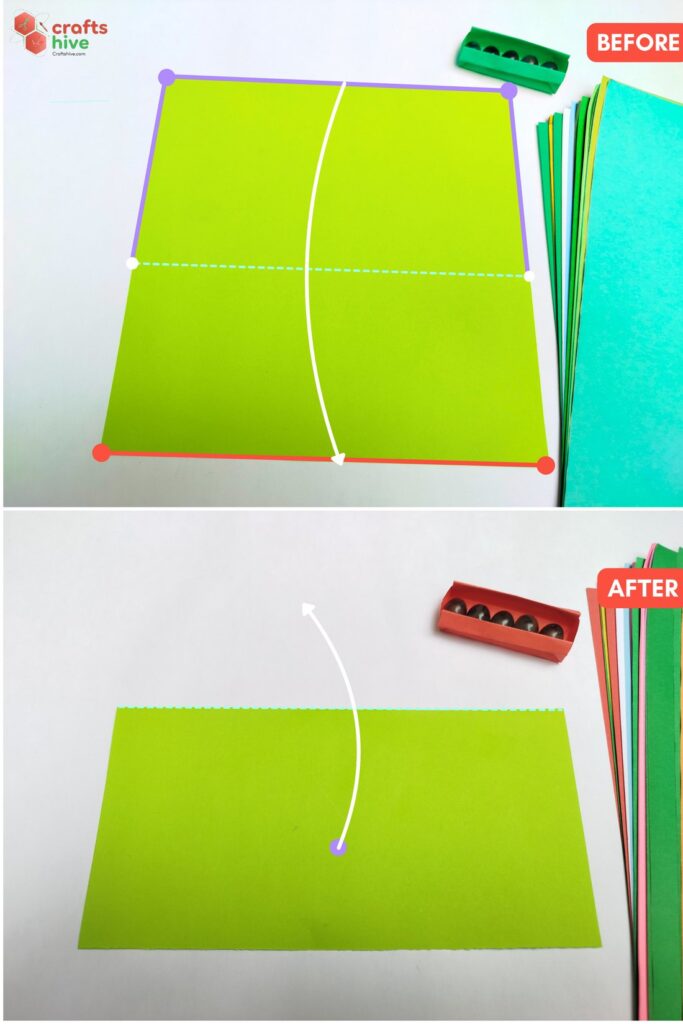
- Fold the paper in half vertically, press the paper flat, and unfold to make a horizontal crease in the middle.
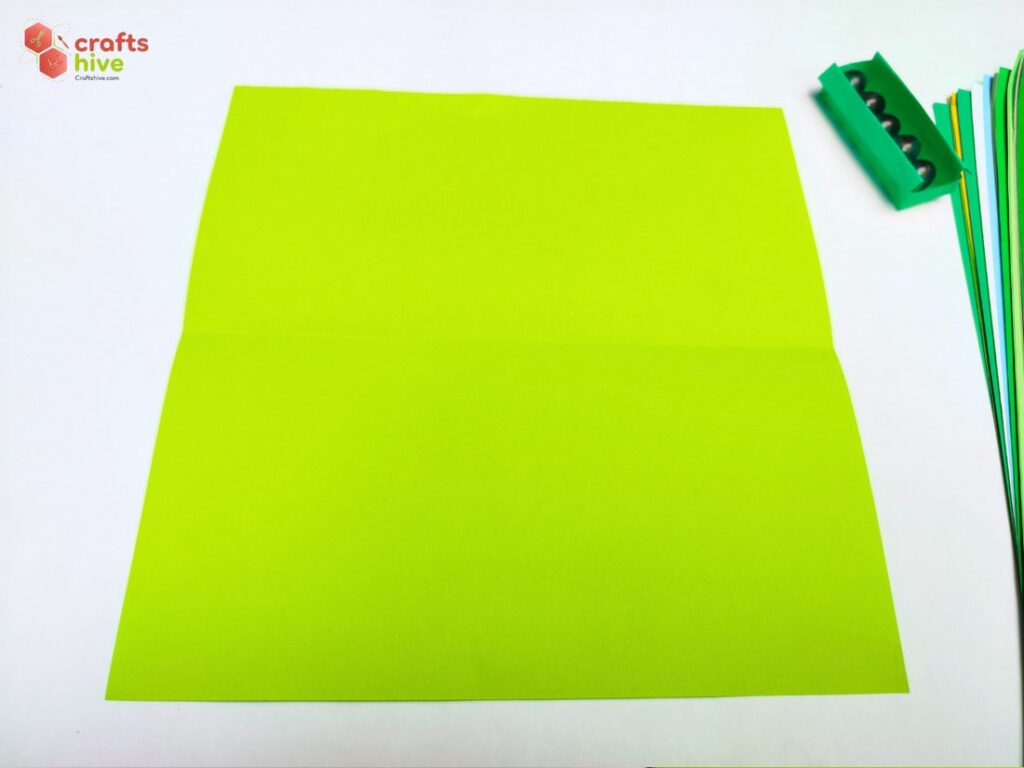
I aligned the top edge of the square to the bottom edge and creased the entire flap. Then unfolded the paper.
Step #2: Vertical Middle Crease
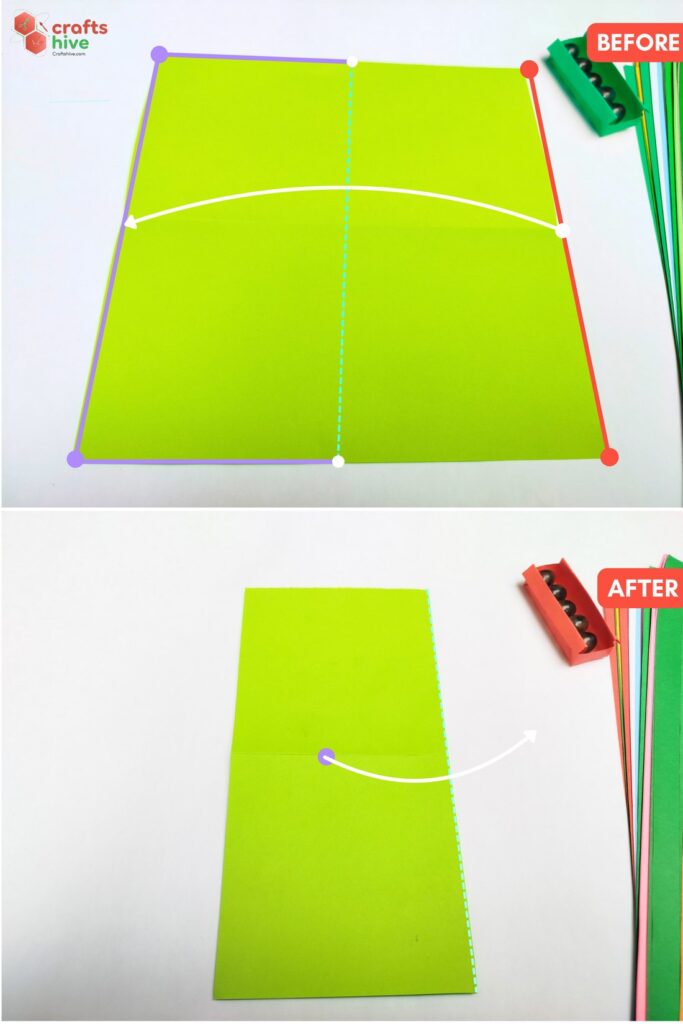
- Fold the paper in half again, this time along the vertical, crease the edges, and unfold to make a vertical middle crease.
Simply align the left edge of the square sheet to the right edge, press the flaps flat, and unfold.
Step #3: Right Vertical Quarter Crease
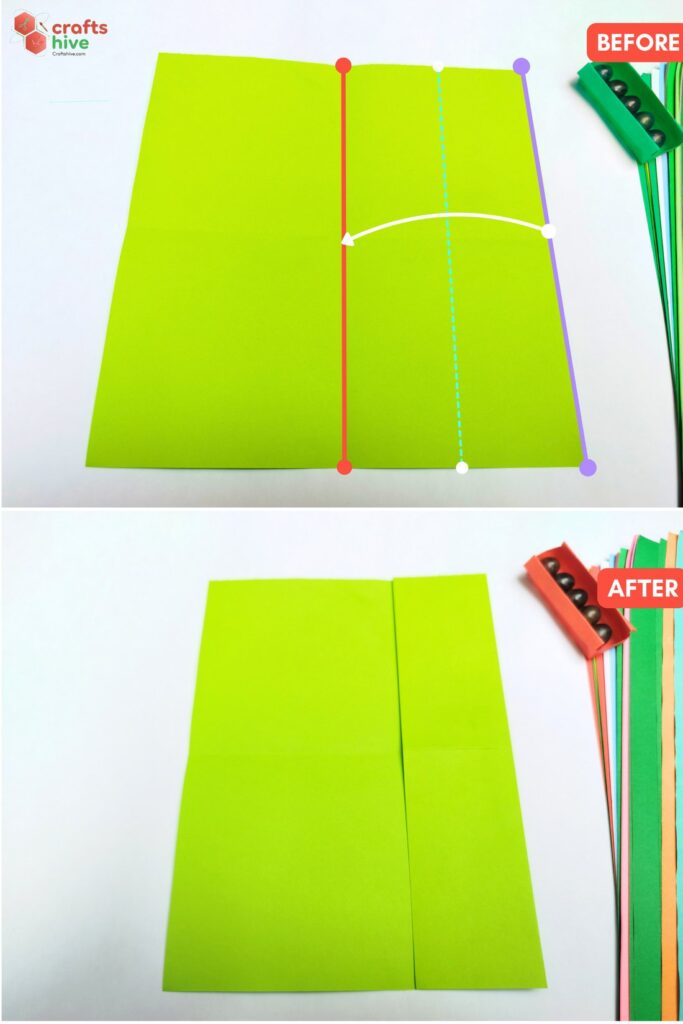
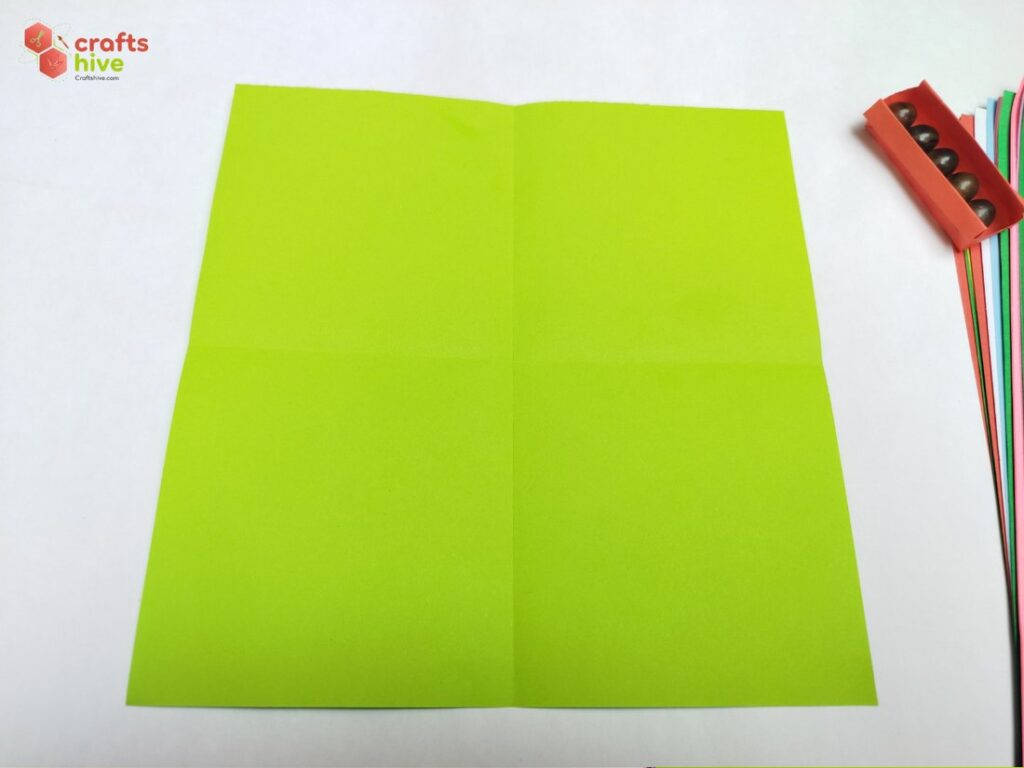
- Fold the right edge of the square to the centreline, align it with the vertical crease, and press the paper flat.
Step #4: Left Vertical Quarter Crease
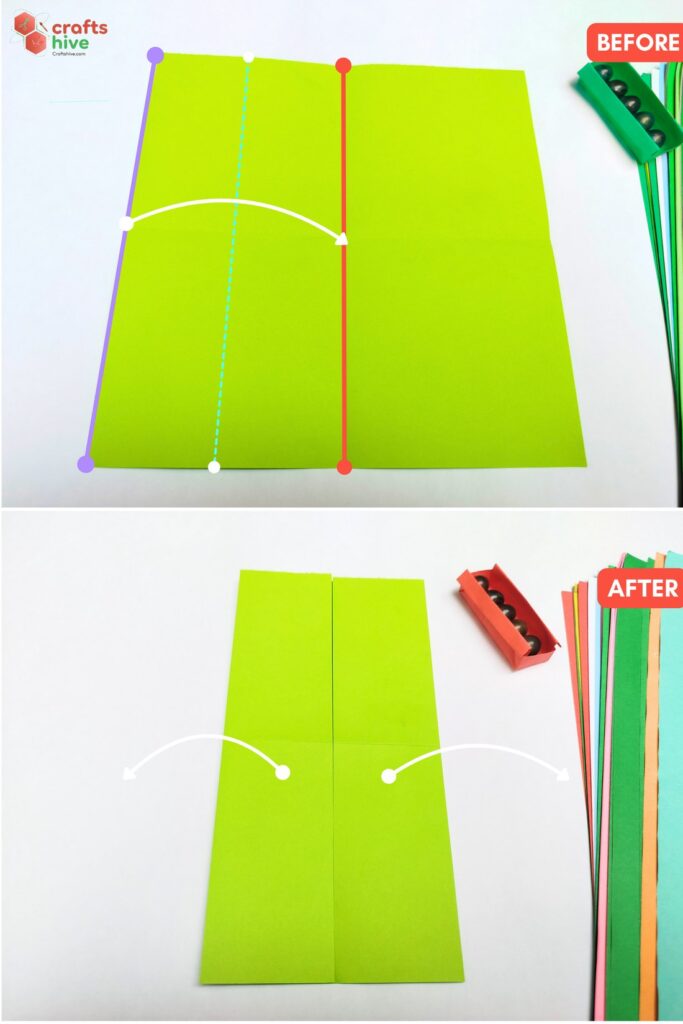
- Repeat another quarter fold with the left edge.
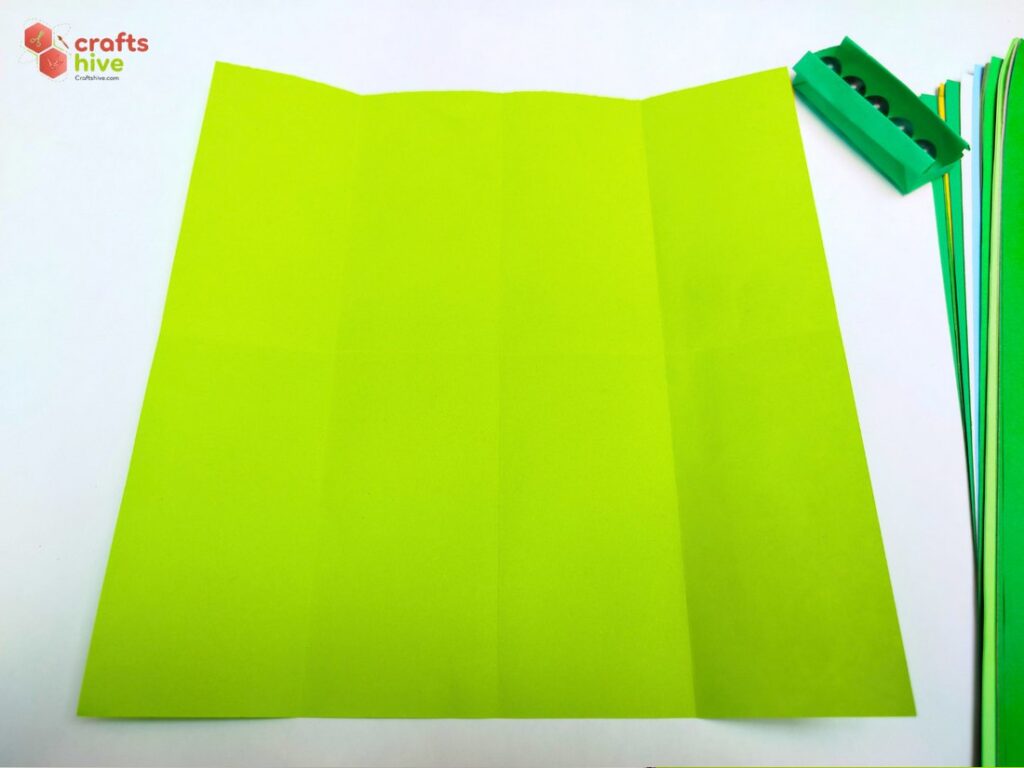
- Unfold both the quarter flaps.
Step #5: Half-Fold
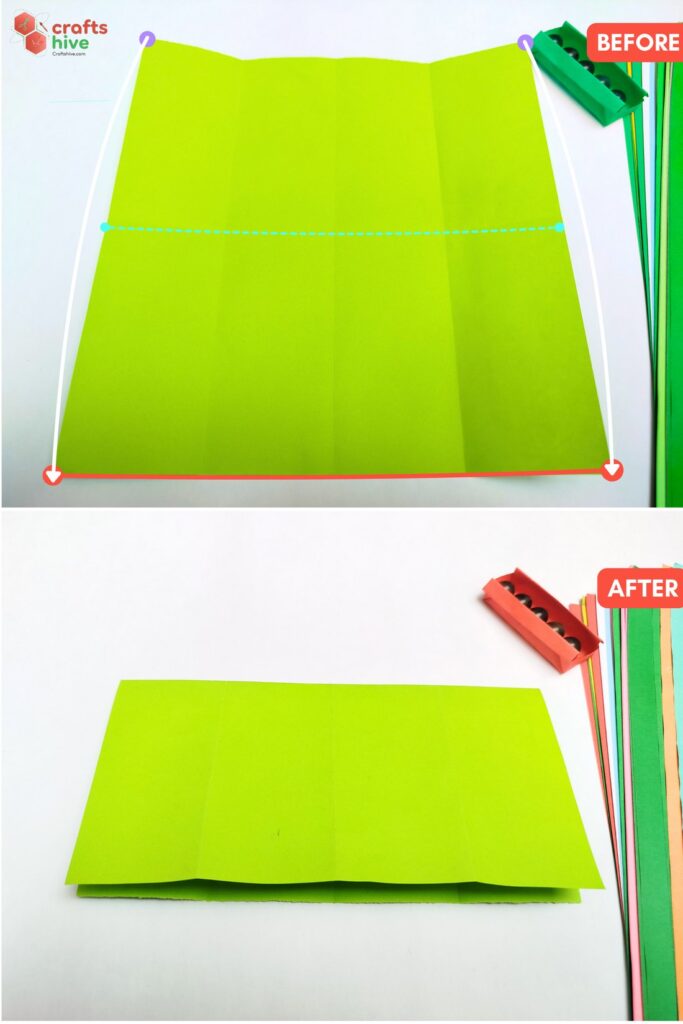
- Fold the paper in half along the vertical again, but don’t unfold this time. Now we shall make the sides of the oblong box.
Step #6: Diagonal Crease (Left)
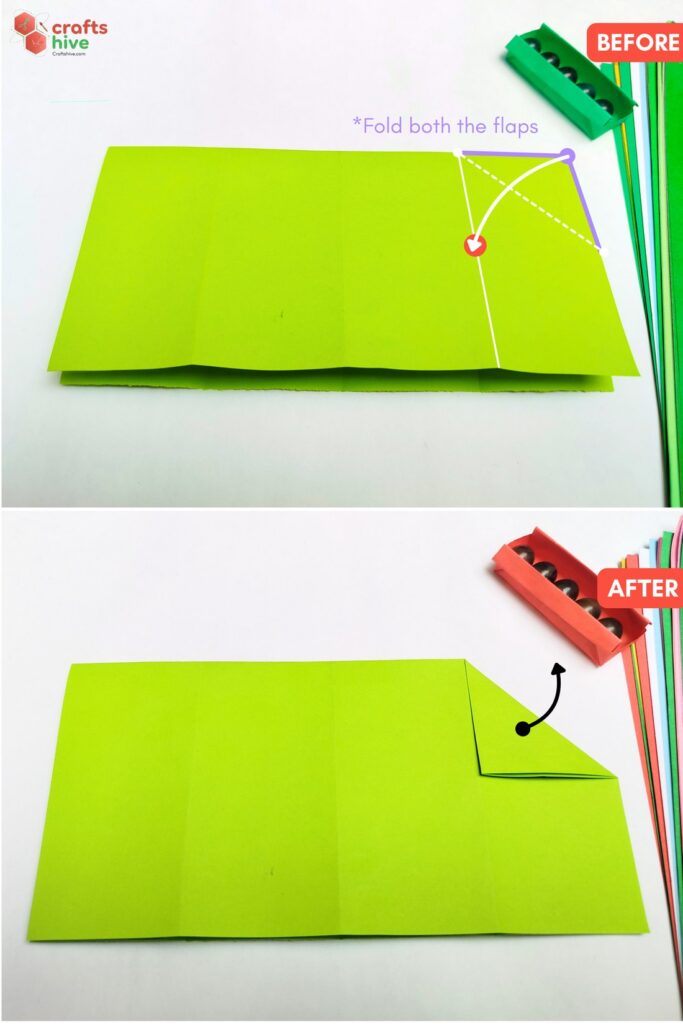
- Diagonally fold the top right corner of the half-folded paper, letting it settle onto the vertical crease of the right quarter fold.
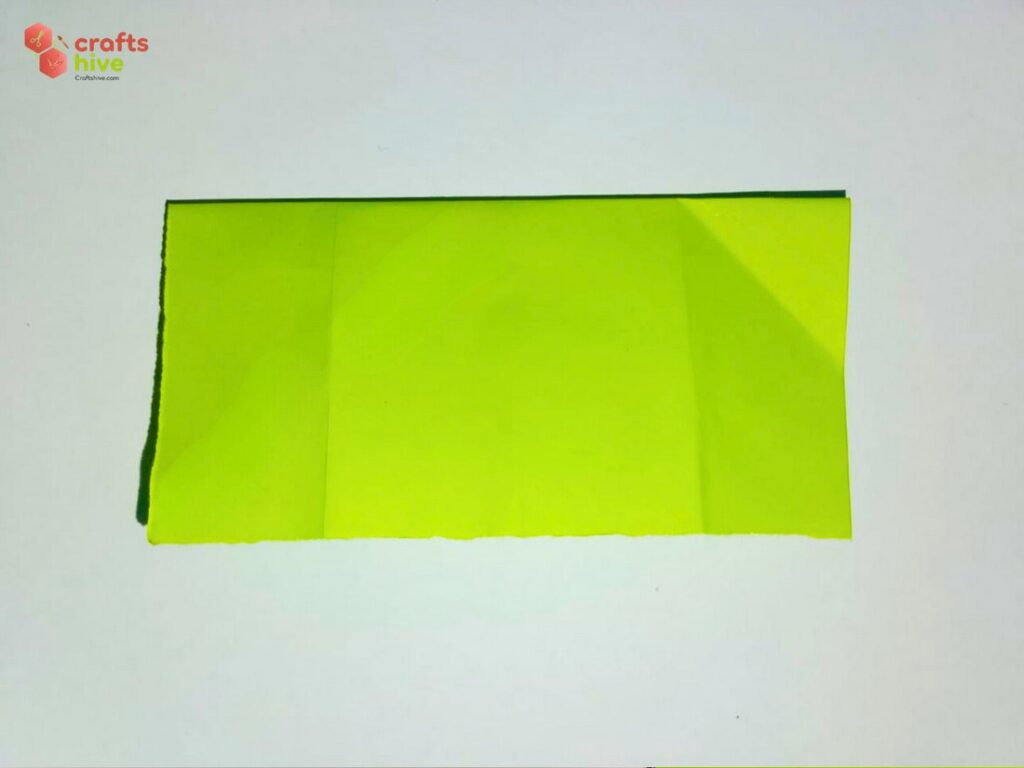
- Unfold to make a diagonal crease that we shall use as a guiding crease for the squash fold.
Step #7: Squash Fold (Left)
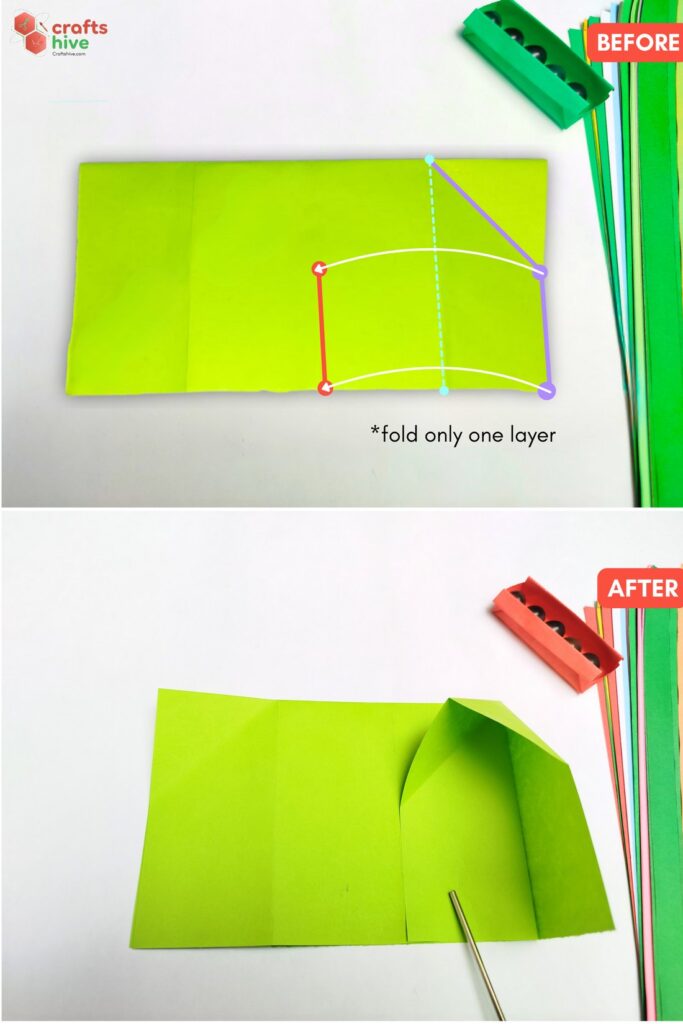
- Holding only the front flap, fold the part of the right edge below the diagonal crease to the centreline and align it with the middle crease.
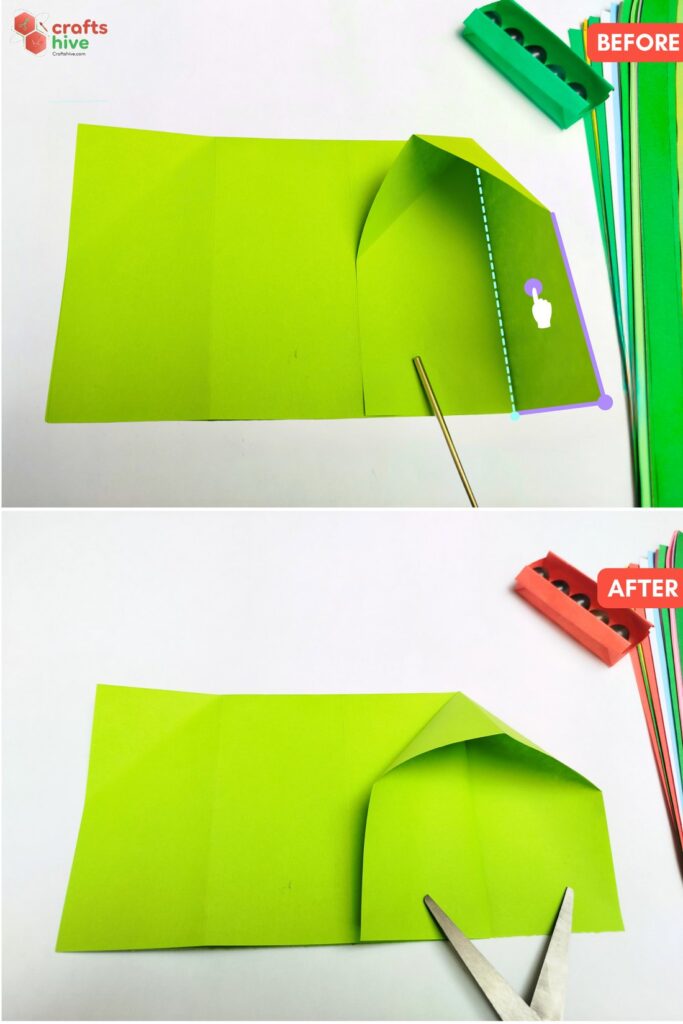
- Holding the flap of the previous fold in place, press the right quarter section of the bottom layer down.
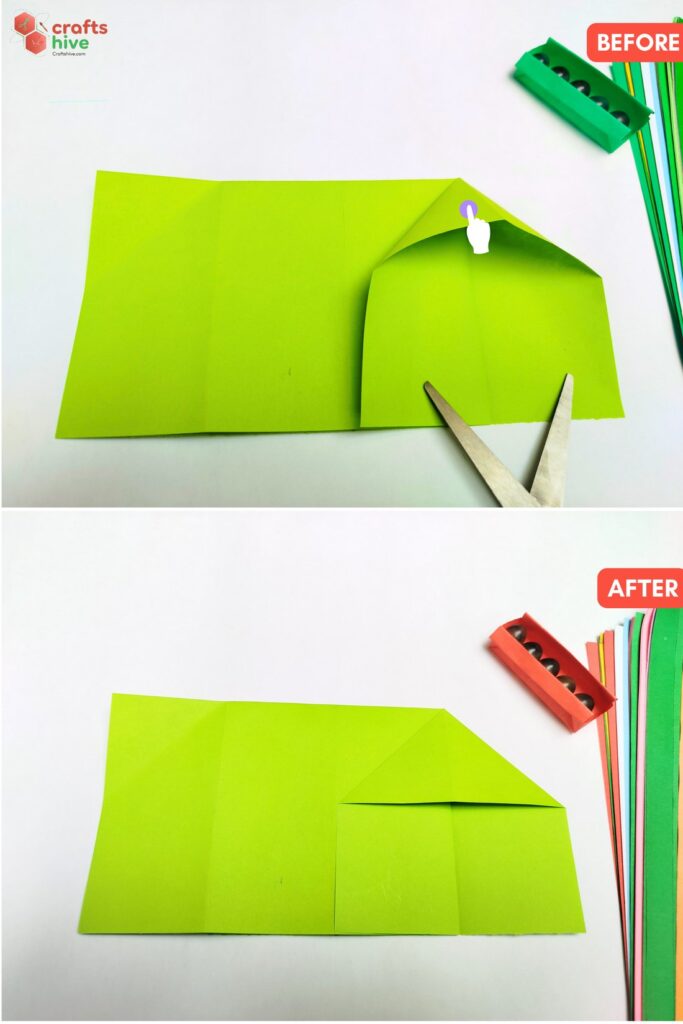
- Holding both the flaps in place, press the triangular pocket upon the sections down.
- Crease all the edges. Our squash fold is complete.
Step #8: Diagonal Crease (Right)
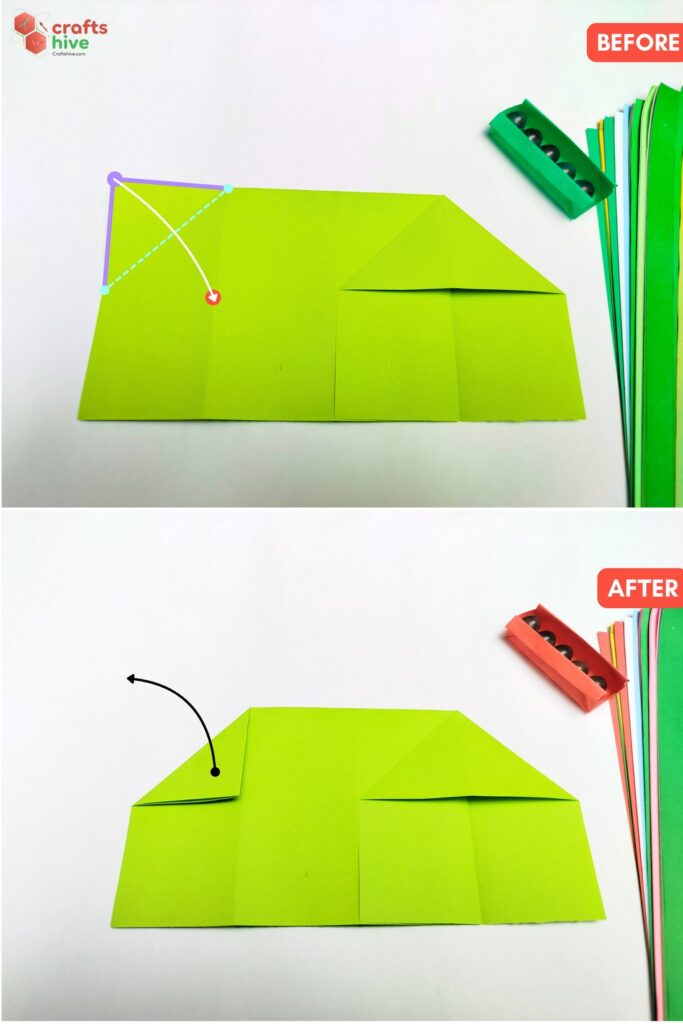
- Similar to the right side, diagonally fold the top left corner onto the left quarter crease.
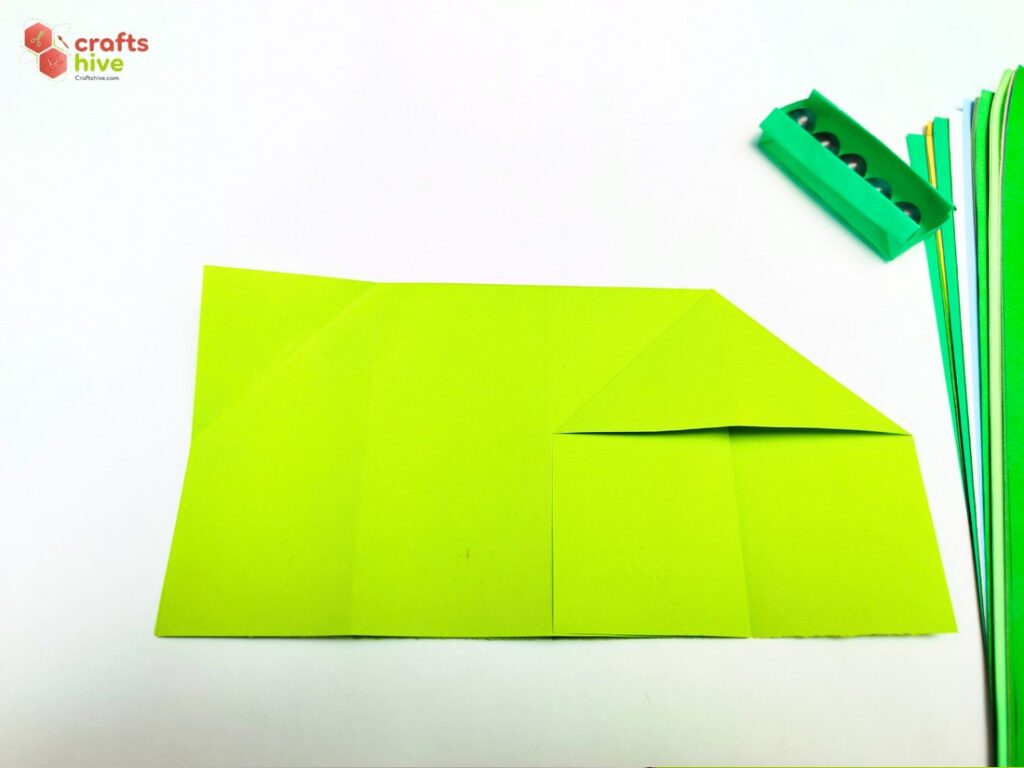
- Unfold it, too.
Step #9: Squash Fold (Right)
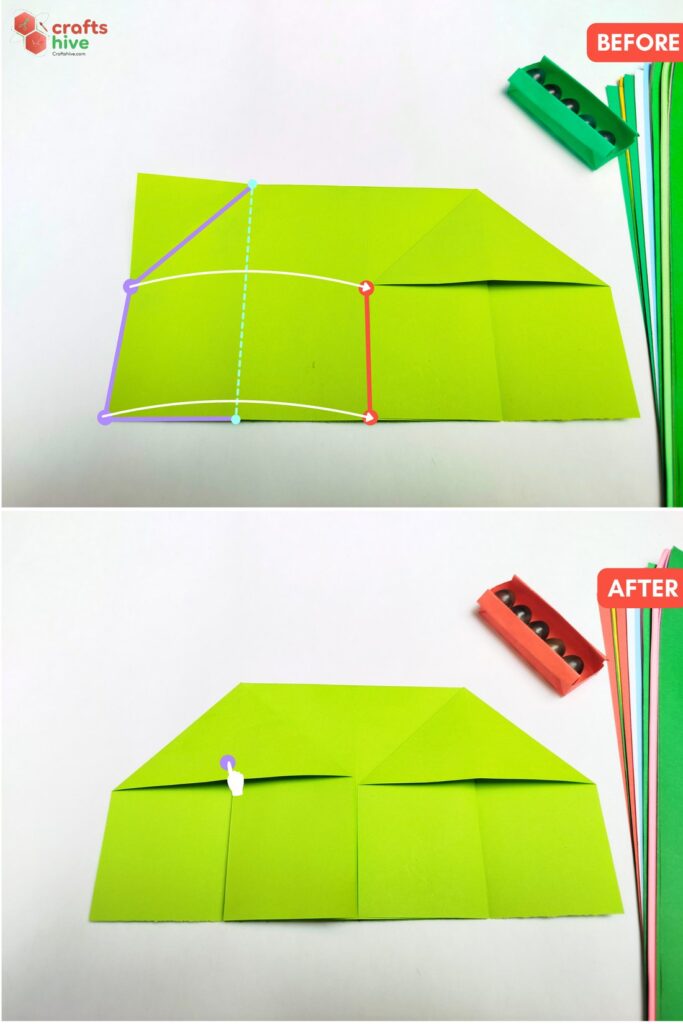
- Squash the left section similarly to the right.
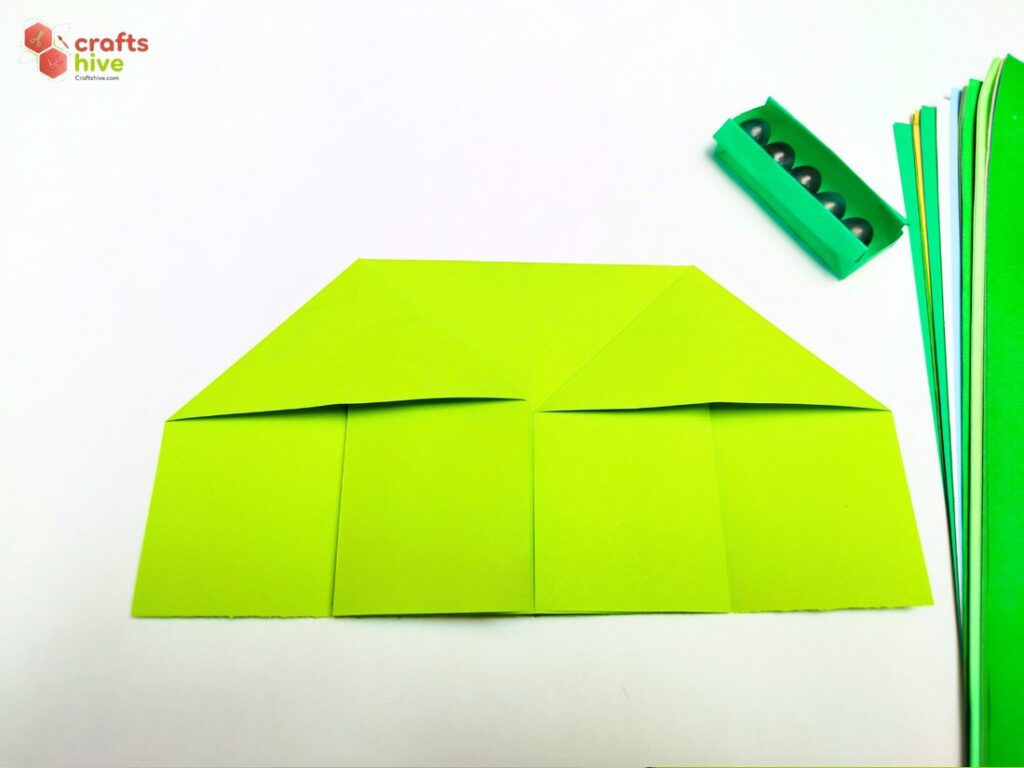
Until now, we followed all the steps needed to fold a traditional origami house. Now, let’s make the sides.
Step #10: Book Folds
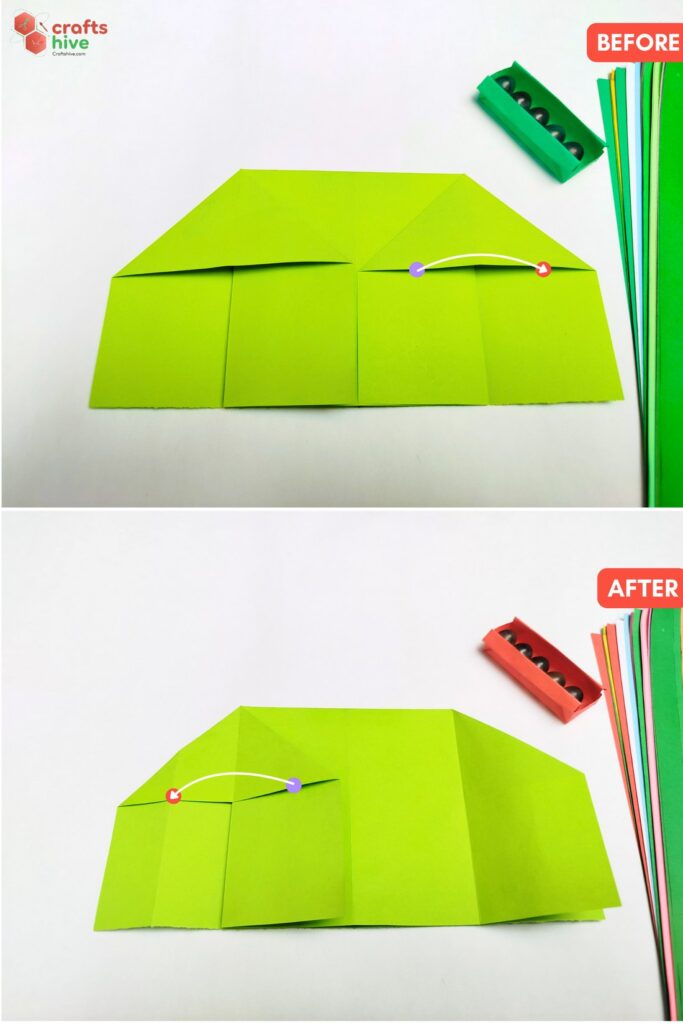
- “Book Fold” the entire left section of the squash fold, including the pocket and the flap to the right, onto the right squash fold.
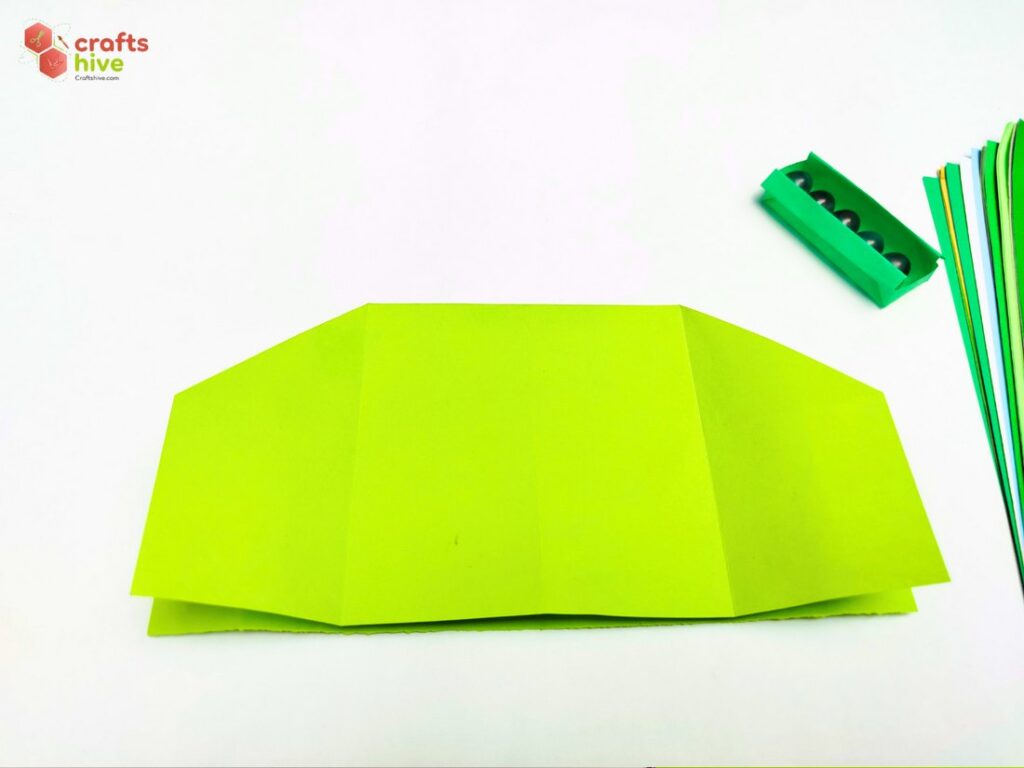
- Similarly, make a “Book Fold” with the right of the left squash fold, too.
Step #11: Half Quarter Folds
Note: Work these folds on only one layer of the model.
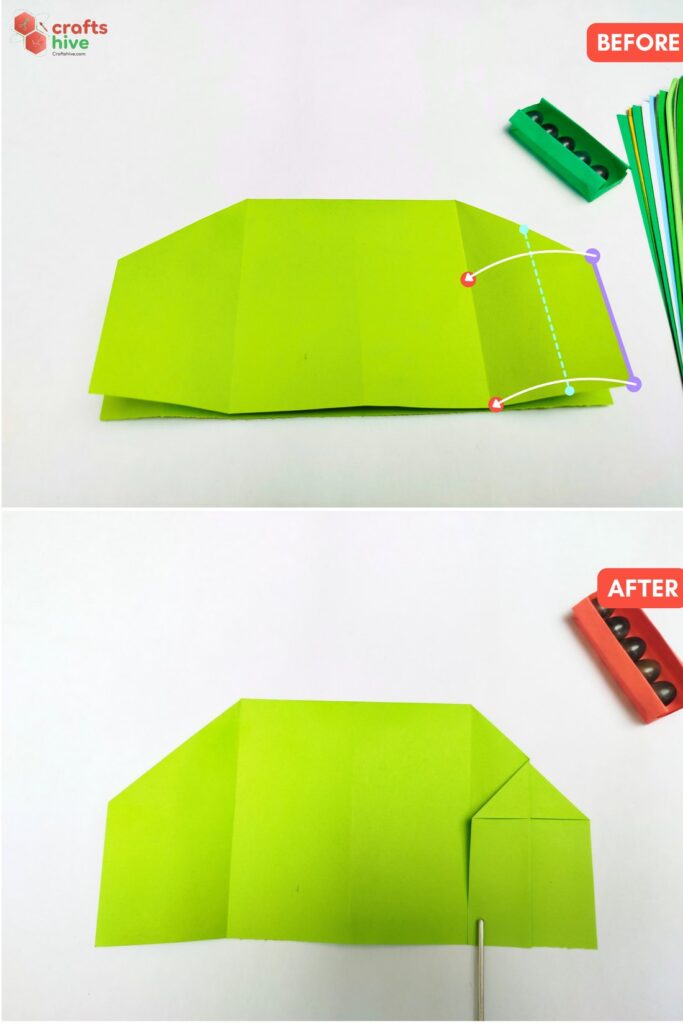
- Fold the right edge of the model onto the crease produced by the right quarter fold and press the paper flat.
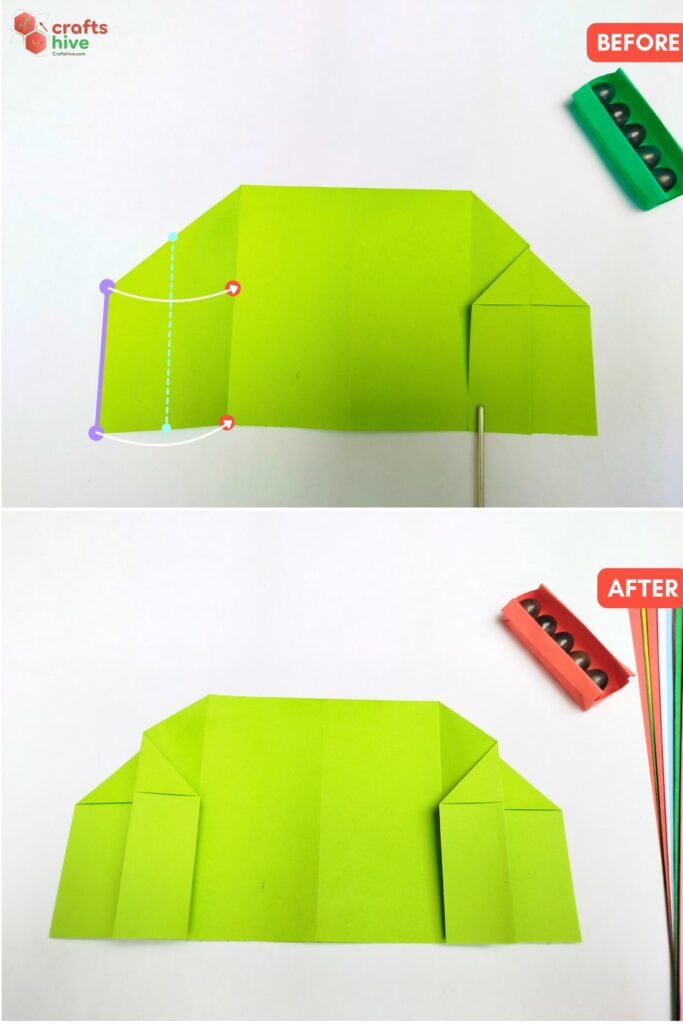
- Similarly, fold the left edge of the model onto the crease of the left quarter fold.
Step #12: Turn the Side
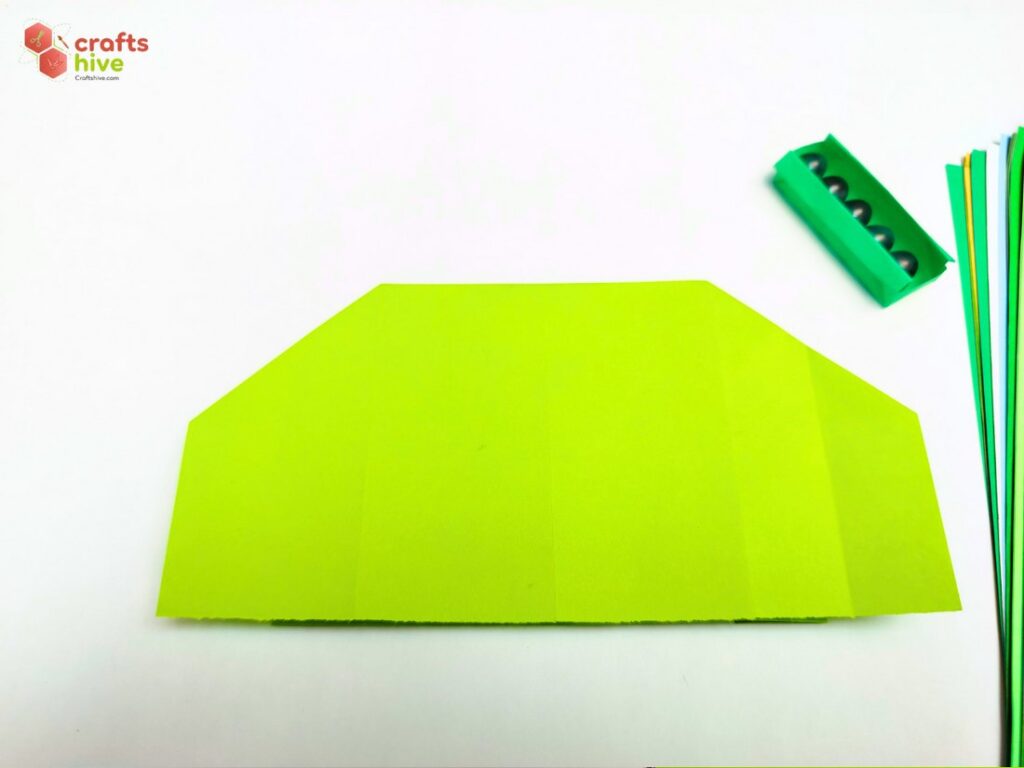
- Turn the entire model over to the other side.
Step #13: Half Quarter Fold
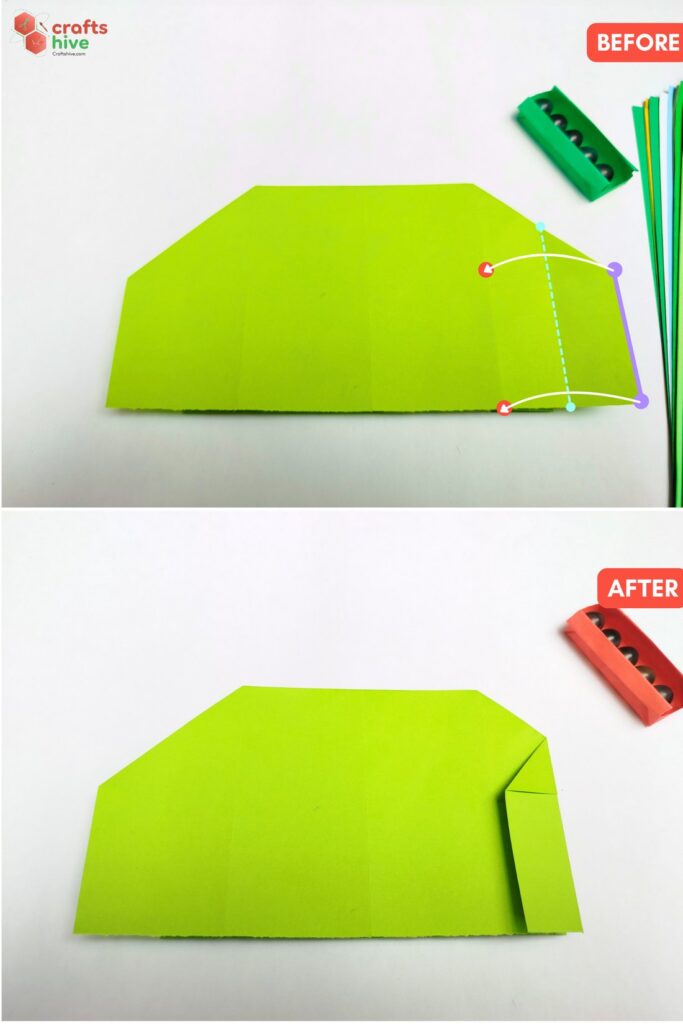
- Make the half-quarter folds on the edges of this side.
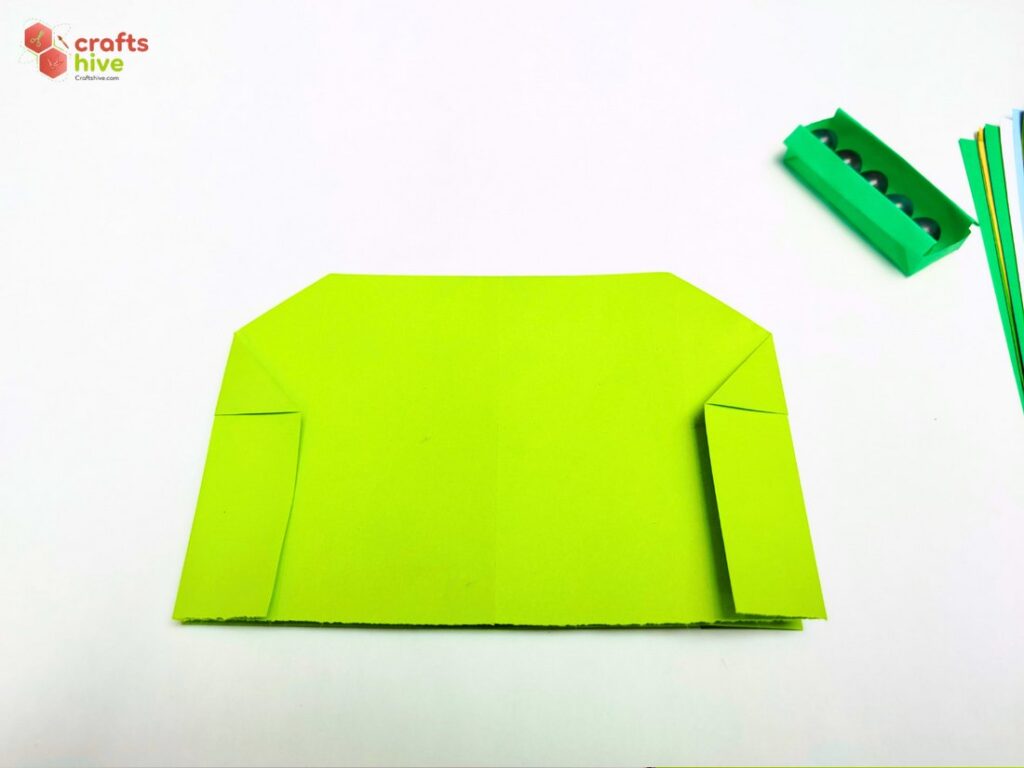
Now, we have finished folding the sides of the oblong box. Let’s make the flaps.
Step #14: Folds for the Box Flaps
Note: The traditional origami oblong box needs half-folds for the flaps. However, I like them a little trimmed to a quarter as I can then glue the flaps to the sides to make an open box with thick sides. You can skip these folds if you want the traditional version.
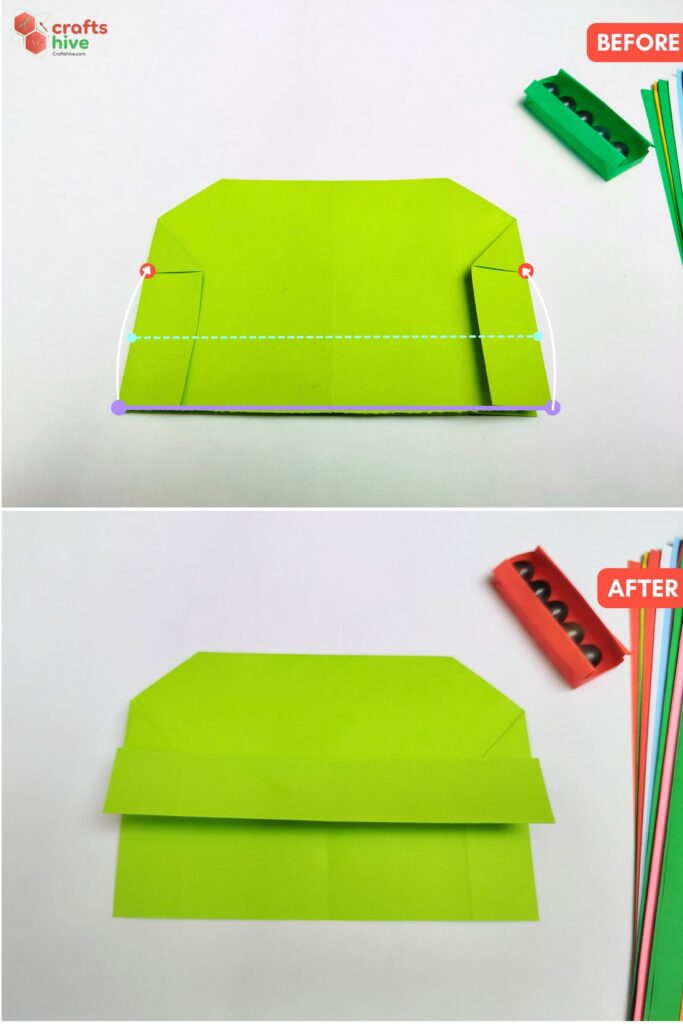
- Holding the bottom edge of the top layer, Valley Fold it to the middle of the model and press the paper flat.
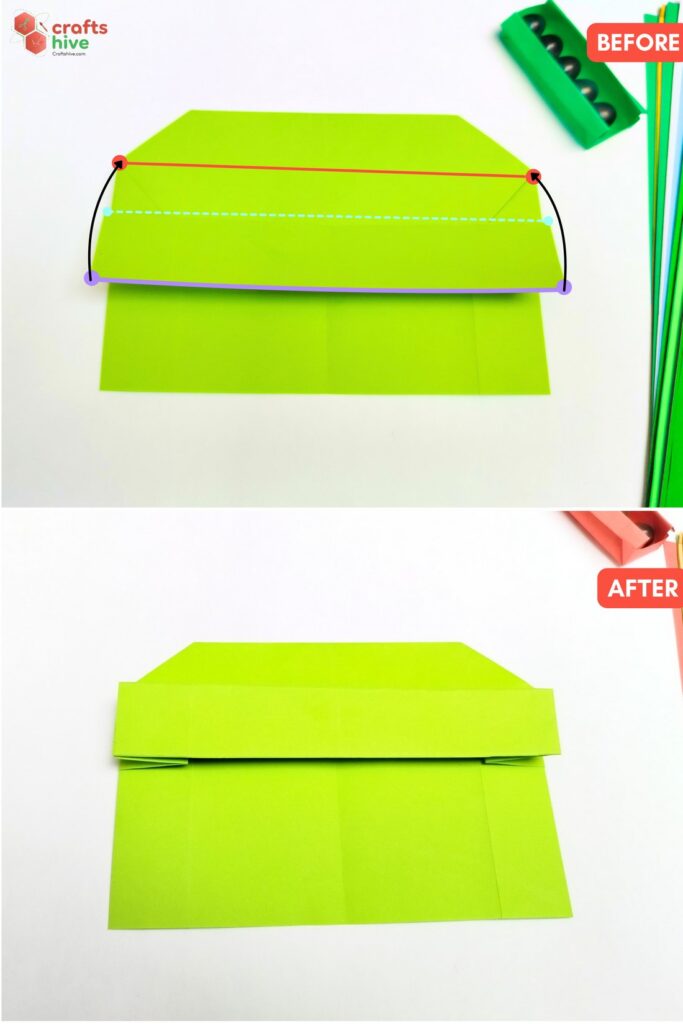
- Make a Reverse Valley Fold with the flap of the previous fold. It will make the other edge of the flap the hinge.
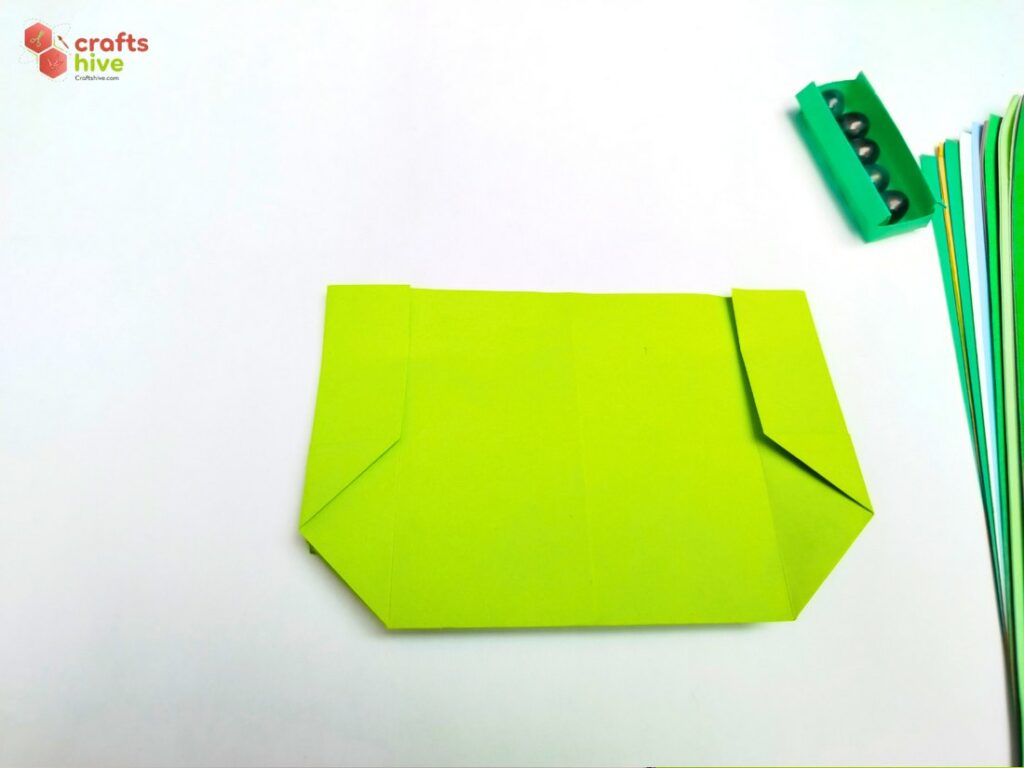
- Turn the model over vertically.
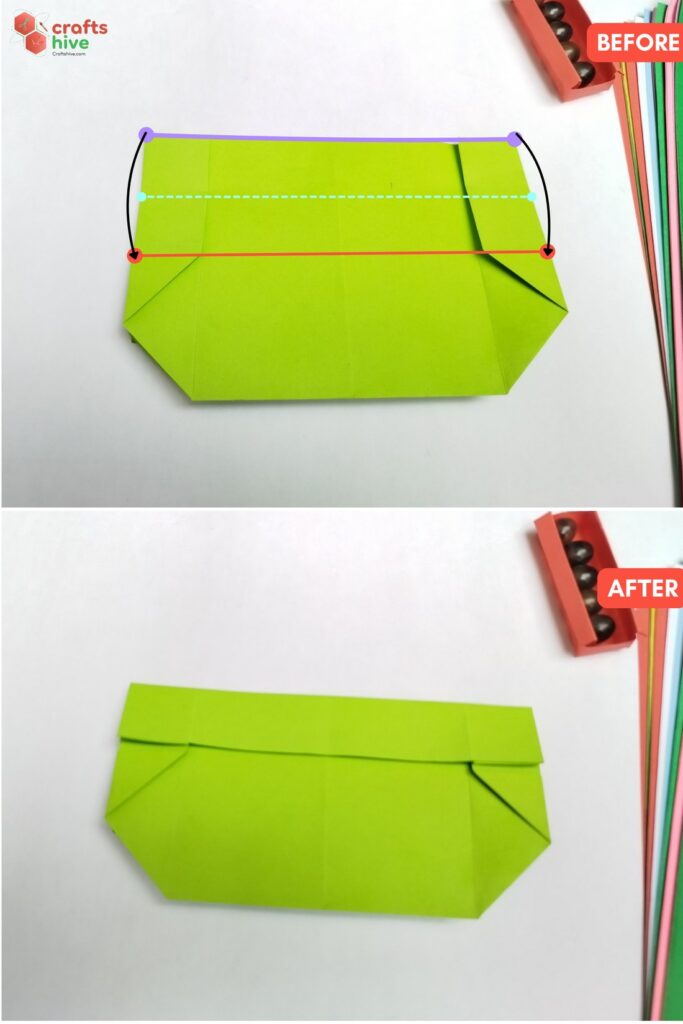
- Mountain Fold the top edge onto the middle crease.
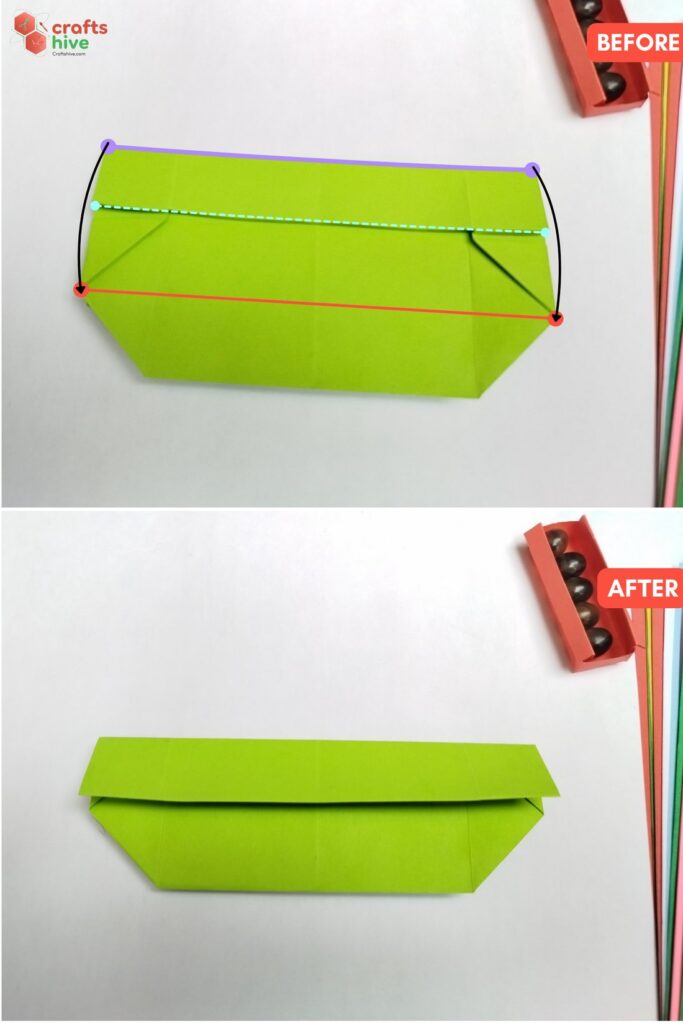
- Mountain Fold the flap of Mountain Fold onto the third crease like on the other side.
Step #15: Open
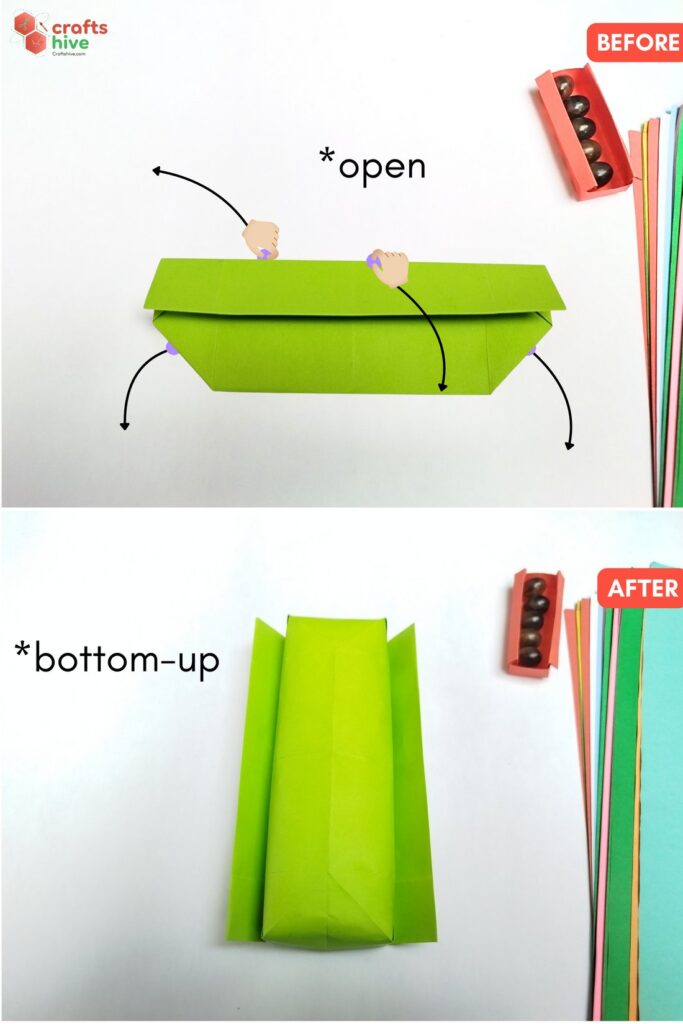
- Hold the sides of both flaps and pull them on opposite sides unless the inner triangle comes out to make the bottom. You can also straighten the base by pressing with your fingers.
Step #16: Sharpen the Edges
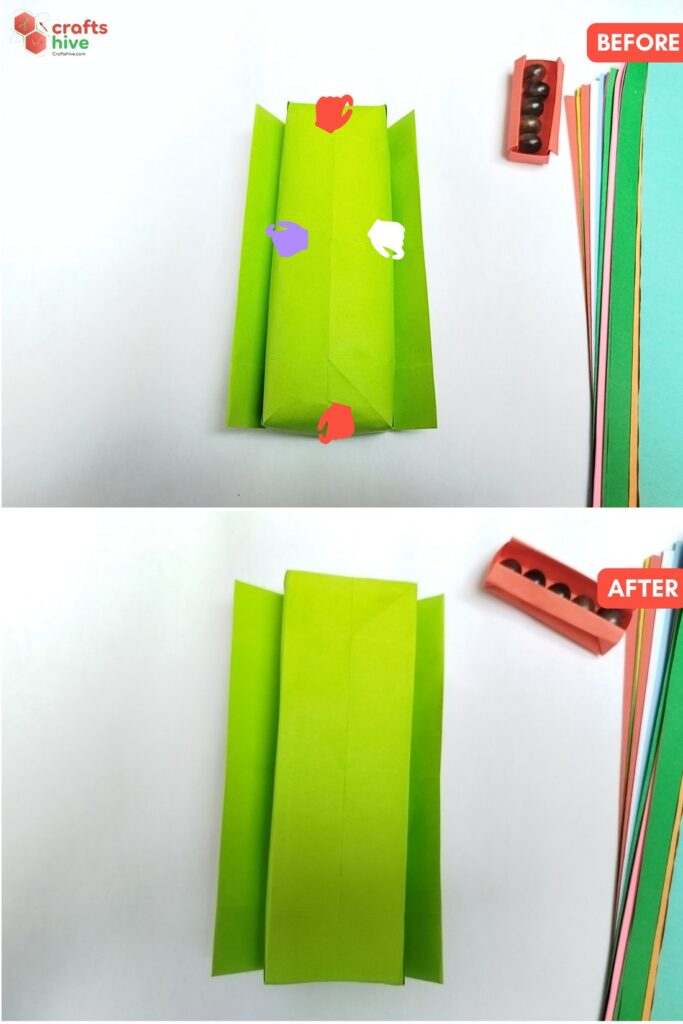
- The edges of the base won’t be straight yet. You have to pinch the sides and move your fingers all along the edges to sharpen them.
Folding Tip: You can also use the flaps as a guide for this step.
Finished
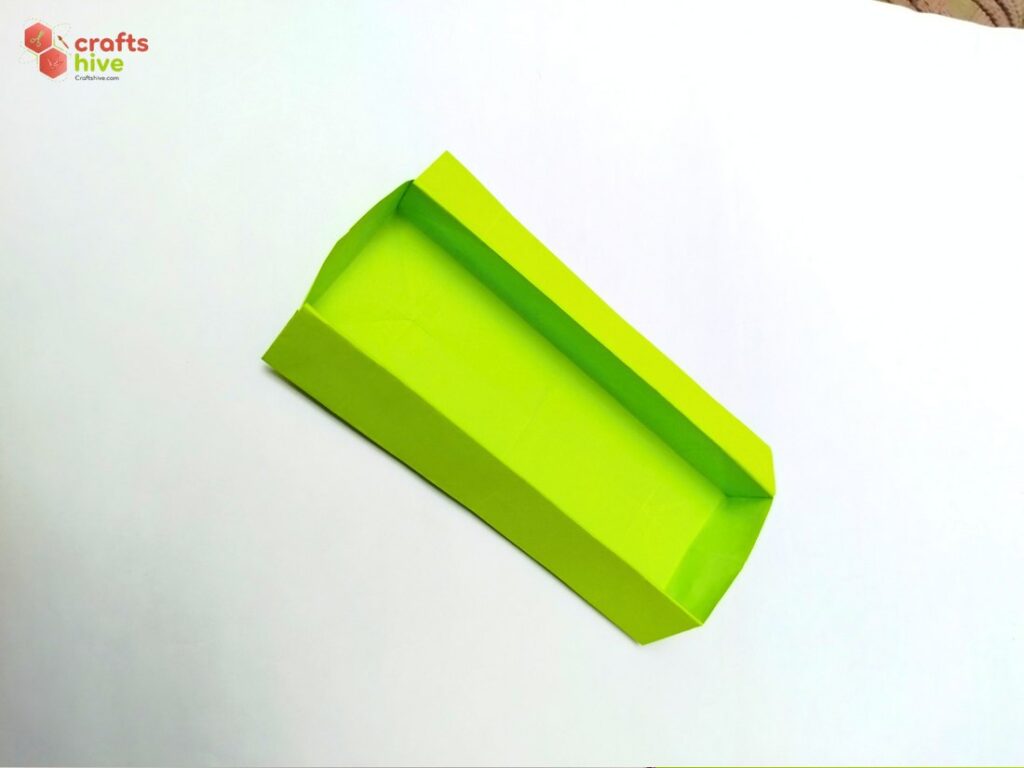
And that’s it. The origami oblong box is ready for holding your stationery and crafting supplies. While it did not turn out to be big enough, the fun thing is, no need for gluing and cutting.
Was this Origami Tutorial Helpful? Tell us in the Comments.
Your feedback is a great way for us to improve our origami tutorials. So, share your thoughts on whether you tried this one or not, and highlight the weak points.

About "Talha"
Hey, I’m Talha, the Crafter on Craftstive.com. I love to share guides on folding cute origami models and paper crafts, and I am always ready to inspire your next craft project with my weekly craft discussions.