
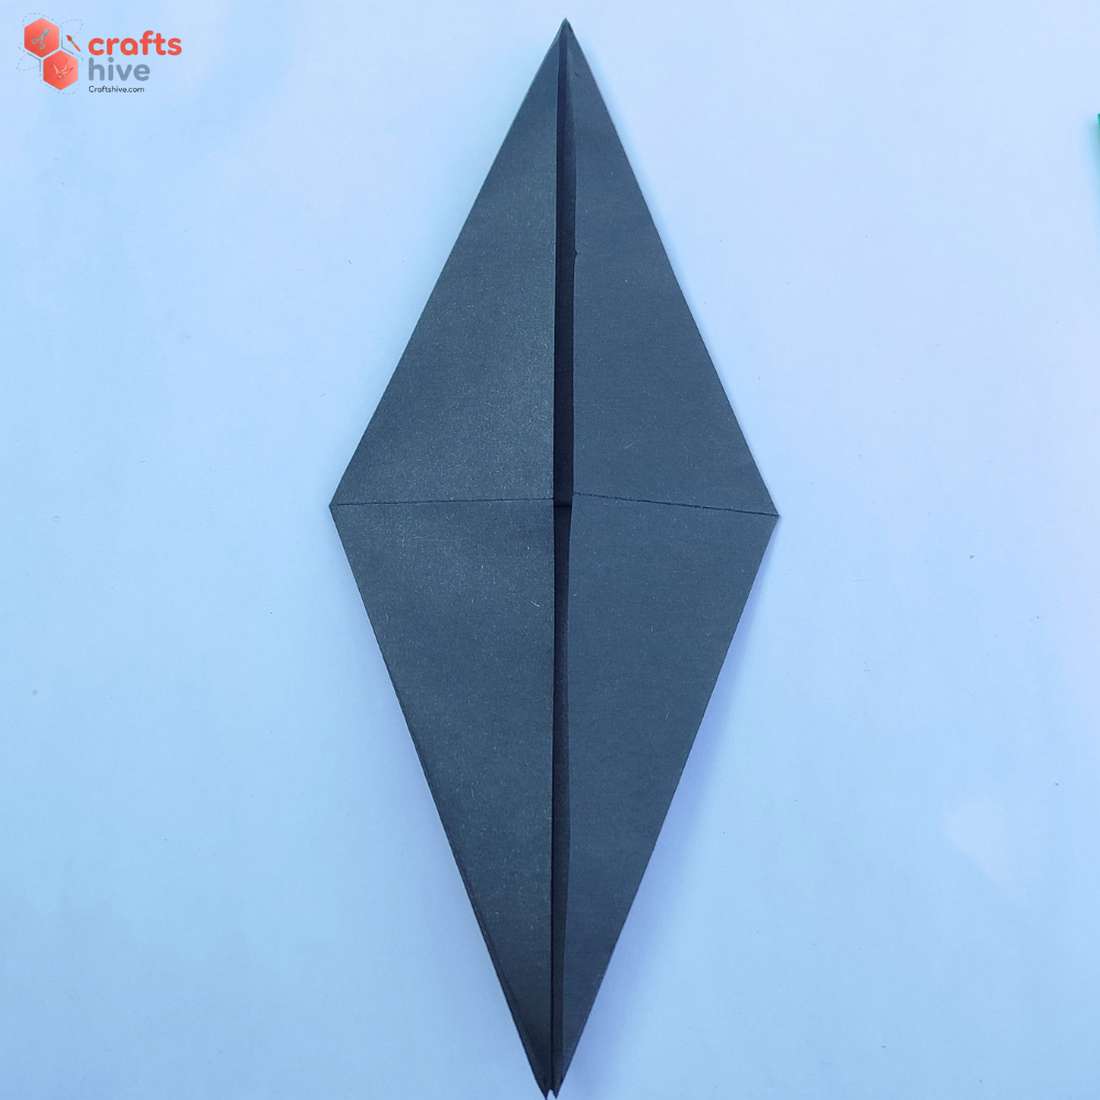
Learn how to fold an origami traditional bird base in 12 simple steps. This origami base is used in almost all the traditional bird models, from basic ones like the origami crane to intermediate ones like the origami phoenix.
So, learning this preliminary base is useful for saving your time while learning these origami models in the future.
Once you are comfortable with it, any bird model becomes a piece of cake. As differences only lie in the direction of folds.
[ez-toc]
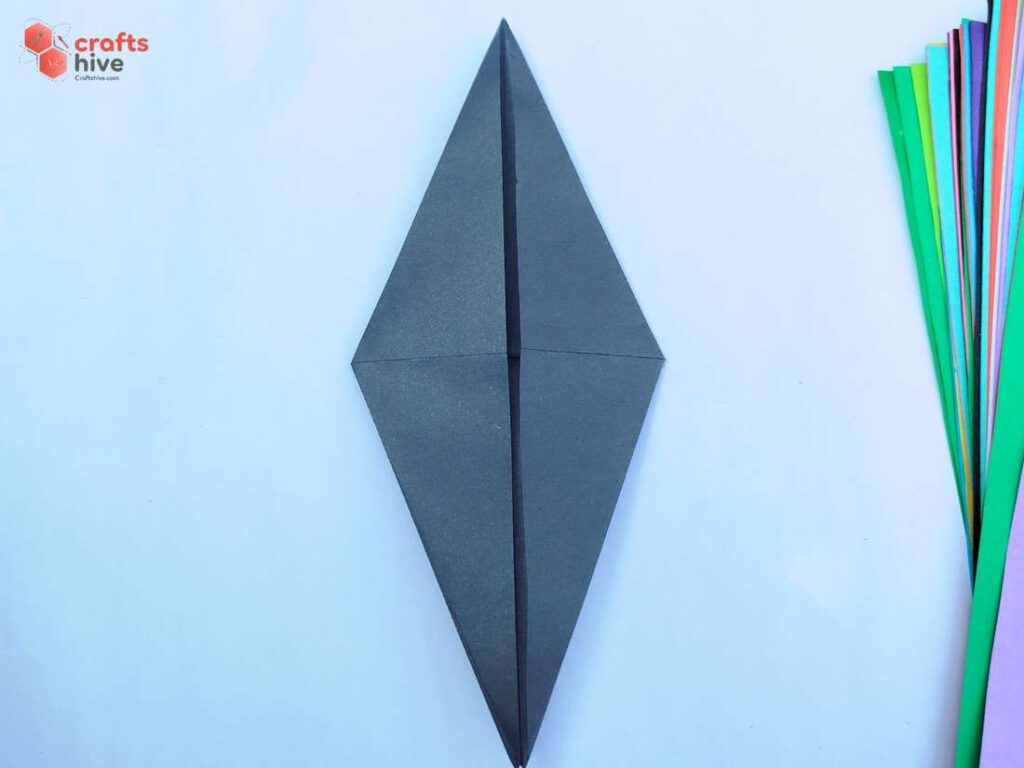
What to Fold with the Origami Bird Base
The following are the models you can fold using the origami bird base as a starting fold:
-
Origami Crane
-
Origami Flapping Bird
-
Origami Pheasant
-
Origami Dove
-
Origami Robin
-
Origami Parrot
- Origami Phoenix
Origami Bird Base: Step-by-Step Guide
This origami base starts with the square base, then the kite base and then the squash folds. It is an easy base.
Model Type: Traditional
Difficulty: Beginner level 2
Step #1: Horizontal Crease
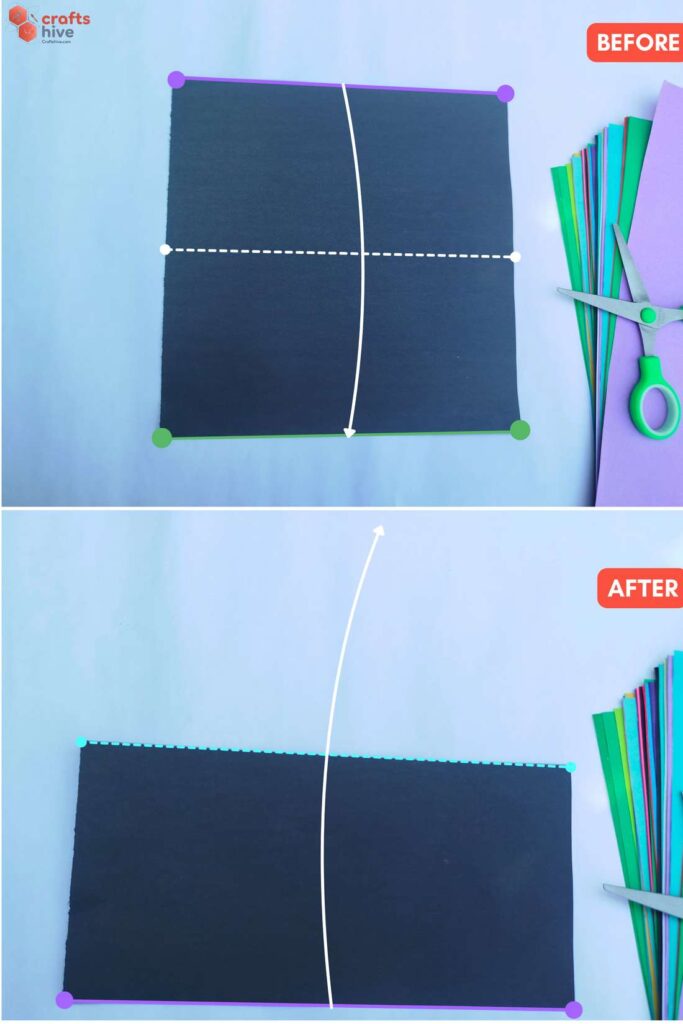
- Fold the paper in half along the horizontal, press the paper flat, and unfold to make a horizontal guiding crease in the middle.
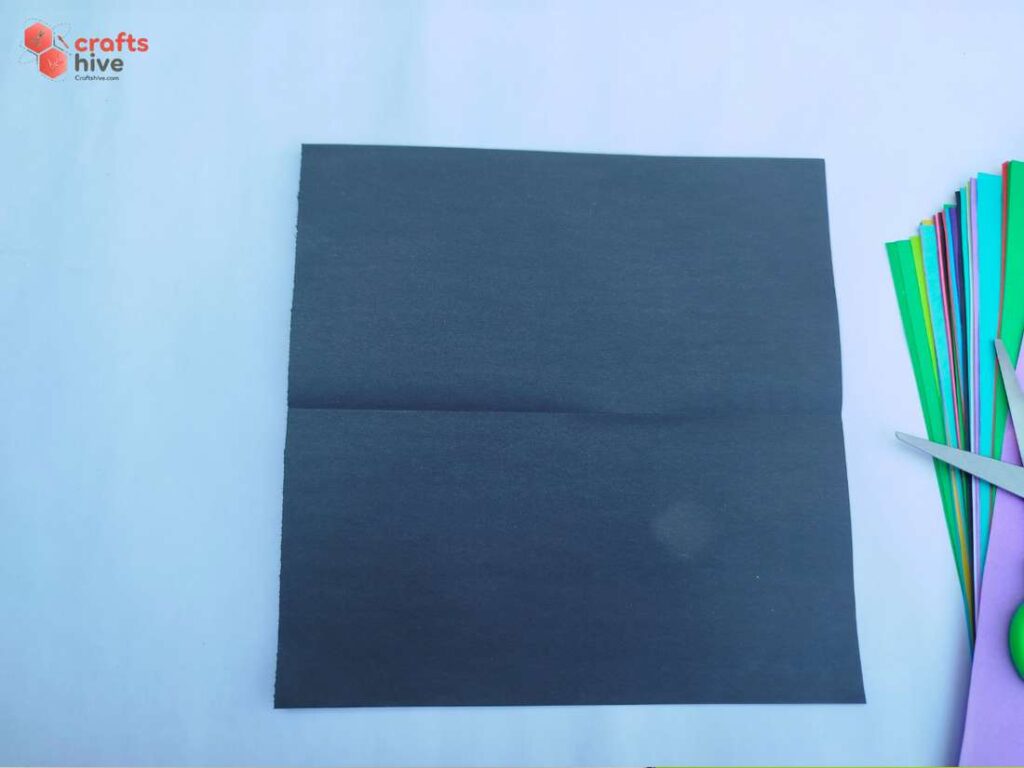
I aligned the top edge of the square with the bottom edge, pressed the hinge, and unfolded it flat.
Step #2: Vertical Crease
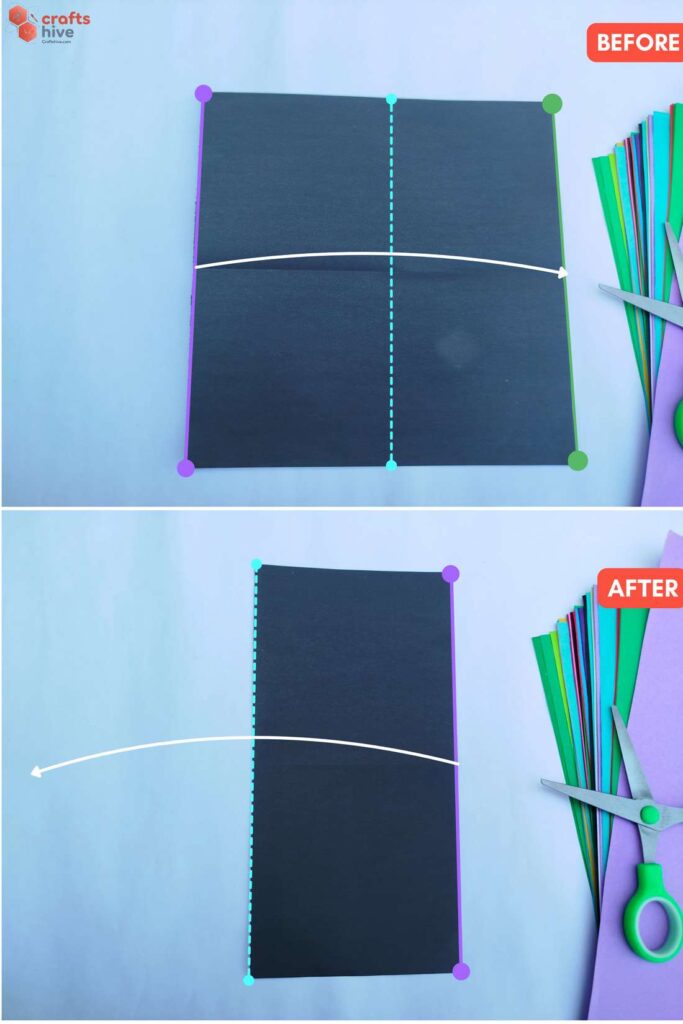
- Fold the paper in half, this time along the vertical, press the whole paper flat, and unfold to make a vertical guiding crease in the middle.
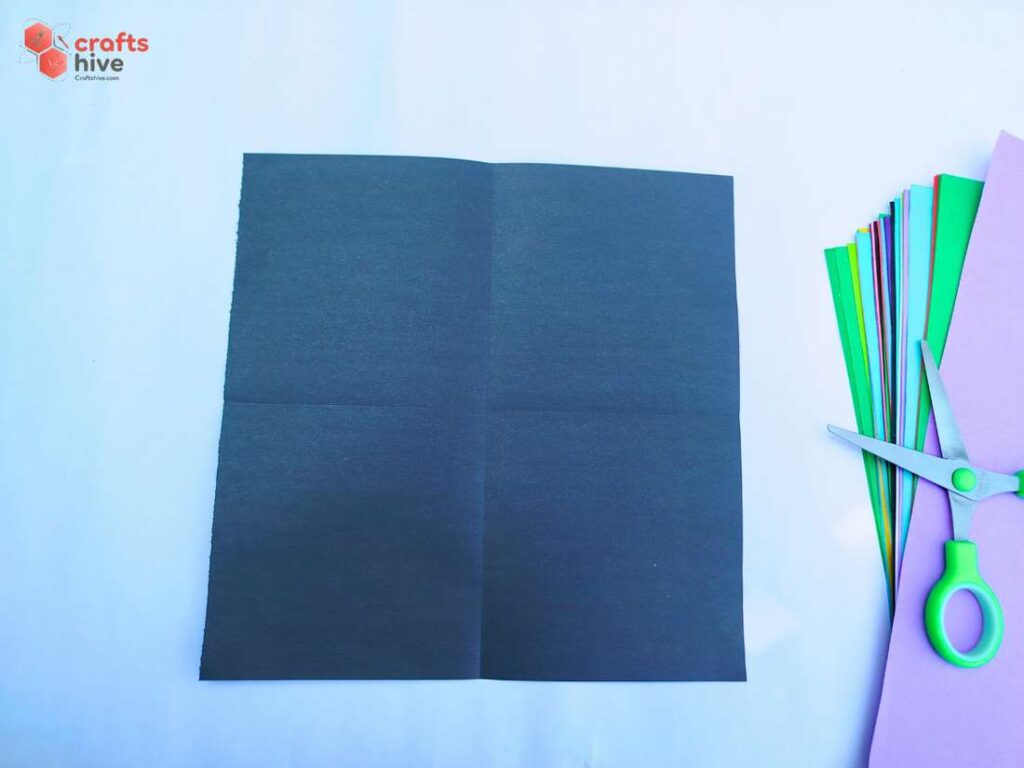
I aligned the left edge of the square sheet with the right edge. After unfolding, I ended up with two crossing creases like in the symbol ‘+.’
Step #3: Diagonal Crease
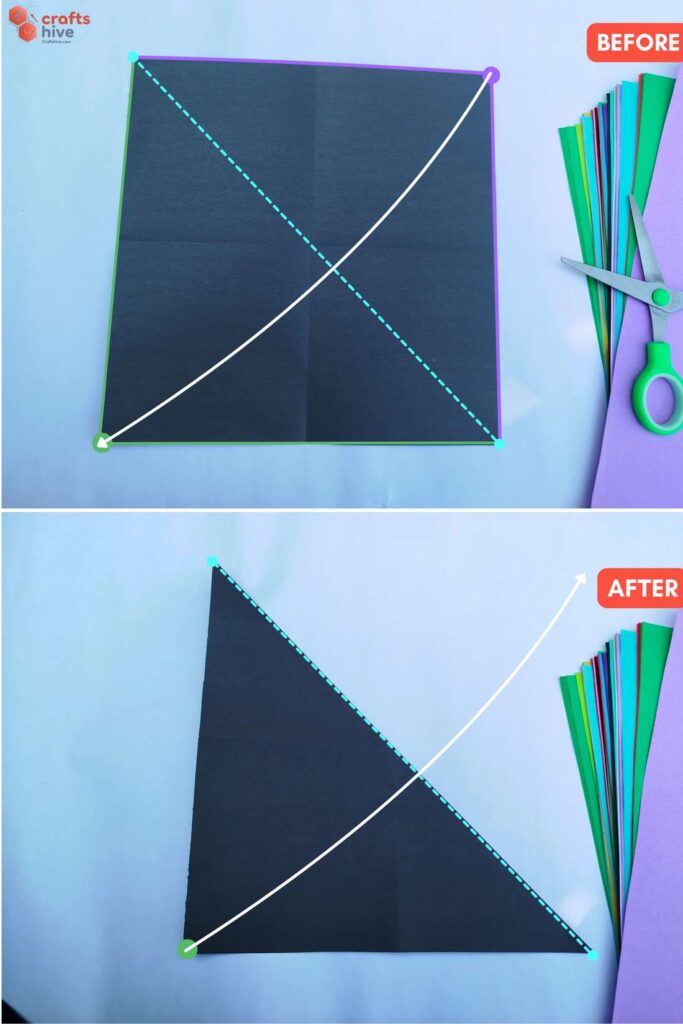
- Fold the paper in half along one of the diagonals, press the paper flat, and unfold to make the first diagonal crease.
I folded the top right corner onto the bottom left corner and aligned the respective sides.
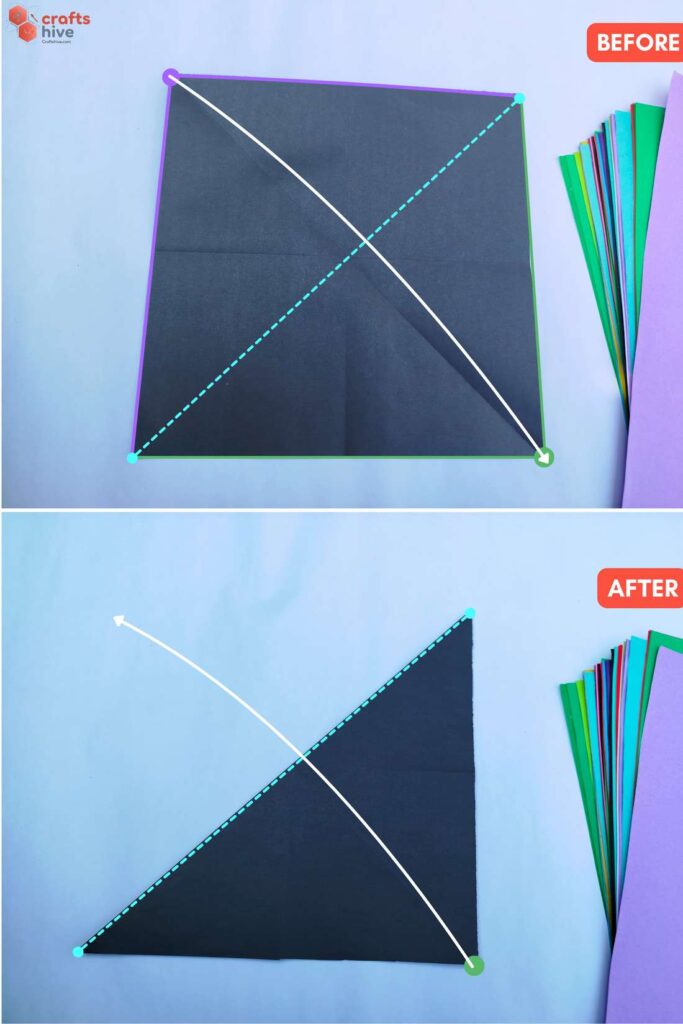
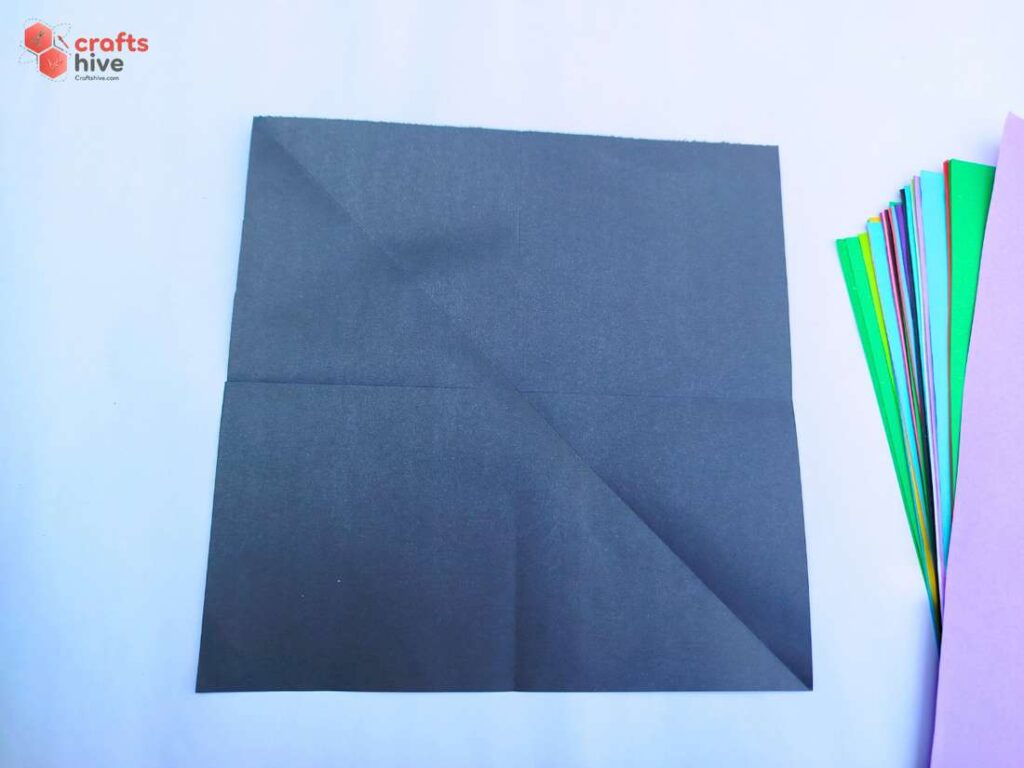
- Fold the paper in half along the creased diagonal, press the paper flat, and unfold to make a diagonal crease intersecting the previous creases.
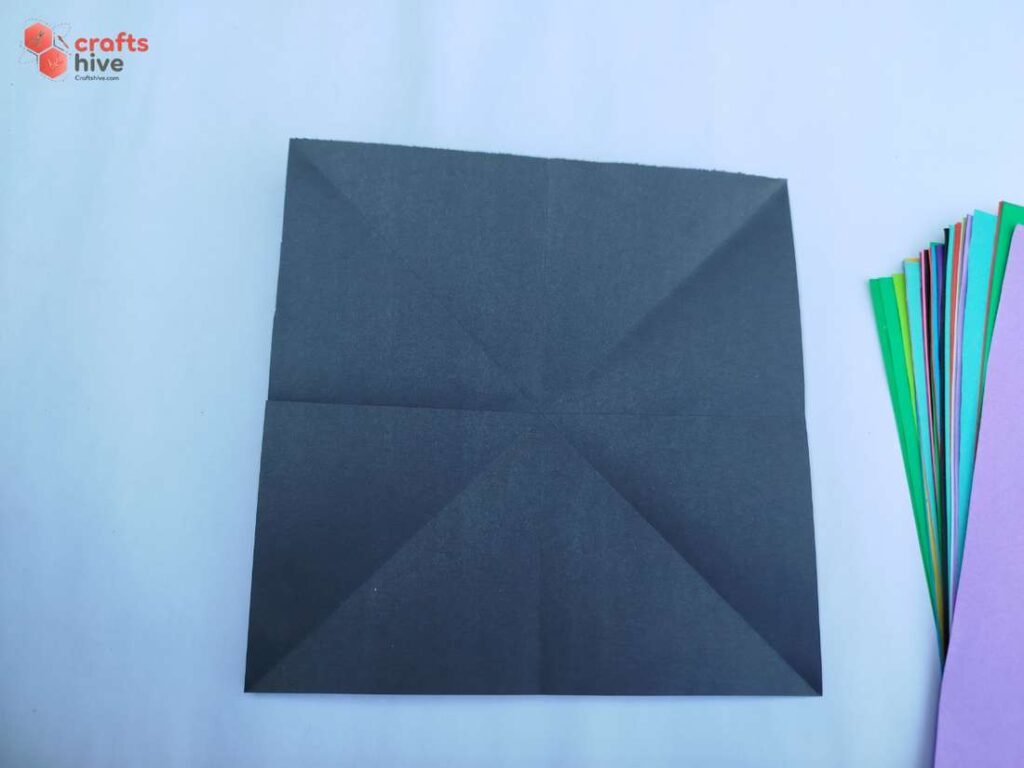
I folded the top left corner onto the bottom right corner, aligned the respective sides, pressed the paper flat, and then unfolded. The diagonal creases must form the shape ‘X’ on the paper in addition to presvious ‘+’ shape.
Step #4: Collapsing Into A Square Base
These steps will explain how to form a square base for the bird base.
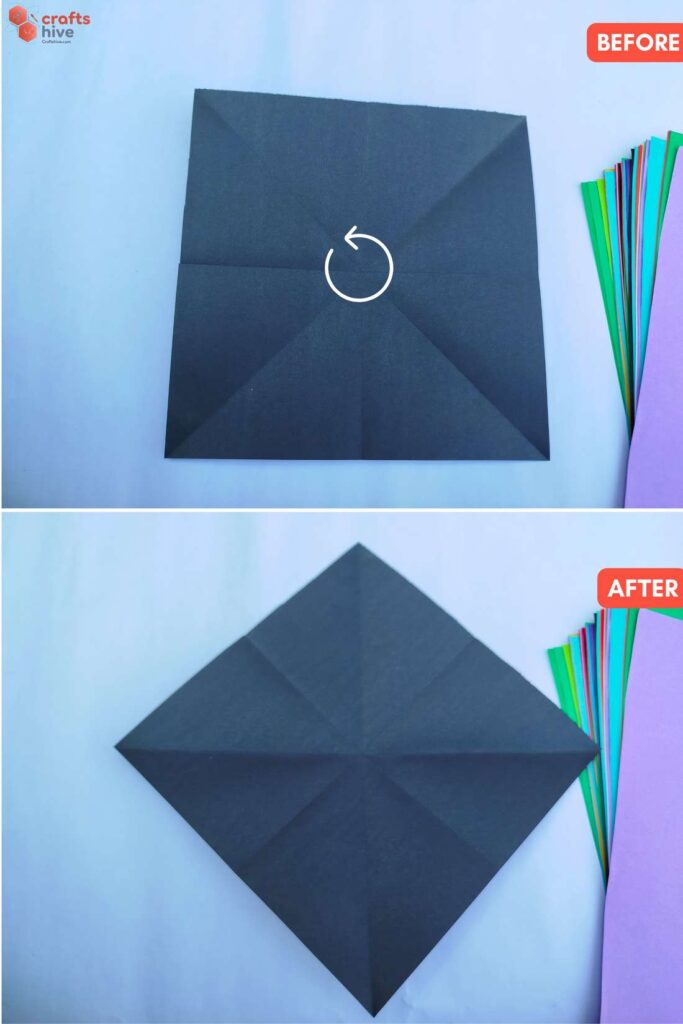
- Bring the paper into the diamond position by rotating it 45 degrees.
- We shall collapse the rest of the paper onto the bottommost diamond.
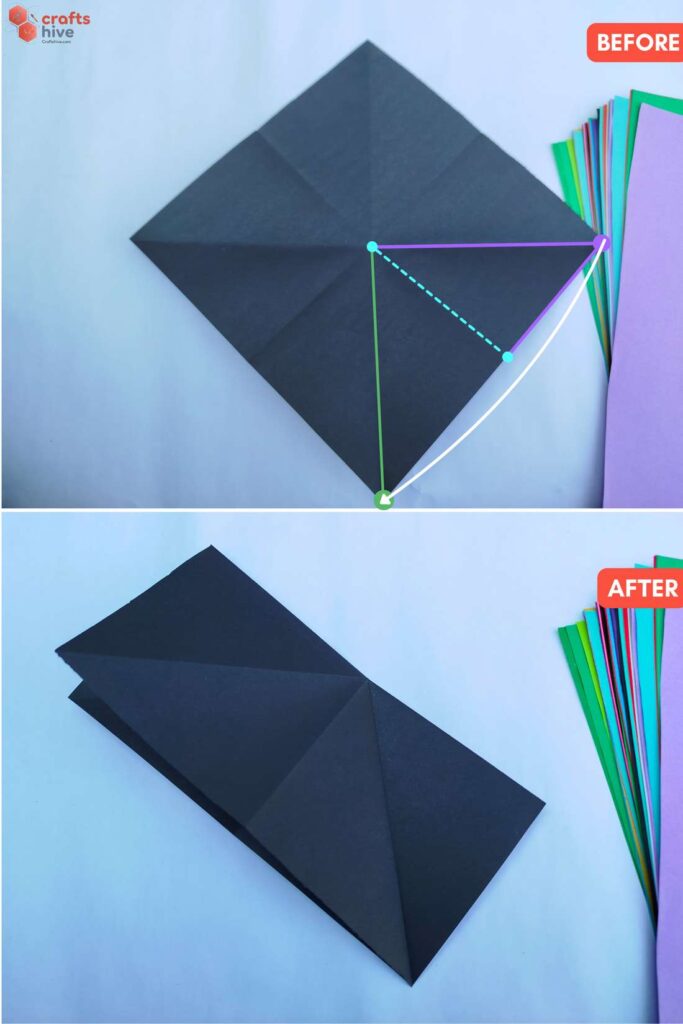
- Fold the bottom triangle of the middle right-sided diamond onto the triangle on the right side of the bottommost diamond, like above.
Other Way: Fold the right corner of the diamond onto the bottom corner. Press the right-sided triangle down and keep holding the corner.
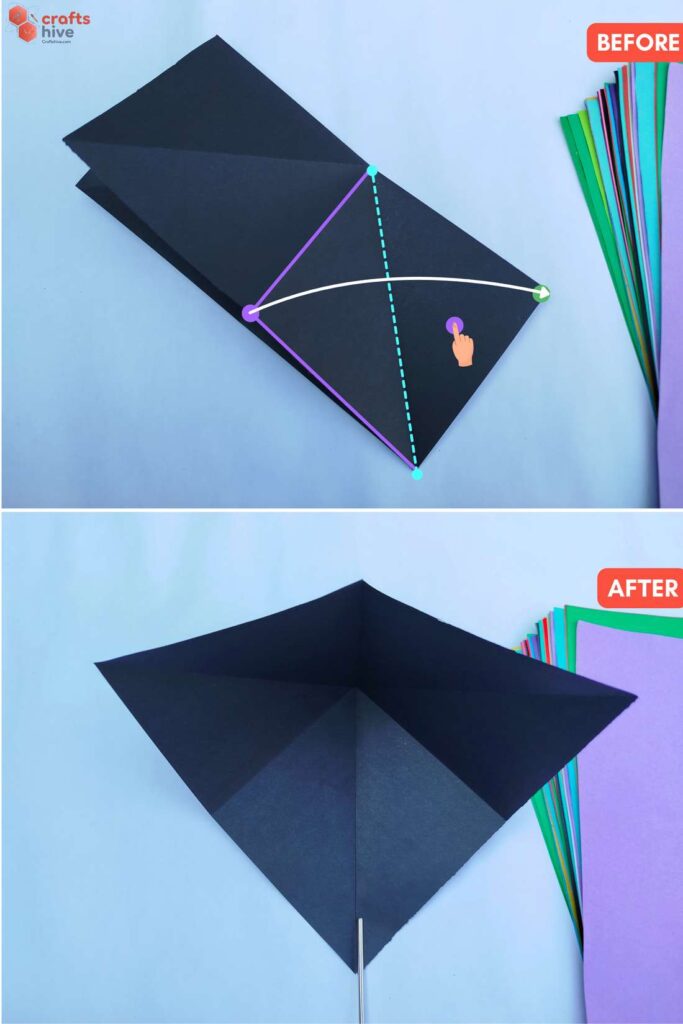
- Keeping the folded triangle pressed, fold the left triangle of the overlapping flap onto the right-sided triangle, like above. Press the paper flat very well.
Other Way: Simply fold the held corner onto the new right corner of the paper and press everything flat firmly.
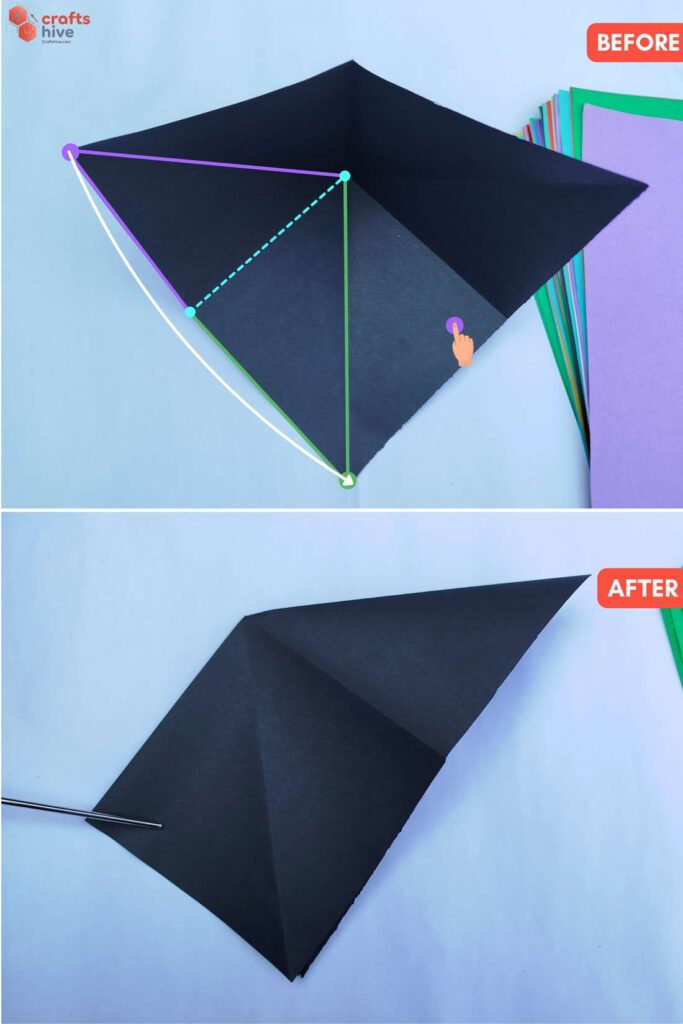
- Fold the left corner of the lifted flap onto the bottom corner so that the bottom triangle of the middle left-sided triangle settles onto the left-sided triangle of the bottom diamond.
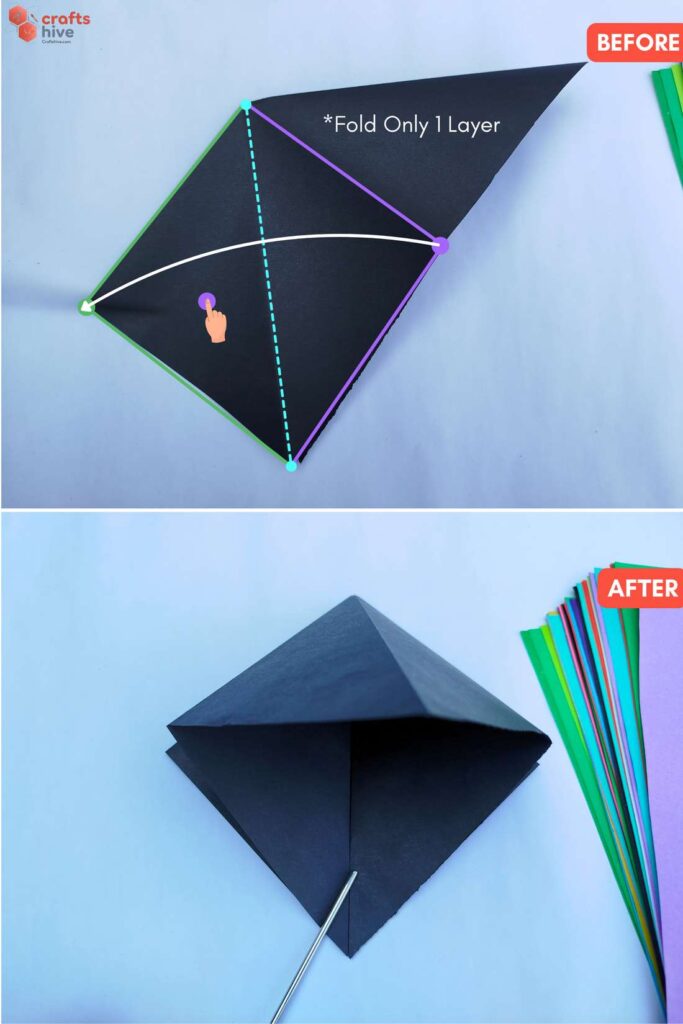
- Holding only one layer, fold the right triangle onto the left triangle like above. Press that area flat.
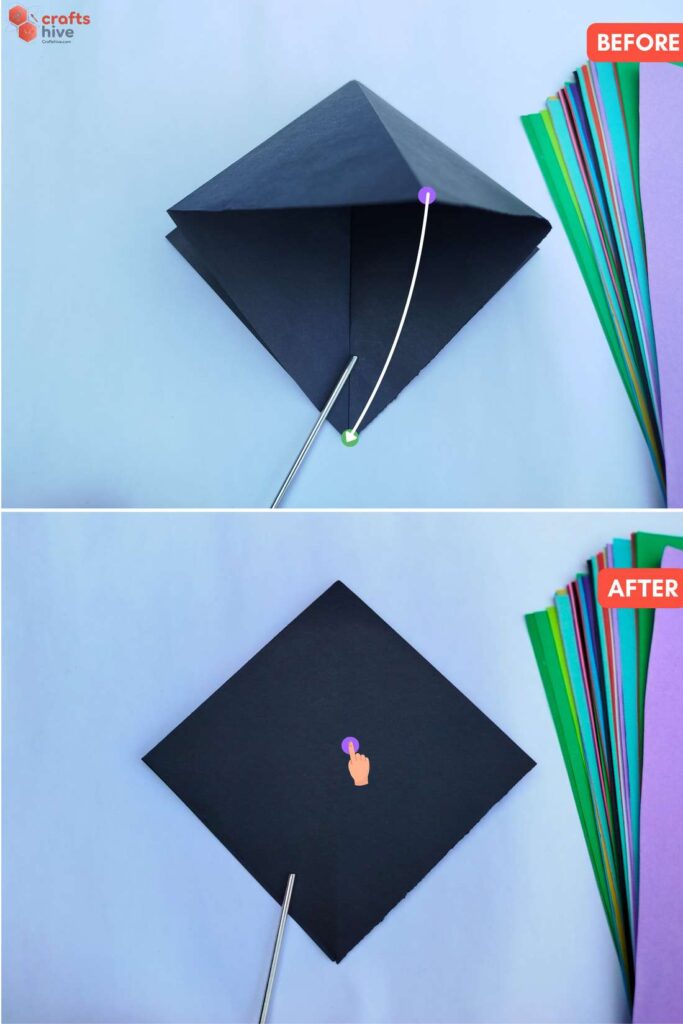
- Press the whole lifted flap down onto the diamond. Then press the whole square base down firmly to secure the creases.
Tip: Be sure that from the upside, the whole square base looks even and no flap is popping out. If that’s the case, open the lifted flap again and adjust the creases.
Step #5: Intermediate Kite Folds for Squash Fold
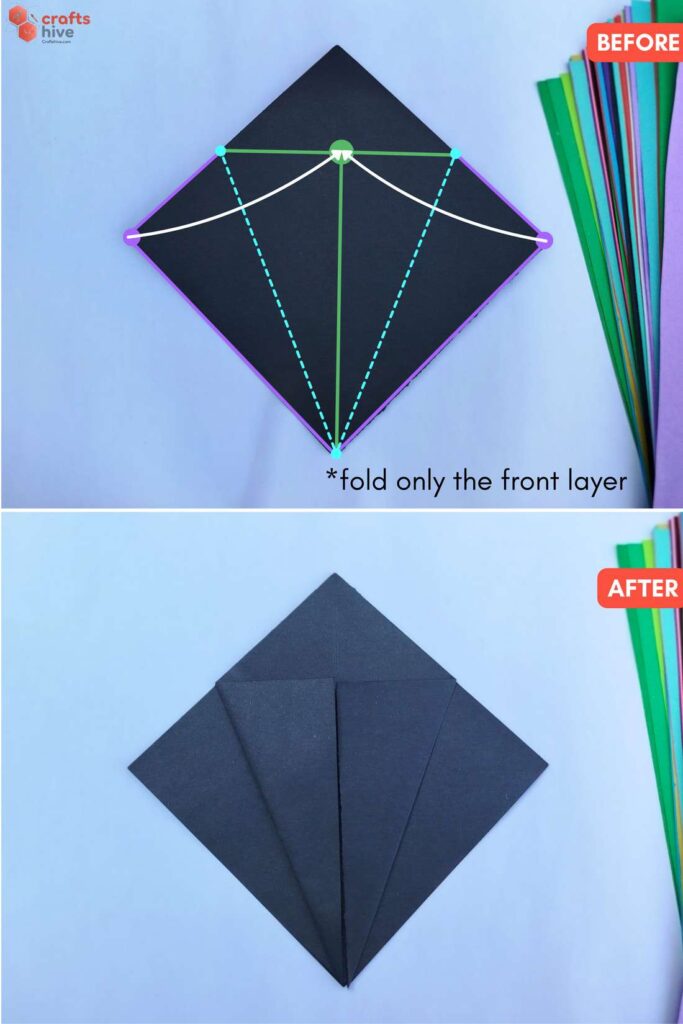
With the open side of the square base down and holding only the front flap of the base,
- Fold both corners of this layer to the middle line, align the bottom edges to that middle line, and press the paper flat.
Step #6: Intermediate Mountain Fold for Squash Fold
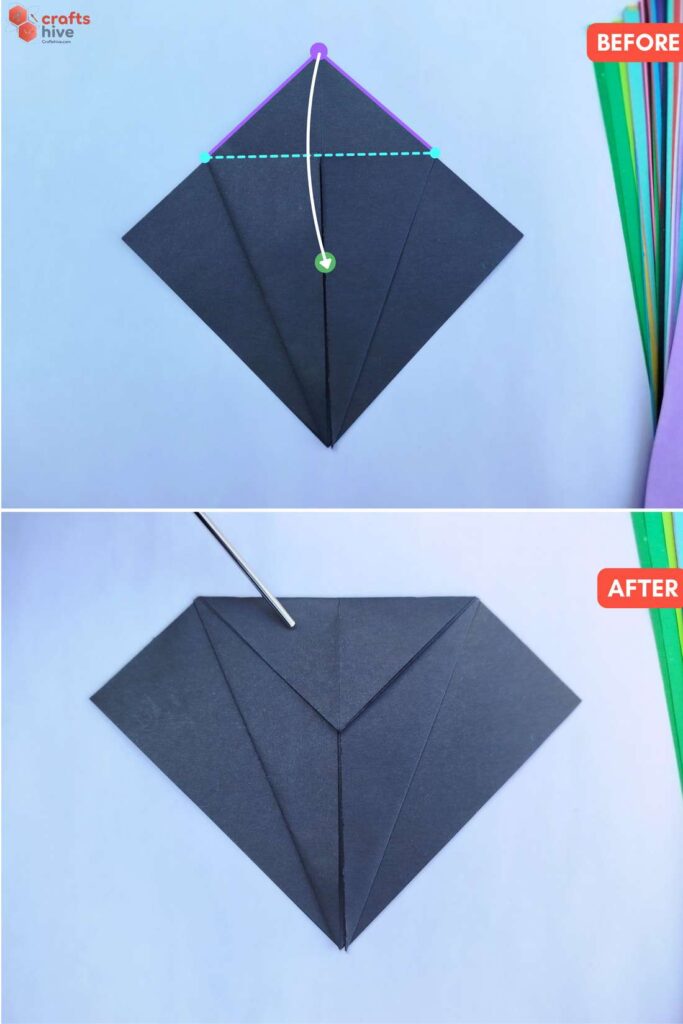
- Mountain Fold the top corner of the base about the top edges of the previous kite folds. This will fold both layers as the top is the closed side.
Step #7: Turn the Side
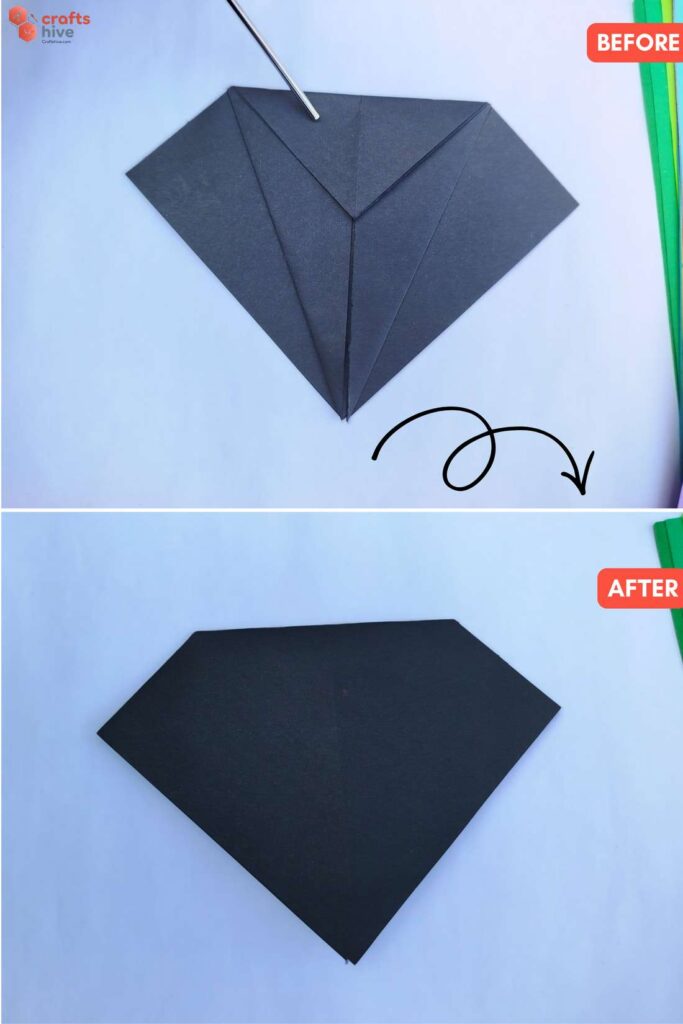
- Turn the base over to the other side.
Step #8: Intermediate Side Fold for Squash Fold
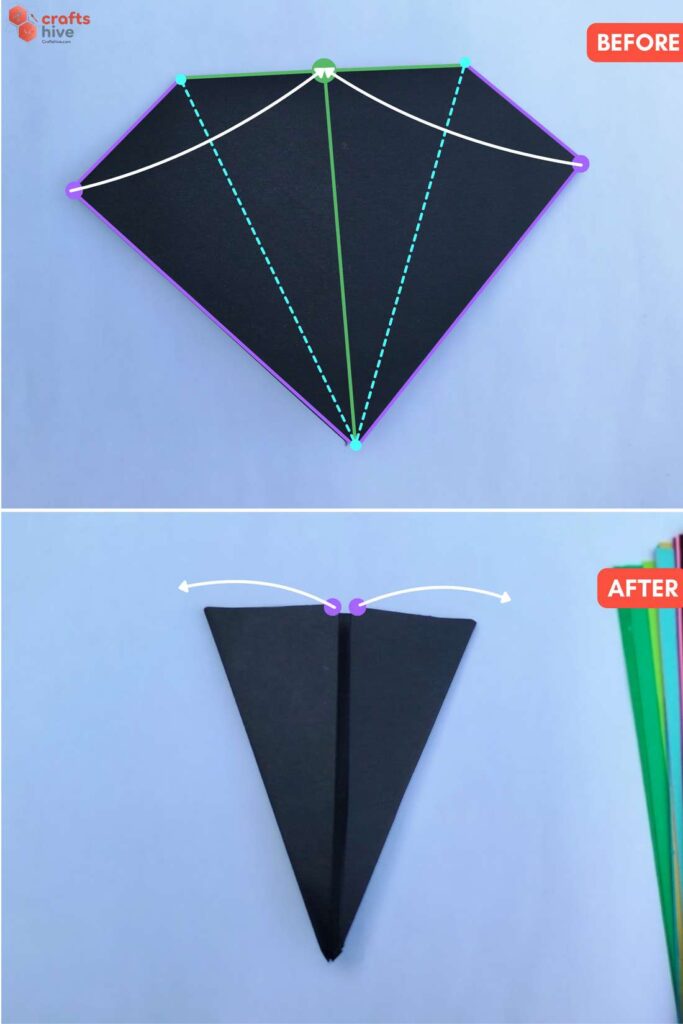
- Fold the middle left corners of this layer to the centre line, align the bottom edges to the centre line and press the paper flat.
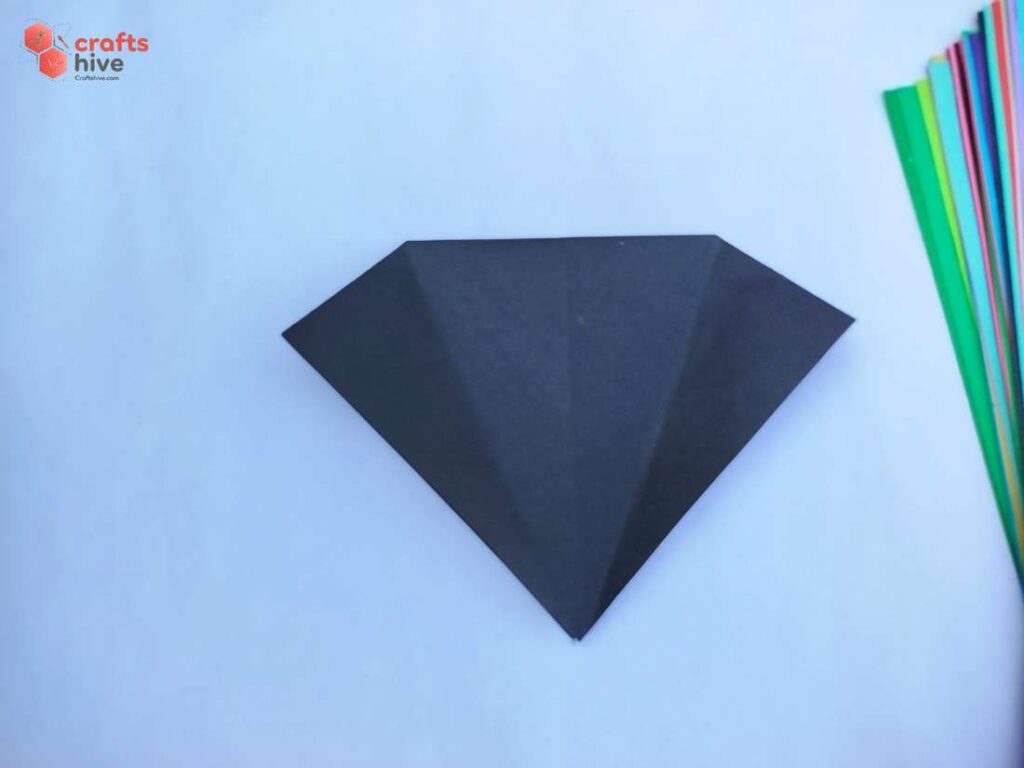
- Undo these kite folds. We have made creases for the kite folds and a pocket.
Step #9: Squash Fold
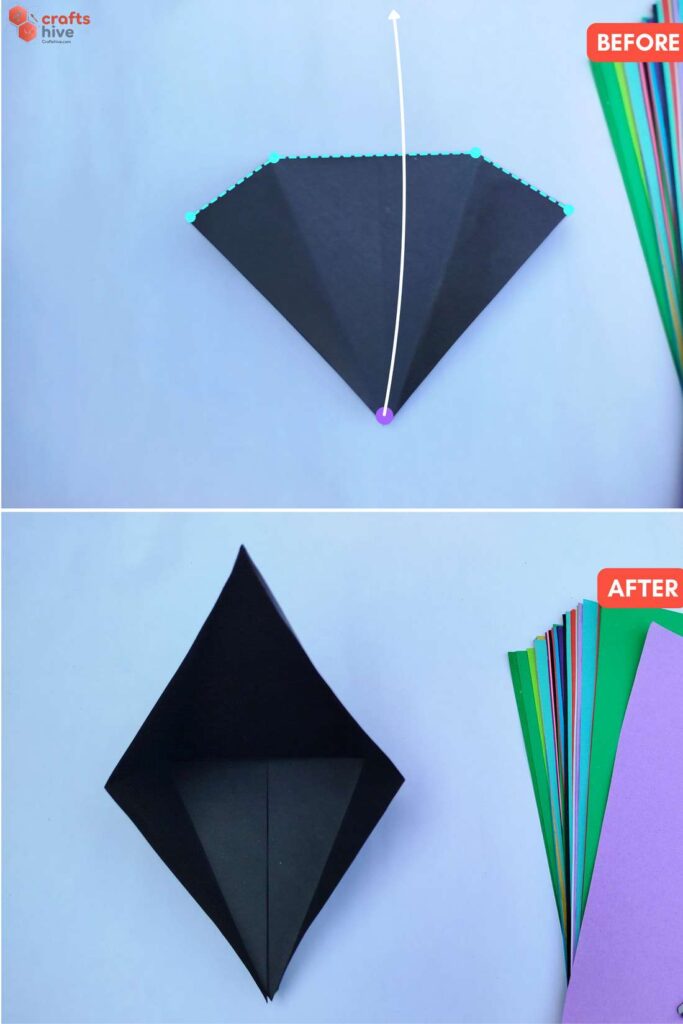
- Valley Fold the bottom corner of the front layer of the pocket as far as you can. This opens a creased pocket.
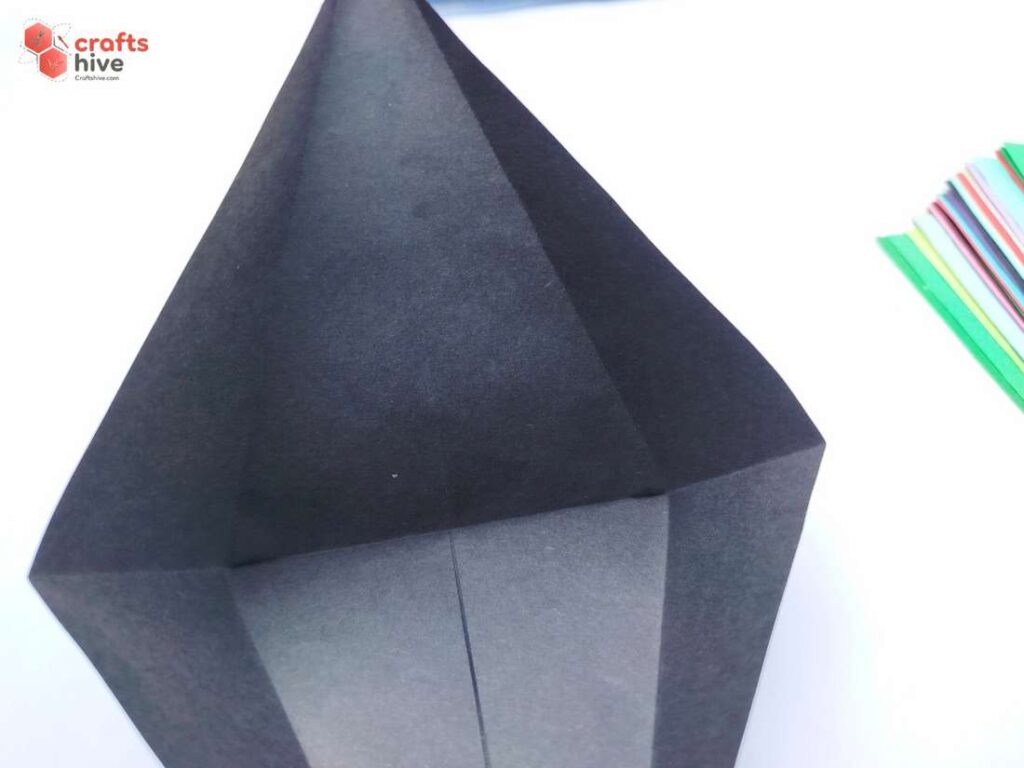
- Notice the creases about which you will fold the edges (reverse the fold).
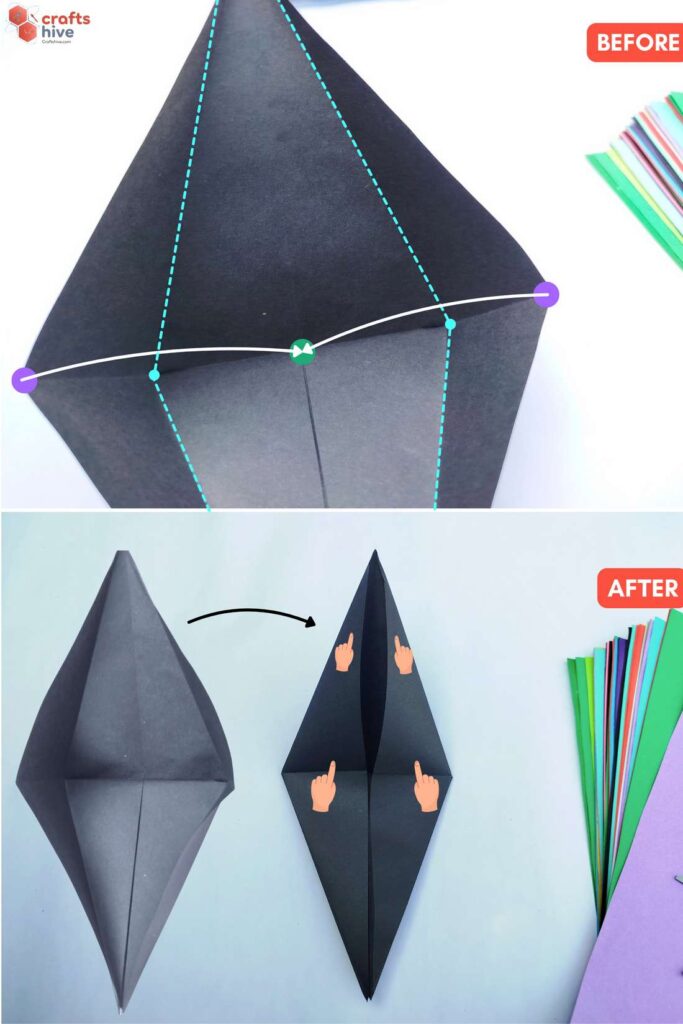
- Fold the middle left and right corners of the edges of this opened pocket onto the middle line and press the paper flat from the top corner down to the bottom.
- This finishes the squash fold for one side.
Step #10: Turn the Side
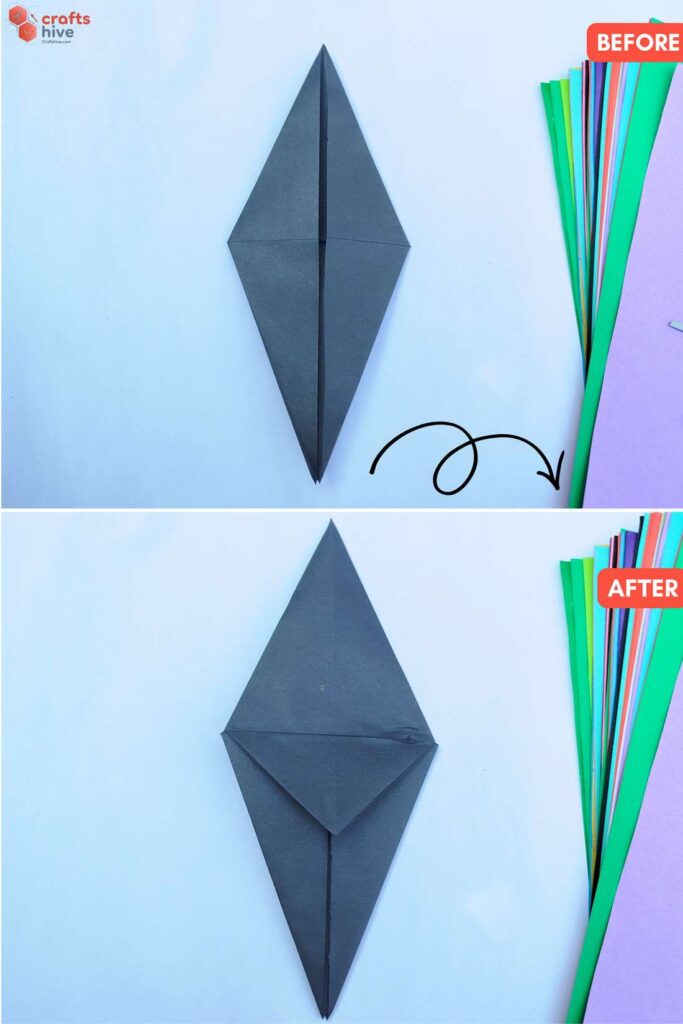
- Turn the model with one squash fold over to the other side.
Step #11: Unfold Intermediate Folds
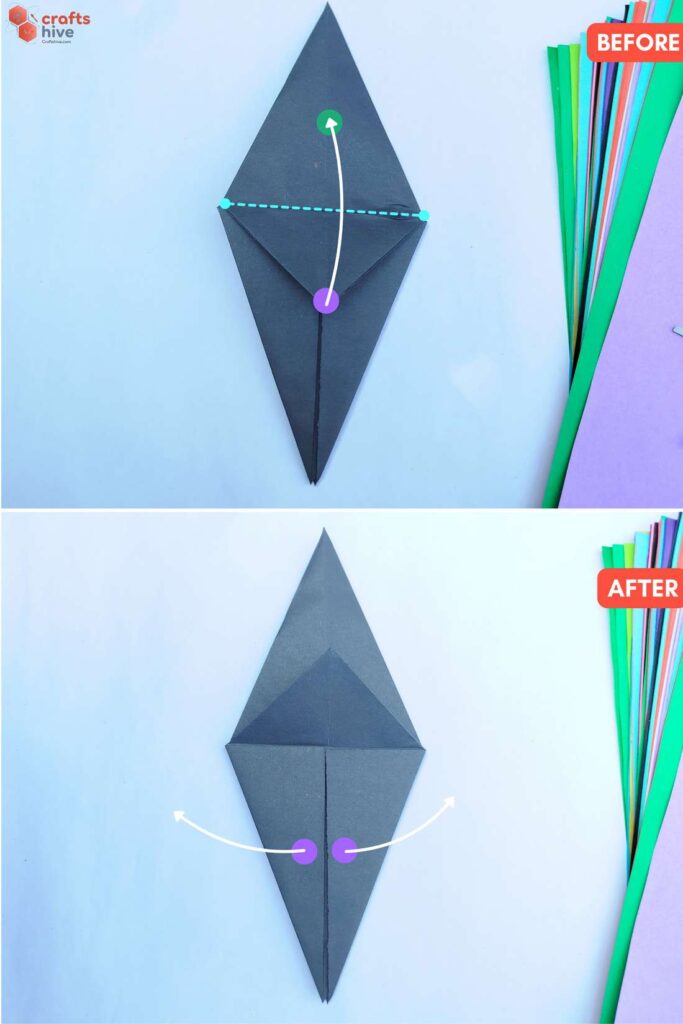
- Reverse the Mountain Fold to the Valley Fold.
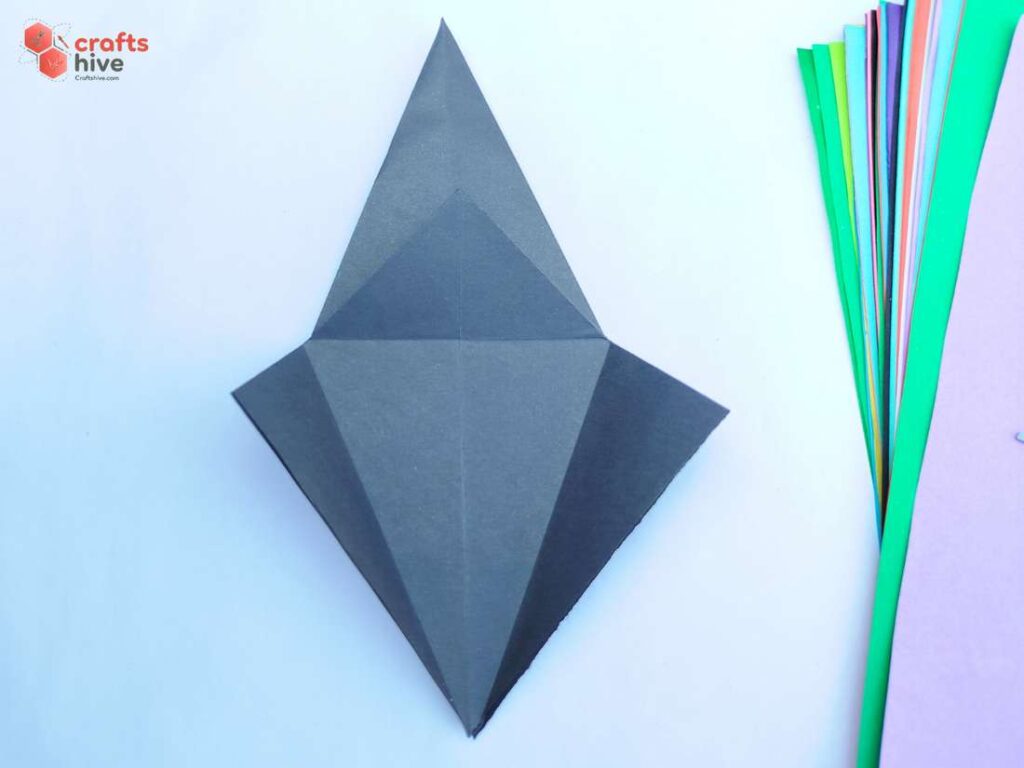
- Open the flaps of the kite folds.
Step #12: Sqaush Fold
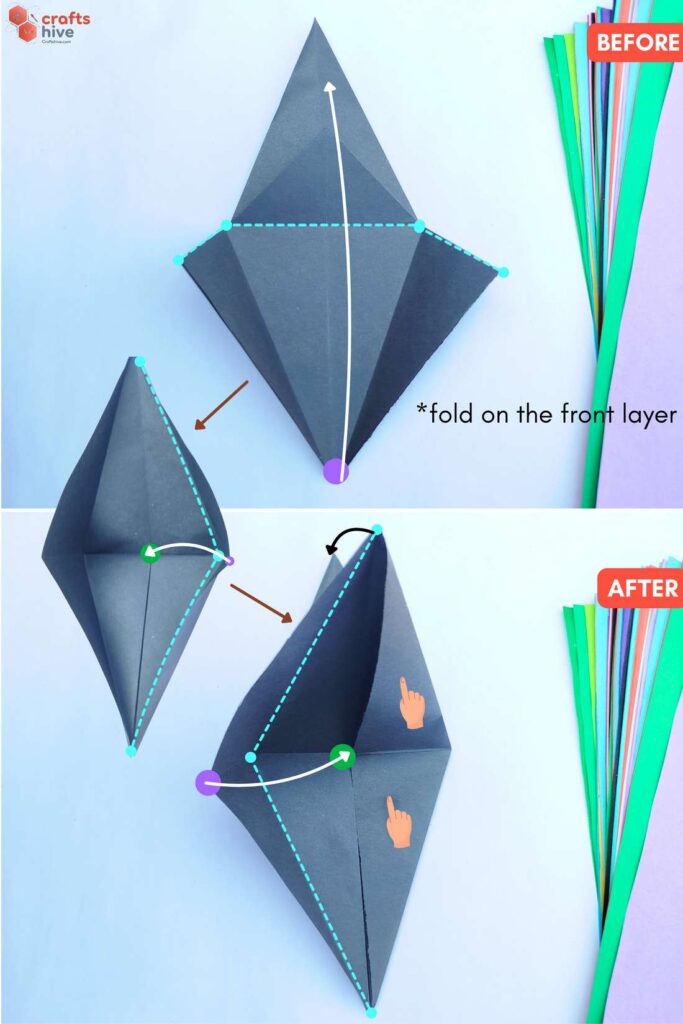
- Make another squash fold. To do so, like for the other side, open the pocket and refold about the creases produced by the intermediate folds.
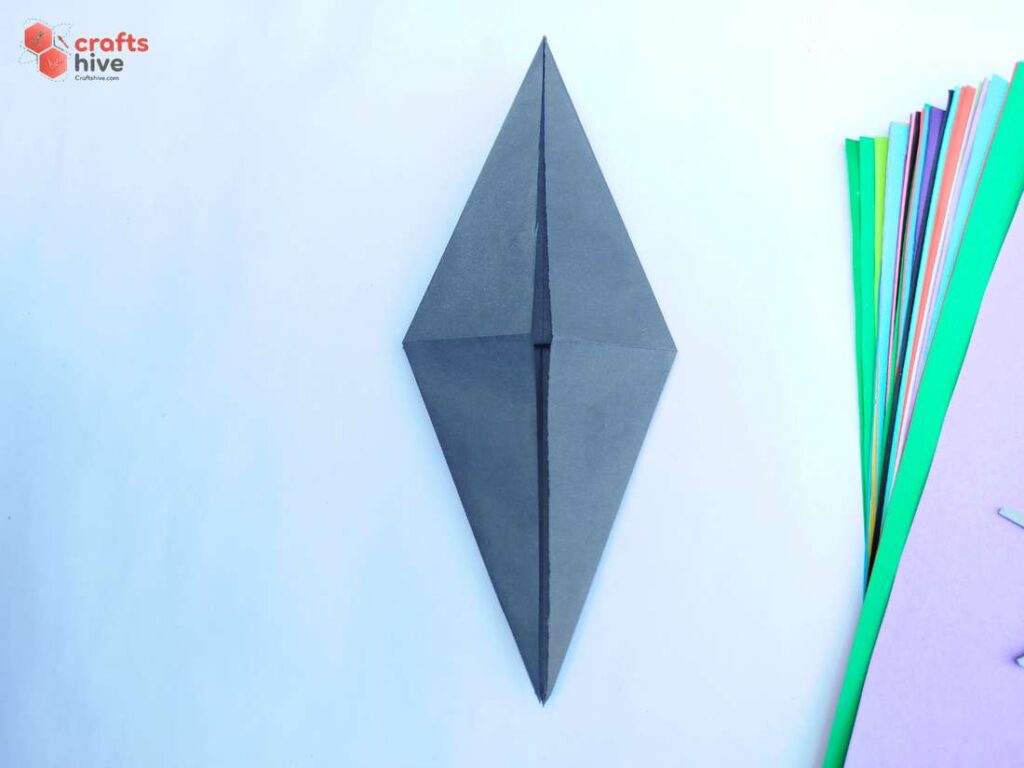
That’s it, this is how to fold an origami kite base. You can turn it into a crane, a flapping bird, Heron or even a hummingbird.
Was this Origami Tutorial Helpful? Tell us in the Comments.
Your feedback is a great way for us to improve our origami tutorials. So, share your thoughts on whether you tried this one or not, and highlight the weak points.

About "Talha"
Hey, I’m Talha, the Crafter on Craftstive.com. I love to share guides on folding cute origami models and paper crafts, and I am always ready to inspire your next craft project with my weekly craft discussions.