
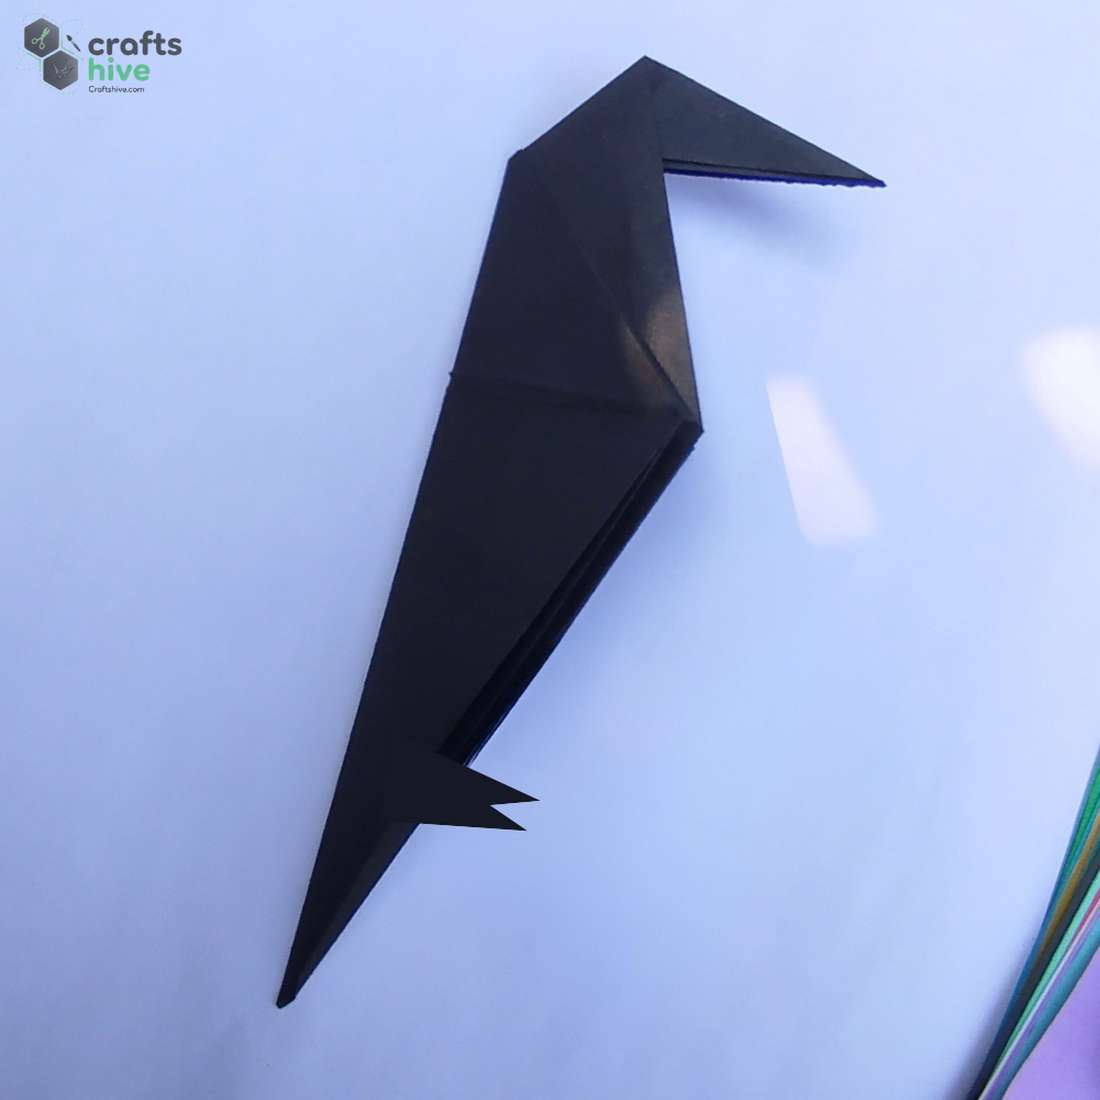
Learn how to fold an origami standing crow with these instructions for absolute beginners. This is going to be our first model requiring the origami bird base, along with three inside reverse folds.
When the feet are folded carefully, this can stand without support. Otherwise, you can correct the model later until it stands perfectly.
With that said, you can add it to your Halloween decorations along with the origami bat and spider. For the rest of the year, you can let it sit on your table as a folding memory. So, try it with me.
[ez-toc]
Origami Crow: Step-by-Step Guide
Below, I will explain the origami bird base in as much detail as I did in the separate tutorial. So, you don’t need to let yourself confuse in how to fold the square base or how I did the petal fold. That’s why I called this bird tutorial beginner-friendly. Now, let me instruct you step-by-step:
Model Type: Traditional/Pure Origami.
Folding Time: Less than 4 minutes
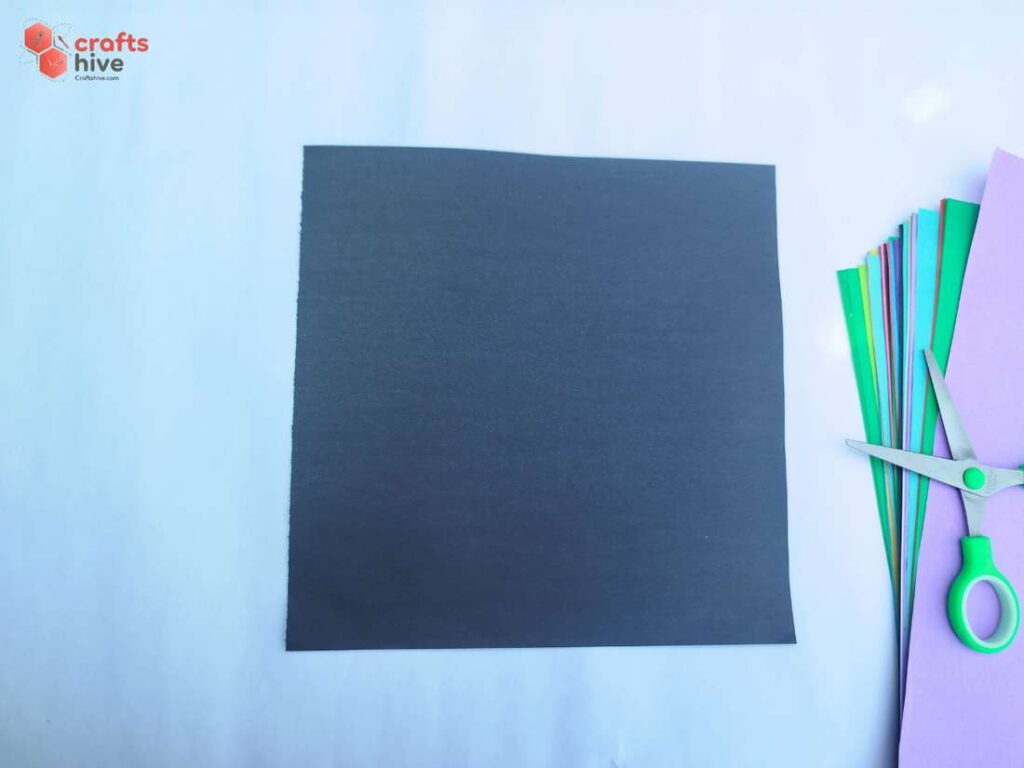
Recommended Paper: We will want the origami crow to be completely black, so I would recommend using the Tant paper. Also, the tant paper provides more structure to let the crow stand, and my favorite rough texture.
I used a 15cm by 15 square sheet of Tant paper in black
Step #1: Horizontal Half Fold
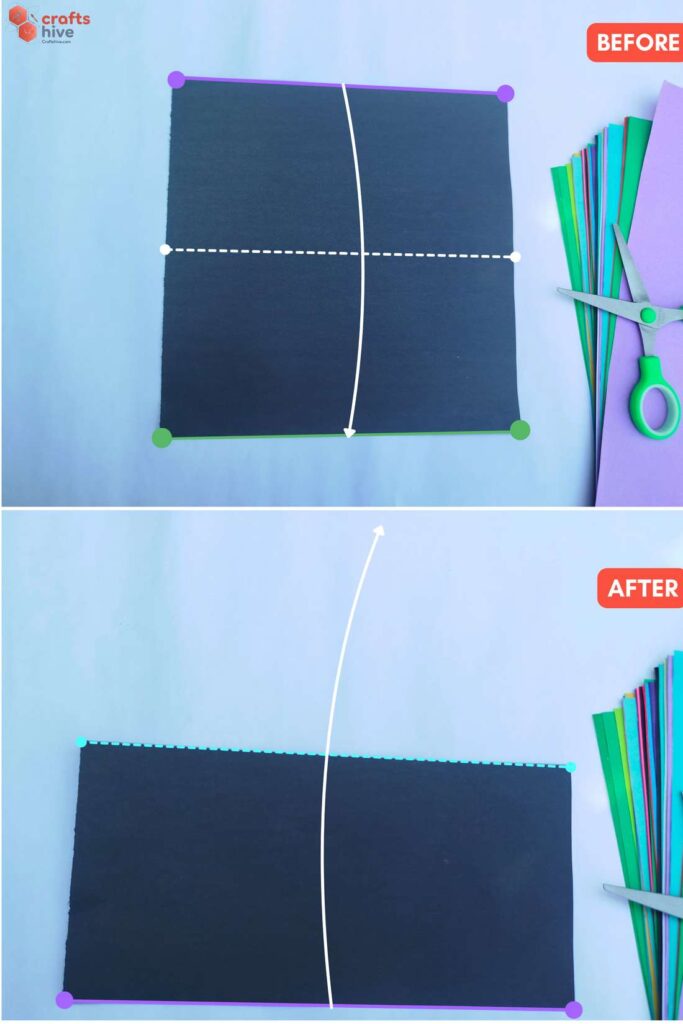
- Fold the paper in half along the horizontal, crease well, and unfold.
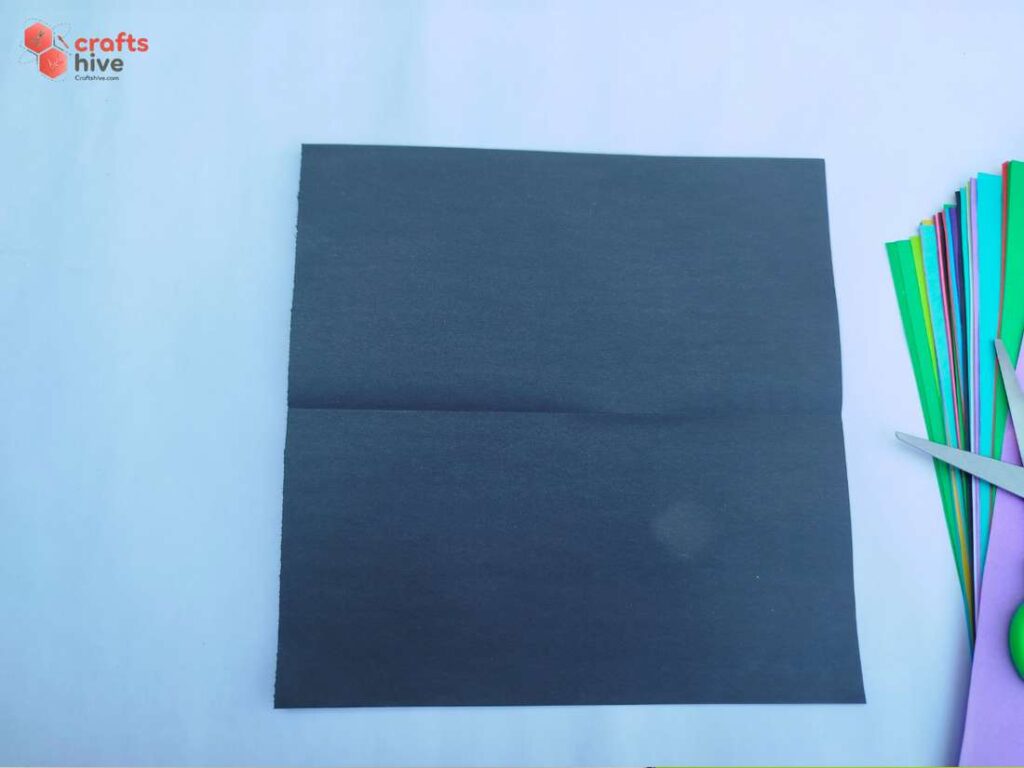
Step #2: Vertical Half Top
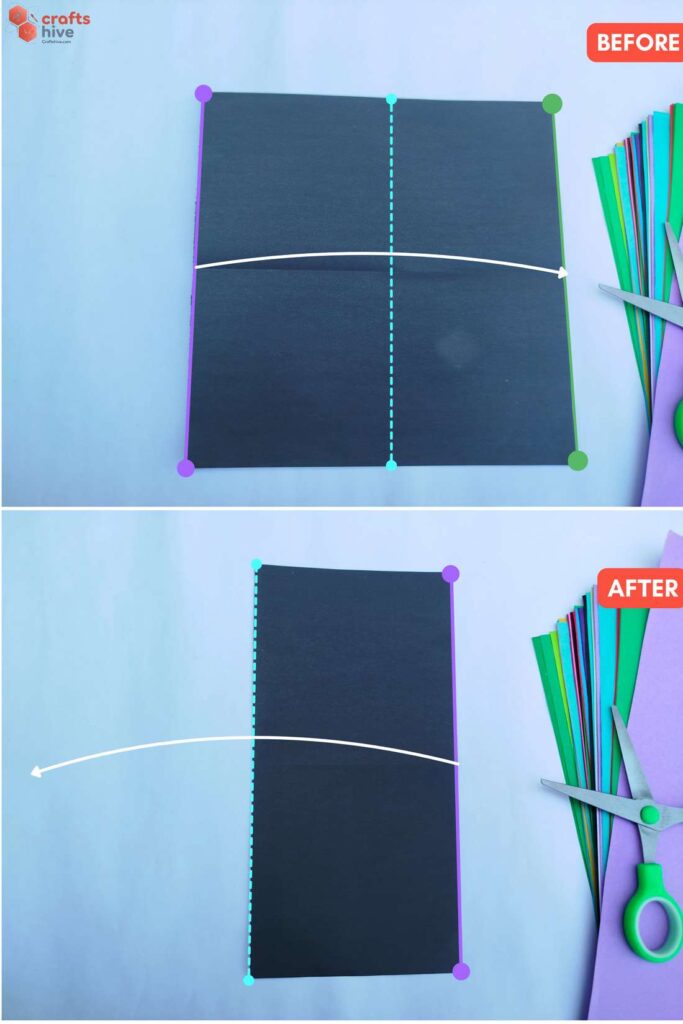
- Fold the paper in half, this time along the vertical, press the paper flat, and unfold.
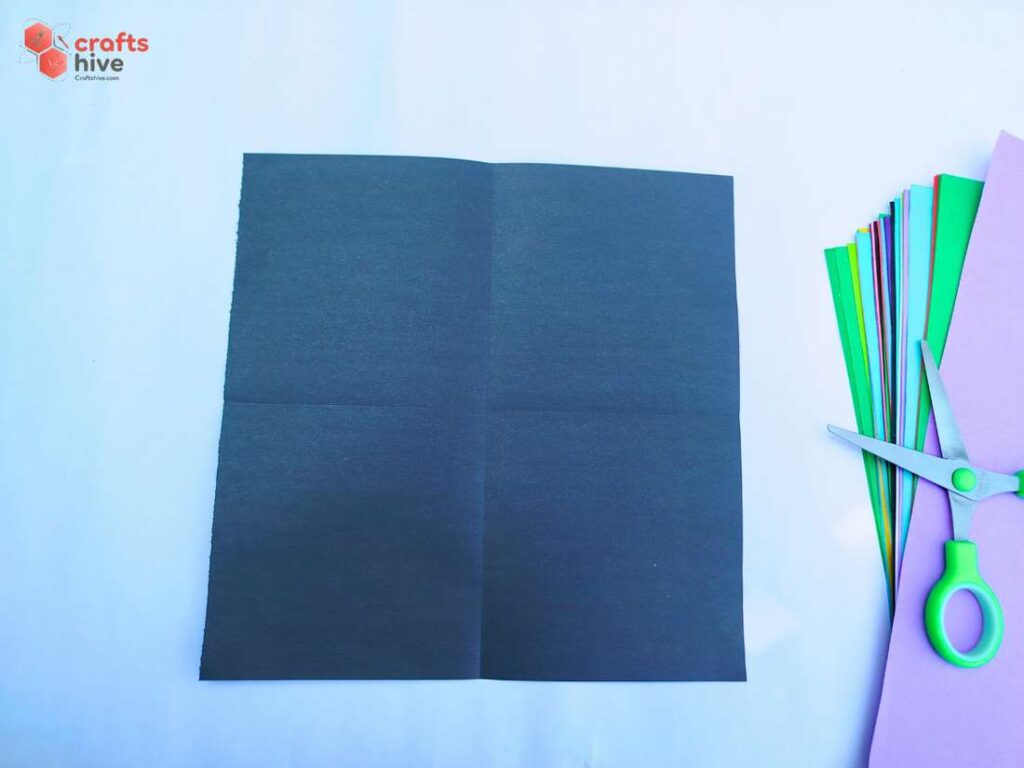
Step #3: Diagonal Folds
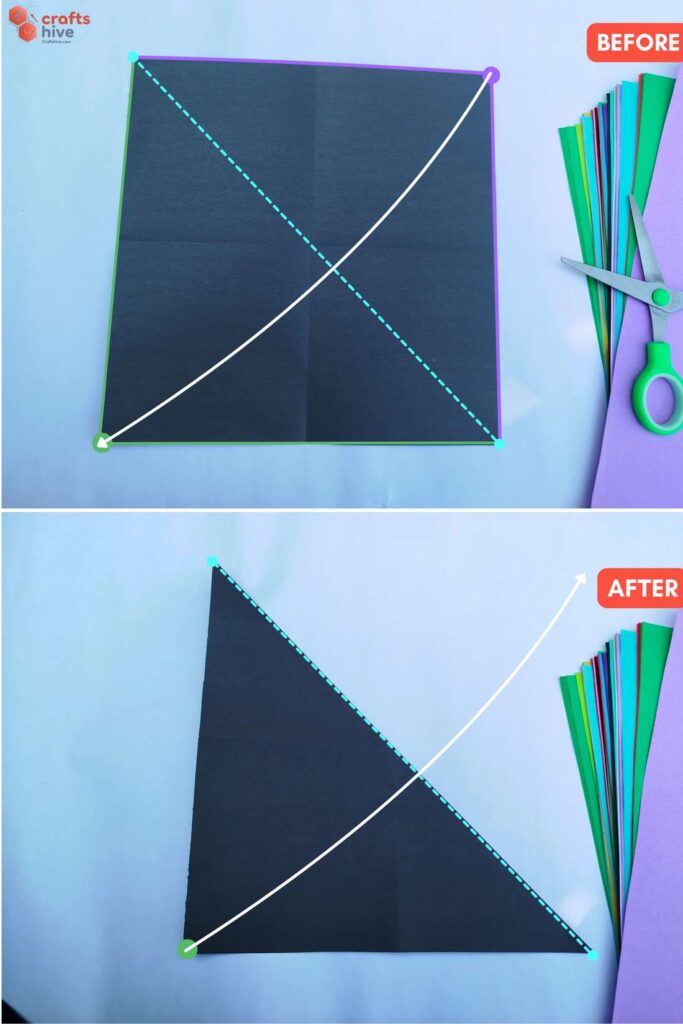
- Fold the paper in half along one of the diagonals, press the paper flat, and unfold.
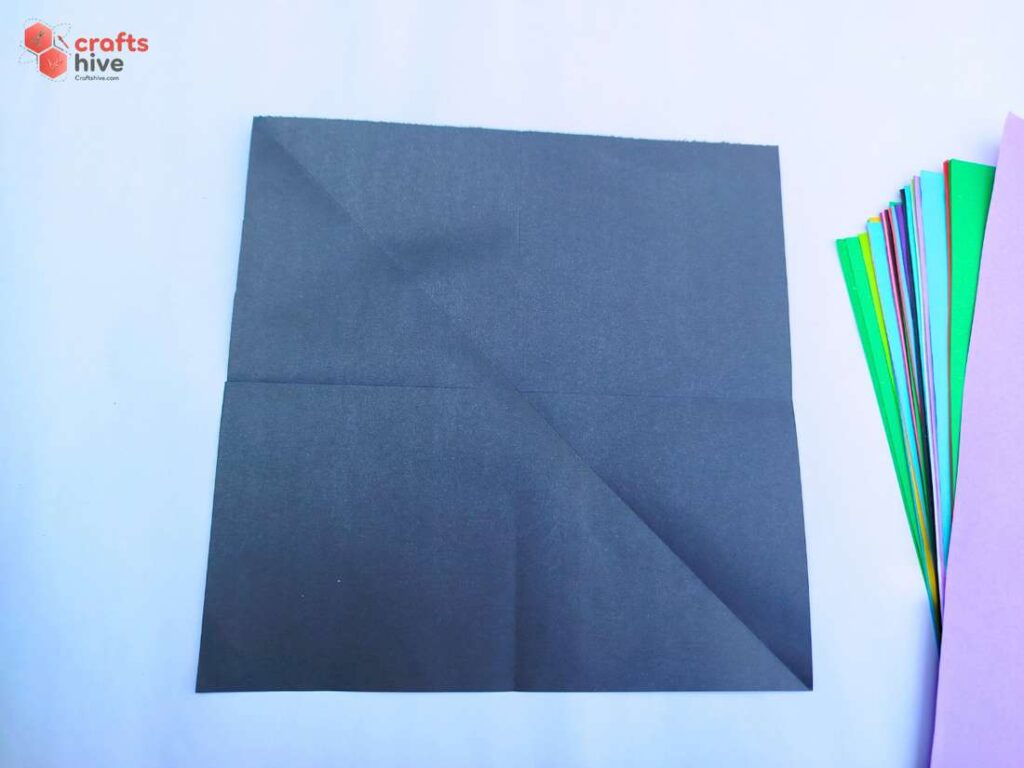
Make another diagonal fold using other corners.
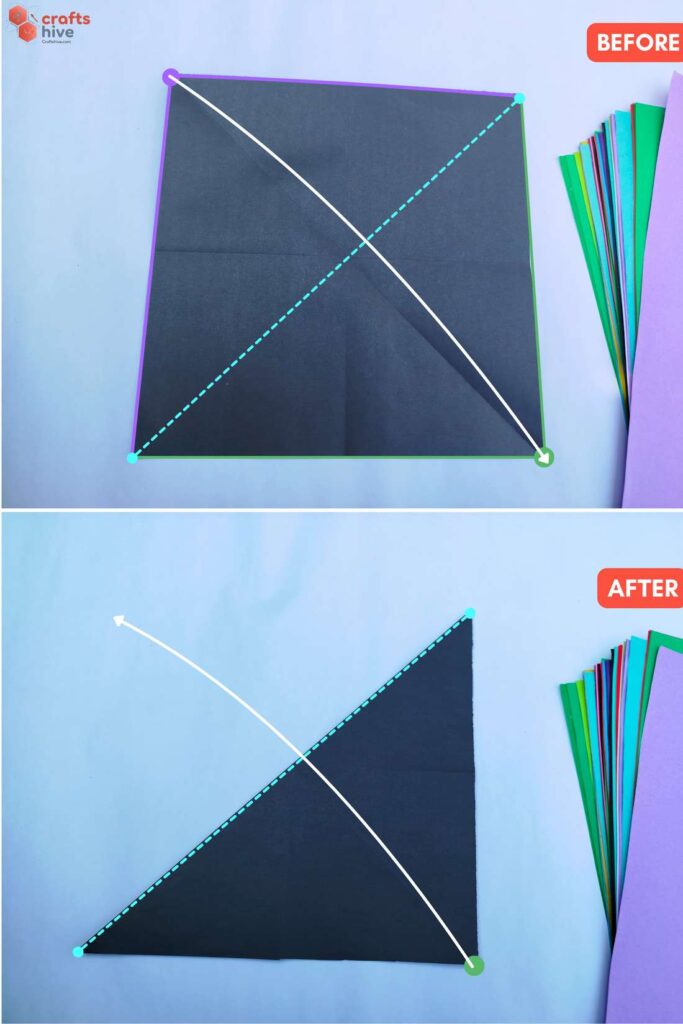
- Fold the paper in half along the creased diagonal and unfold after pressing flat.
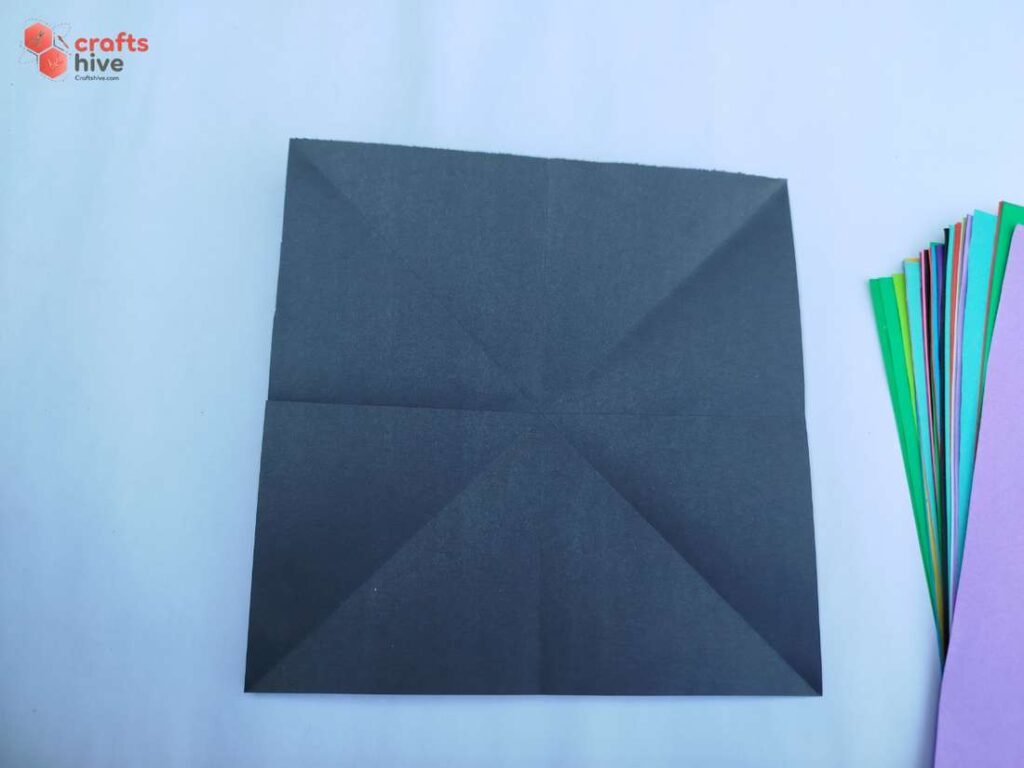
The diagonal creases form the shape ‘X.’
Step #4: Collapse Into A Square Base
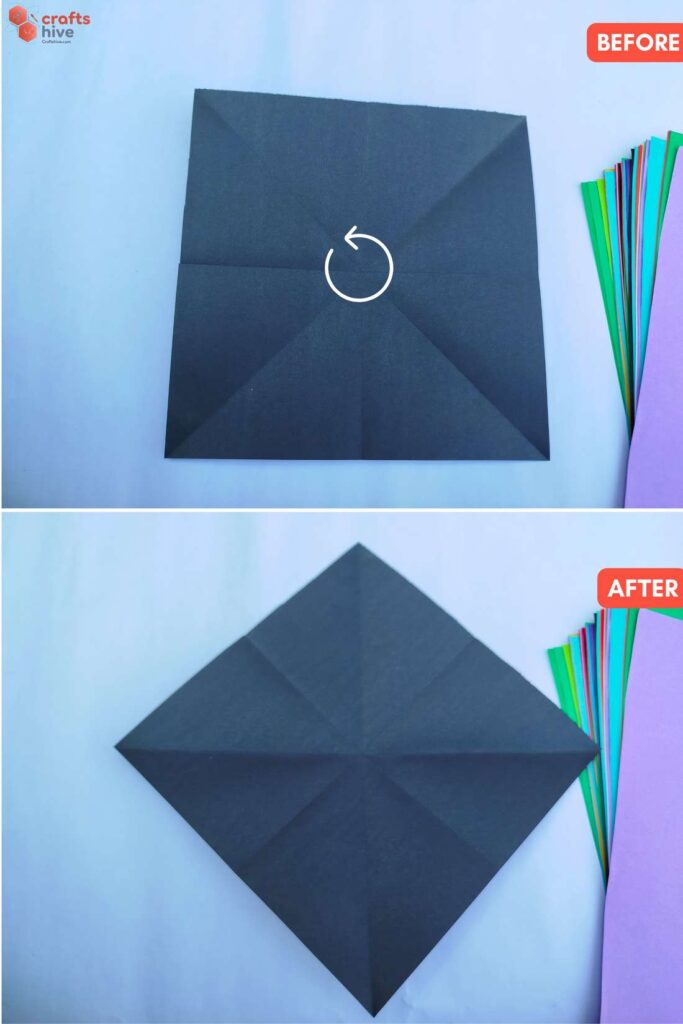
- Bring the paper into the diamond position.
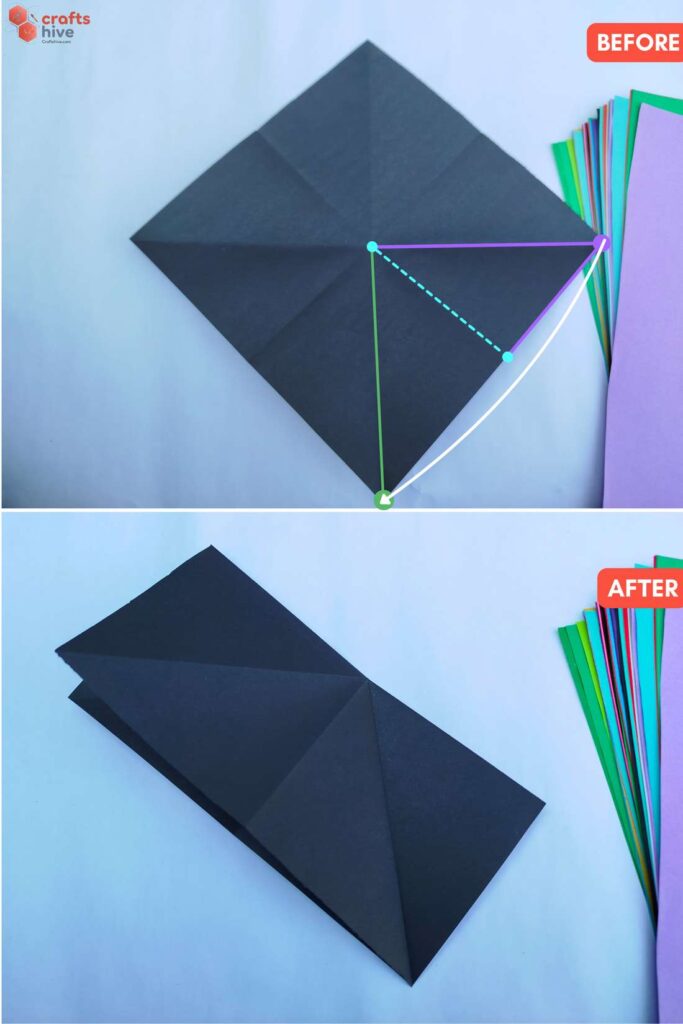
- Fold the bottom triangle of the middle right-sided diamond onto the triangle on the right side of the bottommost diamond.
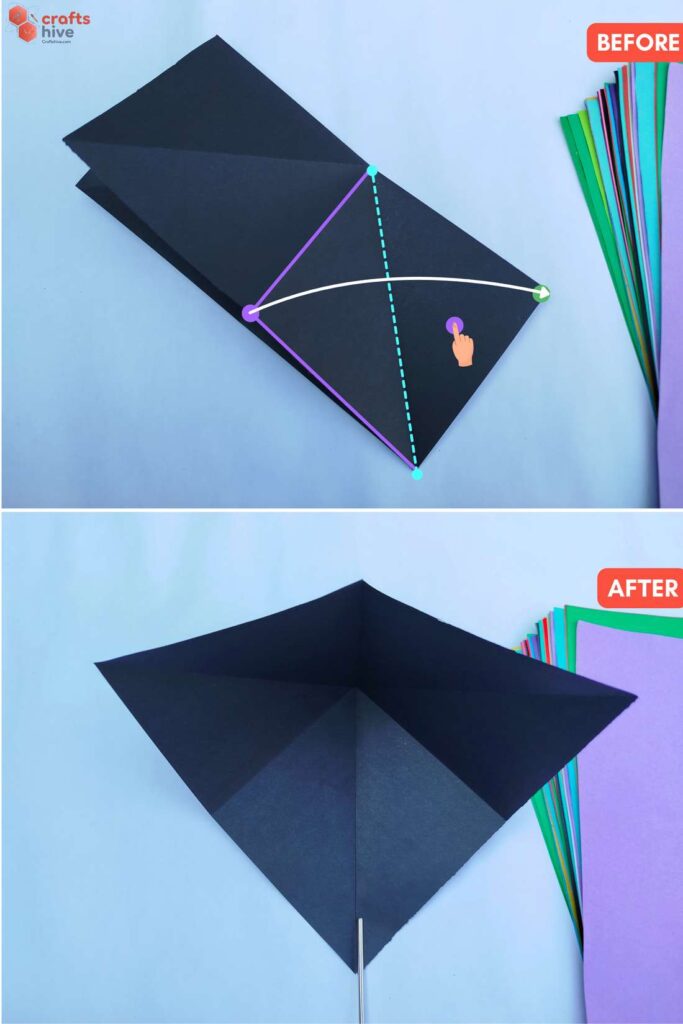
- With the folded triangle pressed, swing the left triangle of the overlapping flap onto the right-sided triangle. Press the paper flat.
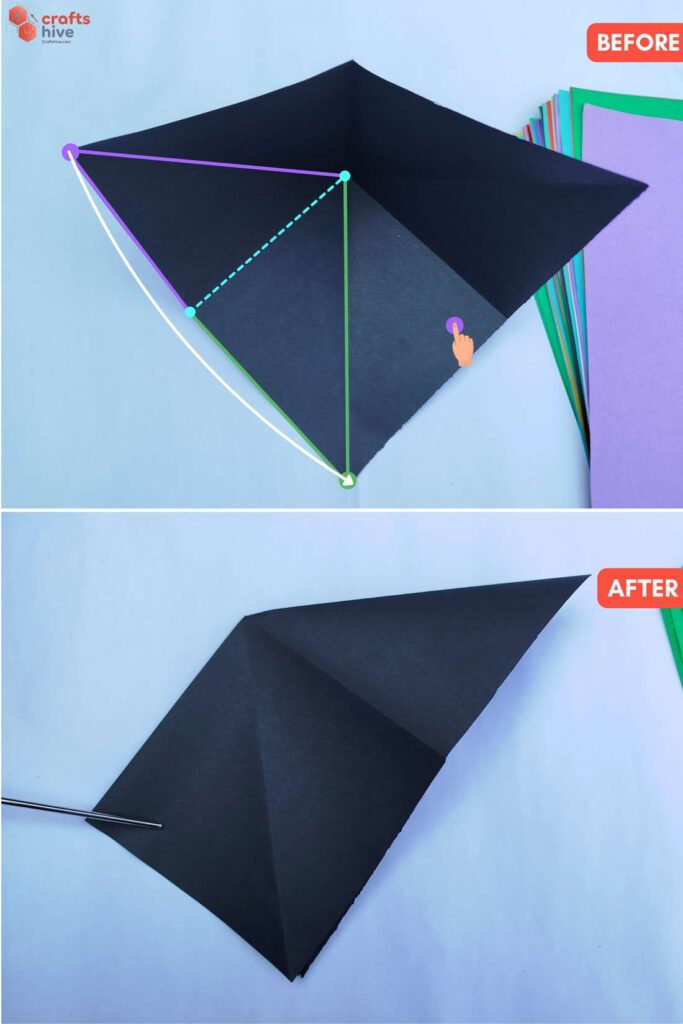
- Fold the left corner of the lifted flap onto the bottom corner.
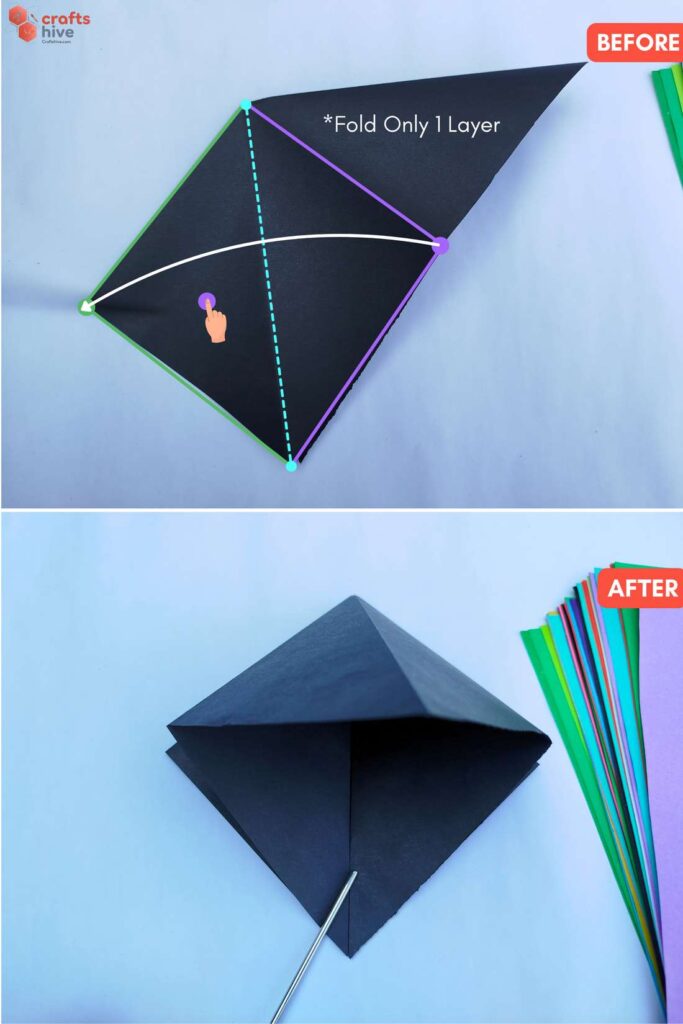
- Holding only one layer, fold the right-sided triangle onto the left triangle like above.
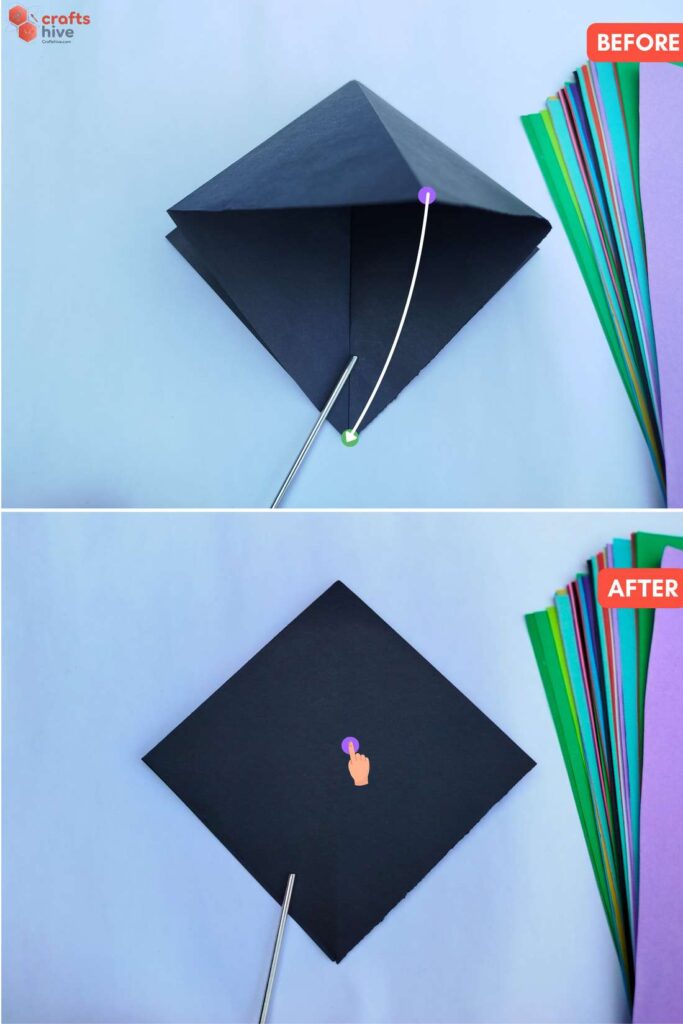
- Press the whole lifted flap down onto the diamond. Then press the whole square base down firmly to secure the creases.
Step #5: Kite Folds for Squash Fold
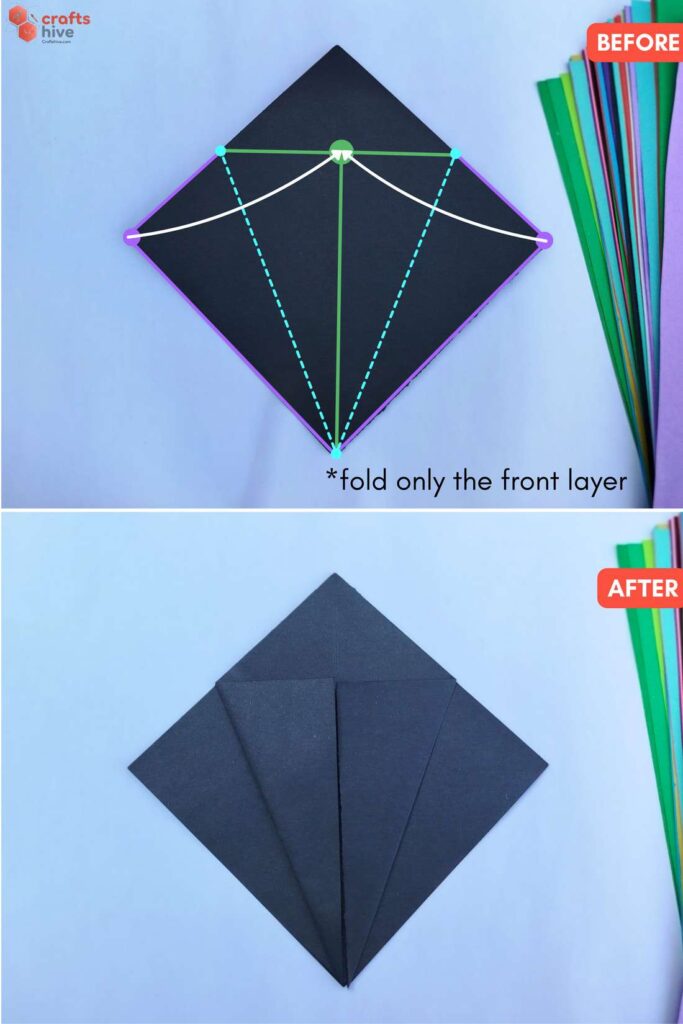
- Fold both straight corners of this top onto the middle line and press the paper flat.
Step #6: Mountain Fold for Squash Fold
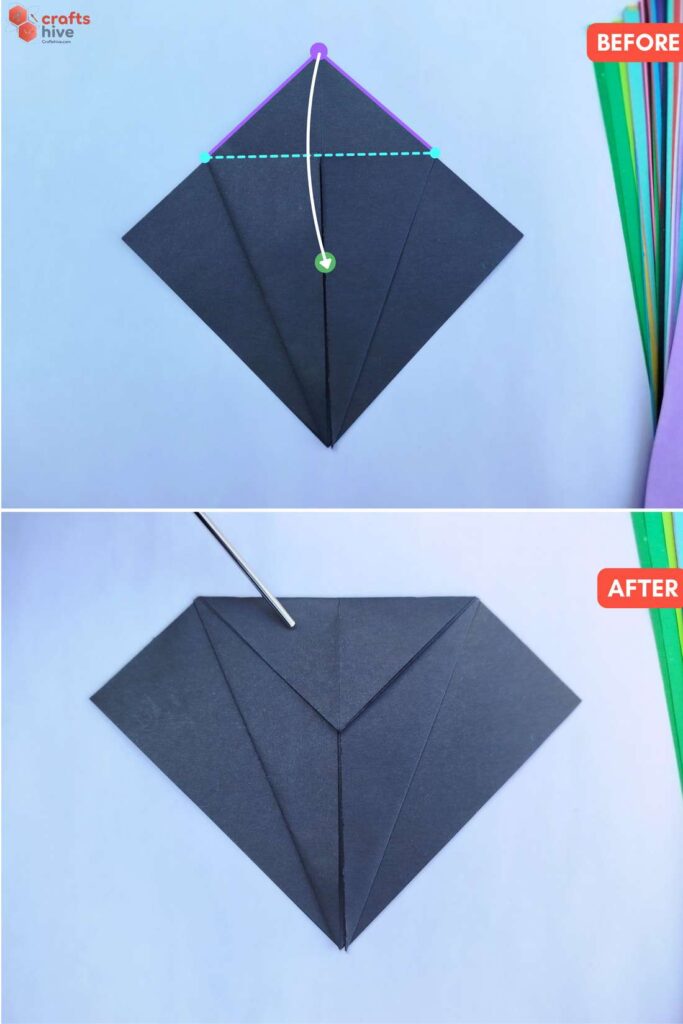
- Mountain-fold the top corner of the base along the top edges of the previous kite folds. Because this is the closed side, both layers will fold together.
Step #7: Turn
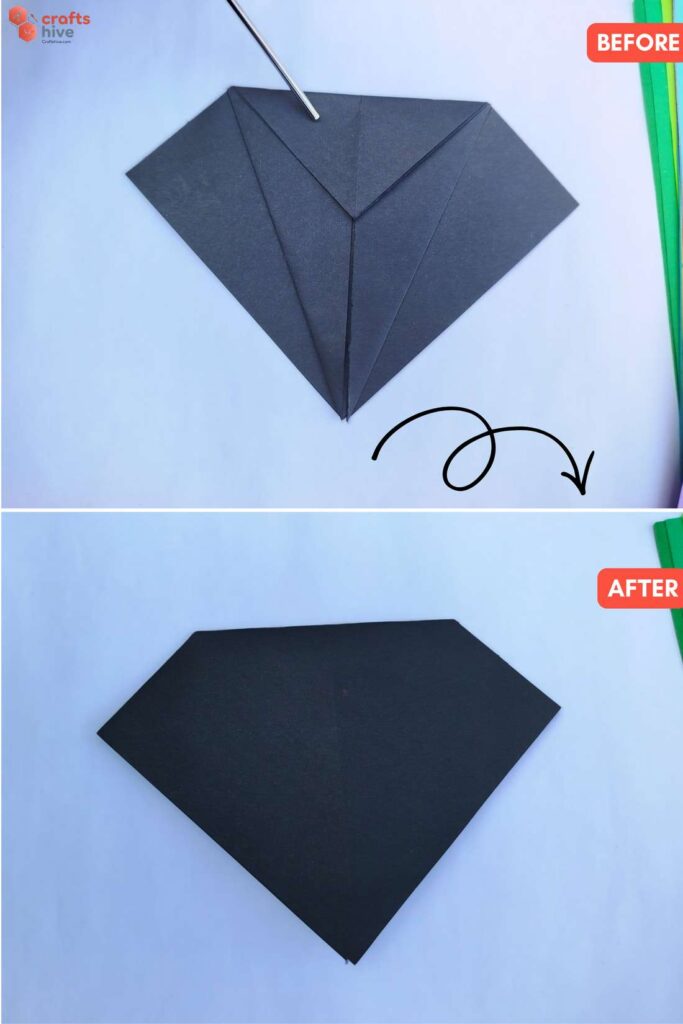
- Turn the square base over.
Step #8: Side Fold for Petal Fold
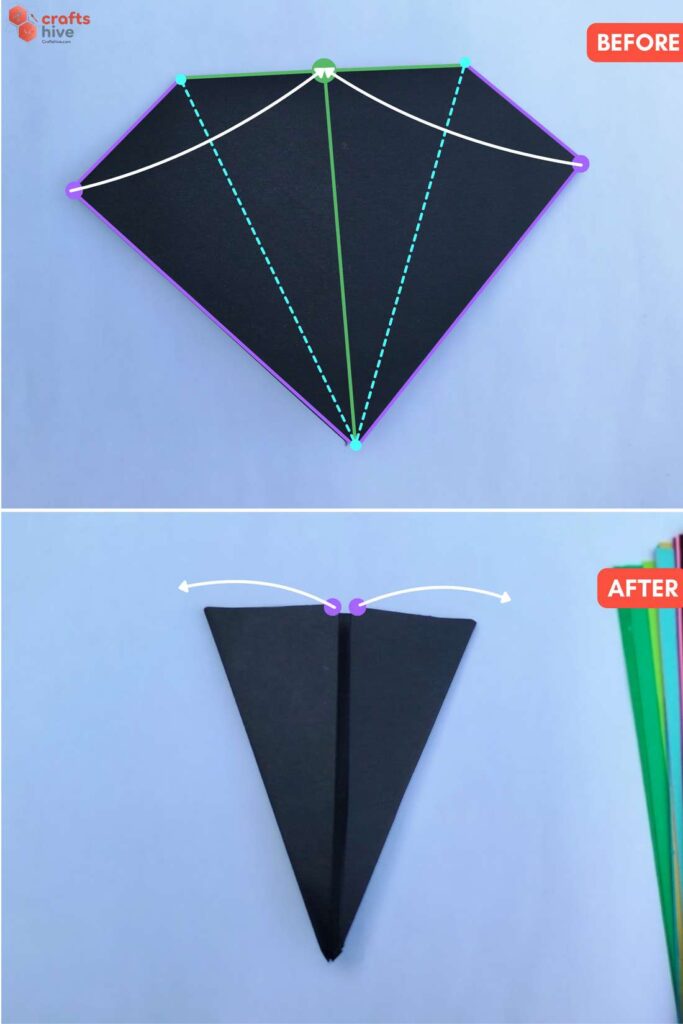
- Fold the middle left corners of this layer to the centre line and press the paper flat.
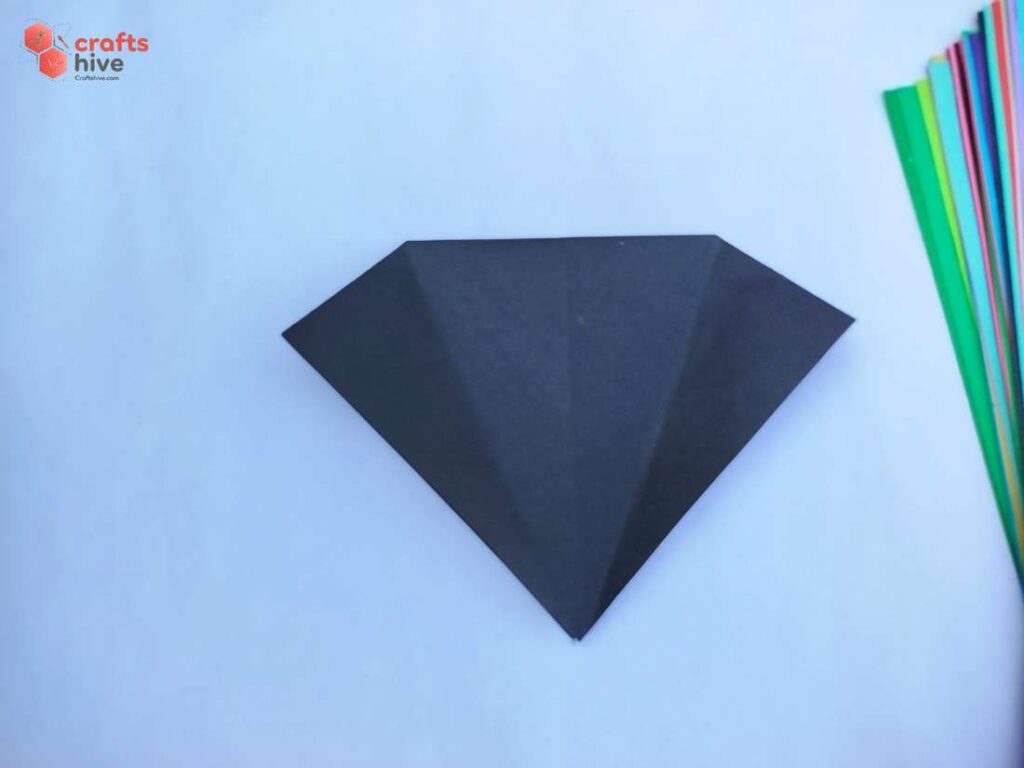
- Unfold these kite folds.
Step #9: Petal Fold (Squash)
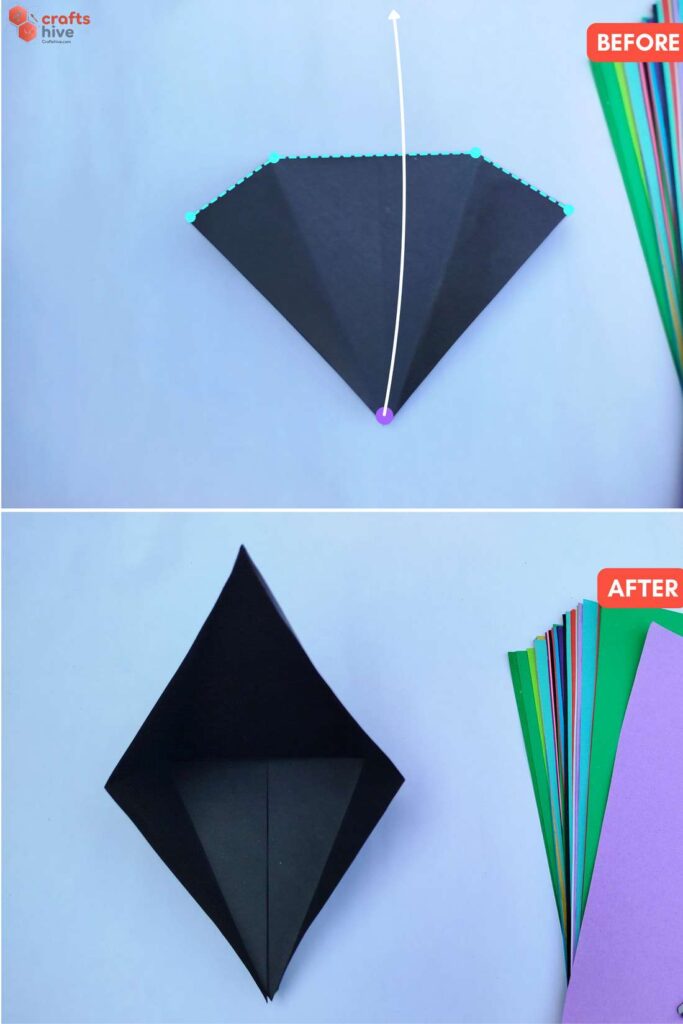
- Fold the bottom corner of the front layer of the pocket upward as far as you can.
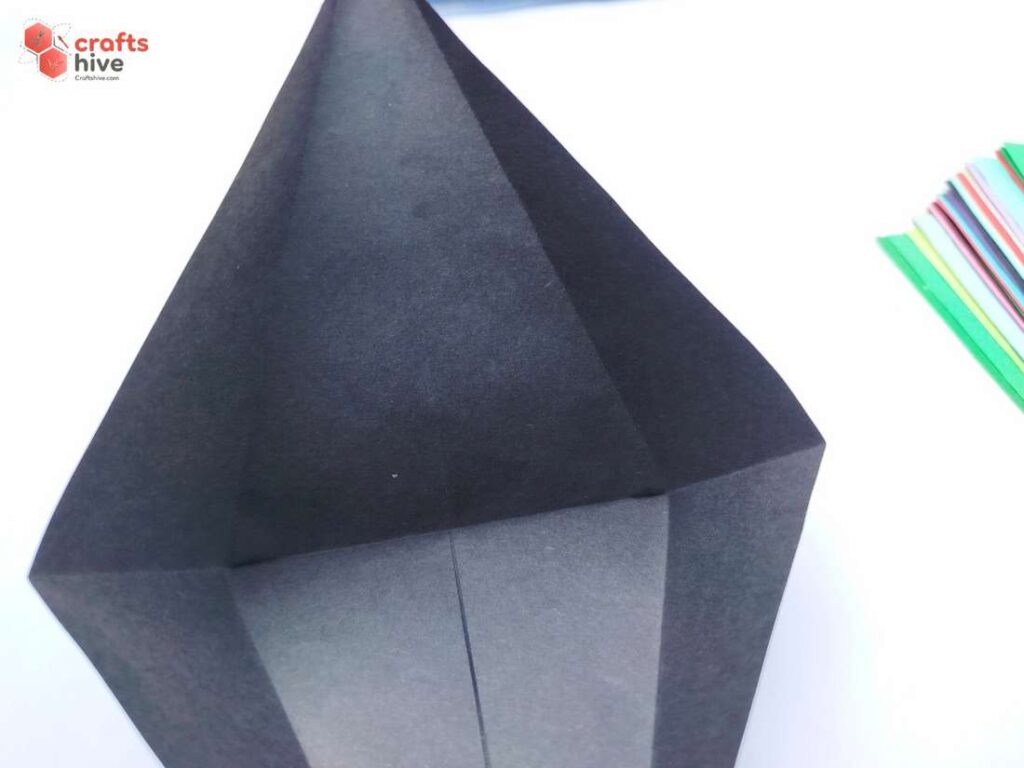
- Notice the creases about which you will fold the edges (reverse the fold).
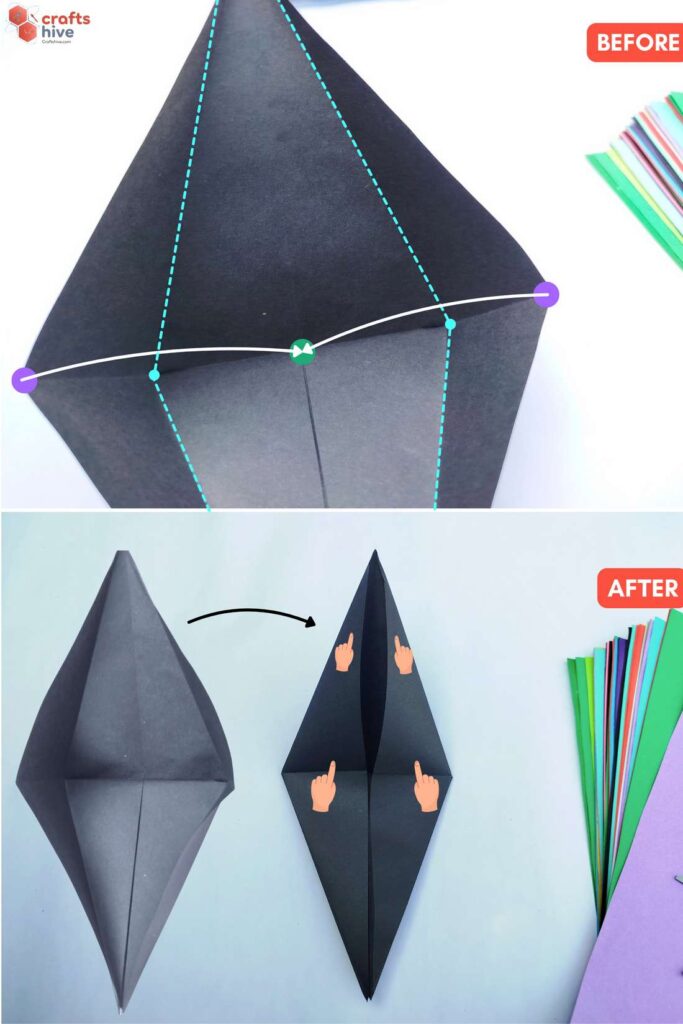
- Fold the middle left and right corners of the edges of this opened pocket onto the middle line and press the paper flat from the top corner down to the bottom.
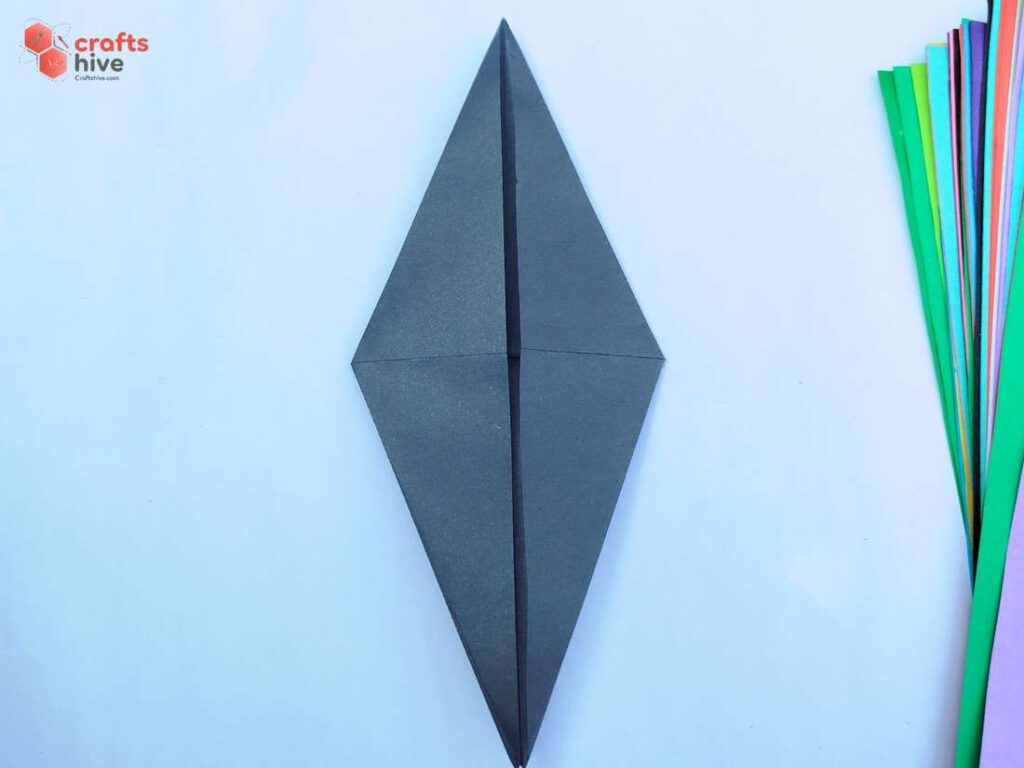
- This finishes the squash fold for one side.
Step #10: Turn
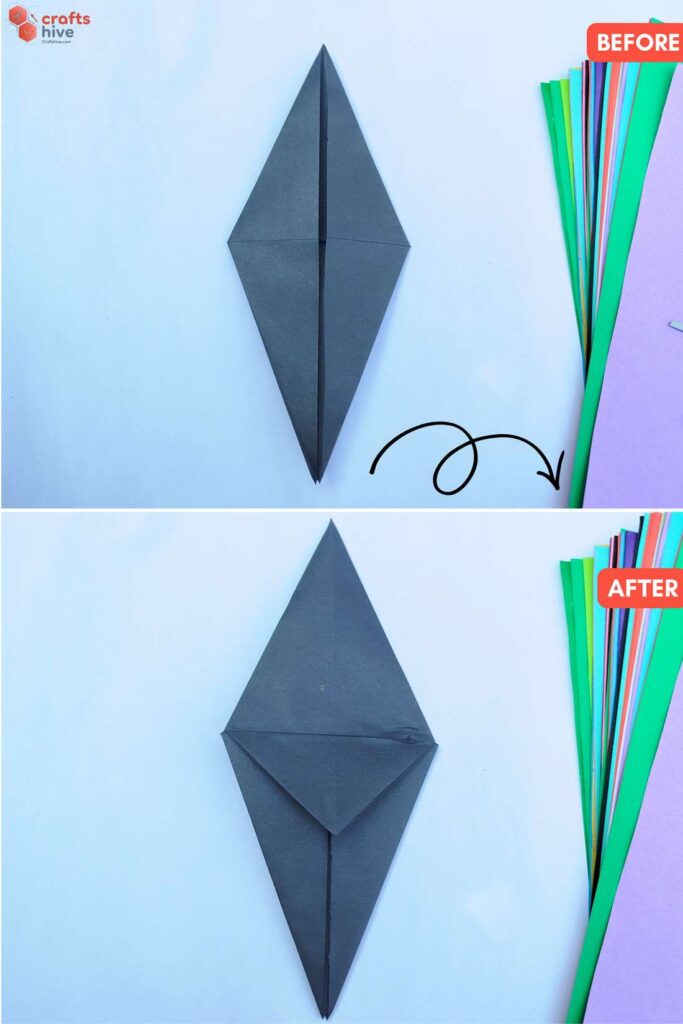
- Turn the model with one squash fold over to the other side.
Step #11: Unfold
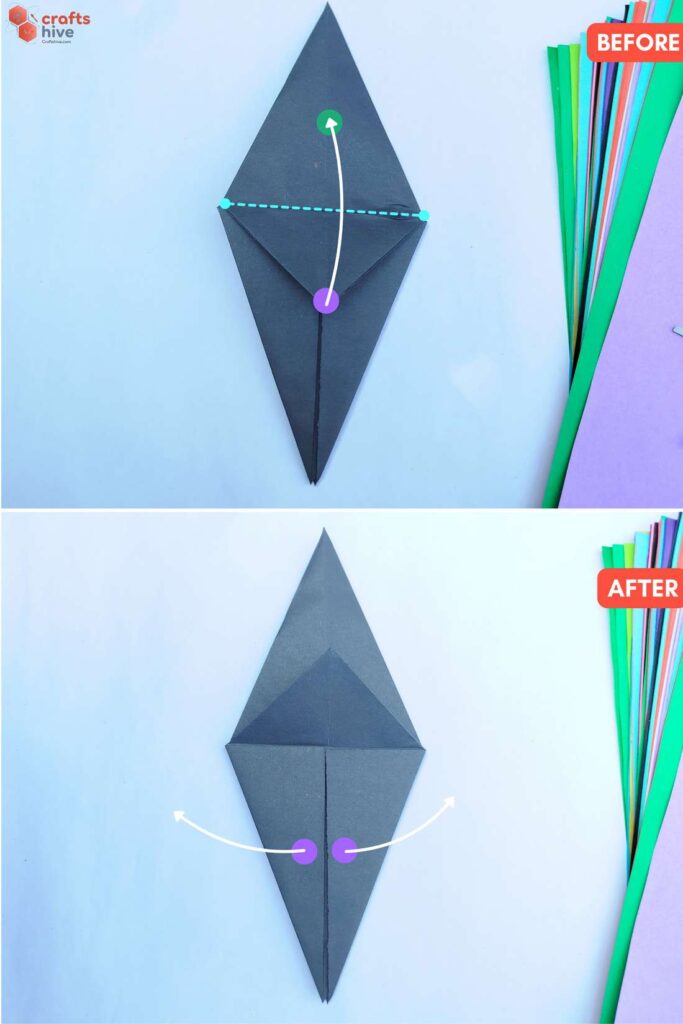
- Reverse the Mountain Fold to the Valley Fold.
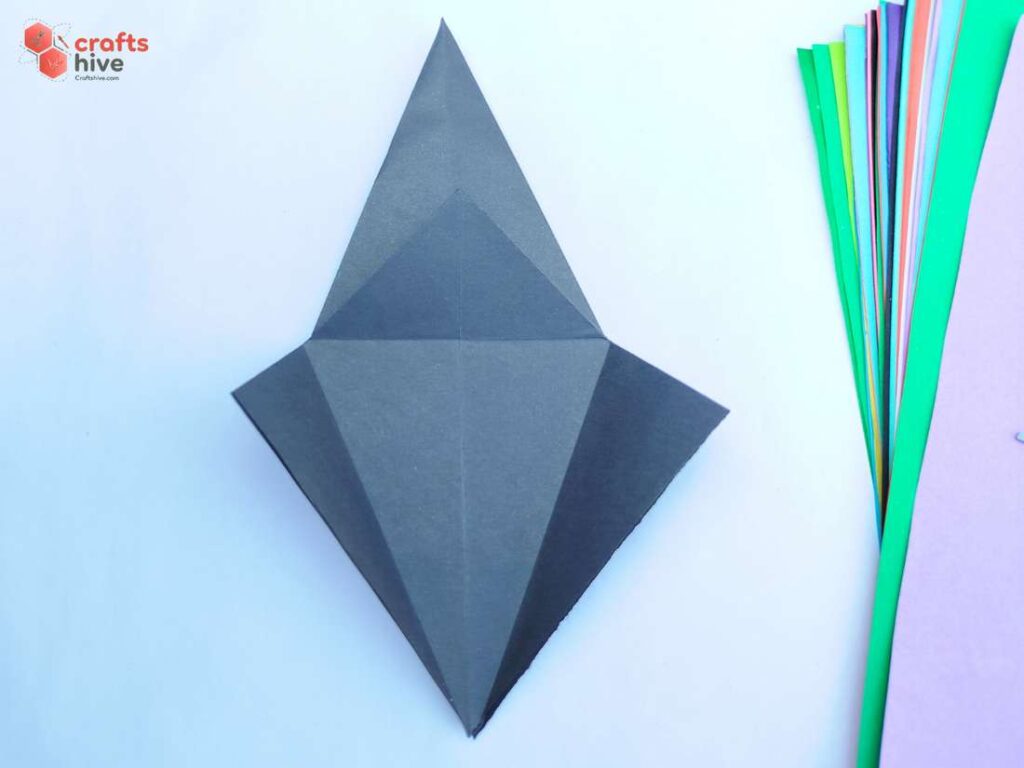
- Open the flaps of the kite folds.
Step #12: Petal Fold
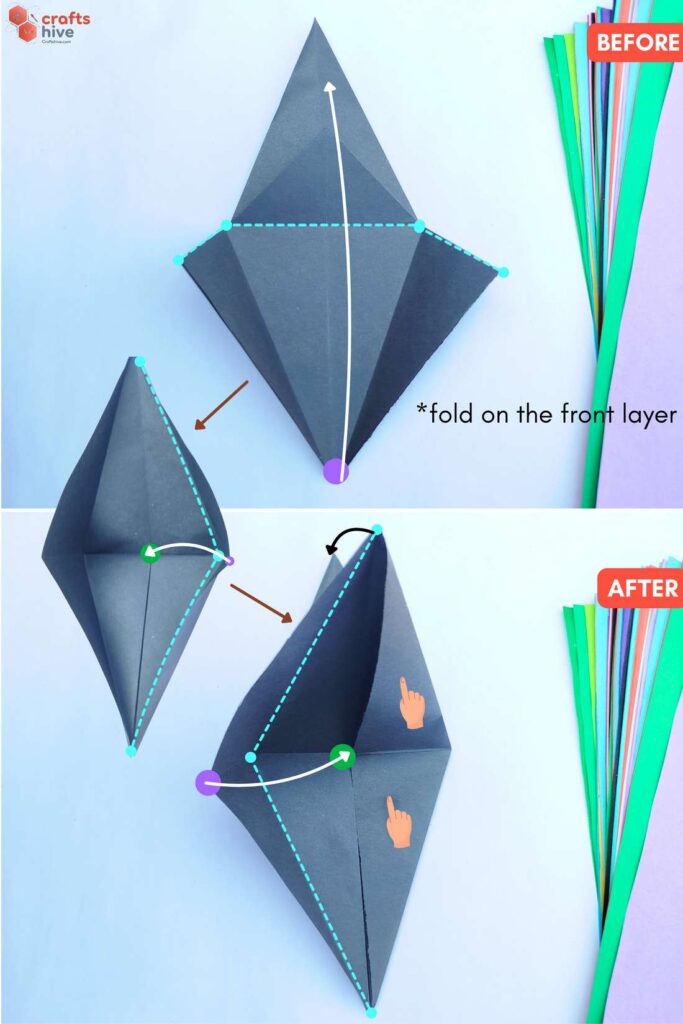
- Make another squash fold. To do so, like for the other side, open the pocket and refold about the creases produced by the intermediate folds.
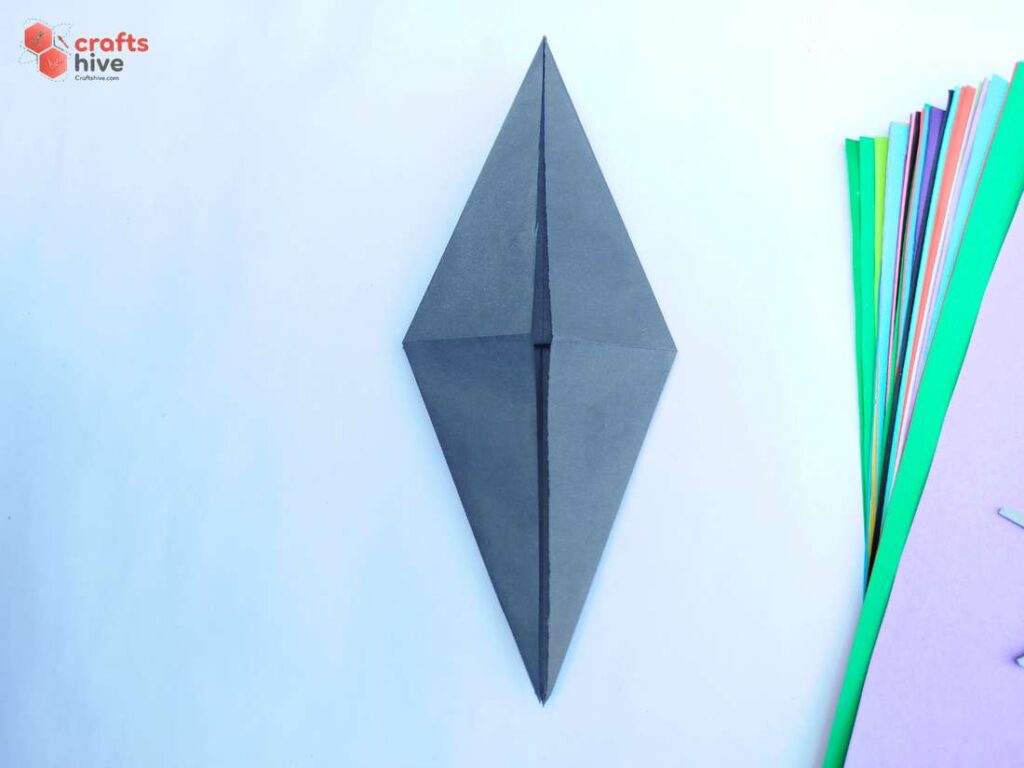
Step #13: Intermediate Folds for the Feet
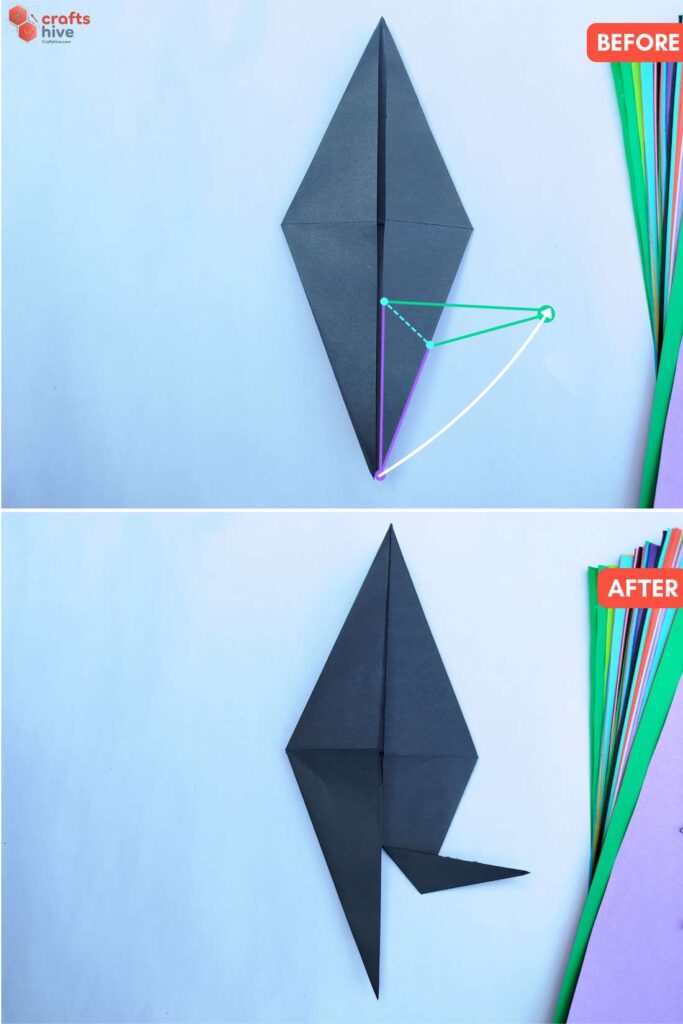
- Fold the bottom right corner of the base upward to the right so that the top edge of the folding flap is parallel to the middle creases. Press the paper flat afterwards to make a crease.
Note: While the feet fold is done to taste, traditionally, the crow’s feet must be shorter than mine so that the crow can stand. I actually exaggerated the fold to better show off.
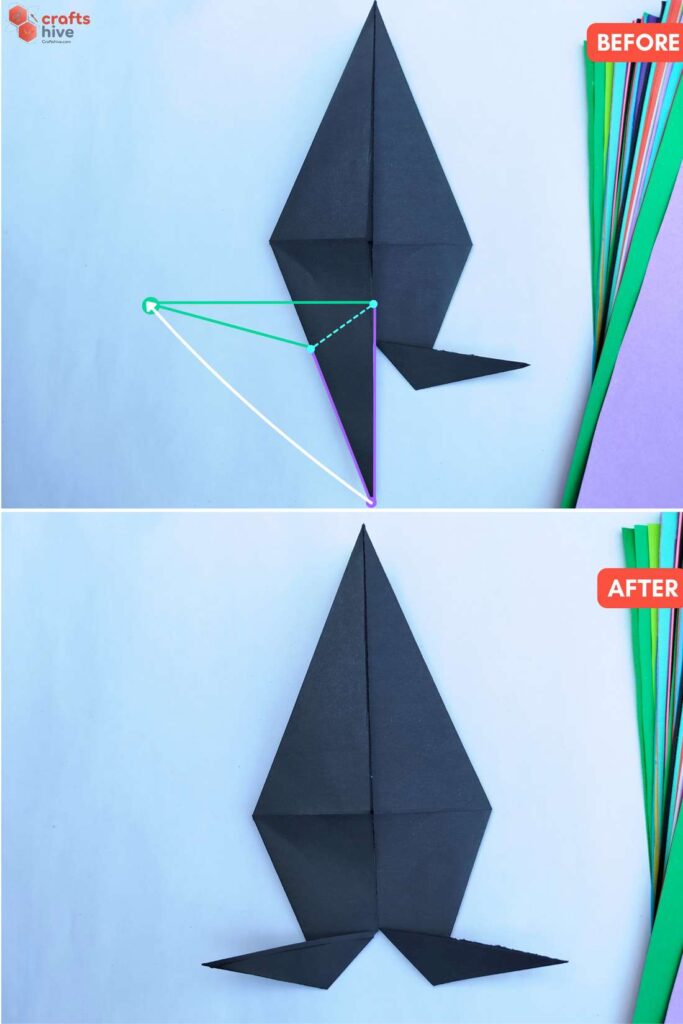
- Fold the bottom of left flap to the left as much as you folded the right flap and press the paper flat.
Step #14: Unfold
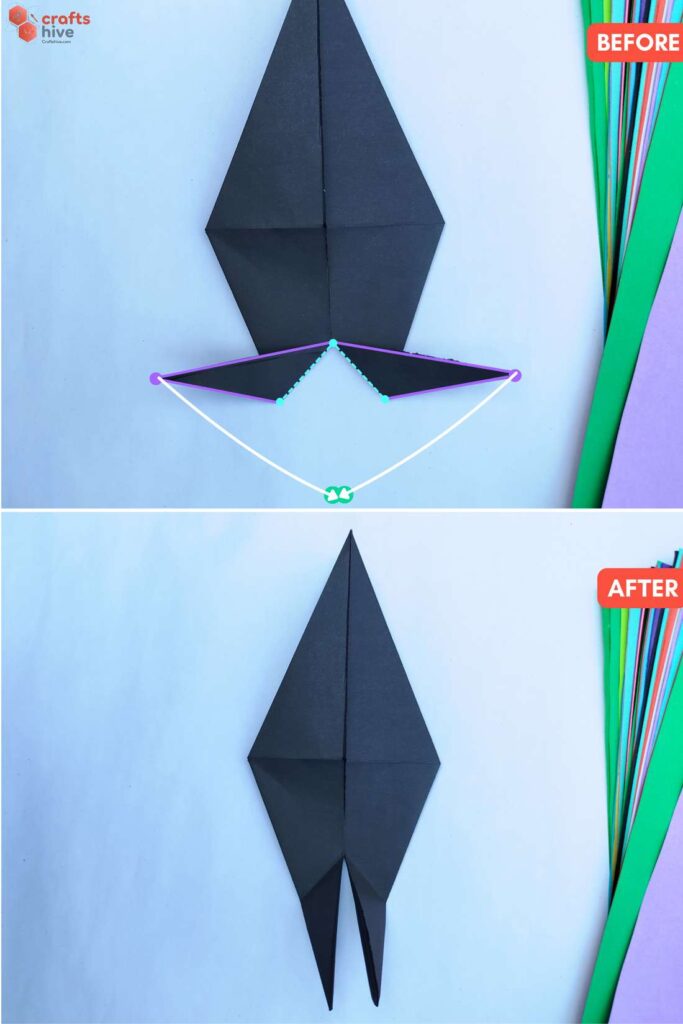
- Undo both the foot folds.
Step #15: Book Fold
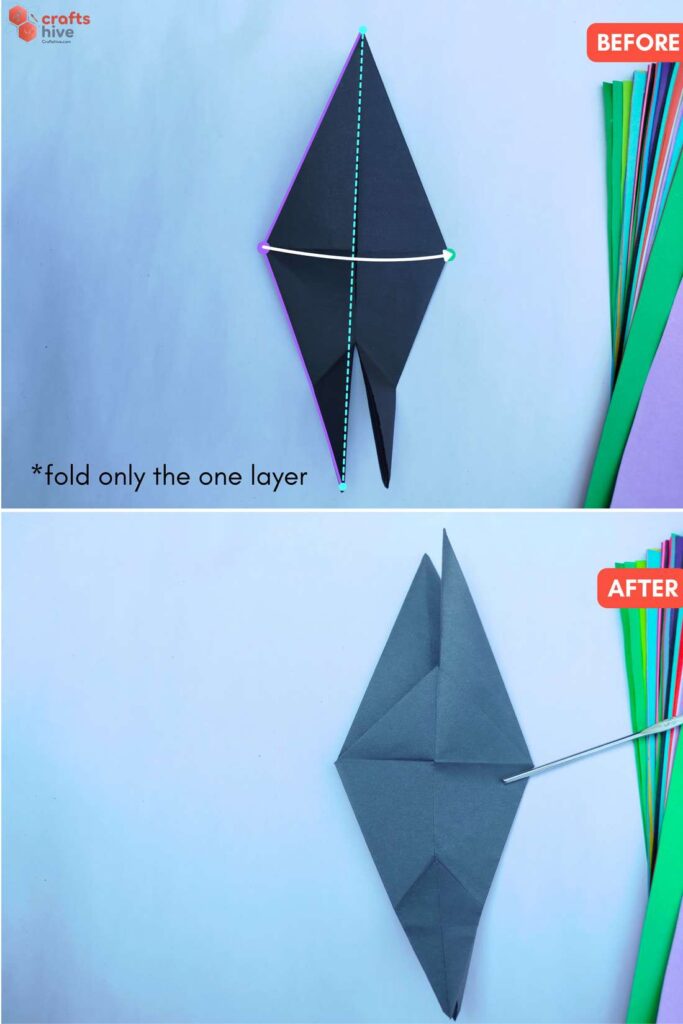
- Book Fold the left of the bird base onto the right, holding only 1 layer.
Step #16: Reverse the Fold
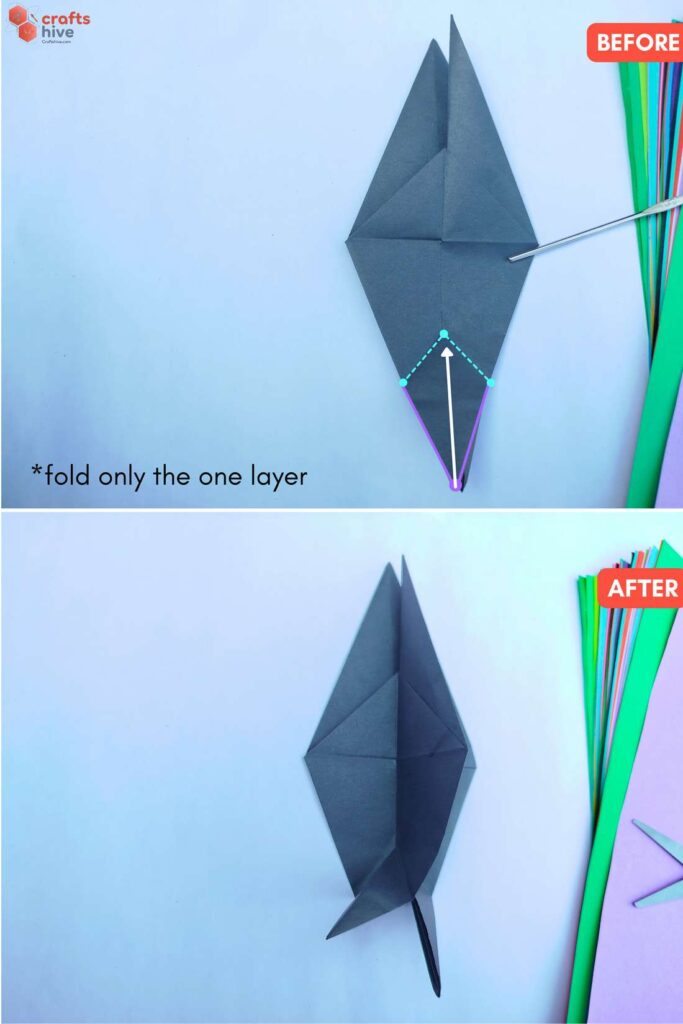
- Make an inside reverse fold by making a Half-Finished Valley Fold with the bottom corner of the front layer along the creases made by the foot fold.
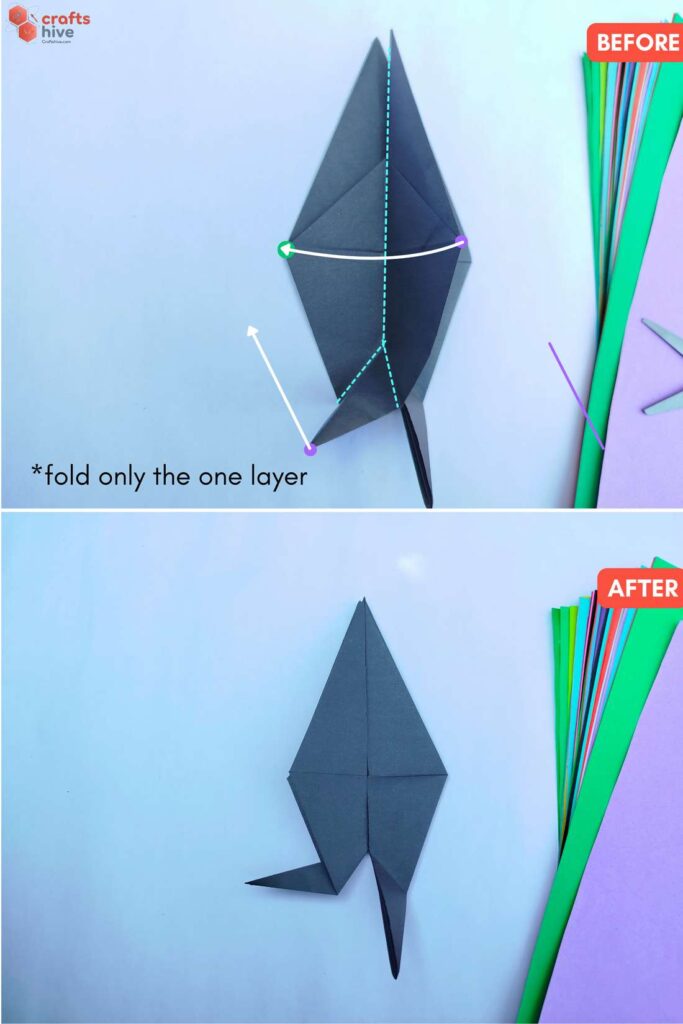
- Undo the previous Book Fold. This finished the reverse fold.
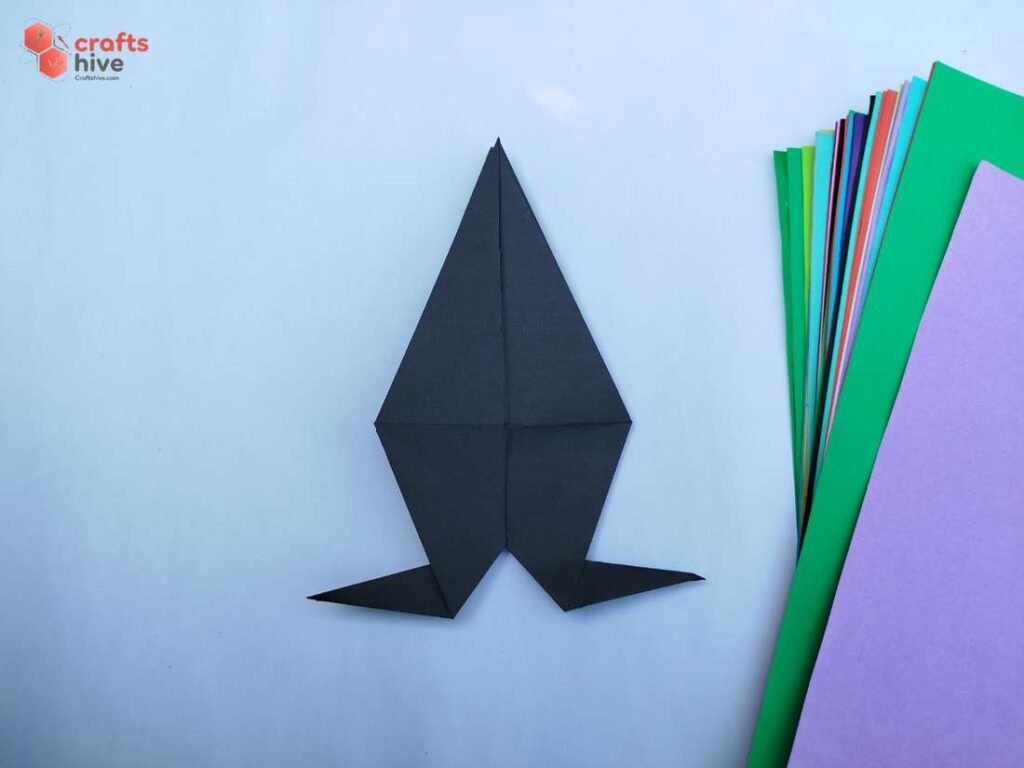
- Book Fold the right side, make an inside reverse.
Step #17: Mountain Fold
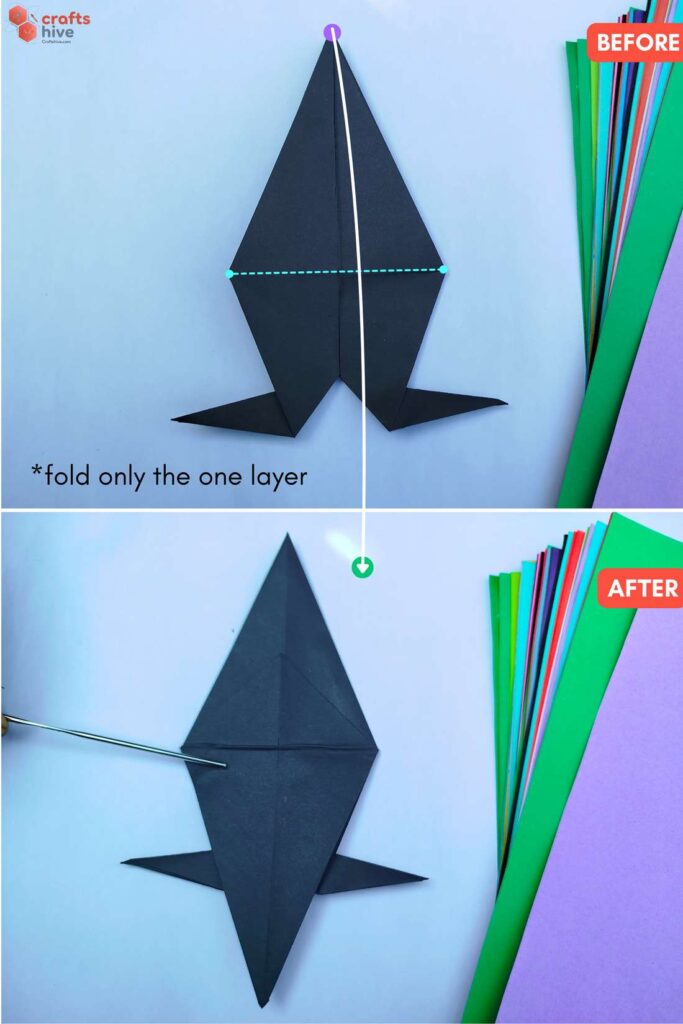
- Mountain Fold the top corner of the front layer along the middle creases all the way to the bottom.
Step #18: Fold in Half
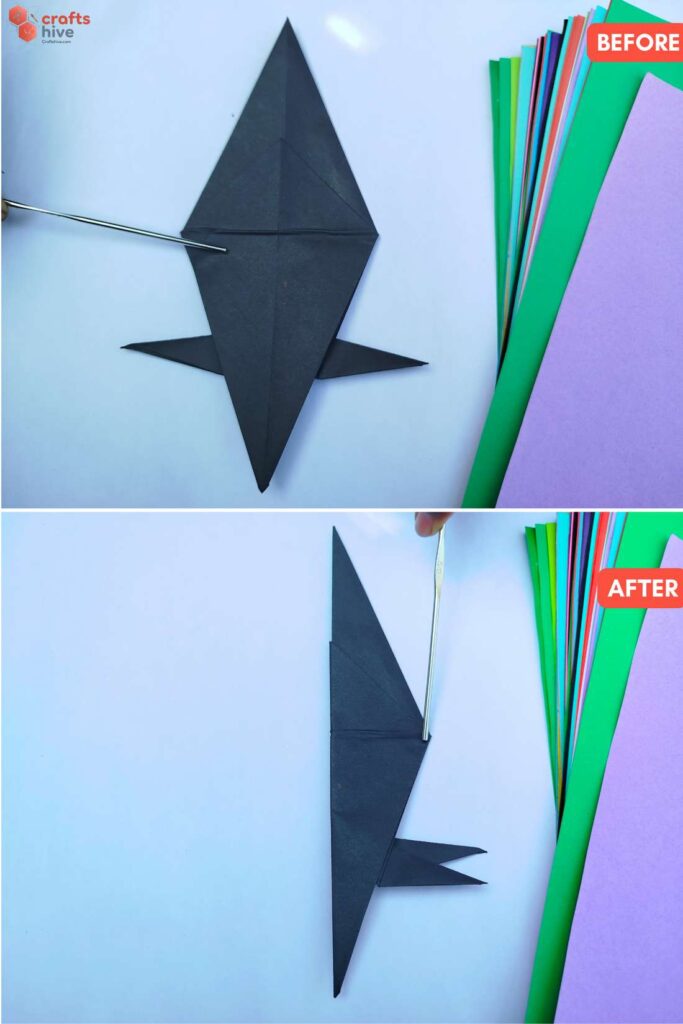
- Make an inside half fold.
Step #18: Fold for the Head
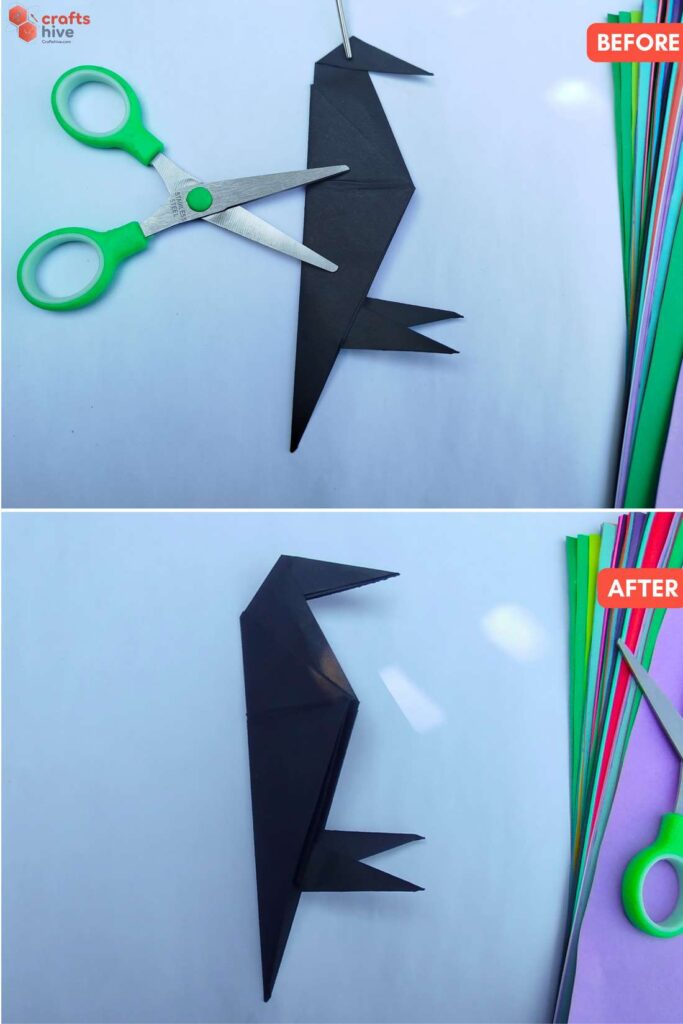
- Fold the top corner downward to the right as much as you please and make an inside reverse fold. This will make the head of the crow. Try to keep it longer.
Finished
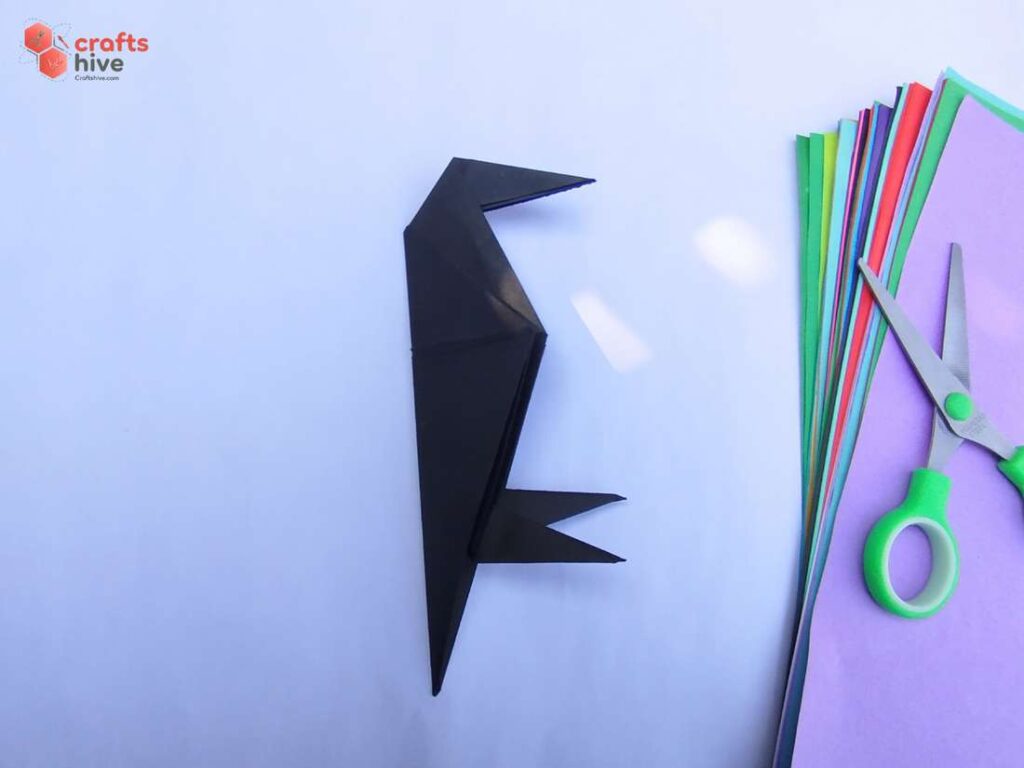
That’s it! Here is how to fold an origami crow. Mine has a little odd feet because I wanted to try something funny 🙃. You can adjust it in your remake.
Was this Origami Tutorial Helpful? Tell us in the Comments.
Your feedback is a great way for us to improve our origami tutorials. So, share your thoughts on whether you tried this one or not, and highlight the weak points.

About "Talha"
Hey, I’m Talha, the Crafter on Craftstive.com. I love to share guides on folding cute origami models and paper crafts, and I am always ready to inspire your next craft project with my weekly craft discussions.