
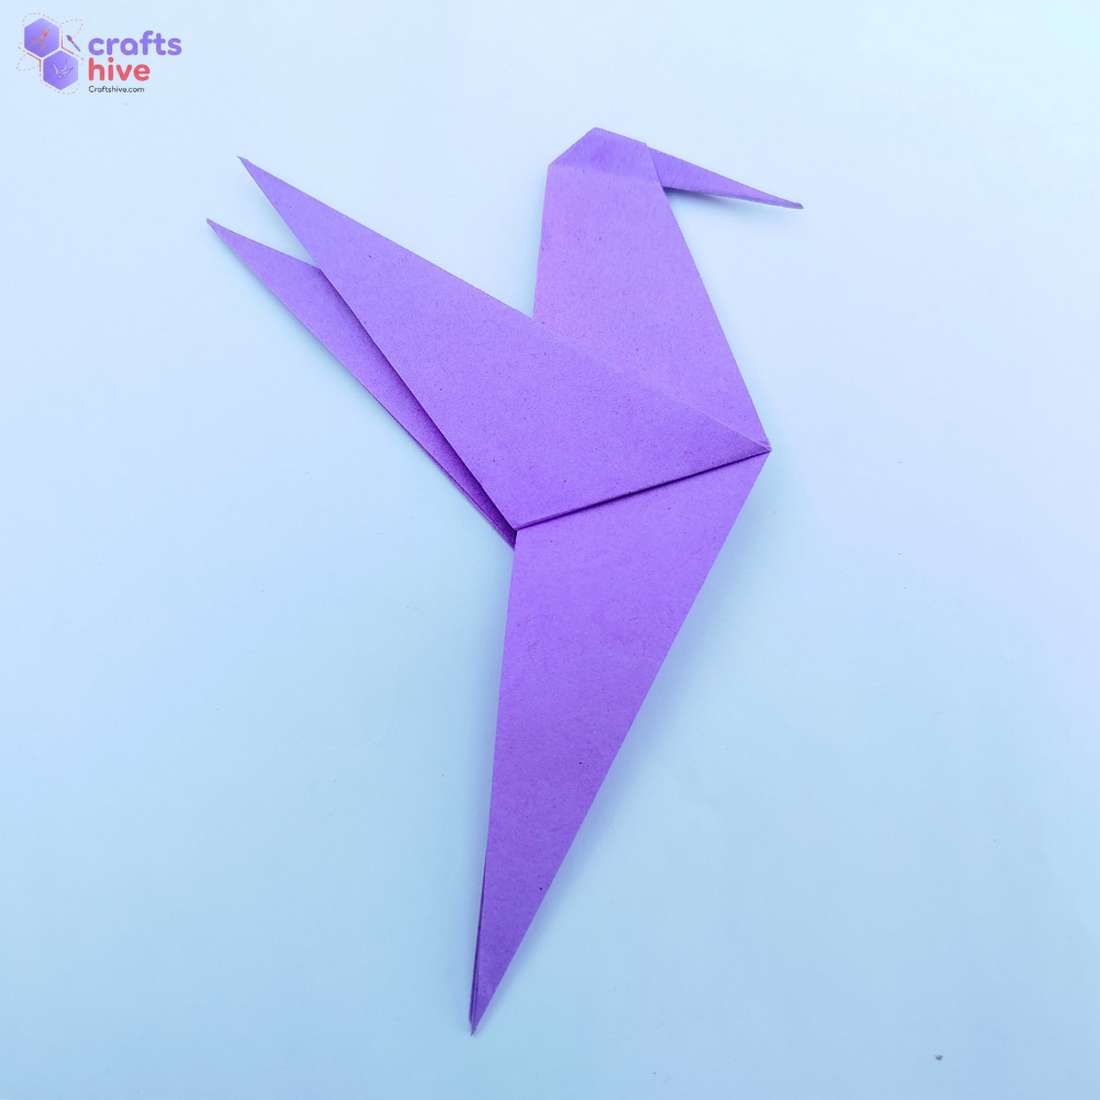
Learn how to fold an easy origami hummingbird in less than 5 minutes. This is a two-sided modern origami model based on the origami Bird Base with a few further folds.
The version I folded is a flying hummingbird that can be customized with craft eyes and different colors of paper.
While the Kami sheet will work fine, I recommend using the Tant paper for structure and rich texture. Otherwise, the printed Kami can’t be resisted.
You can add this origami bird to your spring and fall crafts and adapt it to a flapping hummingbird, too. Let’s dive into the step-by-step instructions:
[ez-toc]
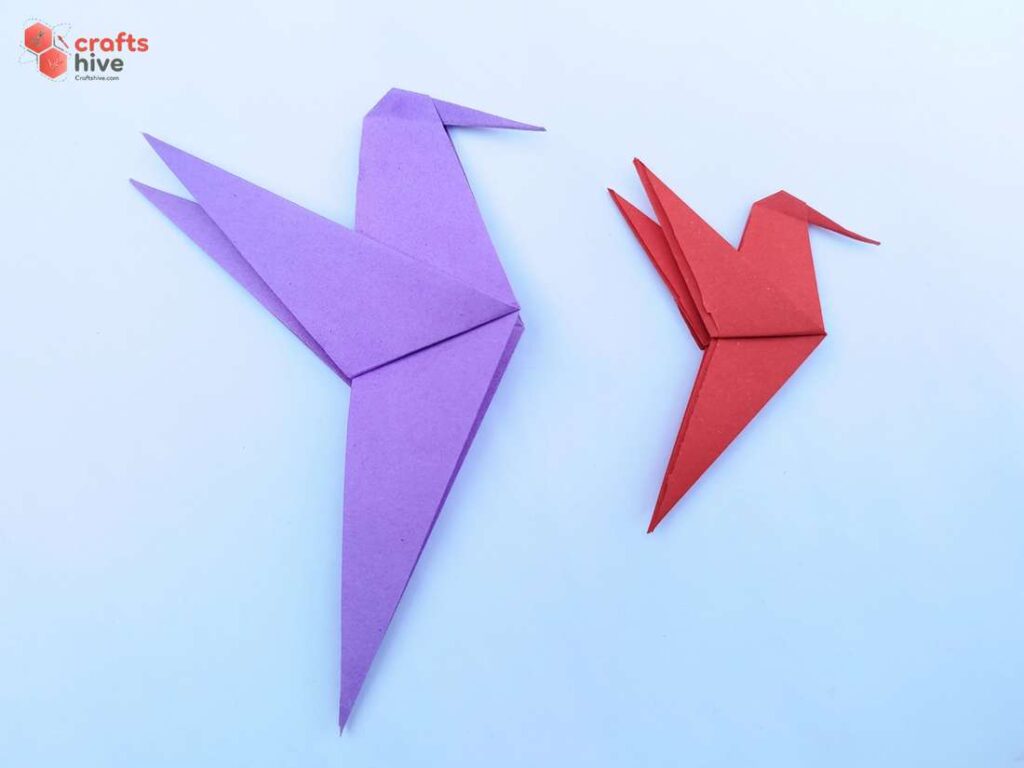
Origami Hummingbird: Step-by-Step Instructions
Model type: Modern Origami Bird
Designer: Unknown/contemporary variation
Difficulty Level: Beginner (Level 3)
Recommended Paper: 15cm by 15cm square sheet of paper (It does not show the 2nd color so a solid sheet is worth giving a shot)
Note: This origami bird needs square base, petal folds, kite folds and ultimately the Bird Base. You should check my detailed guide on “How to Fold Origami Bird Base.”
Step #1: Diagonal Creases
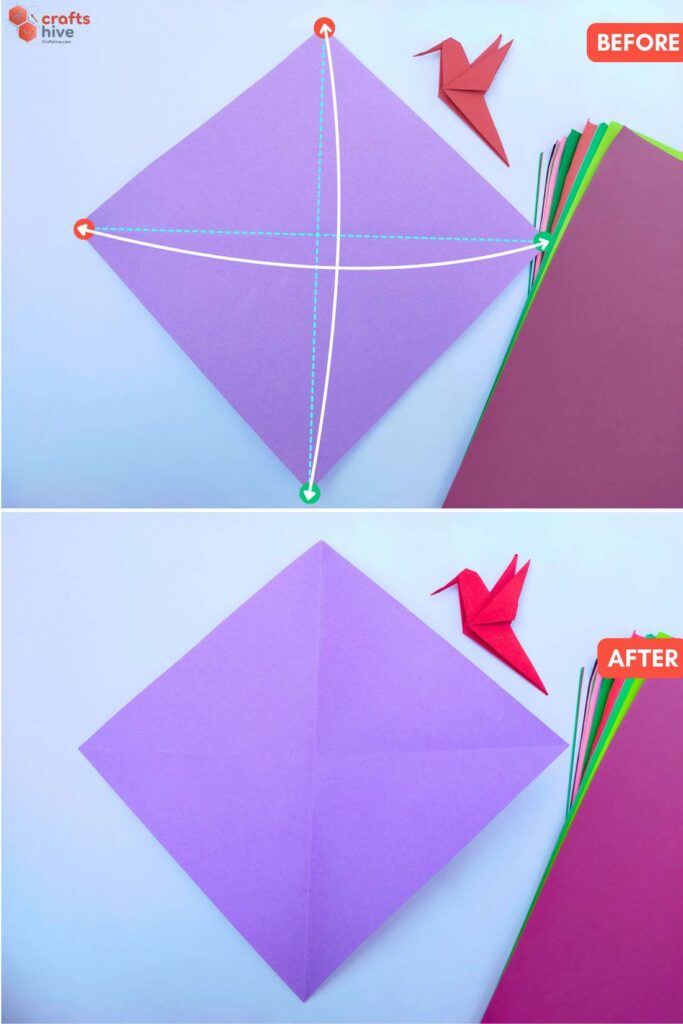
Step #2: Middle Creases
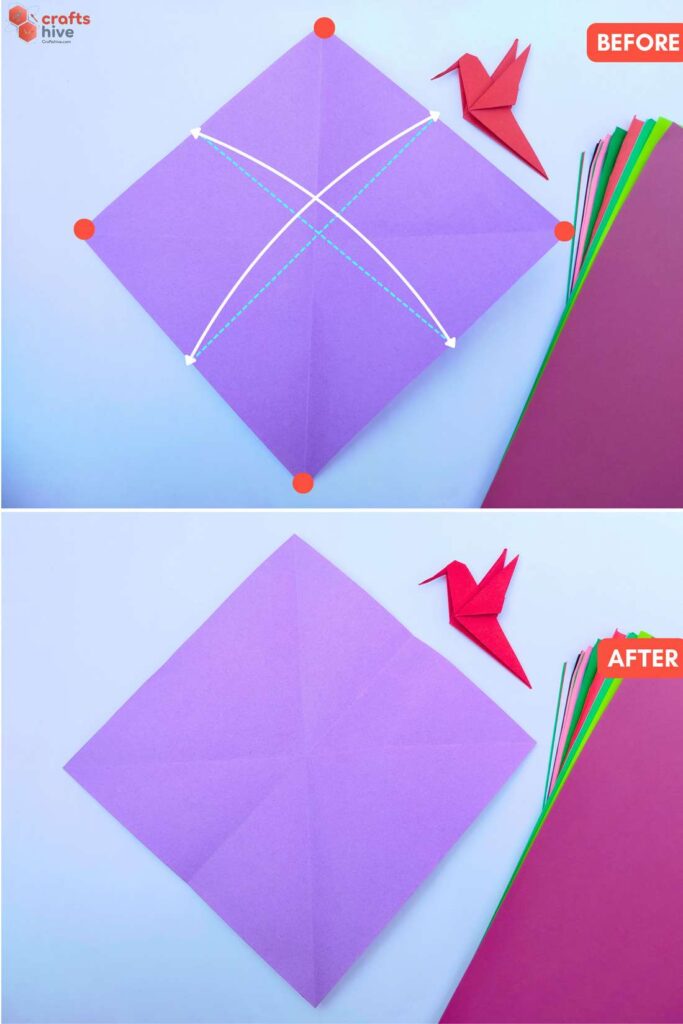
Step #3: Collapsing into a Square Base Along Existing Creases
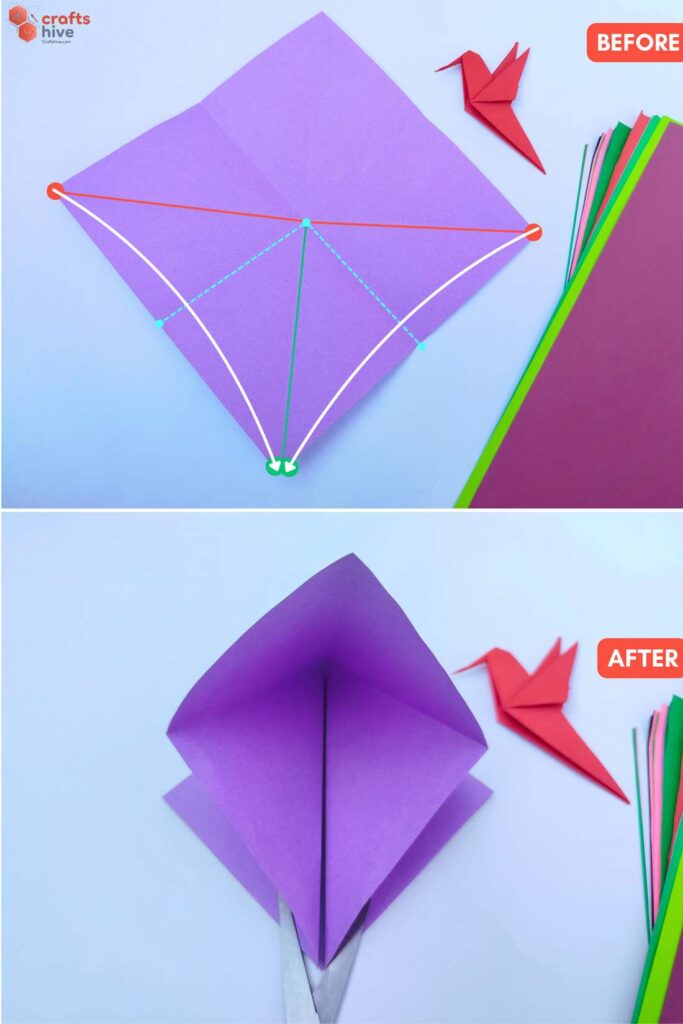
- Fold the left and right corners of the diamond onto the bottom corner.
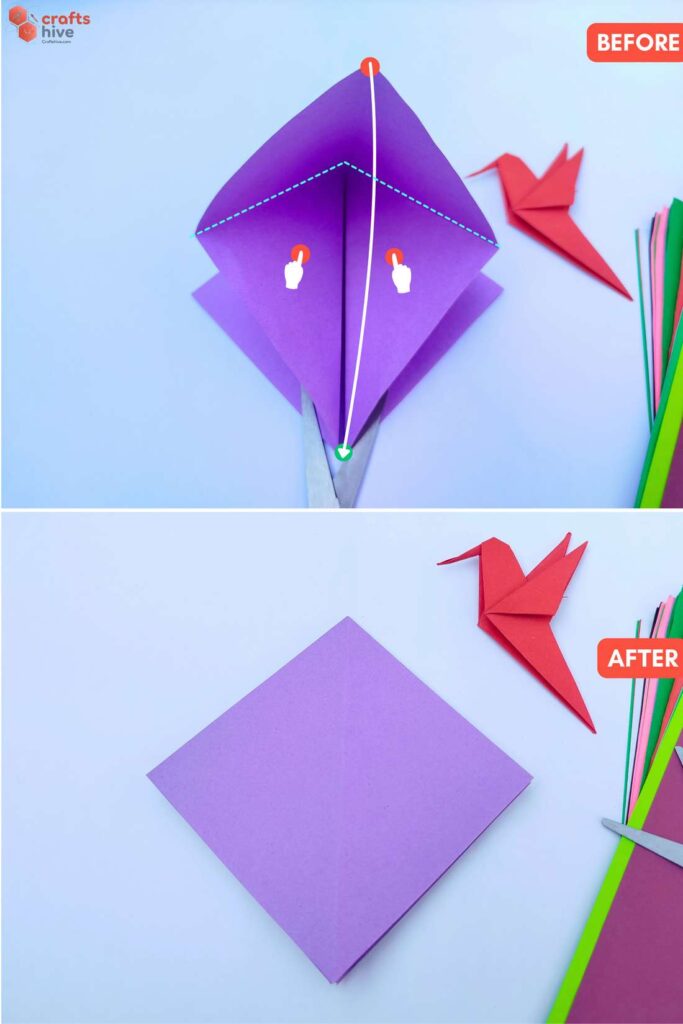
- Also, fold the top corner onto the bottom corner and press the flaps flat. This is how to collapse along the creases we made earlier.
Step #4: Kite Folds
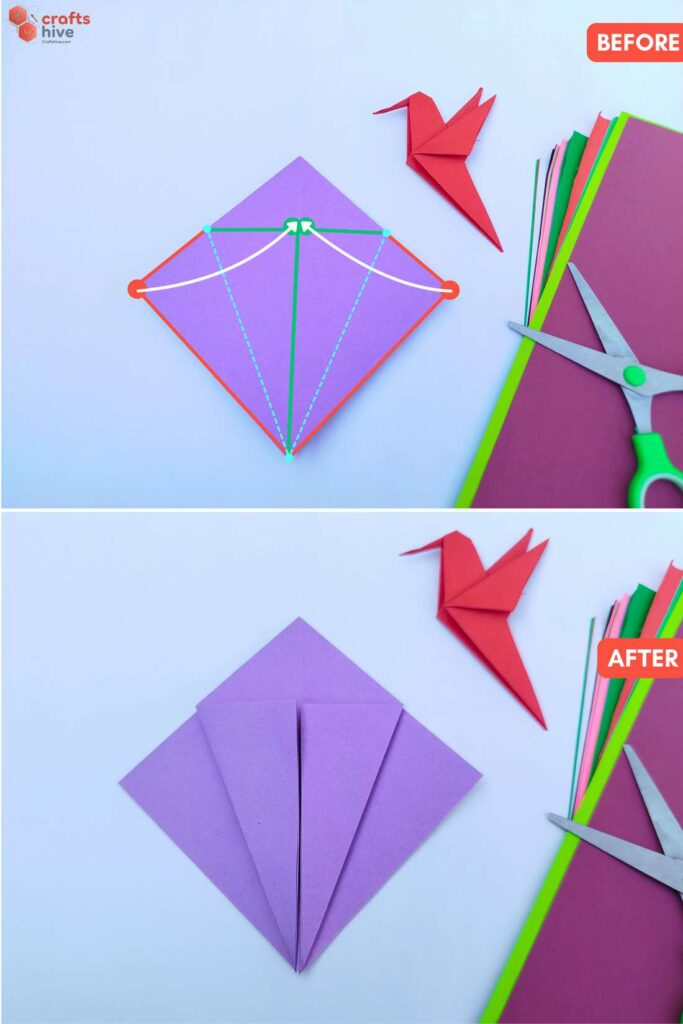
- Fold the bottom edges of the Square Base to the middle vertical crease and press the paper flat.
This is called a Kite Fold w.r.t the bottom corner.
Folding Tip: Crease the paper harder for these folds, more than that of for usual folds. Otherwise, the paper won’t swing along the creases as it is expected in the Petal Fold.
Step #5: Mountain Fold
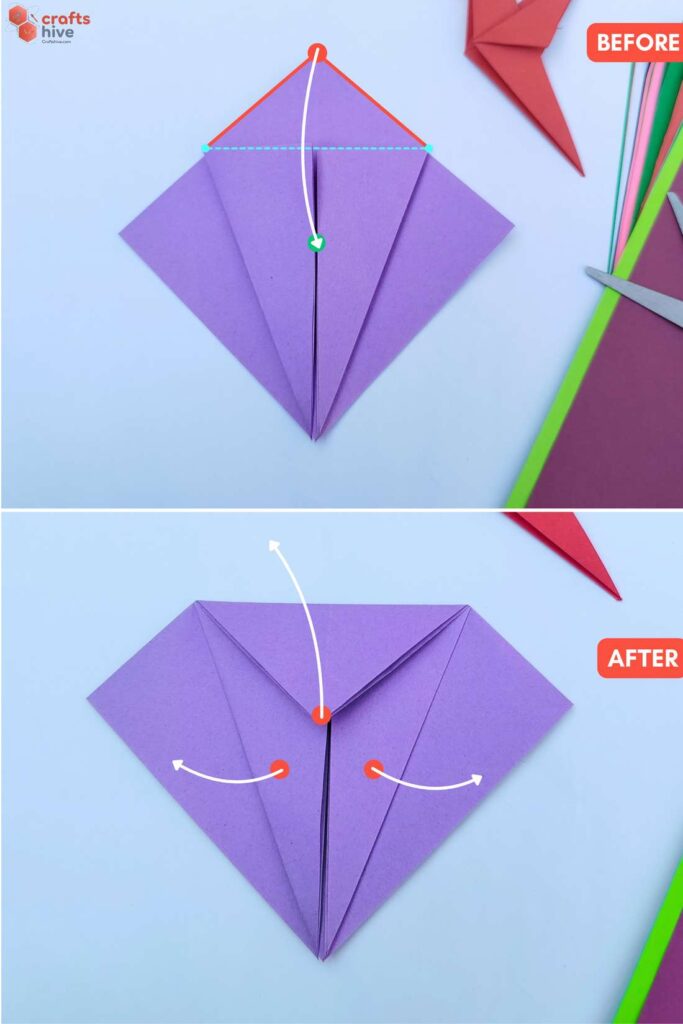
- Fold the top corner of the Square Base down along the edges of the flaps of the Kite Folds. You basically have to crease where both layers intersect.
Step #6: Unfold
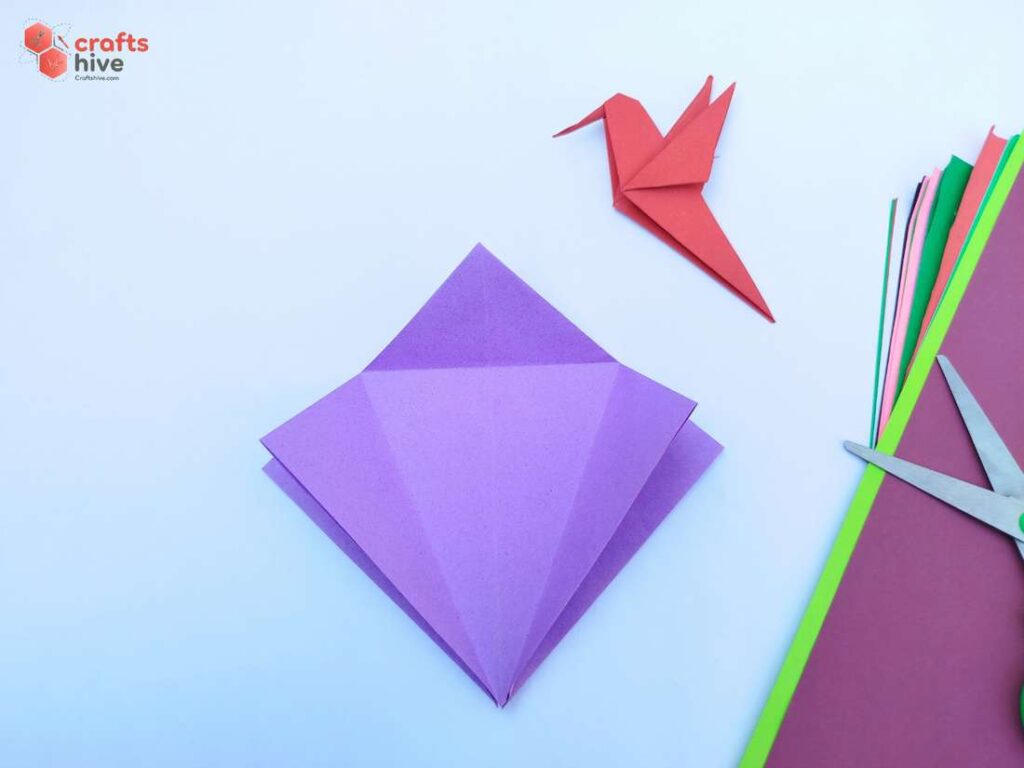
- Unfold the Kite and Mountain Flaps (Undo Step #4 and Step #5).
Step #7: Petal Fold
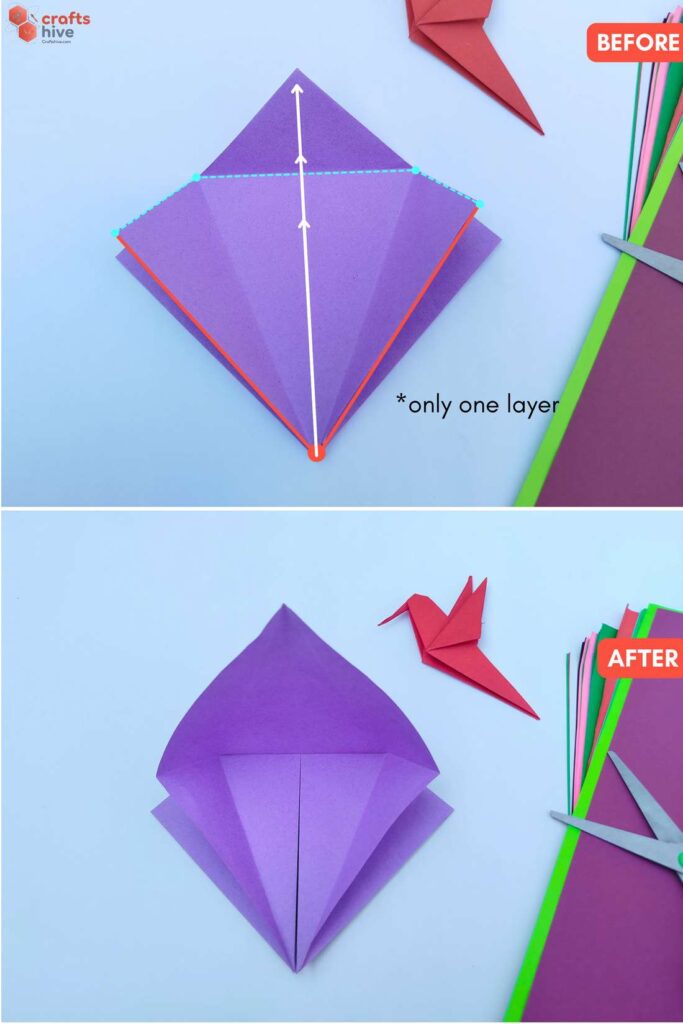
- Pinch the bottom corner of only one layer of the Square Base and swing it to the back away from you. This will open the pocket with the creases we made.
Step #8: Petal Fold
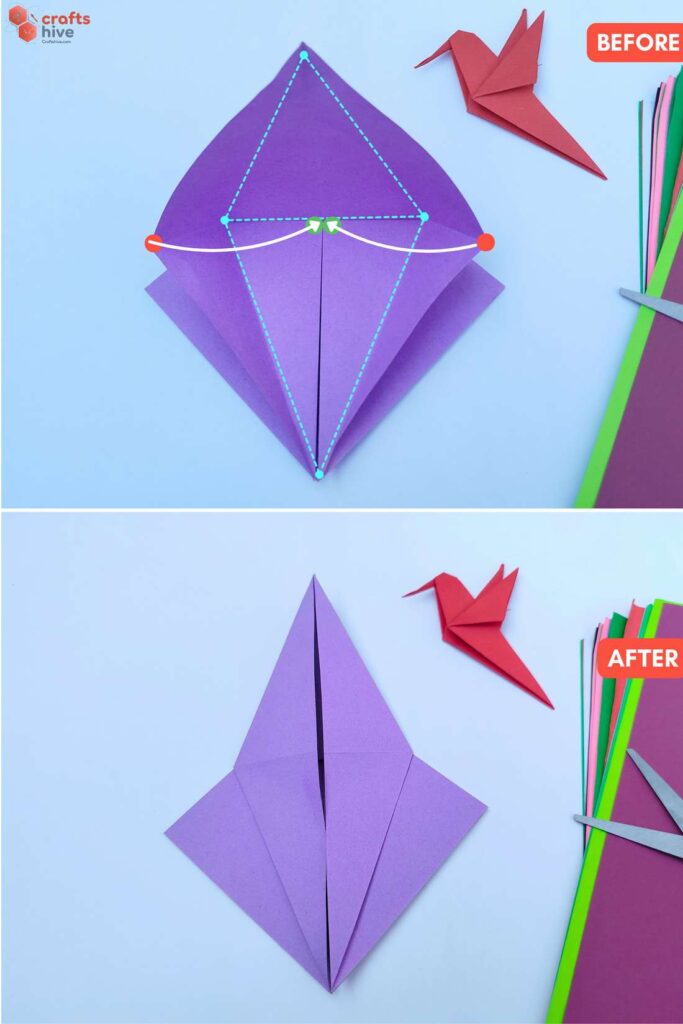
- Fold the edges to the centreline along the creases and press the paper flat with the surface.
Step #9: Bird Base
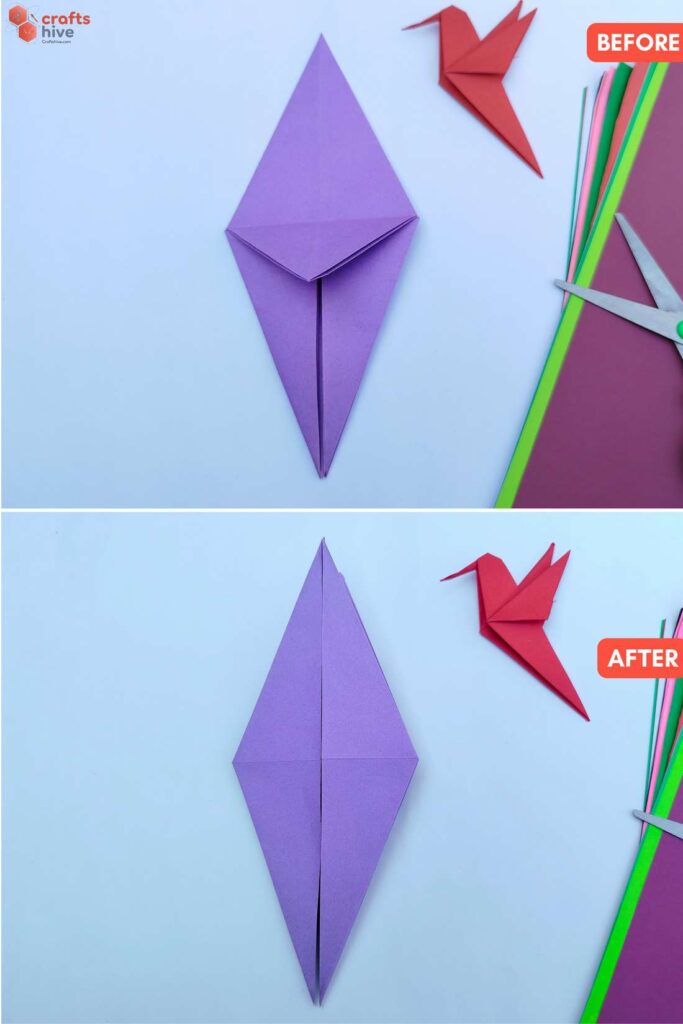
- Turn the model over. Repeat Step #4 to Step #8 on the remaining layers of the Square Base. This will make a symmetrical, elongated diamond shape called the Bird Base.
Step #10: Mountain Fold
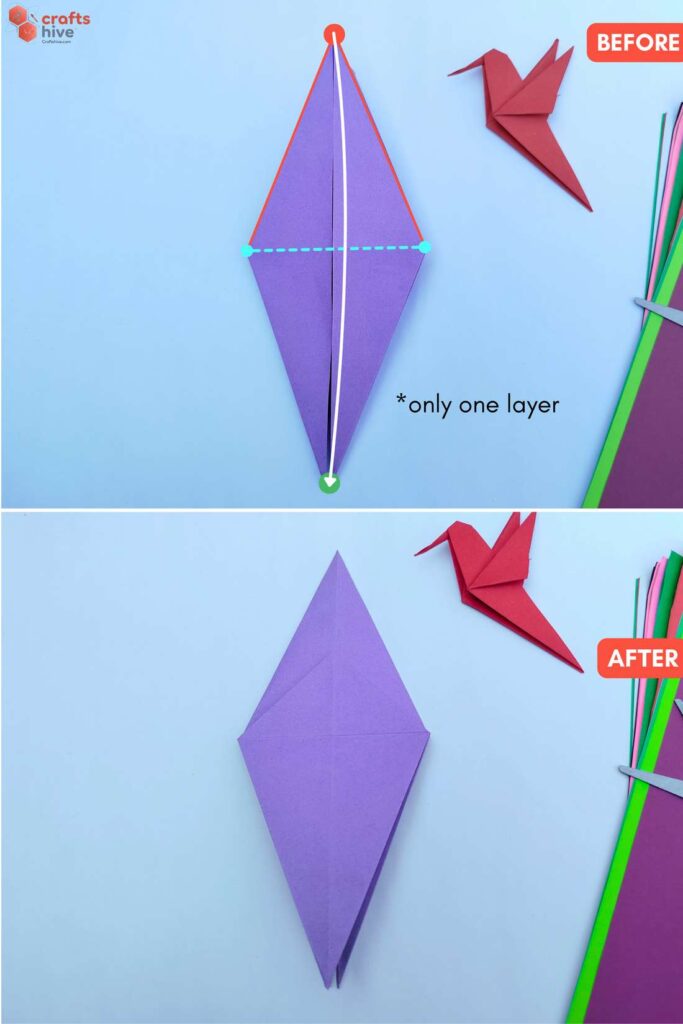
- With the help of the top corner, swing one layer of the Bird Base downward along the horizontal creases in the middle.
Note: On the top, you should be left with only one layer, three at the bottom.
Step #11: Half Fold
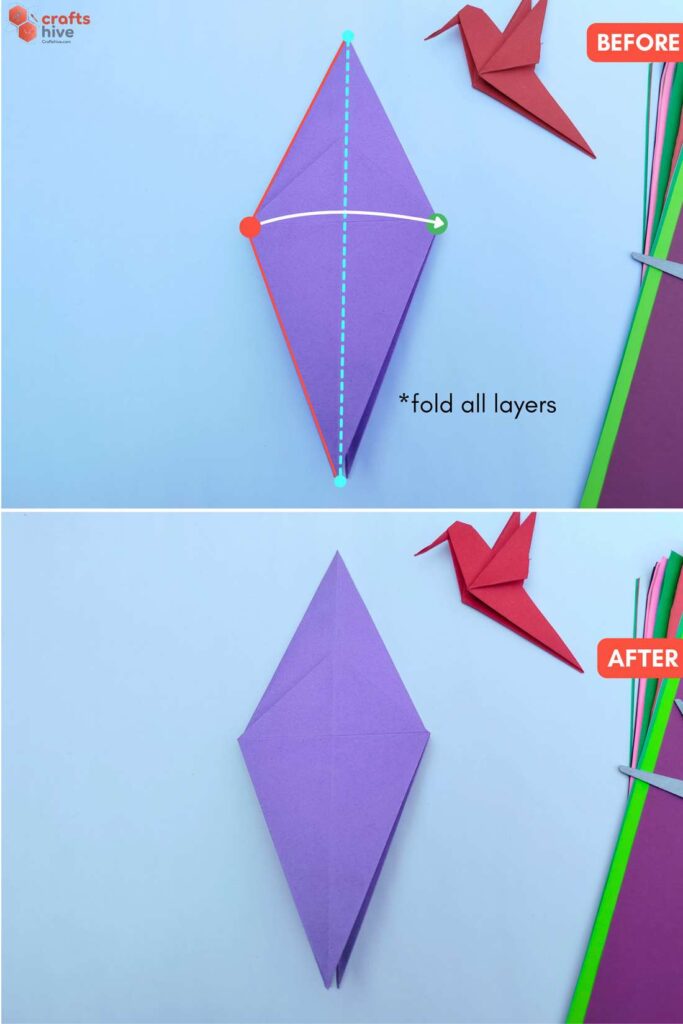
- Fold the Bird Base in half along the centreline and press the paper flat.
Step #12: Fold for the Head
Note: This Fold is done to taste, but I recommend folding upto the one-forth of the height of the bird base.
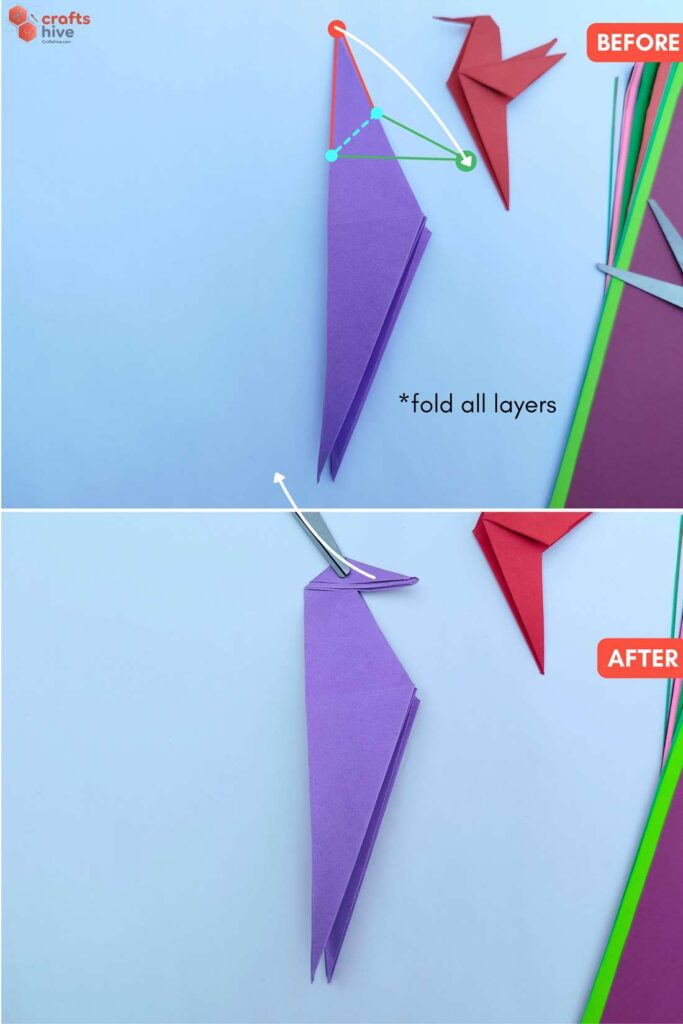
- Fold the top corner of the half-folded Bird Base downward to the right. Keep the bottom edge of the flap parallel to the middle horizontal crease.
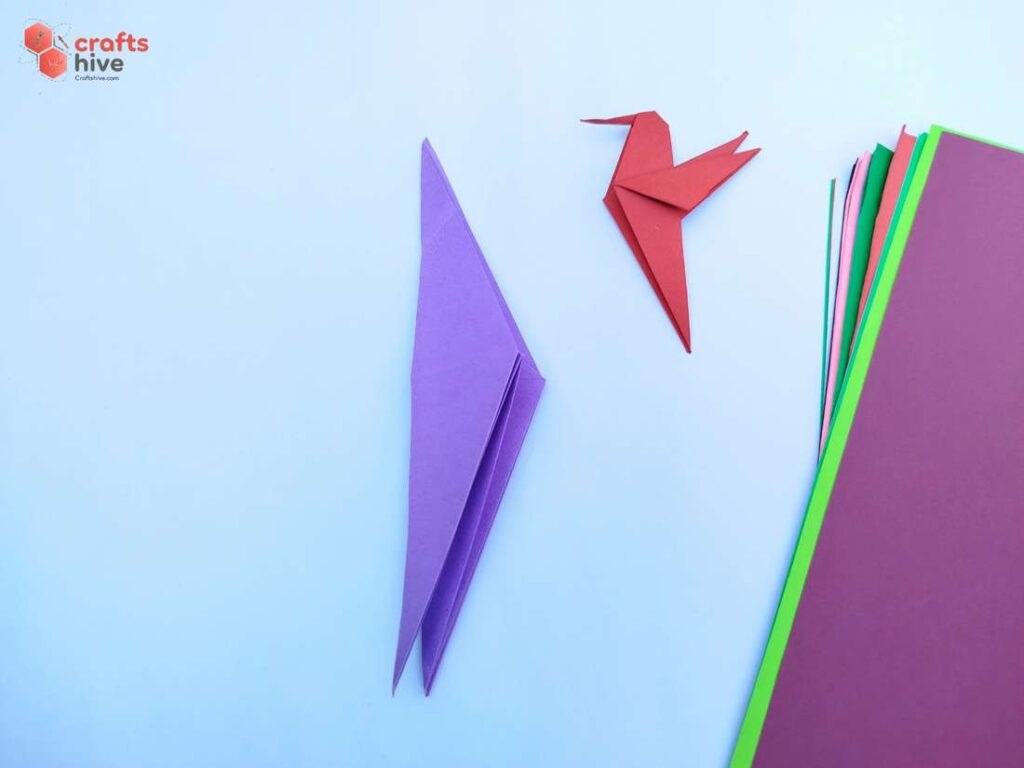
- Unfold.
Step #13: Inside Reverse Fold

- Reverse the Fold Inside the bird by making a Book Fold to the left, swinging it towards you until it is perpendicular to the surface and refolding in half along the creases.
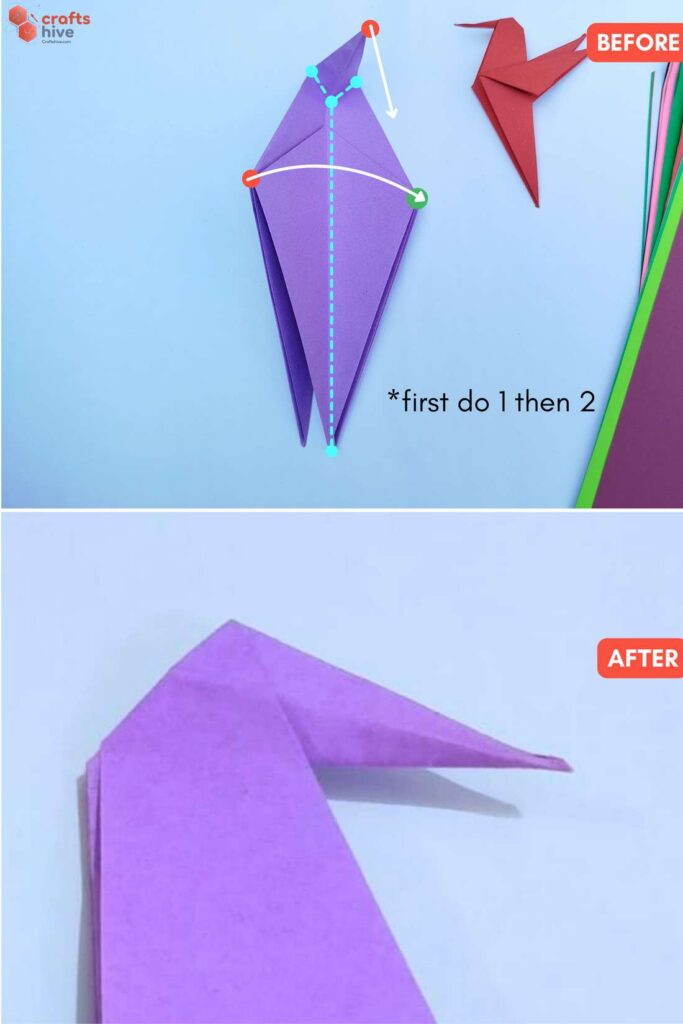
- Press the paper flat like this.
Step #14: Fold for the Beak
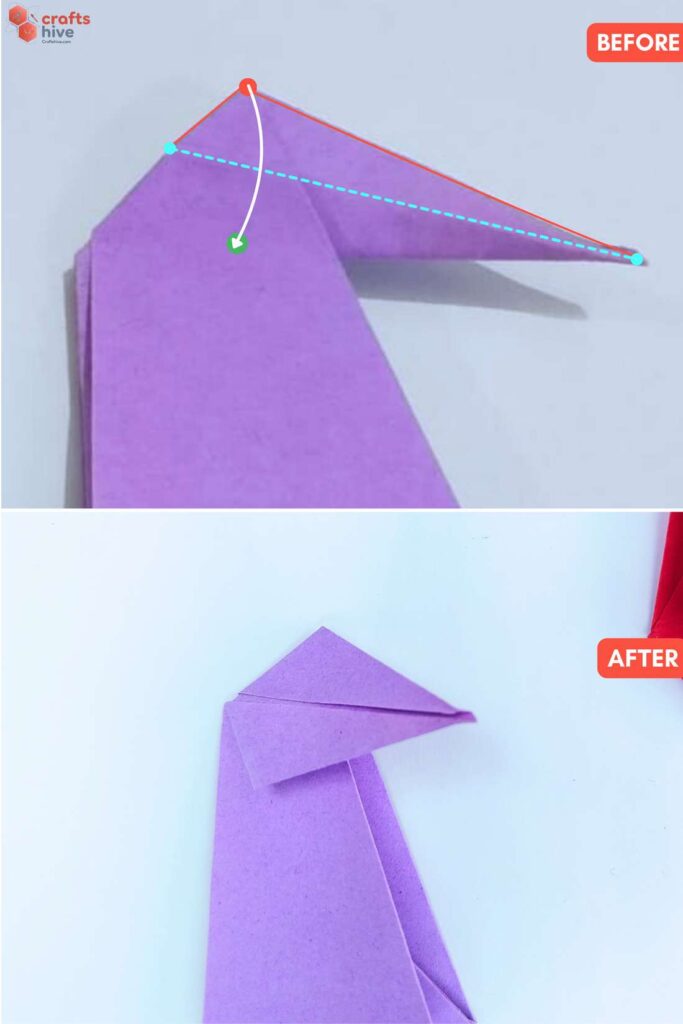
- Swing the top corner of the front layer of the head downward. This exposes a Kite-like shape.
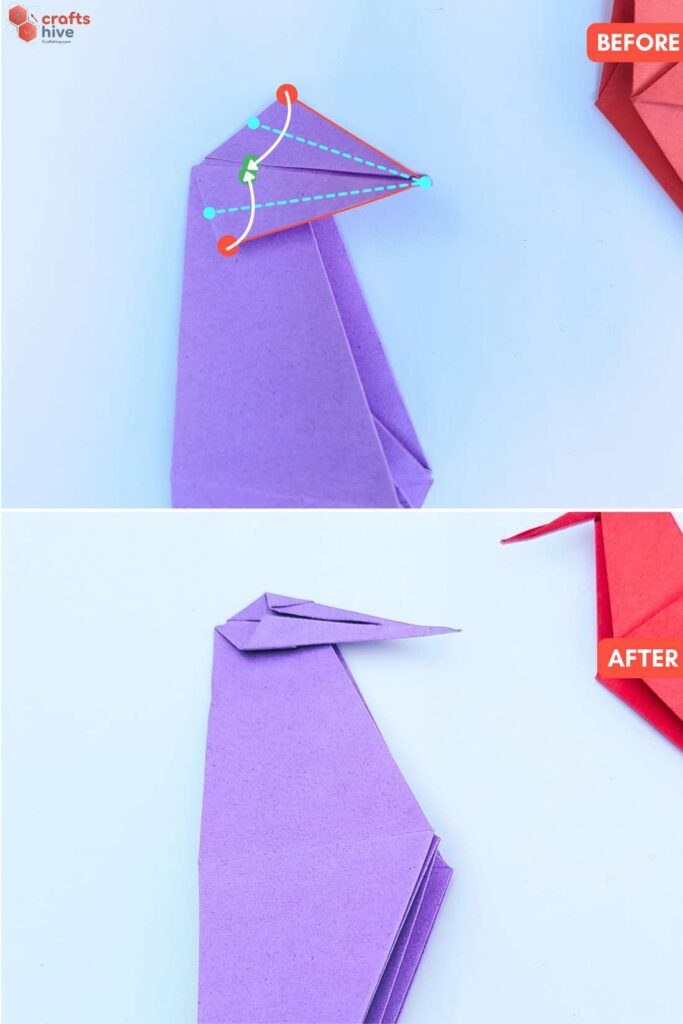
- Swing the top corner of the front layer of the head downward. This exposes a Kite-like shape.
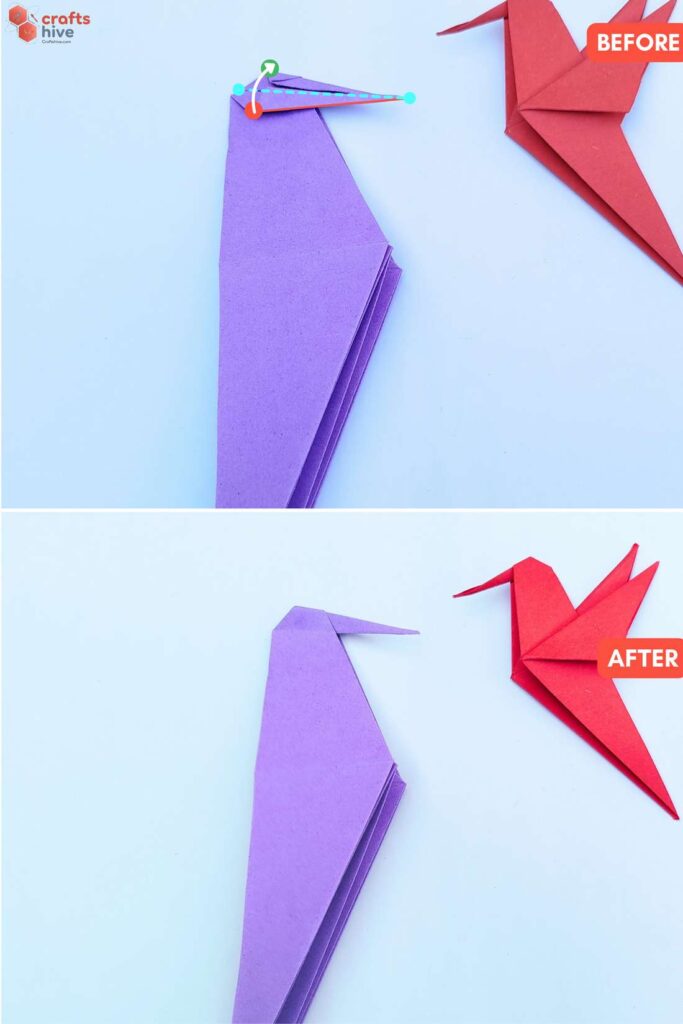
- Fold both edges to the centreline carefully and press the flaps flat. Try to keep it as accurate as possible, as a mistake may later ruin the shape of the beak.
Step #15: First Wing Fold (Done to Taste)
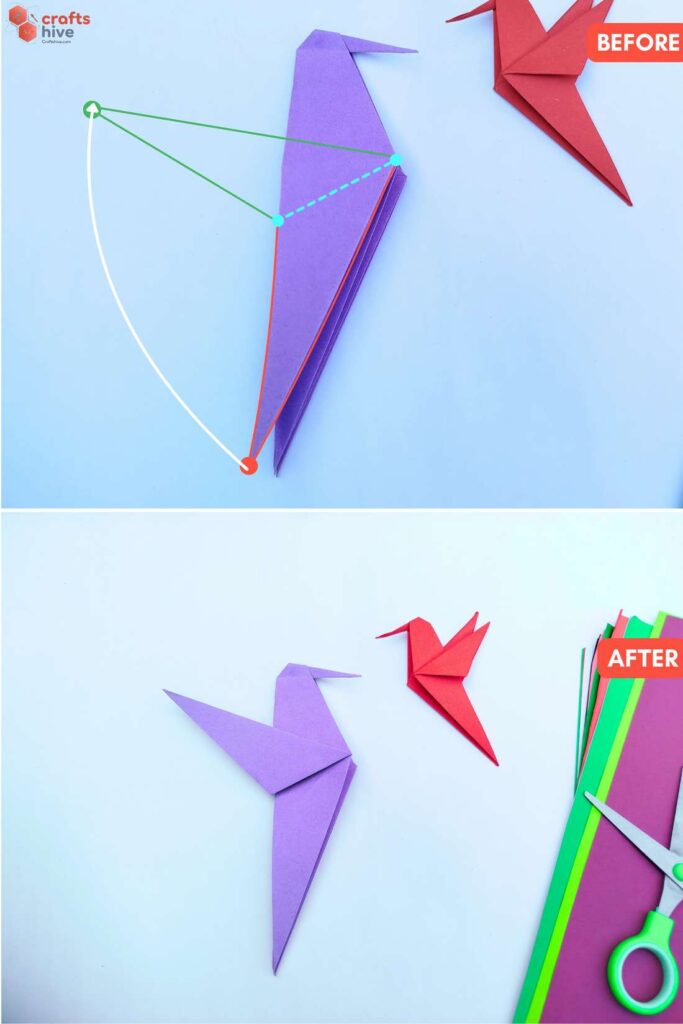
- Fold the bottom corner of one layer upward to the right upto the middle corner of the bird.
Step #16: Turn
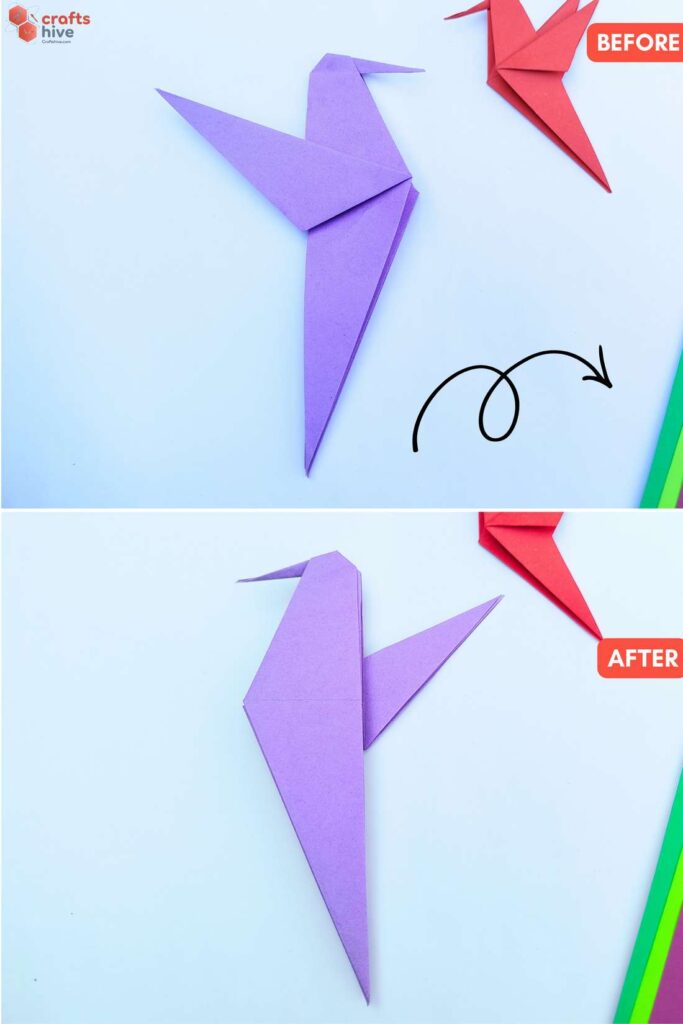
- Turn the bird with one wing over to the other side.
Step #17: 2nd Wing Fold
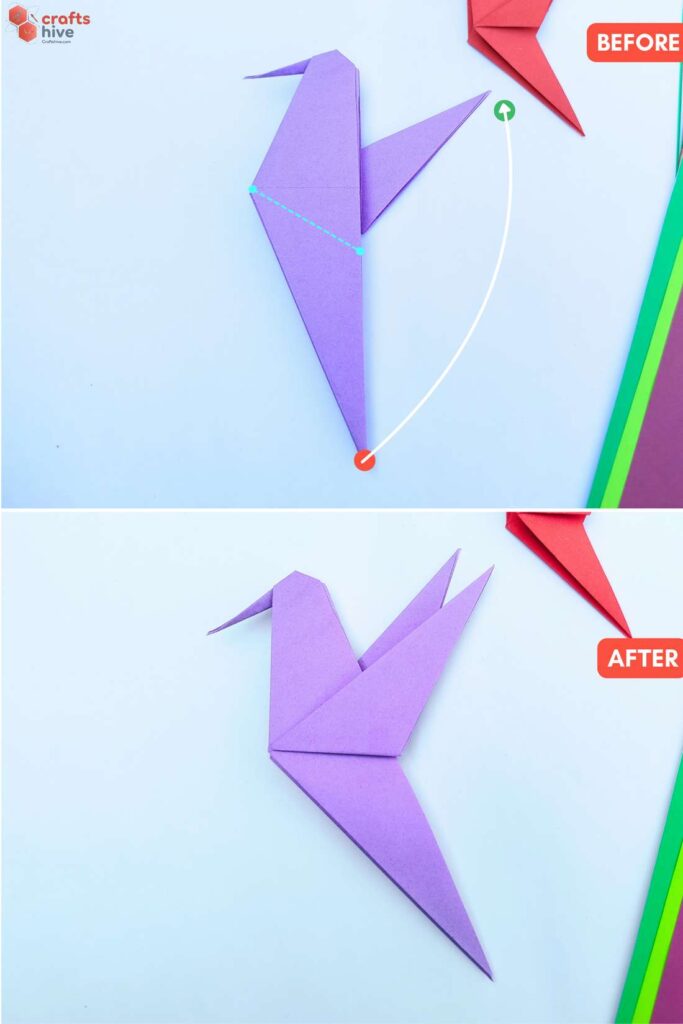
- Fold similar to the first wing. Now there are two options: you can fold the symmetrical part to the first wing or crease the paper when the wing is a little below the previous one. I like the 2nd option, as when turned to the other side, it looks like a 3D hummingbird.
Finished
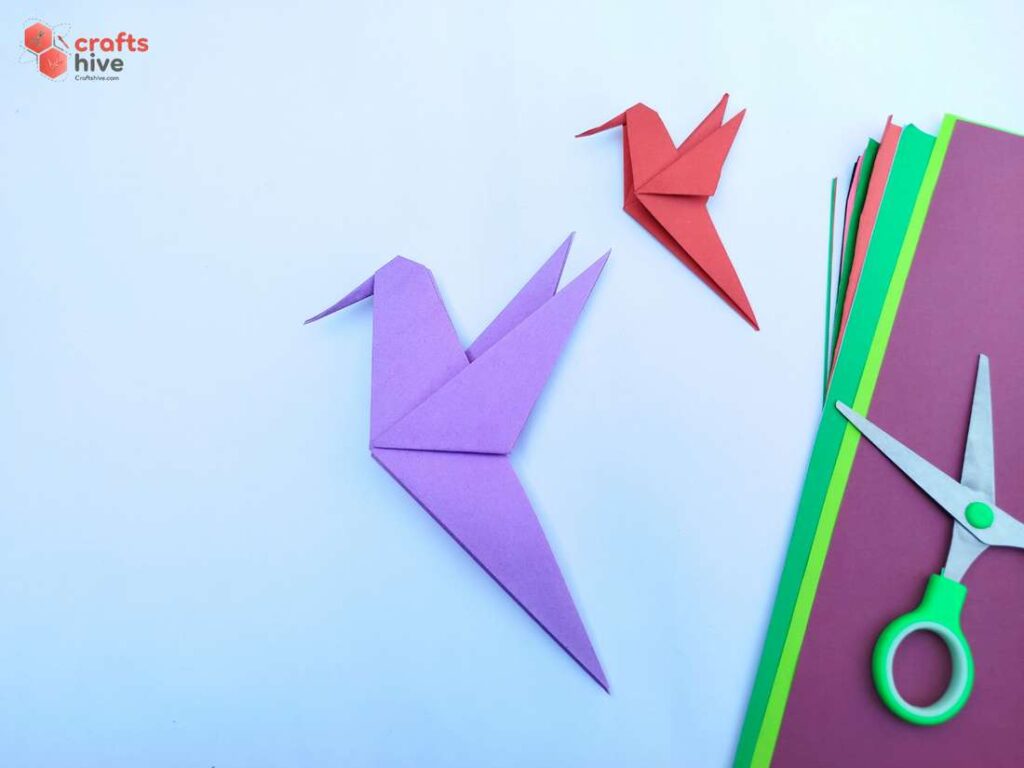
And that’s all on how to fold an origami hummingbird. You can attach a chopstick or a rolled piece of paper to the bottom if you’d like to display it or make it easier to hold. 😎
What’s Next?
Was this Origami Tutorial Helpful? Tell us in the Comments.
Your feedback is a great way for us to improve our origami tutorials. So, share your thoughts on whether you tried this one or not, and highlight the weak points.

About "Talha"
Hey, I’m Talha, the Crafter on Craftstive.com. I love to share guides on folding cute origami models and paper crafts, and I am always ready to inspire your next craft project with my weekly craft discussions.