

Learn how to fold an easy origami dog face in 7 simple steps. This is going to be a traditional model and can be folded in less than 1 minute. I will also show you how to fold this dog face with a mouth if you don’t want to draw the nose and the mouth.
Otherwise, it looks double the cute with the hand-drawn kawaii dog face. It shows only one side of the paper, so it can also be folded with the Tant paper.
The brown, dark grey, black, and orange sheets make the dog belong to different breeds. However, any color will work fine. This face will have long, pointy ears and a perfect shape of forehead, too.
Kids will love it. You can make a Love Card with it, like my origami heart puppy (it uses a different version). Let’s dive into the tutorial.
[ez-toc]

Origami Dog Face: Step-by-Step Instructions
Model Type: Traditional/Pure Origami
Difficulty Level: Beginner Level 1
Recommended Paper: Use the Tant paper for Texture (I will be using a 15cm by 15cm square sheet of purple paper).
Starting Fold: Triangle Base
Folding Terms:
- Valley Fold: To fold away from you.
- Mountain Fold: To fold towards you.
Step #1: Triangle Base
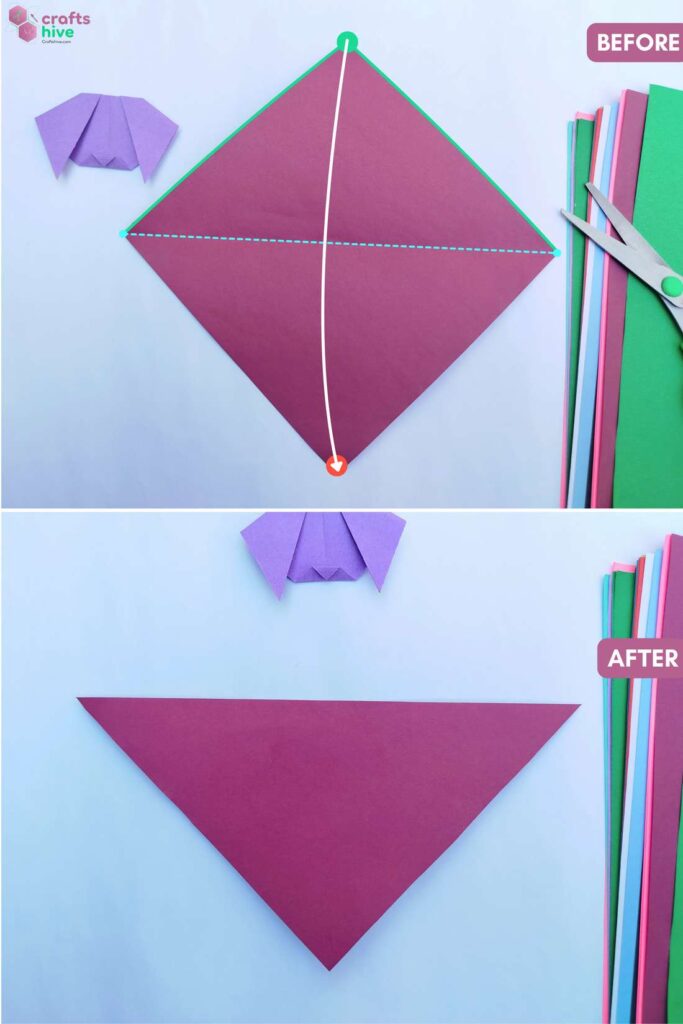
- With the square sheet in Diamond Position, fold the paper in half along the Horizontal Diagonal and press flat.
Step #2: Vertical Crease
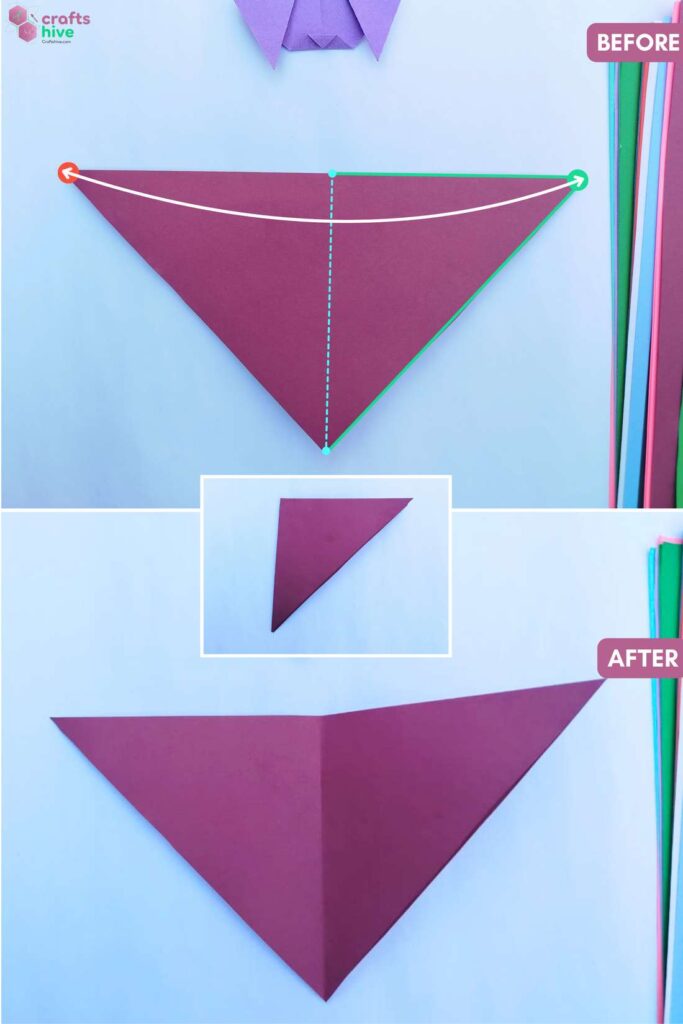
- Fold and unfold the Triangle Base in half along the Vertical to make a Crease in the Middle.
How-to: You have to fold and align the left and right corners, crease the paper, and then unfold.
Step #3: Folds for the Ears
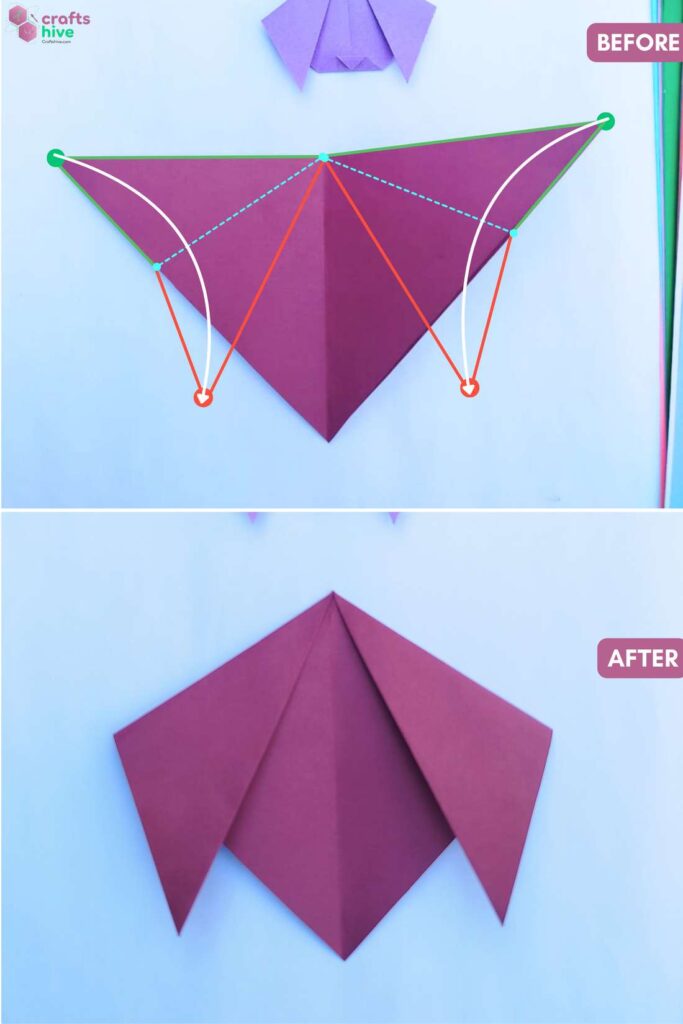
- Fold the Left Half Edge of the Triangle downward to the Right and crease the fold when you are comfortable with the length of the ears.
Tip: Normally, you will want to fold about 1/3 of the Bottom Left Edge.
- Fold the Right Half Edge downward to the Left, the same way, and try to keep it symmetrical to the previous Ear Fold of the dog face.
Folding Tip: Measure the length from the bottom corner to the intersection of the Ear Flap and use this to guide the fold for the 2nd ear.
Step #4: Turn
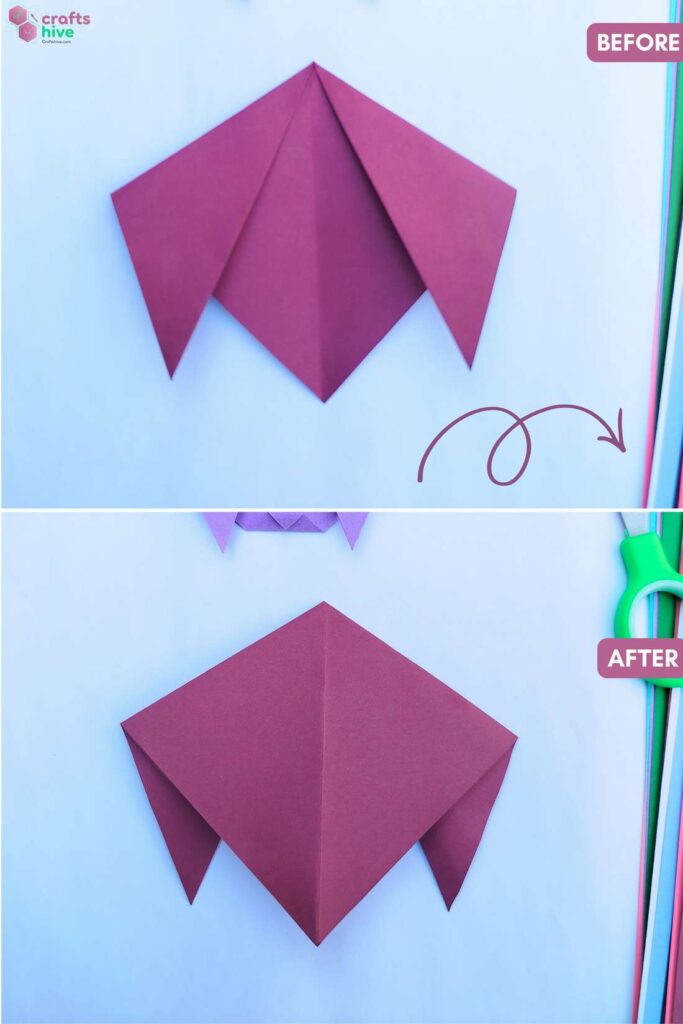
- Turn the model over to the other side.
Step #5: Mountain Fold
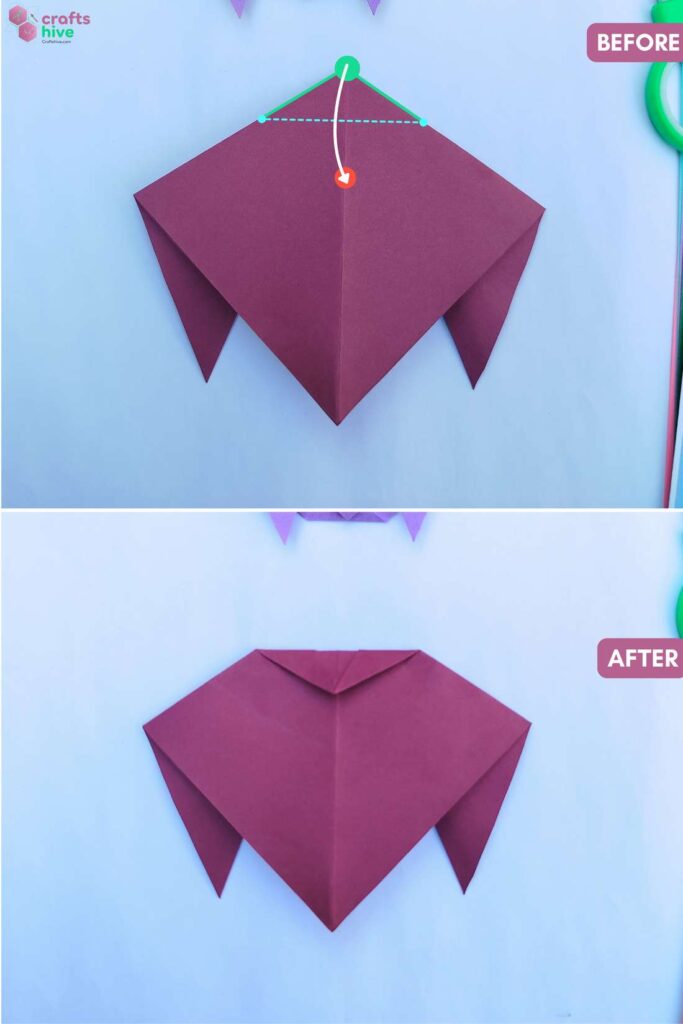
Pre-Note: This fold has to be done to taste and shape the forehead of the origami dog face.
- Make a Mountain Fold with the Top Corner of the model.
Example: I folded about 1/7 of the height of the model.
Step #6: Valley Fold
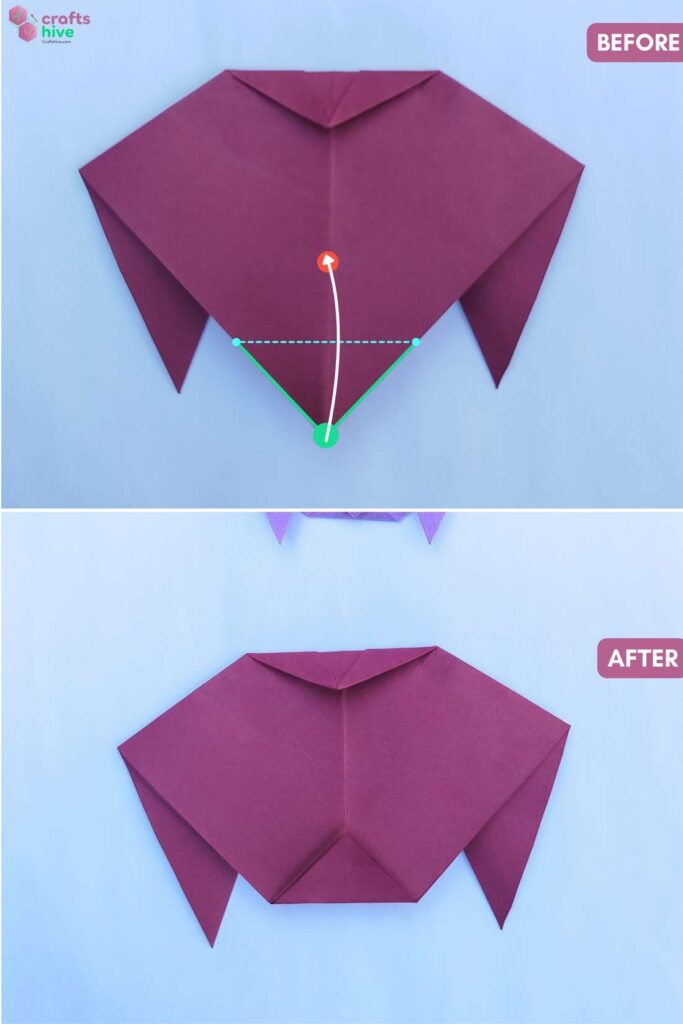
Pre-Note: This fold shapes the chin of the origami dog face and is usually done to taste.
- Valley Fold the bottom corner of the model.
Step #7: Turn
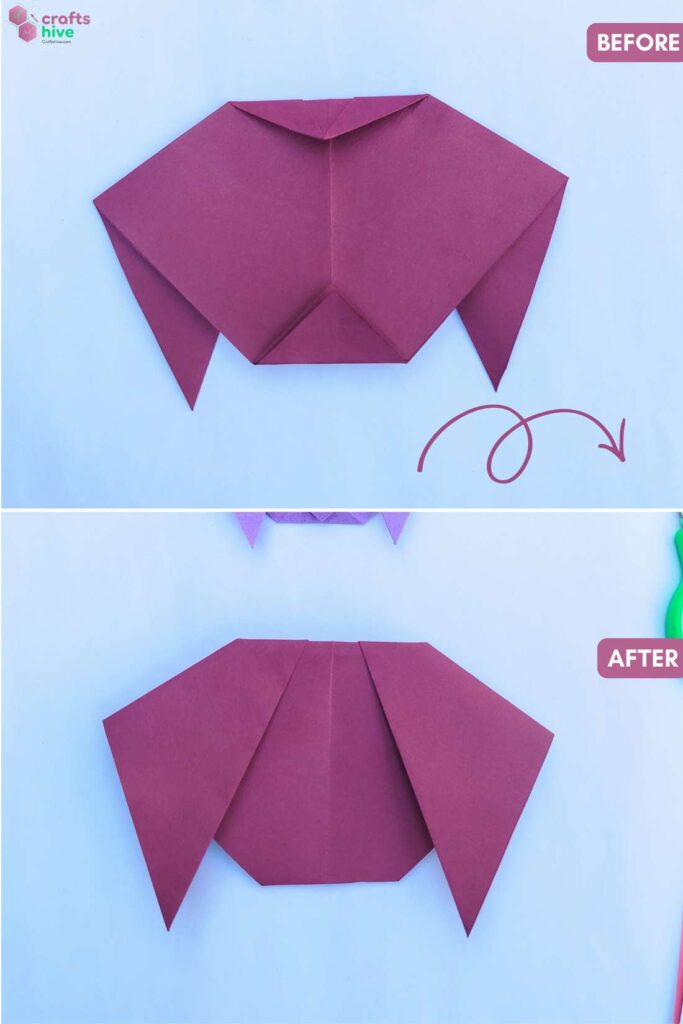
- Turn the model over.
This will be the front of the origami puppy face. You can now adjust the folds if needed and draw a dog face on it as I showed. You can also use this template.
How to Fold the Mouth
You can also fold a version of origami puppy with a mouth. Let me show you how:

Step #1: Mountain Fold
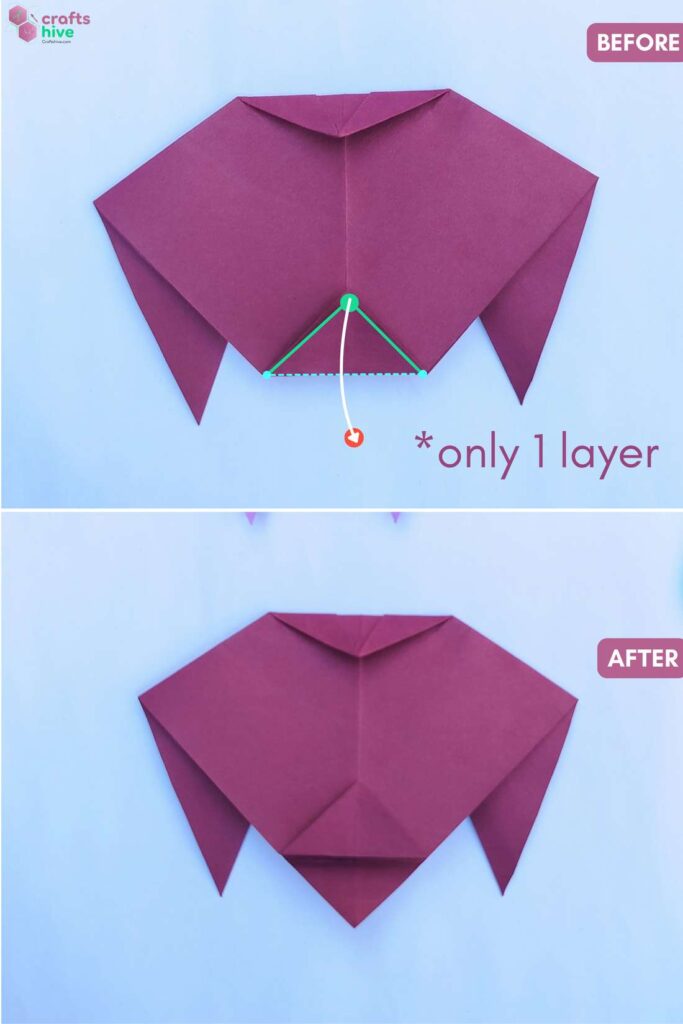
- Fold the paper upto Step #6.
- Swing one of the Valley Fold flaps (the upward) down to the bottom. This is called half-reversing the fold about the crease.
Step #2: Turn

- Turn the Model Over.
Step #3: Valley Fold
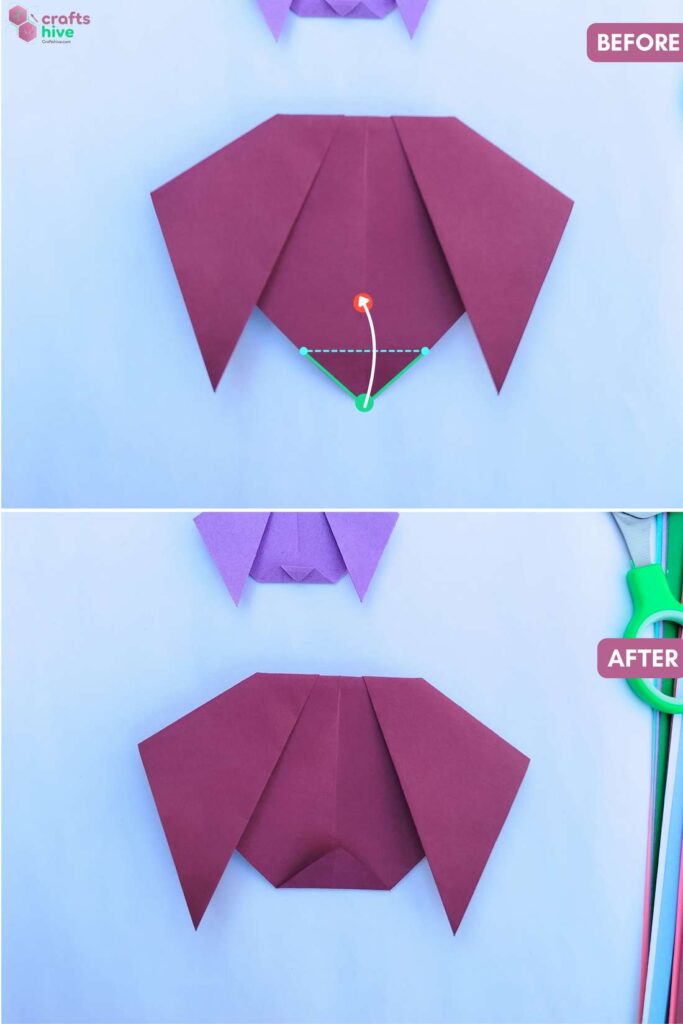
- About the crease, fold Valley Fold the half-reversed flap. This is called the full reverse of the fold to the other side.
That’s kind of similar to the Fold we made in the traditional origami cat face. You can choose whichever you find more pleasing. And that’s how to fold the traditional origami dog face.
Was this Origami Tutorial Helpful? Tell us in the Comments.
Your feedback is a great way for us to improve our origami tutorials. So, share your thoughts on whether you tried this one or not, and highlight the weak points.

About "Talha"
Hey, I’m Talha, the Crafter on Craftstive.com. I love to share guides on folding cute origami models and paper crafts, and I am always ready to inspire your next craft project with my weekly craft discussions.
Thank you! These step-by-step visuals will be very helpful for my class of neurodivergent students.
You are welcome and Thank you!