
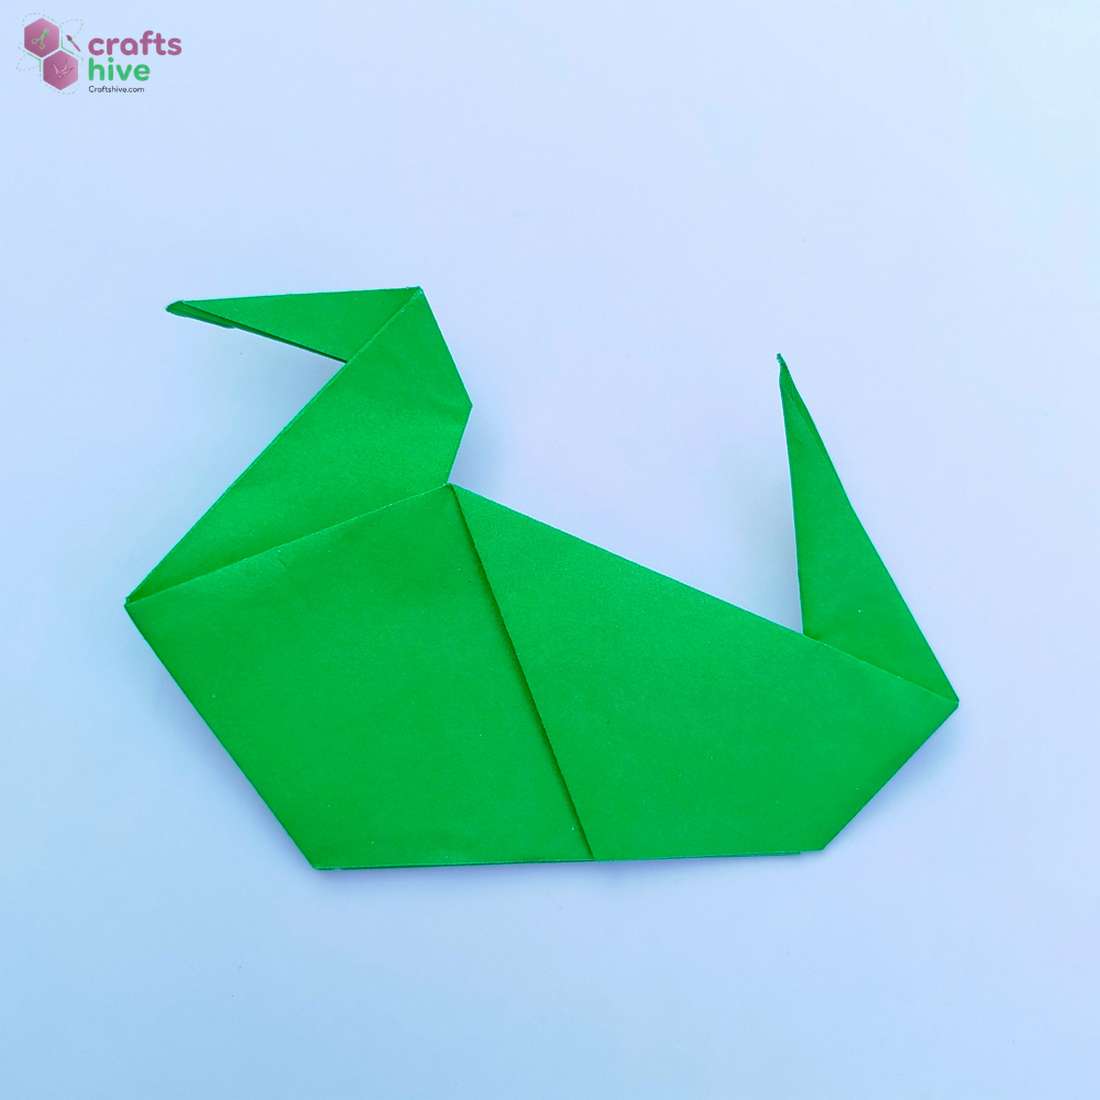
Learn how to fold the easiest origami duck with these instructions. We will be folding a cute paper duck with a tail pointing up, a wide body, a head, and flaps for the wings.
This will be a two-sided traditional model because of the use of inside reverse folds for the head, neck, and tail. While folding starts off with the kite base, the easy transformation to the diamond base will allow us to have it with wing flaps.
It is perfect for learning many basic and useful origami folds without having to deal with intermediate, squash folds. You can fold many in different colours, from parrot to orange and even yellow. Now, let me show you how.
[ez-toc]

Origami Traditional Duck: Step-by-Step Instructions
Recommended Paper: This model shows only one side of the paper. So, I recommend using the Tant paper for a good structure of the paper bird. However, Kami works equally well.
Size: I will be using a 15cm by 15cm square sheet of Tant paper in green.
Difficulty Level: Beginner Level 2 (needs other than Mountain and Valley Folds)
Valley Fold: Fold the paper such that the side facing up coincides with itself.
Mountain Fold: Fold the paper such that the side of the paper facing down coincides with itself.
Step #1: Middle Crease

- With your square sheet lying in the Diamond Position, fold and unfold the paper in Half along the Vertical Diagonal.

This makes a vertical crease in the middle of the diamond.
Step #2: Kite Base
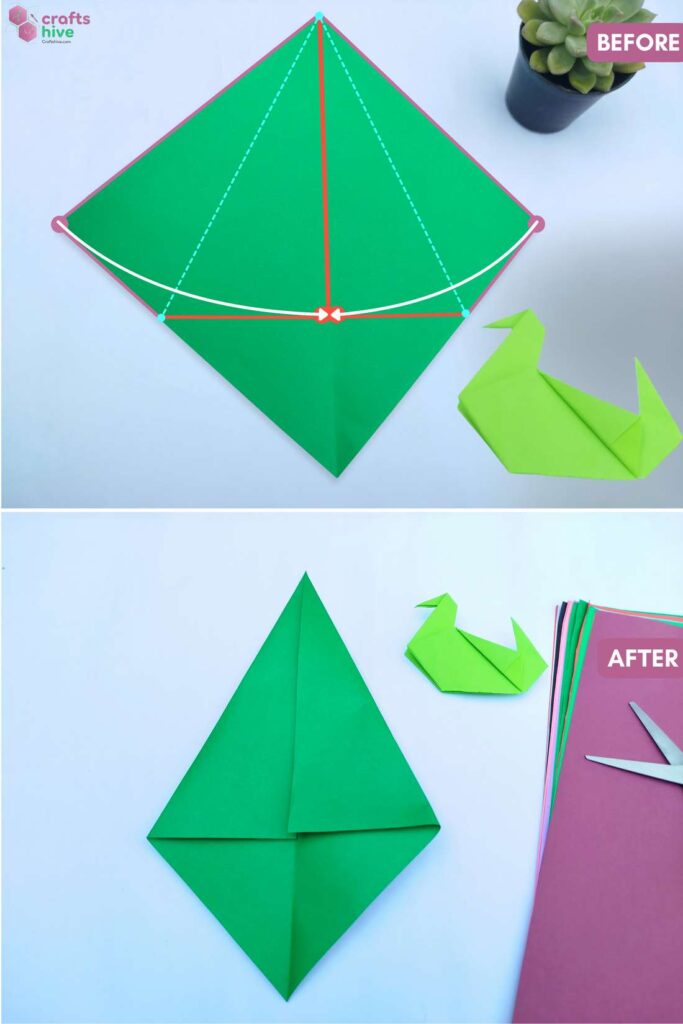
- Fold the left and right corners of the diamond to the Center Line, aligning the top edges with the Diagonal Crease, and press the paper flat. This way, you make the traditional Kite Base.
Step #3: Another Base
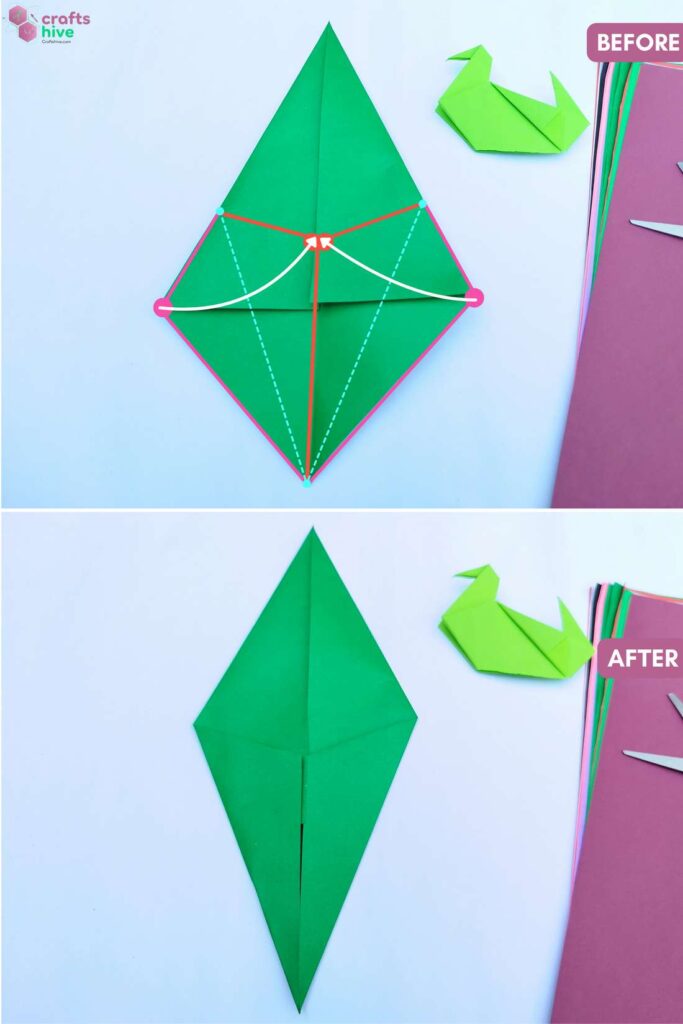
- Fold the Middle Corners of both sides of the Kite Base, align the bottom edges with the Vertical Crease, and press flat. This is usually referred to as a Diamond Base.
Step #4: Turn
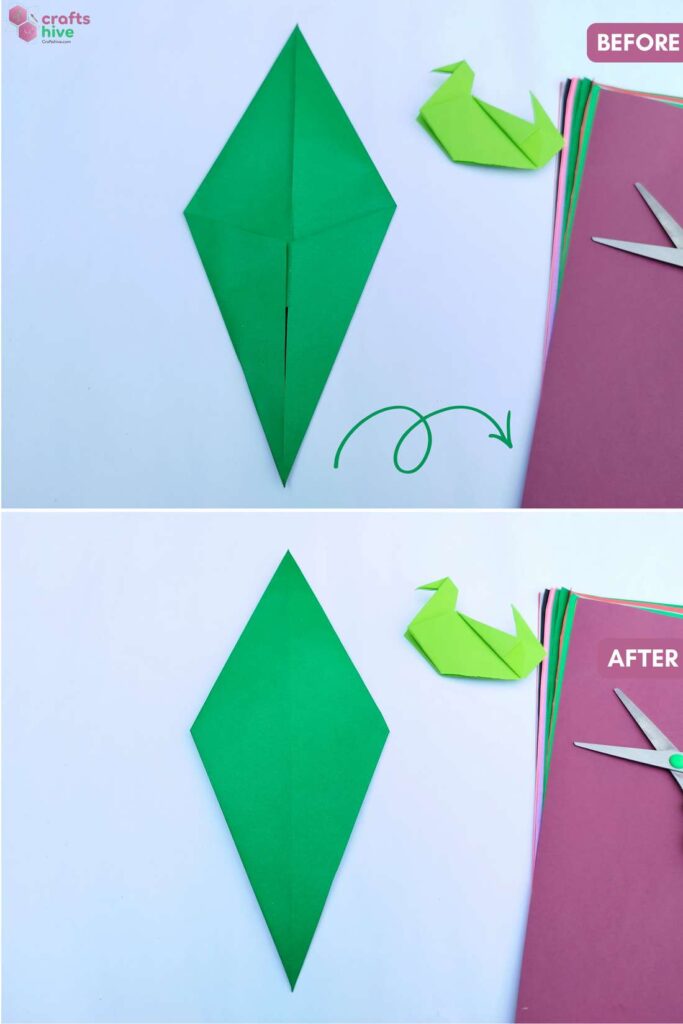
- Turn the base over to the other side.
Step #5: Fold in Half

- Fold the Base in Half along the Vertical and press the paper flat.
Observation: Focus on the middle corner of this Half Diamond and the Top Corner for the next step.
Step #6: Fold for The Neck
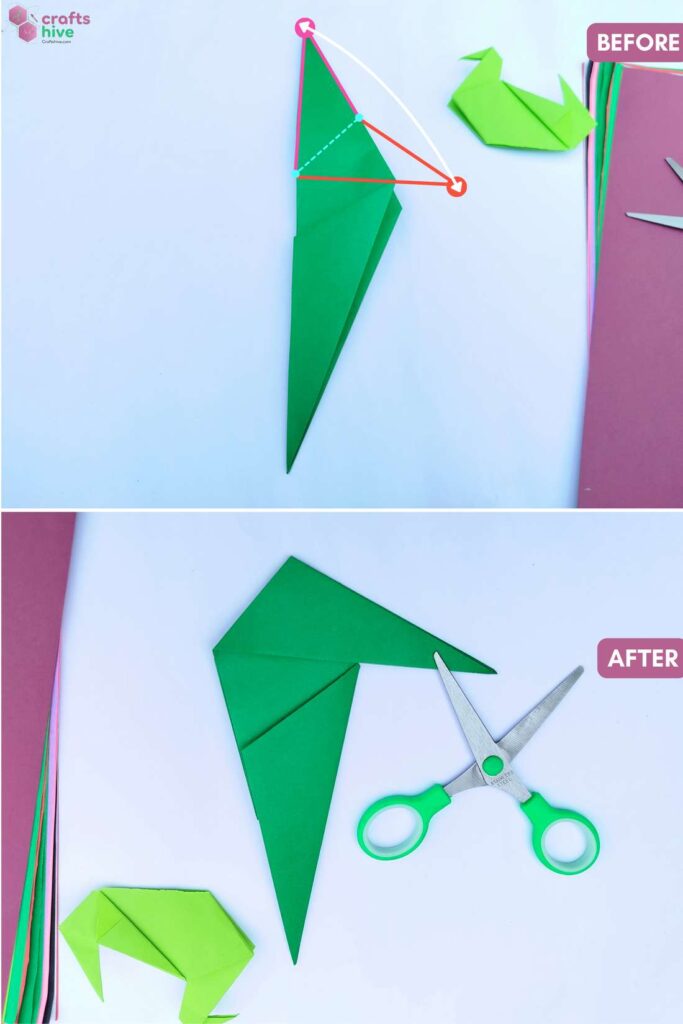
- Fold and unfold the Top Corner of the Half Base to the Right as much as you wish. However, note that the bottom edge of the fold must not cross past the middle corner to the bottom and should rest side-by-side with this corner.
Step #7: Inside Reverse Fold
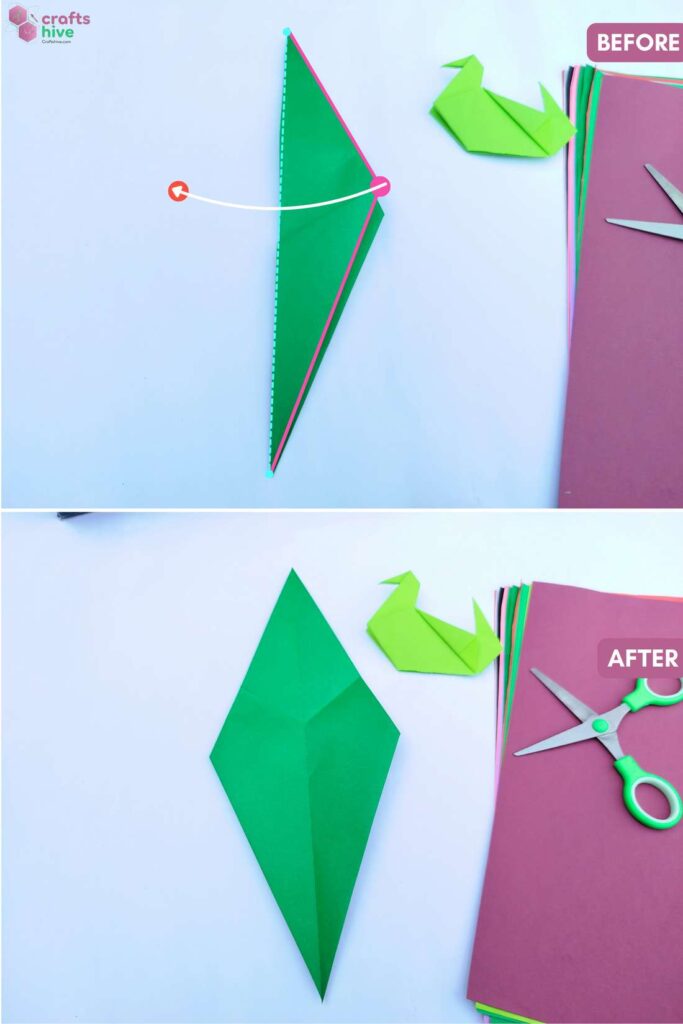
- Now, we have to make an inside reverse fold to turn the neck of the Duck Two-Sided or emerge from inside. To do so:
First, unfold the paper into a full diamond base along the vertical as in Step #4. You will have nice creases on the top, creating a Kite-Like section.
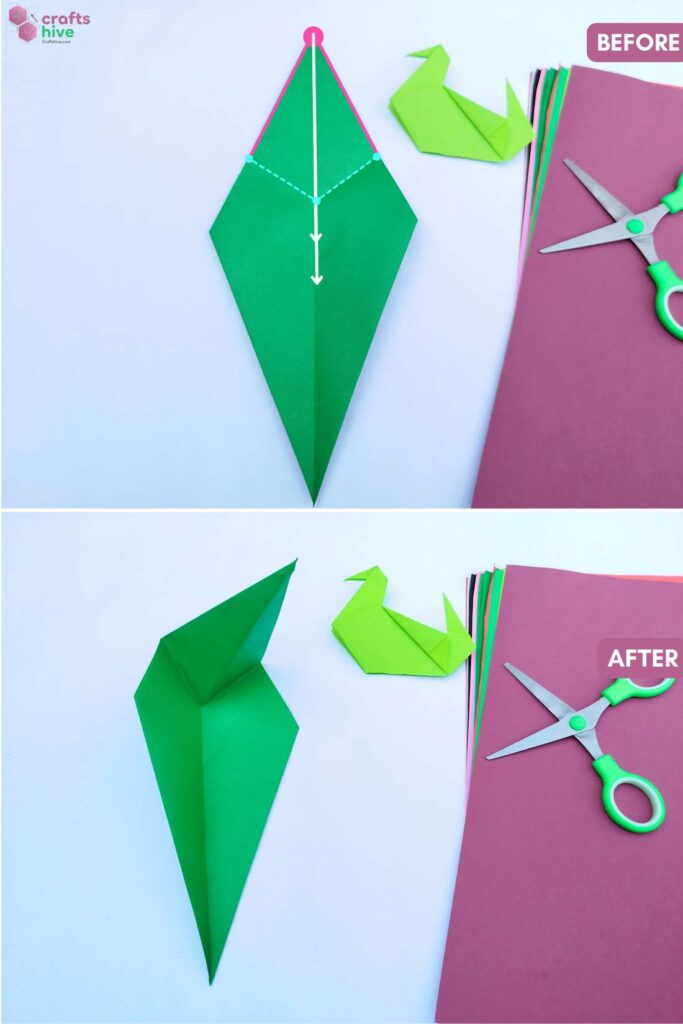
- Try to lift the top corner along these creases like this. This can be easily done by pinching both sides separated by the vertical and lifting the flap automatically.

- Refold in Half Along the Vertical such that you Mountain Fold the Kite section and Valley Fold the remaining. So, you essentially fold the one in half externally and the latter internally.
Step #8: Folds for the Head and Tail
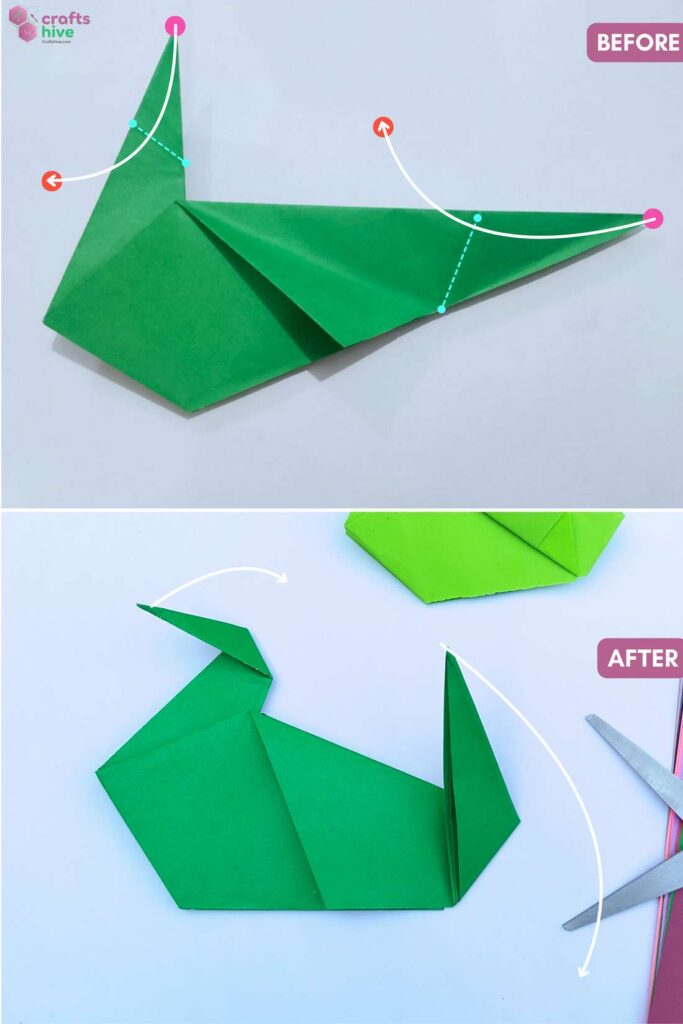
- Fold and unfold the Top corner of the neck to the Left.
- Fold and unfold the Right corner of the tail to the Left as much as you wish.
Note: We want a lifted tail for this model.
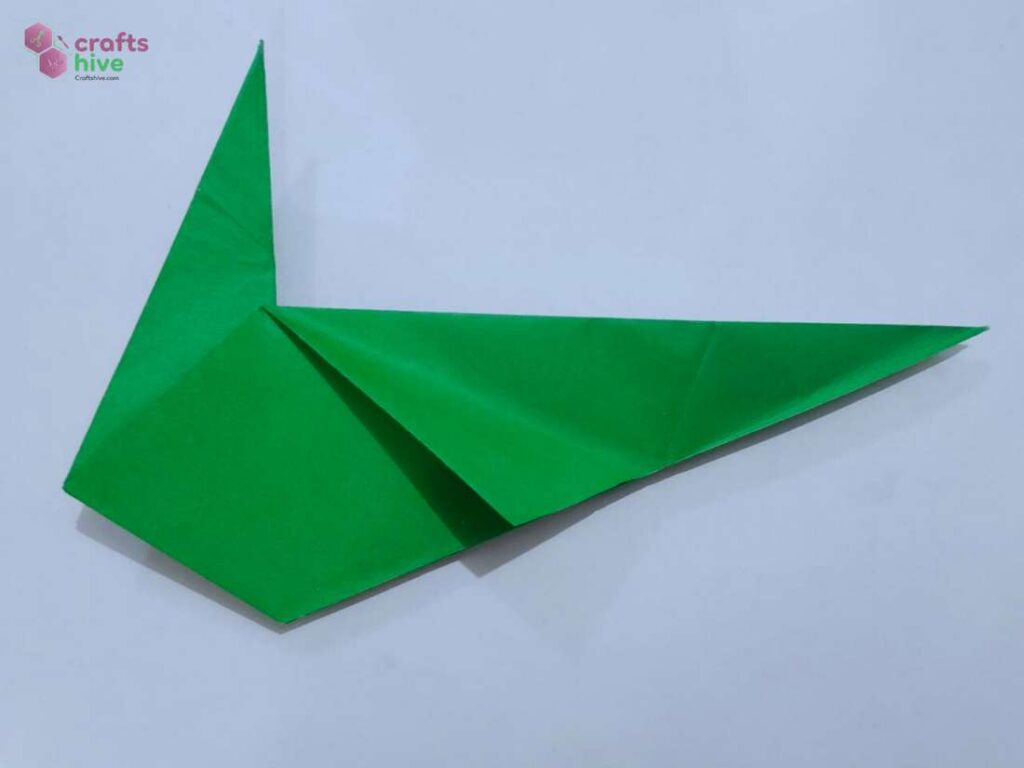
Step #9: Reverse Folds
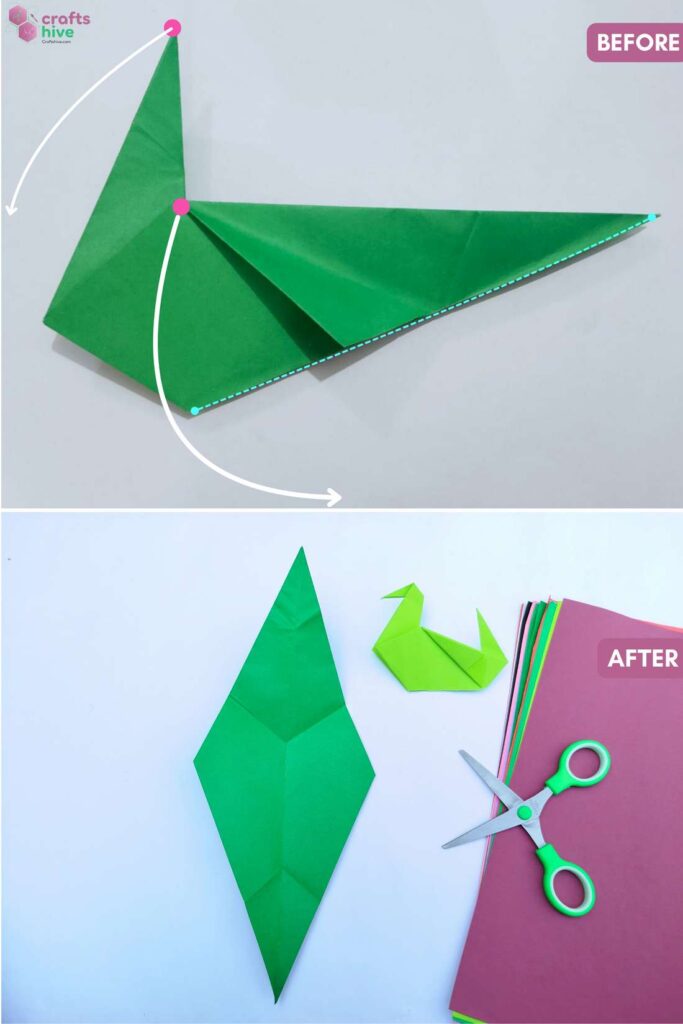
- Unfold the Whole Model into the Diamond Base by undoing steps upto 4.
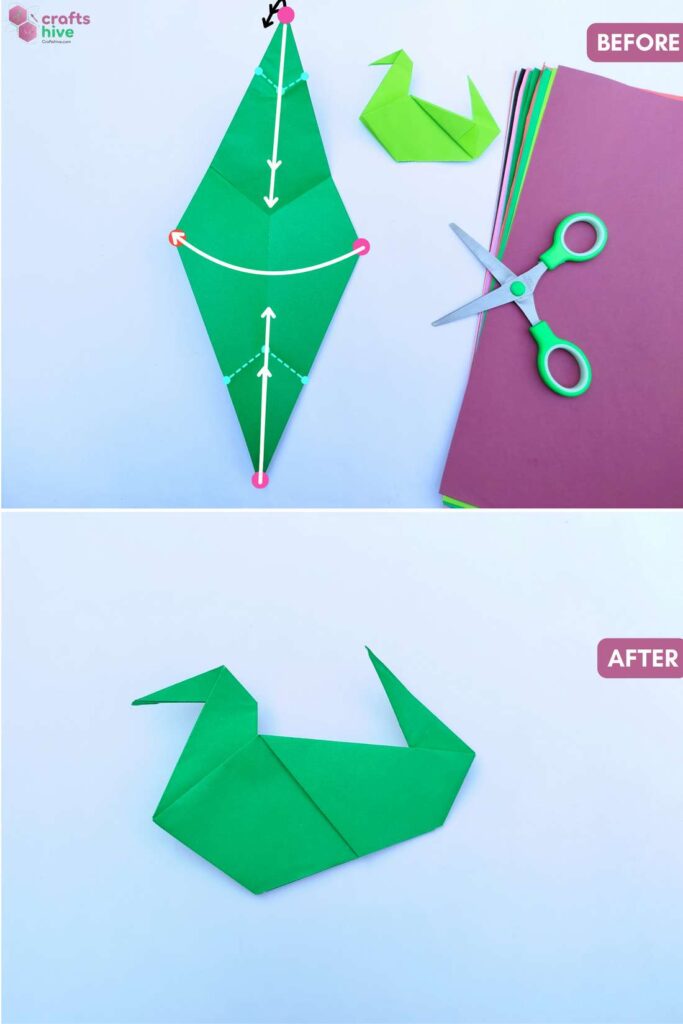
- Make an Inside Reverse Fold with all three sections you have, following the same steps as for the previous fold.
Tip: A Better method of doing is to first fold the neck, then you can partially unfold to make other folds quite easily.
Finished
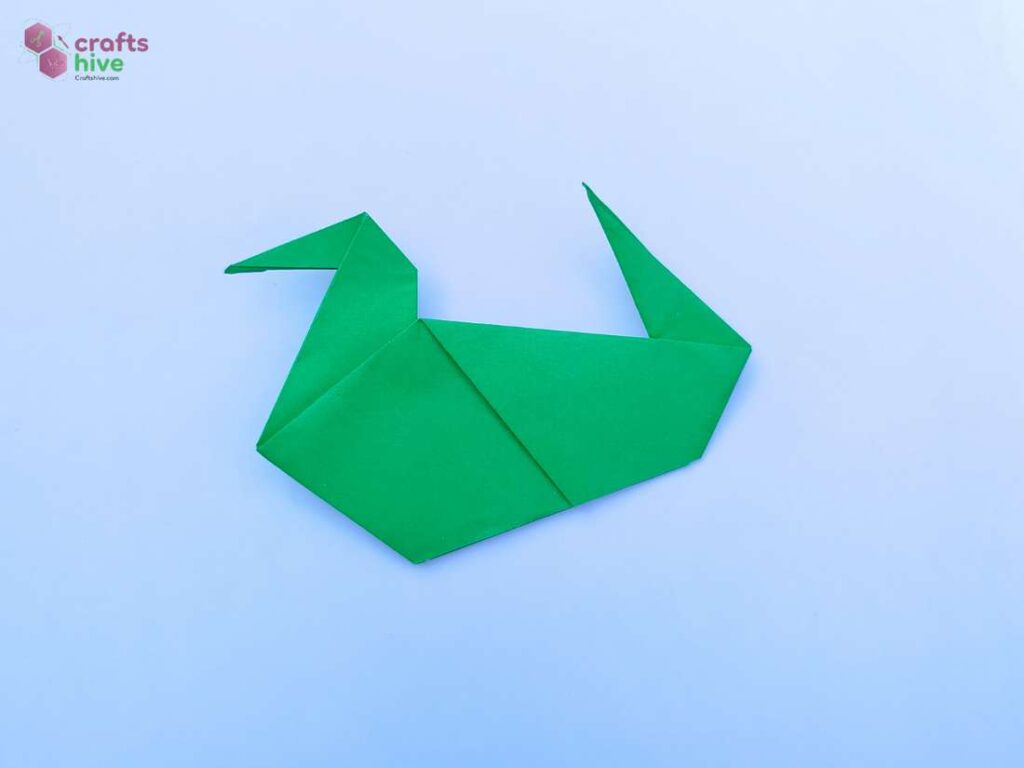
That’s how you can fold an origami duck by yourself. You can open the side flaps a bit to make it stand on its own.
I am expecting some confusion regarding the reverse folds. So, soon, I will also add the supplementary videos regarding these folds. If you reached the tutorial afterwards, you are luckier.
Did you find this tutorial Helpful? Tell Us in the Comments.

About "Talha"
Hey, I’m Talha, the Crafter on Craftstive.com. I love to share guides on folding cute origami models and paper crafts, and I am always ready to inspire your next craft project with my weekly craft discussions.