
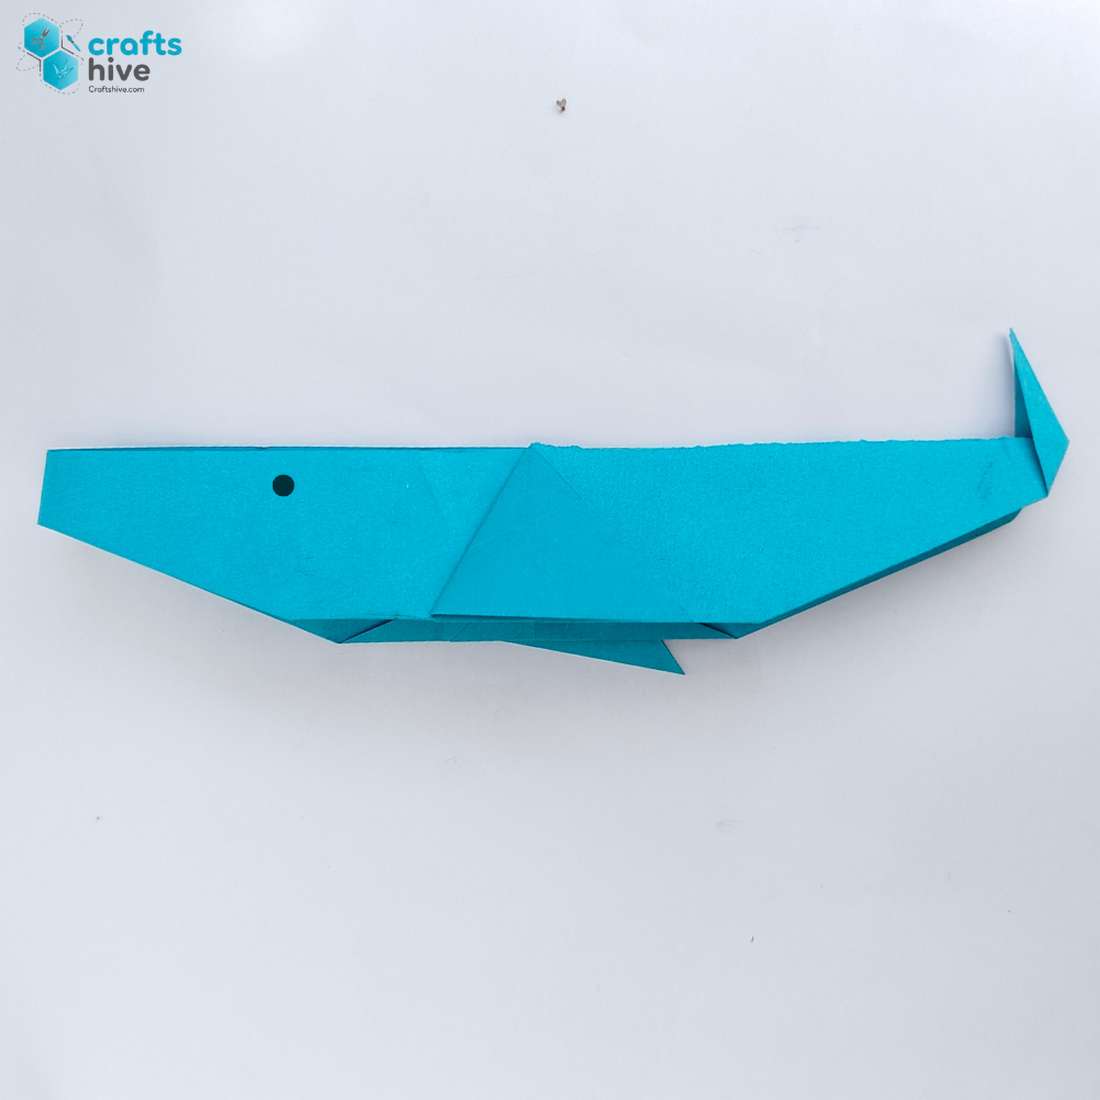
To welcome summer, learn how to fold this cute origami whale in 19 simple steps. This traditional origami whale is folded from the Fish Base, unlike the one I used in my origami whale with heart craft.
I favor this model over the first one as it has fins and a shape that perfectly matches the 2D whale depictions. If you are looking for a simpler model that does not need a squash fold, definitely check that one, too.
For now, I will show you how to fold this origami whale in aqua and blue. You can also draw a simple eye on yours to make it look even cuter.
[ez-toc]
Origami Traditional Whale: Step-by-Step Instructions
Model Type: Traditional/Pure Origami
Difficulty Level: Beginner Level 3
Recommended Paper: This model also does not show both sides of the paper, so I would recommend using Tant Paper (I will be using a 15cm by 15cm square sheet of aqua and black paper).
Starting Fold: Kite Base and then Fish Base. Now you can also learn the folding Kite Base from my Video Tutorial.
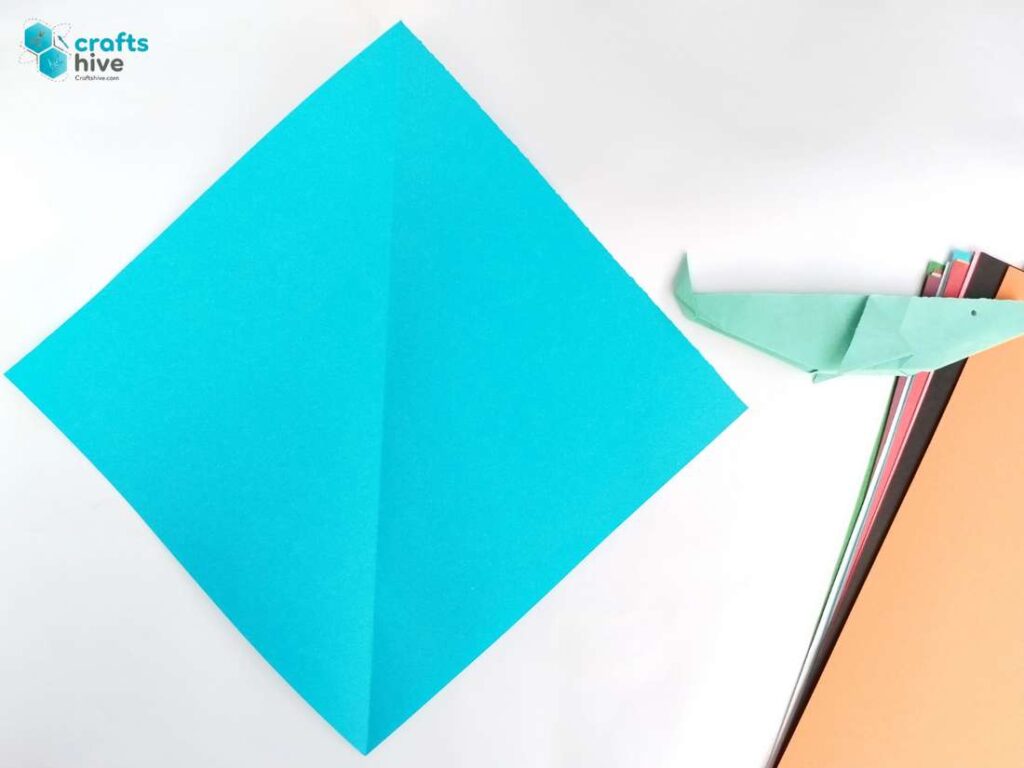
- To begin with, place your square sheet in the diamond position, flat on your origami table.
Step #1: Middle Crease
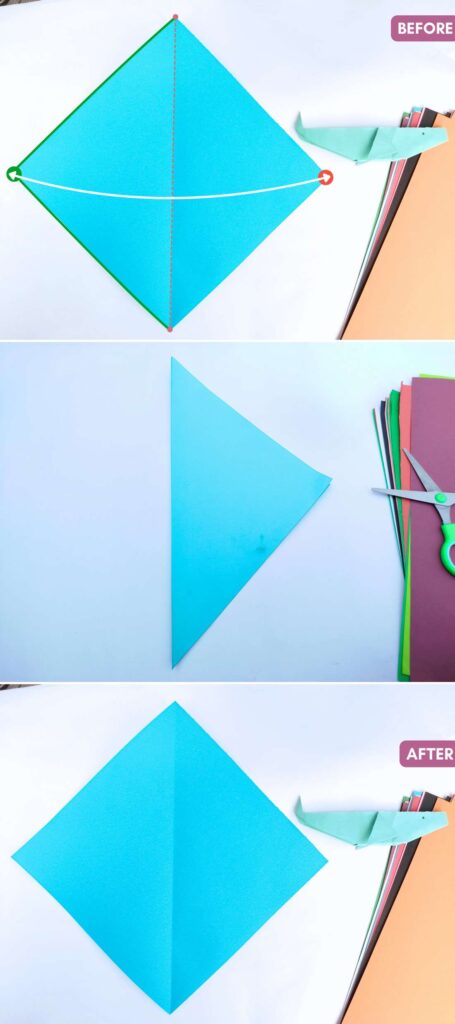
Fold and unfold the Diamond in Half along the Vertical Diagonal to make a crease in the middle.
- Make sure to press flat for a visible crease.
Step #2: Kite Base
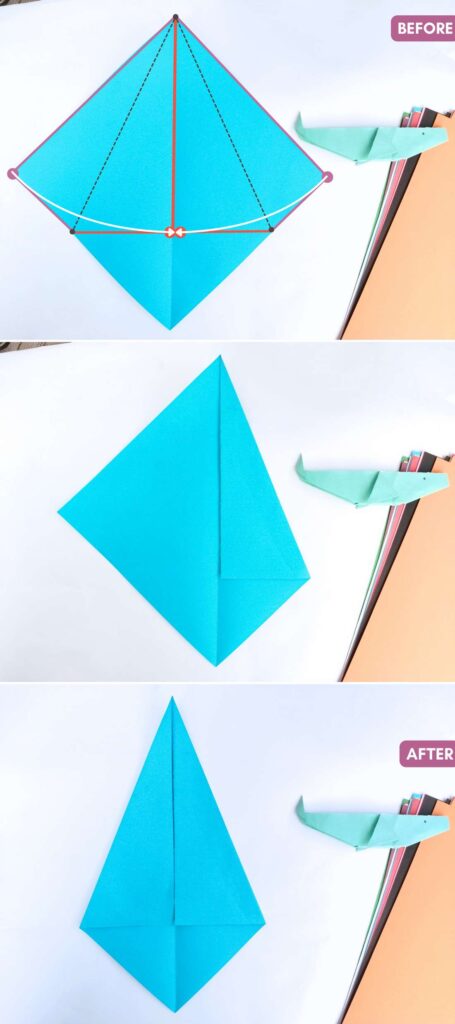
Fold the top edges to the middle crease, align with it, and press the paper flat.
To do so, simply move the left and right corners downward to the centreline until the edges line up with the crease. This way, we have the Traditional Kite Base start.
Step #3: Turn
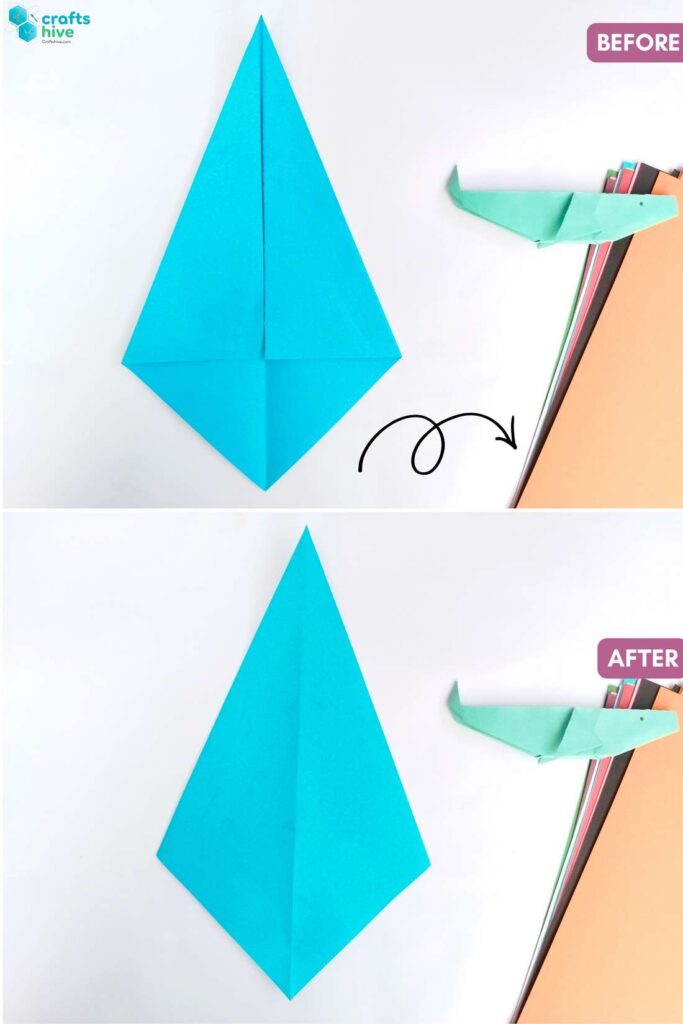
Turn the Kite Base over to the other side.
Step #4: Fold Down
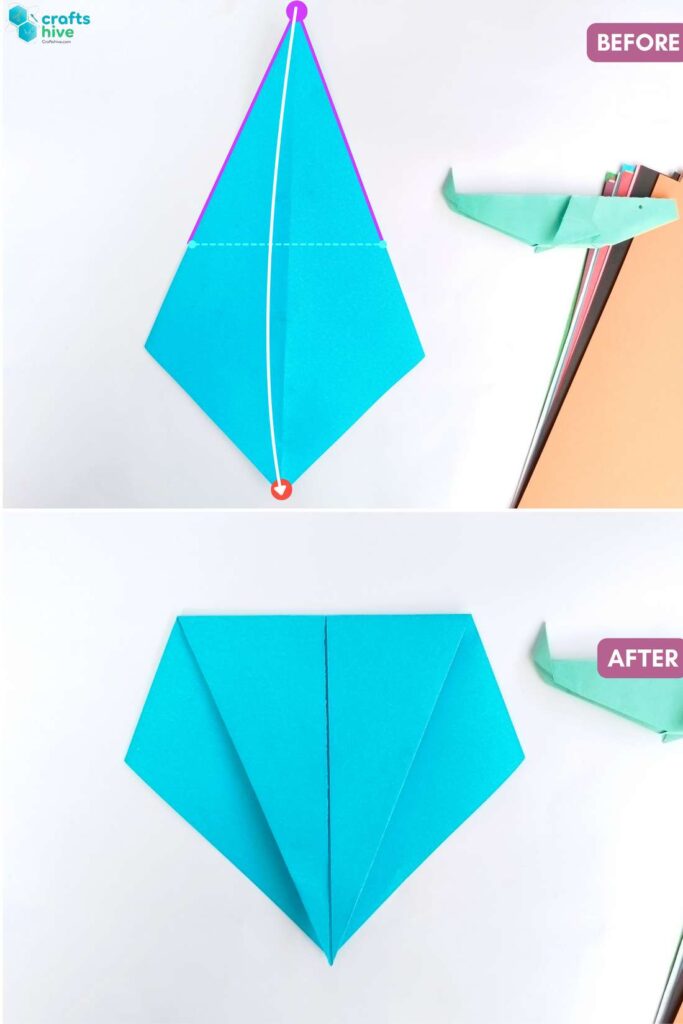
Fold the top corner down to the bottom corner and crease the fold well.
Step #5: Turn
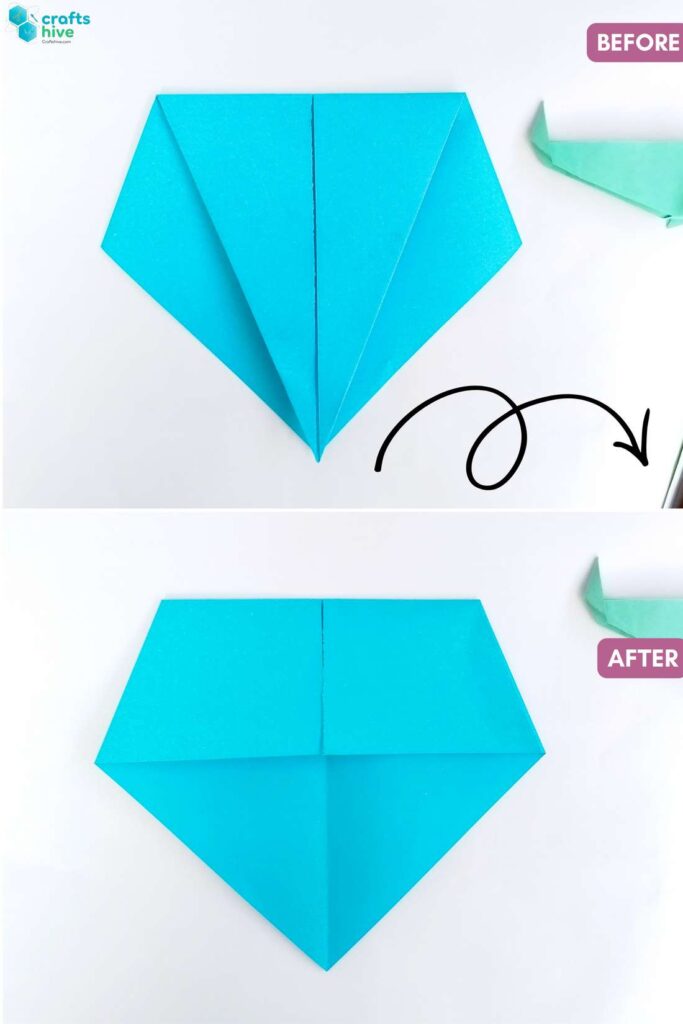
Turn the model over.
Step #6: Intermediate Fold
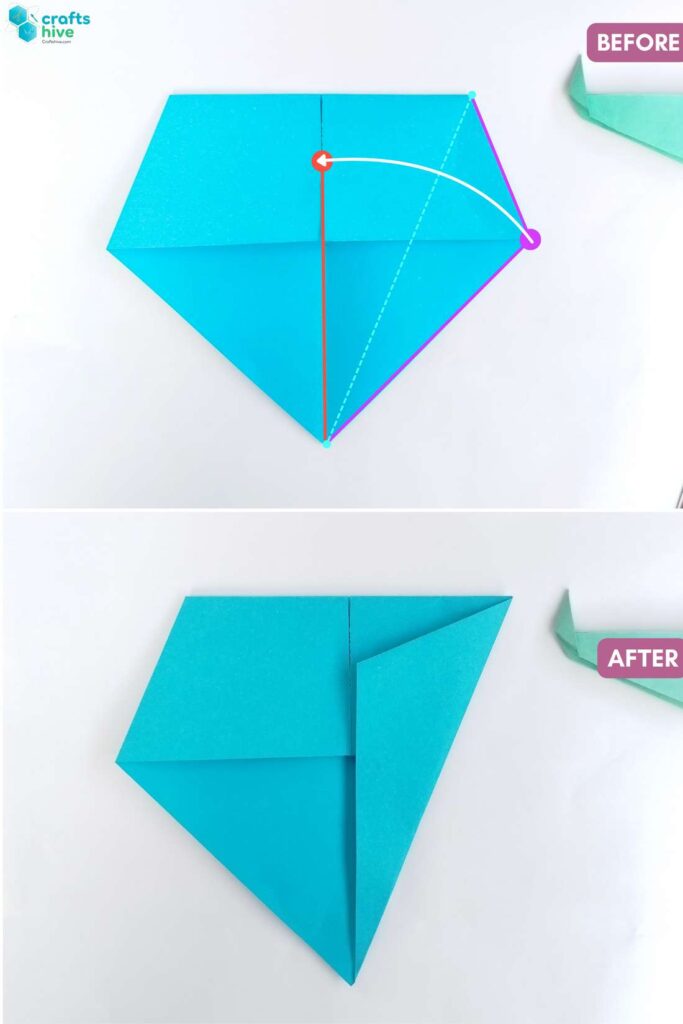
Fold the bottom edges to the vertical crease along the bottom and top side corners, align with the crease, and press the paper flat very well.
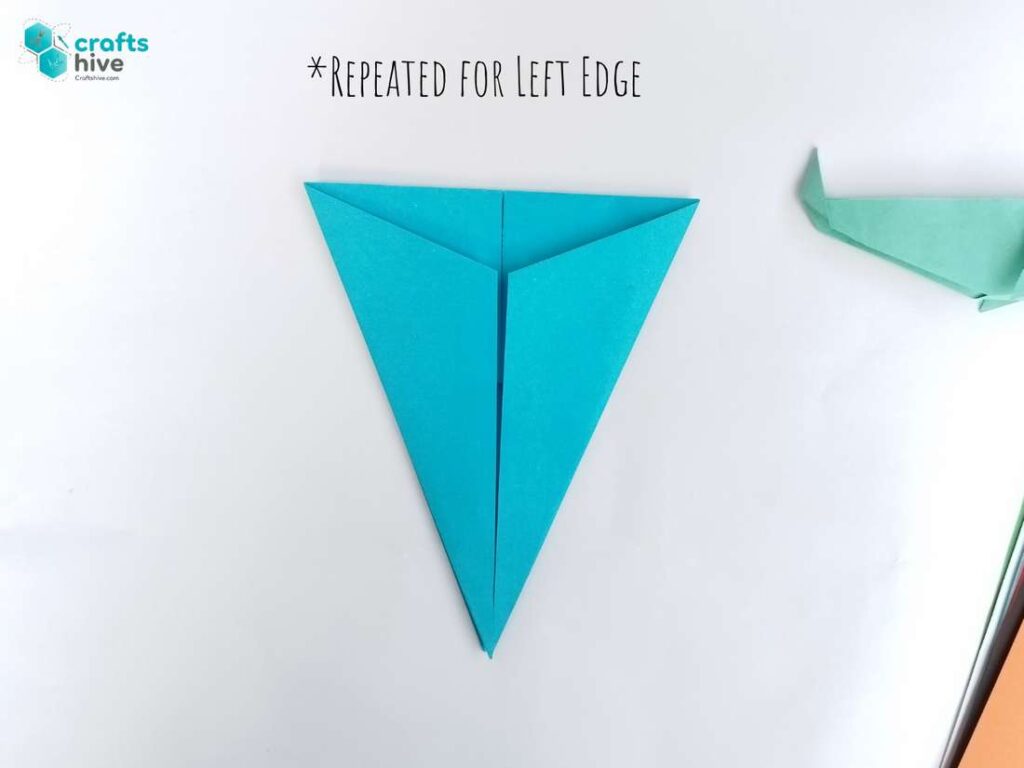
Step #7: Unfold
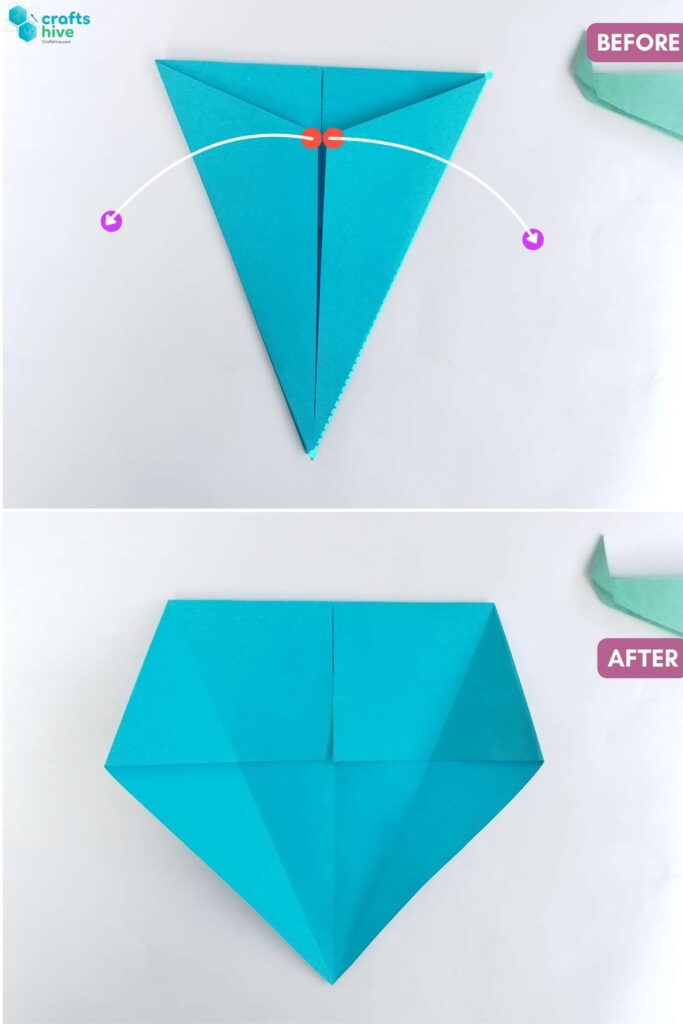
Undo Step #6.
Step #8: Squash
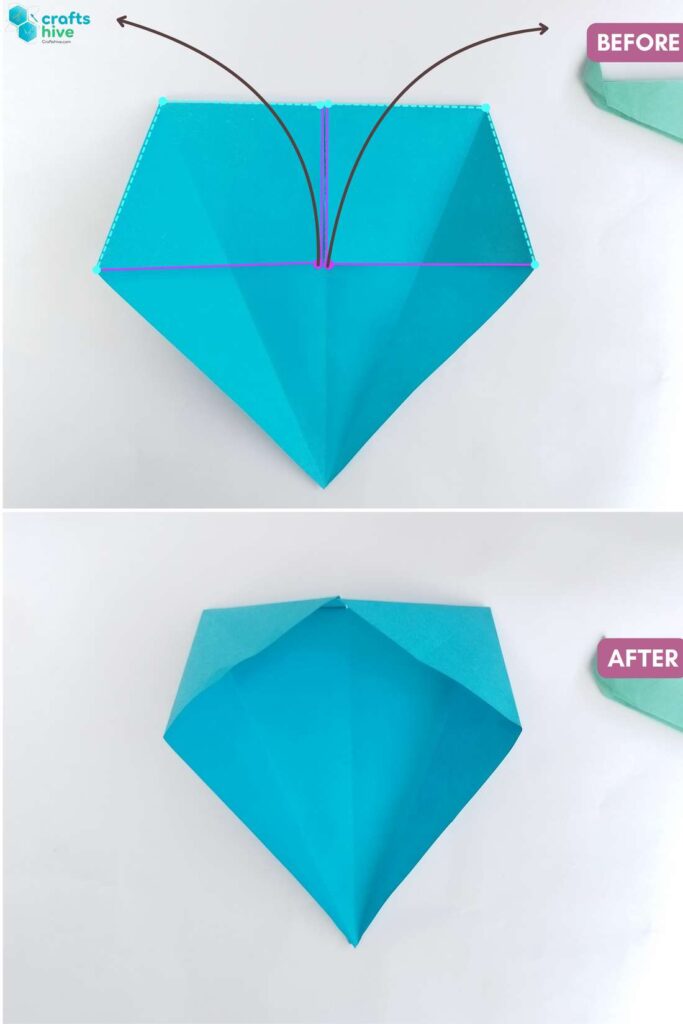
Swing the Kite Flaps away from you along the marked creases by picking corners. This is kind of like opening the pockets.
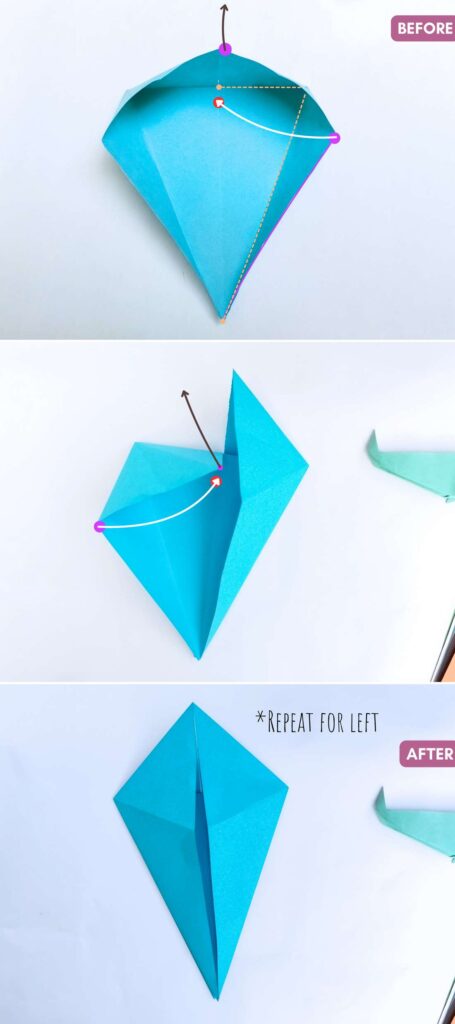
Refold along the creases made in Steps #6 and #7 such that the Kite Flaps don’t again get folded. To do so, continue pulling the flaps away from and do this fold. The Flaps will settle along the crease they should be.
Step #9: Uncollapse
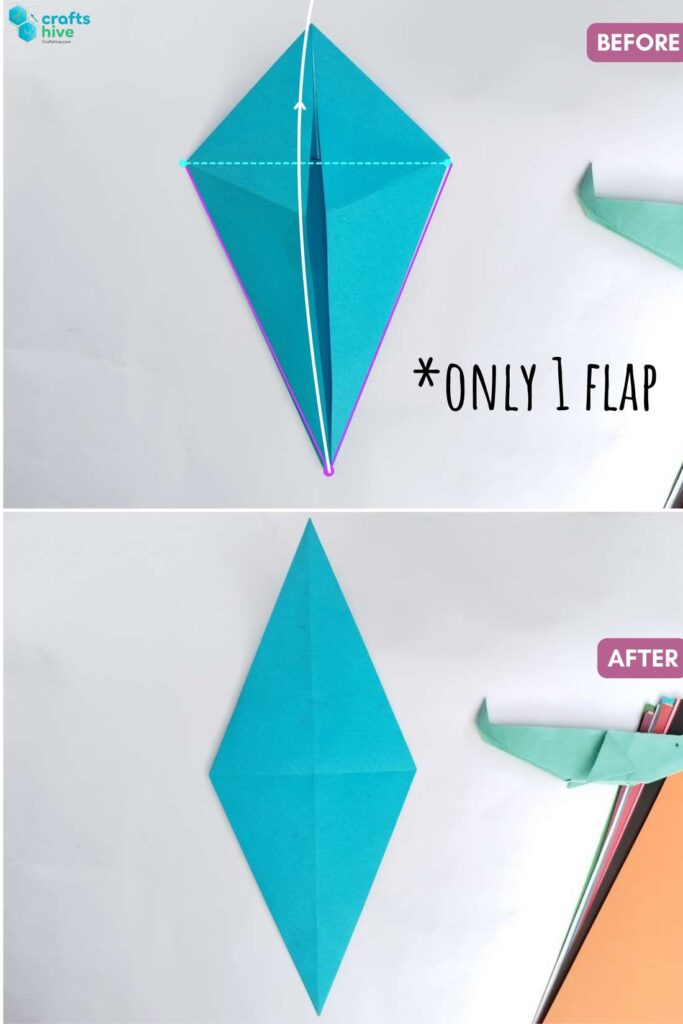
Swing one flap away from you along the middle corner and press flat.
Step #10: Turn
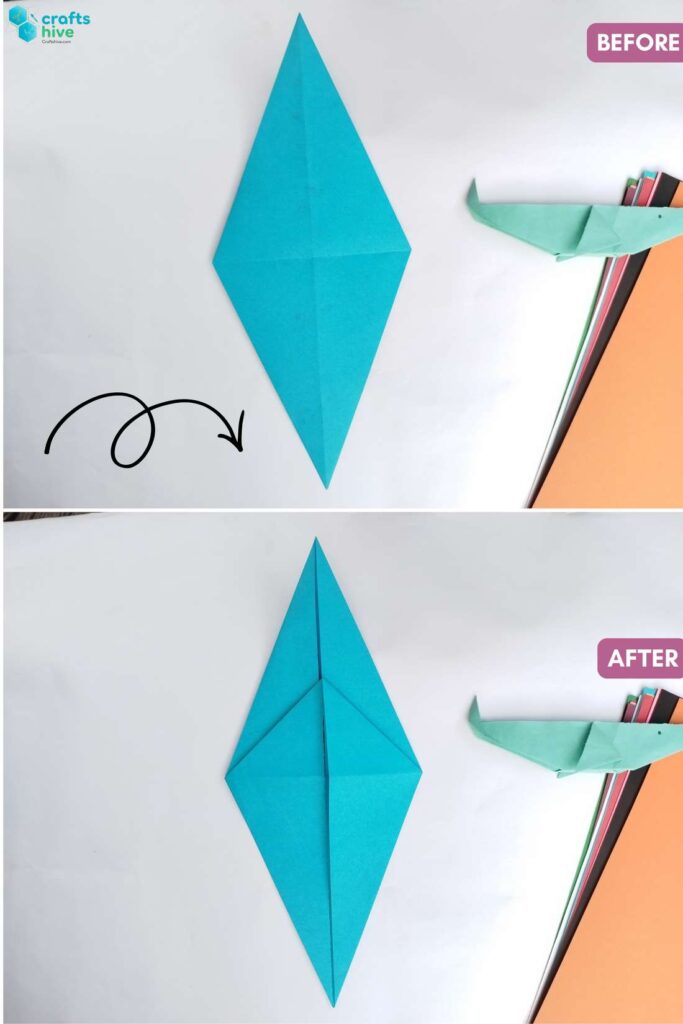
Turn the entire model over to the other side.
Step #11: Fold Down
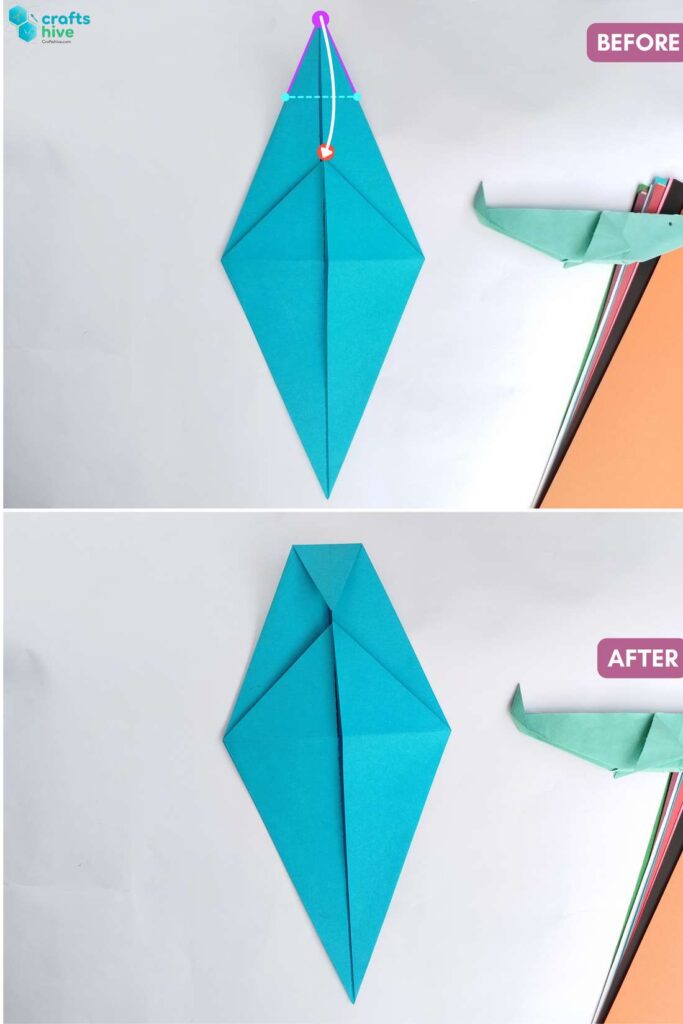
Fold and unfold the top corner to the top corner of the overlapping flap.
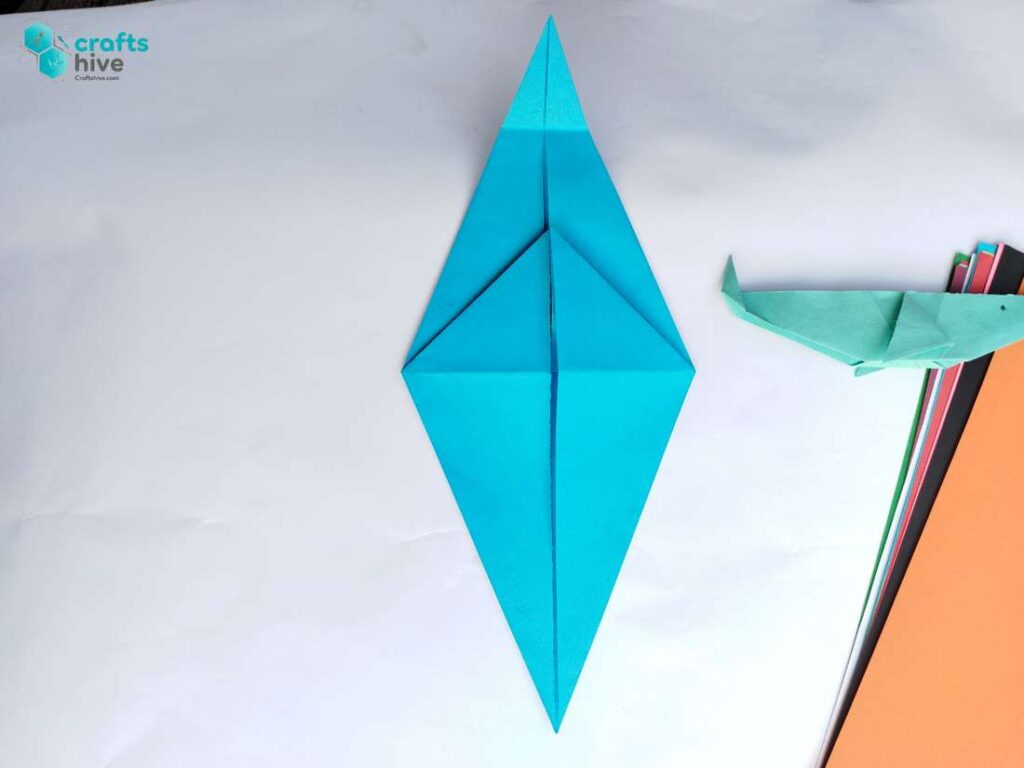
Step #12: Turn
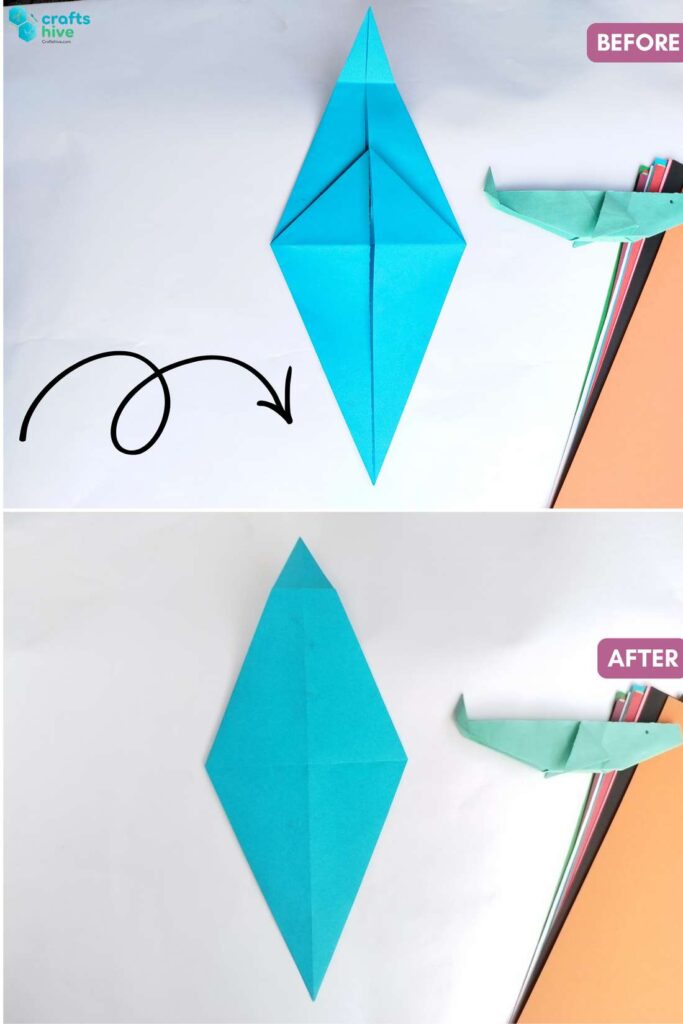
Turn over to the other side.
Step #13: Fold Down
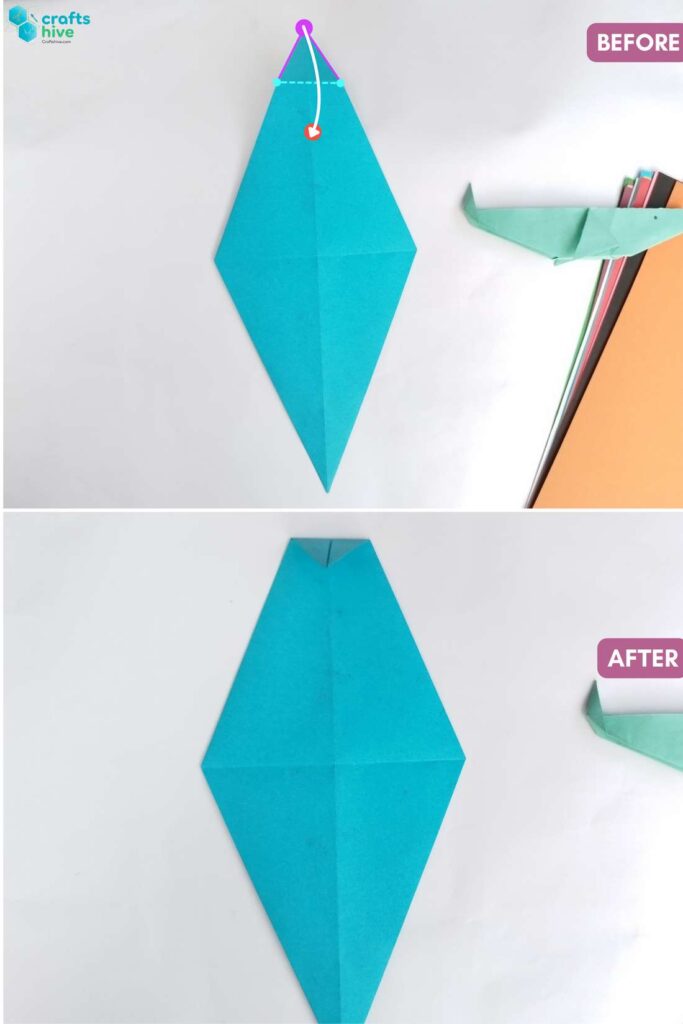
Along the crease made in step #11, the top corner down. This transforms our Valley Fold to Mountain Fold.
Another method: Simply Mountain Fold.
Step #14: Fold the Sides
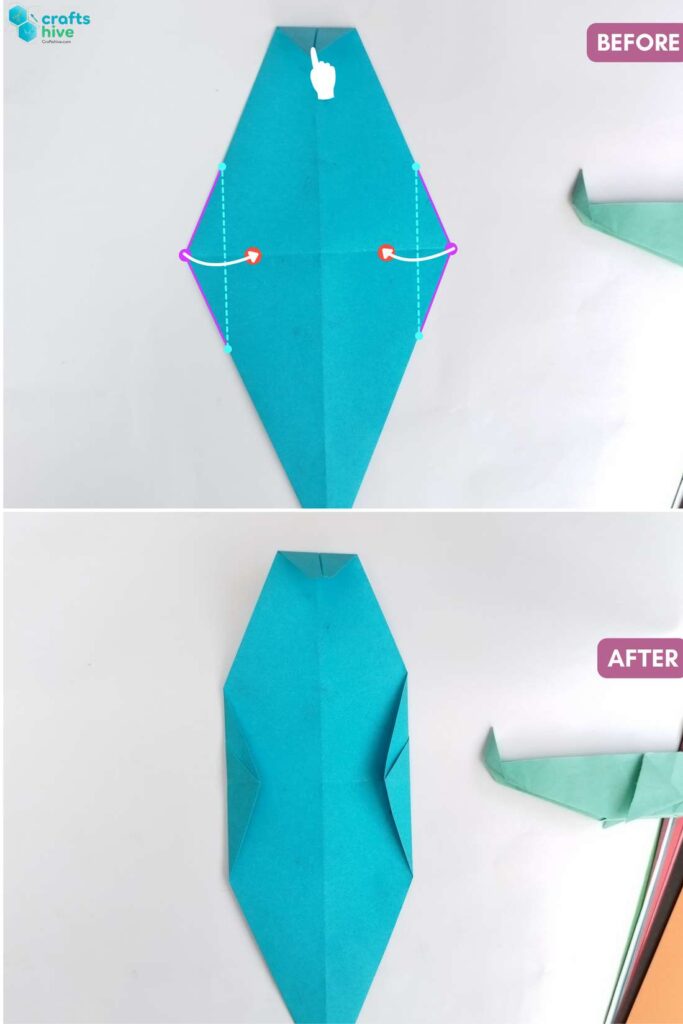
Note: This step decides the height of your finished origami whale. So, to your taste, fold the middle corner to the opposite sides. You can definitely do as much as I did.
Step #15: Fold in Half
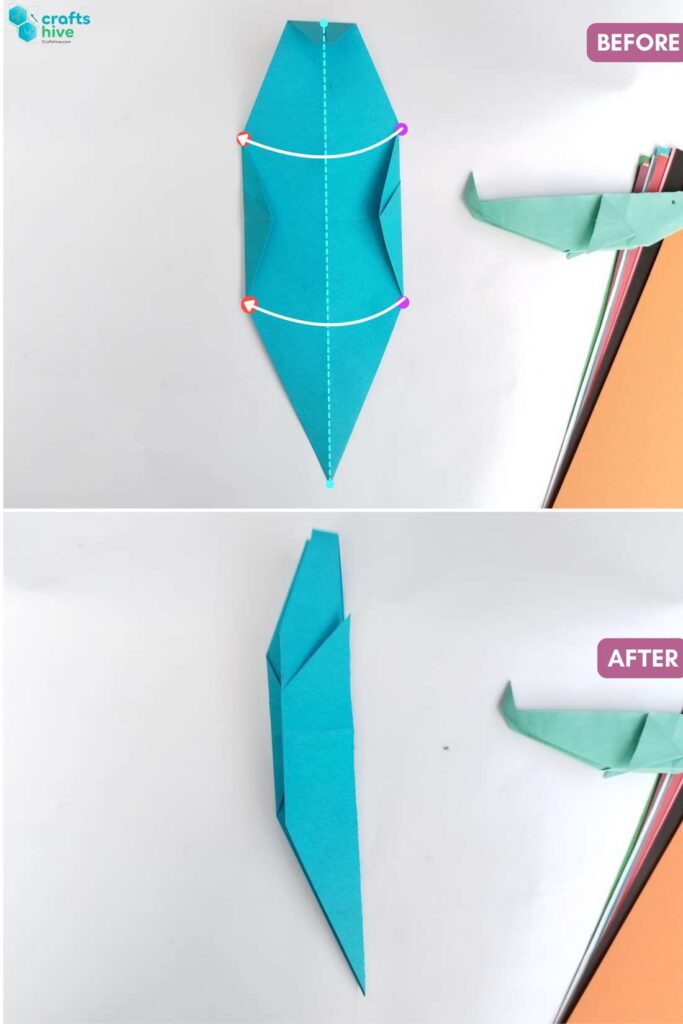
Along the middle crease, fold the model in half to get the body of the origami whale.
Step #16: Fold the First Fin
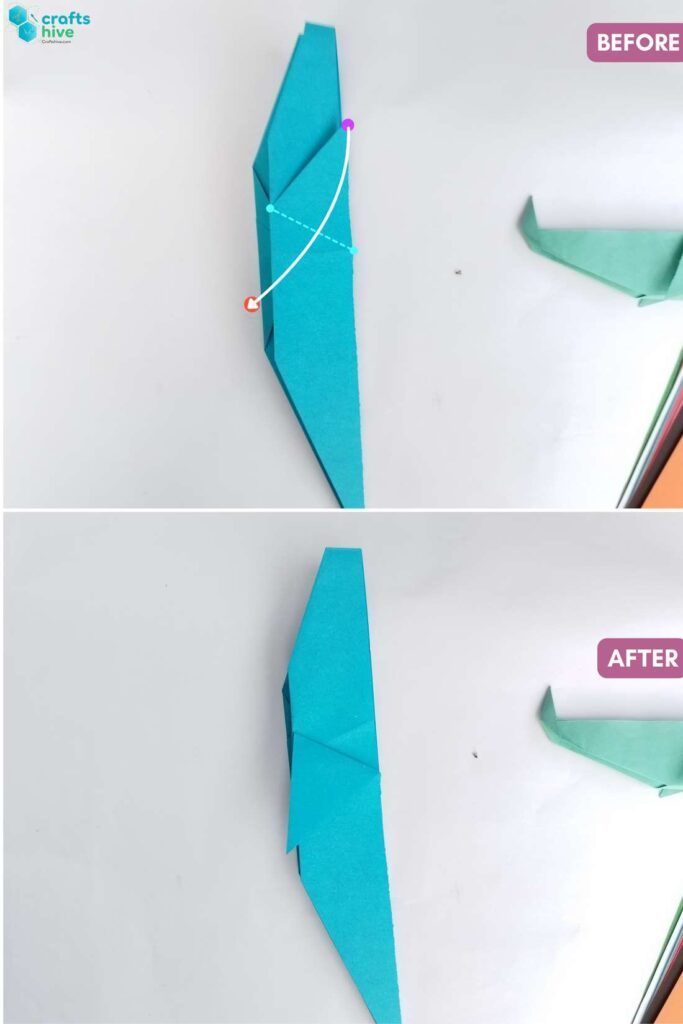
Along the end of the flap from the left and the end of the crease on the right, fold the flap down and press flat.
Step #17: Turn
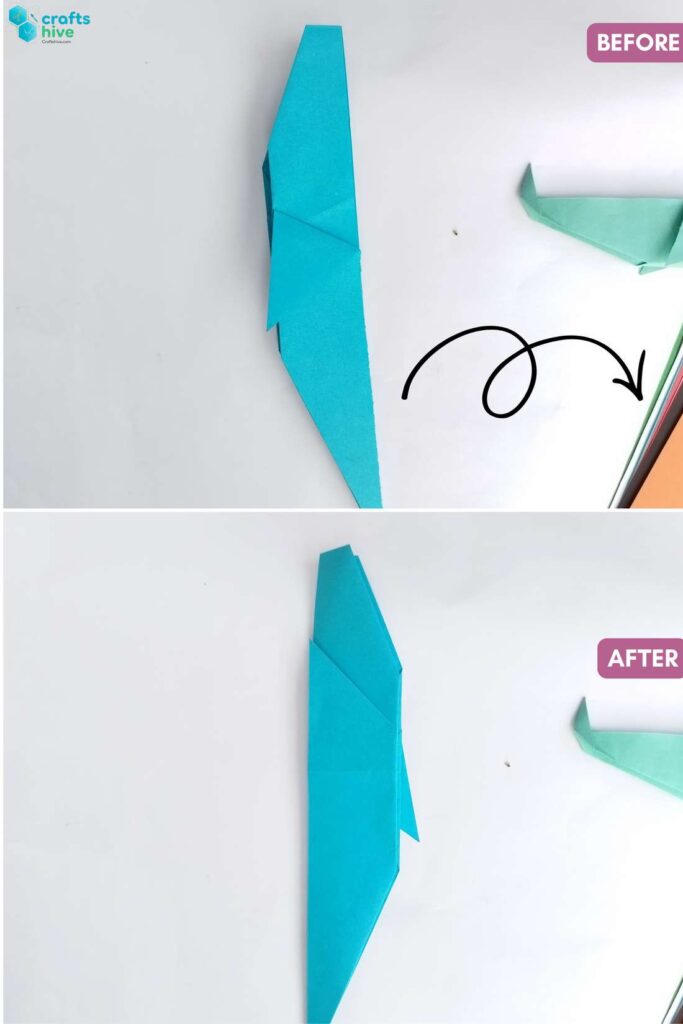
Turn the origami whale over to the other side.
Step #18: Fold the 2nd Fin
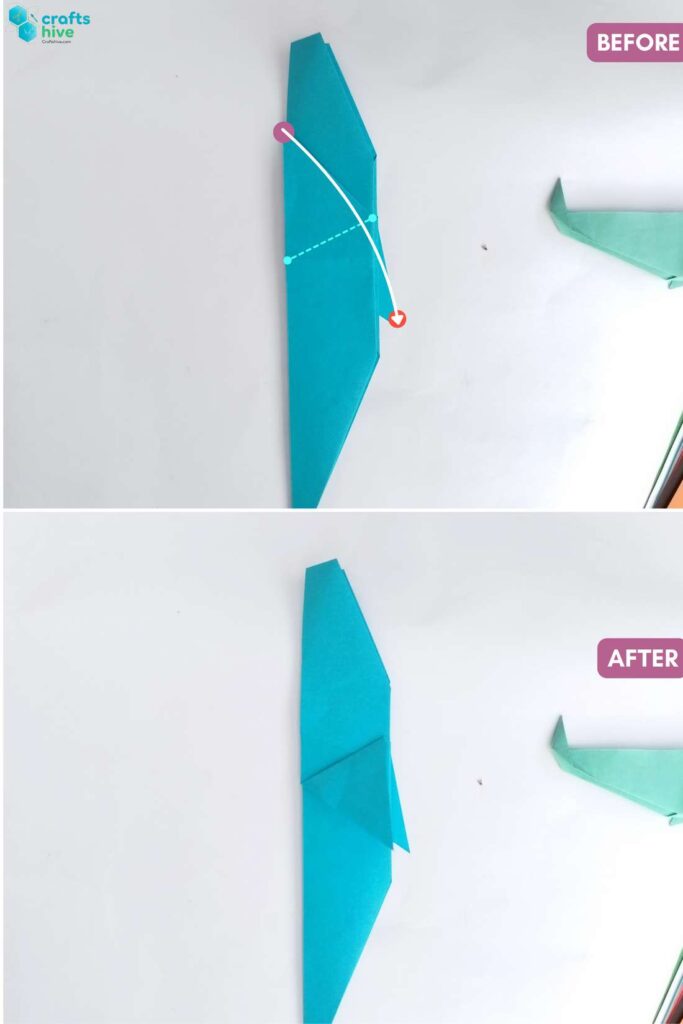
Similarly, fold the 2nd fin now along the end of the flap from the right and the end of the crease on the left.
Step #19: Fold the Tail
Make an Inside Reverse Fold with the bottom corner to make a two-sided tail.
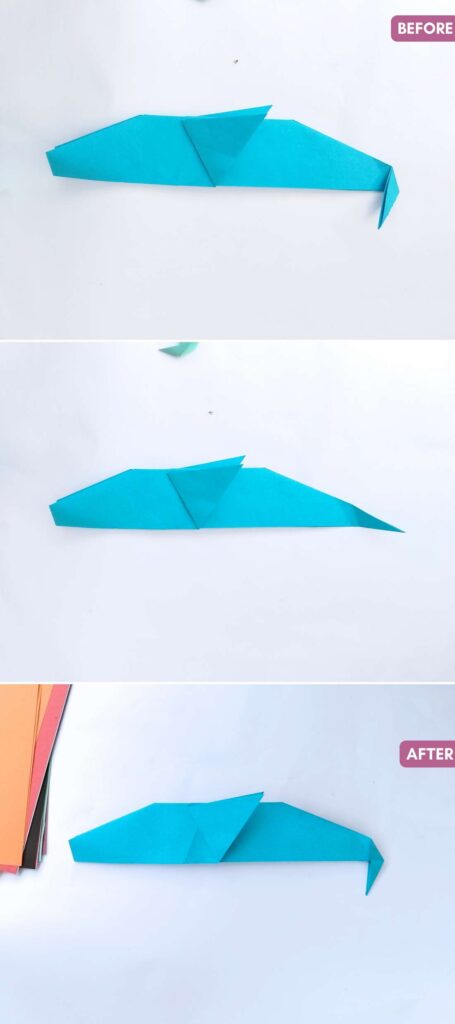
Finished
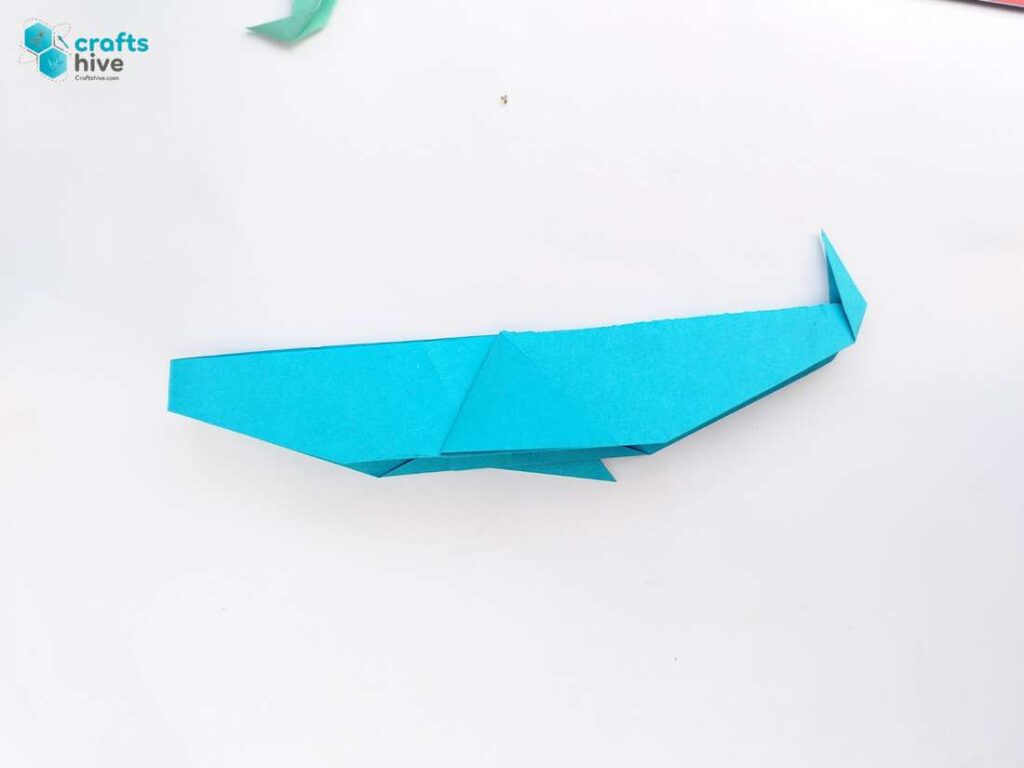
This is how you will fold your origami whale in 19 basic steps. You can also add an origami heart to it to make my origami Valentine’s Day whale craft. Enjoy making one!
Was this Origami Tutorial Helpful? Tell us in the Comments.
Your feedback is a great way for us to improve our origami tutorials. So, share your thoughts on whether you tried this one or not, and highlight the weak points.