
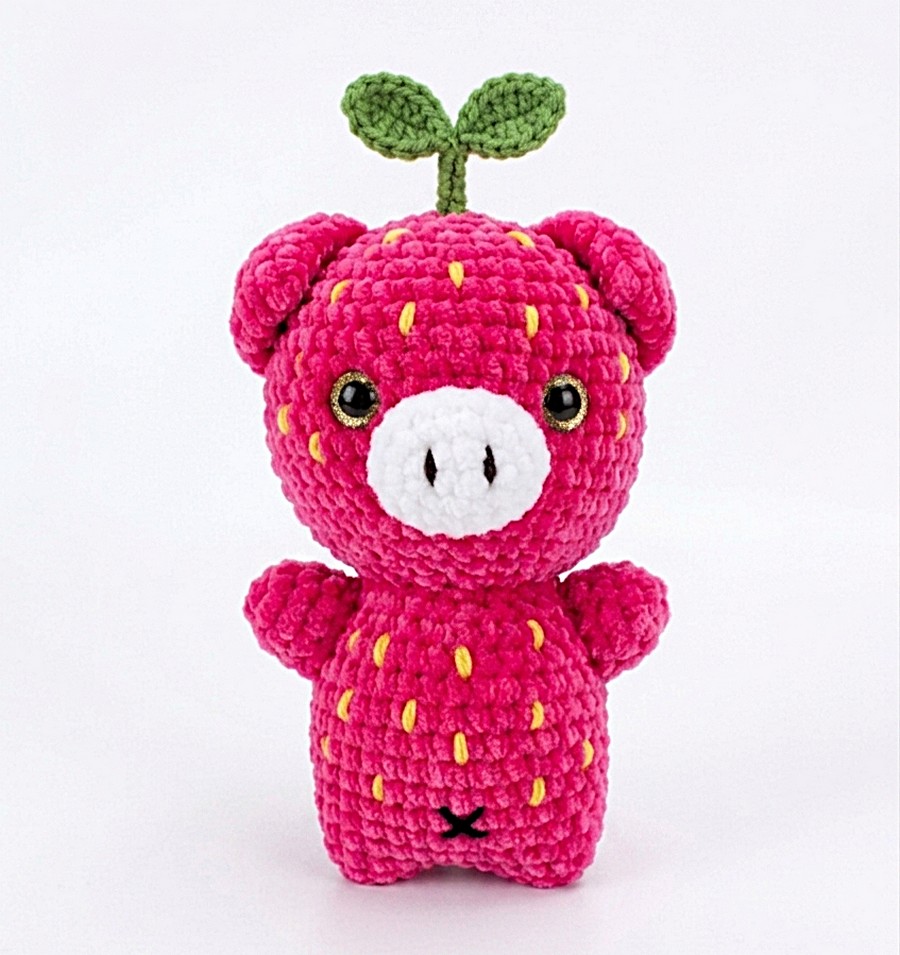
Yesterday, I shared a pattern to crochet the cheering pig plushie that I named just a big pig plushie. Since it is feeling like summer already, as I promised, here is a free pattern to crochet a strawberry cheering pig plushie doll that is as huggable as the big pig plush. While you can also crochet it with red as the main color for the yarn, I liked the dragonfruit pink or hot pink more, and coupled it with the yellow plush yarn.
An extra pattern that I will provide is for the two-leaf sprout that is wired from the stem. It looks so cute on its head. The stem uses a double chain as it is much thicker and holds the shape well. I have described all the methods in the end. Now, continue reading for the full pattern to crochet this “hug me” pig plush.
[ez-toc]
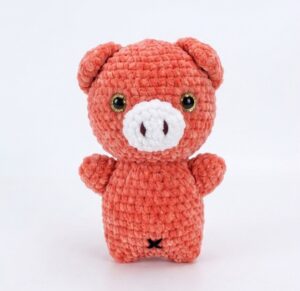
Looking for part 1 of this crochet pig plushie? It is simple and even easier:
Strawberry Pig Amigurumi Pattern
Let’s crochet a strawberry version of Cheering Pig amigurumi (the body closure, snout, head, hands, ears, and other parts) with this pattern. Assembly is in the end:
Supplies
- Yarn: 4-ply milk cotton or thin plush yarn (Hot Pink, Leaf Green, White/Yellow for seeds)
- Hook: 2.0 mm
- Extras: Florist wire (for stem), Fiberfill, glitter, Safety eyes, Black embroidery thread or plush yarn.
1. Strawberry Body
Start with Hot Pink Yarn.
- R1: 6 sc in MR [6 sts]
- R2: 6 inc [12 sts]
- R3: (1 sc, 1 inc) * 6 [18 sts]
- R4: (2 sc, 1 inc) * 6 [24 sts]
- R5: (3 sc, 1 inc) * 6 [30 sts]
- R6: 2 sc, 1 inc, (4 sc, 1 inc) * 5, 2 sc [36 sts]
- R7: (5 sc, 1 inc) * 6 [42 sts]
- R8: (6 sc, 1 inc) * 6 [48 sts]
- R9–R15: 48 sc around (7 rounds total) [48 sts]
- R16: 5 sc, 1 dec, (10 sc, 1 dec) * 3, 5 sc [44 sts]
- R17: 44 sc around [44 sts]
- R18: (9 sc, 1 dec) * 4 [40 sts]
- R19: 40 sc around [40 sts]
- R20: 4 sc, 1 dec, (8 sc, 1 dec) * 3, 4 sc [36 sts]
- R21: 36 sc around [36 sts]
- R22: (7 sc, 1 dec) * 4 [32 sts]
- R23–R24: 32 sc around (2 rounds total) [32 sts]
- Seeds: Using White or Yellow, embroider small vertical “seeds” randomly across the red section.
- R25 (Closure): Stuff firmly. Flatten the edge and work 16 sc through both layers to close. Fasten off.
2. Snout / Nose
Unlike the body, the snout is worked in joined oval rounds rather than a continuous spiral. Again, start with the pink yarn.
- Foundation: ch 6.
- R1: Starting in the 2nd ch from the hook, work 4 sc. In the last chain stitch, work 3 sc in the same stitch. Turn to work along the opposite underside of the chain: 3 sc, then 1 inc in the very first chain stitch. Join with a sl st to the first sc. [12 sts]
- R2: ch 1, 1 inc, 4 sc, 2 inc, 4 sc, 1 inc. Join with a sl st. [16 sts]
- R3: ch 1, 1 sc, 1 inc, 4 sc, 1 inc, 2 sc, 1 inc, 4 sc, 1 inc, 1 sc. Join with a sl st. [20 sts]
- R4: ch 1, 2 sc, 1 inc, 4 sc, 1 inc, 4 sc, 1 inc, 4 sc, 1 inc, 2 sc. Join with a sl st. [24 sts]
- Fasten off, leaving a long tail for sewing. Use a needle to create a seamless, invisible bind-off.
3. Head
Worked in a continuous spiral with the main color yarn. Use the hot Pink yarn.
- R1: 6 sc in MR [6 sts]
- R2: 6 inc [12 sts]
- R3: (1 sc, 1 inc) * 6 [18 sts]
- R4: (2 sc, 1 inc) * 6 [24 sts]
- R5: (3 sc, 1 inc) * 6 [30 sts]
- R6: 2 sc, 1 inc, (4 sc, 1 inc) * 5, 2 sc [36 sts]
- R7: (5 sc, 1 inc) * 6 [42 sts]
- R8: 3 sc, 1 inc, (6 sc, 1 inc) * 5, 3 sc [48 sts]
- R9: (7 sc, 1 inc) * 6 [54 sts]
- R10: 4 sc, 1 inc, (8 sc, 1 inc) * 5, 4 sc [60 sts]
- R11–R22: 60 sc around (12 rounds total) [60 sts]
- R23: 4 sc, 1 dec, (8 sc, 1 dec) * 5, 4 sc [54 sts]
- R24: (7 sc, 1 dec) * 6 [48 sts]
- R25: 3 sc, 1 dec, (6 sc, 1 dec) * 5, 3 sc [42 sts]
- R26: (5 sc, 1 dec) * 6 [36 sts]
- R27: 2 sc, 1 dec, (4 sc, 1 dec) * 5, 2 sc [30 sts]
- Stuff tightly with fiberfill and leave a long yarn tail for sewing.
4. Hands / Arms (Make 2)
Worked in a continuous spiral with the main color yarn.
- R1: 4 sc in MR [4 sts]
- R2: 4 inc [8 sts]
- R3: (1 sc, 1 inc) * 4 [12 sts]
- R4–R5: 12 sc around (2 rounds total) [12 sts]
- R6: (3 sc, 1 inc) * 3 [15 sts]
- R7: 15 sc around [15 sts]
- Fasten off and leave a tail for assembly.
5. Ears (Make 2)
Worked in a continuous spiral with the main color yarn.
- R1: 6 sc in MR [6 sts]
- R2: 6 inc [12 sts]
- R3: (1 sc, 1 inc) * 6 [18 sts]
- R4: (5 sc, 1 inc) * 3 [21 sts]
- R5–R7: 21 sc around (3 rounds total) [21 sts]
- Closure: Flatten the opening of the ear and crochet the two opposing sides together with 10 sc to seal it shut [10 sts]. Fasten off and leave a long tail for sewing onto the head.
6. Two-Leaf Sprout & Stem
The Wired Stem (Tail-Wrap Double Chain)
Use Leaf Green. Leave a tail at least 3 times the desired length of the stem.
- Make a slip knot and place it on the hook. Hold the tail toward you and the working yarn (from the ball) toward the back.
- Yarn Under: Bring the tail over the hook from front to back.
- Yarn Over: Wrap the working yarn over the hook from back to front.
- Pull Through: Pull the working yarn through both loops on the hook.
- Repeat steps 2–4 until the cord is ~2 inches long.
- Insert Wire: Slide your wire through the center of this cord. Fold the wire ends into small loops so they don’t poke through.
The Leaves (Make 2)
Use Leaf Green.
- ch 7.
- 2nd ch from hook: sl st, sc, hdc, dc, hdc.
- In the last chain: (sc, ch 2, sc) to turn the corner.
- Opposite side of chain: hdc, dc, hdc, sc, sl st. Fasten off.
5. Assembly
- Head to Body: Sew the pink head to the green “strawberry top” of the body.
- The Sprout: Sew the two leaves to the top-center of the head. Sew the wired stem between them.
- The Face:
- Sew the Snout between R16–R22.
- Place Eyes on either side of the snout.
- Embroider two black Nostrils.
- The Rest: Sew the Hands to the sides (red part) and Ears to the head.
- Belly Button: Add a small black “X” or a white seed on the lower belly.

About "Talha"
Hey, I’m Talha, the Crafter on Craftstive.com. I love to share guides on folding cute origami models and paper crafts, and I am always ready to inspire your next craft project with my weekly craft discussions.