
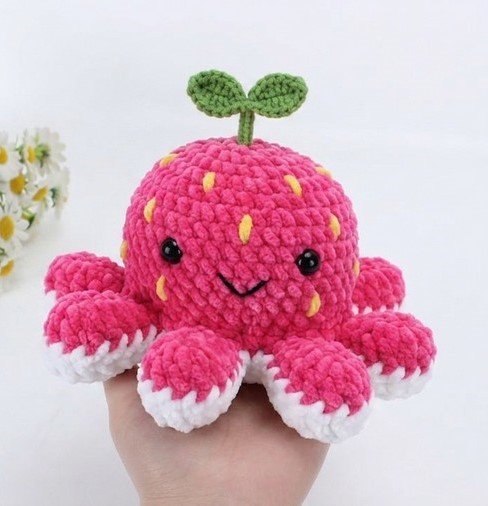
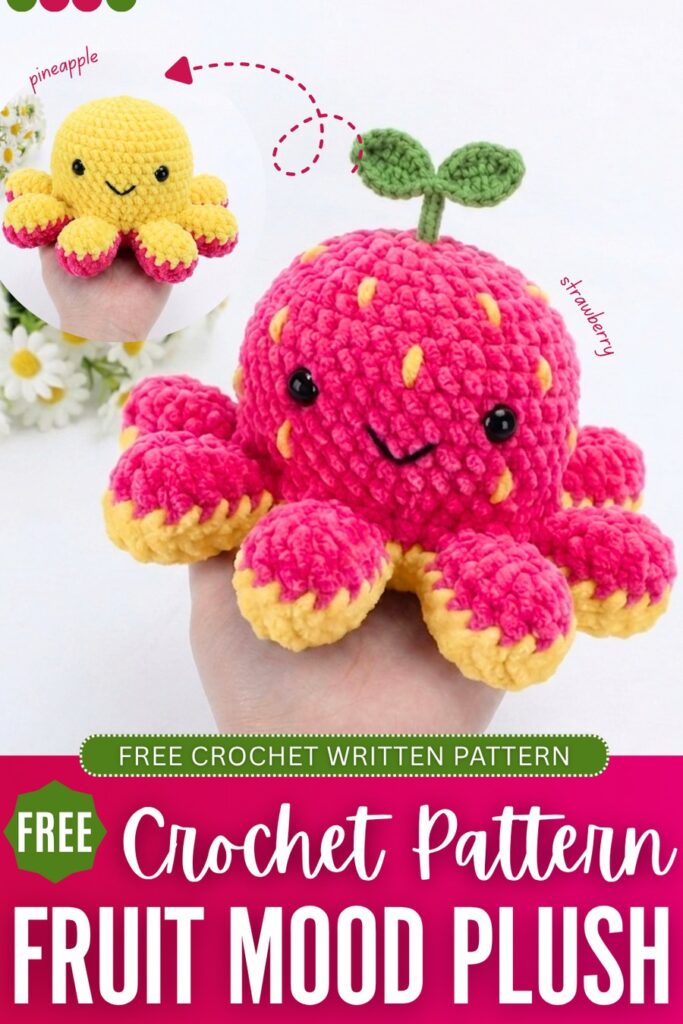
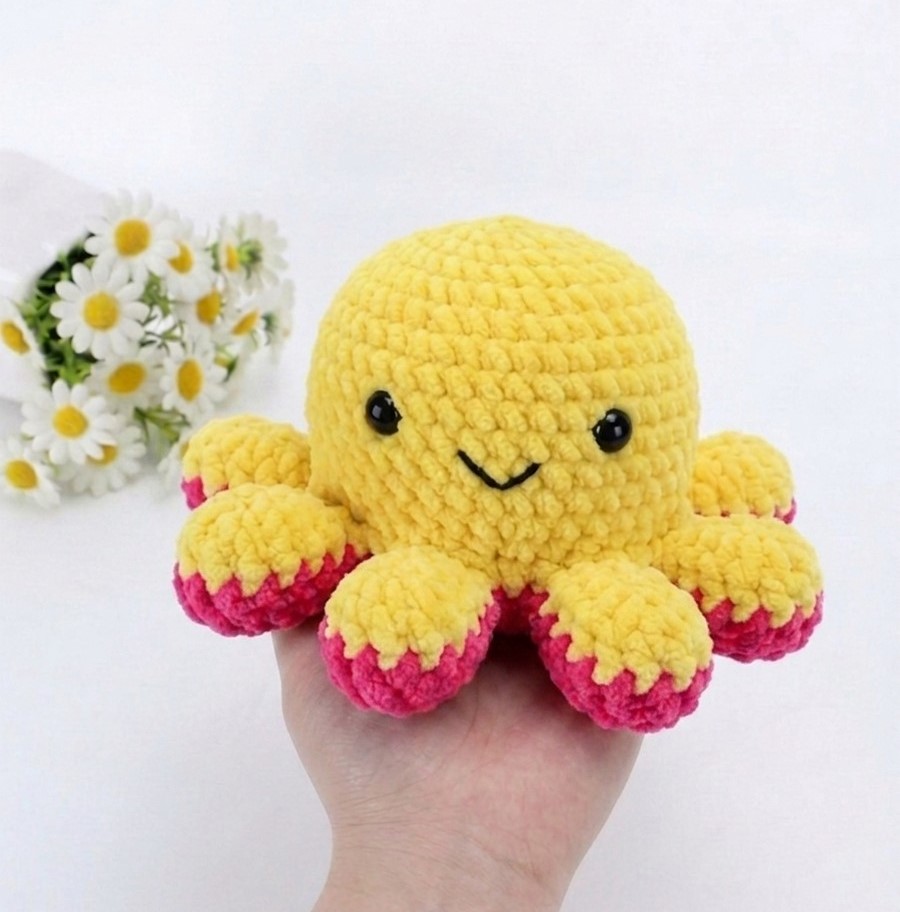
Today I will share a FREE crochet pattern for a very UNIQUE reversible octopus plushie. Well, during the summer, maybe your mood flips from not happy to sad, but from craving a strawberry to a pineapple, just like a whale plushie or vice versa. That’s the idea behind this crochet fruit mood octopus plushie with a tiny two-leaf sprout on its head. Both faces are smiling, and so when you reverse it, you will have a pineapple plushie.
I have kept the pineapple version simpler, while the strawberry version has embroidery seeds as well as the sprout. We will follow the usual construction method to make it, and this is crocheting two pieces and joining them later on. There is a wire inserted in the sprout, so it is poseable. Crochet it this summer for sure with the free pattern below.
[ez-toc]
Octopus plushies? I have more patterns:
Strawberry to Pineapple, Reversible Octopus Plush
Here is the full step-by-step crochet pattern to recreate this reversible octopus plushie.
Materials Needed
- Yarn: Soft plush yarn or 4-ply/5-ply milk cotton yarn in 2 contrasting fruit colors (e.g., Color A = Hot Pink, Color B = Yellow)
- Crochet Hook: Size suitable for your yarn (typically 2.5mm to 3.5mm)
- Green amigurumi yarn.
- Safety Eyes: 2 pairs (one pair for each color side), approx. 8mm–12mm
- Embroidery Thread/Yarn: Black yarn for embroidering the mouths
- Stuffing: Polyester fiberfill (PP cotton)
- Tools: Yarn needle, stitch markers, and scissors
Crochet Abbreviations
- MR: Magic Ring
- ch: Chain
- sc: Single crochet
- inc: Increase (2 sc in the same stitch)
- dec: Invisible decrease (sc 2 stitches together using the front loops only)
- hdc: Half double crochet
- dc: Double crochet
- sl st: Slip stitch
- st(s): Stitch(es)
- Rnd(s): Round(s)
- … *: Repeat instructions within asterisks the indicated number of times
Main Body & Head Pattern
(Make 2 identical pieces—one in Color A and one in Color B. Work in continuous spiral rounds without joining. Use a stitch marker to track the first stitch of each round.)
- Rnd 1: MR, ch 1, work 8 sc into the ring. Pull the tail tight to close. (8 sts)
- Rnd 2: 8 inc around. (16 sts)
- Rnd 3: *1 sc, 1 inc* × 8. (24 sts)
- Rnd 4: 1 sc, 1 inc, *2 sc, 1 inc* × 7, 1 sc. (32 sts) (Staggering the increases keeps the head perfectly round)
- Rnd 5: 32 sc around (no increases). (32 sts)
- Rnd 6: *3 sc, 1 inc* × 8. (40 sts)
- Rnds 7–11: 40 sc around (Repeat for 5 rounds total). (40 sts)
- Rnd 12: *3 sc, 1 dec* × 8. (32 sts)
For the strawberry piece:
Two-Leaf Sprout & Stem
Use Leaf Green. Leave a tail at least 3 times the desired length of the stem.
- Make a slip knot and place it on the hook. Hold the tail toward you and the working yarn (from the ball) toward the back.
- Yarn Under: Bring the tail over the hook from front to back.
- Yarn Over: Wrap the working yarn over the hook from back to front.
- Pull Through: Pull the working yarn through both loops on the hook.
- Repeat steps 2–4 until the cord is ~2 inches long.
- Insert Wire: Slide your wire through the center of this cord. Fold the wire ends into small loops so they don’t poke through.
The Leaves (Make 2)
Use Leaf Green.
- ch 7.
- 2nd ch from hook: sl st, sc, hdc, dc, hdc.
- In the last chain: (sc, ch 2, sc) to turn the corner.
- Opposite side of chain: hdc, dc, hdc, sc, sl st. Fasten off.
Tentacles Pattern
- Rnd 13 (Tentacle Stems): 2 sc on the base body. *Ch 6, turn and start in the 2nd ch from hook: work 5 sc back down the chain. Join/anchor the stem by drawing a loop through the same base stitch and the next base stitch, then pull through all loops on your hook to secure. Work 3 sc along the base body.* Repeat from * to * around for a total of 8 tentacle stems. (The final repeat will finish with 1 sc instead of 3 sc, combining with the first 2 sc to maintain an even 3-sc gap between all tentacles)
- Rnd 14 (Tentacle Shaping): 1 sc on the base body. *Working up one side of the 5 sc tentacle stem: 1 hdc in next 2 sts, 1 dc in next 2 sts, 2 dc in the last st (the tip). Turn to work down the opposite side of the stem: 2 dc in the first st, 1 dc in next 2 sts, 1 hdc in next 2 sts. Skip the anchor join and work 3 sc along the base body stitches between the tentacles.* Repeat from * to * around for all 8 tentacles. (The final repeat will finish with 2 sc to complete the gap). Sl st to finish.
- Finishing the Pieces:
- For the first piece (Color A), cut the yarn and fasten off with a short tail.
- For the second piece (Color B), fasten off but leave a very long tail for sewing the two pieces together later.
Faces & Assembly
- Placing the Eyes: On both pieces, insert the safety eyes between Rnds 8 and 9, leaving 8 stitches of space between them. Secure the backings tightly on the inside.
- Embroidering the Mouth: Using black yarn and a needle, embroider a happy smiling mouth centered between and 1 round below the safety eyes. Tie a secure knot on the inside.
- Stuffing and Sewing Together:
- Place the two completed octopus pieces back-to-back (wrong sides facing each other on the inside).
- Add a moderate amount of polyester fiberfill into the head section. Do not overstuff, or it will be too stiff to flip properly!
- Using a yarn needle and the long yarn tail, line up the tentacles of both pieces stitch-for-stitch and sew them together around the edges.
- You can add a tiny bit of stuffing into each tentacle right before closing it up completely.
- Tie a secure knot, hide the remaining yarn tail inside the body, and clip any excess.
Your magic reversible octopus plushie is complete! You can flip it inside out to change its color anytime.