
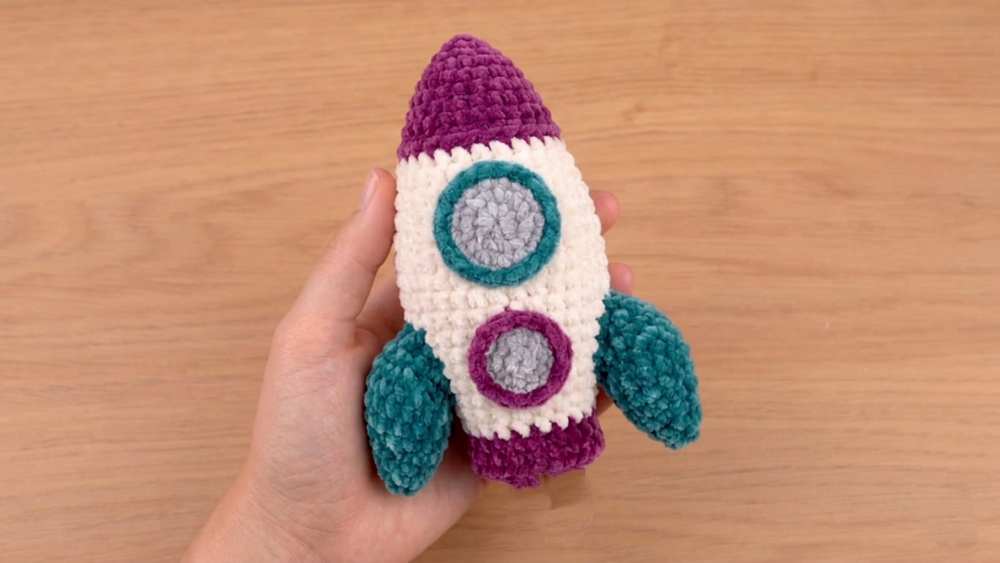
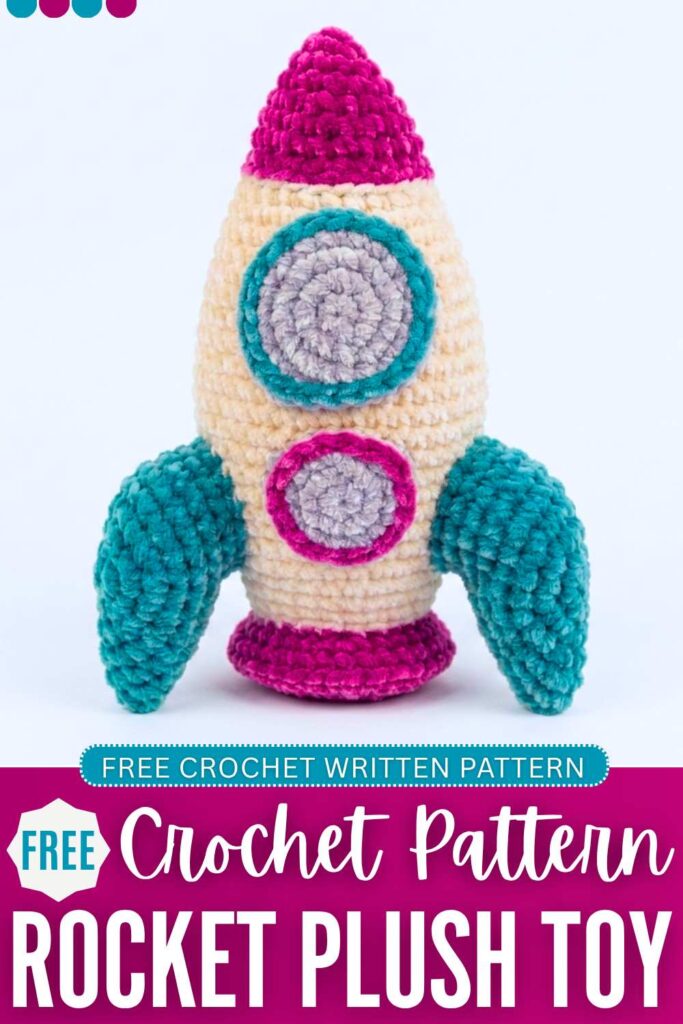
Learn how to crochet a PERFECT & colorful rocket plush toy for kids with this desk buddy crochet pattern. It is a low-sew crochet plushie with the body crocheted as a single piece. This is also a masterclass for learning the crochet shaping, color changes, and spiral work. This rocket plushie will stand without support on your crochet table and add color to the space.
You can also customize it to crochet the standard rocket with the red and yellow yarns. Give it as a present to a future astronaut for the imaginative plays. You will learn many clever techniques while crocheting this rocket plushie. Customize it further with the felt or safety eyes.
Crochet Big Rocket Keychain: Round-by-Round Pattern
Below is the pattern to crochet this big rocket plush for kids with the assembly in the end:
Materials Needed
- Yarn: Plush yarn or 100% Cotton Yarn (Tex 400).
- Color Suggestion: Try a deep teal for the base rocket color, hot pink for the windows/accents, and a pale pink or cream for the middle hull to fit!
- Crochet Hook: 2.0mm – 5.0 mm hook
- Other Supplies: Fiberfill stuffing, tapestry needle, stitch markers, and scissors.
- Optional: A small piece of flat plastic (like a clean lid from a tub) to cut into a circle!
Abbreviations (US / UK Terms)
- MR: Magic Ring
- SC / DC: Single Crochet (US) / Double Crochet (UK)
- INC: Increase (2 sc in one stitch)
- DEC: Decrease (sc 2 together)
- SL ST: Slip Stitch
- BLO: Back Loops Only (Móc vào cạnh sau)
- [ … ]: Total number of stitches at the end of the round.
1. Main Rocket Body
- Start with your top color (e.g., Teal).
- R1: MR, 4 sc [4]
- R2: 4 inc [8]
- R3: (1 sc, 1 inc) * 4 [12]
- R4: (2 sc, 1 inc) * 4 [16]
- R5: 2 sc, 1 inc, (4 sc, 1 inc) * 2, 2 sc [19]
- R6: (5 sc, 1 inc) * 3 [22]
- R7: 3 sc, 1 inc, (6 sc, 1 inc) * 2, 3 sc [25]
- R8: (7 sc, 1 inc) * 3 [28]
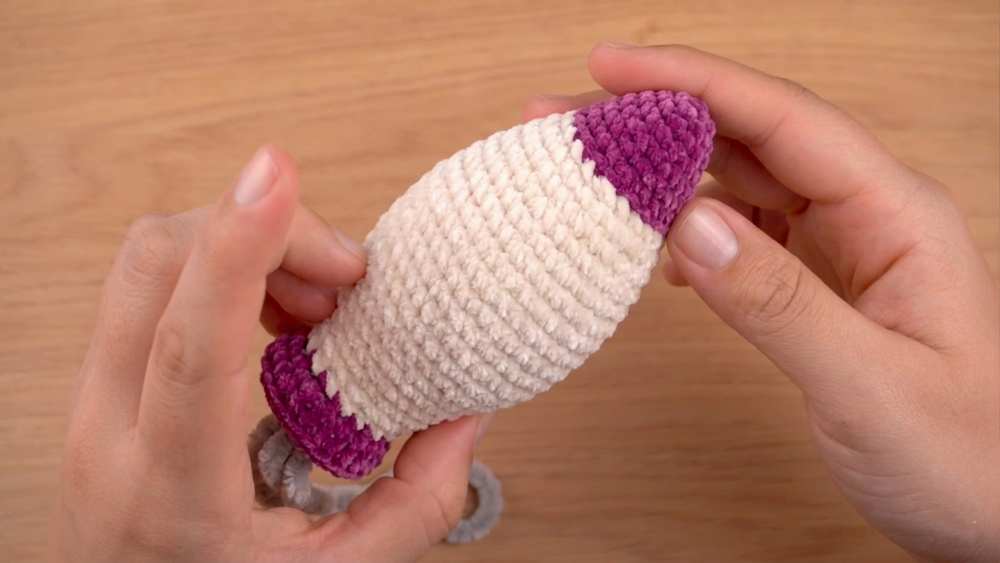
- Change to your middle hull color (e.g., Cream/Pale Pink).
- R9: Work this entire round in BLO. 28 sl st around. [28]
- R9.5: Still working in the BLO of the previous round, 28 sc. [28]
- R10: 4 sc, 1 inc, (8 sc, 1 inc) * 2, 4 sc [31]
- R11: 31 sc [31]
- R12: (9 sc, 1 inc) * 3 [34]
- R13: 34 sc [34]
- R14: 5 sc, 1 inc, (10 sc, 1 inc) * 2, 5 sc [37]
- R15: 37 sc [37]
- R16: (11 sc, 1 inc) * 3 [40]
- R17 – R21: 40 sc [40 for 5 rounds]
- R22: (11 sc, 1 dec) * 3 [37]
- R23: 37 sc [37]
- R24: 5 sc, 1 dec, (10 sc, 1 dec) * 2, 5 sc [34]
- R25: 34 sc [34]
- R26: (9 sc, 1 dec) * 3 [31]
- R27: 31 sc [31]
- R28: 4 sc, 1 dec, (8 sc, 1 dec) * 2, 4 sc [28]
- R29: 28 sc [28]
- R30: (7 sc, 1 dec) * 3 [25]
- Change back to your base/fin color (e.g., Teal).
- R31: BLO 25 sl st [25]
- R32: BLO (6 sc, 1 inc) * 3 [28]
- R33: 3 sc, 1 inc, (8 sc, 1 inc) * 2, 5 sc [31]
- Pause to stuff the top tip of the rocket very firmly.
- R34: BLO (4 sc, 1 dec) * 5, 1 sc [26]
- R35: (3 sc, 1 dec) * 5, 1 sc [21]
- Insert your flat plastic circle stabilizer into the base if using one, and finish stuffing the rocket firmly.
- R36: 1 sc, 1 dec, (2 sc, 1 dec) * 4, 2 sc [16]
- R37: (1 sc, 1 dec) * 5, 1 sc [11]
- R38: 4 dec [7 remaining sts]
- Fasten off, sew the remaining hole shut through the front loops, and weave the end inside the body.
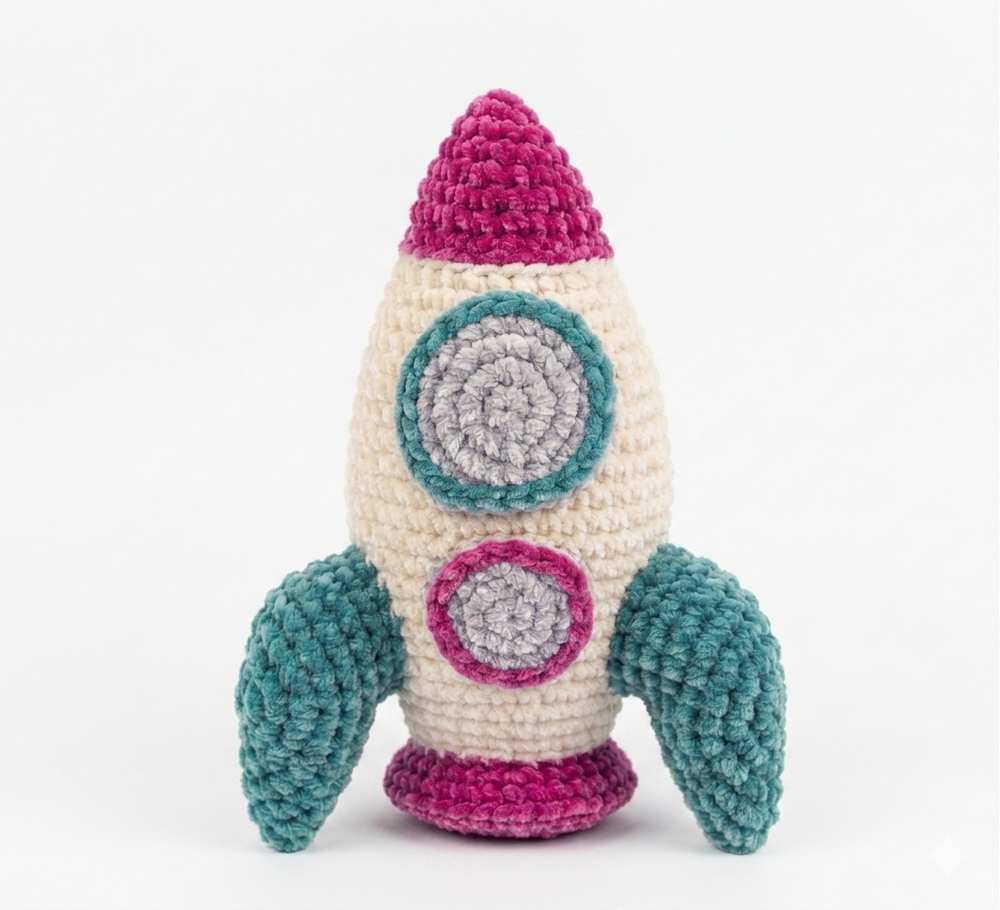
2. Rocket Fins (Make 3)
- Use your fin color (e.g., Teal).
- R1: MR, 6 sc [6]
- R2: 6 inc [12]
- R3: (1 sc, 1 inc) * 6 [18]
- R4: (2 sc, 1 inc) * 6 [24]
- R5: (3 sc, 1 inc) * 6 [30]
- R6: 30 sc [30]
- R7: Fold the circle in half. Crochet through both sides to close the fin: 14 sc [14]
- R8: Ch 1, turn. 14 sc [14]
- Fasten off, leaving a long tail for sewing. Add just a tiny pinch of stuffing inside the fin so it isn’t completely flat.
3. Windows (Make 2)
- Use a window accent color (e.g., Hot Pink).
- Small Window:
- R1: MR, 6 sc [6]
- R2: 6 inc [12]
- R3: (1 sc, 1 inc) * 6 [18]
- Fasten off, leave a tail. For a clean edge, attach your hull color (e.g., Cream) and SL ST around the border.
- Large Window:
- R1: MR, 6 sc [6]
- R2: 6 inc [12]
- R3: (1 sc, 1 inc) * 6 [18]
- R4: (2 sc, 1 inc) * 6 [24]
- Fasten off, leave a tail. Attach your hull color (e.g., Cream) and SL ST around the border.
4. Assembly
- Windows: Sew the windows to the front of the middle hull section. Place the larger window towards the bottom, skip 1-2 rounds, and place the smaller window above it. Ensure the color change seams are hidden at the back of the rocket.
- Fins: Position the 3 fins evenly around the bottom base section (around the R31 color change line). The flat sewn edge (R8) of the fin should sit flush against the rocket body. Leave about 2 stitches between the base of the rocket and where the fin attaches so it stands level.

About "Talha"
Hey, I’m Talha, the Crafter on Craftstive.com. I love to share guides on folding cute origami models and paper crafts, and I am always ready to inspire your next craft project with my weekly craft discussions.