
Subscribe to DIY Dreams!
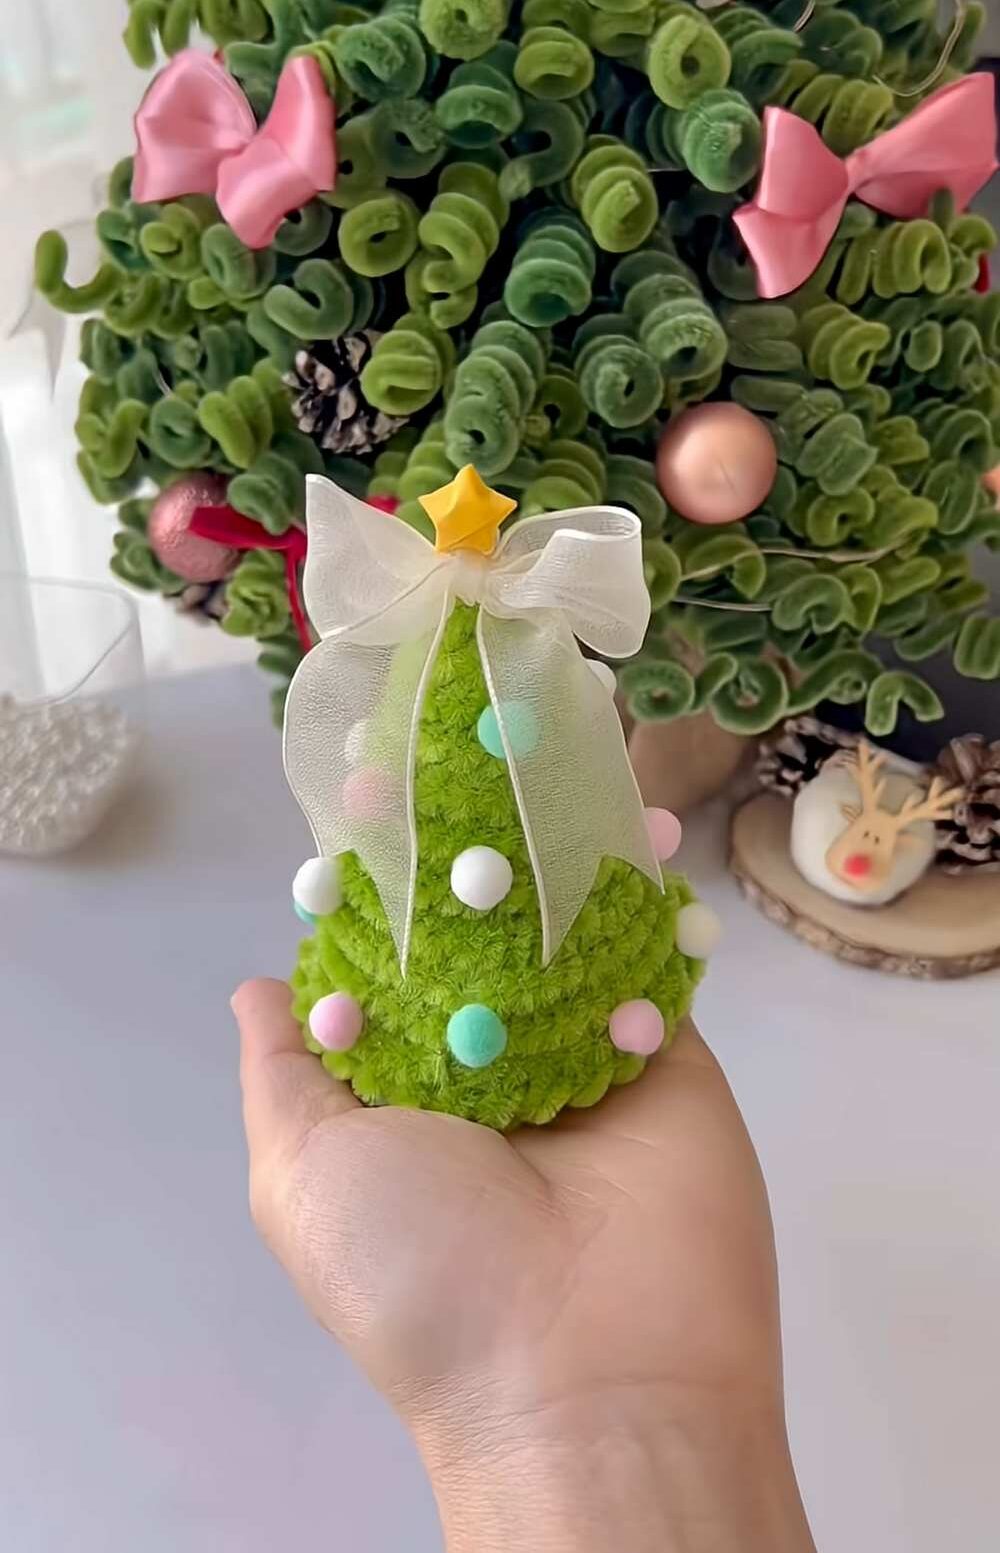
So far, I have taught you how to craft a pipe cleaner Christmas Tree using pipe cleaner units that you bend and attach separately. However, today you can learn how to craft this last-minute chenille wire Christmas tree table decoration plushie just by wrapping and gluing pipe cleaner springs around a cardboard cone base.
You can make this Christmas tree decoration in minutes using just a small number of pipe cleaners in any size.
Then, decorate your Christmas tree plush using the store-bought pom poms and a ribbon bow. Continue reading to learn more about this quick Christmas tree project that is also perfect for holding treats. I have provided written instructions as well!

[ez-toc]

Tutorial for DIY A Chenille Stem Christmas Tree Table Decoration
Making a pipe cleaner Christmas tree is a fun and easy project for the holidays. You start by making a simple cone out of green paper to act as the base. Then, you take green pipe cleaners and wrap them tightly around a pencil or a pen to create spring-like coils. You glue these coils onto the paper cone in rows, starting from the bottom and going all the way to the top. You also glue a spiral of pipe cleaner on the bottom to close the hole. Finally, you add a white bow, a star, and tiny colorful balls.
Materials You Will Need:
-
Green construction paper
-
Green pipe cleaners (several)
-
A compass (or a round plate to trace)
-
A pencil or pen (for coiling)
-
Hot glue gun
-
Scissors
-
Small pastel pom-poms
-
A white ribbon bow
-
A small yellow star decoration
Video Tutorial?
Detailed Step-by-Step Instructions:
Step 1: Make the Paper Cone
Use a compass to draw a large semi-circle on a piece of green construction paper. Use your scissors to cut it out. Roll the paper into a cone shape and use hot glue along the edge to secure it. This will be the sturdy base for your tree.
Step 2: Create the Pipe Cleaner Coils
Take a green pipe cleaner and wrap it tightly around a pencil or a pen. Keep the loops close together so it looks like a spring. Slide the coil off the pencil. You will need to make several of these coils to cover the entire tree.
Step 3: Glue the Coils to the Cone
Apply a line of hot glue around the bottom edge of your paper cone. Press one of your pipe cleaner coils onto the glue. Continue applying glue and wrapping the coils around the cone, moving upward row by row. Make sure the coils are packed tightly together so you cannot see the paper underneath.
Step 4: Cover the Top
When you reach the very top of the cone, wrap the last bit of the pipe cleaner coil into a tight point to finish the peak of the tree.
Step 5: Close the Bottom
Turn the tree over so you can see the open bottom. Apply hot glue around the inside edge and the center. Take a pipe cleaner coil and glue it in a spiral shape to fill the hole at the bottom. This makes the tree look neat from every angle.
Step 6: Add the Top Decorations
Apply a small dab of glue to the top peak of the tree. Attach a white ribbon bow. Then, glue a small yellow star directly onto the center of the bow.
Step 7: Decorate with Ornaments
Take your small pastel pom-poms. Place tiny dots of hot glue randomly all over the pipe cleaner “branches.” Press the pom-poms onto the glue dots to look like colorful Christmas ornaments.
Your pipe cleaner Christmas tree is now finished and ready to display!