
Subscribe to Juanjuan Crochet! The video tutorial & instructions are below!
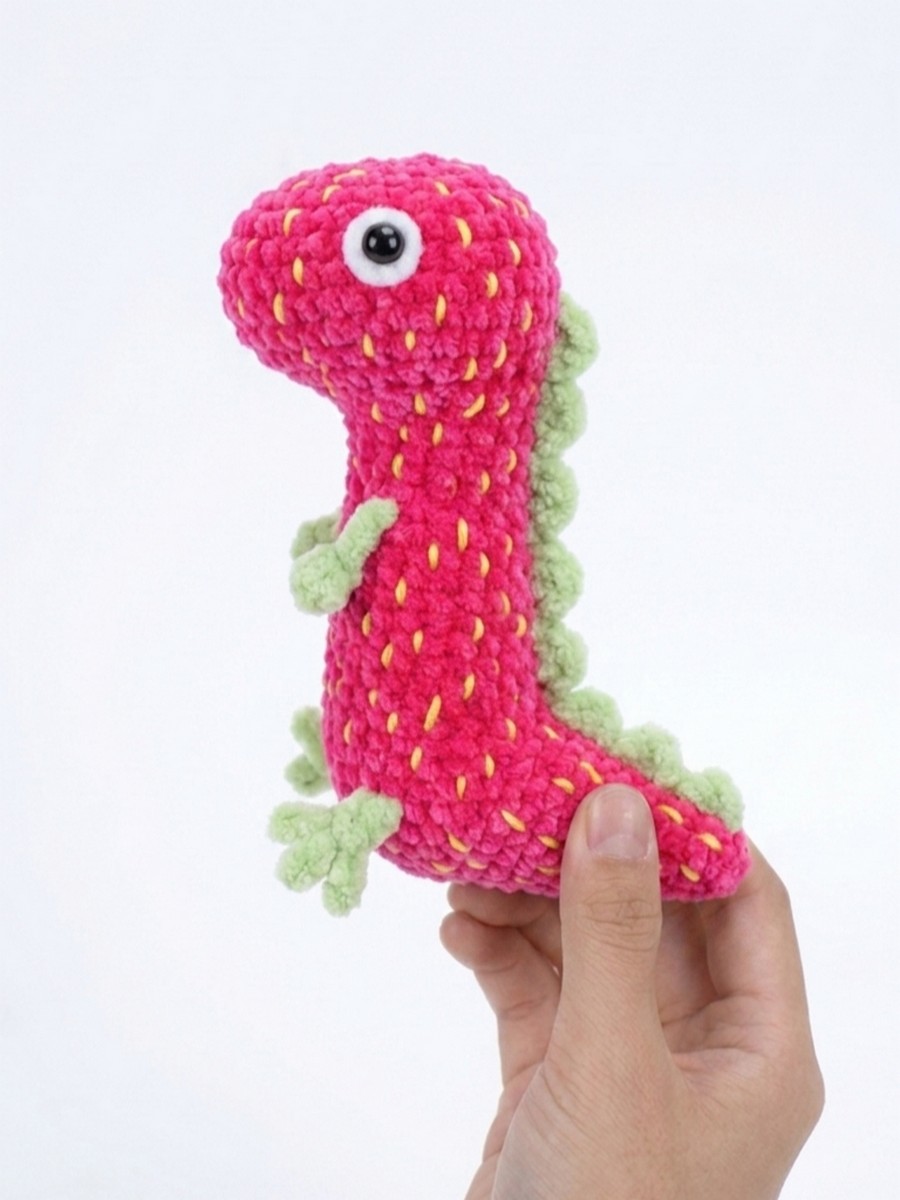
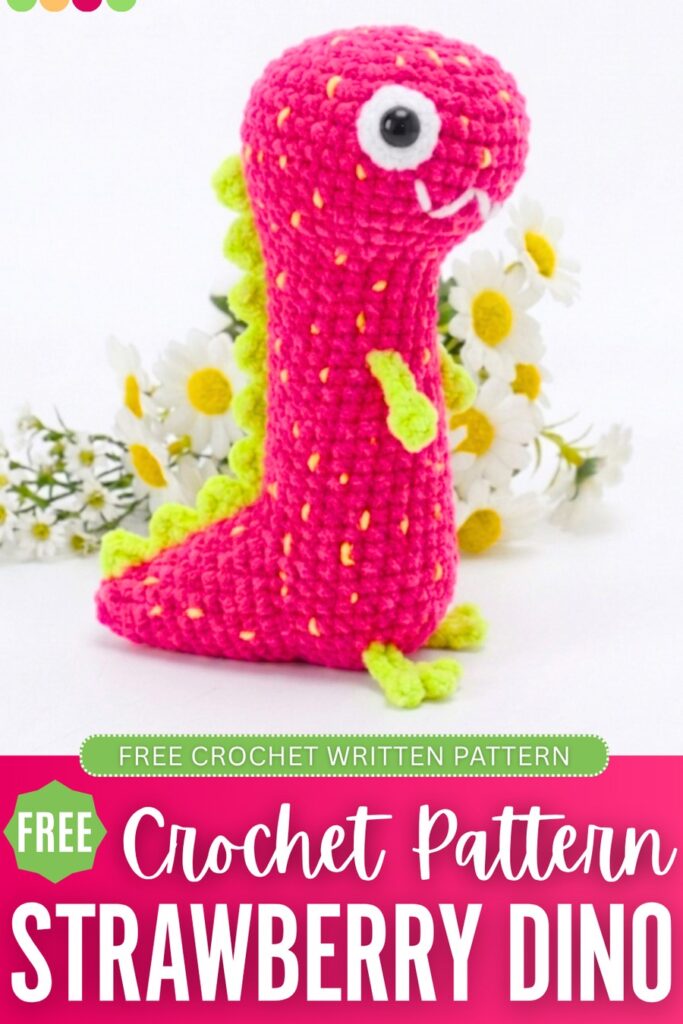
Here is the pattern to crochet the strawberry version of the crochet Mr. Dinosaur plushie, as I promised. I have reimagined this for both the summer and the spring and have also rewritten the full pattern so you can crochet a funny strawberry dino plushie without confusion. For those who don’t know, I have already shared a pattern to crochet Peppa’s love Mr. Dinosaur plushie last time. Now, this one is made entirely in the hot pink (inspired by the dragon fruit) with embroidery seeds all around.
The base no-sew dinosaur plushie will be the same with the lizard limbs, baby look, and oh-so cute googly eyes. You can also crochet it as a Valentine’s Day present. Originally, it is a bed snuggler, so make one for sure. The pattern will be written in US terms.
The original Mr. Dinosaur plushie? Here is the pattern:
Crochet Fruity Mr. Dinosaur Plushie: Row-by-Row Pattern
This adorable plushie is made by crocheting the head and body in one piece from the top down. The tail, arms, legs, and back spikes are all crocheted separately and then sewn onto the main body. Finally, you will add easy yellow stitches to create the strawberry “seeds.” Below is the full pattern to crochet it:
Materials Needed
- Thin or bulky Plush Chenille Yarn: Main color: Bright Pink (for the head, body, and tail)
- Contrast color: Light Green (for the back ridges, arms, and legs)
- Cotton yarn: A small amount of Yellow (for the strawberry seeds)
- Crochet Hook: 2.5mm to 5.5 mm (or size recommended for your plush yarn)
- Eyes: 1 pair of 12mm or 14mm plastic safety eyes (with white felt circles for the backing)
- Stuffing: Fiberfill (PP cotton)
- Notions: Yarn needle, scissors, and a stitch marker
Abbreviations
- ch = chain
- sc = single crochet
- inc = increase (2 single crochets in the same stitch)
- dec = decrease (crochet 2 stitches together)
- sl st = slip stitch
- MR = magic ring
- st(s) = stitch(es)
- FO = fasten off
1. Head & Body
Worked from the top of the head down to the base of the body using Bright Pink yarn.
- Foundation: Ch 11.
- R1: Starting in the 2nd ch from the hook: 9 sc. Turn your work to crochet along the opposite side of the chain: 3 sc in the last ch, 8 sc, 1 inc. Join with a sl st. (22 sts)
- R2: Ch 1, 1 inc, 7 sc, 5 inc, 7 sc, 2 inc. Join with a sl st. (30 sts)
- R3: Ch 1, repeat (4 sc, 1 inc) 6 times. Join with a sl st. (36 sts)
- R4: Ch 1, 36 sc around. Join with a sl st. (36 sts)
- R5–R7: Continue increasing evenly around to shape the wide snout until you reach 48 stitches at the end of R7. Join with a sl st. (48 sts)
- R8: Ch 1, 17 sc, (1 dec, 3 sc) 2 times, 1 dec, 19 sc. Join with a sl st. (45 sts)
- R9: Ch 1, 1 dec, 43 sc. Join with a sl st. (44 sts)
- R10: 16 sc, (1 dec, 2 sc) 2 times, 1 dec, 18 sc. (41 sts)
- R11: 1 dec, 8 sc, (1 dec, 2 sc) 4 times, 1 dec, 13 sc. (35 sts)
- R12: 8 sc, (1 dec, 1 sc) 5 times, 1 dec, 8 sc, 1 dec. (28 sts)
- R13: (5 sc, 1 dec) 4 times. (24 sts)
Eye Placement Tip: This is the perfect time to add the eyes! Cut two small circles out of white felt. Poke the plastic safety eyes through the center of the felt, then insert them into the sides of the head near the snout (around rows 6–8). Secure the safety backings inside.
- R14–R37: Creating the tall body. Work 24 sc evenly around for all 24 rows. (24 sts per round)
Note: Start stuffing the head and upper body firmly with fiberfill as you work your way down. - R38: (2 sc, 1 dec) 6 times. (18 sts)
- R39: (1 sc, 1 dec) 6 times. (12 sts)
- R40: Ch 1, 6 dec. Join with a sl st. (6 sts)
- To Finish: Stuff the rest of the body firmly. Fasten off, leaving a long yarn tail. Thread the tail into your needle, weave it through the front loops of the last 6 stitches, pull tight to close the bottom, and hide the yarn end inside the body.
2. The Tail
Worked from the tip outward using Bright Pink yarn.
- R1: 6 sc in a MR. (6 sts)
- R2: Repeat (1 sc, 1 inc) 3 times. (9 sts)
- R3: 9 sc around. (9 sts)
- R4: 1 sc, 1 inc, repeat (2 sc, 1 inc) 2 times, 1 sc. (12 sts)
- R5: 12 sc around. (12 sts)
- R6: Repeat (3 sc, 1 inc) 3 times. (15 sts)
- R7: 15 sc around. (15 sts)
- R8: 2 sc, 1 inc, repeat (4 sc, 1 inc) 2 times, 2 sc. (18 sts)
- R9: 18 sc around. (18 sts)
- R10: Repeat (1 inc, 5 sc) 3 times. (21 sts)
- R11: 21 sc around. (21 sts)
- R12: 3 sc, 1 inc, repeat (6 sc, 1 inc) 2 times, 3 sc. (24 sts)
- R13: 24 sc around. (24 sts)
- R14: Repeat (1 inc, 7 sc) 3 times. (27 sts)
- To Finish: Stuff the tail firmly with fiberfill. Fasten off, leaving a long tail for sewing it to the body later.
3. Arms (Make 2)
Worked in a continuous spiral using Light Green yarn.
- R1: 6 sc in a MR. (6 sts)
- R2: (1 sc, 1 inc) 3 times. (9 sts)
- R3–R8: 9 sc around for all 6 rows. (9 sts)
- To Finish: Stuff only the bottom half of the arm lightly. Leave the top half unstuffed so it can lay flat against the body. Fasten off and leave a long sewing tail.
4. Legs (Make 2)
Worked in a continuous spiral using Light Green yarn.
- R1: 6 sc in a MR. (6 sts)
- R2: 6 inc. (12 sts)
- R3: (1 sc, 1 inc) 6 times. (18 sts)
- R4–R9: 18 sc around for all 6 rows. (18 sts)
- To Finish: Pack the legs firmly with fiberfill so they are sturdy. Fasten off and leave a long sewing tail.
5. Back Ridges / Spikes (Make 5 or 6)
Worked in Light Green yarn to make small triangular spikes.
- R1: 4 sc in a MR. (4 sts)
- R2: (1 sc, 1 inc) 2 times. (6 sts)
- R3: (1 sc, 1 inc) 3 times. (9 sts)
- To Finish: Fasten off, leaving a long tail for sewing. Do not stuff these spikes; just flatten them into triangles with your fingers.
Simple Assembly Guide
Step 1: Embroider the Strawberry Seeds
Before sewing the pieces together, take your yarn needle and Yellow yarn. Make small, vertical, single-stitch lines all over the pink head, body, and tail to look like strawberry seeds. Securely knot the yellow ends on the inside or pull them through the body to hide them.
Step 2: Attach the Tail
Pin the stuffed tail onto the lower back of the body (position it roughly 4 rounds up from the bottom base). Sew around the edge securely using your yarn needle, adding a bit more stuffing just before closing if needed.
Step 3: Attach the Spikes
Line up your green triangular spikes in a straight column right down the center spine. Start from the top of the head, go down the neck and back, and end at the tip of the tail. Stitch them flat against the body.
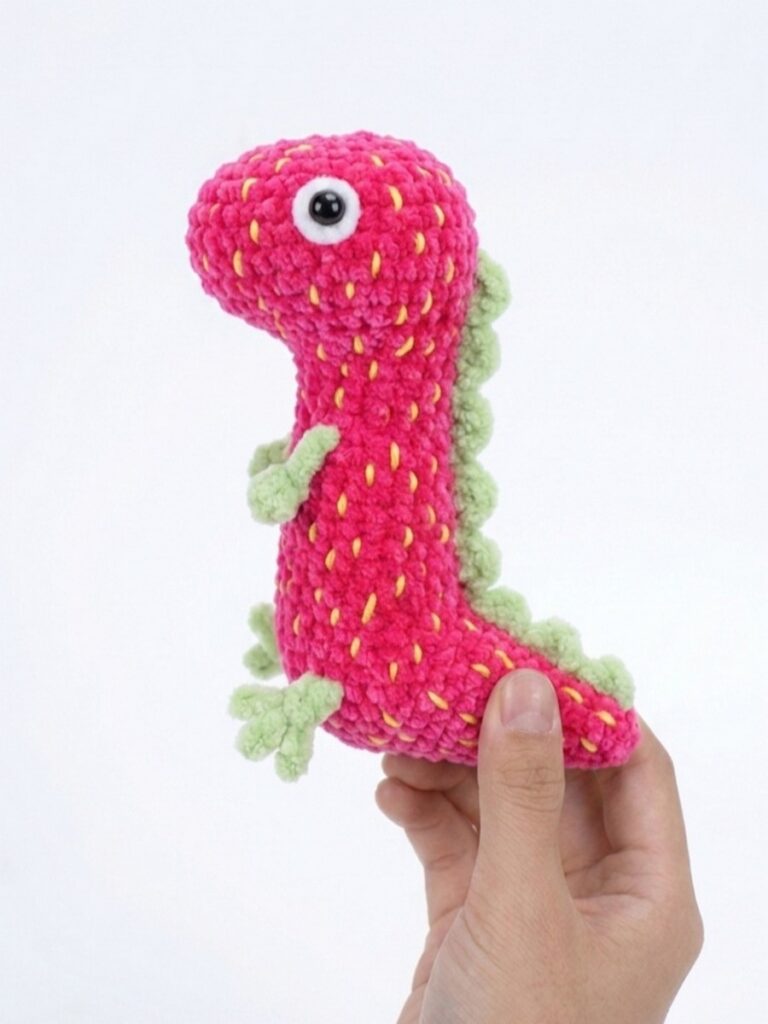
Step 4: Attach the Arms and Legs
- Arms: Sew the flat tops of the green arms symmetrically to the upper chest area, a few rows below the neck.
- Legs: Sew the stuffed legs onto the bottom sides of the body. Position them slightly forward so that the feet and the bottom of the body act together like a tripod, keeping your dino perfectly upright!
Weave in all your loose ends, trim any extra yarn, and your plush strawberry dinosaur is ready to go!
About "Juanjuan Crochet"
She was an iconic crochet designer from China!