


The origami traditional heart is simple and meaningful. In most of the Valentine’s Day and anniversary crafts, this paper heart is happily added by the designers.
So, one can call it a useful origami model besides being cute and a present on its own. This article carries a detailed tutorial on how to make an origami heart in just 8 simple steps.
I will describe it both with the pictorial corner instructions and the usual written ones. That’s why you can find out how to craft a classic heart in any size easily.

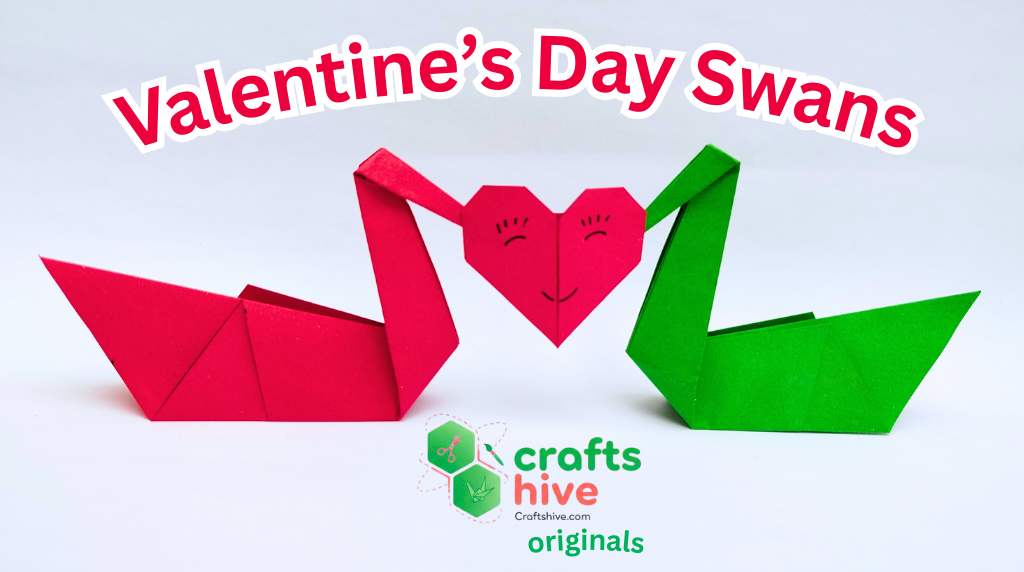
Tip: Once you are done making this origami heart, you can craft my origami Valentine’s Day swan!
Origami Traditional Heart Fold Pattern: Step-By-Step
Project Difficulty Level: Easy
Model Type: Traditional
Paper Needed: A thin square sheet of paper in red
Size Restriction: Little to None (you can craft a traditional with a sheet as small as 2cm by 2cm because the layers are few.)
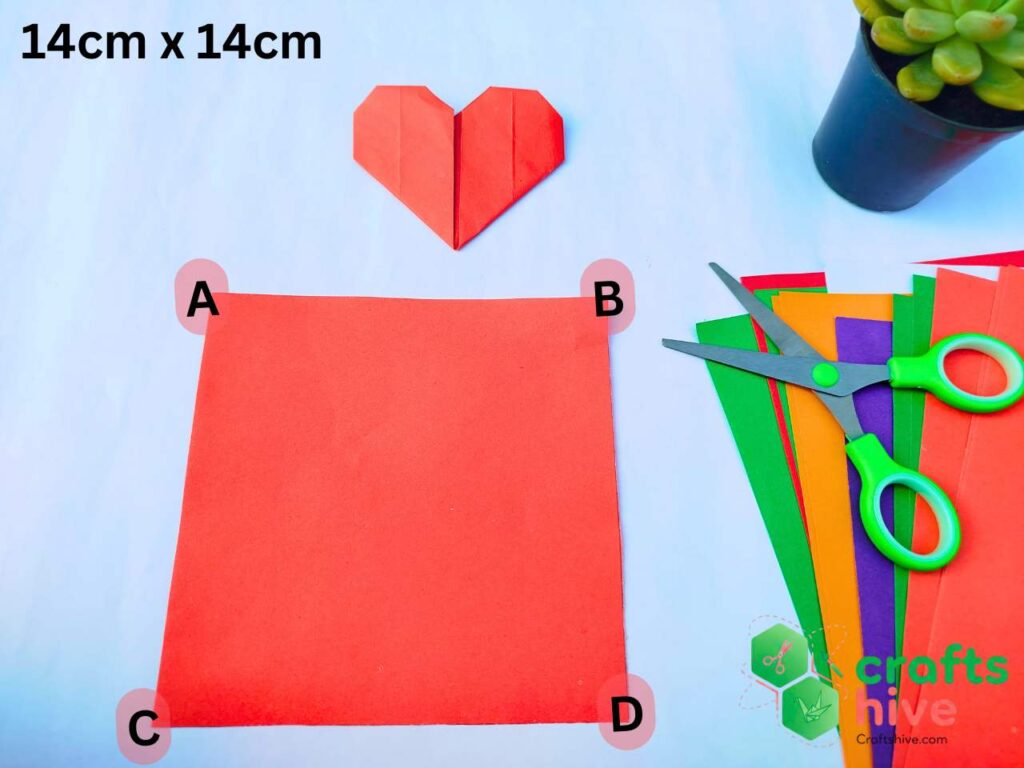
I will be using a 14cm by 14cm square sheet of paper for this tutorial, cut from an A4 paper sheet.
Corner Labeling
Throughout this origami heart tutorial, I will be labeling the corners of the square sheet with the English alphabet. To begin with, let’s label the corners of the square lying on the table as A, B, C, and D.
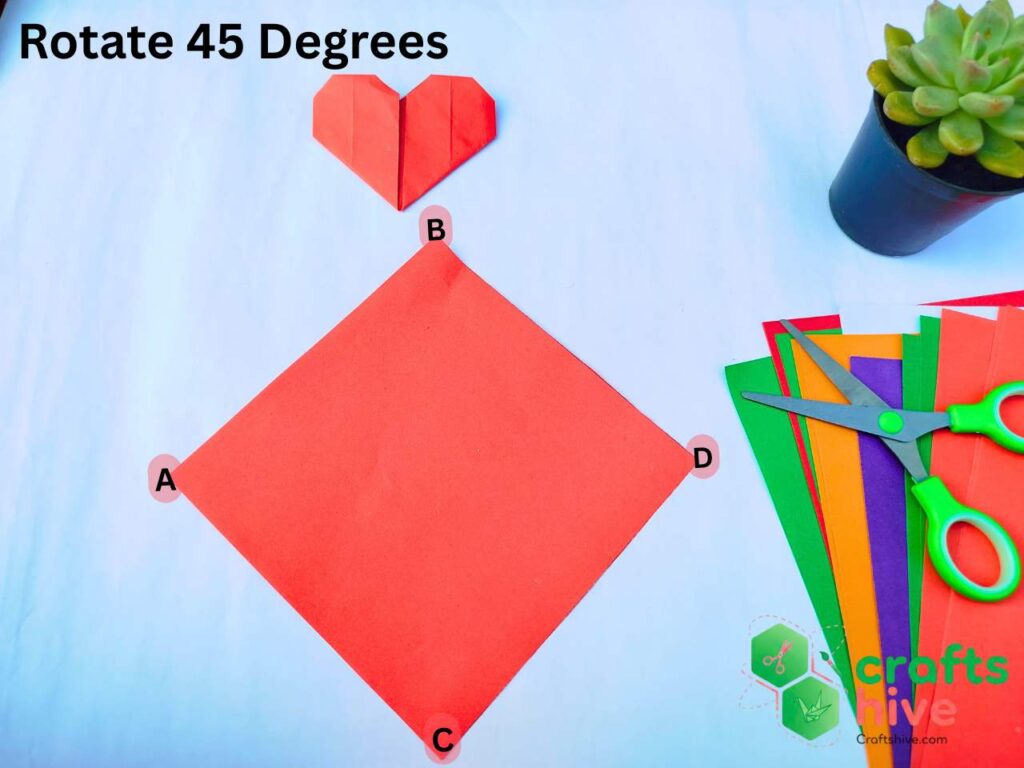
Step #1: Rotate the Paper Sheet
The basic origami heart is diagonally symmetric with respect to a square. So, we shall begin by rotating our origami sheet at an angle of 45 degrees. t will now look like a solid diamond.
Step #2: Make the Diagonal Fold

Note: The curly arrows in opposite directions in the above picture represent “Fold, Crease, and Unfold.”
Hold the top corner of the rotated sheet in your fingers and align it with the bottom corner. Crease and press the paper well, and unfold the paper. The crease will extend from the left corner to the right corner.
Label Instruction: Align the corner B with the corner C in the rotated square sheet. After unfolding, the crease AD will be visible.
Step #3: Make the First inside Fold of the Heart
The diagonal crease produced in step #3 divides the area into two halves. Here, it will be used as a guiding crease.
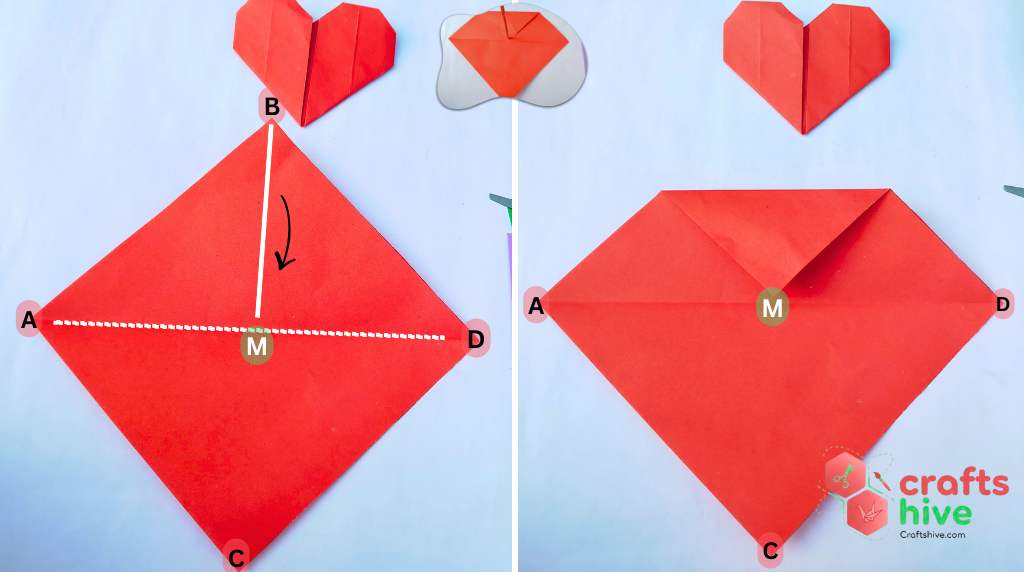
Now, again, hold the top corner of the rotated square sheet and align it with the midpoint of the crease made in step #3. Press the paper and crease evenly. Don’t unfold this time.
Label Instruction: Align the corner B with the point on the 1/2 of the crease AD.
Let’s label the corners of this fold as A, C, D, E, F, and G.
Tip: Use the ruler to make your folds get flat with the paper. See more tips on origami.
Step #4: Make 2nd inside Fold of Heart
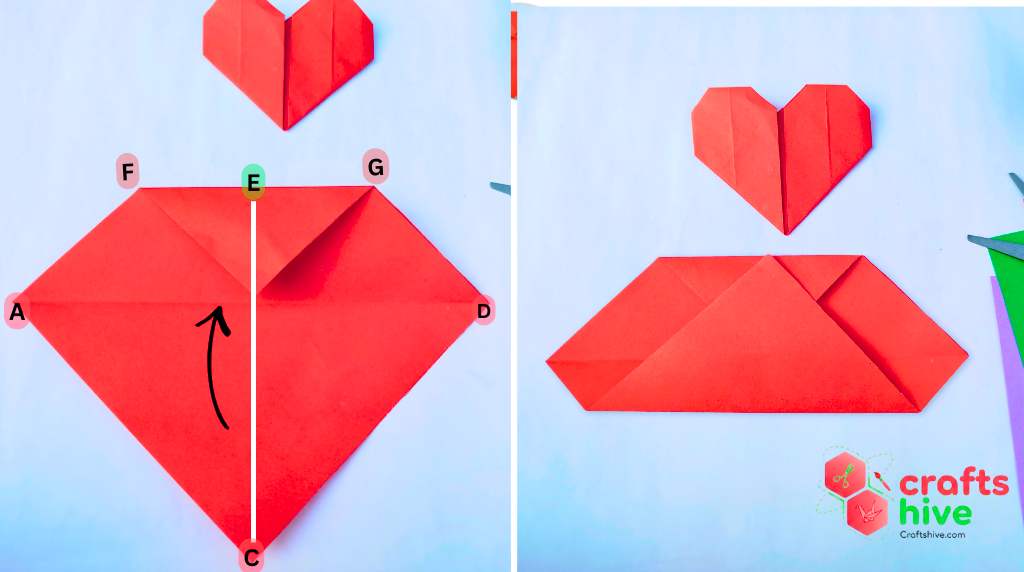
Now hold the bottom corner of the fold with the first inside fold and align it with the midpoint of the top side.
Label Instruction: Fold the corner labeled as C onto 1/2 of the side FG labeled as E.
Step #5: Fold the Right Side of the Heart
Grab the left portion of the folded paper. Fold it and align the half of the bottom side with a line perpendicular to this side and in the middle. The bottom left corner must align exactly with the midpoint of the top side.
Label Instruction: Fold the corner labeled as C onto the point labeled as B (the half of the top side). This way, the bottom half will automatically align with the line passing through the middle of the folded sheet after pressing well.
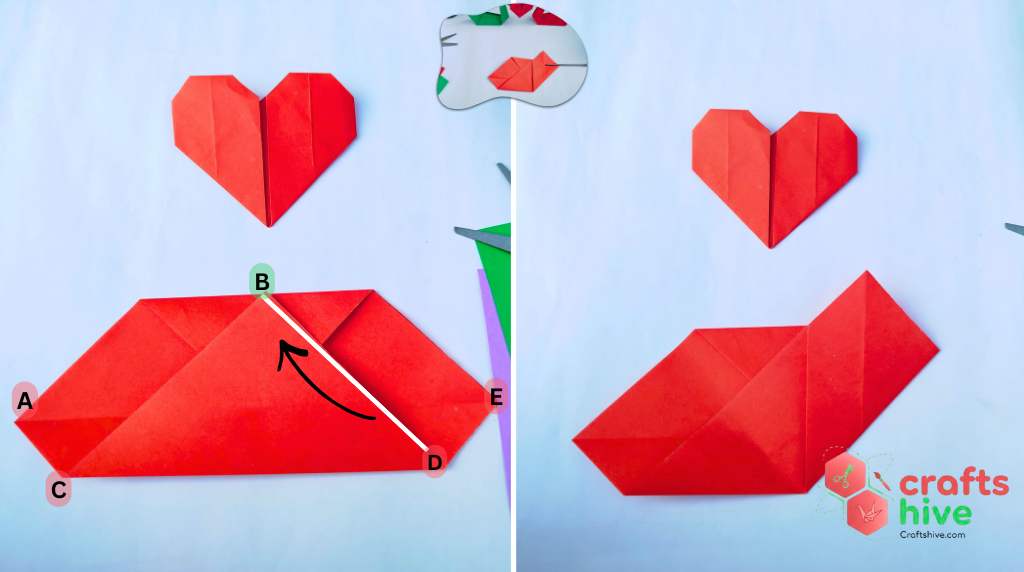
Step #6: Fold the Left Side of the Heart
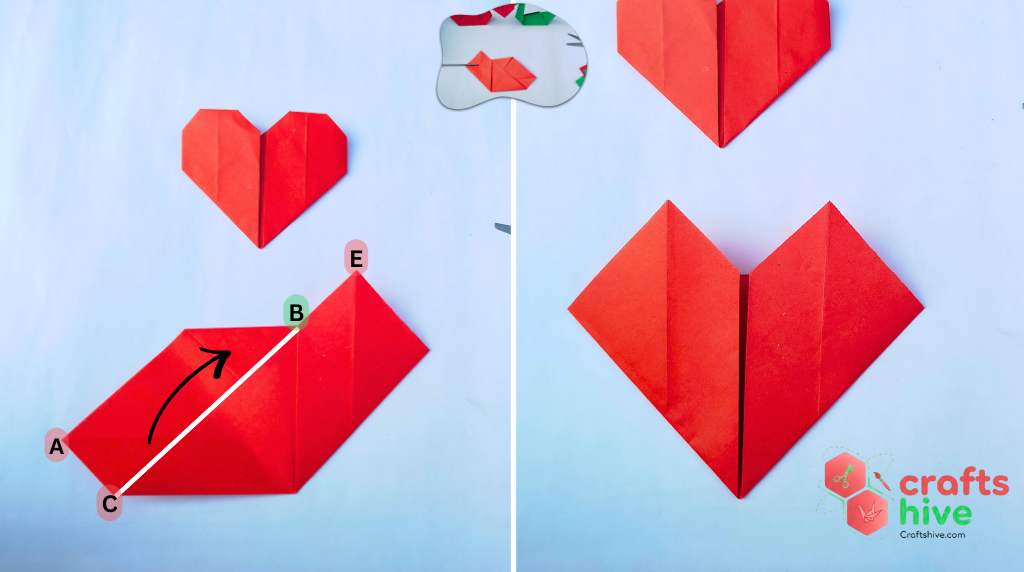
Now, grab the right side of the folded paper. Align the remaining half side of the bottom with the line perpendicular and in the middle of this side. Match the positions of the top corners of the heart halves.
Label Instruction: Fold the corner labeled as D onto the point labeled as B (the half of the top side).
I have labeled the side and top corners of the heart with A, B, C, and D as we shall work further folds with these corners.
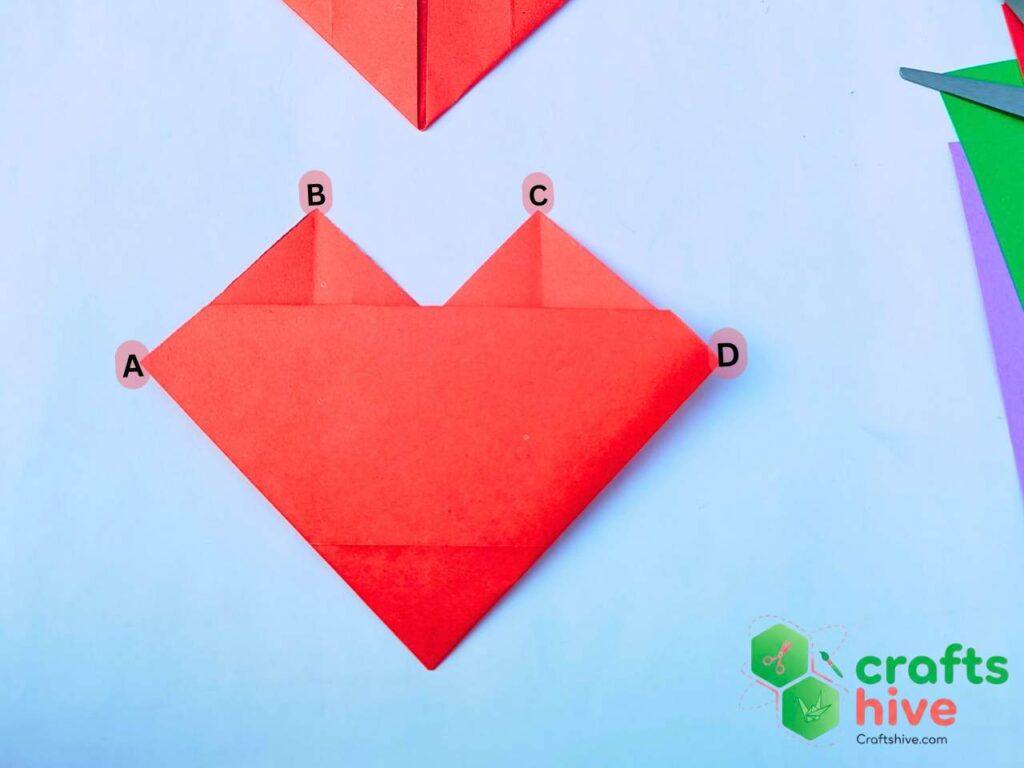
Step #7: Fold the Side Corners
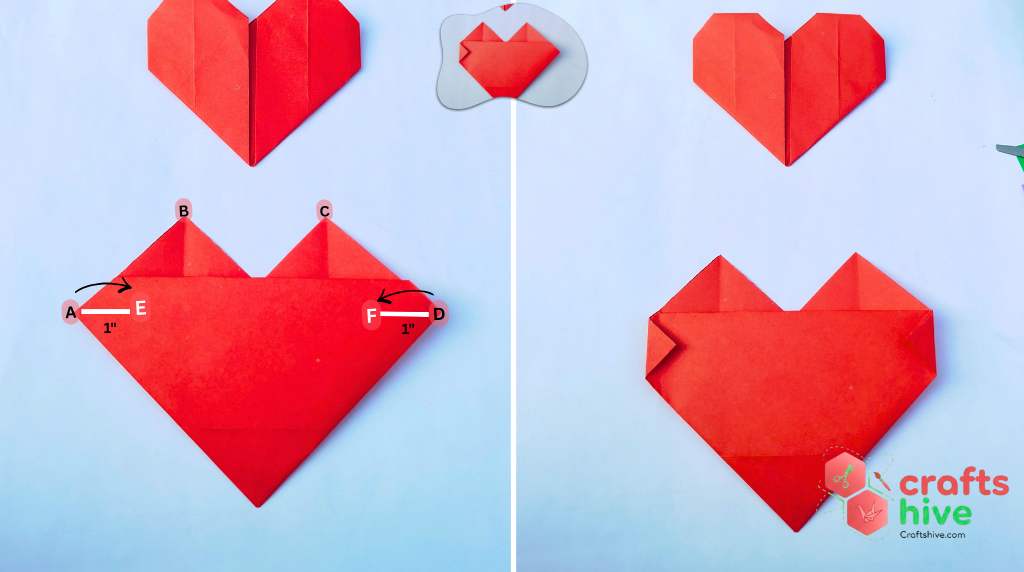
Grab the left corner of the heart, fold it and stop the corner at 1” or less away from the previous position of the corner. Do the same with the right corner of the heart. Try to keep the distance same for both the sides.
Label Instruction: Fold the corner B onto the point labeled as M and then C onto N.
Step #8: Fold the Top Corners

The finsished heart will have a flap that makes it easy to fold the top corners. Just pick them and align onto the beginning of the flap. Do the same for the both.
Label Instruction: Fold the corner A onto the point labeled as E that is 1” away from the corner. Then, fold the corner D onto the point labeled as F that is 1” away from the corner.
Finished Heart

This is the finished origami heart, easy and simple. Please, share us your finished paper heart on Pinterest and in the comments.
Next Make? Craft these Love Swans.
About "Origamist@Craftshive"
Our origamist is expert in both the traditional origami and designing some REALLY creative crafts.
 How to Fold Origami Jumping Frog in 10 Steps
By Origamist@Craftshive
How to Fold Origami Jumping Frog in 10 Steps
By Origamist@Craftshive How to Fold Easy Origami Butterfly in 12 Steps
By Origamist@Craftshive
How to Fold Easy Origami Butterfly in 12 Steps
By Origamist@Craftshive How to Fold Origami Ninja Star in 7 Steps
By Origamist@Craftshive
How to Fold Origami Ninja Star in 7 Steps
By Origamist@Craftshive How to Craft Cute Paper Bow with Origami and Cutting
By Origamist@Craftshive
How to Craft Cute Paper Bow with Origami and Cutting
By Origamist@Craftshive How to Fold Easy Origami Penguin for Winter
By Origamist@Craftshive
How to Fold Easy Origami Penguin for Winter
By Origamist@Craftshive How to Fold Origami Sailing Boat in 8 Steps
By Origamist@Craftshive
How to Fold Origami Sailing Boat in 8 Steps
By Origamist@Craftshive How to Make Origami Square Base in 4 Steps
By Origamist@Craftshive
How to Make Origami Square Base in 4 Steps
By Origamist@Craftshive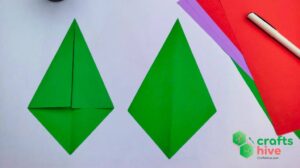 How to Make Origami Kite Base in 4 Steps
By Origamist@Craftshive
How to Make Origami Kite Base in 4 Steps
By Origamist@Craftshive How to Make An Easy Origami Swan in 13 Steps
By Origamist@Craftshive
How to Make An Easy Origami Swan in 13 Steps
By Origamist@Craftshive