
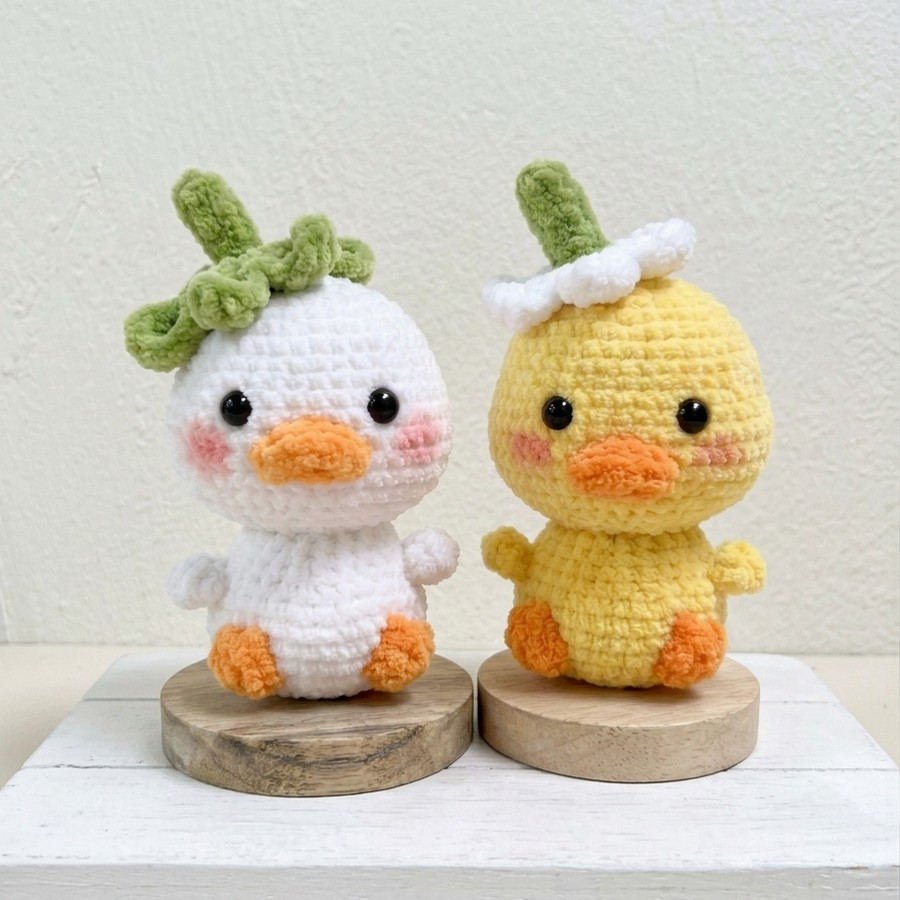
Looking to crochet the summer’s CUTEST and plushiest desk buddy? Learn how to crochet this oh-so cute sitting duck plushie with a FREE pattern for absolute beginners. This is a duckling plush with a flower placed upside down on its head. Sits without support and requires little sewing. With the blush cheeks, tiny arms, and the tail, it will become a stress-reliever for you.
You can also crochet it with the regular yarn and get a pretty big size for this duck plush. You can also crochet a white version of the duck or a green and brown version, too. The tiny puff stitch legs make it very elegant. You can also crochet the fat bird plush or other bird plushies. Now, continue reading for the complete pattern for beginners in US terms.
[ez-toc]
Bird plushies? Here is another pattern to crochet with:
Crochet White & Yellow Duck Plushie: Row-by-Row Pattern
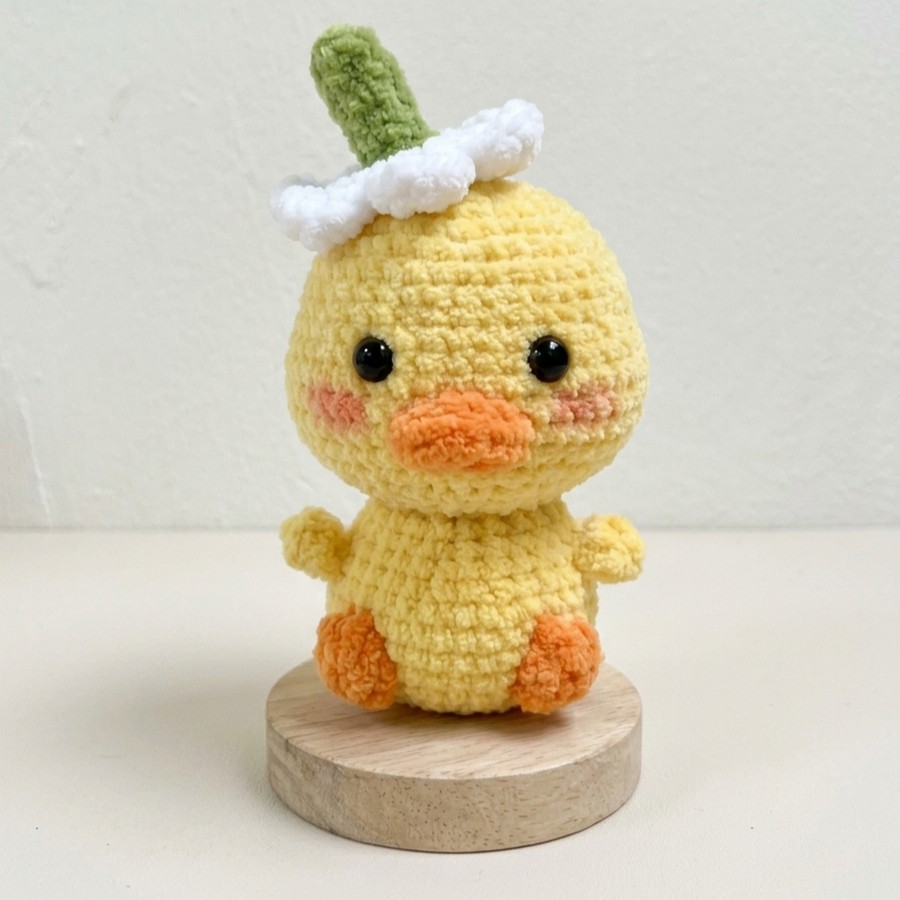
This adorable little crochet duck has a flower hat and has a charming shape that makes it perfect as a pocket companion or a keychain.
Worked in pieces, starting with a head to cute cheeks, followed by a body with a tiny tail. Below is the full pattern to crochet this duck plushie, both in white and yellow:
Materials
- Milk cotton yarn or thin plush yarn in light yellow (or white), dark orange, green, and white
- 2.0 mm or 2.5 mm crochet hook
- 6mm or 8mm safety eyes
- Polyester fiberfill stuffing
- Yarn needle, scissors, fabric glue, and pink cosmetic blush
Construction Steps
The Head
Round 1: Use light yellow yarn to make a magic ring (MR) and work 6 single crochet (sc) stitches inside. (6 sts)
Round 2: Work 2 sc into every stitch around. (12 sts)
Round 3: Repeat a pattern of 1 sc followed by an increase (inc) 6 times. (18 sts)
Round 4: Work a staggered repeat pattern of 1 sc, 1 inc, and 1 sc exactly 6 times. (24 sts)
Round 5: Crochet a sequence of 3 sc then 1 inc, repeating it 6 times over. (30 sts)
Round 6: Work 30 sc evenly around without any changes. (30 sts)
Round 7: Repeat a sequence of 2 sc, 1 inc, and 2 sc 6 times around. (36 sts)
Rounds 8–10: Maintain the shape by placing 36 sc in each of these three rounds. (36 sts)
Round 11: Create the cheek bulges by working 9 sc, 4 inc, 10 sc, 4 inc, and 9 sc. (44 sts)
Rounds 12–15: Crochet 44 sc around for each individual round. (44 sts)
Round 16: Begin closing the shape with 9 sc, 4 decreases (dec), 10 sc, 4 dec, and 9 sc. (36 sts)
Round 17: Work a pattern of 2 sc, 1 dec, and 2 sc 6 times around the loop. (30 sts)
Round 18: Work 3 sc followed by 1 dec, repeating the sequence 6 times before starting to pack the head firmly with stuffing. (24 sts)
Round 19: Decrease evenly around to reach a final total of 20 stitches. Fasten off and leave a long tail for sewing.
The Body
Round 1: Form a magic ring with yellow yarn and place 6 sc inside. (6 sts)
Round 2: Place an increase in each of the 6 stitches around. (12 sts)
Round 3: Work a regular repeating pattern of 1 sc and 1 inc 6 times. (18 sts)
Round 4: Follow a staggered increase sequence of 1 sc, 1 inc, and 1 sc 6 times. (24 sts)
Round 5: Crochet 3 sc followed by an increase, repeating 6 times total. (30 sts)
Round 6: Work 2 sc, 1 inc, and 2 sc across the round 6 times. (36 sts)
Round 7: Place 36 sc all the way around without expanding. (36 sts)
Round 8: Shape the little duck tail by working 1 sc, 1 half double crochet (hdc), 2 double crochet (dc) in one stitch, 1 hdc, and 32 sc. (37 sts)
Round 9: Work 1 sc, 2 dec, repeat a sequence of 7 sc and 1 dec twice, then finish with 6 sc, 1 dec, and 6 sc. (32 sts)
Round 10: Process 2 dec back-to-back, then repeat a pattern of 5 sc and 1 dec 4 times. (26 sts)
Round 11: Execute 1 dec at the start and follow it with 24 normal sc stitches. (25 sts)
Round 12: Repeat a sequence of 3 sc and 1 dec a total of 5 times around. (20 sts)
Round 13: Crochet 20 sc evenly around, then fasten off and firmly stuff the completed piece.
The Wings (Make 2)
Step 1: Chain 5 using the yellow yarn base.
Step 2: Working down from the second chain from your hook, make 1 slip stitch (sl st), 1 sc, 2 hdc in the next chain space, and 1 sc in the last loop.
The Feet (Make 2)
Step 1: Use dark orange yarn to set up a magic ring.
Step 2: Work 3 sc, 1 hdc, ch 1, 1 sl st, ch 1, 1 hdc, ch 1, 1 sl st, ch 1, and 1 final hdc directly into the ring before pulling it tight.
The Beak
Round 1: Start with dark orange yarn and chain 5. Work 3 sc starting from the second chain, then place 3 sc all into the final chain loop. Turn to work along the opposite underside of the chain, making 2 sc and 1 inc. (10 sts)
Round 2: Crochet 10 sc evenly around the oval shape.
The Flower Hat
Round 1: Use green yarn to set up a magic ring and place 6 sc inside. (6 sts)
Rounds 2–4: Work 6 sc around each row to build up the little green stem piece. (6 sts)
Round 5: Repeat a pattern of 2 sc and 1 inc twice. (8 sts)
Round 6: Repeat a pattern of 1 sc and 1 inc 4 times total. (12 sts)
Round 7 (Petals): Switch over to your white yarn. Chain 7, then work 4 dc, 1 hdc, and 1 sl st back down the chain. Skip a stitch on the green base, sl st into the front loop of the next stitch, and repeat until you have 6 white petals.
Assembly and Final Details
- Step 1: Thread your needle with the long head tail and secure the head to the body stitch-by-stitch, making sure the front center lines up perfectly.
- Step 2: Place safety eyes between rounds 10 and 11 of the head, leaving roughly 8 open stitches between them.
- Step 3: Dab fabric glue inside the beak, fold it slightly, and secure it centered right between the eyes.
- Step 4: Attach the orange webbed feet securely to the bottom front of the stuffed body.
- Step 5: Position the whimsical flower hat on top of the head at a cute, slight angle.
- Step 6: Sew the wings onto the sides of the body between rounds 10 and 11.
- Step 7: Embroider three pink accent lines directly underneath each eye to create blushing cheeks, and accent them with a dab of cosmetic pink blush.

About "Talha"
Hey, I’m Talha, the Crafter on Craftstive.com. I love to share guides on folding cute origami models and paper crafts, and I am always ready to inspire your next craft project with my weekly craft discussions.