
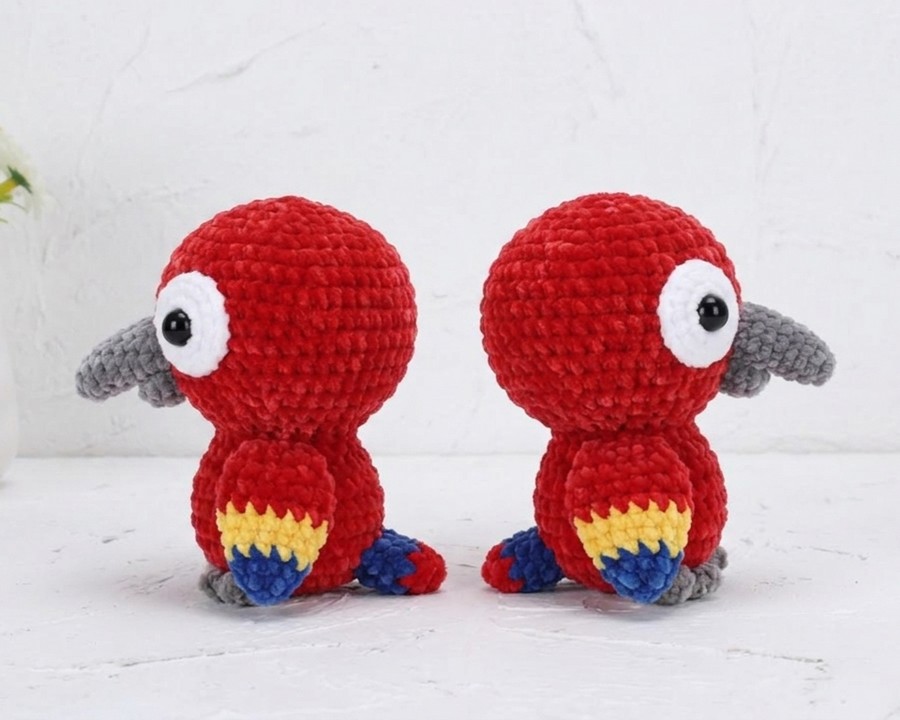
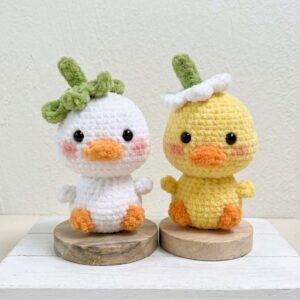
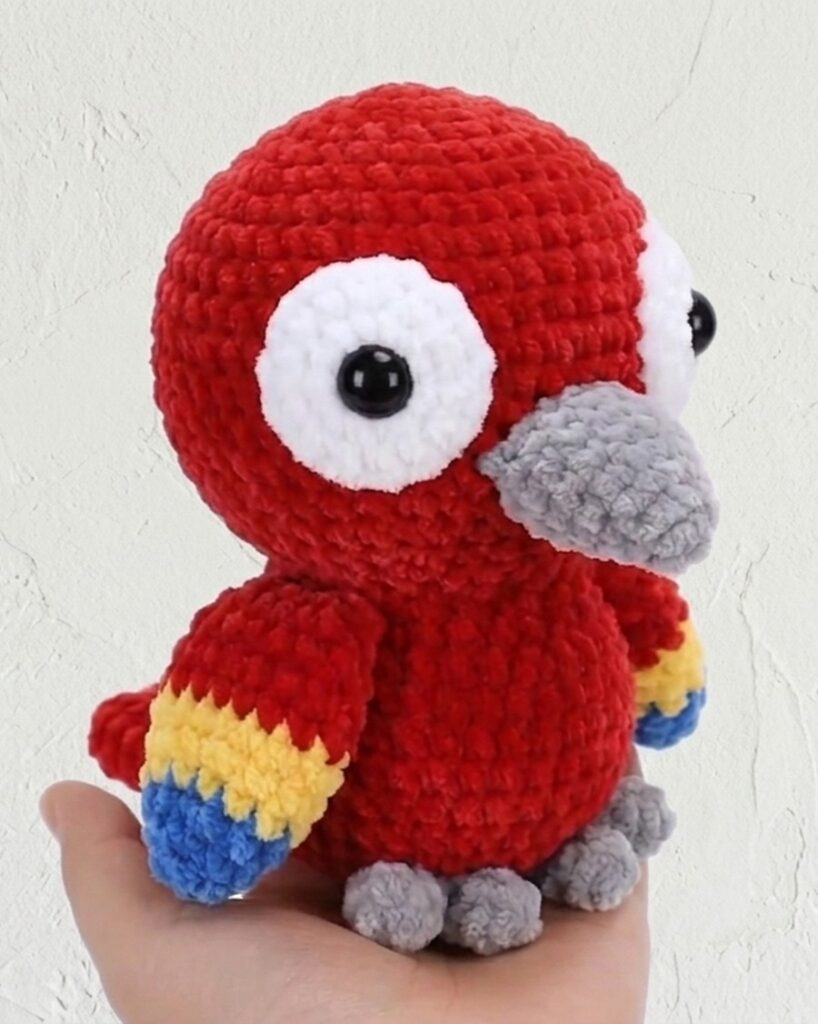
Crochet a sitting scarlet plushie as a desk buddy for your working table with this pattern. This is a part of the “Hawaiian Plush” series, so I could not miss providing you with a pattern to crochet a colorful baby parrot plush. This is a chubby, Chibi, and low-sew plushie. Only wings and the tail are crocheted in three signature colors of scarlet (yellow, blue, and red). The tail and little grey feet let it stand on the table and the wrist without any support.
I love its googly crochet eyes and the detailing in its beak. Unlike most patterns, we shall also crochet the parrot’s mouth in grey below the beak. Kids will love to receive it as a birthday present. Now, continue reading for the full scarlet plush pattern for all skill levels.
Bird Plushie? What is better than a summer’s charm, duck plush:
Crochet Scarlet Parrot Plush: Round-by-Round Pattern
This little red parrot plushie can stand on its own on your table! We shall crochet it in many parts, including tail, wings, no-sew body, and head beak and eyes. Below is the pattern to crochet this colorful parrot plush for summer:
Materials Needed
- Yarn: Five colors (Red/Main Color, Blue, Yellow, Grey, and White)
- Crochet Hook: Choose based on the thickness of your yarn. For a bigger plush, use a 5mm crochet hook with super bulky yarn.
- Safety Eyes: Black plastic insert beads/pupils
- Stuffing: Polyester fiberfill (PP cotton)
- Tools: Stitch markers, yarn needle, and scissors
Crochet Stitch Abbreviations
- MR: Magic Ring
- ch: Chain stitch
- x: Single crochet (or cross single crochet as shown in the charts)
- v: Increase (2 single crochets worked into the same stitch)
- a: Decrease (invisible decrease working through the front loops only)
- sl st: Slip stitch
Step-by-Step Crochet Pattern
1. Head & Body (Continuous Spiral Crochet)
Worked as one continuous piece from top to bottom. Do not slip stitch at the end of rounds.
- R1: MR 6x (6)
- R2: 6v (12)
- R3: (x, v) * 6 (18)
- R4: x, v, (2x, v) * 5, x (24)
- R5: (3x, v) * 6 (30)
- R6: 2x, v, (4x, v) * 5, 2x (36)
- R7: (5x, v) * 6 (42)
- R8: 3x, v, (6x, v) * 5, 3x (48)
- R9–R16: 48x (48) (Total 8 rounds)
- R17: 3x, a, (6x, a) * 5, 3x (42)
- R18: (5x, a) * 6 (36)
- R19: 2x, a, (4x, a) * 5, 2x (30)
- R20: (3x, a) * 6 (24)
- R21: x, a, (2x, a) * 5, x (18) (Neck area narrowing)
- R22: x, v, (2x, v) * 5, x (24) (Body widening begins)
- R23: (3x, v) * 6 (30)
- R24: 2x, v, (4x, v) * 5, 2x (36)
- R25–R29: 36x (36) (Total 5 rounds)
- R30: 2x, a, (4x, a) * 5, 2x (30)
- R31: (3x, a) * 6 (24)
- R32: x, a, (2x, a) * 5, x (18)
- R33: (x, a) * 6 (12)
- Firmly stuff the head and body with PP cotton stuffing here.
- R34: 6a (6)
- Fasten off, weave the tail through the remaining 6 front loops, pull tightly to close the opening, and hide the yarn end.
2. Wings (Join-Round Crochet Method – Make 2)
Slip stitch to join and chain 1 at the end of every round. Change colors smoothly during the joining slip stitches.
- R1 (Blue): MR 6x, sl st, ch 1 (6)
- R2 (Blue): 6x, sl st, ch 1 (6)
- R3 (Blue): 6v, sl st (change to Yellow on this sl st), ch 1 (12)
- R4–R5 (Yellow): 12x, sl st, ch 1 (12) (Total 2 rounds)
- R6 (Yellow): (x, v) * 6, sl st (change to Red on this sl st), ch 1 (18)
- R7–R11 (Red): 18x, sl st, ch 1 (18) (Total 5 rounds)
- Fasten off, leaving a long red yarn tail for sewing later.
3. Feet / Claws (Make 2)
Each foot is formed by joining two small crocheted toe parts together.
- Toe Part 1:
- R1: MR 6x, sl st, ch 1 (6)
- R2: 6x, sl st, ch 1 (6) → Fasten off and cut yarn.
- Toe Part 2: Repeat R1 and R2 exactly, but do not cut yarn.
- Joining Round & Leg:
- R3: Crochet continuous spiral stitches across both pieces: 6x around Toe Part 1, followed by 6x around Toe Part 2 (12 total stitches).
- R4: (2x, a) * 3 (9)
- R5: 9x (9)
- R6: (x, a) * 3 (6)
- Sl st to next stitch, fasten off, and leave a long tail for assembly.
4. Eyes (White Yarn – Make 2)
- R1: MR 6x, sl st, ch 1 (6)
- R2: 6v, sl st, ch 1 (12)
- R3: (x, v) * 6, sl st (18)
- Fasten off and leave a long sewing tail.
5. Beak Parts (Grey Yarn)
- Beak B (Upper / Larger Beak):
- R1: MR 6x (6)
- R2: 6x (6)
- R3: (x, v) * 3 (9)
- R4: (2x, v) * 3 (12)
- R5: 12x (12)
- R6: (3x, v) * 3 (15)
- R7: 15x (15)
- Fasten off and leave a tail.
- Beak A (Lower / Smaller Beak):
- R1: MR 6x (6)
- R2: (x, v) * 3 (9)
- R3: 9x (9)
- Fasten off and leave a tail.
6. Tail (Color Change)
- R1–R2 (Red): MR 6x, then 1 round of 6x (6)
- R3 (Blue): (x, v) * 3 (9)
- R4 (Blue): 9x (9)
- R5 (Blue): (2x, v) * 3 (12)
- R6 (Blue): 12x (12)
- Fasten off and leave a long sewing tail.
Detailed Assembly Instructions
Assemble the Eyes: Press your plastic safety eye pupils directly through the centers of your crocheted white eye patches.
Sewing the Eyes: Position the eye patches symmetrically onto the upper head. Count down from the top center magic ring and pin the eyes between R11 and R12. Use your yarn needle to sew flatly around the entire white border. Ensure you leave a gap of 6 to 8 empty stitches between the two white eye circles.
Sewing the Upper Beak (Beak B): Position the larger grey beak right in the center between both eyes, roughly around R13 to R14. Sew through the double layer to fix it downward, shaping a classic curved parrot-beak look.
Sewing the Lower Beak (Beak A): Add a tiny amount of stuffing inside Beak A. Position it directly underneath the upper beak and stitch securely around its rim onto the face.
Wings: Flatten the wings (do not stuff them) and sew them symmetrically onto the left and right sides of the middle body section.
Tail: Add a small bit of stuffing inside the tail cavity and sew it onto the lower back area of the body piece.
Feet/Claws: Align the two joined feet horizontally along the very bottom base of the bird’s body and stitch them firmly into place. This balanced placement ensures your cute finished bird stands perfectly on flat surfaces!