
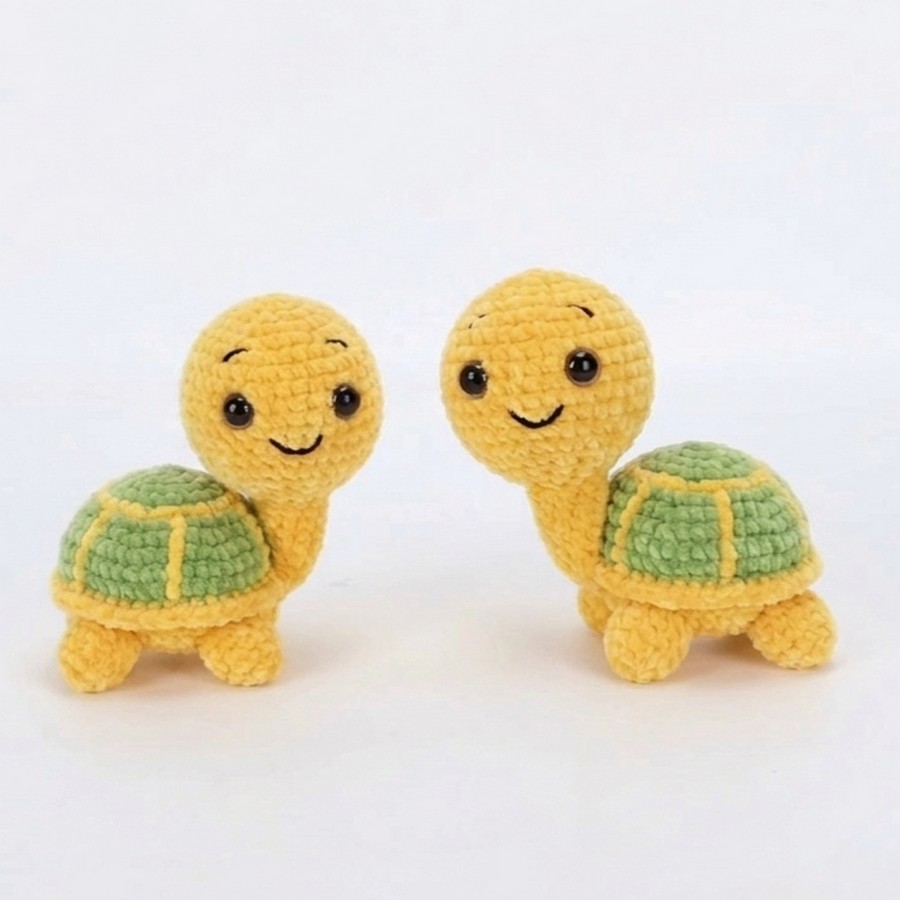
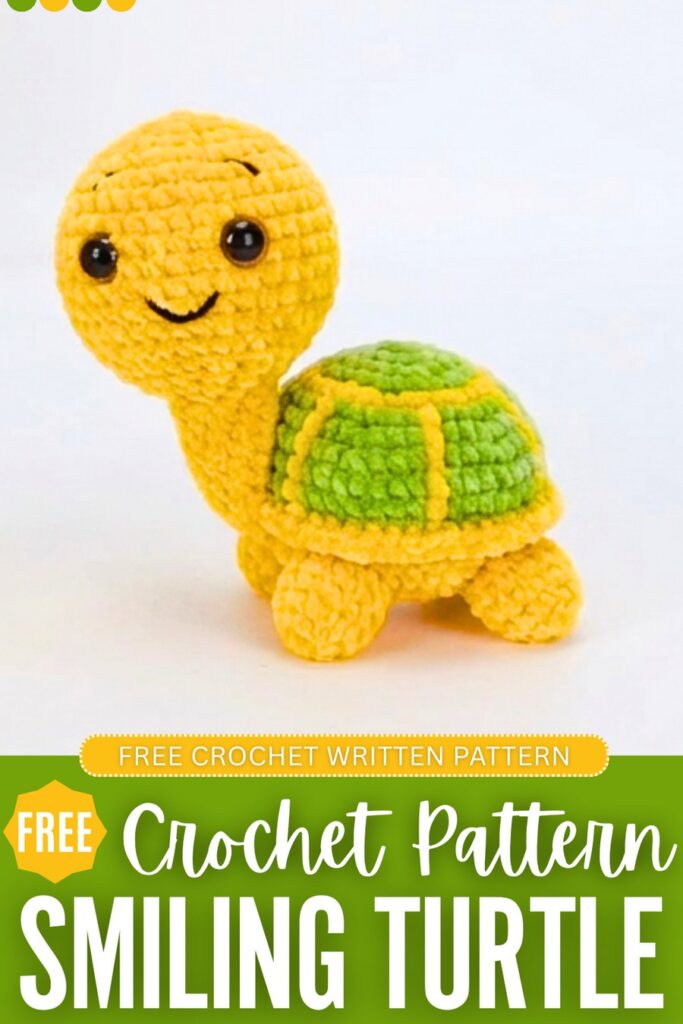
This free pattern will let you crochet a standing and smiling tortoise plushie that will become your ultimate desk buddy for this summer. Its shell has a colorwork, and there is also a neck crocheted, no-sew with the head pattern. With the big smiling face and tiny body, this looks simply cuter and even more so than it does without any support. Tortoise plushie has been a bit underrated compared to turtle plushie, so I decided to share a pattern for this one.
Still, you can convert it to a turtle plushie by attaching crochet fins instead of the legs. You can use any two contrasting colors to crochet the shell pattern. Also, crochet the accessories for its head as a summer bucket hat. Now, let me show you how you can crochet it!
This pattern is perfectly accurate, like the one recommended, so you will love crocheting it!
Crochet Smiling Tortoise Plushie: Row-by-Row Pattern
Here is the full pattern written in US instructions for this tortoise for kids:
Abbreviations
- MR: Magic Ring
- x: Single crochet
- v: Increase (two single crochets in the same stitch)
- a: Decrease
- () * n: Repeat the sequence inside the parentheses n times
- ch 1: Chain one
- sl st: Slip stitch
- G: Green yarn
- Y: Yellow yarn
Materials Needed
Here is the full pattern written in US instructions for this little crab plushie for kids:
- Yarn: Chenille yarn in green and yellow.
- Hook: 4.0mm.
- Eyes: Two-color eyes.
- Others: Fiberfill stuffing and embroidery thread in black.
Tortoise Head Pattern
The head is worked in continuous spiral rounds. Use a stitch marker to mark the first stitch of each round.
R1: MR, 6x (6)
R2: 6v (12)
R3: (x, v) * 6 (18)
R4: (2x, v) * 6 (24)
R5: (3x, v) * 6 (30)
R6: (4x, v) * 6 (36)
R7–R14: 36x (Work 8 rounds of 36 single crochets with no increases or decreases). (36)
Tortoise Head & Neck Pattern (Continued)
R15: (4x, a) * 6 (30)
R16: (3x, a) * 6 (24)
R17: (2x, a) * 6 (18)
R18: (x, a) * 6 (12)
R19–R26: 12x (Work 8 rounds of 12 single crochets). (12)
Belly Pattern
Use yellow yarn and work in a continuous spiral.
R1: MR, 6x (6)
R2: 6v (12)
R3: (x, v) * 6 (18)
R4: (2x, v) * 6 (24)
R5: (3x, v) * 6 (30)
R6: (4x, v) * 6 (36)
R7: (5x, v) * 6 (42)
R8: (6x, v) * 6 (48)
Finish: Slip stitch to the first stitch of the next round and fasten off.
Feet Pattern
Make 4 using yellow yarn.
R1: MR, 6x (6)
R2: 6v (12)
R3–R6: 12x (Work 4 rounds of 12 single crochets). (12)
Finish: Fasten off, leaving a tail for sewing to the body.
Important Technique Change
Unlike the other parts of the tortoise that use a spiral method, the shell is worked using joined rounds.
Each round begins with a ch 1.
Each round ends by joining with a sl st to the first stitch of that round.
Tortoise Shell Pattern
R1 (Green): MR, 6x. Join with sl st, ch 1. (6)
R2 (Green): 6v. Join with sl st, ch 1. (12)
R3 (Green): (x, v) * 6. Join with sl st, ch 1. (18)
R4 (Green): (2x, v) * 6. (24)
Color Change Note: Work the final stitch of R4 until there are two loops on the hook. Drop the green yarn and pull through the final two loops with Yellow yarn. Join with sl st and ch 1 using the yellow yarn.
R5 (Yellow): (3x, v) * 6. (30)
Color Change Note: On the final stitch of R5, change back to Green yarn before joining the round.
Shell Colorwork Pattern (Joined Rounds)
Always start each round with a ch 1 and end with a sl st to the first stitch. When changing colors, carry the non-working yarn along the back of your stitches.
R6: (G: 2x, v, x; Y: x) * 6. (36)
R7: (G: 2x, v, 2x; Y: x) * 6. (42)
R8: (G: 2x, v, 3x; Y: x) * 6. (48)
R9–R10: (G: 7x; Y: x) * 6. (48)
Finish Shell: Fasten off the green yarn after R10. Keep the yellow yarn attached for assembly.
Assembly Instructions
1. Joining the Shell and Belly
Positioning: Place the finished Belly (yellow circle) against the open bottom of the Shell, with the right sides facing out. Both pieces should have exactly 48 stitches.
Joining (R11): Use yellow yarn to single crochet through both the Shell and the Belly simultaneously, stitch for stitch.
Stuffing: When you have about 10–12 stitches left to join, firmly stuff the body with fiberfill.
Closing: Complete the remaining single crochets to close the body. Join with a sl st.
Finishing Edge (R12): Work one final round of 48x in yellow yarn around the joined edge to create a clean border. Fasten off and weave in the ends.
2. Neck and Body Assembly
Placement: Align the neck with any of the six green sections on the shell. The neck should be positioned between the two yellow vertical lines that define the shell’s pattern.
Sewing:
- Secure the base of the neck to the shell by sewing through the layers.
- To keep the head upright, sew the sides of the neck to the shell slightly higher up to provide more stability.
- If you want the head to look further upward, add a few extra stitches between the upper part of the neck and the shell.
3. Leg Assembly
Placement:
- Front Legs: Attach one leg to each side of the neck, ensuring they are symmetrical.
- Back Legs: Align them with the shell pattern sections diagonally opposite the front legs.
Alignment: Use pins to secure all four legs before sewing to ensure the tortoise can stand evenly on its own.
Method: Sew through both the yellow belly layer and the shell edge to ensure a strong hold.
4. Facial Details
Eyes:
- Preparation: Cut two small circles of white felt and insert the safety eyes or buttons through the center to create the whites of the eyes.
- Positioning: Install the eyes between R9 and R10 of the head, leaving a gap of 4 to 5 stitches between them.
Eyebrows:
- Use thin black thread.
- Position them 2 rounds above the eyes, spanning about 2 stitches in width and slanting slightly downward.
Mouth:
- Center the mouth horizontally between the eyes, 1 round below them.
- Create a “V” or “Y” shape spanning approximately 3 stitches in width to give the tortoise a smiling expression.
Customization
Head Direction: To make the tortoise look to the right instead of the left, simply mirror the placement of the eyes, eyebrows, and mouth on the opposite side of the head.