
Show support for craftbee!
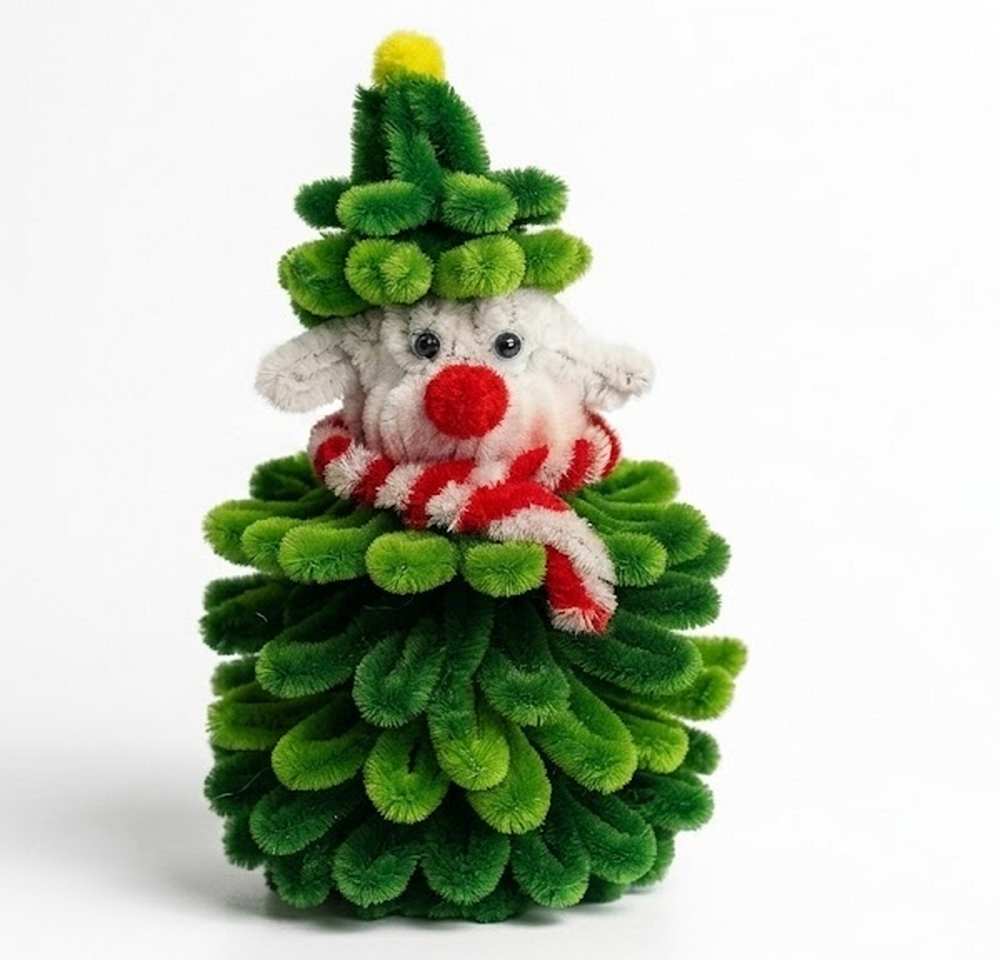
In today’s FEATURED pipe cleaner Christmas tree craft tutorial, you will learn how to DIY this UNIQUE reindeer in a Christmas tree costume out of pipe cleaners. This is a super cute and elegant table decoration for Christmas with our little Reindeer wearing a pipe cleaner peppermint scarf and pinecone hat.
We will use the same method to DIY the Christmas tree as was used in the “mini pipe cleaner standing Christmas tree” tutorial.
This makes making the complete reindeer in a Christmas tree decoration easy and quick. The pipe cleaner little reindeer also has small safety beads, which make it look so cute. You can also give this chenille stem Christmas tree craft as a gift!
[ez-toc]

Tutorial to Make a Pipe Cleaner Christmas Tree with an Animal
This project is a small Christmas tree with a cute animal head on top. It is made of wire and paper. You use green wire for the tree. You use white wire for the head. You use red and white wire for the scarf. First, you cut the green wire into small parts.
You glue the green parts to a paper cone to make the tree. Then, you make a white head by winding white wire around a tube. You glue eyes and a red nose on the head. You put the head on the tree. You make a small hat. You put a scarf around the neck.
How to Make a Pipe Cleaner Christmas Tree and Character
What you need:
-
Green pipe cleaners (many)
-
White pipe cleaners
-
Red and white striped pipe cleaner (or one red and one white)
-
Small yellow pom-pom
-
Small red pom-pom (for the nose)
-
Tiny googly eyes
-
White paper
-
Glue gun
-
Scissors
-
Ruler
- A pen or straw (for winding)
Video Tutorial?
Detailed Instructions
1. Prepare the Tree Branches
Take your green pipe cleaners. Use a ruler to measure and cut them into pieces that are 6cm long. Bend each piece in half to make a “U” shape or a small loop. You will need a lot of these to cover the whole tree.
2. Make the Tree Base
Take a piece of white paper. Roll it into a cone shape. Glue the edge of the paper so the cone stays together. Use your scissors to cut the bottom of the cone so that it can stand up straight on a table.
3. Glue the Green Loops
Put a line of hot glue around the bottom of the paper cone. Stick your green loops onto the glue, with the rounded part of the loop pointing down. Once the bottom row is finished, start a second row just above it. Keep gluing rows of green loops until the entire paper cone is covered.
4. Create the Character Head
Take a white pipe cleaner. Wrap it tightly around a pen or a straw to make it curly like a spring. Slide it off. Take another white pipe cleaner and coil it into a flat circle. Take your curly white wire and glue it around the edge of the circle to build up a round, fluffy head shape.
5. Add the Face
Use the glue gun to stick two tiny eyes onto the front of the white head. Glue the small red pom-pom in the middle to make the nose.
6. Make the Christmas Hat
Take a few green pipe cleaners. Wrap them into a very small cone shape that fits on top of the white head. Glue a small yellow pom-pom to the very tip of this small hat.
7. Make the Scarf
Take one red pipe cleaner and one white pipe cleaner. Twist them together tightly so they look like a candy cane.
8. Assemble the Craft
-
The Head: Put a lot of glue on the top of your green tree. Press the white head onto the glue and hold it until it is dry.
-
The Hat: Glue the small green hat onto the top of the white head.
-
The Scarf: Wrap the red and white twisted wire around the “neck” area where the head meets the tree. Cross the ends over to make it look like a real scarf.
Your holiday pipe cleaner craft is now finished!
About "Craftbee 9"
She makes incredible fabric, recycle and pipe cleaner crafts.