
Decorate the room of your little sweetie with this DIY glow-in-the-dark butterfly glow night lamp by recycling an 1/2 litre water bottle and some white paper. You can put a tealight, fairy lights, Christmas lights, and even a candle in this bottle lamp to make it glow beautifully near your bed.
The butterfly cutouts seem like they’re flying and also add a 3D look to the lamp.
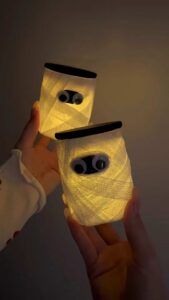
You can prepare this nightlight fairy lantern using a mason jar, too, just like the mason jar mummy lantern. Or else, use a pipe cleaner basket base. Now, continue reading to learn more about this bottle lamp project.
[ez-toc]

Tutorial to DIY A Night Light Plastic Bottle Lamp
This project shows you how to make a beautiful lamp using a plastic bottle and paper. You start by cutting a plastic bottle to make a clear tube. Then, you use a piece of white paper to decorate it. You make a small butterfly pattern first.
You use that pattern to draw many butterflies on the paper. You cut the wings of the butterflies but leave the bodies attached to the paper. You bend the wings up so they look like they are flying. Finally, you wrap the paper around the bottle and put a small light inside.
Materials Needed
-
An empty plastic bottle (smooth sides work best)
-
A4 paper (70gsm thickness)
-
Small piece of paper (3 x 2.5cm)
-
Craft knife or utility knife
-
Scissors
-
Pencil
-
Ruler
-
Double-sided tape
-
LED candle light
Video Tutorial?
Detailed Step-by-Step Guide
Step 1: Prepare the Plastic Base
Take your empty plastic bottle and remove the label. Use a craft knife to carefully cut off the top part (the neck) and the bottom part of the bottle. You should be left with a clear plastic cylinder. Use scissors to trim the edges so they are straight and smooth.
Step 2: Create the Butterfly Template
Cut a small rectangle of paper measuring 3cm by 2.5cm. Fold this small piece in half. On the side with the fold, draw the shape of half a butterfly. Use your scissors to cut along the line you drew. When you unfold the paper, you will have a perfectly symmetrical butterfly template.
Step 3: Draw Butterflies on the A4 Paper
Place your large A4 sheet of paper flat on your work surface. Use your butterfly template and a pencil to trace many butterflies all over the paper. You can arrange them in rows or scatter them randomly for a natural look.
Step 4: Cut the Butterfly Wings
This step requires a craft knife and a cutting mat. For each butterfly you traced, carefully cut around the outer edges of the wings. Important: Do not cut the middle part (the body) of the butterfly. The butterfly must stay attached to the paper by its center.
Step 5: Make the Butterflies “Pop”
Once all the wings are cut, use a ruler to help you bend the wings upward. Place the ruler along the center “body” of the butterfly and gently fold the wings up towards you. This makes the butterflies look like 3D decorations sitting on the paper.
Step 6: Attach Tape and Wrap
Flip the paper over to the back side (where there are no pencil marks). Apply a strip of double-sided tape along one of the long edges and one of the short edges. Peel off the backing of the tape. Carefully wrap the paper around your plastic bottle cylinder. Press the edges down firmly so the paper sticks to the plastic and stays in a tube shape.
Step 7: Light It Up
Turn on your LED candle light. Place the light on a table and set your butterfly tube over the top of it. The light will shine through the paper and the butterfly cut-outs, creating a beautiful glowing effect with shadows of butterflies.
About "Craftbee 9"
She makes incredible fabric, recycle and pipe cleaner crafts.