
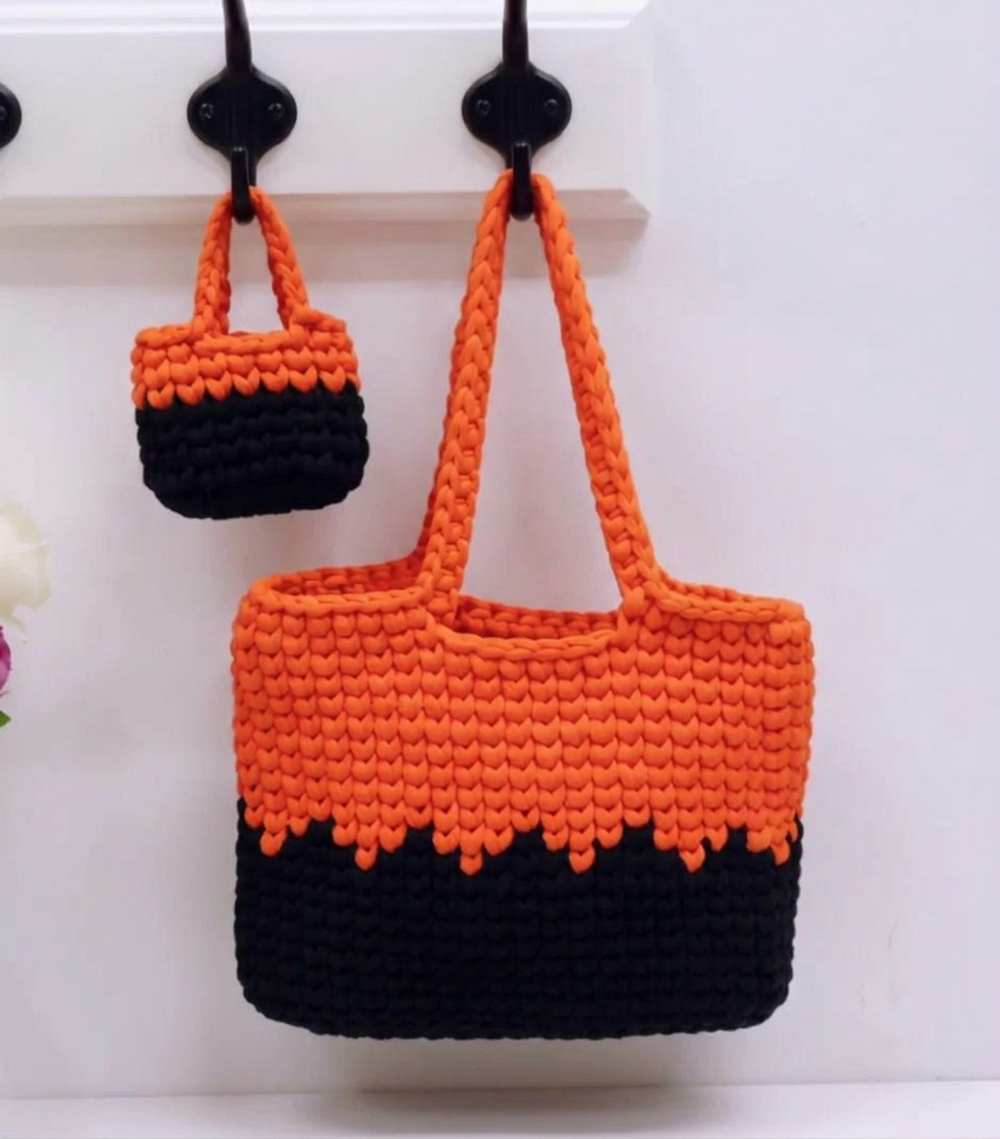
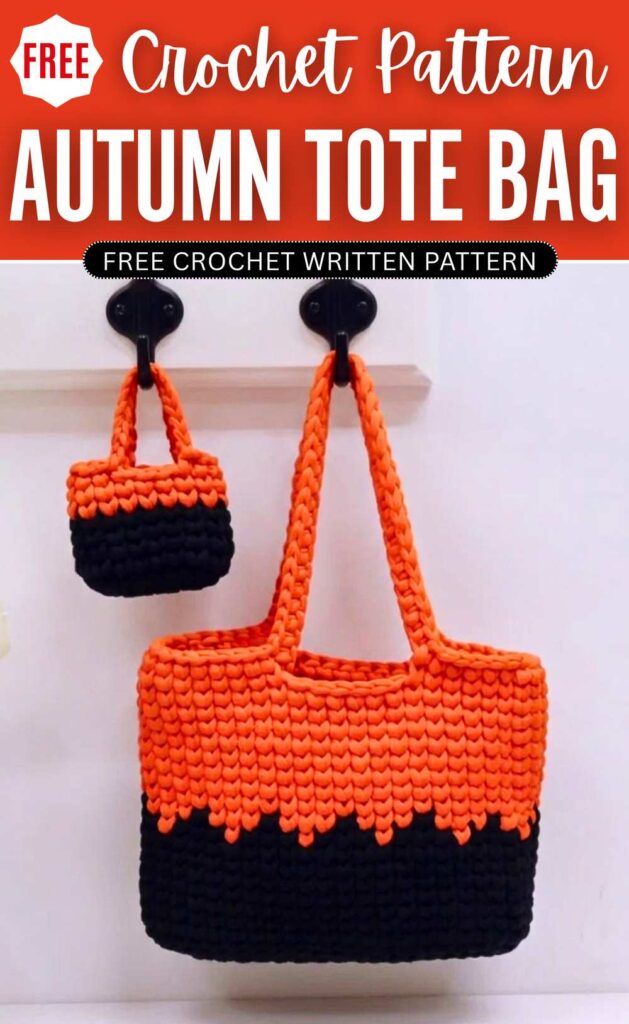
Looking for an easy tote bag pattern that you can crochet for both kids and yourself at Halloween? Learn how to crochet this black-and-orange colorwork crochet tote bag using T-shirt yarn & following this FREE written pattern for absolute beginners.
The small version has an even more basic colorwork and is perfect for kids for trick-or-treating. You can also hang a small crochet pumpkin bag charm from its handle, and it will turn out to be even more elegant.
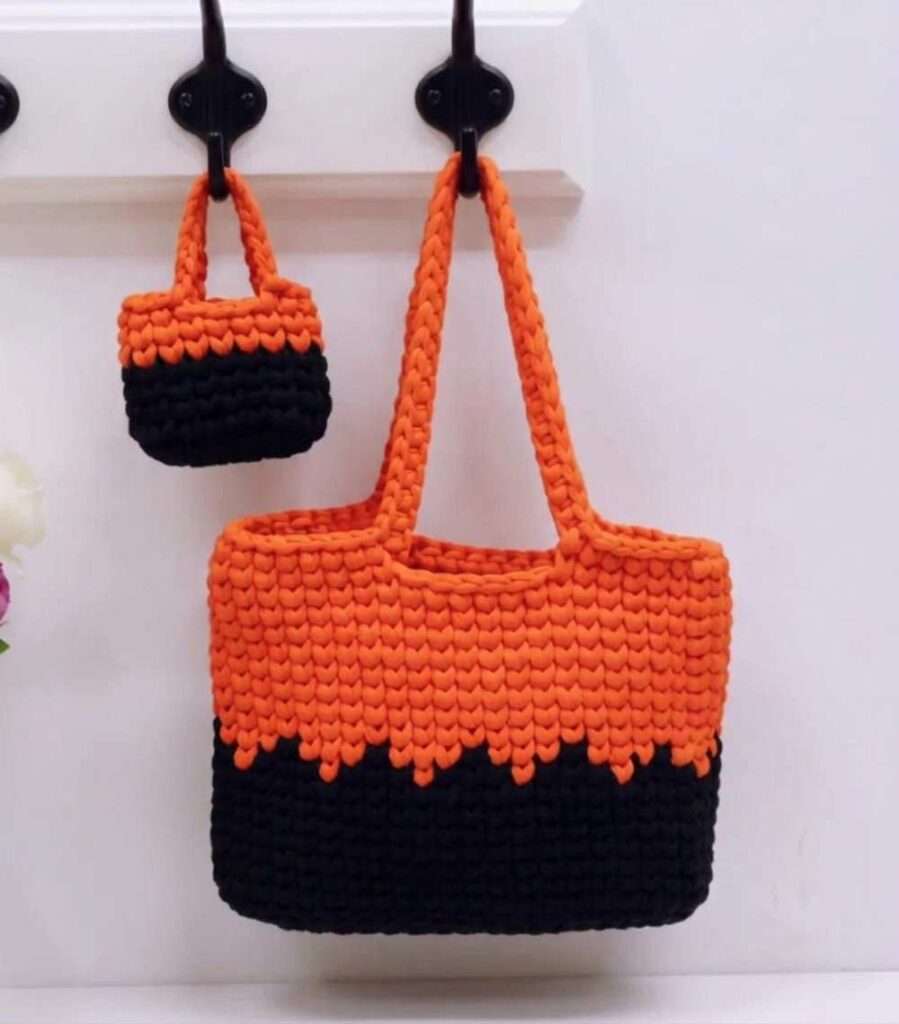
This is a no-sew crochet bag with two color panels with a spooky wavy transition that makes it a must-have for Halloween. It has a beautiful texture of waistcoat sc. The construction involves the oval base, so you can crochet it from the bottom up. Now, continue reading for the full crochet tote bag pattern.
[ez-toc]
Chunky Cotton Core Autumn Yarn Tote Bag: Written Instructions
This stylish and lightweight tote bag is crocheted using chunky cotton core yarn. Cotton core yarn is an excellent alternative to typical T-shirt yarn because it is much lighter, very smooth, lacks elasticity (which makes it easier on the hands while crocheting), and creates highly defined, neat stitches.
The finished bag is sturdy, holds its shape beautifully, and features a cute, contrasting color-block pattern in the middle. This project is perfect for daily use and makes for a fantastic handmade accessory.
Materials Needed
- Yarn: Chunky Cotton Core Yarn in two colors (e.g., Grey for the main body and Pink for the accent/top portion).
- Crochet Hook: 5.5 mm or 6.0 mm.
- Accessories: Stitch markers (essential for tracking your rounds), scissors, and a tapestry needle or a smaller crochet hook for weaving in ends.
Abbreviations
- ch = Chain
- sc = Single Crochet
- waistcoat sc (knit stitch) = Center Single Crochet / Knit Stitch (Insert the hook between the “V” legs of the single crochet stitch from the previous round, rather than under the top two loops).
- inc = Increase (2 stitches in the same stitch space)
- sl st = Slip Stitch
- st(s) = Stitch(es)
Pattern Instructions
Part 1: Crocheting the Oval Base
Foundation: Leave a short tail, create a slip knot, and chain 15.
Round 1:
- Turn your chain over to expose the back bumps (the horizontal bars on the back of the chain).
- Starting in the second back bump from your hook, place 1 sc. Place a stitch marker in this first stitch.
- Continue working 1 sc into each back bump down the chain for a total of 13 sc.
- In the very last back bump, make 3 sc into the same stitch space. Place a stitch marker in the first of these 3 sc, and place another stitch marker in the third sc.
- Rotate your work to crochet down the opposite side of the foundation chain (working under the remaining loops of the original chain). Crochet over your starting tail to hide it.
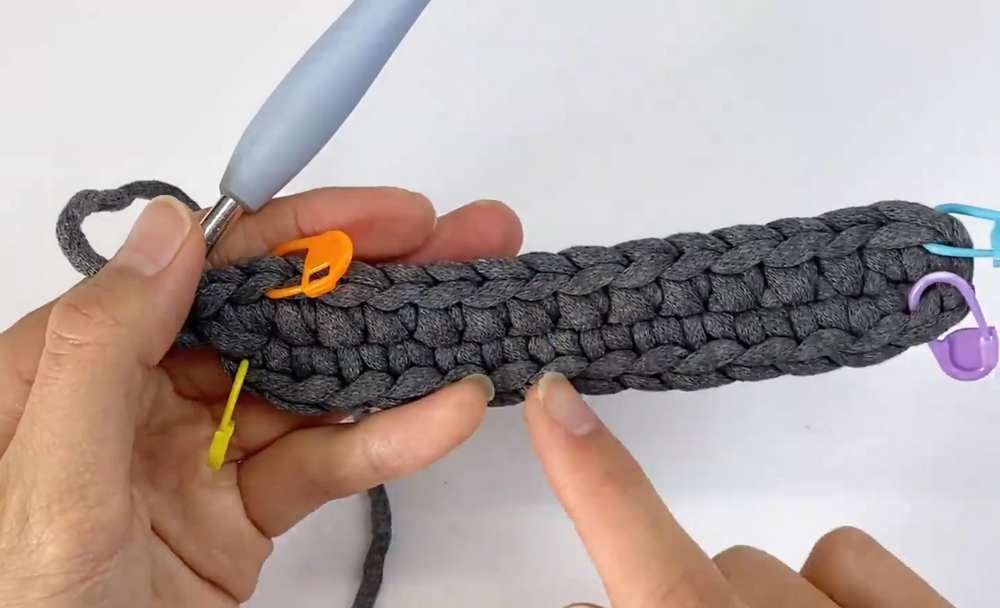
- Work 1 sc in each of the next 12 stitches.
- In the final stitch space (the same space where you placed your very first sc of the round), work 2 sc. Place a stitch marker in the first of these 2 sc.
- You should have 30 stitches in total.
Seamless Join: Remove your hook from the active loop. Insert the hook from back to front under the top loops of the second stitch of the round (the stitch after the marker). Grab the active loop and pull it through to the back.
Round 2: Note: From this point forward, you will be using the waistcoat sc (also known as the knit stitch or center single crochet) for all single crochet stitches unless otherwise specified. This means you insert your hook directly into the center of the “V” of the stitch from the previous round.
- Insert your hook into the center of the “V” of the very first stitch (where the loop was just pulled back). Put the dropped loop back onto your hook, pull the yarn through, and ch 1 to start the round.
- In the same stitch space, place 1 waistcoat sc. This counts as your first increase (inc). Place a marker in the first stitch.
- Work 1 waistcoat sc into each of the next 12 stitches.
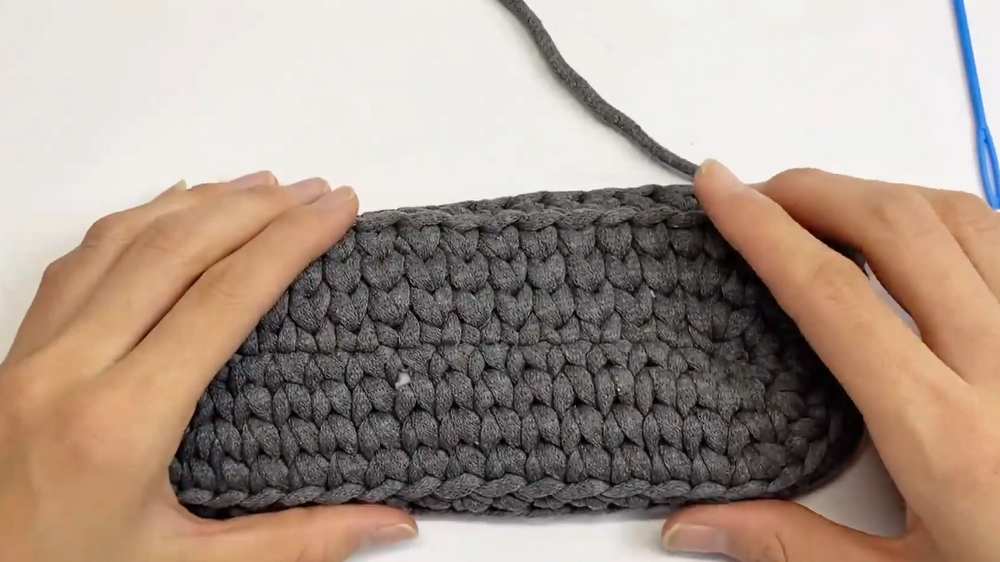
- When you reach the 3 marked stitches at the curve, place 1 inc (2 waistcoat sc) into each of the 3 stitches. Mark the very first stitch of this curved section and the very last stitch of this section.
- Work 1 waistcoat sc into each of the next 12 stitches along the straight side.
- In the final 2 stitches of the round, place 1 inc in each stitch.
- Perform the seamless join as described above.
Round 3:
- Start with the seamless join setup, ch 1.
- The pattern for the curved ends is (1 sc, 1 inc).
- Work 1 inc into the very next stitch (completing your first curve set). Mark the first stitch.
- Work 1 waistcoat sc in each of the next 12 stitches.
- For the 3-stitch curve section: (1 waistcoat sc, 1 inc) repeat 3 times across the curve.
More
- Work 1 waistcoat sc in each of the next 12 stitches.
- For the final curve section: (1 waistcoat sc, 1 inc) repeat 2 times.
- Perform the seamless join.
Round 4:
- Start with the seamless join setup, ch 1.
- The pattern for the curved ends is (2 sc, 1 inc), but to keep the oval round, we stagger the increases. Work 1 inc, then 2 waistcoat sc.
- Work 1 waistcoat sc in each of the next 12 stitches.
- For the next curve section: (1 inc, 2 waistcoat sc) repeat 3 times.
- Work 1 waistcoat sc in each of the next 12 stitches.
- For the final curve section: (1 inc, 2 waistcoat sc) repeat 2 times.
- Perform the seamless join. (Total: 48 stitches).
Part 2: Crocheting the Bag Body
Round 1 (Transition Round):
- Do the seamless join setup.
- For this round only, you will not use the waistcoat stitch. Instead, insert your hook under the back loop and the back bump (the horizontal bar directly beneath the back loop) of each stitch.
- Ch 1, and work 1 standard sc into every stitch around using the back loop and back bump. This creates a crisp folded edge for the bottom of the bag.
- Perform the seamless join at the end of the round.
Rounds 2 – 12 (Main Body Color):
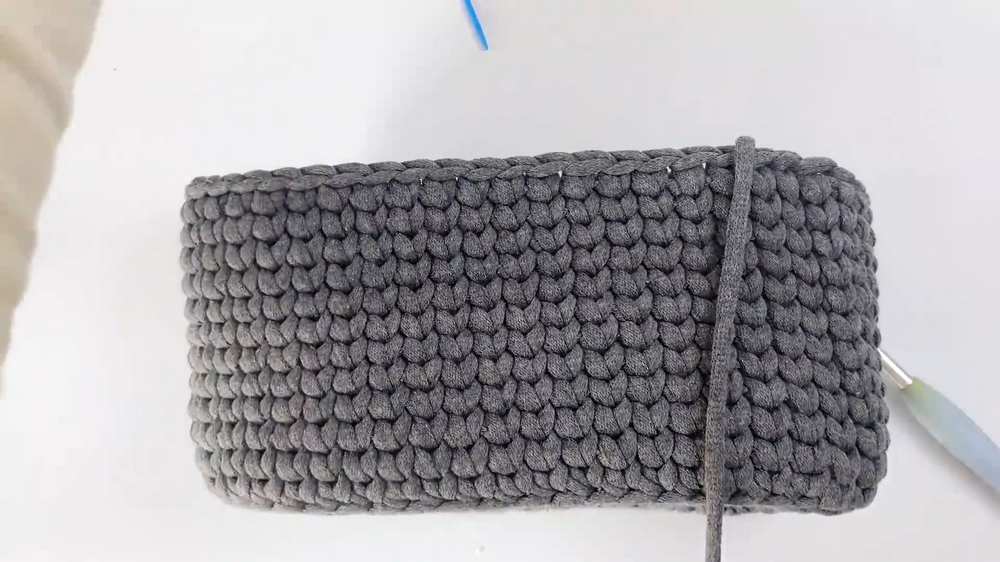
- Starting from Round 2 of the body, switch back to working the waistcoat sc (center single crochet).
- Ch 1, and place 1 waistcoat sc in every stitch around.
- The base will start to curve upwards into a bowl shape. Do not worry if it curls; it will straighten out as the walls get higher.
- Continue working 1 waistcoat sc in each stitch around, performing a seamless join at the end of every round, for approximately 12 to 13 rounds using your main color (Grey).
Part 3: Colorwork Pattern
Note: When changing colors, always make the color switch on the final step of the stitch prior to the new color. Drop the old color, pick up the new color, and pull it through the final two loops on the hook. Carry the unused yarn by crocheting over it so it is hidden inside your stitches.
Round 13 (Color Block Pattern – 3 Grey, 1 Pink):
- Continue with Grey: Work 3 waistcoat sc. On the third stitch, switch to Pink yarn for the final pull-through.
- With Pink: Work 1 waistcoat sc. Switch back to Grey on the final pull-through.
- Repeat this pattern (3 Grey, 1 Pink) all the way around the bag.
- At the end of the round, finish the join with the Pink yarn.
Round 14 (Color Block Pattern – 3 Pink, 1 Grey):
- With Pink: Work 3 waistcoat sc. On the third stitch, switch to Grey for the final pull-through.
- With Grey: Work 1 waistcoat sc. Switch back to Pink on the final pull-through.
- Repeat this pattern (3 Pink, 1 Grey) all the way around the bag.
Part 4: Upper Bag Body and Straps
Rounds 15 – 20 (Upper Body Color):
- Cut the Grey yarn, leaving a tail to weave in later. Continue strictly with the Pink yarn.
- Work 1 waistcoat sc into every stitch around for approximately 6 rounds (or until you reach your desired bag height before adding straps).
Round 21 (Creating the Straps):
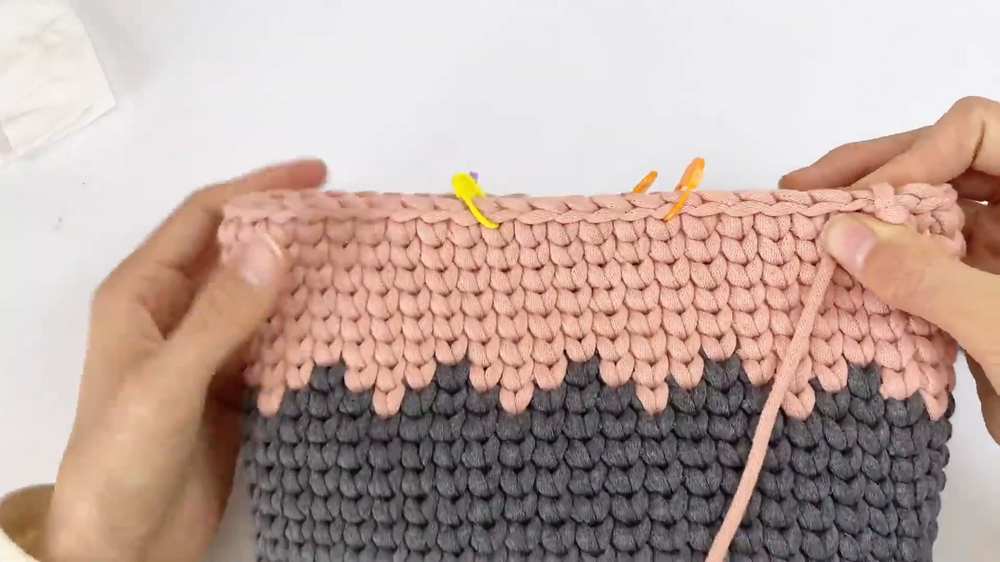
- Lay your bag flat and find the exact center stitches on the front and the back.
- Place stitch markers to map out the strap gap. Count about 6 or 7 stitches from the side edges towards the center, leaving an unworked gap in the middle. Mark the stitch where your strap will begin and end on both sides.
- Work waistcoat sc until you reach the first stitch marker.
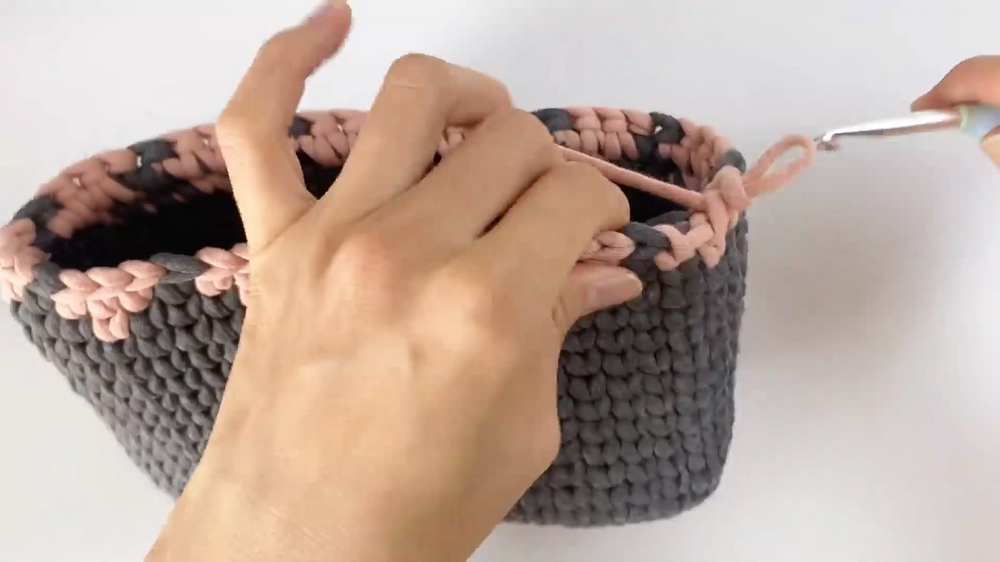
- Chain 35 (or more if you prefer a longer handle).
- Skip the unworked gap stitches, and anchor the chain down by placing a waistcoat sc into the stitch immediately following the second stitch marker on the other side of the gap. Make sure your chain is not twisted.
- Continue working waistcoat sc across the side of the bag until you reach the stitch marker on the back face of the bag.
- Chain 35.
- Skip the back gap stitches, and anchor the chain into the stitch following the final marker. Work waistcoat sc to the end of the round. Perform the seamless join.
Round 22 (Final Strap Round):
- Work waistcoat sc in each stitch until you reach the beginning of the chain 35 strap.
- Work 1 standard sc into the top loops of each chain stitch all the way across the strap (35 sc).
- Resume working waistcoat sc across the side of the bag.
More
- Work 1 standard sc into each chain across the second strap.
- Finish the round with waistcoat sc and perform the seamless join.
Part 5: Finishing and Fastening Off
- After your final seamless join, cut the yarn, leaving a long tail.
- Pull the tail completely through.
- Thread the tail onto a tapestry needle (or use a smaller crochet hook).
- Create an invisible finish by threading the yarn back into the center of the final stitch, mimicking the top loops of the stitches. Do not pull too tight; match the tension of the surrounding stitches.
- Carefully weave the tail through the thick vertical bars on the inside of the bag. Because the core yarn is bulky, take your time threading it so you do not snag the outer fabric. Weave it back and forth several times for extra security.
- Trim any remaining yarn ends to complete your bag.
Save for Later!

About "Talha"
Hey, I’m Talha, the Crafter on Craftstive.com. I love to share guides on folding cute origami models and paper crafts, and I am always ready to inspire your next craft project with my weekly craft discussions.