
Subscribe to knot magic!
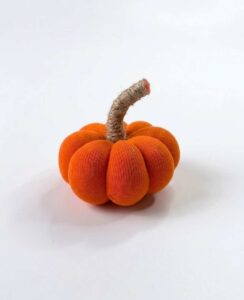
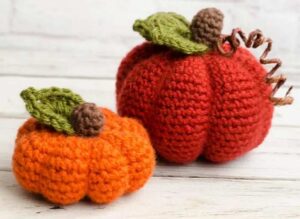
If you know how to crochet, learn how to DIY this chenille yarn orange pumpkin decorated with a satin ribbon bow + a bee button, and a coiled straw stalk. This pumpkin plush is crocheted in the same way as the crochet ribbed fall pumpkin amigurumi (crocheting a ribbed rectangle and sewing it into a stuffed pumpkin). If you are looking for a fall cottage decoration, you can also crochet this pumpkin plush in brown or dull pistachio.
With fluffy yarn, this crochet pumpkin becomes a charming handmade decoration + a gift, as it has a ribbon bow. You can also make a bigger pumpkin plushie by using super bulky yarn instead.
A wooden twig piece or cinnamon piece can also be attached as the pumpkin stalk, just like the rustic pumpkin. Anyway, continue reading to learn more about this crocheted DIY pumpkin. You can make it in under 20 minutes in any size. In this pattern, you will start with 16 chains, but you can crochet it even less chains for a smaller keychain-sized pumpkin.
Tutorial to Crochet A Fall Chenille Yarn Pumpkin
Making a small pumpkin from soft yarn is fun. You use orange yarn and a crochet hook. First, you make a long chain. Then, you crochet many rows to make a rectangle. After that, you sew the sides to make a tube. You close one end of the tube and put soft stuffing inside.
Then, you close the other end. You use a needle to pull yarn around the ball to make lines. This makes it look like a pumpkin. Add a straw for the stem and a ribbon. It looks very cute and nice.
DIY Chenille Yarn Pumpkin Crafting Guide
Materials Needed:
-
Orange chenille yarn (soft and fuzzy)
-
Crochet hook (4.0 mm or 5.0 mm)
-
Scissors
-
Sewing needle (with a wide eye)
-
Soft stuffing (polyester fiberfill)
-
Orange plastic straw
-
White ribbon
-
Small ladybug button (optional)
Video Tutorial?
Step-by-Step Instructions:
Step 1: Create the Crochet Base
-
Start by making a slip knot and placing it on your crochet hook.
-
Chain 16: Create 16 chain stitches in a row.
-
First Row: Start in the 3rd chain from the hook. Make a Half Double Crochet (HDC) into that stitch and every stitch across the row.
-
Continuing Rows: At the end of the row, Chain 2 and turn your work.
-
Continue making HDC stitches in every row until you have a total of 18 rows. You will now have a soft, rectangular piece of fabric.
Step 2: Form the Tube
-
Fold the rectangle in half so the short ends meet.
-
Thread a needle with a long piece of the same orange yarn.
-
Sew the two short sides together. This will turn your rectangle into a tube.
Step 3: Close the Bottom and Stuff
-
Keep the needle threaded. Weave the yarn in and out of the stitches around the bottom opening of the tube.
-
Pull the yarn very tight to close the bottom hole completely and tie a knot to secure it.
-
Turn the “bag” right-side out so the seam is hidden inside.
-
Fill the inside with plenty of soft stuffing until the pumpkin looks round and firm.
Step 4: Close the Top
-
Weave your needle and yarn through the stitches around the top opening.
-
Pull the yarn tight to close the top hole, leaving just enough space for the stem.
Step 5: Create the Pumpkin Segments
-
To make the pumpkin look real, you need to create “ribs” or sections.
-
Take your needle and thread it through the very center of the pumpkin from the bottom to the top.
-
Pull the yarn over the outside of the pumpkin and push the needle through the center again.
-
Pull the yarn tight to create a deep line or “dent” in the side.
-
Repeat this process about 5 or 6 times around the pumpkin to create even sections.
Step 6: Add the Stem and Decorations
-
Take an orange plastic straw. Bend the flexible part and cut a small piece to act as the stem.
-
Push the cut end of the straw into the top center of the pumpkin.
-
Cut a piece of white ribbon and tie a neat bow around the base of the straw stem.
-
For a final touch, glue or sew a small ladybug button onto the side of the pumpkin.
Your DIY Chenille Yarn Pumpkin is finished!