
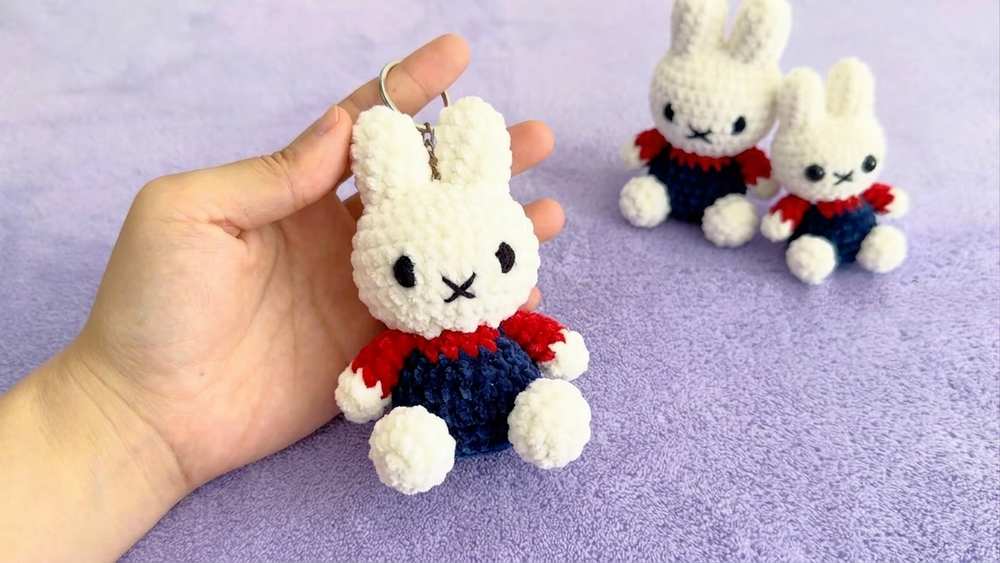
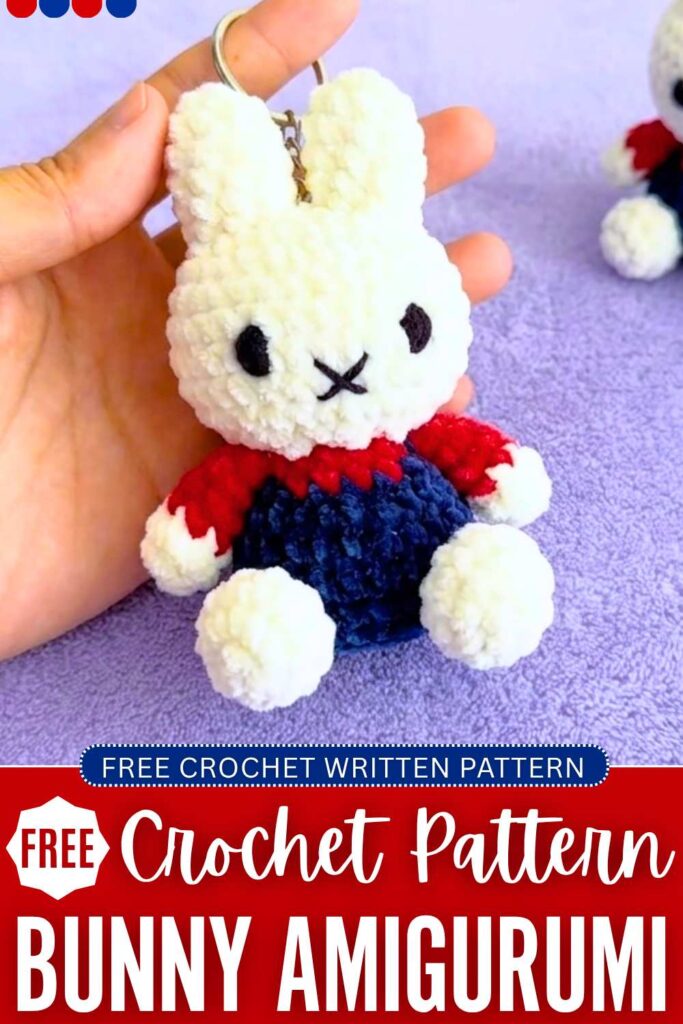
Learn how to crochet an authentic sitting Miffy plushie with this free pattern. This will end up pretty small, does not need much sewing, so you can use it as a keychain. You will need basic colorwork to crochet the no-sew costume of this crochet Miffy plush. There is also its iconic cross mouth embroidery, and the big oval crochet eyes are retained the same.
You can also use it as a desk buddy for your crochet work. If you just crochet its face. You can also use that part as a keychain, just like you might have seen some already. With the same doll pattern, you can also use it for many other animal amigurumi plushies. Now, continue reading for the FULL pattern.
Crochet Kawaii Miffy Plushie: Round-by-Round Pattern
Here is the written crochet pattern for the plush amigurumi Miffy, with the assembly in the end:
Materials Needed
- Yarn: 4-ply or 5-ply yarn in White/Light Gray (head, arms, legs), Blue, and Rose Red (dress)
- Crochet Hook: Sized appropriately for your chosen yarn (typically 2.0 mm to 2.5 mm)
- Other Tools: Stitch marker, fiberfill stuffing, tapestry needle, scissors, pins, tweezers, and black yarn for face details.
Abbreviations Used
- MR: Magic Ring
- ch: Chain
- sc: Single crochet
- inc: Increase (2 sc in the same stitch)
- dec: Decrease (invisible single crochet decrease using front loops)
- sl st: Slip stitch
- FLO: Front loops only
1. The Ears (Make 2 – Head Color)
- Round 1: Start with a MR. Work 6 sc into the ring. Join with a sl st to the first sc, ch 1.
[6 sts] - Round 2: [1 sc, 1 inc] repeat 3 times around. Join with a sl st, ch 1.
[9 sts] - Rounds 3–5: Work 9 sc around. Join with a sl st, ch 1.
[9 sts] - Finishing Note: Do not chain 1 after the final slip stitch of either ear. Cut the yarn for the first ear. Leave the yarn attached on the second ear to join them together.
2. The Head (Head Color)
- Round 6 (Joining the Ears): Insert hook into the first stitch of the first ear, make a sl st to join them, ch 1. Work 1 sc into that same joining stitch, followed by 7 sc around the first ear. Work a special 3-loop single crochet into the joining area gap to prevent holes. Work 8 sc around the second ear, and finish with another special gap-closing sc in the opposite joining area. Join with a sl st, ch 1.
[18 sts] - Round 7: [1 sc, 1 inc, 1 sc] repeat 6 times around. Join with a sl st, ch 1.
[24 sts] - Round 8: [3 sc, 1 inc] repeat 6 times around. Join with a sl st, ch 1.
[30 sts] - Rounds 9–12: Work 30 sc around. Join with a sl st, ch 1.
[30 sts] - Round 13: [3 sc, 1 dec] repeat 6 times around. Join with a sl st, ch 1.
[24 sts] - Round 14: [1 sc, 1 dec, 1 sc] repeat 6 times around. Join with a sl st, ch 1.
[18 sts] - Stuffing: Firmly pack both ears and start filling up the head with fiberfill.
- Round 15: [1 sc, 1 dec] repeat 6 times around. Join with a sl st, but do not chain 1 yet.
[12 sts]
3. The Body & Dress (Color-Changing)
- Round 16 (FLO): Drop the head color and pull through a loop of Blue yarn, ch 1. Working in the front loops only:
- Using Blue: 1 sc, 1 inc, 1 sc, [1 sc, change to Rose Red on the 2nd loop of the increase stitch].
- Using Rose Red: 1 sc, 1 inc, 1 sc, [1 sc, change back to Blue on the 2nd loop of the increase stitch].
- Using Blue: 1 sc, 1 inc, 1 sc, 1 inc. Join with a sl st, ch 1.
[18 sts]
- Round 17 (Both Loops): Continuing with Blue yarn, [1 sc, 1 inc, 1 sc] repeat 6 times around. Join with a sl st, ch 1.
[24 sts] - Rounds 18–21: Work 24 sc around. Join with a sl st, ch 1.
[24 sts] - Round 22: Work 12 consecutive invisible decreases (
dec12 times). Join with a sl st, fasten off leaving a long yarn tail for closing.
[12 sts] - Finishing the Body: Firmly stuff the remaining space in the head and body. Thread your tail onto a tapestry needle, weave through the front loops of all 12 remaining stitches, pull tightly to secure the opening closed, and hide the yarn tail inside.
4. The Arms (Make 2)
- Round 1: Using Head color, start with a MR. Work 6 sc into the ring. Join with a sl st, ch 1.
[6 sts] - Round 2: Work 6 sc around. Join with a sl st, but drop head color and switch to Rose Red yarn, ch 1.
[6 sts] - Rounds 3–4: Using Rose Red, work 6 sc around. Join with a sl st, ch 1.
[6 sts] - Round 5: Flatten the arm edge flat, and work 3 sc directly through both layers to close the top flap.
- Finishing Note: Fasten off the first arm and hide its tail. When finishing the second arm, leave a long Rose Red yarn tail for sewing.
5. The Legs (Make 2 – Head Color)
- Round 1: Start with an MR. Work 8 sc into the ring. Join with a sl st, ch 1.
[8 sts] - Round 2: [1 sc, 1 inc] repeat 4 times around. Join with a sl st, ch 1.
[12 sts] - Round 3: Work 12 sc around. Join with a sl st, ch 1.
[12 sts] - Round 4: [1 sc, 1 dec] repeat 4 times around. Join with a sl st. Fasten off.
[8 sts] - Finishing Note: Leave a long tail on the second leg for sewing. Firmly stuff both legs with fiberfill before assembly.
6. Assembly & Facial Details
- Arms: Pin the arms symmetrically near the neck area on the sides of the dress. Use the long Rose Red tail to stitch them securely in place. You can add a hidden stitch lower down to keep them flat against the body if desired.
- Legs: Pin the stuffed legs securely to the bottom base of the dress, hiding the seam slip stitches toward the back. Sew them tightly on using your yarn needle.
- Eyes & Nose: Use sewing pins to mark out your desired face layout on the front of the head. Embroider two vertical line stitches with 4 strands of black yarn for the eyes. Centered right between and slightly lower than the eyes, embroider a small “X” shape to create Miffy’s classic cross-shaped nose.
- Optional: Apply a tiny dab of cosmetic blush right under each eye for a cute, rosy-cheeked finish!

About "Talha"
Hey, I’m Talha, the Crafter on Craftstive.com. I love to share guides on folding cute origami models and paper crafts, and I am always ready to inspire your next craft project with my weekly craft discussions.