

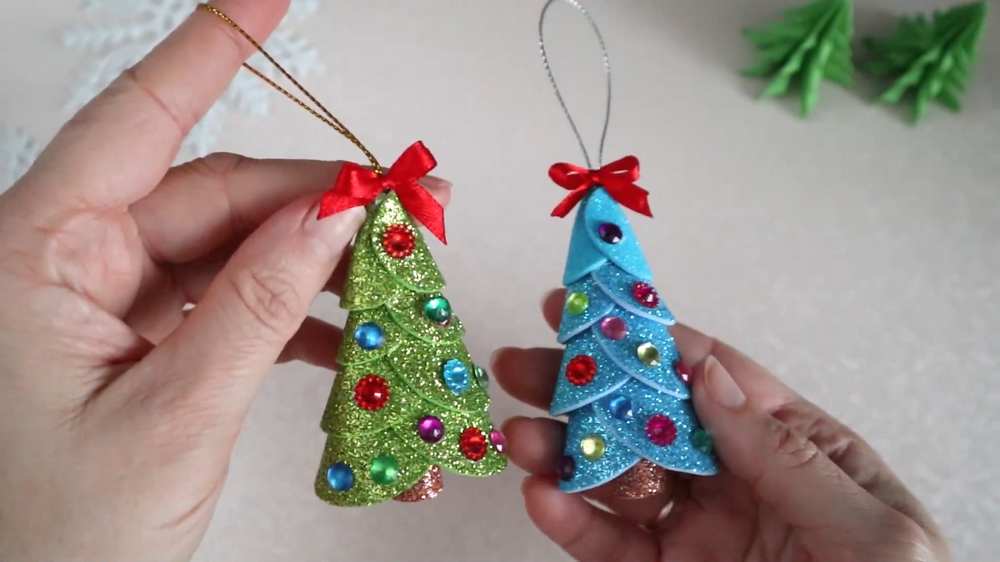
Learn how to craft a miniature 3D Christmas tree ornament using glitter EVA foam paper in either blue or green. It is covered with colorful beads! Makes hanging Christmas tree decoration, festive window or mantel garland accent, decorative gift box topper, holiday table centerpiece accent, and classroom craft or holiday workshop project.
By cutting circles of decreasing diameters, folding each into cone-like tiered petals, and assembling them onto a hanging loop, a layered festive tree is formed.
A rolled foam trunk, a red satin bow, and colorful stick-on acrylic rhinestones complete the design.
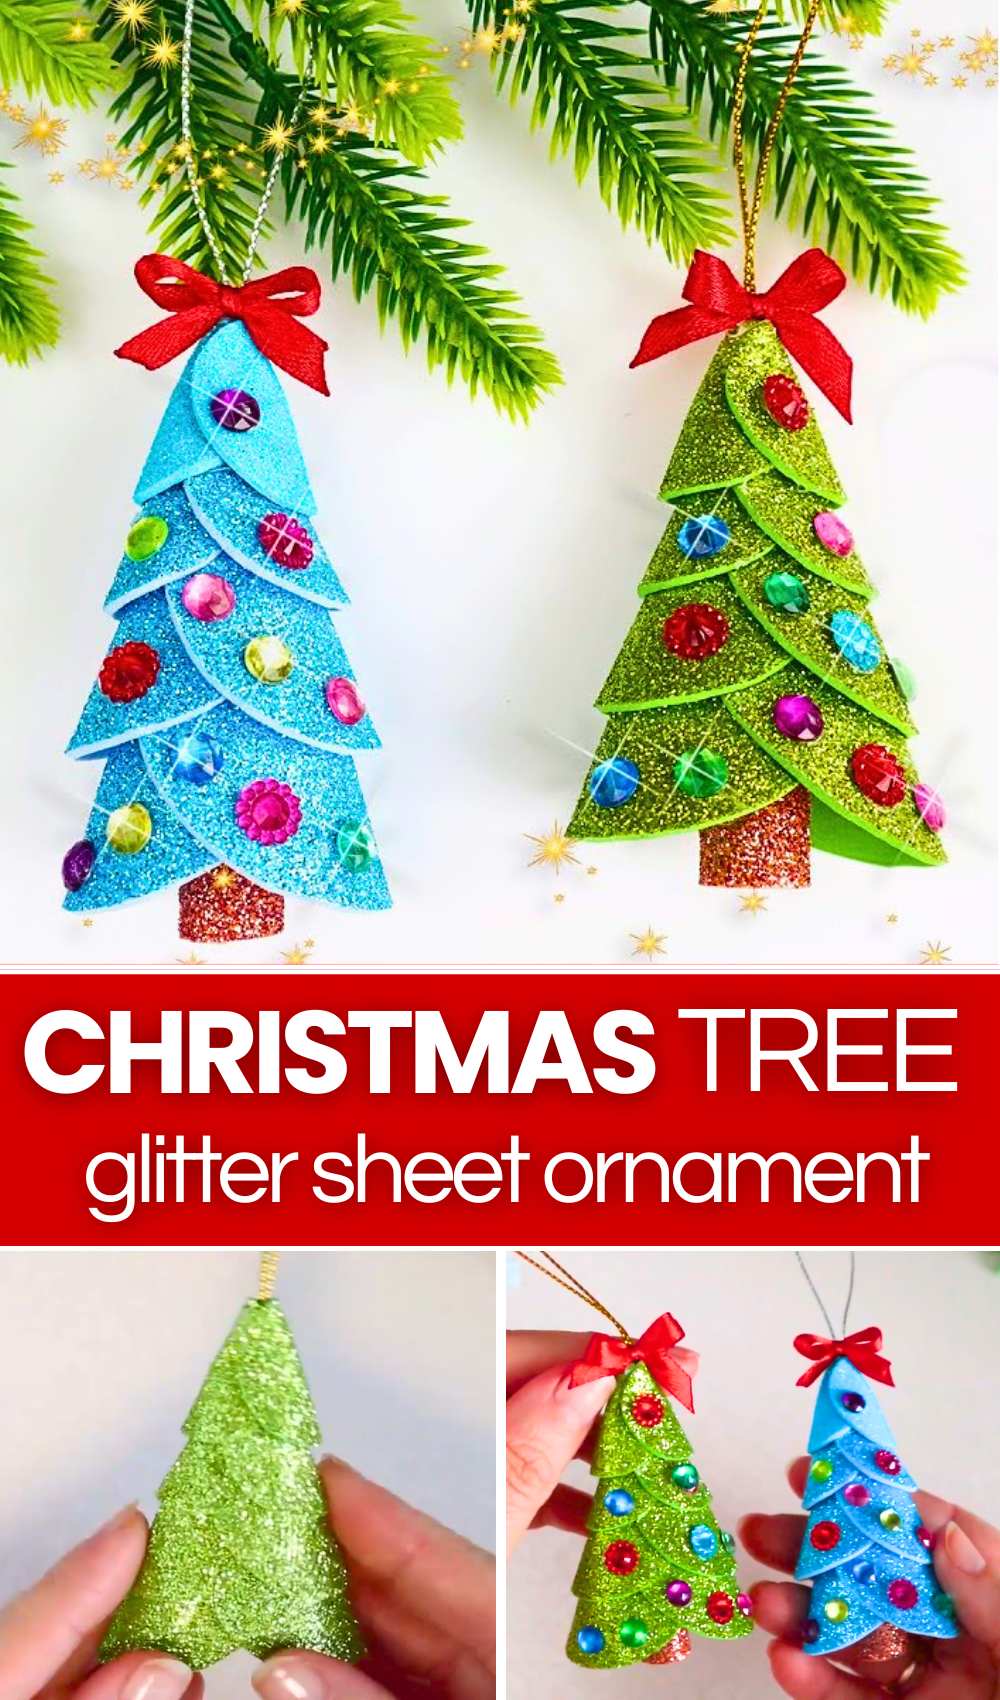
Tutorial to DIY a Glitter Sheet Christmas Tree
Difficulty Level: Easy (Beginner)
Explanation:
-
-
The project relies entirely on basic cutting along simple circular outlines and repetitive, identical folds.
-
No complex origami creases or specialized crafting machinery are required.
-
Assembly uses standard hot glue, making the process fast and forgiving for beginner crafters and supervised children.
-
Materials and Folds Used
Materials:
-
Green glitter EVA foam sheet (or blue/alternate color)
-
Bronze/brown glitter EVA foam strip (2.5 cm by 8 cm)
-
Metallic hanging cord (gold or silver)
-
Small red satin ribbon bow
-
Self-adhesive or flatback rhinestones/gems
-
Hot glue gun and glue sticks
-
Scissors
-
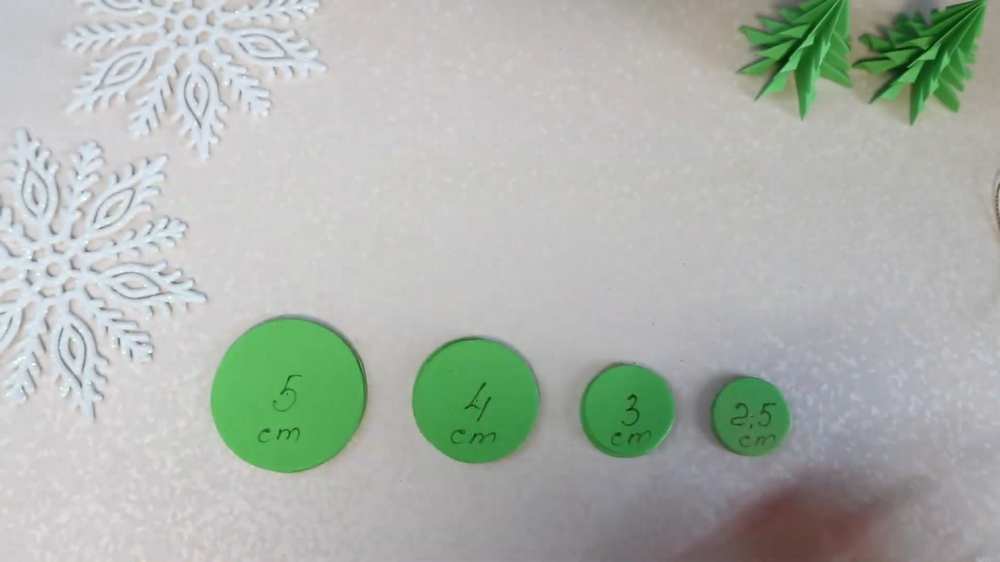
Pencil/pen and compass or circular templates (diameters: 5 cm, 4 cm, 3 cm, 2.5 cm)
Folds Used:
-
Overlapping Cone Fold: Both outer curved edges of each circle are folded towards the center, overlapping slightly to produce a pointed top with a curved, flared lower hem.
-
Tight Cylinder Roll: The rectangular trunk strip is coiled tightly from one end to the other to make a dense cylindrical base.
Quick Step-by-Step Guide
-
Trace and cut pairs of circles from glitter foam: two of 5 cm, two of 4 cm, two of 3 cm, and two of 2.5 cm (eight circles total).
-
Fold both sides of each circle toward the center so they overlap into a cone shape, gluing the overlap in place.
-
Glue a looped hanging cord into the tip of the smallest tier (2.5 cm).
-
Snip the pointed tip off the 3 cm, 4 cm, and 5 cm pieces.
-
Glue the tiers together in descending order (2.5 cm at the top, followed by 3 cm, 4 cm, and 5 cm at the base) on both front and back.
-
Roll the 2.5 cm by 8 cm glitter foam strip into a tight cylinder, glue the seam, and secure it inside the bottom opening as the trunk.
-
Glue a red ribbon bow to the top peak below the cord.
-
Decorate the tree tiers with colorful rhinestones on all sides.
Video Tutorial!
Detailed Analysis
-
00:00 – 00:05: Display of finished ornaments in green and light blue glitter finishes with rhinestones, ribbon bows, and hanging loops.
-
00:06 – 00:31: The maker takes a sheet of green glitter EVA foam. On the non-glitter back, eight circles are marked and cut out: two of 5 cm, two of 4 cm, two of 3 cm, and two of 2.5 cm.
-
00:32 – 01:23: The two largest 5 cm circles are curved inward from both sides to form overlapping conical tier segments and secured with hot glue. The same folding and gluing process is repeated for the two 4 cm circles.
-
01:24 – 01:59: The two 3 cm circles and the two 2.5 cm circles are folded and glued using the identical overlapping cone technique.
-
02:00 – 02:19: A folded golden hanging cord is placed into the top point of the 2.5 cm tier piece and bonded with hot glue to create the hanging apex.
-
02:20 – 03:00: The top tips of the progressively larger tiers (3 cm, 4 cm, and 5 cm) are snipped with scissors to allow a snug fit. They are glued sequentially underneath one another, forming a double-sided, flared fir tree.
-
03:01 – 03:28: A strip of brown/copper glitter EVA foam measuring 2.5 cm by 8 cm is rolled tightly into a cylinder and glued to form the trunk. The top of the trunk is glued inside the bottom hollow of the tree.
-
03:29 – 03:36: A tiny red ribbon bow is hot-glued to the peak of the tree, directly beneath the gold hanger.
-
03:37 – 03:54: Colorful flatback craft rhinestones are glued onto the front and rear foam tiers to simulate tree baubles.
-
03:55 – 04:15: Final presentation showing completed ornaments suspended from Christmas pine branches.
About "DIYChristmasIDEAS"
She shared only Christmas crafts with always the creative ideas!