
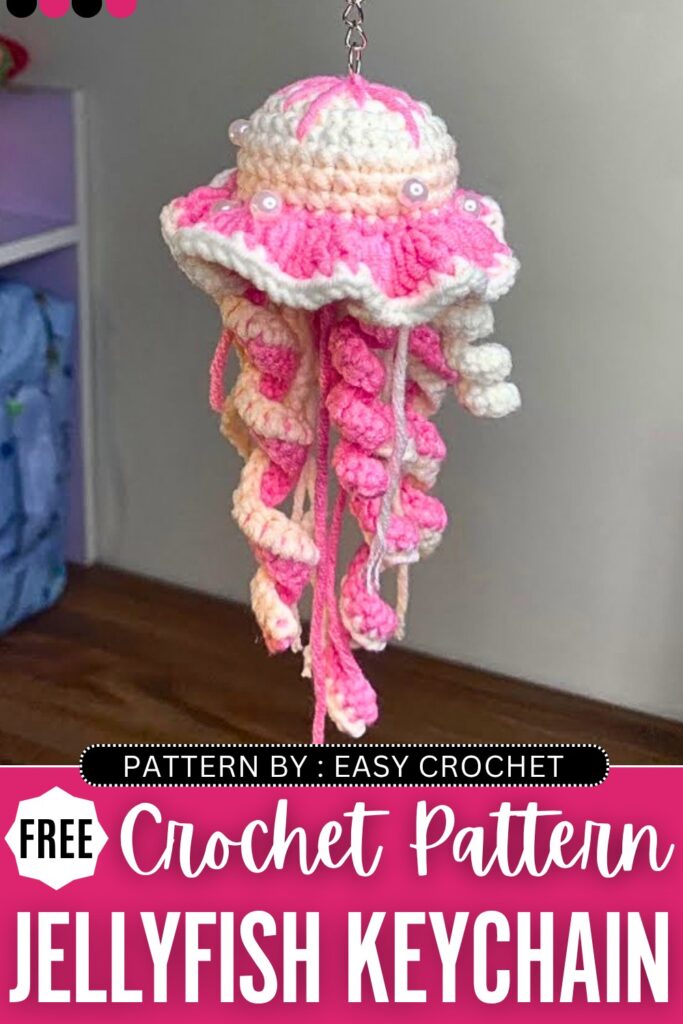
Today, let’s crochet this DETAILED & ELEGANT amigurumi Jellyfish hanging with a FREE written pattern. It has curly tentacles, straight tentacles, shorter and longer tentacles, pearls on the head, lovely embroidery, and a beautiful ruffled neck, which makes it an ULTIMATE crochet jellyfish design.
Crochet it as a Jellyfish bag charm for your beach tote bag, hanging for kids’ backpack, or windspinner for your windowside. Of all the sea creature amigurumi patterns, this is the best suited for decorations.
You can choose any color other than pink with beige, and it will turn out to be the same life-like Jellyfish plush. You can also simplify the design a little bit if you wish, but I don’t think the skill level beyond the advanced beginners is needed. Now, continue reading for the full pattern to crochet this Jellyfish.
Crochet Jellyfish Decoration: Written Instructions
Materials Needed
- Yarn: Size 5 yarn in three colors (Cream White, Light Peach, and Pink).
- Crochet Hook: 2.5 mm size hook.
- Stuffing: Soft filling for the jellyfish head.
- Keyring loop: Metal loop to hang the jellyfish.
- Beads: Small fake pearls for decoration.
- Yarn Needle: To sew parts together and hide loose ends.
- Scissors: To cut yarn.
Crochet Abbreviations
- MR: Magic Ring
- ch: Chain
- sc: Single Crochet
- dc: Double Crochet
- inc: Single Crochet Increase (make 2 single crochets in the same stitch)
- sl st: Slip Stitch
- st / sts: Stitch / Stitches
Step-by-Step Crochet Jellyfish Pattern
Jellyfish Top (Head)
- Round 1: Start with Cream White yarn. Make a Magic Ring (MR). ch 1. Make 8 sc into the ring. Pull the ring tight. sl st into the first sc. (Total: 8 sts)
- Round 2: ch 1. Make an inc in every stitch around. sl st into the first sc. (Total: 16 sts)
- Round 3: ch 1. (1 sc, inc) repeat this pattern 8 times around. sl st into the first sc. (Total: 24 sts)
- Round 4: ch 1. (3 sc, inc) repeat this pattern 6 times around. sl st into the first sc. (Total: 30 sts)
- Round 5: ch 1. Make 1 sc in every stitch around. sl st into the first sc. (Total: 30 sts)
- Rounds 6 to 8: Change to Light Peach yarn. ch 1. Make 1 sc in every stitch around. sl st into the first sc. Do this for three rounds. At the end of Round 8, cut the yarn and finish off. (Total: 30 sts)
Jellyfish Bottom (Base)
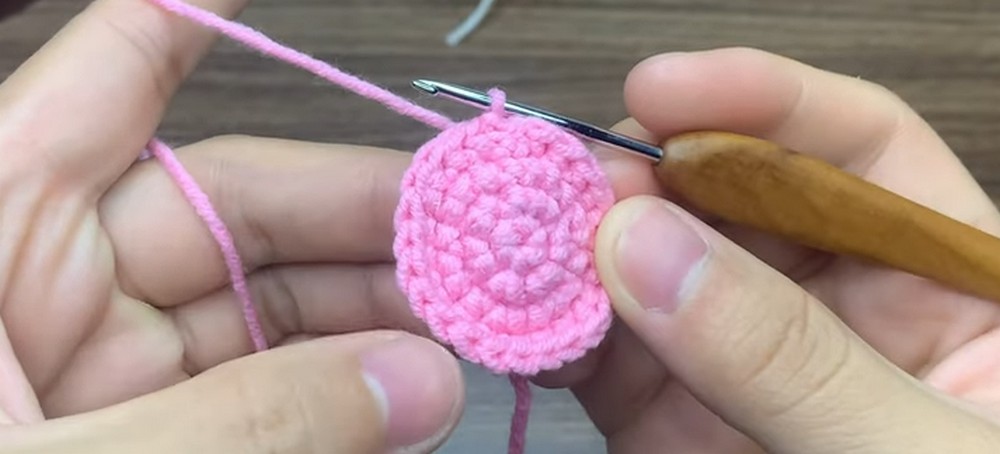
- Round 1: Start with Pink yarn. Make a Magic Ring (MR). ch 1. Make 6 sc into the ring. Pull the ring tight. sl st into the first sc. (Total: 6 sts)
- Round 2: ch 1. Make an inc in every stitch around. sl st into the first sc. (Total: 12 sts)
- Round 3: ch 1. (1 sc, inc) repeat this pattern 6 times around. sl st into the first sc. (Total: 18 sts)
- Round 4: ch 1. (2 sc, inc) repeat this pattern 6 times around. sl st into the first sc. (Total: 24 sts)
- Round 5: ch 1. (3 sc, inc) repeat this pattern 6 times around. sl st into the first sc. (Total: 30 sts)
Connecting Top and Bottom
- Place the Jellyfish Bottom under the Jellyfish Top. The open sides should face each other. The stitches on the edges should line up. There are 30 stitches on both pieces.
- ch 1 on the Bottom piece.
- Insert your hook through the next stitch on the Bottom piece AND the matching stitch on the Top piece.
- Make 1 sc through both layers.
- Repeat making sc through both layers all the way around.
- Before closing completely, add the soft stuffing inside the jellyfish. Stuff it firmly.
- Continue making sc to close the jellyfish. Make a sl st into the first sc.
Frilly Edge (Skirt)
- Round 1: Continue with the Pink yarn from the connecting round. ch 2. Make 3 dc into every stitch around the edge. You will put 3 double crochets in each single crochet from the previous round. Make a sl st into the top of the first dc.
- Round 2: Change to Cream White yarn. ch 1. Make 1 sc into every stitch around the frilly edge. Make a sl st into the first sc. Cut the yarn, finish off, and hide the ends. (Total: 90 sts)
Tentacles
Long Two-Color Tentacles (Make 3)
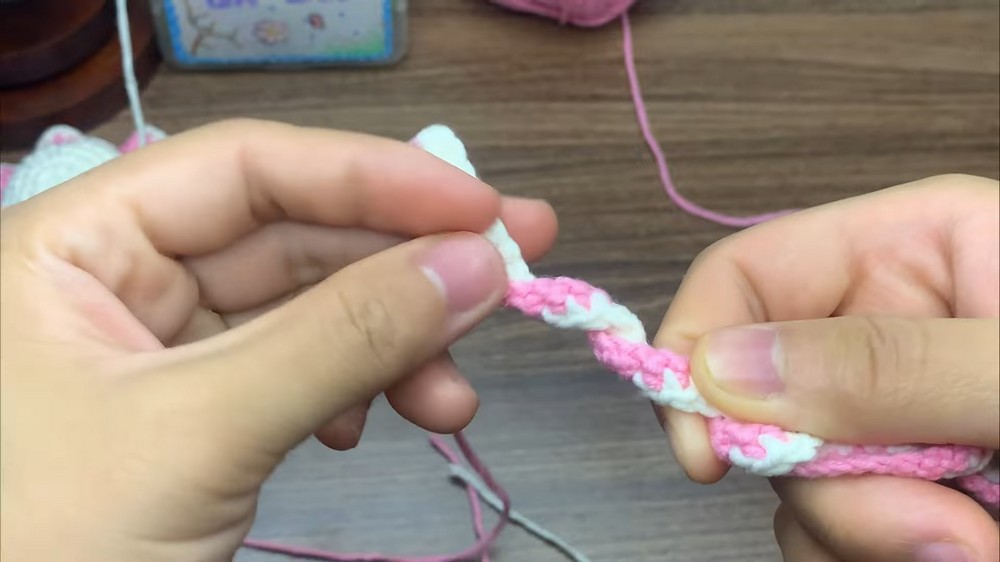
- First Tentacle: Start with Pink yarn. ch 45. Starting in the second chain from the hook, make 44 sc down the chain. Change to Light Peach yarn. ch 1. Turn your work. Make 44 sc back up the other side. Fasten off and leave a long tail for sewing.
- Second Tentacle: Start with Pink yarn. ch 44. Starting in the second chain from the hook, make 43 sc down the chain. Change to Light Peach yarn. ch 1. Turn your work. Make 43 sc back up the other side. Fasten off and leave a long tail.
- Third Tentacle: Start with Pink yarn. ch 42. Starting in the second chain from the hook, make 41 sc down the chain. Change to Light Peach yarn. ch 1. Turn your work. Make 41 sc back up the other side. Fasten off and leave a long tail.
Medium Curly Tentacles (Make 3)
- First Tentacle: Use Cream White yarn. ch 30. Starting in the second chain from the hook, make 29 sc down the chain. Fasten off and leave a long tail.
- Second Tentacle: Use Cream White yarn. ch 28. Starting in the second chain from the hook, make 27 sc down the chain. Fasten off and leave a long tail.
- Third Tentacle: Use Cream White yarn. ch 26. Starting in the second chain from the hook, make 25 sc down the chain. Fasten off and leave a long tail.
Thin Chain Tentacles (Make 3)
- First Tentacle: Use Light Peach yarn. ch 25. Fasten off. Cut the yarn close to the knot.
- Second Tentacle: Use Light Peach yarn. ch 30. Fasten off. Cut the yarn close to the knot.
- Third Tentacle: Use Light Peach yarn. ch 35. Fasten off. Cut the yarn close to the knot.
Assembly and Decoration
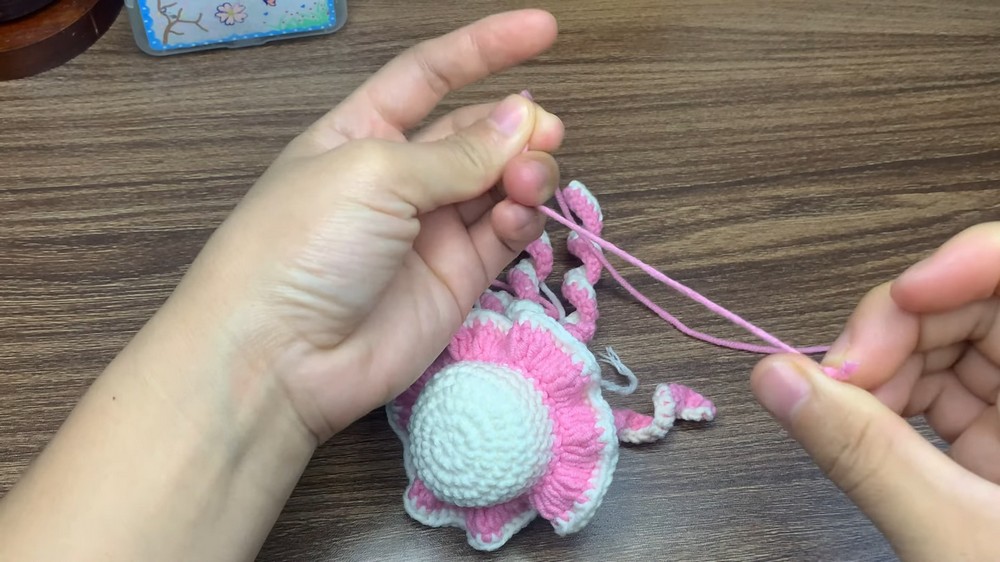
- Take the Longest Two-Color Tentacle and sew it directly into the center of the Jellyfish Bottom. Use the long yarn tails to attach it securely. Do not cut the excess yarn completely; leave it hanging down to look like extra, thin tentacles.
- Sew the rest of the Long Two-Color Tentacles and Medium Curly Tentacles randomly around the bottom base. Try to space them out evenly. Stay one row inside the frilly edge.
- Attach the Thin Chain Tentacles around the bottom as well.
- Sew small fake pearl beads onto the top of the jellyfish head for decoration. Use thin white thread.
- Sew the metal keyring loop firmly to the top center of the jellyfish head.
Learn with the Video Tutorial

About "Talha"
Hey, I’m Talha, the Crafter on Craftstive.com. I love to share guides on folding cute origami models and paper crafts, and I am always ready to inspire your next craft project with my weekly craft discussions.