
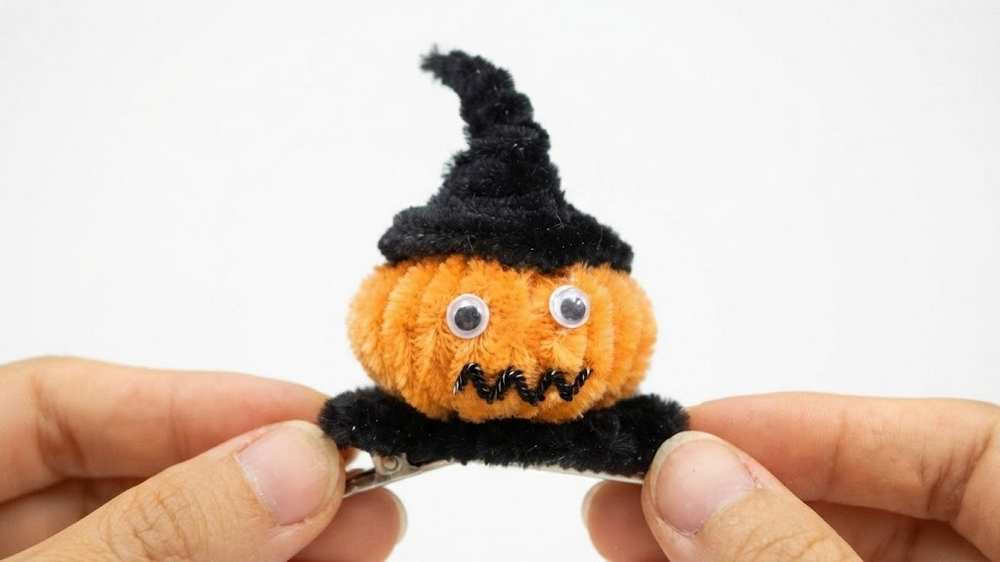
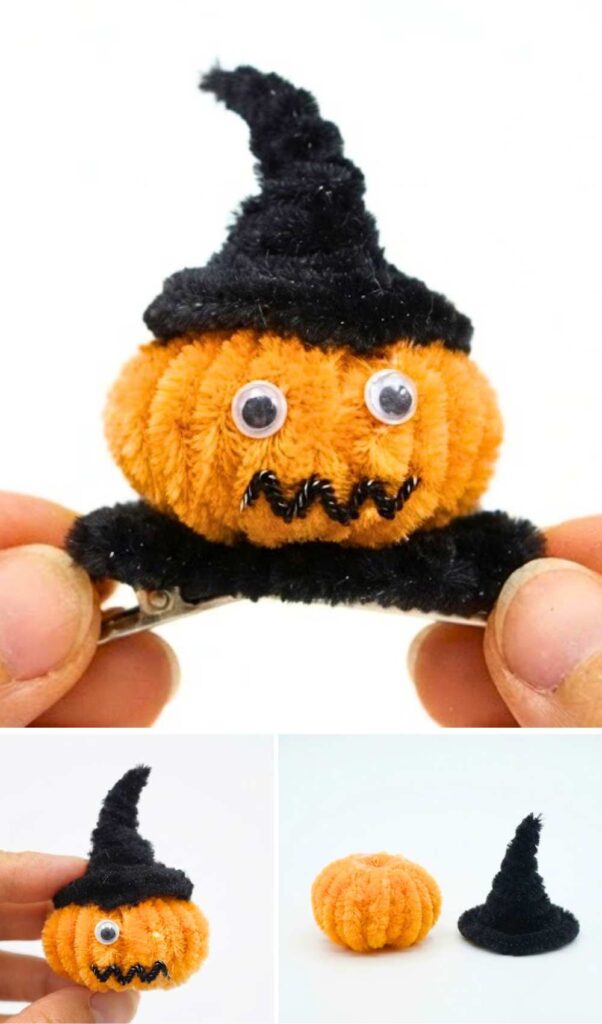
Looking for a 3D Halloween hair clip that is quick, too? Learn how to DIY this easy googly-eyed pipe cleaner pumpkin wearing a witch hat hair clip that also includes a standalone black fuzz clip cover. Follow this step-by-step tutorial to make this hair clip as a present for a little girl using small craft googly eyes, a metal hair clip, and some hot glue. Can be made using both the snap clips and the French barrettes. The thread mouth looks funny and makes it the kids’ favorite!
[ez-toc]

Tutorial to Make a Halloween Pumpkin Face Hairclip
Making a pumpkin hair clip is very easy. You need pipe cleaners and glue. First, you make a round orange ball. This is the pumpkin. You wrap a pipe cleaner around a pen to make it. Then, you make a black hat. You wrap a black pipe cleaner to make a cone.
You glue the black hat on top of the orange pumpkin. Next, you make a face. You glue two eyes and a black mouth on the pumpkin. Finally, you take a metal clip. You put glue on the clip. You glue the pumpkin on the clip.
DIY Halloween Pumpkin Hair Clip Guide
Materials Needed:
-
Orange Pipe Cleaners: 3 pieces (30cm each) and 1 piece (8cm).
-
Black Pipe Cleaners: 1 piece (30cm) and 4 pieces (5cm).
-
Googly Eyes: 2 small ones.
-
Hair Clip: Plain metal alligator clip.
-
Tools: Marker or pen (for shaping), scissors, and a hot glue gun.
Video Tutorial?
Detailed Instructions:
Step 1: Create the Pumpkin Body
-
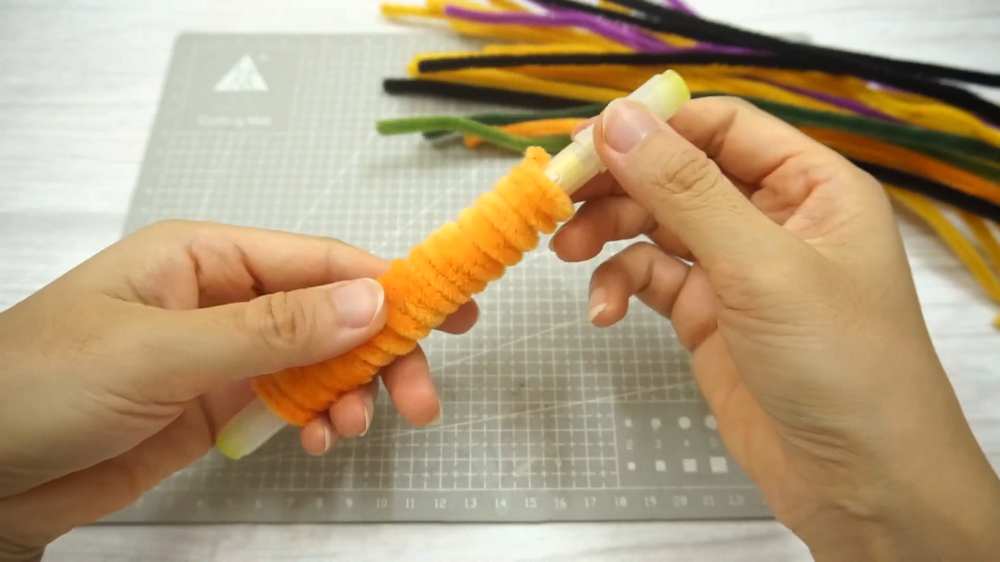
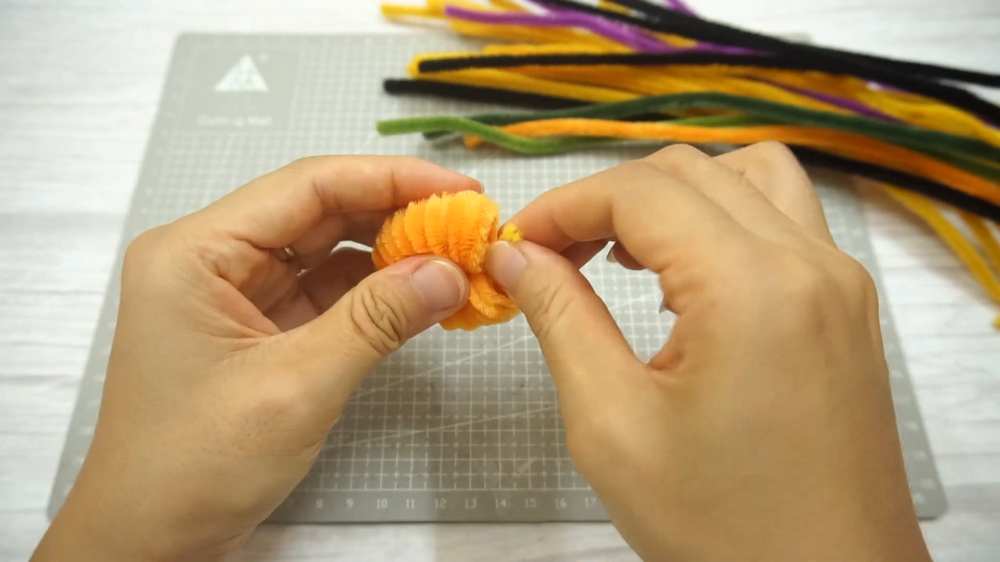
Take 3 orange pipe cleaners (30cm each) and twist their ends together to turn them into a single long pipe cleaner, and wrap it tightly around a marker or pen to create a spring-like spiral.
-
Slide the spiral off the marker.
-
Take the 8cm orange pipe cleaner piece and thread it through the center of the spiral.
-
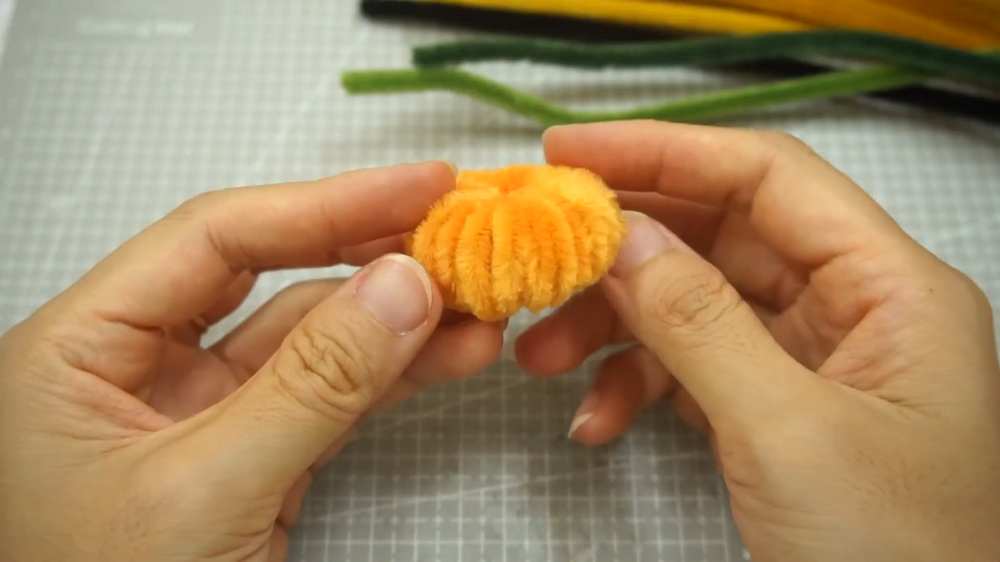
Bring the two ends of the 8cm piece together to form the spiral into a ring. Twist the ends together tightly to lock the shape.
-
Use your fingers to gently press the sides and top of the ring to turn it into a round, squashed pumpkin shape.
Step 2: Make the Witch Hat
-
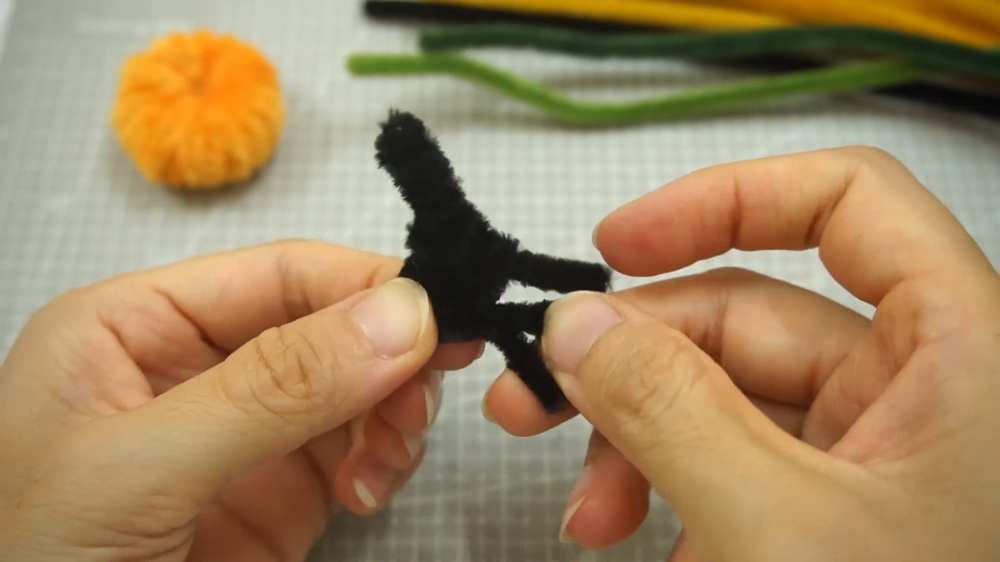
Take three of the 5cm black pipe cleaner pieces. Hold them together in a bundle.
-
Take the 30cm black pipe cleaner and start wrapping it around the top of the bundle.
-
Continue wrapping downward, making each circle slightly wider than the one above it to create a cone shape.
-
Once you reach the bottom, tuck the end in.
-
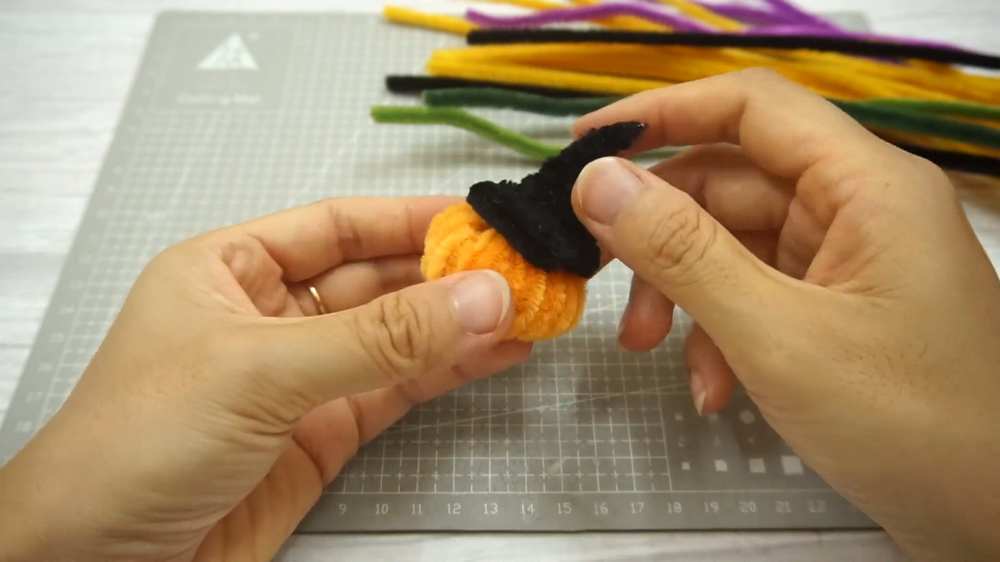
Use scissors to trim the top “frame” pieces and the bottom edges so the hat looks like a neat, sharp cone.
-
Bend the bottom edge slightly outward to create the “brim” of the hat.
Step 3: Assemble the Face
-
Take a tiny piece of black pipe cleaner and bend it into a zigzag shape to make a “scary” mouth.
-
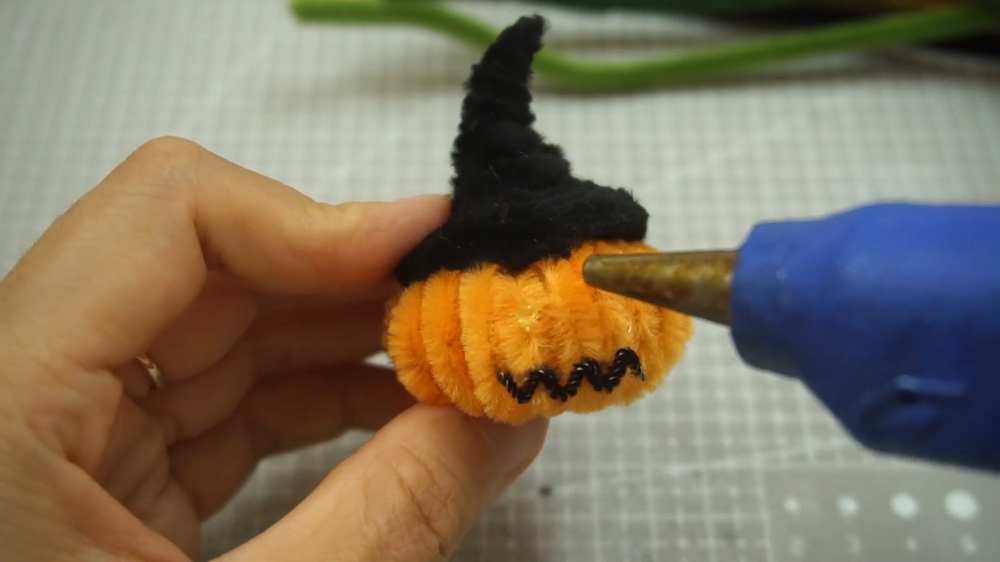
Apply a small dot of hot glue to the pumpkin and press the mouth onto it.
-
Apply two dots of glue above the mouth and attach the googly eyes.
-
Apply glue to the bottom of the black hat and press it firmly onto the top center of the pumpkin.
Step 4: Prepare the Hair Clip
-
Take your plain metal hair clip.
-
Apply glue along the top surface of the clip.
-
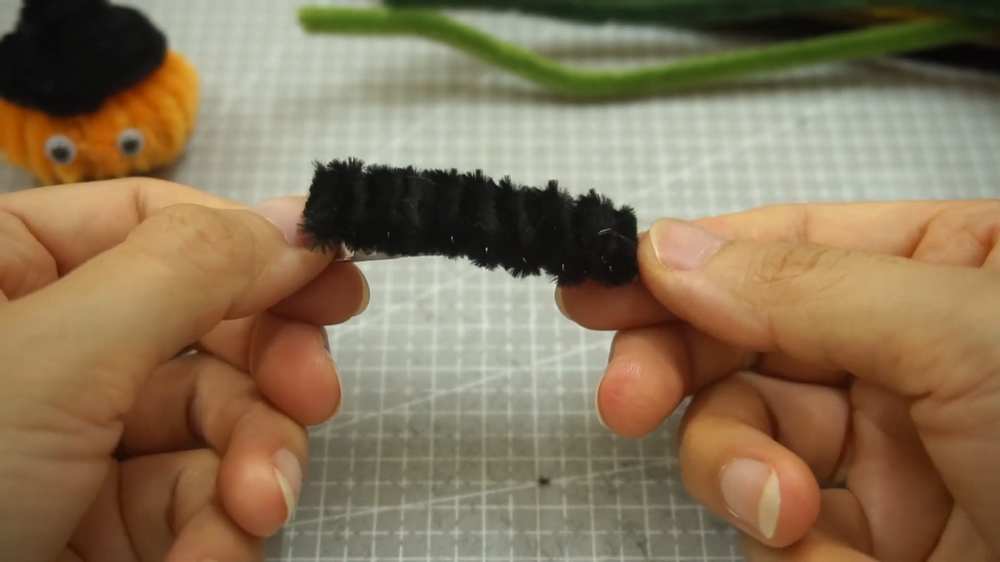
Take a black pipe cleaner and wrap it around the top part of the clip (the side that will hold the pumpkin) until the metal is covered. Trim any extra.
-
Apply a generous amount of glue to the bottom of your finished pumpkin.
-
Press the pumpkin onto the black-covered clip and hold it until the glue sets.
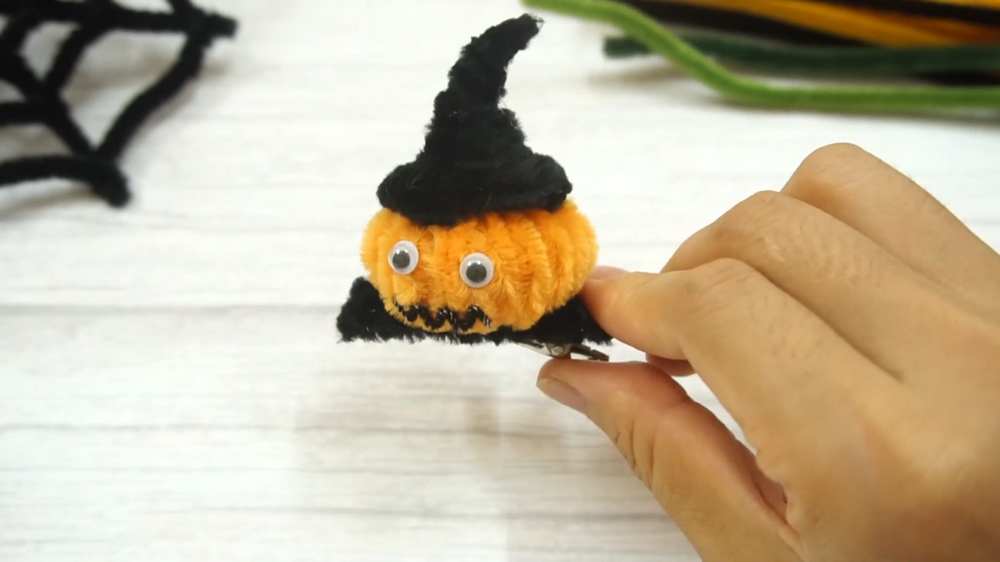
Your DIY Pumpkin Hair Clip is ready for Halloween!
Share on Social Media!
About "Craftbee 9"
She makes incredible fabric, recycle and pipe cleaner crafts.