
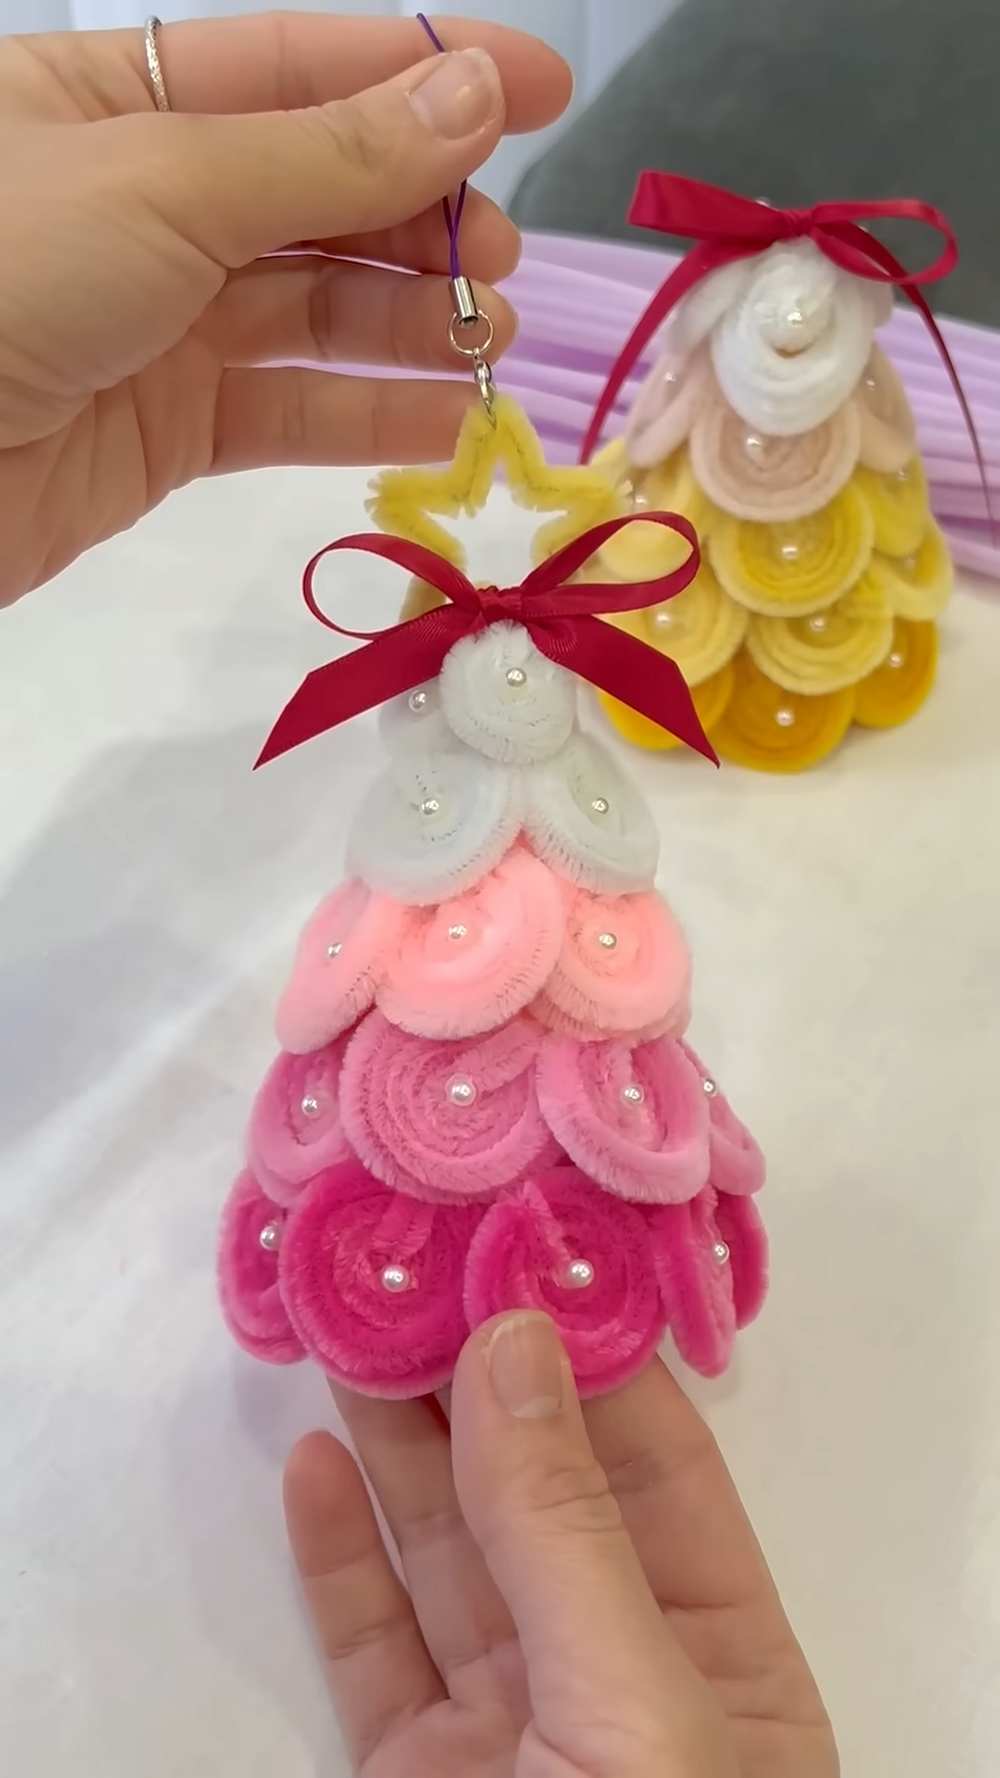
Last year, you all liked the crocheted version of the rainbow Christmas tree a lot. But if you are a pipe cleaner crafter, you need to learn how to make this mini ombré Christmas tree ornament using a paper cone and coiled pipe cleaners. The crafter rolls and trims pink paper into a standing cone base. You can choose from the pink and yellow variations.
Pipe cleaners in three shades – dark magenta, pastel pink, and white – are coiled into flat spiral discs.
These coils are glued in gradient layers around the cone from bottom to top. The tree is finished with a yellow pipe-cleaner star topper, a red satin bow, pearl bead centers, and a hanging cord.



Difficulty Level & Explanation
Difficulty Level: Very Easy (Beginner)
The process consists of repetitive, beginner-friendly techniques: rolling paper into a cone, spiraling pipe cleaners with fingers into flat discs, and adhering them in rows with hot glue.
No specialized skills, complicated folds, or complex tools are required. Anyone can complete it with basic crafting supplies, though adult supervision is recommended when handling the hot glue gun and scissors.
Materials
-
Colored craft paper (pink)
-
Pipe cleaners/chenille stems (dark magenta/rose pink, baby pink, white, and yellow for the star)
-
Craft scissors
-
Hot glue gun and glue sticks
-
Small white faux pearl beads
-
Pre-tied burgundy/red satin ribbon bow
-
Phone charm lanyard / hanging string loop
Enlisted Folds & Techniques
-
Cone Rolling & Trimming: Rolling a flat square sheet into a conical shape and snipping the bottom rim straight to stand flat.
-
Flat Concentric Spiral Coiling: Winding a pipe cleaner flatly onto itself from center to edge to form textured spiral discs.
-
Tuck-and-Lock Fold: Tucking the outer wire tail of the spiral coil inward so the disk stays flat and tight.
-
Five-Point Star Bending: Bending a yellow pipe cleaner into five connected points to create a dimensional star topper.
-
Tiered Gradient Layering: Arranging coils in ascending rows from dark to light to produce an ombré effect.
-
Embellishment Inset: Setting pearl beads into the core recesses of each coil.
-
[00:03 – 00:06] Make the Paper Cone Base: Roll a pink sheet of paper into a tight cone, glue or tape the seam, and trim the uneven bottom edge with scissors so it stands level.
-
[00:07 – 00:16] Coil the Pipe Cleaners: Take a pipe cleaner and roll it tightly inward between your fingers into a flat circular spiral disc. Repeat this process with dark magenta, light pink, and white stems.
-
[00:17 – 00:19] Organize the Gradient: Prepare sets of discs in three shades (dark pink, light pink, and white) for the ombré transition.
-
[00:20 – 00:23] Glue the Bottom Row: Apply hot glue around the base of the paper cone and adhere the darkest pink coils side-by-side all the way around.
-
[00:24 – 00:27] Layer the Upper Rows: Glue a row of light pink coils directly above the base row, followed by a top row of white coils covering the cone tip.
-
[00:28 – 00:29] Attach the Star Topper: Hot-glue a yellow pipe-cleaner star with a hanging lanyard to the very top point of the cone.
-
[00:30 – 00:30] Add the Front Bow: Adhere a small burgundy satin ribbon bow at the base of the star.
-
[00:31 – 00:32] Add Pearl Accents: Place a small dab of hot glue into the center of each coiled disc and press a white pearl bead into place.
-
[00:33 – 00:34] Final Display: Lift and showcase the completed ombré Christmas tree ornament.