

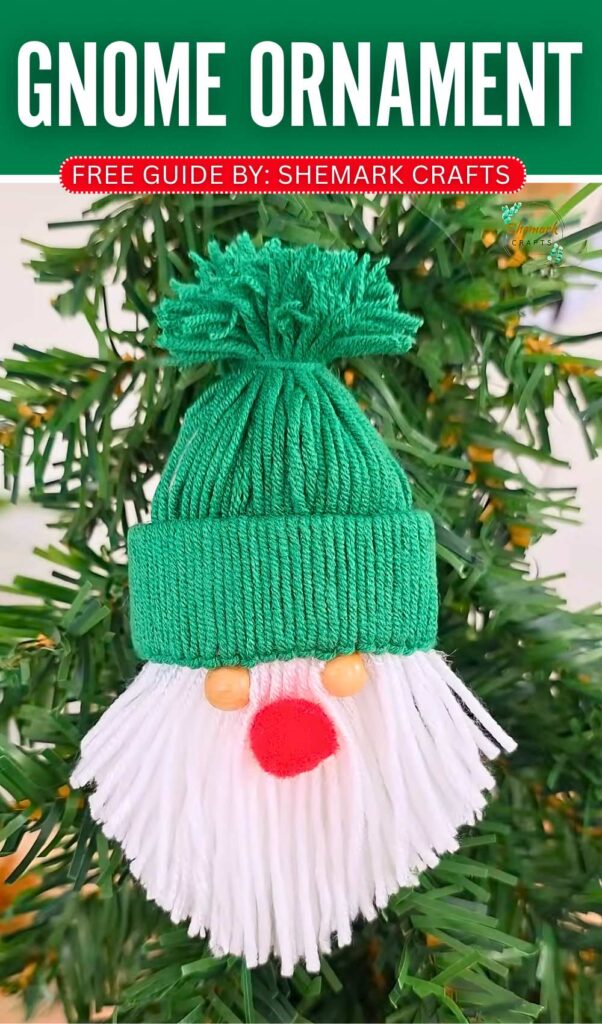
Today, learn how to DIY another SUPER CUTE and soft beanie-wearing gnome ornament for Christmas out of just yarn. I have named it, this time, “beanie-wearing bearded man plushie.” This green beanie gnome can be practically made in under 4 minutes using a quick method. This tutorial contains both the visual and the written guides.
This time again, we shall make the beanie for the gnome plush by knotting yarn around a small tissue paper roll strip cutout, leaving small tails.
This DIY gnome has the spacer wooden beads as the eyes and the pom-pom nose. But on second look, my recommendation is to use the kawaii safety eyes instead of the spacer beads. You can also make your DIY gnome using plush yarn, and it will turn out to be even fluffier.


Tutorial to Crochet the Christmas Gnome Ornament Plushie
This project shows how to make a cute gnome ornament for a tree. You use a cardboard tube, green yarn, and white yarn. First, you cut a small ring from the tube.
Then, you tie green yarn pieces around the ring to make a winter hat. You fill the hat with soft cotton to keep its shape. Next, you use white yarn to make a long, thick beard.
You glue the hat onto the white yarn and trim it with scissors. Finally, you glue a red pom-pom for a nose and two beads for eyes. It is easy and fun.

How to Make a Yarn Gnome Ornament
What you will need:
-
One cardboard tube (like a toilet paper roll)
-
Green yarn
-
White yarn
-
Scissors
-
Hot glue gun
-
Cotton or stuffing
-
One small red pom-pom (for the nose)
-
Two small wooden beads (for eyes)
Video Tutorial?
Step-by-Step Instructions
1. Make the Hat Base
Take the cardboard tube and cut a small ring about one inch wide. This will be the base for the gnome’s hat.
2. Cover the Ring with Green Yarn
Cut many pieces of green yarn, each about 10 inches long. Fold a piece of yarn in half. Put the folded loop through the middle of the cardboard ring. Pull the two ends of the yarn through the loop and pull it tight. Do this all the way around the ring until the cardboard is completely hidden.
3. Shape the Hat
Take all the loose ends of the green yarn and push them through the center of the ring to the other side. This creates the brim of the hat. Put a small ball of cotton inside the yarn to help the hat keep a round shape.

4. Finish the Hat
Take a separate piece of green yarn and tie it tightly around the bundle of loose ends, about an inch from the top. Use your scissors to trim the yarn above the knot to make a round, fluffy pom-pom on top of the hat.
5. Create the Beard
Wrap white yarn around a piece of cardboard many times until it is thick. Carefully slide the yarn off and cut the loops on one side. Use a small piece of yarn to tie the bundle together at the top. This is the gnome’s beard.
6. Assemble the Gnome
Use the hot glue gun to put a line of glue inside the rim of the green hat. Press the top of the white beard into the hat and hold it until the glue is dry.
7. Trim the Beard
Use your scissors to trim the white yarn into a pointed “V” shape so it looks like a real gnome beard.
8. Add the Face
Put a drop of glue on the front of the beard, just under the hat, and press the red pom-pom on for a nose. Then, glue the two small beads just above the nose to make the eyes.
About "Shemcrafts"
She is an incredible pom, pipe cleaner and yarn craft!